All is Calm Christmas …

Hello Stampin’ Friends,

I hope you had a wonderful weekend. It’s Monday and back to work for many of us, so I’d like to begin with a simple, calm Christmas card.

Yesterday I showed you an easy layout which included the dimensions you’ll need to make the card. I also suggested that you could use this layout for any type of card, so today I’m here to show you …

000_1606

The card was created using the Lost Lagoon cardstock and “All is Calm” Designer Series paper. The pop of Whisper White really makes the “Merry Christmas” stand out. The greeting comes from the “Making Spirits Bright”, found on page 48 in the Holiday catalog.

All of the layers are “popped” up, using the Stampin’ Dimensionals … it gives so much depth and texture to the card.

I couldn’t resist adding the beautiful silver glimmer snowflake to really make the card feel like Christmas. The snowflake comes from the Snowflake Card Thinlet Dies (9 dies) in our Holiday Catalog.

000_1608

Hope you enjoyed my Christmas version of the simple layout I shared yesterday, and thank you for stopping by.

Have a great week ahead ~

blog-closing-small

LINDA’S STAMPIN’ SUPPLY LIST


Simply Sweet Layout …

Hello Stampin’ Friends,

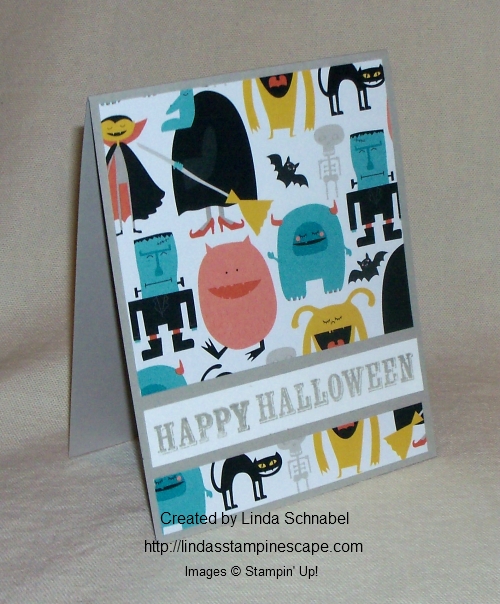
Today’s card share is all about the layout and showcasing the designer paper … Motley Monsters!  This is the last in my Halloween series of cards and super simple to make!

000_1601

Here I have the “ghostly” side of the designer paper … the large piece is 4 x 3-1/2″ and the small is 4 x 3/4″. The Whisper White is also 4 x 3/4″ and all are mounted on the Sahara Sand cardstock.

My greeting is from the Paper Pumpkin kit … those stamps sure come in handy!

On this card I just used another pattern in the Motley Monsters and everything else remained the same!

000_1602

Just think … Birthdays, Christmas … anything!  Let your imagination run wild.

The first card sample was popped up with dimensionals, and looks even better than the photo.

Let me know what you think … and have fun with this layout!

Enjoy the rest of your weekend ~


Simply Halloween

Hello Stampin’ Friends,

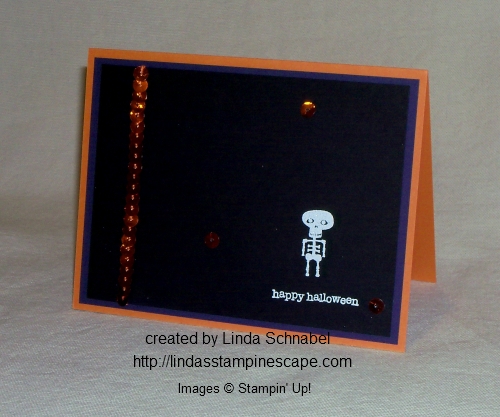
Today I have a cute, super simple Halloween card for you…

000_1594

I used the “Freaky Friends” stamp set – I just had to have that little skeleton! Look at him just standing there … isn’t he just the cutest!

The “Happy Halloween” comes from that tried and true greetings set … Tiny Tiny Wishes. One of my go-to stamp sets.

I simply stamped my skeleton and greeting with Whisper White “CRAFT” ink and embossed it with white embossing powder. Most people use the VersaMark for embossing, but I love the way the “white on white” works.

The majority of my stampers who have done this technique, have purchased a White Craft pad.  You can find it on the bottom of page 210 in the Stampin’ Up! catalog or just click on the link in my Stampin’ Supply List at the bottom of this post.

I layered it on Elegant Eggplant and mounted it onto the Pumpkin Pie cardstock.

000_1596

I used a bit of bling from the September Paper Pumpkin kit to finish off my card … SIMPLE.

Thank you for dropping by today! Stop back tomorrow for my last post of my Halloween Series. I will be highlighting the Freaky Friends and Motley Monsters Designer paper.

Have a wonderful day ~

blog-closing-small

STAMPIN’ SUPPLY LIST …


Halloween Greetings …

Hello Stampin’ Friends,

Today is a quick -n- easy, or should I say “fast -n- furious” for Friday Halloween card. This “boo-tiful” card was created with the “Motley Monsters Designer Series paper, the Fun Fall Fest Bundles (Save 15%) and with a little help from my September Paper Pumpkin.

000_1588

I love this polka dot background because once Halloween is over, I can still use this paper! Keep a close watch on my blog because you may even see one of these designs in an upcoming Christmas card!

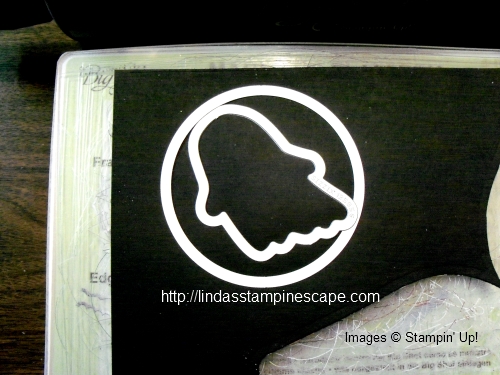
I cut the ghost and circle out from a piece of scrap at the same time … saved me from lining it up and running it through the BigShot again.

000_1587

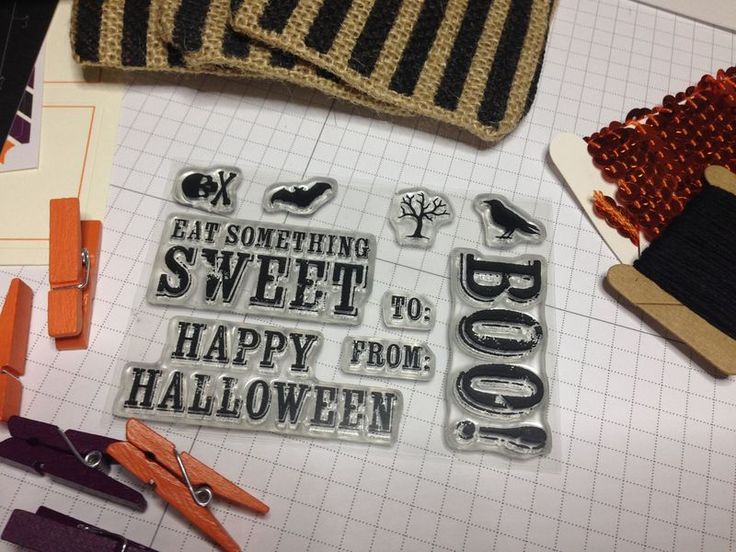
My “BOO” greeting comes from the Paper Pumpkin kit and is designed to look old a worn out … and I couldn’t resist putting that crow on it. Besides, it added a bit a color and drew your eye across the card (very effective!) lol

000_1590

The stampin’ list of ingredients is listed below, just click on any of the items to begin shopping. I have a sweet treat for all on-line orders this weekend (sent directly to you!)

Have a wonderful weekend and be sure to stop back and see my final projects in this Halloween series.

blog-closing-small


Halloween Gift Bag …

Hello Stampin’ Friends,

What goes great with Halloween … well, pumpkins of course! Better yet … Paper Pumpkins!  I love getting that pretty package each month and the surprise that is in store for me.

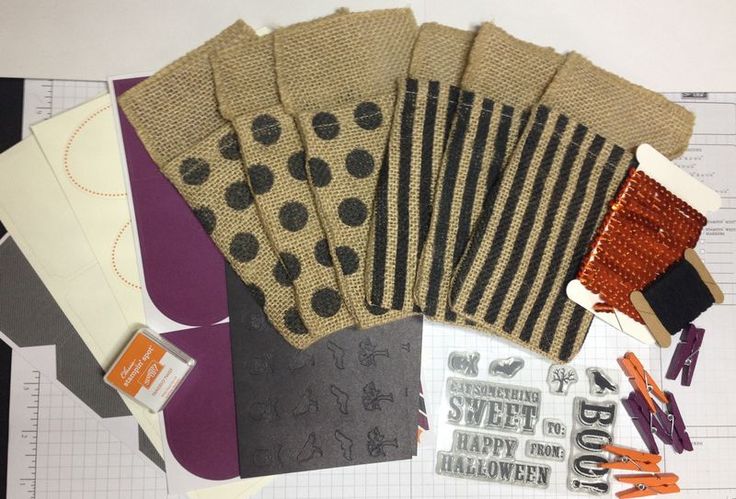
This months Paper Pumpkin was filled with Halloween treats, NO tricks! Just look at all these goodies.

0269c26a71c936c3c258eb7a97cfb18d

d386d4e0b6b085557af739990479d44c

I just love the stamps.. they Rock!!  One of the best benefits of being a Paper Pumpkin subscriber … you get to keep all these great stamps, long after all the goodies are gone.

AND … they are exclusive to Paper Pumpkin … you can’t buy them anywhere else.

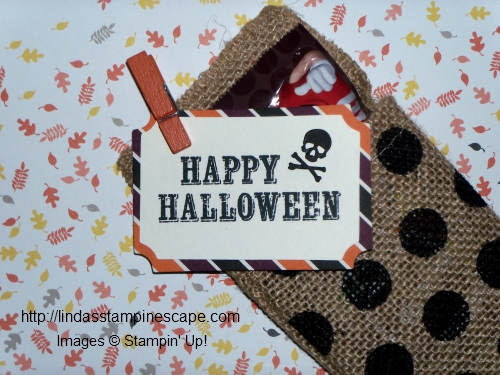
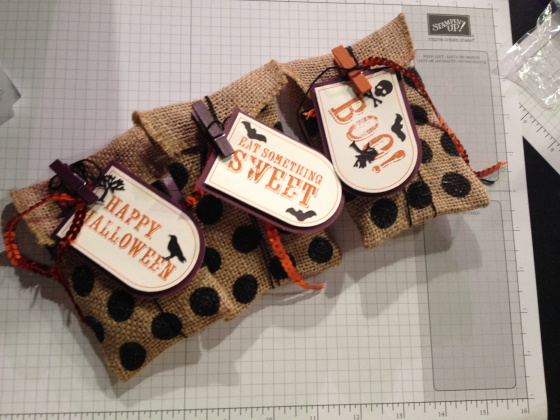
Here is my cute little Halloween bag with M & M’s tucked inside … they fit perfect and you could close it up, but I chose to keep it open.

000_1580

000_1582


Here’s a fun video to show you how easy these are to make.

These cute little bags will hold the sweetest of treats for your Trick 0r Treater’s.  What a special gift to hand out to a grandchild, niece, nephew, neighbor or a friend.

img_9878

You can sign up for the next month Paper Pumpkin –

just CLICK HERE!

The Paper Pumpkin also makes the perfect gift … and Christmas is coming soon.

TO MY Paper Pumpkin Pals (subscribers) … check your e-mail for an invitation to make our September kits together.. a bit of a Halloween Party. I’ll even show you another cute project for these fabulous items!

Hope you enjoyed the fun today.

blog-closing-small

Sweet Treat Halloween Keepsake Box

Hello Stampin’ Friends,

I’m back with my Halloween series of cards and projects … Today a project! I saw so many fabulous boxes created with the “Curvy Keepsake Box” that I had to order one for myself, and my first endeavor highlights Halloween and the “Motley Monsters” Designer Paper …

000_1579

Isn’t that cute!  The box is so simple to create … just cut 2 pieces from the die (I slide the designer paper in too, to create the two tone look) I like using the 12 x 12 cardstock sheets cut in half for my boxes.

I plan on adding treats inside so I wanted to make a tag… and what better set is there to use than the new ” Merry Everything” stamp set.  I love a stamp set that you can use all year long! I love a great value too, an you can save 15% by bundling it with the coordinating “Note Tag” punch.

000_1572

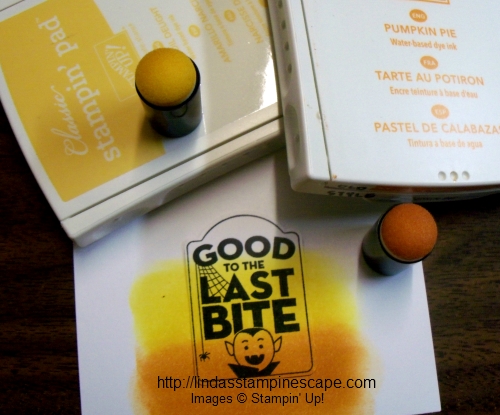
I wanted to recreate the candy color on the designer paper, so I sponged the Daffodil Delight and Pumpkin Pie onto my Whisper White, and then stamped my “Good to the Last Bite” stamp. I used the new Memento pad … love it, love it, love it!

Let’s grab the “Sticky Strip” and put our little treat box together, and celebrate our sweet treat box. The ribbon is the new “Tangelo Twist” Satin Stitched ribbon … it’s even prettier in your hands!

000_1576_0001

Let’s not forget the yummies … Oh yes, and the little clothes pin came from one of my “Paper Pumpkin” kits!

000_1577

Thanks for stopping by today and checking out my creations… it’s truly appreciated.

If you would like to purchase any of the materials I used to create today’s projects, just click on the link below.  I will send you a Step-by-Step Instruction Sheet with tips on how I created today’s project.

Have an most awesome day ~

blog-closing-small

STAMPIN’ SUPPLY LIST …


NEW Weekly Deals & Halloween Treats …

Hello Stampin’ Friends,

There is so much to share with you… exciting new products coming and great deals right now. Keep reading to the end as I have a cute little Halloween treat for you!

Let me begin with some wonderful ways to save …

Main_weeklydeals_olo_10.7-31.2014_SP_UK

 Just click directly onto the weekly deals logo above or on the side bar to view this weeks deals!


Released for sale today “Gentle Peace” stamp set … This may go quickly so contact me to order or click on the link below to shop directly from my website.

6a00e554f4a3a4883401bb0794c762970d-800wi6a00e554f4a3a4883401b8d0799282970c-800wi


Here are some exciting new “My Digital Studio” products …

mds-ribbon

Freaky Friends Stamp Brush Set - Digital Download
Freaky Friends Stamp Brush Set – Digital Download

Price: $8.95
Mingle All The Way Stamp Brush Set - Digital Download
Mingle All The Way Stamp Brush Set – Digital Download

Price: $4.95
Motley Monsters Designer Series Paper - Digital Download
Motley Monsters Designer Series Paper – Digital Download

Price: $4.95


Now, let’s get you ready for Halloween.  Using the jack-o-lantern faces from the “Fall Fest” Stamp set, add a face to create the little ghost using Tuxedo Black Memento Ink on the large White Filter Paper circle.  (No cutting required!) Finish it off with a little bit of Basic Black Baker’s Twine—so simple and so cute. This would make a fun classroom project or Halloween treat.

Fall Fest_crbGhostly treats

Thank you for dropping by today, please let me know if I can help you in any way.

Have a wonderful day ~

blog-closing-small

STAMPIN’ SUPPLY LIST ….


Halloween Birds …

Hello my Stampin’ Friends,

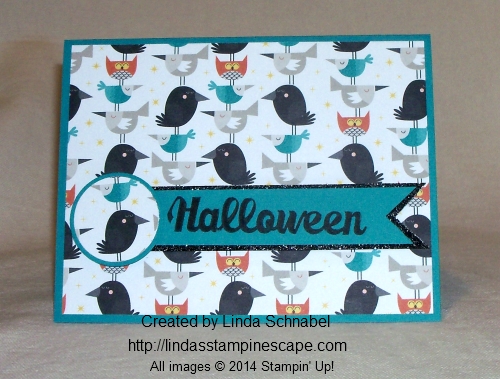
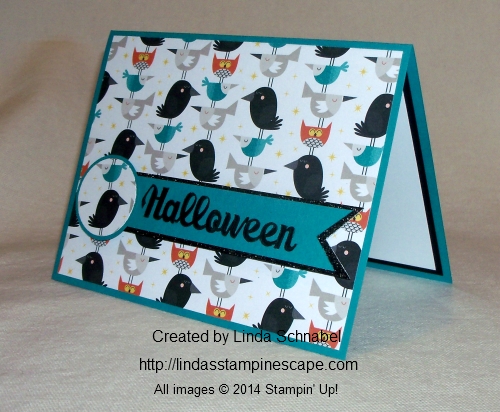
Today as promised … I have a Halloween card for you.  You won’t need to hide behind the tree’s as these little Halloween birds are rather cute! Of course I am using the “Motley Monsters” Designer Series Paper and the coordinating Bermuda Bay Cardstock.

000_1562

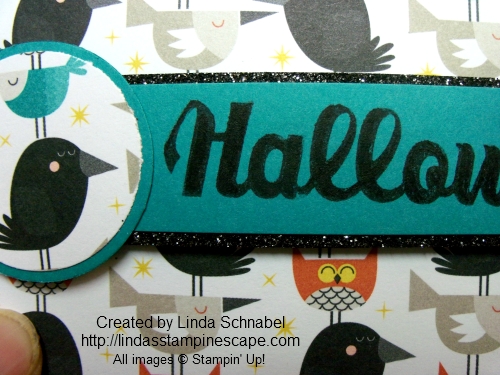
For those of you who have been following my blog for a while, you know that I love to dye my “Silver Glimmer Paper”. Today’s card I dyed it Basic Black!  It really highlights my “Halloween” … which comes from the stamp set “Halloween Street”.

000_1567

I used my marker to color the “Halloween” and omitted the house and the happy.  This is a great way to change up your stamps a bit.

I highlighted two of the cute little birds with my circle punches.  Simple … Simple … Simple!

000_1564

Thanks for stopping by! Have a wonderful week.

blog-closing-small

STAMPIN’ SUPPLY LIST …

Please let me know if you have any questions or would like to order.  To view full details of the product or begin shopping, just click on the product pic below.


Introducing … Gentle Peace Stamp Set

Hello Stampin’ Friends,

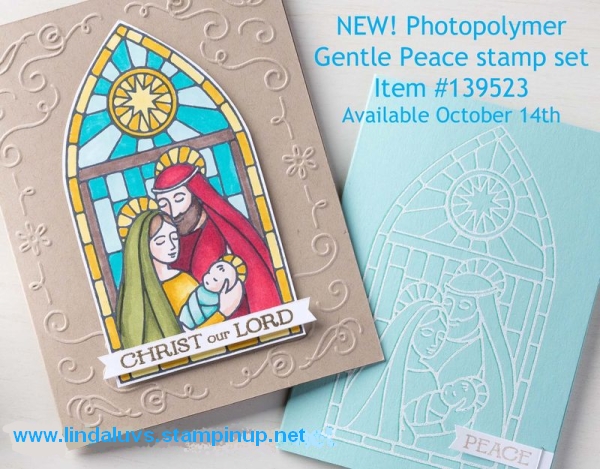
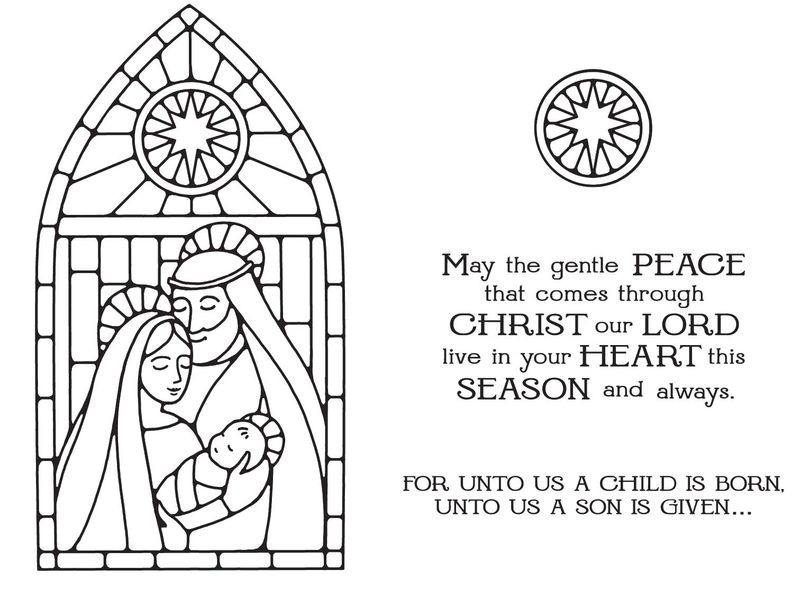
Today I have a new product share for you.  A brand new photopolymer stamp set just in time for Christmas, and it looks like a beautiful stained glass window.

6a00e554f4a3a4883401bb0794c762970d-800wi

Designed specifically with our new alcohol-based Blendabilities markers in mind, it’s perfect for any coloring medium you prefer.  You can see by the second sample, you can create an amazing card just by embossing it too. Whether you want to do super-detailed cards or something simple but meaningful–Gentle Peace is a great choice!


6a00e554f4a3a4883401b8d0799282970c-800wi

Gentle Peace is available beginning October 14th, but you can pre-order it NOW.  I recommend that, because I have a feeling this one is going to go on backorder pretty much instantly! The set is clear photopolymer and costs just $15.95. Email me today and I will put the order in bright and early on the 14th so none of us misses out! lindaluvs2stamp@aol.com

I look forward to connecting with you …

Stop back this week as I will be sharing more Halloween fun with you.

Have a wonderful Sunday.

blog-closing-small

Guest Stamper: Gloria H

Hello Stampin’ Friends,

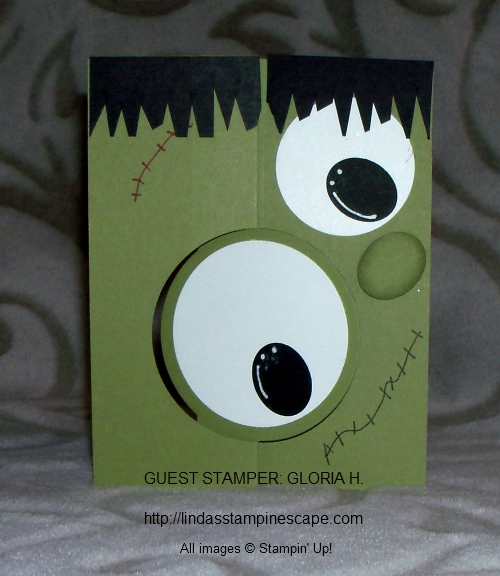
With Halloween just around the corner, I wanted to share this cute Halloween card that I received as a swap from my upline Gloria at her fall regional last year.

I love the cute idea of using the flip card to create a monster … kids are going to “flip” for this card!

000_1557

How easy is that! The Circle Card Framelit die and a few punches and you’ve got yourself a cute little monster.

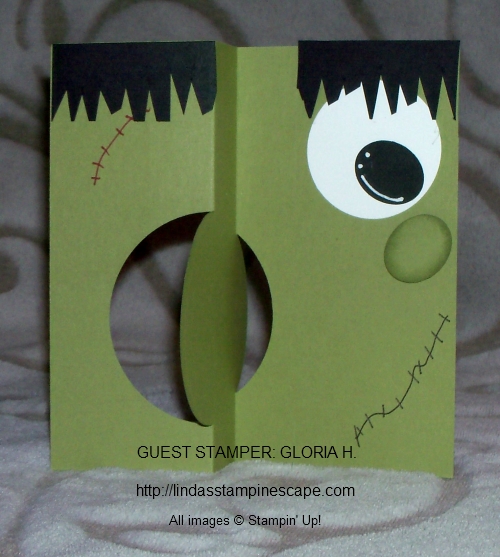
Here’s the flip side …

000_1560

Enjoy as is or embellish it a bit if  you wish.

Thanks for stoppin’ in and have a flippin’ good weekend.

blog-closing-small


Hauntingly Fun Halloween

Hello Stampin’ Friends,

Today I would like to share with you the cutest Halloween projects created by one of our (Stampin’ Up!) staff writers Cindy B.

Simple to recreate you are sure to avoid the tricks when you pass out these sweet treats …

Hauntingly Fun Halloween Décor

Love Halloween? Need a few frightful ideas for home décor? Check out this easy-to-make witch hat created using an inexpensive papier–mâché cone.

Halloween post1

Just wrap a papier–mâché cone using Typeset Specialty Designer Series Paper.

Halloween post2

Scrunch up a round of White Filter Paper, fold in quarters, and hot glue to the bottom of the cone.

Halloween post3

Embellish using a stamped tag. Easy! Or you could step it up a bit as you see here:

Halloween post4

Or turn it upside down and make a spooky candy cone.

Halloween post5

Just for fun, here’s a fancy treat that you could put inside the candy cone:

Halloween post6

Got any magical Halloween décor ideas? Share the spookiness in the space below!

Cindy B.
Sr. Staff Writer

Hope you enjoyed! I think they are so sweet, I’ll be sure to make a few for my Halloween festivities.

Thanks for stopping by and have a fun day ~

blog-closing-small


A Halloween Walk in the Woods

Hello Stampin’ Friends,

Today’s card share is a bit spooky … follow me through a walk in the woods on a dark, dark night. BOO!

I love Halloween and it’s just around the corner, but there is still time to create some awesome cards and projects.

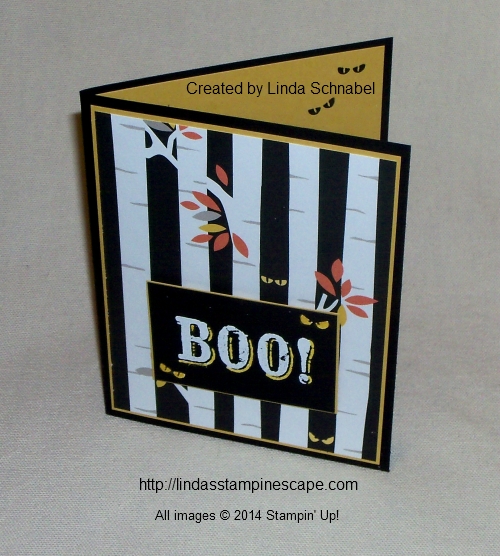
Today’s “BOO” card begins with the “Motley Monsters” Designer Series Paper using the wooded background with scary little eye’s staring back at you! These designer papers are so much fun and easy to create with!

000_1555

This card only called for a greeting which I borrowed from the September Paper Pumpkin Kit. If your not signed up … you have till the 10th of this month, Friday, to begin this months kit!  Check it our HERE.

I embossed my greeting and added some little friends (spooky eyes) and then colored them with the Daffodil Delight Blendabilities.

As always, I let the designer paper guide me to my color pallet … Basic Black and Hello Honey! And … don’t forget to add some spooky eyes to the inside of your card & envelopes!

000_1552

Oh yes, those little eyes come from the “Freaky Friends” stamp set which I will be sharing more of.

Have a wonderful day … and stay out of the woods at night! LOL

blog-closing-small


Time for Weekly Deals!

Hello Stampin’ Friends ~

CM1634B

It’s time for the weekly deals and today I’m going to list my favorites, CLICK HERE to view all the products on sale this week.

I’m going to start with one of my all time favorite products … the Silver Glimmer Paper.

With Christmas just around the corner this stunning, no-mess way to add glitter accents is perfect for your card making. The glitter won’t brush off this cover-weight paper!

Here are a couple of my Christmas Cards using the Silver Glimmer paper …

000_1433 000_1470

HOT STAMPIN’ TIP: When cutting with framelits, place your framelits on the un-glittered side … Because it is cover weight (a bit heavier than cardstock) and has a protective layer, cutting from the back side works beautifully.

The next product I would like to showcase is the “This and That Journal” … what a perfect gift for a your kids or grandkids, then invite them over to embellish the cover (if you haven’t done it for them).  Journals are an age-old gift and are very popular now.  It’s a gift that keeps on giving through out the year!

Again, these are just two of the items I love, there’s more framelits and punches and ribbon – Oh my!

CHECK IT OUT HERE

I have put the links for the key ingredients for my cards below.

Thank you for stopping by and enjoy your day ~

blog-closing-small


Last Day for Stamp, Stock & Save …

Hello Stampin’ Friends,

TODAY is our last day for the ridiculous “Stamp, Stock &15% off sale” on some of your favorite products! It’s time to purchase select ink, paper, envelops, and adhesive-all at a 15% discount! Select stamps are 20% Off too! I have them all listed below for you … plus 2 cute cards!


CM2009B

Now’s the time restock your supply …Christmas right around the corner, it’s a perfect chance to save on your card making supplies!

Here are the selected stamp sets at 20% Off and two cards that I have created with the “Big News” stamp set …

6a00d8354941d869e201bb078f9984970d-400wi

000_1229 000_1224


Here is a list of the paper with the “savings” price … We all need paper, especially the Whisper White.  These are definitely on my order. I always take advantage of these types of sales 🙂

6a00d8354941d869e201b8d0746ced970c-400wi

Yep … might as well save on the envelopes and adhesives too!  With Christmas just around the corner, it’s a great time to stock up on these everyday items.

I’m also getting the Fast Fuse refills … if you haven’t’ tried it yet, now is a good time … when it’s on sale!

6a00d8354941d869e201bb078f9966970d-400wi

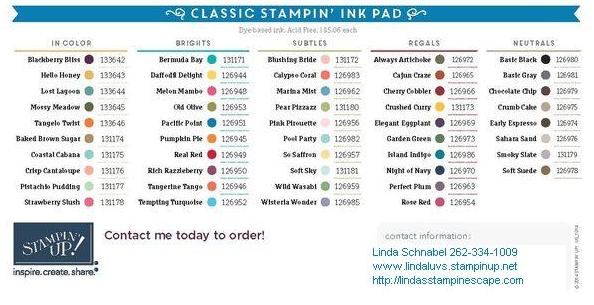
Don’t forget the ink pads … pick up those colors that are not in your collection yet.

Ink Pads

Click on the link to view or print Stamp, Stock & Save Flyer … Flyer_SSS_demo_10.1-6.2014_US

CLICK HERE to view all products on sale / shop now.

Please let me know if you need help placing an order or if you have questions on any of the products listed here today …  Click Here to Contact me.

Thank you for stopping by.  Have a wonderful day.

blog-closing-small

Simply Sunday: Christmas

Hello Stampin’ Friends,

I hope this Sunday finds you and your family well. Today I would like share with you a quick yet beautiful card, along with a paper-savings tip!

I will begin with the “Trim the Tree” Designer Series Paper Stack and the Cherry Cobbler 1″ Sheer Linen Ribbon.  My intent was to create a card that looked as magnificent as a present under the tree!

000_1542

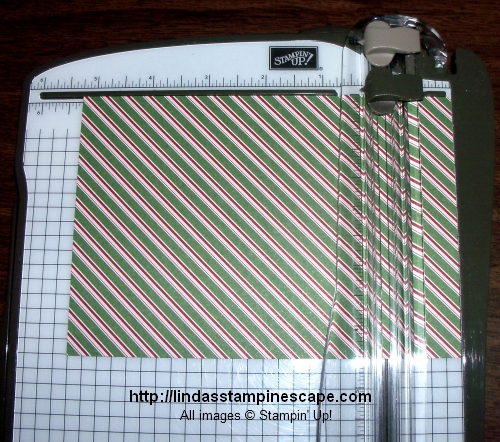
The Trim the Tree DSP is 4-1/2″ x 6-1/2″ and will have to be trimmed down.  Put your paper into the cutter horizontally (longest length) to 5-1/4″ and trim.

000_1547


Now turn 90º – align paper to 4″ mark and trim.

000_1548


Here is what you have … save your extra pieces as you will be using them!

000_1549

As you can see, the skinny piece goes on the inside of your card, and the wide piece fits nicely on your envelope.  You will need to trim off just a small piece!  No scraps! HINT: Be sure to get it on securely as it needs to run the the post office machinery.

000_1545

The greeting is from our Hostess special … YOU can earn it FREE by hosting a stampin’ party or placing a qualifying order of $300… gather your friends, it’s that easy.  Contact me for more information.

I hope you found this post as fun as a present under your tree!  Enjoy your paper savings!  To purchase any of these items just click on the links posted below.

Thank you for coming to my blog and have a great day!

blog-closing-small