Simply Sunday: Silent Night

Hello Stampin’ Friends ~

Today I’d like to share with you a simply beautiful card that I did at with my technique clubs this month. We focused on the “Woodland” embossing folder and some fun techniques that you can use with them to create a “WOW” card.

I paired up the Woodland folder with the beautiful “Wonderland” and “Happy Scenes” stamp sets…

000_2568

To create this beautiful card, you simply stamp directly onto the Woodland embossing folder with the pines from the Wonderland stamp set. Be sure you stamp on the “raised” side of the folder (the trees will be recessed on the side you stamp on).

Silent Night is stamped on vellum in Mossy Meadow and tucked behind your embossed front … I also used Mossy Meadow to mat the front and highlight the beautiful color.

000_2571

For the inside of the card, we stamped the trees from “Happy Scenes” into the corner and the verse from “Wonderland” into the center. I love how many of the stamp sets from Stampin’ Up! coordinate together.

Hope you enjoyed my card …

000_2568

 and I hope you have a beautiful day!

Thanks for stopping by ~
blog-closing-small

TODAY’S STAMPIN’ SUPPLY LIST …


Cool Technique with Embossing Folders!!

Hello Stampin’ Friends ~

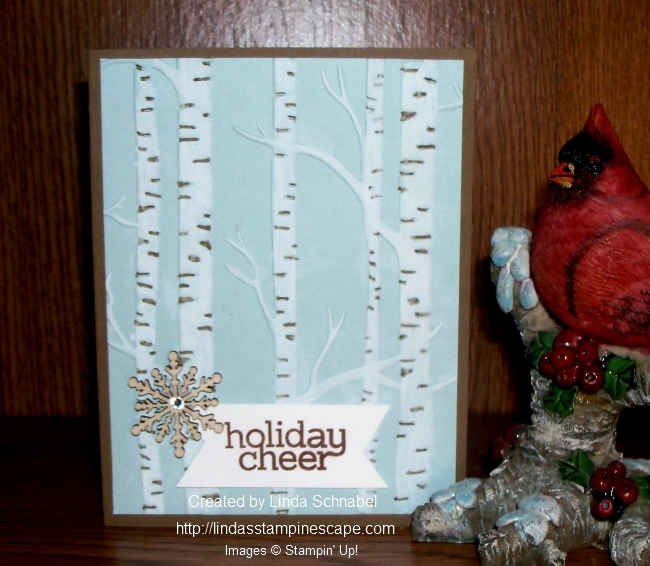
I am excited that the weekend is here, and today I kick off a new season of my Stampin’ Technique Clubs. Our September technique will focus on different ways you can use your embossing folders… and I chose the new “Woodland” folder.

Today I will show you something fun to do with your folders (they’ll make 2 more!) I can’t show them to you yet because it will spoil their fun. I began my card by embossing the trees using Soft Sky cardstock

000_2528

Using the “White Stampin’ Chalk Marker” – I colored the trees and branches to highlight them even more. Wow … it looks so cool and it’s so easy to do!!

I colored in the indented areas of the tree with my Soft Suede marker to coordinate with the base of my card. Don’t you think it makes the tree more realistic looking? I love White Birch … I think it’s my favorite tree!

000_2530

I added a simple greeting (I think this one got past my purging of discontinued sets) and then added one of the new “Snowflake Elements” to add texture and continue the “woodland” feel of the card.

I didn’t want a lot of glimmer on this card, so I added just a touch with a rhinestone in the center of the wooden snowflake. You could easily add glitter to the branches to create a shimmery snow effect!

000_2525

What a simple way to make an impact (the WOW effect) on your card… just by coloring the embossed area.  Hope you enjoyed today’s technique tip!

Thank you for taking time to visit with me today.

I hope you have a wonderful weekend ~

blog-closing-small

Remembering the anniversary of 9-11-01. We will never forget.

TODAY’S STAMPIN’ SUPPLY LIST …


Season To Season Wreath Project Kit

Hello Stampin’ Friends,

Happy Labor Day!!  Today I have another fun 3-D project to share with you …

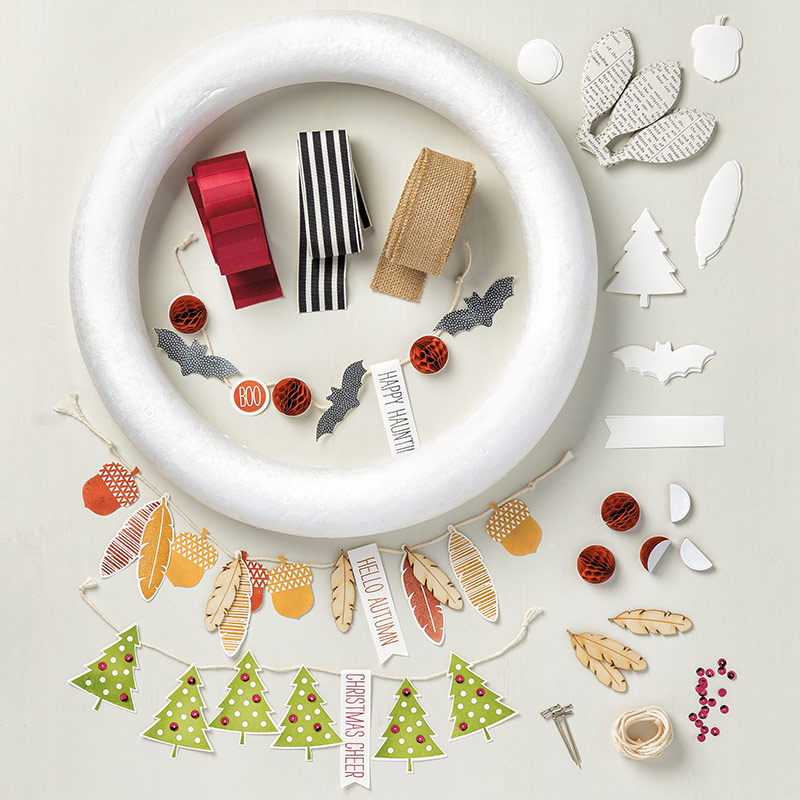
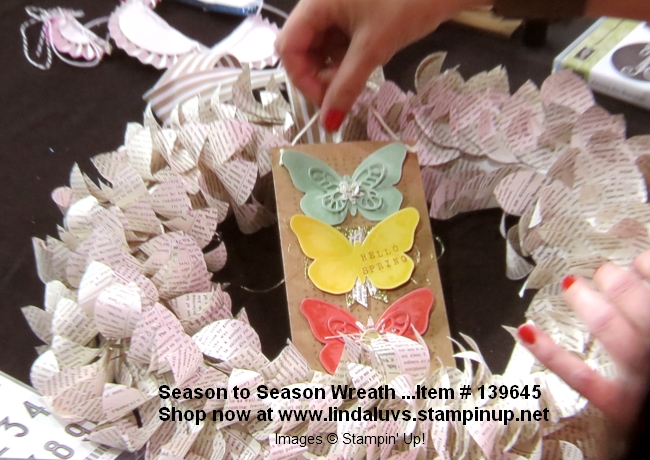
It’s a wreath for all seasons. Change the banner from season to season, and create your own for birthdays and holidays using your favorite stamp sets and dies. Makes one wreath with materials for creating three changeable banners: autumn, Halloween, Christmas.

139645O1 139645Sb

Complete the kit using the Cheer All Year Stamp Set (item 139839). Stamps, ink, and adhesive sold separately. Instructions are included.

I have a video for you demonstrating how to make the wreath along with some tips for you.

Below is a wreath that was showcased at Convention! I think it’s perfect for Labor Day… don’t you!

IMG_0281

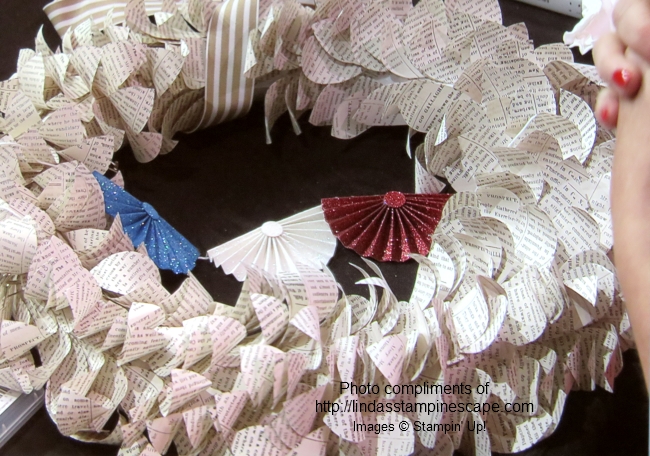
You can decorate this any way you’d like … Here’s some butterflies for spring! Also a convention photo.

IMG_0279

How would you decorate your wreath?  I’d love to hear from you.

Thank you for stopping by today, hope yours is a great one!

blog-closing-small

TODAY’S STAMPIN’ SUPPLY LIST …

Delicate Ornaments …

Hello Stampin’ Friends,

With the release of the new 2015 Holiday Catalog, I wanted to share with you some of the amazing new products! I’ve already shared sneak peeks of Fall and Halloween cards, so today I’m going to bring you Christmas …

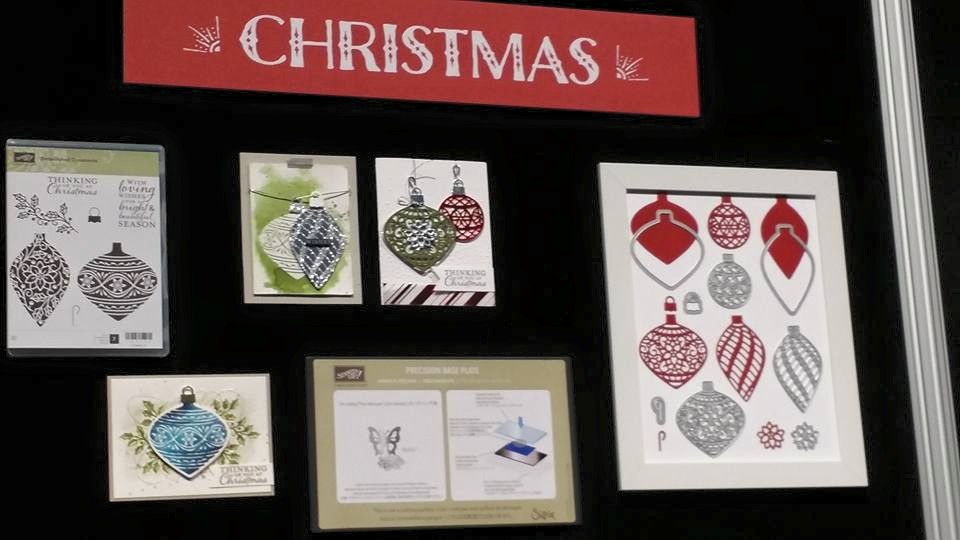
I want to focus on the Delicate Ornament Thinlits Die and the new Precision Base Plate. This steel plate delivers improved performance with more detailed dies, giving you extra fine cuts.

Grab a cup of coffee and sit back to watch this video explaining how it works …

The beautiful card shown in the video is the same card as shown in the Holiday catalog on page 14 – there is where you’ll find the Precision Base plate.

The Delicate Ornament Thinlit Dies are on page 15, and can be bundled with the Embellished Ornaments stamp set to save 15%. You’ll be seeing more of these in upcoming blog posts.

140857S

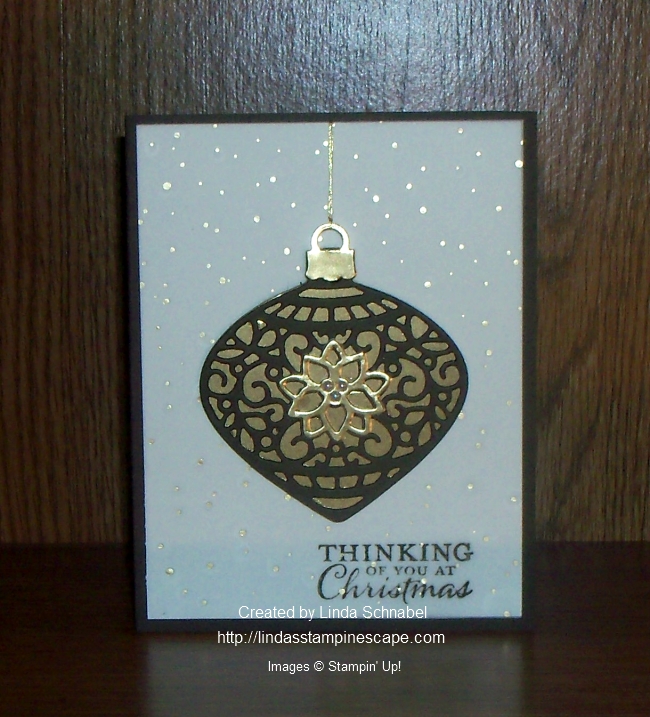
Today I’m using the Delicate Ornament Thinlit Dies with the beautiful Winter Wonderland Designer Paper stack and Embellished Ornaments stamp set.

I wanted to use Early Espresso cardstock with my gold paper, but please note that you may need a shim to cut out the delicate ornament even with the Precision Base plate … it is a lot thicker and each BigShot is different. So this is just a “heads-up”.

000_2501

I cut the gold paper with the solid image to back my Espresso … the color really gets pulled out when combined with the Winter Wonderland Designer Paper stack. I really loved building this ornament, can’t wait to sit down and “really” play with these.

The fine tip glue pen works wonders when layering these images! I even used it to adhere my designer paper… just put a dot of glue behind the dots on the designer paper. Once dried you can bearly see it.

The greeting comes from the Embellished Ornaments stamp set and stamped in Early Espresso. I then popped up my ornament to give the card some dimension, the ornament itself give you beautiful texture.

I finished it off with a couple of little pearls and the gold thread. I love the way this card turned out!

000_2501

I hope you enjoyed today’s card share and video.  If you like my blog … share it with a friend!

Have a wonderful day ~

blog-closing-small

TODAY’S STAMPIN’ SUPPLY LIST …


Simply Sunday: Reason for the Season

Hello Stampin’ Friends ~

First …  I’d like to wish my nephew Artie a Happy Birthday!!

Today I have a simply beautiful card to share with  you from our Holiday Catalog … you should have yours by now. Don’t you just love it!!

I have been patiently waiting to bust open my box of goodies … needed to organize my stampin’ area before I added more, but I could wait no longer!!

000_2458

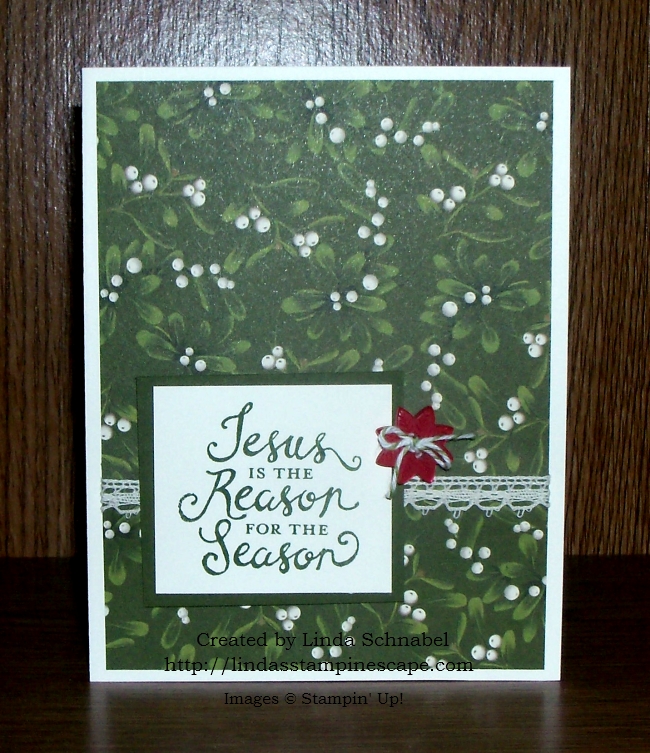
Now that’s a box of FUN!!  I had a hard time picking out something out to make our card today! So I decided to create another card using the “Home for Christmas” Designer paper that you saw yesterday. I just love this paper and it’s so easy to keep it simple when the paper is so pretty.

000_2461

I added the greeting from the “Reason for the Season” stamp set. I just adore it when they use the nostalgic fonts, it just screams Christmas. I used the Venetian Crochet Trim to maintain the nostalgic feel.

For a pop of color I added the pretty little poinsettia button from the “Home for Christmas” Designer Buttons and tied a little bow using the Old Olive Bakers Twine.

I would love to hear what your favorite items are in the new Holiday Catalog.  Don’t have one?? If you are in need of a demonstrator I would be happy to send you a catalog.

Thanks for visiting with me today.

Have a wonderful Sunday and enjoy it’s simple pleasures.

blog-closing-small


Sneak Peek Cozy Christmas Card

Hello Stampin’ Friends ~

A quick post today and a sneak peek from the upcoming Holiday Catalog!

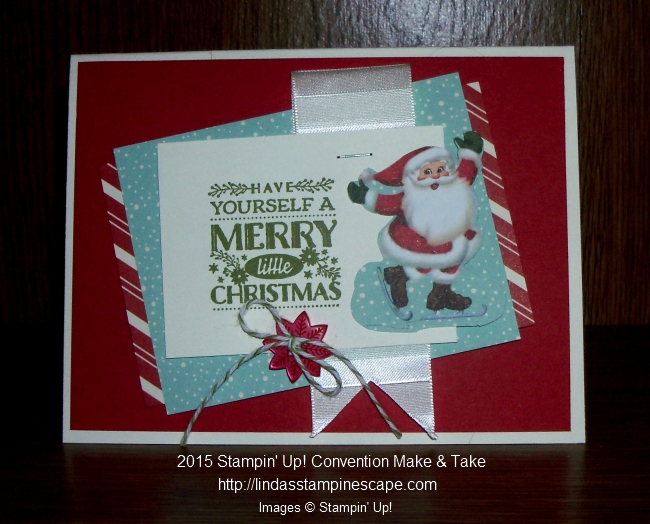
At our Stampin’ Up! Convention we (the demonstrators) had the chance to see many Christmas card ideas using products from the Holiday Catalog! We also had the opportunity to create this card using Cozy Christmas stamp set and Home for Christmas Designer Series Paper.

I love the retro feel … What do you think?

000_2452

The delightful Santa was snipped from one of the patterns in the Home for Christmas Designer Series Paper. Tucked behind Santa is a piece of Very Vanilla 1-1/4″ Subtle Stripes Satin Ribbon … oh so pretty! This would look great on gifts as well.

I love when everything coordinates. Stampin’ Up! Home for Christmas Designer Buttons are the perfect compliment to the stamp set and paper.

All of these wonderful “sneak peek” holiday products shared today will be available when the Stampin’ Up! Catalog begins Sept. 1

Thank you for poppin’ in today …

Hope your day is a great one!

blog-closing-small

More Holiday Catalog Sneak Peeks …

Hello Stampin’ Friends ~

Today I have a few more sneak peaks for you from our upcoming Holiday Catalog! I’m so excited … I can’t wait for you to get it in your hands. If you are one of my current customers, your catalogs have been tagged for you and you’ll be receiving it sometime this month!!

If you don’t currently work with a Stampin’ Up! demonstrator and want to be my customer, I’m happy to mail you a copy of this awesome catalog.  Please email me at lindaluvs2stamp@aol.com.

OK … Let’s begin with the colorful season of Autumn ~

IMG_0127

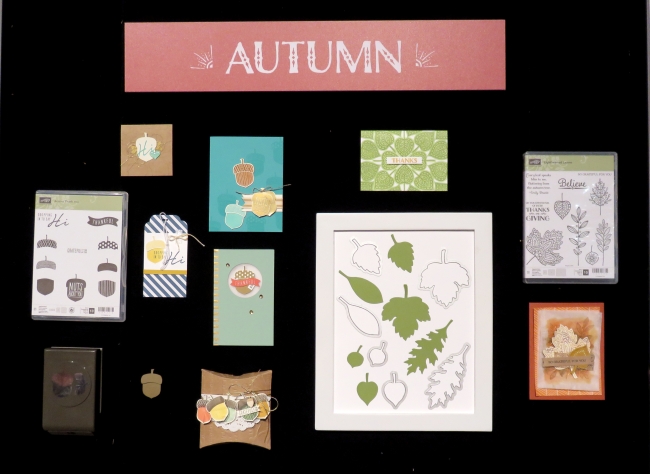
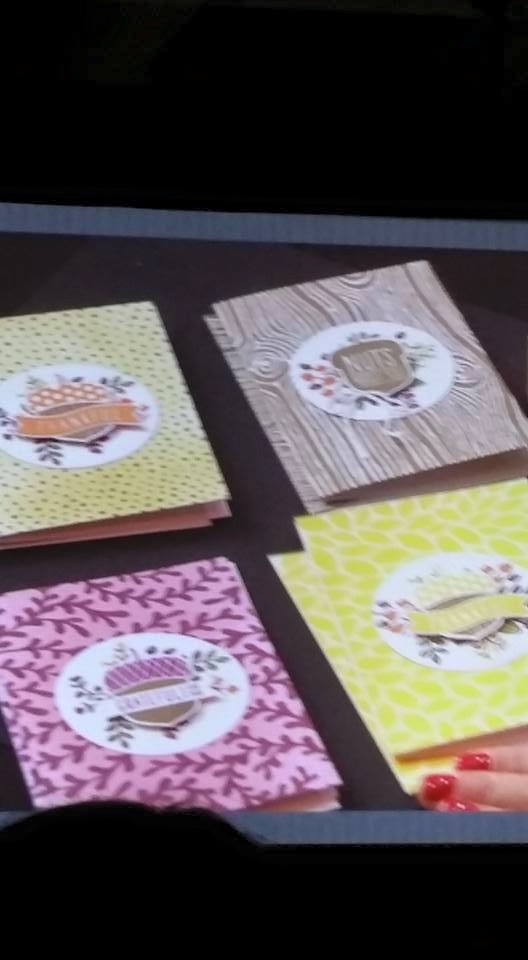
Let’s start at the left side and work our way to the right. Do you see the cute little Acorn stamp set? Isn’t it adorable? I love it, and what I love even more … BUNDLE!! That’s right, you’ll be able to save 15% when you purchase the adorable “Acorny Thank You” stamp set with the “Acorn Builder Punch”.

Next … you will see our beautiful “Leaflets Framlelits” Dies from the current (main) catalog! I love that these have now two stunning stamp sets to coordinate with! One is the “Vintage Leaves” stamp set in our current catalog and second is the “Lighthearted Leaves” you see in the upper right hand corner of the photo.

Now … if you’d like to follow me to the dark side ~

IMG_0122

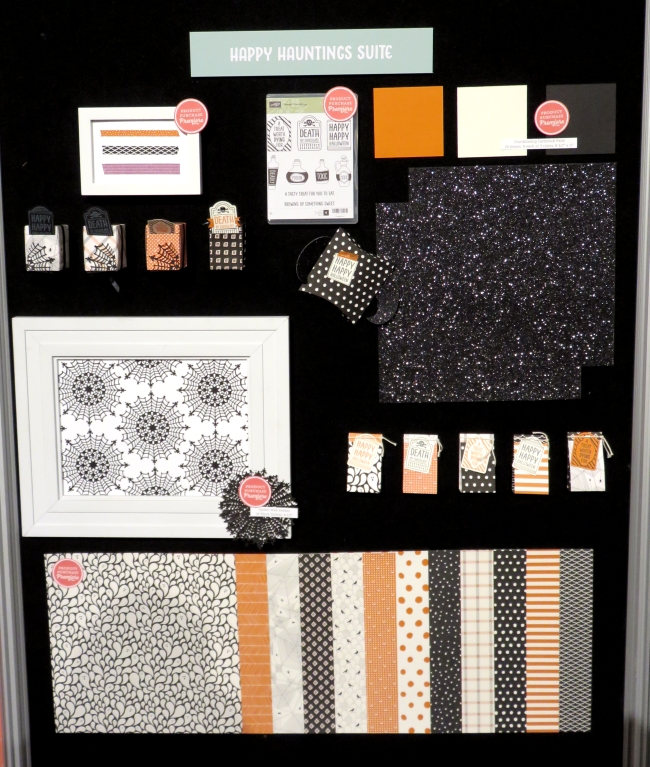
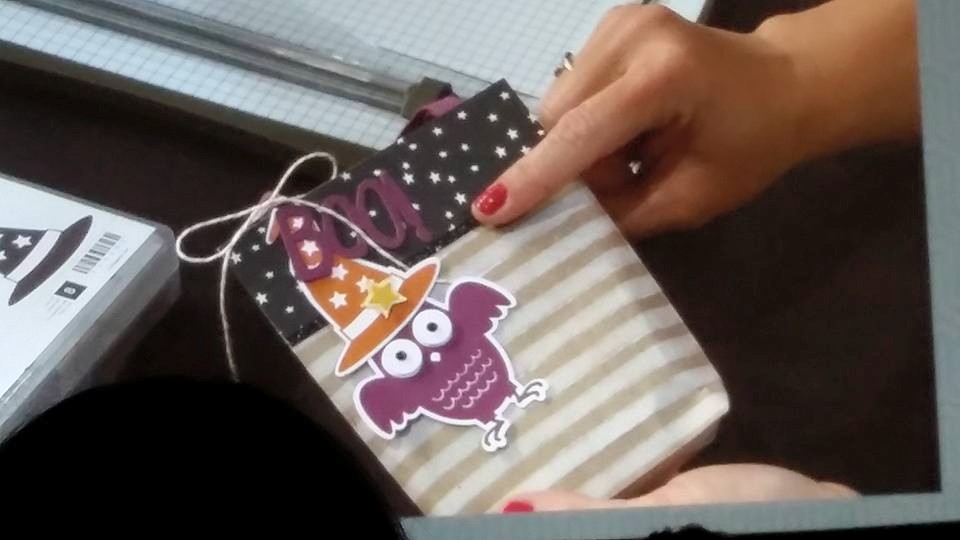
I’m not sure where to start here! So I’ll begin with the new “Happy Haunting” Designer Washi tape in the uppper left hand corner. Then you will see some cute boxes crafted with the “Happy Haunting” Designer Series Paper and our new “Spider Web Doilies” … oh, the things you can do with these!!

And if you saw my earlier posts … you know that I am head-over-heels in love with the new “Black Glimmer Paper”. I cannot wait to get my hands on this entire suite of products! Do you see a “Happy Hauntings” Class in your future!

And finally … put your coats on, it’s a bit chilly in Wisconsin during Christmas!

IMG_0125

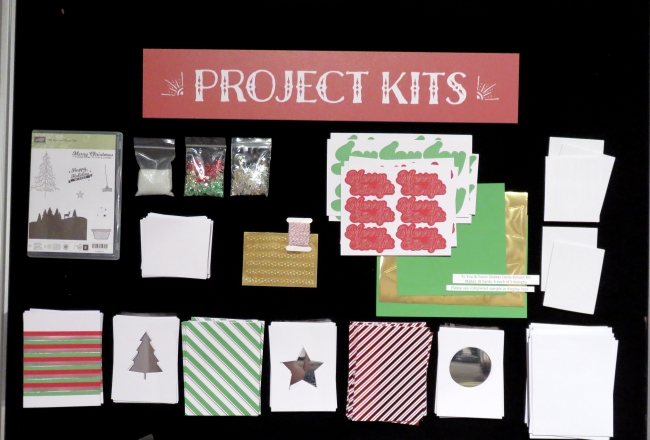
This is just one of the project kits Stampin’ Up! is offering in the Holiday catalog and I chose the Christmas one as my sneak peek today because …. I LOVE WINDOW / SHAKER CARDS!!! Oh my gosh, everything you need to make these cute cards is included in the “To You & Yours Shaker Cards” Project Kit.

It makes 18 cards for ONLY $24.00 … You can’t buy this kind-of-cute at any store, and YOU get to hand craft them!!

11709610_10153447855047210_6775974221702976680_n

There is just sooooooooooo much awesomeness in our new Holiday catalog. Many of the items in our Holiday catalog were designed to coordinate with many items in our current catalog, so there are endless possibilities!!

I hope you enjoyed this sneak peek! And I can’t wait to share more, and better yet … begin stamping with you.

Thanks for joining me today!!

blog-closing-small


Sneak Peaks from Convention!

Hello Stampin’ Friends ~

Convention may be over but the fun will soon begin … with you that is!! I’m still in Salt Lake City and I have already begun planning so fascinating stamping events for you!

The new Holiday catalog is amazing so I wanted to give you a sneak peek before your catalog arrives next month…

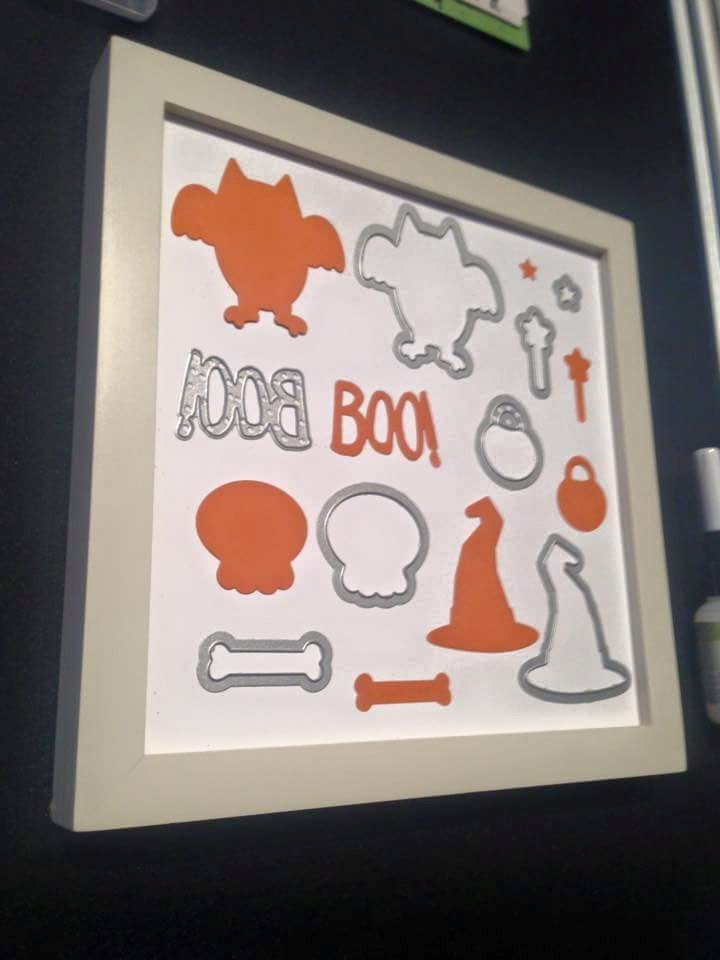
Let’s start with one of my favorite holidays … Halloween! I actually won this stamp set during one of our “Prize Patrols”

11751960_10153448190592210_6405193210391164454_n

And of course we have to have those “awesome” coordinating framelits to go with the stamp set!

11251820_10153447850557210_901775885438737686_n

Lets move on to my favorite season … Fall ~

11695975_10153448238042210_5983339478524454769_n

A tantalizing peek at these most amazing coordinating products …. I received the stamp set (Happy Scenes) below for one of our “Leaders” gifts

11208654_10153446704032210_7932295865713062002_n

And of course there is everyone’s favorite ….  Christmas!

11247893_10153446705402210_8818244516538553422_n

10857952_10153446705622210_364461652598780309_n

And if lack of time is a concern … got you covered! The answer:  we have fun kits for you that include what you need, eliminates cutting (it’s done for you) and comes with full color instructions … easy! Oh … and one more thing … they are Shaker cards!! You’re friends and family will think you’ve worked for months … but that’s OK. lol

11709610_10153447855047210_6775974221702976680_n

If your looking for something special this year … I have just the answer! I know you are going to fall in love with these beautiful ornaments and coordinating framelit dies! So pretty!!

11800172_10153449961332210_1443968634941546705_n

There is so much for me to show you, but don’t just wait for a stampin’ event … invite your friends over and I will show how amazing these products are! Then earn some for FREE!!

So… what do you think so far? I’d love to hear from you.

Have a wonderful day ~

blog-closing-small

Snowflakes in July ….

Hello Stampin’ Friends,

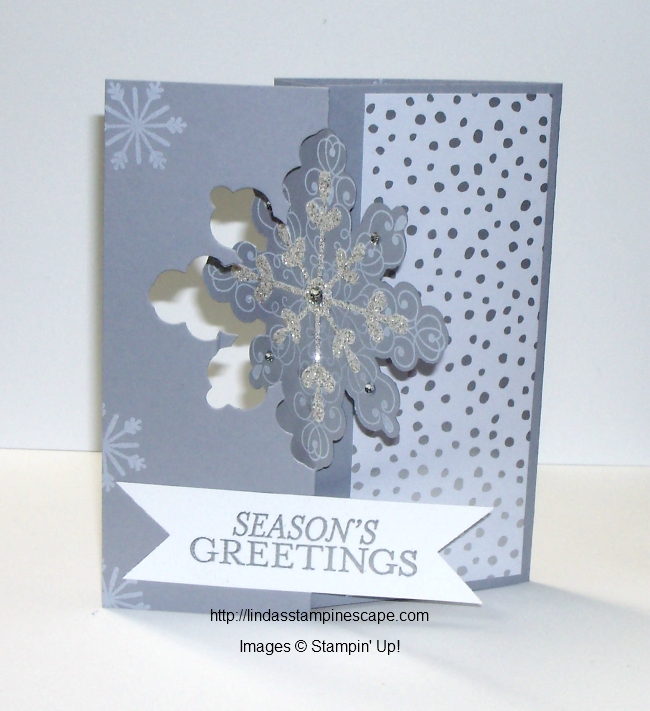
Hope your day is going well. Yesterday I posted some of my favorite items from the Clearance Rack … one of them was the Snowflake Card Thinlit Die. We all love those “flip” cards, so today I’m going to show you one that we made at last years Holiday retreat…

 000_2364

We used Smoky Slate as our core color and then added the designer paper.  We slip the end of the cardstock over the top of the end piece on the die so it would not cut it off.  It does however leave you a nice score line so you can fold it in.

000_2365

We even stamped on the inside, so you wouldn’t get bored when you open it up. lol

Simple to make … I’m sure your friends will flip over a card made with this fun framelit.

Thanks for stopping by ~

blog-closing-small

Don’t Miss Out …

Hello Stampin’ Friends,

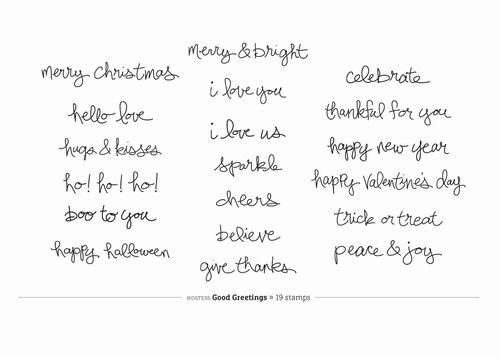
Today I’d like to share with you the opportunity to get this exclusive hostess set ‘Good Greetings’? It’s on sale at the Year End Closeout for just $10.19. There are tons more deals starting at just $1.99. It’s a good time to say ‘Merry Christmas’ to me and get some of those items you’ve been wanting. .

6a00d8354941d869e201b7c6d472dd970b-500wi

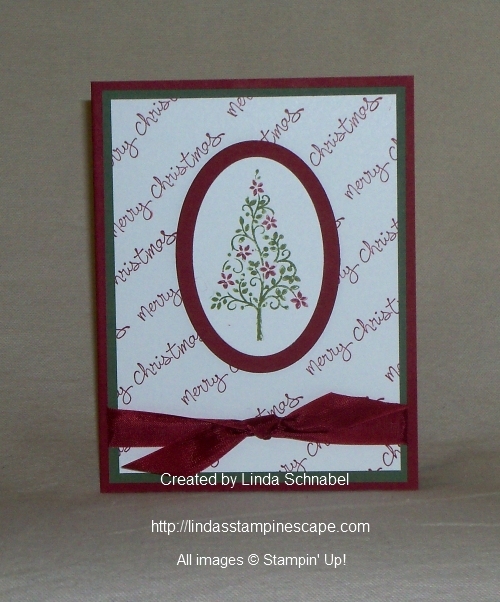
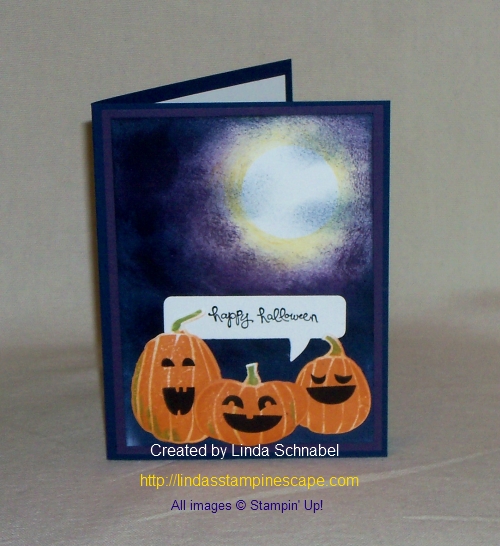
Here are just a few of the items that I had made using this fabulous stamp set …

000_1613

000_1428

000_1418

000_1505

As you can see, the “Good Greetings” stamp set is very versatile … these are only a few, just think what you could do!

CLICK HERE FOR THIS AND MORE DEALS

Thank you so much for stopping by today …

Have a great one!

blog-closing-small

Merry Christmas Friends ~

Merry Christmas Stampin’ Friends,

On this Christmas Eve I am feeling so blessed.

I am grateful for our connection, whether it be through my stamping clubs or classes, the social media world of my blog or facebook page, or just through an email connection.

I am grateful that I get to do what I love, in an industry that I love, for people that I adore.

From my house to yours ….

000_1838

I’m wishing you a very Merry Christmas and a Happy New Year.

I hope this holiday and the new year brings you peace, love, and the pure joy of spending time with those most precious to you.

blog-closing-small

Christmas Card Parade …

Hello Stampin’ Friends ~

Today I want to share a few of the Christmas cards that I have received from friends and family. You will see that some of the stamp sets used are retired, but I figured many of you have those stamp sets so you would yet another card idea!

Enjoy ….

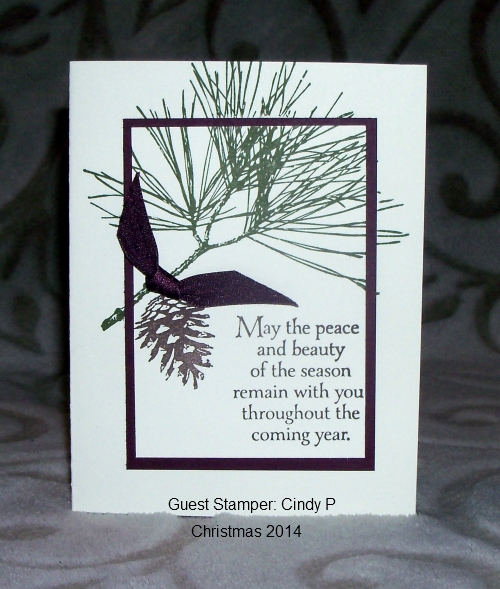
000_1821

Cindy used the “Ornamental Pine” stamp set found in the Holiday catalog.

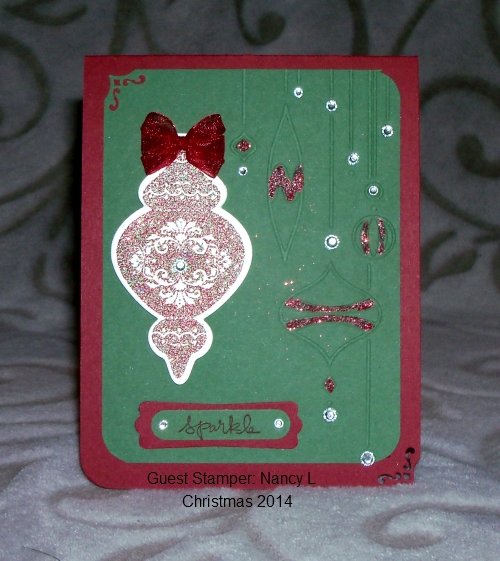
000_1822

Many of you will recognize this ornament that Nancy used, it also had framelits to match.

000_1823

This Christmas card was from my Mom. I believe our friend Sandy H. helped her with this card.

000_1824

Barb used the “Pinwheel” technique for her card. The greeting comes from the Christmas Bliss Photopolymer stamp set.

000_1825

Jenny created this card using the Bright & Beautiful stamp set, Star Framelits, and Lucky Stars folder.

000_1826

This card was done by my sister Rita … Embossed in gold.

000_1827

Sandy H. made her card using the “Circle Card Framelit” die

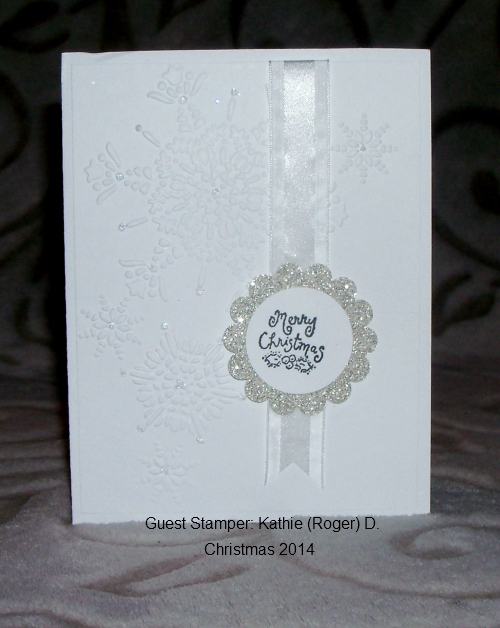
000_1828

Our last card was made by a husband & wife team: Kathie and Roger!

I want to thank all of you who have sent me cards, they are all so pretty, and they have warmed my heart.

Hopefully I will have more time to share additional Christmas cards. Thanks for stopping by.

Have a wonderful Sunday ~

blog-closing-small

Last Minute Gift Giving …

Hello Stampin’ Friends,

I’ll keep this quick because we know you’re busy and short on time. If you’re looking for the perfect last-minute gift and want to avoid the crowds and stay cozy by the fire, we’ve got you covered with prepaid Paper Pumpkin subscriptions.

Paper Pumpkin-Give the Gift of Creativity

Choose from 1, 3, 6, or 12 months. Then, click to purchase, print a gift card, sign, and stuff into their stocking. Easy! You can literally wait until the very last minute, but save yourself the stress and go get it now. Prices start at just $19.95 US/$24.95 CAN. Click here to shop. You’re welcome. Now go finish that hot cocoa.

Thank you for stopping by today, and stop back tomorrow to check out another Paper Pumpkin sample that will include a SNEAK PEEK at an upcoming Sale-a-Bration stamp set!

Have yourself a fabulous day ~

blog-closing-small

Wintertime Calm …

Hello Stampin’ Friends,

Hope you had a wonderful weekend! Since I took Saturday off from blogging, I figured I would share a special post with you today. I am going to show you a progression of cards, from simple to a touch of glitz.

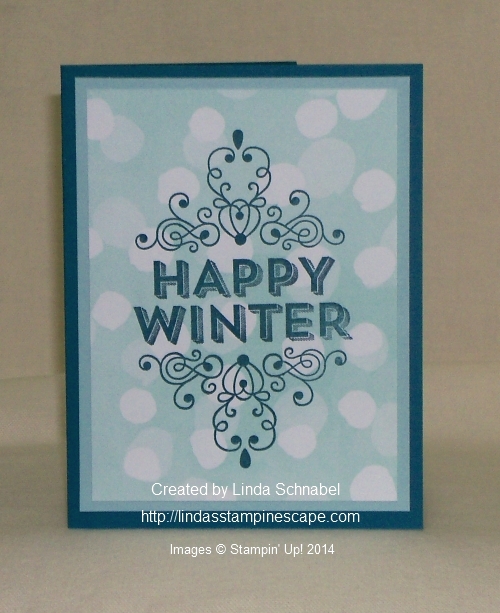
I started ever so simple with the “All is Calm” Specialty Designer Paper and the “Wintertime” stamp set. I haven’t used it yet, but have been dying to get my hands on it and stamp!

000_1782

My core colors that I used are Pool Party and Island Indigo … even though those are not listed on the designer paper pack, the Pool Party went well with the pattern I chose.

I simply inked up the stamp with the Island Indigo and stamped directly onto the designer paper… assemble and you have a cute and quick card! Simple can still be pretty.


Now … If you’re one of us who like some sparkle to your cards, my next sample illustrates what a few rhinestones can do for your card. Oh my that’s pretty!

000_1786


If you’d like to step it up a bit more and highlight the greeting, simply stamp another image onto the Whisper White cardstock … cut it out … and mat it with a little piece of Island Indigo.

000_1789

Wow… that really adds dimension and gives your card a new look.


If you still don’t have enough sparkle … then instead of the Pool Party mat behind the designer paper, you could use our beautiful (and new) Dazzling Diamonds Shimmer paper.

000_1793

Look at how that makes the entire card pop! So whether you like a more simple and subtle card or full out bling … you can see how easy you can transform your cards.

So head off into your stamp room and have some fun! Feel free to share your projects with me (lindaluvs2stamp@aol.com) I’d love to share your project with our stampin’ friends on Linda’s Stampin’ Escape blog… with your permission of course!

Thank you for stopping by my blog.

Have yourself a wonderful day ~

blog-closing-small

STAMPIN’ SUPPLY LIST …


Big Brothers / Big Sisters Organization Stamp Camp

Hello Stampin’ Friends,

Yesterday afternoon I had the pleasure of working with the Big Brothers / Big Sisters Organization. The local Volunteer Center donated the facility for us … it was a wonderful collaboration by all so the “Big Sisters” and their “littles” could spend an afternoon together stamping.

000_1753

The theme for the stamp camp was Christmas… the season of giving. The projects everyone made reflected a “giving theme” and I elaborated that the beauty of stamping is much like Christmas … a gathering of friends.

Our first project we did was the “Santa Card” … so easy but so stinkin’ cute!

000_1757

We used the Real Red cardstock as our base and Basic Black for the belt. The buckle was created with the Silver Foil paper and the Curvy Label punch.

We used the beautiful new “Dazzling Diamonds Glimmer Paper” for the fur on the jacket, and finished it off with the “Happy Holidays” greeting I borrowed from my November Paper Pumpkin Kit.

Our next project was the Christmas Treat Tree Box … this comes from the October Paper Pumpkin Kit. The adhesive is already on the cardstock … all we did was punch out the tree and add a window sheet … Ta Da!

000_1755

I should have put candy in it for you … it really is cute, and who wouldn’t want a cute treat box filled with candy!

Our last project was the sweet little treat box … remember, our theme was “the season of giving”.

000_1754

Create a belly band with any designer paper, the one shown here is retired. My poinsettia flower was created using the “Petite Petals” punch. It takes a bit of layering to get it to look this full but our group did an awesome job!

The front tag was created using the “Cheerful Tags” stamp set … just wanted to add a greeting to our gift box.  These “Tiny Treat Boxes” can be found in the Holiday catalog.

I hope you enjoyed viewing our Stamp Camp projects … I had a wonderful time with the Big Sisters and their littles. I also want to Thank the Volunteer Center for letting us all gather together for the afternoon in their facility.

Wishing you all a fabulous day today ~

blog-closing-small

STAMPIN’ SUPPLY LIST ….