Stampin’ on a Budget …

Hello Stampin’ Friends,

Today I want to share with you some of the items that were just posted on the Year End Clearance and some fabulous samples from those items. It’s a great time to be looking for some savings (and card samples)!


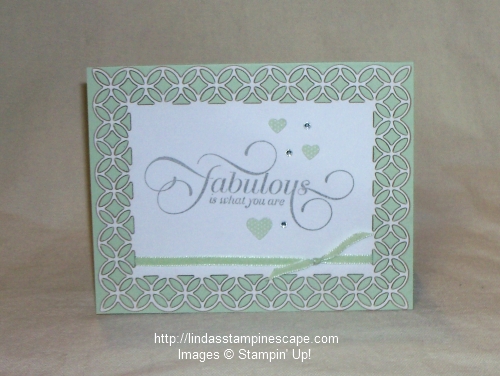
Simply Fabulous Simply Sent

Simply Fabulous Simply Sent 126925
Price: $12.95 $5.19
Paper and accessories for 8 cards. Coordinates with Million & One Stamp. Kit includes* 8 4-1/4″ x 5-1/2″ cards, with elegant lasered edges
* 8 envelopes, 4 Pistachio Pudding and 4 Smoky Slate
* 30 adhesive-backed, 3 mm rhinestones
* 72 cardstock sticker hearts, 36 in Pistachio Pudding and 36 in Smoky Slate
* 8 pieces of 1/8″ Taffeta Ribbon, each 15″ long; 4 pieces of Pistachio Pudding and 4 of Smoky Slate

000_1025

I want you to know that I added the base of the card, so when you recreate these designs … you can make them any color you want!

000_1022

Joyful Christmas Clear-mount Stamp Set
Joyful Christmas Clear-Mount Stamp Set 131805
Price: $16.95 $10.19
Share Christmas joy and your best wishes for the new year with cards you make yourself. Some cardstock, a little bit of ink, and this stamp set are all you need.Set Quantity: 4

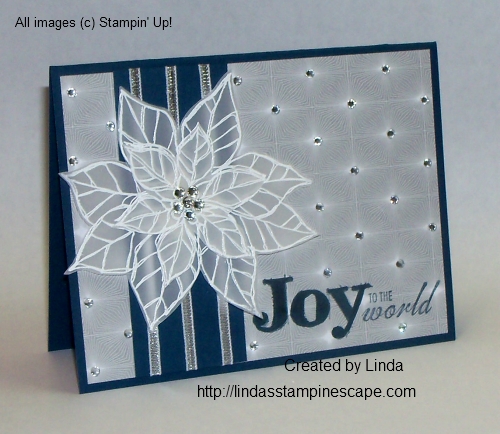
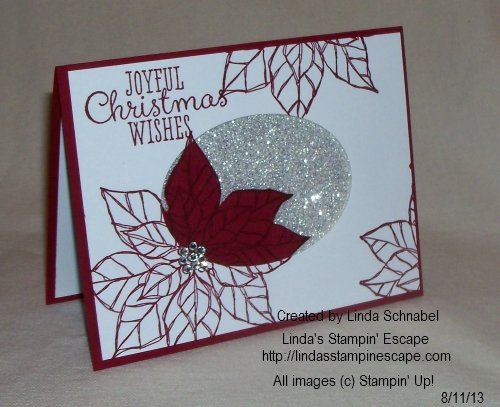
OK … this is one of my favorites, and I miss this set so much. I have four beautiful Christmas card samples to share with you today.

I used the Triple Time Technique for this card, using the Silver Foil paper … quite striking, don’t you think?

000_0282

On my second poinsettia card sample, I embossed Vellum cardstock and cut them out to create a beautiful focal point on my card.

000_0420

On the third sample I used Washi Tape between the lines from the embossing folder. I stamped the flower in Cherry Cobbler and then lightly sponged the edges after cutting it out.

000_0085

On my last sample from the Joyful Christmas stamp set, I used the “Reverse Spotlighting” technique. The Cherry Cobbler really pops against the Silver Shimmer Paper.

000_0074

Here was another one of my favorite stamping item to have in my stamp room …

Watercolor Wonder Designer Note Cards & Envelopes
Watercolor Wonder Designer Note Cards & Envelopes 133362
Price: $12.95 $5.19
Easiest DIY cards ever! Take a printed Watercolor Wonder Designer Note Card. Stamp or write on it. Done! Coordinate with the Watercolor Wonder suite.■ 20 printed cards on watercolor paper: 4 ea. of 5 designs
■ 20 Ivory envelopes
■ Card size: 3-1/2″ x 5″

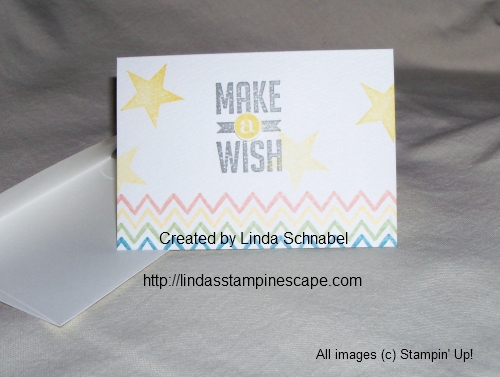
This note card set is a fantastic way to make quick and easy cards… Add a greeting and then either stamp an added image or punch a butterfly ….

000_0493

000_0582

It’s nice to see the items that are on sale … but it’s even nicer to see what you can create with these items! I have more and would love to share them with you, so stop back tomorrow and check them out.

To begin your shopping experience, just click on one of the items descriptions and it will take you to my on-line store or you can click my shop now button…

blog insert - shop now

Have a great day … and thank you for stopping by today.

blog closing-small

Gentle Peace with Blendabilities …

Hello Stampin’ Friends,

Today I want to share with you a different take on the “Gentle Peace” stamp set. This beautiful stamp with it’s stained glass is perfect for the Blendabilities. I did use the Blendabilities and love how easily they blend … but now I want to share my card with you!

000_1743

I love this card because my focal point is the holy family … I kept the star from the window to shine above them. A simple card but oh so lovely.

I wanted to show you that you can change up a stamp set by omitting or cutting out a part of it and giving it a whole new look. I enjoy hearing what you think … please leave a comment below.

There are only two days left for our Online Extravaganza, and today don’t forget to check out the Door Busters available “today only”.

6a00e54ef32691883401b8d095ed7b970c-800wi

Door Buster Sale… 30% Off the Blendabilities Bundle (140388) includes all 12 assortments! (except Skin Tone) Plus… When you purchase your bundle today from my on-line store, you will be invited to my  FREE Blendabilites class in which you will learn how to use and get the most out of your new markers!

There’s MORE… So you can get started “right away” I will include the Momento Ink Pad and Color Lifter Pen FREE!! They will be with your projects supplies when you get to class. I’ll have everything ready .. just bring your new Markers! With the Stampin’ Up! savings of 30%, the FREE Class, Momento Pad and Color Lifter Pen … your saving over $85!

Here is the list of today’s Door Busters ….

December 1 Door Busters

To view the rest of the deals by % of savings – Click on the icons below …. 

                  CM2017T       CM2019T       CM2021T       CM2023T

Save this for the direct link to my on-line store and shop early Monday
CLICK HERE to SHOP

Enjoy the savings. For those of you getting the Blendabilities … I will send you the class information shortly.

Thanks for stopping by and have a wonderful day ~

blog-closing-small

Make an Impression Card Share …

Hello Stampin’ Friends,

I’m excited to share 3 pretty card samples from my new toy with you today …

DemoHeader_TextureBoutique_Demo_Jan28_US

Texture Boutique Embossing Machine
Item 132657   $29.95

It’s embossing made easy. Texture Boutique is the perfect, portable tool to create embossed cards, tags, embellishments, and more. Use it with our Stampin’ Up! exclusive Textured Impressions Embossing Folders.


You can try it with any of our new embossing folders from the Holiday Catalog:

    • Filigree Frame Textured Impressions Embossing Folder (item 135818)
    • On Point Textured Impressions Embossing Folder (item 135835)
    • Lucky Stars Textured Impressions Embossing Folder (item 135817)

If you order the Texture Boutique Embossing Machine and all three of the new folders you will qualify for my … Free goodie bags when you purchase with me! Use my hostess code 3NWFJK9U

All Goodie Bags will include a few hand-stamped cards, a yard of ribbon and a wood mounted stamp. Goodie Bags will also include one or more of the following: stamp set(s), 6×6 sheets of Designer Series Paper, fabric, buttons, glitter, stampin spritzers, Big shot embossing folders, simply created kits, tags, embellishments and more

  • Filigree Frame Textured Impressions Embossing Folder (item 135818)

 000_1737_0001

I used the Christmas Bauble stamp set along with the Old Olive and Cherry Cobbler Blendabilities markers. I also tried out my Stampin’ Dazzle Marker in Silver … it works really nice. The greeting comes from the Watercolor Winter Too stamp set.


  • On Point Textured Impressions Embossing Folder (item 135876)

 000_1734_0001

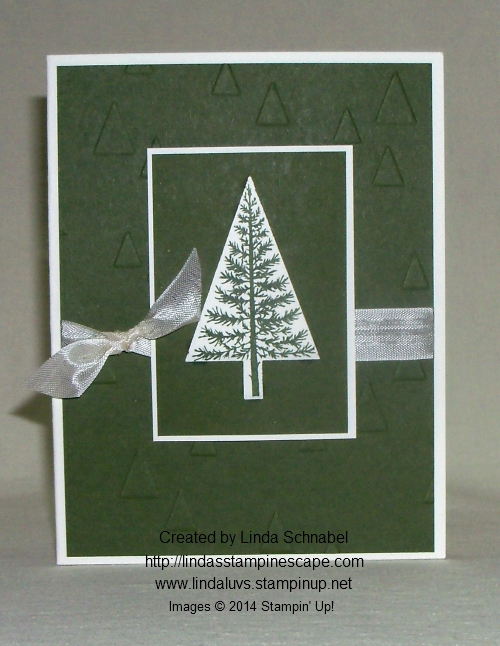
This cute and simple card also the Festival of Trees stamp set and Tree Punch. Save 15% when you bundle the two.


  • Lucky Stars Textured Impressions Embossing Folder (item 135817)

000_1731_0001

Here’s another quick card … but it makes quite a statement with the silver foil paper!  My greeting comes from the Letterpress Winter stamp set and is stamped in Lost Lagoon.

Here is the video to explain how it works.


I know you will love it, can’t wait to share it with my club members!  And, if you want to try it out … I’ll be happy to bring it along to show you and your friends (let’s gather for a stampin’ party)!

I’m now taking bookings for Sale-a-bration… where everyone has the opportunity to earn FREE products! Sale-A-Bration will be January 6  – March 31 , 2015

Have a great day ~

blog-closing-small

STAMPIN’ SUPPLY LIST …


Sweet -n- Sassy Gift Boxes …

Hello Stampin’ Friends ~

Why wait till Black Friday for great deals? Stampin’ Up! is rocking the stampin’ world with the Online Extravaganza and Door Buster Deals tomorrow and next Monday! Just click on the logo to view the entire list …

6a00e54ef32691883401b8d095ed7b970c-800wi

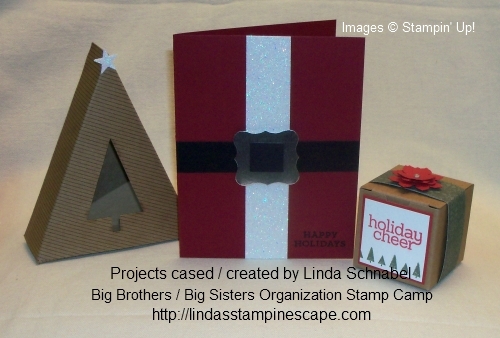
Today I want to share with you some sweet and sassy projects using the “Gift Box” Punch Board. It’s one of the Doorbuster Deals on Monday, November 24th … Save a whoppin’ 30% Off tomorrow .

I will be happy to send a Free Project Tutorial of today’s projects to anyone who orders the Gift Box Punch Board on Monday. If, however, you click “no contact” when placing your order, I will not be able to send this to you so be sure to fill out all the information and allow me to contact you so I can pass on the Free Tutorial. Thank you!!

Let’s begin with the sweet …

000_1717

I used the “Under the Tree” Specialty Designer Paper, the Cheerful Tags stamp set, and the beautiful Cherry Cobbler 1″ Sheer Linen Ribbon.

Once you get started it’s so easy … you’ll find yourself making several at a time. And why not!

Now for the sassy …

000_1722

So what category do you fall into … Naughty or Nice, or like the tag says: Naughty and Nice!

I know there is someone on your Christmas list that would love the Gift Box Punch Board, or put it on your Christmas wish list! Just tell them it’s on sale Monday only.

Here is a video from Stampin’ Up! Show how to use this Gift Box Punch Board, it makes 15 sizes boxes. Before I watched this video I felt a bit overwhelmed, but it is TOTALLY easy and I have made many boxes now.

Remember … I will send you the Free Project Tutorial to you when you purchase your very own Gift Box Punch Board from me. Then I’ll direct you to even more projects!

I will be posting projects from some of my favorite items that are now on sale during the week, so make sure you stop back! Feel free to share my blog site with your friends 🙂

See List … Click HERE.

Thanks so much for joining me today ~

blog-closing-small

STAMPIN’ SUPPLY LIST …


It’s beginning to look a lot like Christmas …

Hello Stampin’ Friends,

Today I would like to share with you some wonderful samples from the Stampin’ Up! Get Inspired blog and Senior Staff Writer Cindy B.

Her projects were so pretty I just had to share, it really is beginning to look a lot like Christmas!

If you’re a papercrafter, Christmas is probably one of your busiest times of the year. And I don’t know about you, but I pretty much want everything in this year’s holiday catalog . . . so deciding what to buy has become a serious problem for me! Is anyone else in the same boat? Here are some great samples …

Introducing the beautiful Nature’s Peace Stamp Set . Here’s what it looks like when you emboss it using VersaMark ink, Gold Stampin’ Emboss Powder, and the Heat Tool.

Christmas_crb2

A gorgeous product from the holiday catalog is the Bright & Beautiful Stamp Set. Use it to make a fun gift package. (Tip: cut the top of a Petite Café Gift Bag using the Large Scallop Edgelits Die.)

Christmas_crb3

I used the same stamp set to create a tag that doubles as a Christmas tree ornament—and put it on one of our Takeout Boxes for a cute gift.

Christmas_crb4

Here’s a fast and easy card made using the adorable Cheerful Christmas Stamp Set.

Christmas_crb5

Last of all, check out this idea for a treat bag—again using that awesome Bright & Beautiful Stamp Set.

Christmas_crb6

If you haven’t seen the holiday catalog yet, click here (US)—then tell us which products are YOUR very favorites!

Cindy B.
Sr. Staff Writer

Don’t you just love Cindy’s projects! What wonderful ideas and great tips. You can see Cindy’s post by Clicking HERE!

Stay Warm & Have a great day ~

blog-closing-small


Happy Holidays …Pumpkin Style!

Hello Stampin’ Friends,

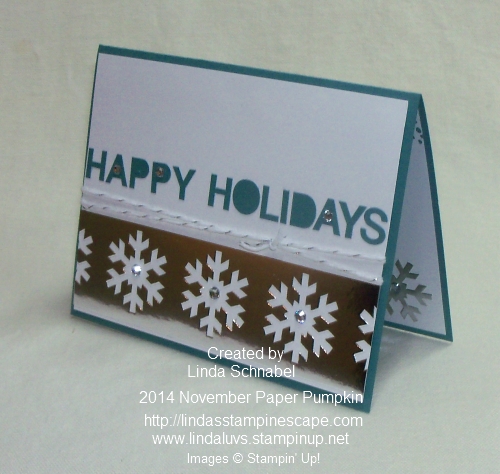
Yesterday I said I would share with you a card that I made with the left overs from the November Paper Pumpkin kit.

Here is how the entire kit looks completed …

705e40ad9dadc622693b934766c577c5

Waste not, want not … we’ve all heard it, but when you have leftovers as fun as we had with this kit, you can’t help but use them. After “popping” out all of the snowflakes I cut a row off and used the negative as the base of my card.

000_1704

Yes, this little cutie is made out of scraps! Don’t you just love it!

I also kept the letters from the tags. Here’s a tip that I used to get my greeting straight. Line up the edge of the snowflake strip to the edge of the card and use that to apply your letters straight. A ruler would also work, but this is handy!

000_1703

I used the techniques of stamping on the edge of the cardstock for the inside of my card, stamped the verse that is included in the set and added a snowflake to tie it all together. You could do the same to your envelope so everything coordinates beautifully.

000_1707

 Just in case you missed the video yesterday … here it is, along with information for becoming one of my Paper Pumpkin Pals!

Give Paper Pumpkin a try … We have 1 month, 3 month, 6 and 12 month subscriptions.

To sign up … just click HERE.

With the holidays just around the corner, it’s a great time to take advantage of these prepaid subscriptions that can be bought as gifts. It’s the gift that keeps on giving!

Item Paper Pumpkin Prepaid Subscription Price (Shipping Included)
137858  1 month $19.95
137859  3 months $59.85
137860  6 months $113.70 — save $1 per month
137861  12 months $215.40 — save $2 per month


As one of my Paper Pumpkin subscribers, you will get invited over for Pumpkin Parties where we gather to create our kits together … just for the fun of it. I also send out e-mails with other ways to use your kits.

Thank yo so much for stopping by.

Have wonderful day ~

blog-closing-small

New Weekly Deals & More…

Hello Stampin’ Friends,

It’s Tuesday and I would like to share with you the new Weekly Deals. I also have the latest Paper Pumpkin video for you!


Main_weeklydeals_olo_10.7-31.2014_SP_UK

1 Square Punch
1″ Square Punch

Price: $15.95 $11.96
1/4 Handheld Punch by Stampin' Up!
1/4″ Circle Handheld Punch

Price: $8.95 $6.71
Autumn Spice Digital Kit -- Digital Download
Autumn Spice Digital Kit – Digital Download

Price: $9.95 $5.97
Clear Oval Accent Bigz Die

Price: $21.95 $16.46
Deco Labels Framelits Die

Price: $24.95 $18.71
Early Espresso Cut & Ready Card Bases by Stampin' Up!
Early Espresso Cut & Ready Card Bases

Price: $4.95 $3.71
Silver Basic Metal Buttons

Price: $7.95 $5.96
Smoky Slate Stampin' Emboss Powder
Smoky Slate Stampin’ Emboss Powder

Price: $4.95 $3.71


You can click on any of the items descriptions for more information or to begin shopping, or you can click on the big “Weekly Deals” picture and it will take you right to my website’s deal page. On-line shoppers can use Hostess Code: B47TWGPD

Wait till you see what they have for us this month … then stop back tomorrow and I’ll show you another cute project you can do with some of the left overs!!

Was I right! How pretty are those cards … and you get 8 of them with envelopes, plus 12 tags! Just give Paper Pumpkin a try …

We have 1 month, 3 month, 6 and 12 month subscriptions.

To sign up … just click HERE.

With the holidays just around the corner, it’s a great time to take advantage of these prepaid subscriptions that can be bought as gifts. It’s the gift that keeps on giving!

Item Paper Pumpkin Prepaid Subscription Price (Shipping Included)
137858  1 month $19.95
137859  3 months $59.85
137860  6 months $113.70 — save $1 per month
137861  12 months $215.40 — save $2 per month
  1. Go to https://mypaperpumpkin.com?demoid=26646 and click one of these three links:. “Join Here” (middle of the page)
    . “Join” (top right of the screen)
    . “Subscribe” (top middle of the screen)
  2. In the “Quantity” field, enter 1 (or more) and click “Continue.”
  3. Enter your general information and click “Continue.”
  4. Enter your payment information and click “Continue.”
  5. Select a demonstrator / You are on my page so you should not have to, but if you are prompted to just write in Linda Schnabel.

That’s it! You are official. You will receive an e-mail that invites you to come back to the site to create a password. You will need that if you ever want to change your information, skip a month, or cancel Paper Pumpkin kits.

As one of my Paper Pumpkin subscribers, you will get invited over for Pumpkin Parties where we gather to create our kits together … just for the fun of it. I also send out e-mails with other ways to use your kits.

Please let me know if there is anything I can help you with … that is why I am here.

Have a terrific Tuesday ~

blog-closing-small

Holiday Retreat Swap Share 2 …

Hello Stampin’ Friends,

I hope you had a wonderful weekend!

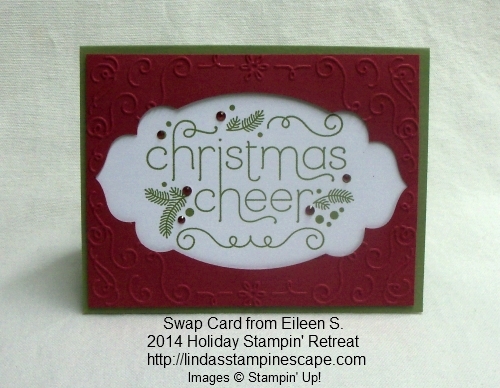
Last Monday I said I would share more swaps from our 2014 Holiday Stampin’ Retreat … today I have 3 more for you! Let’s begin with Eileen’s swap card ….

000_1694

Eileen used the new “Cheerful Christmas” stamp set and Filigree Frame folder from the Nordic Noel Suite found on pages 14 & 15 of the Holiday Catalog. She framed it so beautifully by using the Apothecary Accents Framelit Die.

She used Real Red, Old Olive and Whisper White for her card … then added a pop of red holiday cheer by coloring her rhinestones. This card truly sends cheer for Christmas!

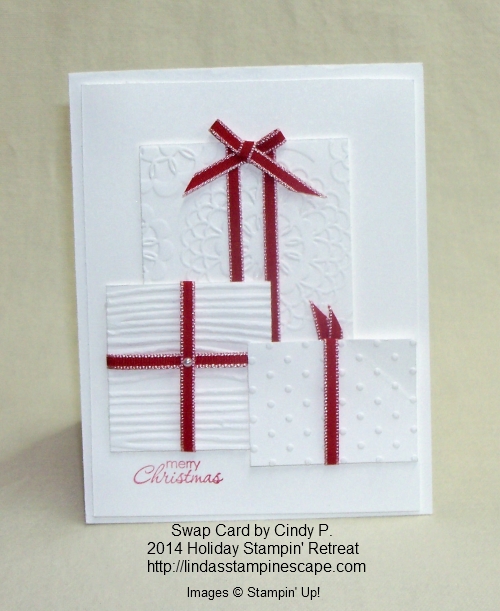
Our next swap is from Cindy P. …

000_1696

Cindy’s all Whisper White present card is striking with the bold pop of red ribbon. Her gifts were embossed with the Lovely Lace, Woodgrain, and Perfect Polka Dots embossing folders. With each layer you get the dimension of real Christmas gifts … how lovely!

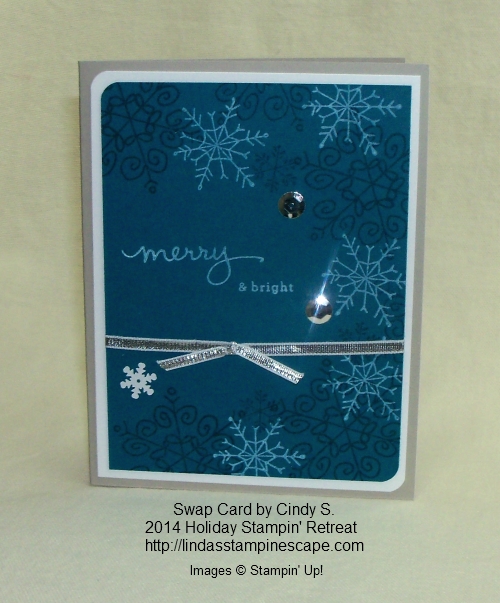
The third swap comes from Cindy S. …

000_1701

Cindy’s card was done in Island Indigo and Sahara Sand with just a pop of White to tie in her snowflakes! The snowflakes and greeting come from the “Endless Wishes” stamp set found in the Holiday Catalog.

You may think you have enough snowflake stamp sets, but with the many greetings included in this set … you will have “endless” ways to say Merry Christmas!

Cindy also used the Silver Metallic Ribbon and Frosted Sequins to highlight her card … It’s simply stunning.

I am so glad that Kris suggested doing swaps at our Retreats, because not only do they get to do all the wonderful cards & projects at retreat, but they also get the beautiful cards made by each other… How wouldn’t be inspired 🙂

Thank you for checking out my blog today, I hope you enjoyed these beautiful cards as well.

Have a wonderful week.

blog-closing-small

STAMPIN’ SUPPLY LIST …


Many Merry Stars …

Hello Stampin’ Friends,

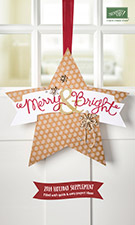
Today I’d like to share with you more star’s from our NEW “Holiday Supplement” … Stampin’ Up! has released a supplement to our Holiday Catalog!  It is full of new & exciting products designed for you in mind and to meet your Holiday needs by providing fabulous kits for home decor, card making, and memory keeping.

 20141020TH_HolidaySupplement_en-US

CLICK HERE TO VIEW / CONTACT ME TO GET A COPY

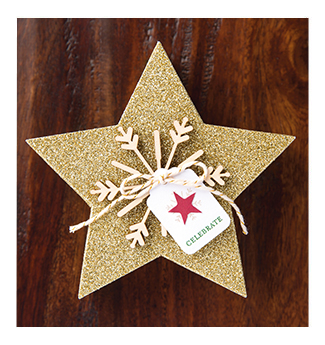
My favorite, and the one I’m going to focus on today is the “Many Merry Stars” Simply Created Kit. Yes, a kit … designed so even novice stampers can create these fabulous stars. I like that, a time saver, especially around the holidays.

6a017744af3aa5970d01b7c6f6e15c970b-500wi

The Many Merry Stars kit is filled with die-cut pieces, peel-and-stick adhesive edges, and accents galore! Easy… yes, but you can still put your own twist to them if you’d like. Here are a few ideas from the home office …

98acc8f6111293af6f396ac15872a5e8

You can make fun and colorful ornaments for your tree with the Many Merry Stars kit from Stampin’ Up!


Star_Box_1_LG

Star_Box_LG

Star_Box_2_LG

And how about using them for …. Christmas Cards! So, so many things you could do, these are just a few.

 I’ve got mine, and you can be sure my house will be filled with these stars! Heck, I may even use them to “gift” with … because they are so adorable! I will finally have something neat to put those “gift cards” in!

Thanks for stopping by today.

Have a super Sunday ~

blog-closing-small

ORDER YOURS TODAY …. Just click on the link below


Be Joyful …

Hello Stampin’ Friends,

Hope you had a good week and that you have a better weekend planned.

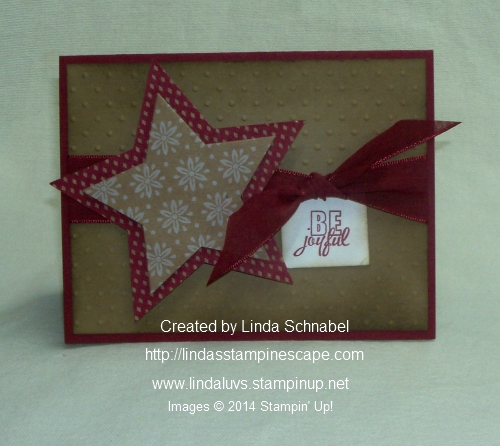
Today I’d like to share with you a card that calls for you to be joyful! I used the warm colors of Cherry Cobbler and Baked Brown Sugar. Hmmm… sounds yummy too!

I sponged the edges of the Brown Sugar to give it an aged look and then ran the “Perfect Polka Dot Folder” through my new Texture Boutique Machine. Wow … it works great!

000_1689

The stars were cut out using the Star Framelit dies, using the warm & lovely “Under the Tree’s” Designer Specialty Paper.

The Cherry Cobbler 1″ Sheer Linen Ribbon added the perfect touch to the card. It is not too heavy or think to tie a beautiful bow … it is really nice to work with.

The “Be Joyful” came from the “Project Life Holiday Cheer” stamp set. I liked it soooo much, that I ordered two!  LOL … yes, demonstrators do that too.

Just look at all the fun stamps this set has, and you can use it all year long!

Hmmm, I might just have do a “give-a-way”  … I don’t need two. Keep your eyes peeled!

000_1692

For more information on the products used in today’s card or to purchase … just click on the items I have listed below for you.

Have a wonderful and joyful weekend!

blog-closing-small

STAMPIN’ SUPPLY LIST …


Three ways to give the Gift of Creativity …

Hello Stampin’ Friends ~

 I have some wonderful gift giving ideas for you today. One is our Paper Pumpkin kits…

Paper Pumpkin Prepaid Subscriptions are the perfect gift this holiday season-for friends, family, and yourself! A fully designed project kit will arrive each month with stamps, ink, and paper so anyone can skip to the fun.

It’s the perfect time to try it out too! Then set a date to stamp your Paper Pumpkin kits together, what a wonderful way to stay in touch … It’s the gift that keeps on giving!

Header_PaperPumpkin_demo_11.11-12.31.2014.2014_US

Item

Paper Pumpkin Prepaid Subscription

Price (Shipping Included)

137858  1 month

$19.95

137859  3 month

$59.85

137860  6 month

$113.70 — save $1 per month

137861  12 month

$215.40 — save $2 per month

 CLICK HERE TO BEGIN YOUR GIFT SUBSCRIPTION

Secondly is our newest photopolymer stamp set … Banner Blessings

136720G

Banner Blessings Photopolymer Stamp Set

136720

Price: $15.95

This uplifting set will surely bring a smile to many faces. A crowd favorite, this stamp set will be sure to shine. Recommended clear block size is D (not included in the set).


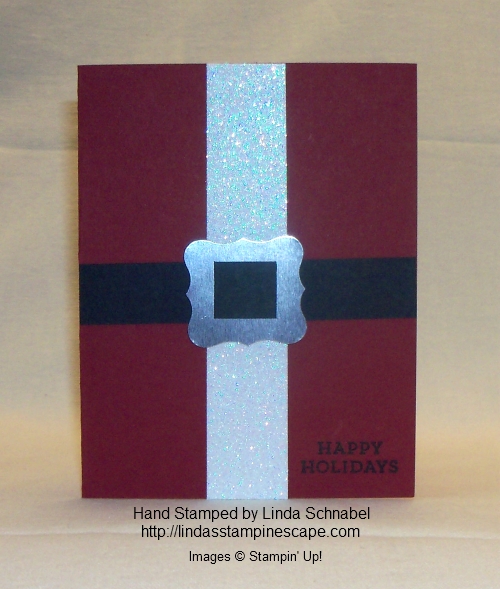
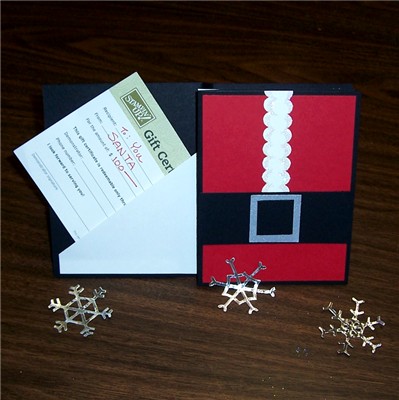
And my third suggestion is a Gift Certificate! If you are not sure what to give the stamper on your gift list, contact me and I’ll get you a Gift Certificate that fits your budget. And Yes … I will have it ready for you (or I’ll send it out) in this cute little gift card 🙂

SantaGiftCertCard

If “YOU” want the Gift Certificate, again, contact me and I will send you a cute little note “suggesting” to your loved ones… what you “really” want for Christmas!

Contact Me @ lindaluvs2stamp@aol.com

I hope this gave you a few ideas for the stampers on your Christmas list. Feel free to contact me, I can help you with a simple order or create a gift basket.

Have an awesome day ~

blog-closing-small


The “JOY” of Christmas Cards and Stampin’ Tips!

Hello Stampin’ Friends,

OK … Halloween is over and many of you know that I just loved that “Motley Monsters” Designer Series paper, but what are we going to do with it now that Halloween is over?

Don’t fret … I have an obvious solution for you in today’s card share plus an awesome stamping tip! 000_1646

 The obvious answer … Yep, flip it over! The great wood-grain paper below comes from “Motley Monsters”! I teamed it up with the “Wondrous Wreath” stamp set and coordinating framelits. Save 15% when you bundle the stamp set with the framelits!

000_1654

The stamp set and framelits are amazing to work with … the beautiful color you create when using this two-step stamp set. I stamped Old Olive onto the Whisper White and then the Mossy Meadow in-color on top of the Olive.

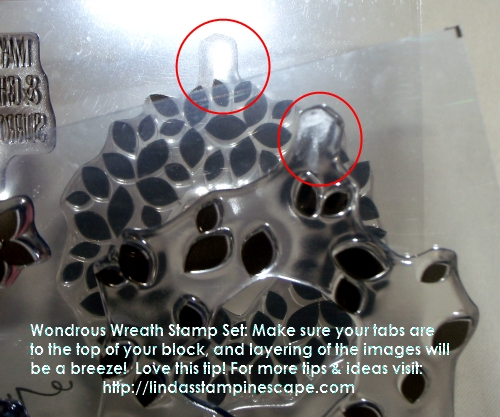
* Just a quick reminder that the tabs on the photopolymer stamps are there for you to align the images and make your stamping easier.

000_1535

You know me, I wanted that holiday sparkle so I used the Red Glimmer Paper and Cherry Cobbler Dazzling Details. I had a blast putting this card together. The Multi-purpose glue works wonders on glimmer paper and holds superbly.

Yes, the “JOY” comes in the Wonderful Wreath framelits collection!!

000_1652-B

One of the things I liked about this stamp set was that it also had a beautiful verse for the inside of the card, but if you are like me …. you can never stamp it straight! Today I want to share an easy solution to that problem …

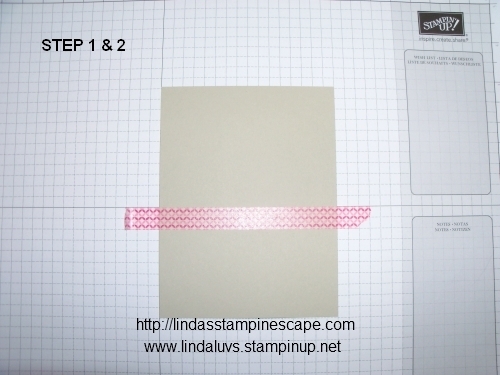
1. Begin with the Grid Paper and align the inside of your card so it’s straight …

000_1647

2. Use Washi tape and place it where you want your verse to “end” ….

(I unsticky my washi tape a bit by placing it on my skin or clothing … you don’t want it to peel your cardstock)

3. Align the bottom of your verse slightly above your washi tape and stamp …

000_1649

Ahhh … doesn’t that look nice! Perfectly straight! I love it, I love it, I love it! Why didn’t I think of this before, like 13 years ago – lol.

000_1651

I hope you enjoyed my card and stamping tips …

000_1654

I’d love to hear what you think… you can leave me a message below. I will have another “Motley Monsters” transformation for you tomorrow!

Till then, have a great day ~

blog-closing-small

PS… I still haven’t found those swaps!

STAMPIN’ SUPPLY LIST …


Seasons Greetings in Silver & Blue …

Hello Stampin’ Friends,

It’s been two weeks since we were at our Holiday Retreat and one of the pillow gifts my guests received was the beautiful Christmas Bauble stamp ….

133824G

We made a gorgeous card by coloring in the bauble with our inks and blender pens, and a touch of that fun glitter glue! It definitely is a perfect stamp for those who love to color, but what about those of you who don’t like to color?!

That was a challenge posed to me at retreat. After thinking about it, I described a card that could be make in silver and blue, with minimal coloring. It’s now out of my head and onto the paper … or should I say cardstock…

000_1642

I began by embossing the Christmas Bauble in silver on the stunning Brushed Silver cardstock and then colored it with the Night of Navy Blendabilities Assortment. I only used the darkest shade for coloring the bauble.

I framed it up like a pretty little package using the Silver 1/8″ Metallic Ribbon.

I mounted the bauble image onto Night of Navy cardstock and embossed Seasons Greetings from the “Watercolor Winter Too” photopolymer stamp set, then completed the card by mounting it onto a Smoky Slate base.

136819G

You don’t have to love coloring to love this precious stamp … I’m sure there are many different cards we could create with little or no coloring, this is just one idea.

Feel free to share your idea with me … I’d love to share it with our stampin’ community! Send picture to lindaluvs2stamp@aol.com

000_1644

Thank you for stopping by ~

Hope you enjoyed today’s solution to coloring in an entire image. Sometimes less is more … especially when you need to make 80 Christmas cards!

Have a wonderful day,

blog-closing-small

STAMPIN’ SUPPLY LIST…


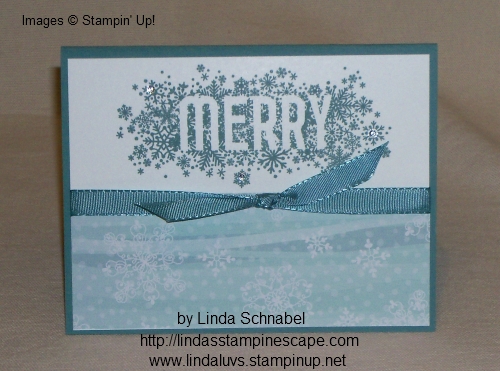
Simply … Merry!

Hello Stampin’ Friends,

Today I would like to share a card that I did as a Make & Take at Alice’s stampin’ party.

We began with Lost Lagoon, a new in-color this year and it coordinates perfectly with the “All is Calm” Specialty Designer Paper.  Specialty… Why?

Because not only does this packet contain the pretty double-sided designer papers, but it also has 2 beautiful silver foil embossed designs. A must have for your holiday cardmaking this year.

000_1636

I chose the paper with the pretty little snowflakes because it goes so well with the snowflake design of the “Merry” in the Seasonally Scattered stamp set.

We stamped our image with the coordinating Blue Lagoon ink and tied it all up with the Blue Lagoon ribbon! I love how everything coordinates … makes life so much easier!

I wanted a bit of holiday sparkle… so we added a few rhinestones to our card. So simple and fun to make, especially when your sitting around the table with a bunch of your friends and family.

I would love to host a stampin’ party for you and your friends. With the holidays coming it’s a great time to get together, see all the wonderful holiday stamps and accessories, and go home with a couple of cute Christmas cards!

000_1637

Contact me (lindaluvs2stamp@aol.com) … we’ll pick a date and begin planning a FUN get together for your friends and check out the free hostess goodies for you!

I have listed all the supplies you need to make the card below.

Thanks so much for dropping by …

and have a great day!

blog-closing-small

STAMPIN’ SUPPLY LIST

Click on the item for more details or to begin your shopping experience. Please let me know if I can be of any help.


The Star’s are Shining Brightly …

Hello Stampin’ Friends,

Yesterday I told you that I was going to share with you another idea from my scraps, today it’s a 3-D project using the flip side of the paper.

First I will tell you that I cut the “Under the Tree” Designer Specialty Paper into 4 x 4 inch squares … it made cutting the star’s for my retreat projects easier.

Today I turned my scrap into luminaries …

000_1630

Such a quick and easy project! Cut some vellum into 4 x 4 squares and tape them to the inside of the cardstock. Then I taped my sides together with …. washi tape! That way if I made a bit of a mistake (crooked) I could lift it up, reposition and attach the side.

000_1632

Tomorrow I will have one more product share for you using my scrap pieces. How’s that for saving money! Then we can spend it on more fun stampin’ stuff! LOL

Have a fabulous week ~

blog-closing-small

Stampin’ Supply List …