On this beautiful day of gratitude, my heart is especially full. I want to take a moment to express just how thankful I am for you and the joy you bring into this little corner of the world through your creativity. What began with simple handmade cards sent to loved ones has blossomed into this big, beautiful, inspiring community—a place where friendships form, ideas spark, and kindness is shared so freely. It means more to me than words can ever fully express.
As you celebrate Thanksgiving, I hope your day is wrapped in joy, gratitude, and the warmth of loved ones. May your home be filled with laughter, your heart be at peace, and your table be surrounded by people who mean the world to you.
Thank you for being such an important part of my creative community. Truly… I wouldn’t be the same without you.
Wishing you a beautiful and blessed Thanksgiving. 🧡🍂
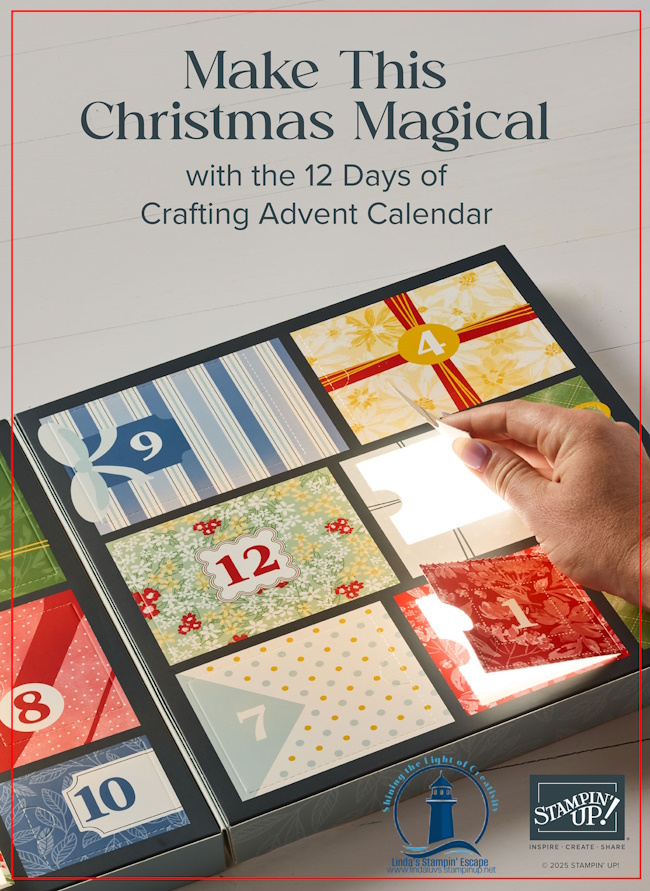
It’s finally here, and I couldn’t be more excited to share it with you! Stampin’ Up!’s brand-new 12 Days of Crafting Advent Calendar is now available for purchase—and trust me, you do not want to miss out on this one. Whether you’re treating yourself or surprising the crafty friend in your life, this advent calendar is the perfect way to count down to Christmas and celebrate the joy of creating.
Inside, you’ll find twelve days of exclusive crafting treasures—never-before-seen dies, paper, embellishments, and more! These goodies aren’t in any catalog or in the online store, so this is truly your chance to get something extra special. Imagine the excitement of opening a new surprise each day, and then putting it to use on your projects all year long. At just $99 USD, it’s a gift that keeps on giving.
👉 Item: 12 Days of Crafting Advent Calendar (167335) 👉 Price: $99 USD 👉 Includes: Exclusive dies, paper, embellishments, and more 👉 Ordering Begins: September 23, 2025 👉 Available: Only while supplies last
And here’s the thing—you’ll want to act quickly. Calendars are only available while supplies last, and with something this unique, they won’t last long. Once they’re gone, they’re gone! So don’t wait another moment—order yours today and get one for that friend or family member who loves to craft. Because honestly, there’s nothing better than giving the gift of creativity.
💡 Remember … by placing this order with me, you’ll also qualify for my FREE PDF Tutorials! You’ll receive step-by-step instructions for creating two “Explosion” Fun Fold cards featuring the Peaceful Garden suite—my special gift to inspire your crafting even more.
Click the link below to shop now and secure your advent calendar before they disappear. 🎁 Thanks for joining me today!
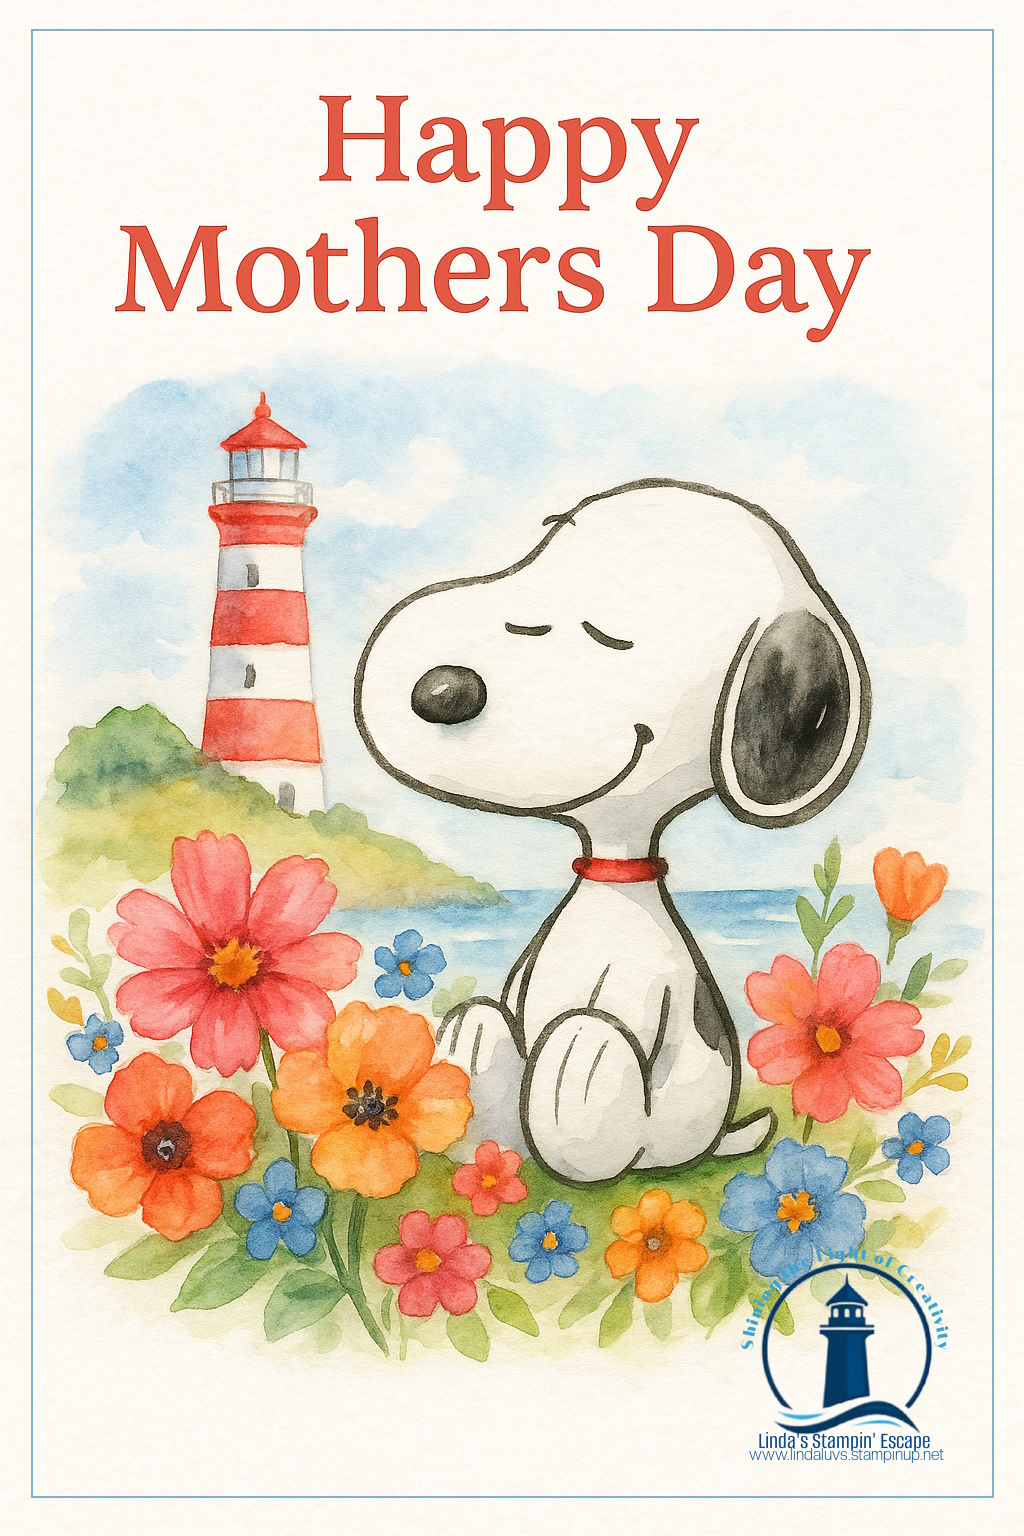
Today we celebrate the love, strength, and creativity that shines in each of you. Whether you’re a mom, a grandma, a fur-mama, or someone who shares their heart and care with others—Happy Mother’s Day from the bottom of mine.
Take a moment to breathe in the beauty of the day, surround yourself with joy and the things you love, and maybe sneak in a little stamping fun too! 😊
You are appreciated more than you know. Thank you for being a special part of this community.
On this special day of gratitude, I want to take a moment to thank each of you for being part of my Stampin’ Up! journey. Your support, creativity, and enthusiasm have made this year truly remarkable. From sharing laughter during classes and retreats to celebrating milestones and new techniques, every moment we’ve spent together has brought so much joy to my heart.
Reflecting on the friendships and fun we’ve shared reminds me why I love what I do. You inspire me every day with your creativity and kindness. I hope today brings you the warmth of family and friends, the delight of delicious food, and cherished moments to treasure.
Thank you for allowing me to be a part of your creative journey. Wishing you a wonderful Thanksgiving filled with love, laughter, and all the things that make your heart happy.
With heartfelt gratitude, Linda
Turkey – Thanksgiving Celebration – Table Setting With Silverware And Bokeh Lights
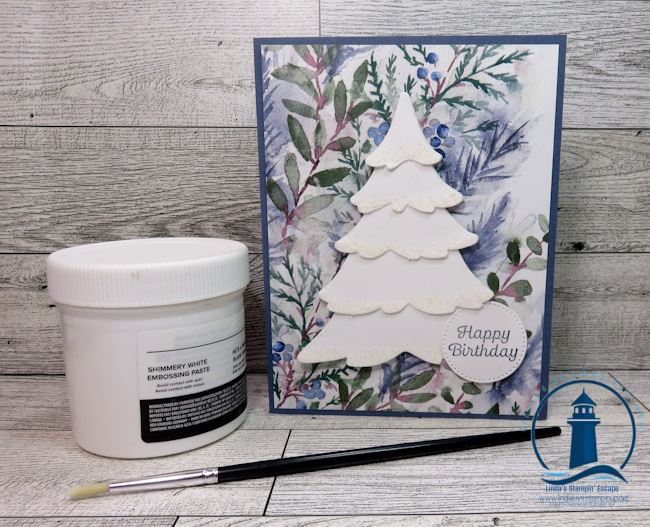
What do you get when you combine the stunning Winter Meadow Designer Paper, the versatile Merriest Tree Dies, and the luxurious Shimmery White Embossing Paste? One breathtakingly beautiful card that’s perfect for the holiday season! Today, I’m thrilled to share my card that highlights these incredible products, showcasing how they work together to create a masterpiece.
The Winter Meadow Designer Paper is nothing short of a winter wonderland on paper. Its soft, frosty hues and intricate designs instantly transport you to a serene winter landscape. Whether you’re crafting a holiday card, a scrapbook page, or a birthday, this paper is your go-to for adding elegance and charm.
I created an adorable focal point using the Merriest Tree Dies. These dies are designed to create intricate, layered trees that add depth and dimension to your cards. The possibilities are endless—you can mix and match the dies to create trees of various sizes, or layer them for a 3D effect. The trees cut out beautifully, making them a joy to work with, and they pair perfectly with the Winter Meadow Designer Paper.
To add that extra touch of luxury and texture, the Shimmery White Embossing Paste is a must-have. This paste was easily applied with a paintbrush and adds a stunning, dimensional shimmer to the card. Whether you’re creating snow-like effects, adding texture to backgrounds, or highlighting specific elements, the Shimmery White Embossing Paste takes your card to the next level. It’s like adding a sprinkle of magic!
This card will be more than just a holiday or birthday greeting—it’s a keepsake that your loved ones will cherish. By combining these three fantastic products, you can create something truly special. The Winter Meadow Designer Paper, Merriest Tree Dies, and Shimmery White Embossing Paste make it easy to create professional-looking cards that are sure to impress.
I hope you’re inspired to pull out your embossing paste and play. Don’t forget, the beautiful Winter Meadow Designer paper is currently on sale! I’ve added the links for you below. Thank you for joining me today.
As Mother’s Day dawns, it’s a time of mixed emotions for many of us. Today, I find myself reflecting on the cherished memories of my own dear Mom and Grandma, who now reside in the heavens above. Though they may be physically absent, their presence lingers in my heart, especially on this day dedicated to celebrating motherhood.
In the tapestry of life, new threads are woven with each passing generation. Today, I honor not only the mothers who came before me but also the ones who walk alongside me now – my daughters and granddaughters, nurturing and guiding their own children with love and grace. These are my lovely daughters and great Mom’s ….
Yet, amidst the joy, there is also sorrow. My thoughts are with my granddaughter Cassie, navigating her first Mother’s Day without her precious son Armani. To all mothers who carry the weight of loss in their hearts, I extend my deepest empathy and love.
On this day, let us broaden our embrace to encompass all forms of motherhood. To the stepmothers, the mothers to be, the foster and adoptive mothers, the single mothers, those that long to be mothers, and those who nurture other peoples children, our caregivers, and moms to our beloved four-legged companions – your love and dedication do not go unnoticed.
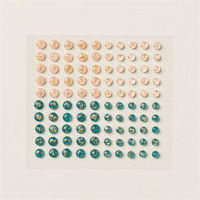
As a token of remembrance and appreciation, I’m sharing a collection of my favorite flowers with you today. Each bloom carries a story, a memory – a tribute to mothers, grandmothers, and sisters who have touched our lives in profound ways.
Just as flowers evoke memories, so do the hand-made cards and gestures of love exchanged today. May these simple acts of kindness serve as a reminder of the enduring bonds that unite us all.
To each and every one of you, I wish a day filled with beauty, love, and cherished moments. Happy Mother’s Day.
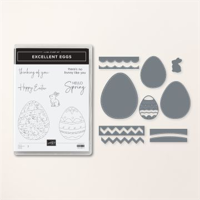
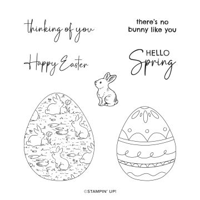
With Easter just around the corner, it’s time to hop into the spirit of the season with creativity and joy. Whether you’re preparing for family gatherings, church events, or simply looking for some delightful activities to engage in, the Excellent Eggs Bundle is here to add an extra dose of fun to your celebrations.
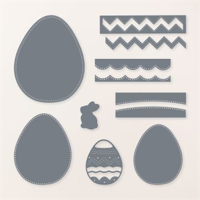
The Excellent Eggs Bundle features two key components: the Excellent Eggs Stamp Set and the Excellent Eggs Dies. This dynamic duo opens up a world of possibilities for Easter-themed crafting and creativity.
The stamp set offers a charming array of Easter eggs, a bunny, and festive sentiments, perfect for adding a touch of whimsy to your projects. Meanwhile, the dies provide precision-cut shapes that complement the stamp designs beautifully, allowing you to create intricate, professional-looking crafts with ease.
One of the most exciting aspects of the Excellent Eggs Bundle is its versatility. Whether you’re making gift tags, name tags for daycare or church functions, or simply crafting for the sheer joy of it, these tools have you covered. Wouldn’t this make the cutest name tag?
Imagine the delight on children’s faces as they receive personalized Easter tags adorned with colorful eggs and adorable bunnies. And speaking of children, why not involve them in the creative process? Stamp the images and let them color them to take home—a wonderful activity for daycare centers, classrooms, or family gatherings.
But the fun doesn’t stop there. With the Excellent Eggs Bundle, the possibilities are truly endless. Create Easter-themed cards to send to loved ones, decorate gift bags or baskets with festive accents, or even design your own custom wrapping paper for extra-special presents.
Easter is all about coming together as a family and celebrating the joy of springtime. With the Excellent Eggs Bundle, you can infuse your festivities with even more creativity and laughter.
This Easter, make memories that will last a lifetime with the Excellent Eggs Bundle. From crafting adorable gift tags to hosting creative coloring sessions with the kids, there’s no limit to the fun you can have with these delightful tools. With the Excellent Eggs Bundle by your side, this year’s celebrations are sure to be egg-ceptional.
Thank you for joining me today, hope your day is a good one!
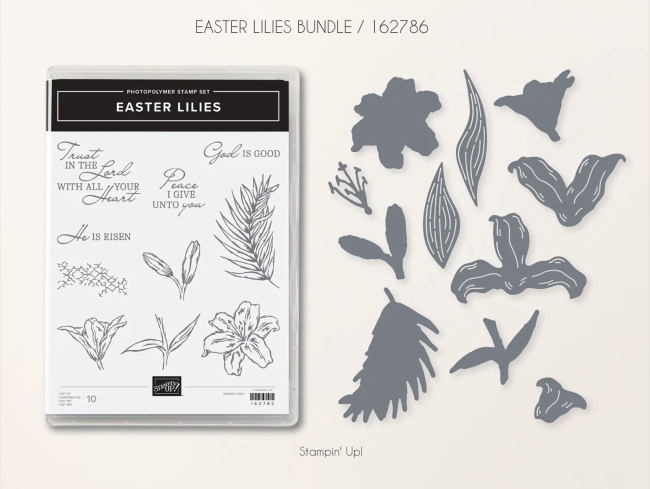
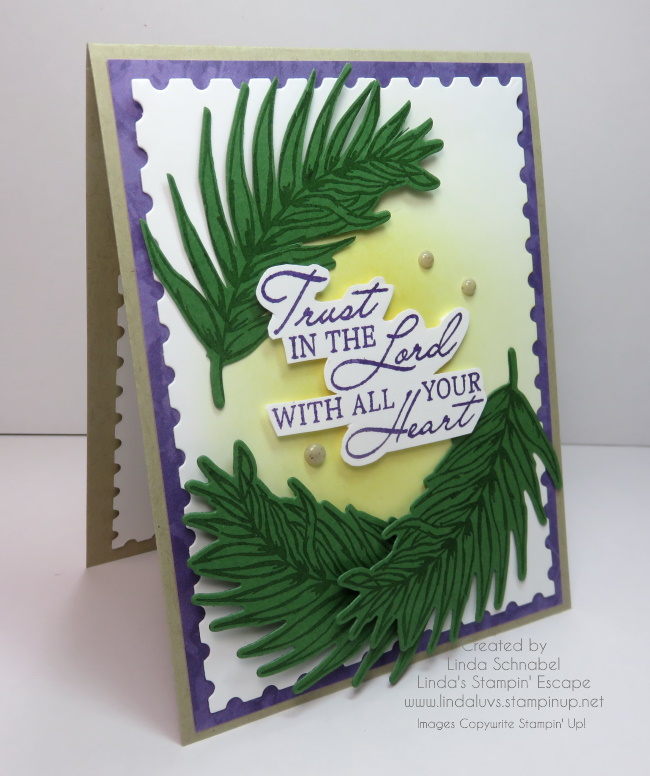
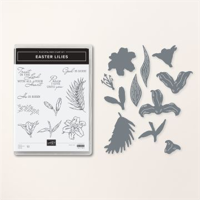
As we approach the sacred season of Easter, it’s a time for reflection, renewal, and reverence. One of the most beautiful ways to capture the spirit of this holy occasion is through heartfelt crafting. And what better way to do so than with the captivating Easter Lilies bundle?
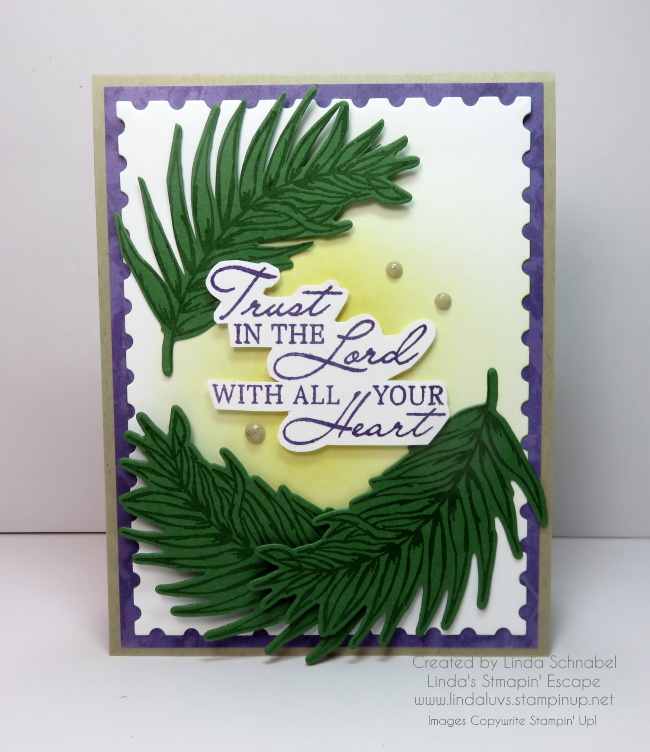
With this bundle, I embarked on a creative journey, selecting the Glorious Grape shade, a color imbued with symbolism that echoes the essence of Lent – penance, humility, and a profound sorrow for the suffering of Jesus. It’s a hue that speaks volumes, reminding us of the sacrifices made and the journey of faith we undertake during this solemn period.
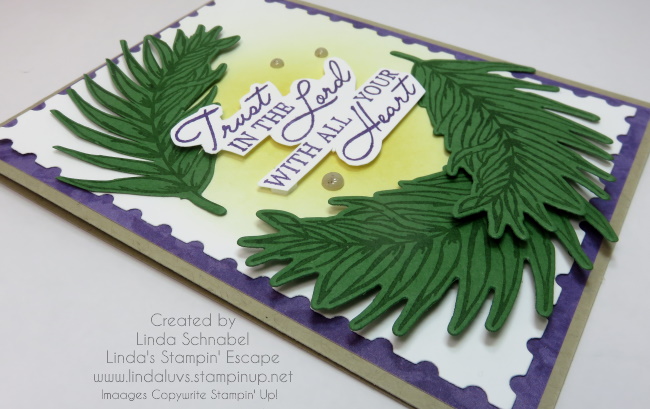
Complementing this regal color, I opted for Crumb Cake cardstock and embellishments, elements that gracefully symbolize the enduring symbol of Christianity – the cross. As I worked with these materials, I felt a sense of connection to the profound narrative of Easter, each choice and embellishment placed carrying the weight of centuries of tradition and faith.
Stamping palms with Garden Green ink onto Garden Green cardstock, I couldn’t help but marvel at the versatility of this bundle. While Easter may be its focal point, its potential extends far beyond the confines of a single holiday. It’s a tool for expressing devotion, gratitude, and joy throughout the year, infusing every creation with a touch of spiritual significance.
This bundle isn’t just about crafting; it’s about crafting with intention. It’s about infusing each project with meaning and purpose, allowing creativity to intertwine with faith in a truly profound way. Whether you’re creating cards, decorations, or keepsakes, the Easter Lilies bundle serves as a conduit for both artistic expression and spiritual reflection.
As we prepare to celebrate Easter, let us embrace the beauty of this season and all it represents. Let us take a moment to pause, to create, and to connect with the deeper significance of the holiday. And what better way to do so than with the enchanting Easter Lilies bundle, a treasure trove of inspiration and symbolism waiting to be explored.
I thank you and appreciate you taking time out of your Sunday to stop by my blog today. God Bless.
My apologies, I did not realize that the embellishments I used had been discontinued. May I suggest the Brushed Metallic Dots as they could represent the nails in the cross.
As we bid adieu to our week-long exploration of exquisite gold color combinations, we reserve the grand finale for a pair that not only complements gold but elevates it to new heights – Petal Pink and Basic Gray. These two hues, when intertwined with the shimmering brilliance of gold, create a symphony of elegance and sophistication.
For our concluding showcase with the Most Adored designer paper, I chose the design adorned with delicate gold hearts. Armed with blending brushes and the soft blush of Petal Pink, I embarked on a journey to craft a gradient effect that would serve as the perfect backdrop for our design.
The stars of the show, the adorable bees, were meticulously fussy cut from the Bee Mine Designer paper. I incorporated the Bee Mine bundle, utilizing both the sentiment and die cut from this delightful collection. The result was a seamless integration of elements, each contributing to the overall allure of the project. And a touch of the Wink of Stella on their wings.
What truly sets this card apart is the attention to detail… I think it’s my favorite! The bees, with their intricate patterns, add a touch of whimsy, while the sentiment and die cut from the Bee Mine bundle infuse a heartfelt message into the design. It’s not just a crafting project; it’s a visual story, told through carefully chosen elements that weave together seamlessly.
To add the finishing touches, I reached for gold cord and Petal Pink Foil Gems. The gold cord, with its understated glamour, brought a sense of unity to the composition, tying together the gold highlights from the Most Adored designer paper. Meanwhile, the Petal Pink Foil Gems introduced a subtle shimmer, echoing the softness of the Petal Pink gradient.
This final card encapsulates the essence of what we’ve discovered… It’s not just about colors; it’s about the stories they tell, the emotions they evoke, and the artistry that unfolds when they come together.
On the Flip Side …
When we turn the page on our Most Adored Designer paper, it reveals a charming transformation from shimmering gold hearts to a delightful pink and red plaid. Where our first card was all about the glitz and whimsy, this card is bold and to the point.
I cut three 1 1/4″ x 4″ pieces of the plaid pattern and matted them in Real Red. This not only accentuates the boldness of the red and pink hues but also adds a touch of sophistication to the overall design.
For the backdrop, I opted for a Basic White mat, which was embossed with the timeless Timeworn Type pattern. This embossing detail introduces a subtle texture, elevating the visual appeal and adding a vintage touch to the composition. It’s a nod to the past, seamlessly integrated into the contemporary vibrancy of the plaid pattern.
The sentiment, borrowed from the Bee Mine bundle featured in our initial card, takes center stage once again. However, this time, it undergoes a transformation of its own, being die-cut with the versatile Everyday Details Dies. This alteration not only reinforces the adaptability of the Bee Mine bundle but also infuses a fresh perspective into the sentiment, making it a perfect fit for this design.
To add a final touch of sweetness, small red hearts were delicately die-cut using the Sending Love Dies. These whimsical embellishments scatter across the card, tying together the theme of love and warmth.
If you’ve been following the past 4 days, you’ll note the Most Adored Designer paper has proven to be a canvas of endless opportunities, and there’s joy in every discovery. Thanks for hanging out with me during this discovery of color and techniques!
Here is a list of supplies I used for today’s cards ….
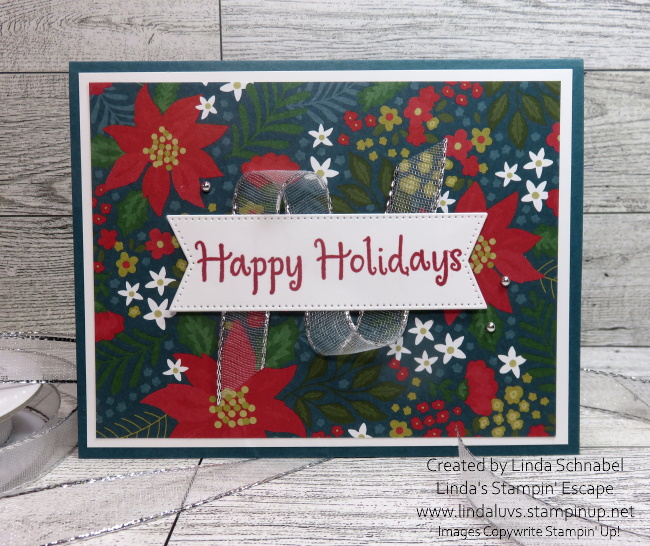
Today I’ll be sharing my Twelve Weeks of Christmas: Week 10 Video along with the individual cards, including a brand new one not shown during the video!! I’m highlighting the amazing and versatile Garden Walk Designer Series paper. You’ll see quick cards, split cards and ways to highlight it. Teamed with the designer paper is the Throughout the Year stamp set. Grab your coffee and let’s take a look at the video ….
Yesterday I shared the poinsettia card, here is a reminder …
Just to help you see different patterns from the designer paper and different styles of cards! Next up is a collage of banners that’s backlit with some brushed color ….
You got to hear how each of these were made so I won’t be covering that here. Our next 2 cards were created when I cut down the 6 x 6 designer paper into 4 – 3 x 3 sheets. Our first is super simple to create and is a great layout when you need to make many cards quickly ….
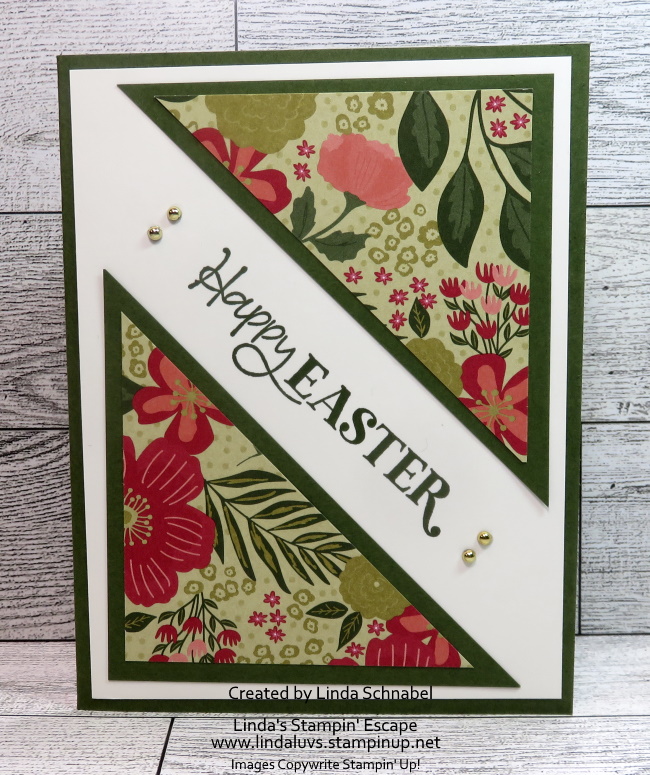
Next is the second of those 4 – 3 x 3 inch squared and is created with one of my favorite / simple card techniques: Split Cards! Simply cut from corner to corner diagonally ….
And lastly … this card was created with the help of the Patchwork Pieces dies. Don’t ever be afraid to pull out those dies and experiment! You just may fall in love with your creation ….
With yet another pretty pattern, your creativity can soar and choosing a color pattern is easy, just follow what’s in the paper. My card base is the Calypso Coral which was embossed with the Timeworn Type embossing folder. I wanted some texture on my card, and this made it easy.
Once I die cut the Garden Walk designer paper with the Patchwork Pieces dies, I mounted it onto Pretty Peacock cardstock … I wouldn’t have put these two colors together myself, but they sure do look good together.
My greeting was stamped in Pretty Peacock and die cut with the Stylish Shapes dies. I then grabbed a flower from another die set to embellish my card.
Creating all of these cards with the combined elements of Garden Walk Designer paper and the Throughout the Year stamp set brings out the magic of both the paper and stamp set. Add these to your wish list and let your creativity flow!
Thank you for joining me today … I hope you enjoyed this showcase
Don’t forget …. FREE SHIPPING on Thursday for all orders over $75. Plus, I have a FREE Gift for all who use the Host Code: HJ2ENVG4
Just a quick post to wish you and your family a Safe and Happy Independence Day. I hope you get to spend this 4th of July with your friends and family.
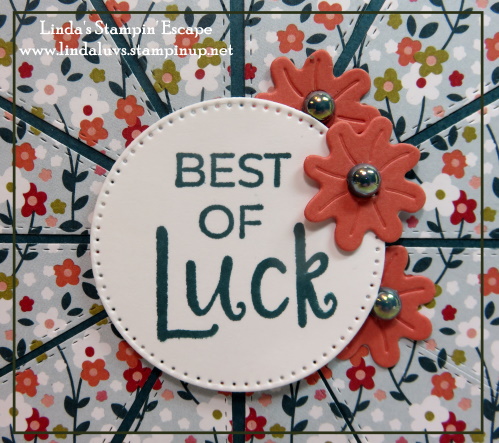
I’m so excited about this fun technique, turning the Floral Dies into Easter Egg Cards. I think the cards turned out so cute / lovely … yes, I have 2 cards for you today along with a video – a replay of my Facebook LIVE from last night.
Let’s take a look at the video …
As promised, I have the dimensions for our Easter Egg card. My cardstock base is Flirty Flamingo and measures 7-1/4″ x 5-1/4″ … Score at 4-1/4″ on the 7-1/4″ length. This will give you a front “flap” and exposes a portion of the inside. You need 2 pieces of Basic White (and one scrap to die cut greeting). Front measures 5-1/4″ x 2-3/4″ … emboss with the “splatter” embossing folder and the inside measures 5-1/4″ x 4″ … add a strip of the designer paper.
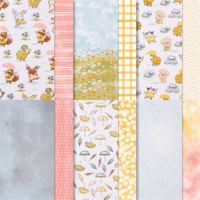
The designer paper I’m using on this card is the Rain or Shine Designer paper. The patterns I picked look great as Easter Eggs … the splatter one reminds me of how your dyed eggs always end up with “some” spots! lol The greeting for both cards come from the Charming Sentiments stamp set and die cut from the Stylish Shapes.
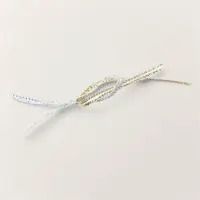
Our next card has an easy layout / dimensions and boasts the Floating Element Technique … I love this technique. Let’s begin with your Petal Pink card base measuring 8-1/2″ x 5-1/2″ scored and folded at 4-1/4″.
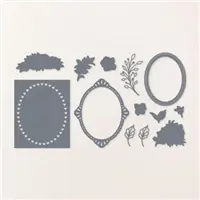
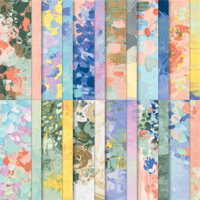
Trim down the 6″ x 6″ Fancy Flora Designer paper to 5-1/4″ to 4″ and adhere it directly to your card front. I use a 4″ x 3″ piece of Window Sheet to die cut my oval /egg and then I attach the 1″ strips which were embossed with the Quatrefoil Tile Embossing Folder. Don’t you love the elegance of the embossed egg?
The greeting for the card comes from the Charming Sentiments stamp set and die cut from the Stylish Shapes. The butterfly is die cut using the Brilliant Wings Dies … and we finished off with the Opaque Adhesive Backed Gems.
You can used any designer paper to create your Easter Eggs and / or use it as a background like I did on this card. So fun and versatile.
Thank You for hanging out with me today, I hope I inspired you to try this fun technique. You can also do it with circles!!
This is the time of year for sharing what you’re thankful for. And at Linda’s Stampin’ Escape, you are at the top of my list! I am incredibly grateful for the continued support of you my friends and customers. I wouldn’t be here without you.
As you consider your blessings this Thanksgiving I hope your day is filled with love, joy and gratitude!
Enjoy this special day and celebrate with friends and family ❤ Happy Thanksgiving!
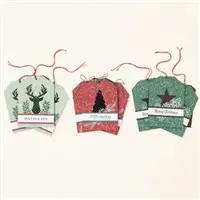
The latest addition to the Kits Collection by Stampin’ Up! is a simple solution to gift cards and tags for the holidays! The Christmas Gifting Kit has everything you need to create gorgeous gift tags to attach to presents and gift card holders that adds a handmade touch.
Kit includes 9 tags and 9 gift card holders—3 each of 3 designs ….
Includes the exclusive Christmas Gifting Stamp Set and a Shaded Spruce Classic Stampin’ Spot
Sized to fit standard gift cards …
Our Kits Collection are all-inclusive kits that are designed for beginner crafters or those of us looking for a quick creative fix… I like them as a “beautiful” time saver!! They are a fun and fast and offer a creative opportunity without having to purchase the whole craft store! Perfect for those who don’t have a lot of space!
I have added the link below for those of you who want to try it out. Thanks so much for stopping by today. Hope your day is a good one ~
Hello Stampin’ Friends ~ I would like to take this time to say “Thank You” for your loyalty, support, trust, and the opportunity to serve you this past year. It’s always a pleasure spending time with you, whether it be in person, through this blog, my Facebook page or YouTube.
I look forward to making your stamping experience a satisfying and enriching one in the months ahead. I’m excited to share all the new goodies in the Mini and Sale-a-bration Catalogs.
I wish you a creative, healthy and Happy New Year ~