Exciting News and great card samples!

Hello Stampin’ Friends,

I hope you are enjoying my Quick -n- Easy card series.  Today I want to share with you all the exciting announcements that Stampin’ Up! has shared with us.  We’ve got Christmas in July and a whole bunch more!!

Christmas has arrived! Stampin’ Up! has released two new stamp sets with Christmas themes – one is from the upcoming Holiday Catalog, and the other is a new photopolymer.

I’m so excited that the “Beauty of the Season” stamp set is now available for purchase.  Watch for this stamp set to be featured in my Christmas in July … Oops August Stamp Camp.  I love cardinals, so as you read this post … mine in already on the UPS truck!  Can’t wait to share with you.

us_flyer_beauty_of_the_season

I love that Stampin’ Up! is offering “Christmas Bliss” in July.  This photopolymer stamp set is a fun, fresh Christmas set with a variety of greetings and styles. It has both images and sentiments, making it great for both cards and treat packaging.  And … I love the fonts!

us_flyer_photopolymer_christmas_bliss_0714


Speaking of Photopolymer …

Stampin’ Up! has released another new photopolymer set, “Dear Heart” – SO CUTE!:

us_flyer_photopolymer_dear_heart_0714

Here are a couple of other promotions you might want to check out:  Just click on any of the pictures to see full details …

buy3dsp_NA

While you’re at it, check out the Blendabilities that are current available for purchase:

demoheader_blendabilities_5.1.2014_NA_SP_EU

Oh! And the Tuesday Weekly Deals were announced ! Check them out here by clicking on the picture.

CM1634B


 Woooo …. I hope I didn’t forget anything!  There is so much going on and they have more in store for us in August.  This summer is HOT!!

Thanks for stopping by, and I’ll see you tomorrow with my last of the Quick -n- Easy cards.

Have a fun day ~

blog-closing-small

Happy 4th of July!

Hello Stampin’ Friends,

Today’s card share is to celebrate this great country of ours, and the men and women who risked it all to give us the freedoms we have.

Now … it may be a bit late for you to recreate this card, however I want to show you how fun and versatile the “Little Letters Framelit Dies” are!  So today I’m sharing 2 cute cards with you…

Let’s begin with the USA card… simple with a statement!  My base for both cards is Whisper White.

000_1204

I cut the U – S – A out of a 2″ x 4″ piece of Cherry Cobbler.  I used my “Paper Piercer” to gently push the alphabet pieces loose (fig. 1) , and then help pull them out (fig.2).  It’s not hard to do, just use a gentle touch.

000_1200  000_1202

I used the “negative” image on my card instead of the actual letters.  To get the center of the “A” attached … I rolled up a glue dot and stuck it on the back.  I popped the entire USA piece up with dimensionals.

000_1206

I backed the USA negative with a 2-1/4″ x 4-1/4″ piece of  “Silver” Glimmer Paper, and matted it with a 2-1/2″ x 4-1/2″ of Night of Navy.  I added a scallop to mimic those pretty Red, White, and Blue swags that I love!

To complete this card, a “Happy Birthday” wish was added from the NEW  “And Many More” stamp set.  This will be a must have stamp set with it’s 23 different greetings!

Image this card with your child’s or friend’s name … in their favorite colors!  The is no limit to the cards you can create!

My “firecracker” card was created to use the “U – S – A” letters.   Again, quite simple to make which is what we need as we prepare for holiday weekends!

000_1207

I created the firecrackers with the straws that were included in the June Paper Pumpkin Kit!  And the stars … well they come from the “Itty Bitty Accents” Punch!I created the firecrackers by placing a glue dot into the straw and the sticking a piece of bakers twine in it!!  Simple and… Oh so cute!!

Thank you for taking time out of your day to check out my blog.

I wish you a very safe and happy July 4th!

blog-closing-small

The Beauty of Blendabilities …

Hello Stampin’ Friends,

Yes …  I missed a day but I’m back with the my “how to” as promised.  To be honest, the best way to learn how the Blendabilities work is to play with them, but until you get yours, I’m here to help.

Grab a cup of coffee and sit back and relax while I take you through the steps to coloring magic 🙂

demoheader_blendabilities_5.1.2014_NA_SP_EU

Let’s start at the beginning.  You will want to pick a line  image (like our friends up above) and stamp it with the NEW Memento Ink Pad onto our Whisper White cardstock – as that works beautifully .  Memento™ dye ink is fast drying and fade resistant. The innovative pad delivers finer impressions and exceptionally even coverage.  It is also acid free!

Now you are ready to choose your color pallet … today I’m using Coastal Cabana! There are three markers per color assortment. They are alcohol based markers are made for blending and shading. They are Acid Free and Lignin Free too!
You can work from light to dark, or dark to light … depending on your color technique. I’ve always used Stampin’ Up!s design to guide me … makes me look like an artist!!

On my first sample I am beginning with the light color first, and I color the entire petal (1). Then I’ve added the medium color (2) and last, the darkest color in the assormtment (3). You can go back over the image again with the light color to blend (4).

000_1192

On this sample, I started with the darkest color first – again following their image and only coloring where there are the lines(1). Next I brought my medium color into the center, and coloring over the dark color to create a soft blend(2). Then I added the lightest color, going over the other two previously colored areas(3). And finally going over it again with whatever color works best for blending and getting you the impact you desire (4).

000_1191

As far as which tip you use, it really is your preference. I like the brush tip for larger areas, however, I know other demonstrators who prefer the harder tip as it feels more like coloring. I must admit, when working in small spaces, the smaller tip works wonders!

If you use the brush tip … color at an angle, it gives you a softer effect and you won’t damage the tip. I will say that the construction and materials used in the tips of these markers are very sturdy.
Just remember that different images will require different coloring techniques … I obviously did not spend that much time and layer of colors with the stem and leaf.

It’s learning some basic techniques and then just having fun with it. And don’t worry when you see the color coming through the back … it’s alcohol based and will do that. I suggest making sure you are stamping on your scratch pads.

000_1194

The designer paper I used for our card is the “Back to Black” and part of the buy 3 get one free promotion.

000_1195

My greeting comes from the stamp set “Starburst Sayings” and I used the coordinating framelits to cut it out.  I used Bermuda Bay ink for the greeting, and the cardstock behind the flower to pull out the darkest color of the flower.  I did however use the “Coastal Cabana” Blendabilities assortment to color the flower.  Don’t you just love how easy it is to pair up the Stampin’ Up! colors!

The other colors used to color are Daffodil Delight and Old Olive Blendabilities.  I hope you enjoyed the card and explanation. I realize it gets a bit wordy … so thanks for sitting through it.


000_1197

Again, thank you for stopping by today… I would appreciate your comments.

Have an awesome day and a Safe and Happy Holiday Weekend!


blog-closing-small


Color me Happy …

Hello Stampin’ Friends,

There is so much to share with you today!  Let me start with the announcement I am most excited to share …

The wait is over!  Stampin’ Up! officially released one of our most exciting new products, Stampin’ Blendabilities Markers! These exclusive, alcohol-based marker sets come in a 3-pack of light, medium and dark shades (of the same color), and provide your projects a more saturated look with blended colors.

blendabilities_US

We recommend using Stampin’ Up! Whisper White Cardstock with your Stampin’ Up! Blendabilities, but choosing any one of our cardstocks will add a unique look to your project. And because traditional alcohol markers require a bit of training, Stampin’ Up! has developed a few videos to ensure that Blendabilities are easy-to-use for everyone!  You can visit www.youtube/com/user/stampinupvideo to view them.

You WILL WANT the Memento Black pad and Color Lifter! The Momento pad was created to work with alcohol markers and won’t smear.  Watch the video to learn more …

What Sets Them Apart:

  • The Stampin’ Up! rectangular barrel keeps your markers from rolling away!

  • Flat storage helps to maintain the life of each marker.

  • Each marker comes with a tip on each end: brush and fine.

  • Marker tips are made of nylon, which is superior to polyester which can fray.

  • Color coded caps.

  • Stampin’ Up! markers coordinate wonderfully with our cardstock, and can be used with transparent sheets.

Here’s a look at my very first card created with the Blendabilities markers …

000_1054

Not bad, but I’ve learned much more about blending, and how nice they really work with just a bit of time.  If you love to sit back, relax and color … you will fall in love with these markers.

I will be hosting a special class, make sure your on my e-mail list so you get an invitation!

MORE NEWS …

CM1634B

The new list of Weekly Deals are here … Just click on the product description for details on the item or to begin shopping.

Weekly Deals

Hope you enjoy this week’s Weekly Deals!

2013-2015 In Color Stampin’ Write Markers Item # 131260
Regular Price: $14.95
Discounted Price: $11.21
Gold Sequin Trim Item # 132983
Regular Price: $4.95
Discounted Price: $3.71
Silver Fancy Foil Designer Vellum Item # 133364
Regular Price: $10.95
Discounted Price: $8.21
Label Bracket Punch Item # 132153
Regular Price: $15.95
Discounted Price: $11.96
7/8″ Circle Scallop Punch Item # 129404
Regular Price: $12.95
Discounted Price: $9.71
Neutrals Designer Buttons Item # 130031
Regular Price: $7.95
Discounted Price: $5.96
Silver Baker’S Twine Item # 132976
Regular Price: $3.50
Discounted Price: $2.63
Summer Home Digital Kit – Digital Download Item # 118464
Regular Price: $14.95
Discounted Price: $8.97

ONE MORE THING …

Have you been waiting for a great deal on Designer Series Paper? Well, wait no longer! When you purchase three Designer Series Paper Packs during the month of July, you’ll get one absolutely free. Don’t miss out on this chance to save money and stock up on beautifully designed paper!

buy3dsp_NA

You can CLICK HERE TO VIEW the Designer Series Papers!

Oh my … so much information today!  I will keep you in tune with the specials by sharing more samples and projects, and the links.

Stop back tomorrow … I will take you on a step -by- step guide to using the new markers.  I know you’ll love the finished card!

blog-closing-small

Great Deals, New Product Share & Last Chances …

Hello Stampin’ Friends,

I hope you had a wonderful weekend!  Monday is upon us and I have some wonderful news and a beautiful card to share with you today.  My guest stamper is my sister Eileen.  She is also a member of my Star’s by Design group of demonstrators.

Eileen’s card features the new “Park Lane” Designer series paper which I have been showcasing this past week.  I couldn’t have timed it better, because starting tomorrow, July 1st… Stampin’ Up! has a great deal for us … Buy 3 packages of our delightful designer paper and you’ll get another FREE!


Eileen’s card has the polka dot design from the “Park Lane” Designer paper and has paired it up with the sweet “Hello Honey”, Blackberry Bliss, Mossy Meadow and a touch of Tangelo Twist In-colors!  These colors are just so striking together… don’t you agree?

000_1189

I couldn’t wait to share this card with you because Eileen also used the fabulous NEW “Flower Patch” stamp set and “Flower Flair” framelits.  You will save 15% when you bundle these two items together.  I haven’t had a chance to play with mine yet so I was so excited to get this card in our Summer Star’s Party Swap.

In just a few paragraphs, I have shared our July special savings on designer paper, and shared Eileen’s swap card using our brand new “Flower Patch” bundle.

Last Chance to Sign and Save:

DemoHeader_SignandsaveUS

Join my Star’s and Stampin’ Up! for just $50 US!   It ends today on June 30, 2014. Just keep on doing what you love—stamping and crafting—and make a little money while you’re at it!

When you join Stampin’ Up! during this limited-time offer, you’ll receive:
• $55 worth of products
• A 30 percent discount on your first $150 order placed within 45 days of joining
• A 20 percent discount on all your orders
• Free Paper Pumpkin Kit

Create friendships that will last forever and enjoy the benefits of fun, friends, and creativity. Hurry, this opportunity is almost over.

I wish you all a wonderful day and thank you for stopping by.

Tomorrow I will share with you some tips and samples using the new “Blendabilities” markers … some will be release for sale tomorrow!

See you then ~

blog-closing-small

Here is another look at Eileen’s card and a list of ingredients!  Click on any to begin your purchase.

000_1187

A Gift to Share …

Hello Stampin’ Friends,

Today I want to share with you a great way to share the fun of stamping with others.  I love being able to share the fun of stamping with others either in a class or by sending a card!

Stamping is a gift you can share as well, in the form of our new pre-paid Paper Pumpkin Subscriptions!  You  can get them for yourself or you can “gift” them.  How exciting would it be for your friend or family member to open the mail box and find a box of creativity!

000_0133

This is the perfect gift for someone just starting out too … why, because everything, including instructions are all in the kit.  The only thing they will need is some adhesive.

Great for College kids … they don’t have the room for all their crafting supplies, but this comes ready to create!     (Quote: Students are beginning to stress about projects, papers and tests, but taking 15 minutes to let loose your creativity, could help you do better to think and stay relaxed during these stressful times.)

Great for Mom … Fun cards & projects they can do with the kids without all the muss and fuss – just open the pretty orange box and begin!  Or this could be her little escape for a 1/2 hour to unwind and create!

Did you know that crafting is in the Top 10 Stress Releivers … it also helps with anxiety, depression, and can even help lower blood presser!

What about a Baby Shower gift?  She may already have all she needs for baby, but this will give her the perfect escape without having to bring out all her supplies!

Gift for teacher …. Why not, we have a 3-month subscription you could gift her during her time off to say Thank You!

Click on any of the options above and begin your gifting now.  I’m sure you can think of more people who deserve such an awesome gift!

I have a gift for you when you purchase a pre-paid subscription.   I also can link you to My Paper Pumpkin Pinterest Board so you can view more samples from current and upcoming Paper Pumpkin projects!

It makes a great gift for someone … or for yourself!  We all need to escape and relax … it’s good for our health!

Here is this months Paper Pumpkin Kit … I will be sharing more ideas on what else you can create with this kit after my Paper Pumpkin Party!

Thank you for stopping in today.

Have a wonderful day !

blog-closing-small


#Hello Star …

Hello Stampin’ Friends,

Today I’d like to share with you a card created by Concept Artist: Melody H. from our Get Inspired blog.  Melody is using our fabulous new Star framelits … I must say, that is definitely what attracted me to this card at first glance.

But there’s so much more …

some-of-my-new-favorites_crbhi-card

The background was created with our new “Dazzling Diamonds” Glimmer Paper.  I like how she just added stripes instead of the full background.  The Marina Mist added a nice touch of color.

You must admit, the Vellum Star really catches your eye, and I love how the designer paper highlights the “HI”. 

some-of-my-new-favorites_crbhi-card-close-up

The “HI” was done by using the new “Little Letters” Thinlit dies … those are on MY Wish List!!  Oh what the heck, they’ll be on my next order!The greeting and that pop of color, really do create a bold focal point … nice!  And the greeting comes from the stamp set #Hello on page 128.  Love this card and a big “Thanks” to Melody for sharing. 

I’d also like to send a BIG “Thank You” to Nancy …the flowers are beautiful.

Love ya my friend, you made my day! 

Who thought a rubber stamp, some ink and paper could bring so many great people together, and create wonderful friendships!!  The star’s are calling our names 🙂

000_1150

Thank you for stopping by my blog today….

Have a great day! 

blog-closing-small

A Little Sumthin’ Sumthin’

Hello Stampin’ Friends,

Oh my gosh … have you gotten through the new catalog?  It seems every time I go through it, I find something new!  Today I would like to share with you some of the new items in the catalog.

Now … I can’t list my favorites, not yet anyways … that is one of the contests at my Hostess Appreciation party coming in July!!  It’s an exciting night of food, stamping, and a whole lot of fun.

You can still join us … host a stampin’ party before the end of June and you too will be invited to this exclusive event.  Contact me at lindaluvs2stamp@aol.com

Ok … I am going to start with a Little Sumthin’ Sumthin’.  Many of my stampers love our card kits and this is no exception.  First I’ll post the details, then I’ll share a video with you …

A Little Sumthin’ Sumthin’ Gift Box by Stampin' Up!

A Little Sumthin’ Sumthin’ Gift Box Kit 133794
Price: $13.95
Includes 10 pillowboxes (folded: 4-1/4″ x 2-1/2″), 10 die-cut word bubbles, 10 bellybands, 10 mini clothespins, 10 wood sticks, 10 sheets of precut cotton paper, 10 pieces of Real Red 3/8″ Stitched Satin Ribbon (ea. 16″).

**************************************

Now I would like to show you a unique die cut box … Our “Hamburger Box”.  I’ve seen some really cute samples with this, however, since I don’t have it yet … sit back, relax, and watch this cute video too …

Hamburger Box Bigz Xl Die by Stampin' Up!
Hamburger Box Bigz Xl Die 133724
Price: $42.95
Makes a hamburger box. 4″ x 3-1/4″ x 1-1/4″
Coordinates with Fast-Food Friends, Num-Num Stamp Sets

*********************************************

And my last product share today is our newest adhesive.  It’s stronger than our Snail, but not as strong as the Sticky Strip … so a great middle adhesive for those projects where you need a bit more hold.  I’ve got mine …

Fuse Fast Adhesive by Stampin' Up!

Fuse Fast Adhesive

129026
Price: $9.95

New super-strength adhesive that bonds instantly and neatly. Safe for memory preservation projects. Acid free. 13.1 yards.

Check out the video to see some great tips on it’s use …

I can’t wait to share more of the new catalog with you!  So many neat items.  You can purchase any of these items by clicking directly on the products name … it will take you to my stampin’ store.  It’s OPEN 24-7!

Let me know if you have any questions on these or other new products.

Have a wonderful day ~

blog-closing-small

Calling all Hero’s …

Hello my Stampin’ Friends,

Today I have two announcements and several project shares for you!  First let me start with the exciting new photopolymer stamp set that Stampin’ Up! just released … Calling all Hero’s!

This stamp set is perfect for kids, but you can also used it as encouragement to support a friend or loved one who is going through a personal struggle and fighting hard.  I know I have my hero’s … how about you?

000_1132

This is my sister Ruthie (right) who lost her battle with Pancreatic Cancer 3 years ago.  Her fight was more than any super hero had to go through.  Just think how a fun card could lift someones spirit.

Here are some fabulous samples and great idea’s that Stampin’ Up! created with our new Calling all Hero’s stamp set …

be45e84a1d76a08a923d129286bd7a89

51a4064dc2e61b6e8f7491b8355d6ad8

32933ea1261bfbd9ce8e7245544a86680d15d6b264ad2ff22d046a56ffb03026

2a58808f406050d435d448af9a65dfe2

Aren’t they just adorable?  Hand stamped cards and projects are a great way to show someone how much they mean to you… and everyone loves to get them 🙂

Second, I want to share with you the Weekly Deals.

CM1634B

I want to remind you that you don’t have to wait for my post to see the weekly deals … just go to the side bar on your right (some may have them on the bottom) and just click on the “Weekly Deals” logo… It looks just like the logo above and it will take you right to the deals!  How cool is that 🙂

Click either of the logo’s, or on the item description listed below to begin shopping.

Weekly Deals

We hope you enjoy this week’s Weekly Deals!

Afternoon Tea Ii Kit – Digital Download Item # 129928
Regular Price: $9.95
Discounted Price: $5.97
Hearts A Flutter Framelits Die Item # 130159
Regular Price: $24.95
Discounted Price: $18.71
Argyle Textured Impressions Embossing Folder Item # 127750
Regular Price: $7.95
Discounted Price: $5.96
Label Petite Curly Punch Item # 129405
Regular Price: $12.95
Discounted Price: $9.71
Chocolate Chip 3/4″ Chevron Ribbon Item # 130014
Regular Price: $8.95
Discounted Price: $6.71
Cherry Cobbler 3/4″ Chevron Ribbon Item # 130012
Regular Price: $8.95
Discounted Price: $6.71
Silver Basic Metal Buttons Item # 133319
Regular Price: $7.95
Discounted Price: $5.96
Blushing Bride 3/4″ Chevron Ribbon Item # 130013
Regular Price: $8.95
Discounted Price: $6.71


I hope you enjoyed today’s post … Please feel free to leave a comment.  I’d love to hear about your hero, we all have one, probably more.

Thank you for stopping by today.

Have a wonderful day ~

blog-closing-small

Out with the old … In with the new!

Hello Stampin’ Friends,

Hope you are enjoying your weekend!  Today I want to share with you all the exciting promotions going on at Stampin’ Up!  Personally … I can’t wait for the new catalog on Monday!  You can begin purchasing at noon (Mountain Time)

000_1039

Promotions

All you need to do is click on the links for full descriptions of promotions.

Thank you for stopping by today!

blog-closing-small


A Little Something Cute (Sneak Peek)

Hello Stampin’ Friends,

The sun is shining today!!  It’s also the first day in a long time that I have had to myself, so I think I got a little lazy with my post!  Let me just say … it’s worth the wait.

Today I am sharing with you a cute card created with some new products from Stampin’ Up!.  It’s a bit of a tease of what coming not only in the new catalog, but at my New Catalog Kick-Off party!!  I don’t have a date right now as I’m still waiting on word from the hall, but I’ll be sure to send invites as soon as we have things finalized.

My card is made with the new “Maritime” Designer Series Paper and is perfect for a new baby boy or a first birthday.

000_1072

My color pallet reflect the designer paper: Whisper White, Night Of Navy, Pool Party, and Cherry Cobbler.  The white, cherry and navy truly feel nautical, and the addition of the Pool Party makes it perfect for this baby card.

I used the both sides of the designer paper … the cute little octopus is on one side, and the fun waves pattern is on the other!  You will also find a strip of the “waves” on the inside of the card.  To anchor my greeting, I used the star punch from the new “Itty Bitty Accents” punch pack.  I also used the punch inside on my strip of designer paper.

000_1074

The greeting… “a little something cute…”  comes from the new stamp set, “Something to Say”.  It’s filled with great greetings and verses!  I added the inside verse “for your cute little someone” to complete the card!  This is one of the stamp sets you will be using and my Kick-off Party!

Oh!  By the way… I will have boxes and boxes of the new catalogs along with me!!  All club members get them for free, or anyone placing an order of $25 or more will also get to take one home with them!

I can’t wait to share this exciting new catalog with you!  Watch for my “Kick-Off Party” invitation!

Thanks for stopping by and have a wonderful weekend!

blog-closing-small


Project Life … Getting Started!

Hello Stampin’ Friends,

Some of you know that I am at my 2014 Annual Spring Retreat, but I didn’t want to miss a post, so I thought I would share with you one of our Concept Artists thoughts on how to get started with Project Life  …

Project Life: Getting Started!


I am a Project Life convert through and through. I first heard about Project Life a couple of years ago by reading Ali Edwards’s blog. I was so intrigued by the whole concept. It seemed so simple to focus on taking photos and recording memories—something that I had been struggling with in my personal albums.I have loved memory keeping for a long time but I just dabbled in it because it overwhelmed me. I am such a perfectionist, and I would spend hours and hours on my scrapbook pages. I had so many photos and so many memories I wanted to record. There was never enough time to document everything, and I was always so behind.

After having my first daughter in 2009 I got really jazzed about recording our new journey. I started a baby album and tried so hard to stay on top of it, but I was spending too much time on it and getting nowhere. After a little while I pretty much gave up because I was so behind and overwhelmed by the whole thing.
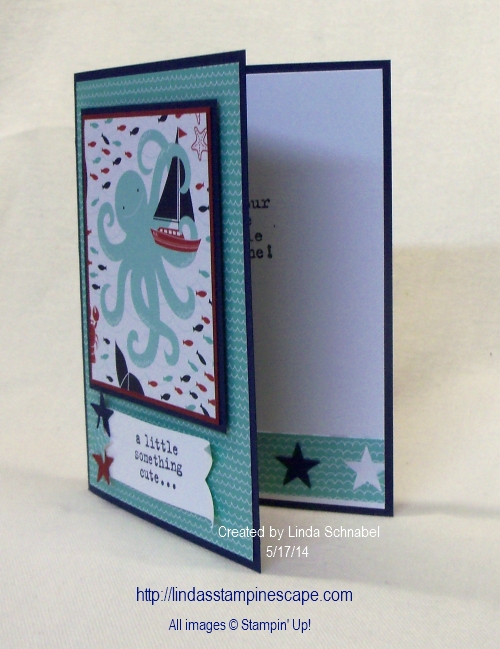
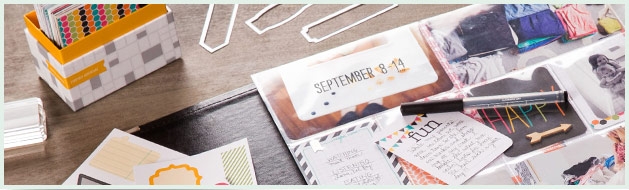
When I came across Project Life I knew I had my answer. I love everything about Project Life. I love all the pockets that can so easily be filled with memories and photos. I love all of the predesigned pocket cards. I love that I can get so many of my photos off my computer and out for my family to look at. I love that I have a place to document the simple everyday moments along with the big ones. I love that I have a place to save all of the little ticket stubs and mementos that I gather. I love adding fun little embellishments to my cards and photos when I have the time and I need a creative outlet. I love that if I just want to get my pages done quickly, I don’t have to fuss around with embellishing things . . . but my pages still look great. Everything about Project Life makes me happy.

If you are new to Project Life, I have put together a few tips I have learned along the way to help get you started recording your life.

Take photos with intention. What are the things that you want to remember? If you made something awesome for dinner . . . take a picture of it. Did you have a fun girls’ night out? Take a picture! Did you go for a walk with a beautiful sunset? Take a picture. We all know to take photos of the big, important events in our lives, but I think the simple moments in our lives are just as meaningful and important to document.

Decide which approach works best for you. Do you want to record your life on a weekly basis, on a monthly basis, or just whenever? There is no right or wrong way to do this. I like working on a monthly basis and adding inserts when I need to, but that might not work for you. Play around and have fun finding out what makes this process of recording your life the easiest and most enjoyable for you.

Jot down the things you want to remember. Carry a notebook in your purse, write ideas in your phone, or write in a journal at the end of the day. When you come across a quote that moves you . . . write it down. When your kid says or does something that you don’t want to forget . . . write it down. If you had a great day . . . write it down. This makes it so much easier when you want to add journaling to your pages.

Save things from your life to include in your album. A tag from your shopping spree, a bag from your favorite boutique that you can cut down to fit into a pocket, happy mail, a birthday card, a ticket stub from a good movie—there are so many fun ways to include bits and pieces from your life.

Set aside time to work on your pages. Make it a priority in your busy life to sit down and get your memories written down and your photos printed off. Doing tasks in chunks is easier than trying to do everything in a big marathon session. Take an hour to go through photos and print them off. Later, sit down for another hour to write down memories onto cards and slip things into page protectors. Take another hour or 30 minutes to play around with embellishing and getting creative if that’s what makes you happy. Again, there is no right or wrong way to do this. Just have fun, and in the end you will have something that you and your family will cherish forever!

Arika B.
Concept Artist

Thank you Arika for sharing!  Project Life products are available right now, so head on over to My Stampin’ Store and check them out!  Stampin’ Up! will be introducing additions as time goes on.

My “Project Life” shipment arrives on Monday and I just cant wait to get started and share with you.

Thank you for stopping by today!

Have a super Saturday!

blog-closing-small

Project Life is now available!

Hello Stampin’ Friends,

Project Life is here ….header

If you haven’t already heard, Stampin’ Up! has partnered with Becky Higgins (the scrapbooking guru) Wait!  Don’t turn away just because you don’t scrapbook!  Our new Project Life can change that for you.  Hear me out …

I began scrapbooking in 1998… I love creating pages, but I will admit, it takes time.  In fact, I haven’t done any scrapbooking for years!!  However this scrapbooking system is for busy people like us!  It coordinates, it simplifies and it’s beautiful.

And for you avid scrapbookers… don’t turn away either, this is a perfect start to a page you can still fully embellish and make your own!

I am posting all the products for you to view.  You can purchase at my ON-LINE STORE (CLICK HERE).  All orders over $50 will qualify for a special gift from me and a copy of the brand new 2014-15 Annual Catalog FREE.

Use Hostess code ..  MCJMH42Y  .. when purchasing.

projectlife_blog2

projectlife_blog3

It’s simply fabulous … don’t you think!?  I love it, and love the fact that I can be back into scrapbooking again.

Here’s Shelli (CEO & Co-founder of Stampin’ Up!) and Becky Higgins to tell you more about Project Life …

Still not sure?  That’s OK … there’s more!!  I will be sharing how you can turn those pocket cards into real cards!  There is 100 cards in the bundle (YES… 100) and it’s only $15.95!  My stampin’ ladies know that cards and scrapbooking are totally transferable!

CLICK HERE TO VIEW PROJECT LIFE GOODIES!

Use Hostess code ..  MCJMH42Y  .. when purchasing.

My order is in, and I can’t wait to share with you!!

Thank you so much for stopping by …

and have a great day!

blog-closing-small

New Catalog … New Stamp Set … New Technique!!

H-E-L-L-O my Stampin’ Friends!!

I am really excited to share this post with you today!  Monday night I went to the Stampin’ Up! Catalog Premiere party!  They commissioned theaters all over the US … over 71oo demonstrators were at the theaters and over 400 at the “Red Carpet” LIVE event!  Wish I could have gone to that but it was in California.

catalog_reveal_fb - 500 PIXELS

I went with my friend and downline member Cindy.  Duh … I didn’t even think of taking a camera.  I would have been fun to share some pictures of the theater and all the demonstrators.  However … I do have a picture of my stuff!!

Here is the new catalog (no, sorry … can’t post pictures of the inside) but I do have a stamp set to share with you too.  You will also see the new “Stampin’ Success” magazine which all demonstrators recieve and is filled with helpful tips for stamping and running our businesses.

000_1039

Yes, those are “POPCORN” Jelly Belly’s … a must have when attending a theater! 🙂  I can’t wait to share the new catalog with you!  How would you like to come to a catalog release party??  Let me know … or tell me what kind of catalog party you would like!!

On to the new stamp set … “Work of Art”.  It’s not typically my style, but Stampin’ Up! showed us some fun ways to use the stamp set.  It’s full of neat images that work great with water coloring and more.

Here is my first card with my new stamp set, from the new catalog …

000_1043

The technique is called “Ombre” … it is a graduation of color.  I used Bermuda Bay on my card.  I began with the Watercolor paper and Spritzer.  I spritzed my water color paper lightly.  Then, I took the “swish” and after inking it up … stamped off 2 times, then stamped on my paper.

Then next “swish” was only stamped off once, and then the last was just stamped directly onto the watercolor paper.  It’s simple … but I like it.  Hope you like it as well.  I think I will be playing with this stamp set quite a bit.  I added a simple butterfly and a bit more bling colored with a Sharpie.

pic2

Hmmm … speaking of coloring you embellishments, I can’t wait until you get your hands on the new “Blendabilities” markers.  Woo Hoo.  I’ll be putting in a nice pre-order in May and can’t wait to show you!!  Watch for upcoming classes.

Want a FREE catalog??

If you are in one of my clubs or an on-line shopper – you will receive yours as soon as they are released. New shoppers can get a FREE catalog from me by placing a $50 or more order from my stampin’ store (click this link, then click the shop now button at the bottom of the page)

Orders from your FREE catalog begin today through May 30th!!  Once I get your order notification from Stampin’ Up! I will send a catalog directly to your home 🙂

Thank you for joining me today!

Have a happy day ~

blog-closing-small

Here is a list of my stampin’ supplies: Click on the pictures for more details and/or to shop.


Introducing Project Life by Stampin’ Up! and more …

Hello Stampin’ Friends,

I have much to share with you today!!  First is a video that will introduce you to a new product offering from Stampin’ Up!  I am so excited to get my hands on this.  Secondly … I will share with you, this months Paper Pumpkin video.

We are so so so excited to let you know we’ve partnered with the amazing Becky Higgins to bring you the real deal-authentic Project Life products, now in exclusive Stampin’ Up! colors and designs. If you’ve somehow missed the Project Life craze and are wondering what it’s all about, we’ll fill you in: it’s a super simple, totally affordable way to get your photos into albums: you just slip your photos into Photo Pocket Pages and add designed cards. It’s a back-to-basics approach to documenting your life. In a nutshell, it’s all about spending more time making memories and less time scrapbooking them.

Here is our April Paper Pumpkin …

Isn’t that cute!  I thought you could put a photo behind that heart and gift it for Mothers Day … it’s May 11th!

I hope you enjoyed the videos, watch for postings in May when I share my “Project Life” creations.

Have a terrific Tuesday!

blog-closing-small