Too Much Happy?

Hello My Stampin’ Friends,

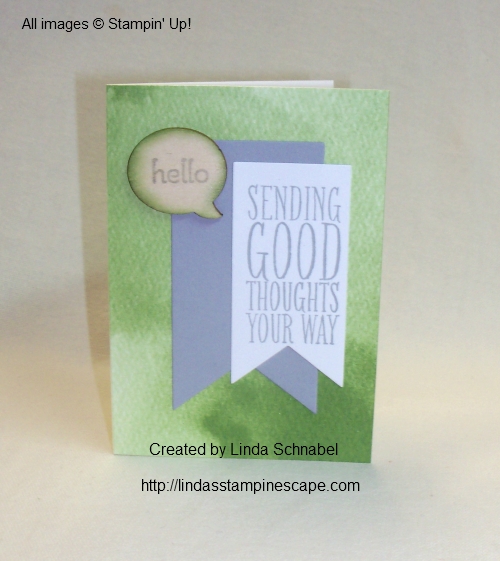
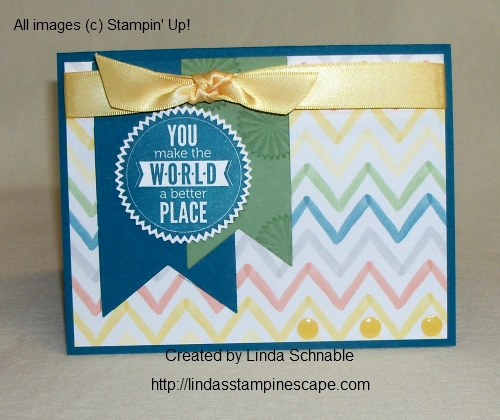
My, my … You can never have too much happy!  Such is the thought of my card share today.  As promised, I will share with you a sample created with the “Weekly Deals”.  Today’s card features the Perfect Pennants Bigz Die… on sale now, through Monday 4/7/14.

Perfect Pennants Bigz Die

Perfect Pennants Bigz Die 123126
Price: $32.95 NOW $24.71
Create trendy pennants and banners with our Perfect Pennants Bigz L Die! The innovative designs in these longer Bigz dies give you new and interesting creative options. Ideal for cutting thicker materials and multiple layers. Use with Standard Cutting Pads. Measures 6″ x 8-3/4″.

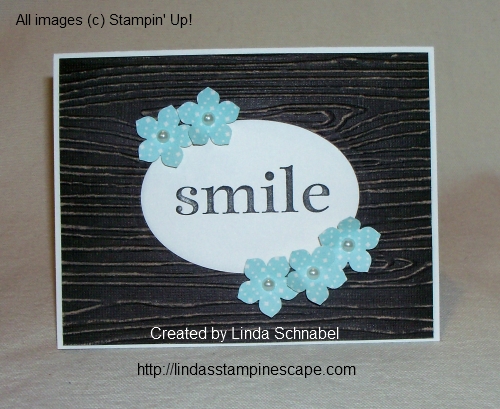
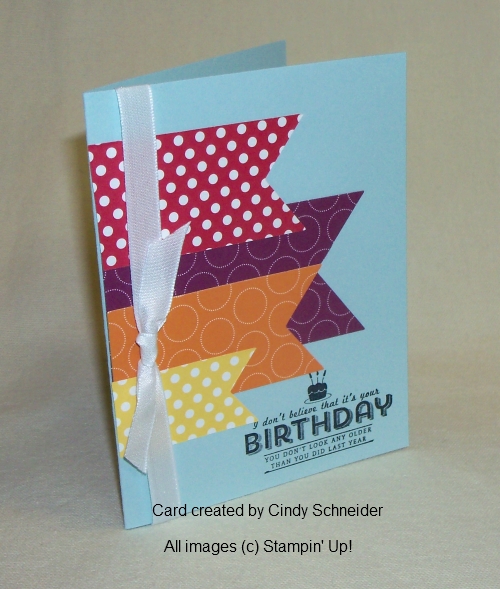
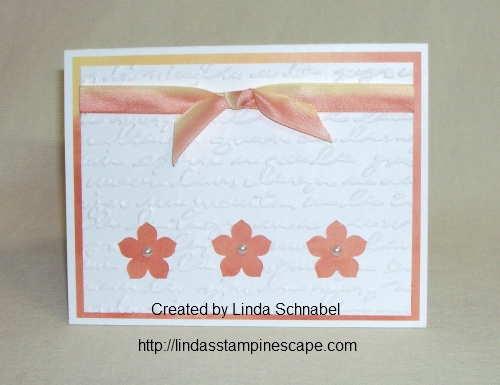
I figured that you could make a banner using that die.   The little decor embellishments work great on your pennants / banners and I wanted to show you how to put them onto a card.  Here it will mat and highlight my greeting!

000_0963

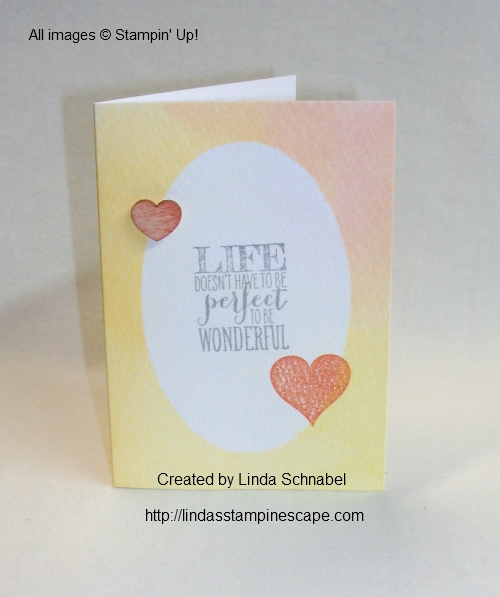
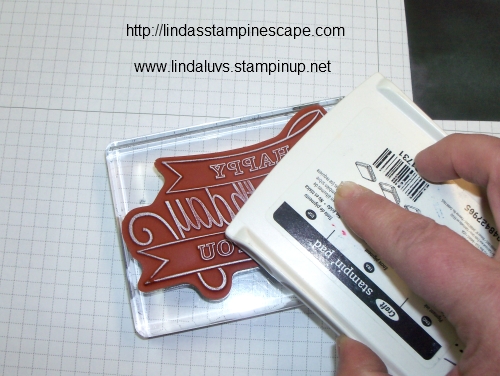
The greeting comes from the stamp set “Yippee Skippee” in our main catalog.  I stamped it onto vanilla cardstock, using the black StazOn™ ink.

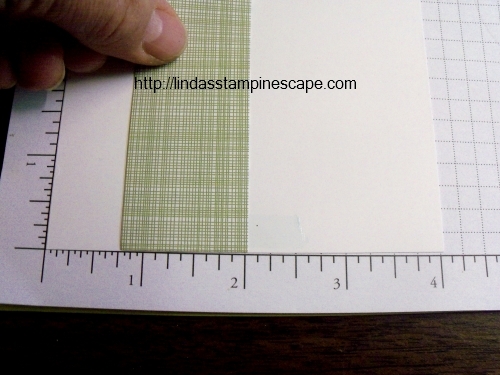
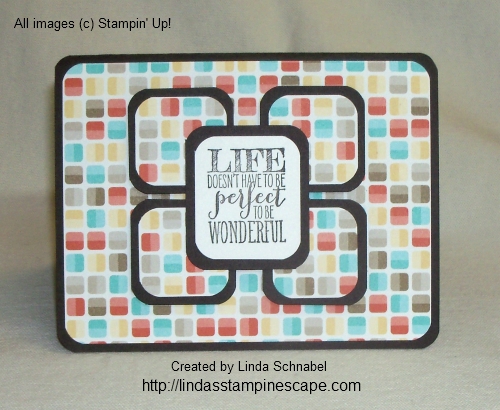
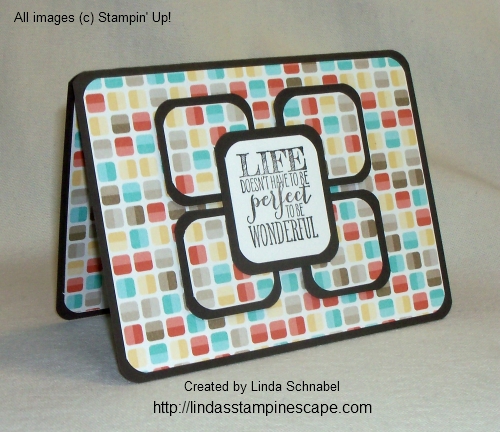
My patterned paper comes from (some of you already know) the Modern Medley Designer Series paper.  Who doesn’t love polka dots!

I teamed it up with this cute little flower from the “Mixed Bunch” stamp set.  You can find that on page 89 of the Stampin’ Up! catalog.  Many of my club members have this set, so I thought you would enjoy another use for this stamp set.  The circles (dots) in the flowers work well with the designer paper.

To create the “pop” on the card I used the Gumball Green stitched satin ribbon and my die cut piece in the coordinating cardstock.

000_0962

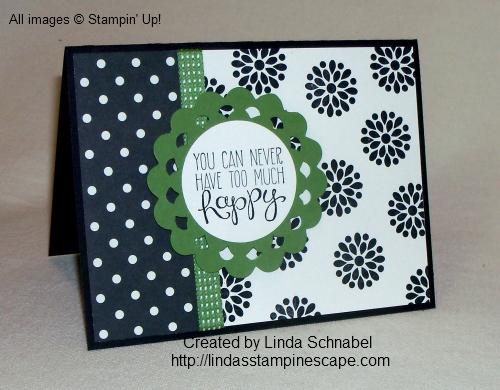
A quick and simple card to make that anyone would love to receive… very cheery.

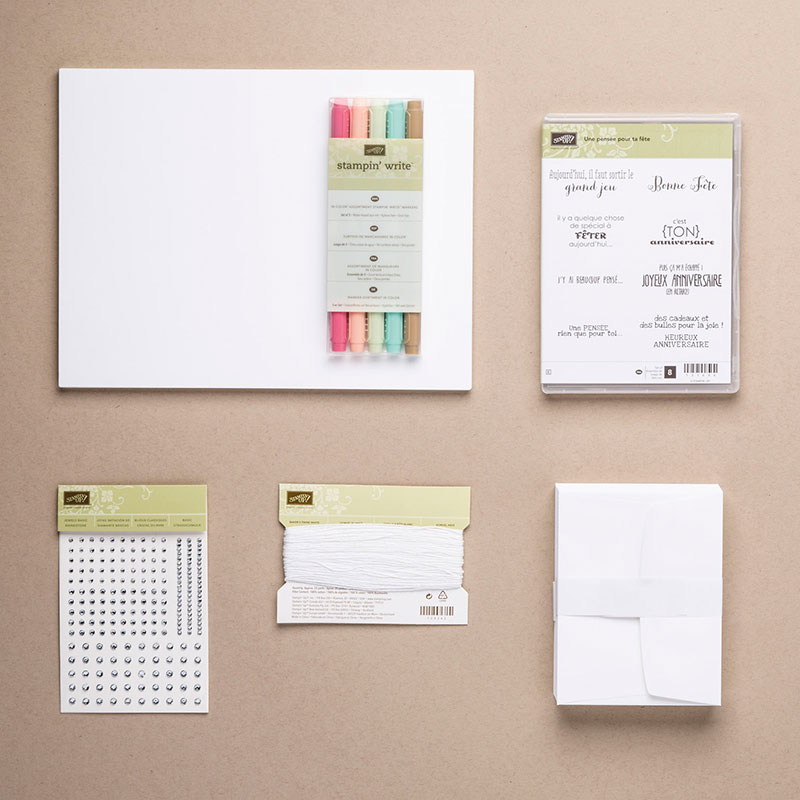
I’m posting the ingredients below- just click on the link for more details or to purchase.  Don’t forget the “Perfect Pennants” Bigz die is on sale through Monday.

Thank you for sharing part of your day with me …

Have a “HAPPY” Sunday ~

blog-closing-small


Technique Tuesday: Wooden Elements

Hello Stampin’ Friends,

And H-E-L-L-O-O-O April!  I think spring is finally here 🙂

Yesterday I showed you the March Paper Pumpkin and how much fun I had creating different looks with the supplies they sent.  What I didn’t know was that Paper Pumpkin actually turned one yesterday!  And in true Stampin’ Up! fashion, they threw a party …

Paper Pumpkin Turns One!

Even more amazing is the incredible year Paper Pumpkin has had.

  • We’ve sent out 229,000 Paper Pumpkin projects (say that three times fast!) to our friends.
  • We’ve helped over 45,000 women bring out their creative sides—(and we know that they were just waiting to break out)!
  • We even had 13,000 take advantage of our Free Marker offer—ended yesterday!

Yep. Not bad for something that is only ONE-year old!

To celebrate, we held a birthday party at our Riverton Campus, complete with yummy cake, festive balloons, and even party hats.

I told you it was a fun company to be associated with!  Well hang in there because my 15th anniversary is next year, and in Stampin’ Up! fashion … I will be hosting parties, specials and more all year long.  Don’t worry, you will be invited to them all!

I also told you yesterday that I would show you some fabulous products that we have in our “Celebrate the Everyday” catalog that you could use to recreate the techniques I showed you.  We will be using the “Essentials Wooden Elements” and the “Watercolor Wonder Designer Note Cards”.

000_0519

On my “Life Doesn’t Have to Be Perfect” card … I used the “Direct to” technique in which we applied the Ink Pad directly to our wood element, the heart.  You can see I dragged the ink pad across the heart for a streaked look, as compared to yesterdays card when I fully inked up the wood greeting.

I teamed this card up with the Perfect Pennant Bundle, which includes the Perfect Pennant stamp set and the Banners Framelit Dies.

000_0518

Yesterday’s card I stamped a pattern onto the wood, today I actually stamped a greeting onto the wood element.  I also sponged the edges.

As you can see, the Wooden Elements are very versatile and you can use many techniques on these fun embellishments!

These two cards were also very quick and easy to create, with this combination of note cards, elements and the bundle … the possibilities are endless!

Here are the items that I used to create these cards…

I hope you were inspired to try out some of these fabulous products and / or the techniques I used on the Wooden Elements.

I thank you for dropping by today!

Have yourself a terrific Tuesday ~

blog-closing-small

Fast -n- Furious Friday: Using Scraps!

Hello Stampin’ Friends ….

Holy cow, I can’t believe it is Friday again!  Don’t get me wrong, I love Fridays … especially when I have off of work until Tuesday!  Wooo hooo.  I’ll be busy in my stampin’ studio working on my upcoming retreat.

Fridays mean “Fast -n- Furious” cards, and what better way to make a quick card than to grab a bunch of scraps.  First let me say that I got my inspiration from “Pinterest”.

I was looking at a few boards and this object caught my eye … it was a board full of “quilting” designs … that’s when the light bulb above my head went on!

9454cbccd509c42b247a7c2d49e820a8

What a wonderful way to use up my scraps.  This card was super simple to make … I simply cut some scrap pieces of designer paper – 1-1/4″ x 4″.    I used the  “Gingham Garden” Designer Series Paper.

Since my designer paper had 4″ length … I cut my Whisper White base into a 4″ x 4″ square.

A simple trick to make sure you pieces are centered is to place your base onto your Stampin’ Up! Grid Paper.  I love this not just because it’s your stamp pad, but the grid make aligning your projects easy peasy … there’s room for notes, and you’ll always have a ruler handy!

000_0922

I added a bit of adhesive at the 2″ mark and then aligned my strips of scrap.  Did the same for the bottom section.  When your laying down the strips, one goes over … one goes under.  Super Simple.  Then you just adhere the ends.

000_0925

I picked the Perfectly Penned stamp set because I thought it works well with the feel of the card.  Besides, who doesn’t love that font!!  It’s done using the Craft White ink and the White embossing powder.

So today’s fast -n- furious card is just a bit of cutting, aligning, and then embossing your greeting.  Items used to create this card will be found at the end of my blog.  Clicking on the item will direct you to my website where you can view the product more closely or to make a purchase.

Just a note:

If you’ve never subscribed to Paper Pumpkin™ and have been eyeing the subscription kit program, I want to let you know that now’s the time to give it a shot. Our current subscribers have been giving rave reviews of our kits the last few months—every month that goes by is a month you’re missing out on Paper Pumpkin! With our creative kits better than ever AND a set of FREE markers for you if you sign up by March 31, you’ll want to subscribe ASAP. You still have five days to take advantage of this great offer!

Visit www.mypaperpumpkin.com today to get started.

demoheader_paperpumpkin_demo_1.11-1.27.2014_US_CA

Thanks so much for stopping by … I’d love to hear what you thought on today’s quilt card.

000_0924

Have a “Fabulous Friday” my friends!

blog-closing-small


Sunday Smiles …

Hello Stampin’ Friends,

How is your weekend so far?  Good I hope!  I have been busy in my Stampin’ room creating and putting together our annual Spring Retreat.  Eileen, my sister and stampin’ side-kick … helps me a lot on these big events, and was here with me.  We enjoy doing these so much!

While I was in my studio creating, I came up with today’s card share.  I wanted this card to reflect our upcoming spring season (finally)!  I knew I wanted to begin with brown – Early Espresso to be exact, because spring is a bit bare of color.  Then I thought … why not emboss it with the Woodgrain Embossing Folder.  That’s when I decided to use the Core’dinations cardstock!

000_0900

Once embossed, I used our sanding system to sand off the Early Espresso and reveal the lighter color underneath.  You can find the entire Core’dination papers and sanding system on page 157 our our Stampin’ Up! catalog.

I decided to create even more texture by cutting out the center of my card front with the Ovals Collection framelit.  Now I needed a base for my card, so I chose the Very Vanilla because it coordinated with the color revealed from the Core’dinations cardstock.

It all flowed so easily… it made me smile!  Hmmm … funny how I came up with that one!  The greeting “Smile” comes from the stamp set “Happy Day” – which is how this day was turning out.

That’s when I decided to add the flowers.  I punched them from the Retro Fresh Designer Series Paper, with the Petite Petals Punch.  Both of these items can be found in our Occasions catalog.  That’s the one that says… “Celebrate the Everyday”.  Oh yes, the punch has a coordinating stamp set and can be purchased as a bundle.

000_0902

Now … I popped up the entire woodgrain cardstock onto the Very Vanilla, and then popped up each of the 5 pretty Coastal Cabana flowers.  I love the color contrast between my flowers and the espresso background.  Spectacular!

To complete the look, I added the largest of the pearls to the center of my flower.  So … don’t you think my card bloomed into a beautiful spring card?

Below I have the links to the products used here today.  Just click on them for more details or to purchase any of the items.

Thank you for stopping by today …

and hope your day is filled with Smiles!

blog-closing-small

http://

Fast -n- Furious Friday 2

Hello Stampin’ Friends,

Today is my second installment of Fast -n- Furious Fridays!  Quick and easy cards for when we need a card fast!

I’m not sure if you can get any simpler than today’s card share, except to stamp a greeting onto a piece of cardstock.  However, I choose to use the beautiful “Sweet Sorbet” Designer Series paper, which I got free with my Sale-a-bration order.  There is still a week left for you to get yours too.

000_0898

I love using designer paper when I’m in a hurry to make a card because the color and design is already there.  My base card is Whisper White … so I added a simple but pretty bow using the white taffeta ribbon.

My greeting comes from the stamp set “Peaceful Petals” which I have been using in my Technique clubs and my Star’s (downline) meetings.  You could use any greeting … thus “Fast -n- Furious!”

000_0899

I hope you enjoyed today’s quick and easy card.  Remember, you can use any designer paper, and any greeting to make a lot of cards in no time at all.

Thank you for stopping by today.

Have a wonderful weekend ~

blog-closing-small

My Guest Stamper … Cindy S.

Hello Stampin’ Friends,

Ohhhhh … it was so nice to see sunshine and almost 50 degree’s yesterday, but that is gone.  Hope spring is coming soon.  But until then, I have a cute card I would like to share with you today.  The card was created by one of my Star’s group members, Cindy Schneider.

000_0882

I love how she began her card with the Soft Sky … still thinkin’ spring, and then added that awesome pop of color with her banners!  The banners were created using the ” Polka Dot Parade” Designer Series Paper and the “Banner Framelit Dies”.  I have these too and just love them … with just a simple roll through the BigShot, you have a perfect banner!

The banners were tied together (lol) with the “Whisper White 3/8″ Taffeta Ribbon”.  Here is another “must have” in your stampin’ supplies.  I just showed my Star’s how to die their ribbon.  What ever color marker you have … you can have that color ribbon, and just from a purchase of a simple white ribbon.  Oh yes, and it ties beautifully.

000_0884

I was so happy to see that Cindy had utilized the “See Ya Later” stamp set from our Sale-a-Bration catalog.  It is so cute, and I have only gotten to use it once.  This is one of the items you can earn free during Sale-a-bration, which by the way, only goes through March 31st.  Let me know if you need anything.

Hope you enjoyed Cindy’s card share as much as I did, and grateful that she allowed me to post her design.  Below is a list of all the ingredients used for this card.  You can click on the image for more details or to begin shopping.

Thanks for coming over to my blog today…

Have an awesome weekend!

blog-closing-small

PLEASE Remember to qualify for the FREE Sale-a-bration item “See Ya Later” … you must have a purchase of $50 or more before Shippping & Taxes.

Again, have a great weekend and hope you can stop back tomorrow.

blog-closing-small

Fast and Furious … Masculine Card

Hello Ladies, Gentlemen and Stampin’ Friends!

A happy Friday to you all.  I am excited to announce that I’ve come up with another themed weekday … Fast and Furious Fridays.  Each Friday I will post a simple to make card that you can easily copy and reproduce at the speed of light.  Well… maybe not that fast, but fast.

My card share today is a masculine card.  So simple and most designer papers will fit the bill (except maybe flowers… those, not so much).  Today I used the Sweet Sorbet, which is a FREE item in the Sale-a-Bration Catalog.  It measures 4″ x 5-1/4″ … that will leave a nice border around the edge, exposing the Basic Black card base.

000_0880

We women like our bling, but men … they like hardware, so I used the brads to create the effect that the greeting was bolted down.  I then added some straps – created with the Word Window punch, and bolted them down too!  You could give your brads a more rustic look by pounding them up a bit with a small hammer!

000_0876

My “Happy Birthday” greeting is great for men or women and has that wonderful nostalgic look.  The stamp set is Perfectly Penned and can be found on page 95 of the big Stampin’ Up! catalog or you an click on the link below.

That’s it … I hope you enjoyed my first Fast and Furious Friday!  This doesn’t mean that I would have quick & easy cards on other days, but I’m reserving Friday for our fast and furious… you know the weekend is coming up and we want to get our cards done quick.

Thank you from dropping in today and …

Have an awesome weekend!

blog-closing-small

Here’s what you need to recreate this card … then another look at the card itself.

FYI … Sale-a-Bration will end March 31st.  Please let me know if you need any help with your Sale-a-bration order.

Again, have an awesome weekend.

000_0877

blog-closing-small

Technique Tuesday & Weekly Deals

Hello Stampin’ Friends,

So … How did you like the “Glitter Paper” technique yesterday?  So simple, and so pretty!  Well that brings me to my exciting announcement…  I am featuring a “technique” each Tuesday!  Yep, Technique Tuesday and it begins today with the wonderful “Chalkboard” technique!

I also have the weekly deals for you … and are they great!  I have them all, so look forward to seeing some projects made with a few of these items!

Today’s card share is simple to do, and looks so nostalgic with the Chalkboard Technique.  I have chosen “Another Great Year” stamp set as my featured set today.

BIRTHDAY

I have seen several ways to do this technique … here is my take on it.  Simply begin with a piece of Basic Black cardstock and wipe your embossing buddy across it.  This will help keep the stray embossing powder off your card and gives you the appearance as if you just wiped off a chalk board!  At least you don’t have to clean the erasers!  Ooops … showing my age again!

Next, ink up your desired image with the white CRAFT ink.  I like to flip my stamps so the rubber is up when inking … it gives you much more control and you can see how exactly where you are placing the ink.

000_0853

Stamp image onto black cardstock…. Sprinkle the White embossing powder over your inked area, tap off excess, and emboss with heat gun.

Now you can add some designs, or color in parts of the image with our fabulous “Stampin’ Chalk Marker”.  It was meant for this technique and is fun and easy to use.  Here I highlighted part of the banner and added a simple border around the card.

000_0856

You can use this technique alone as your focal point as I did today, or frame it with one of our beautiful designer series papers – that would really make it pop!  My technique clubs made Christmas cards using this technique, so feel free to experiment … and have fun.

The Chalkboard technique is really hot right now … just take a look around, you’ll be surprised  at how many different places you will find it.

Thanks for visiting me today ~

blog-closing-small

Here is a list of supplies used for today’s card …

 ITEM

 DESCRIPTION

133038

 Another Great Year Stamp Set – WOOD

133041

 Another Great Year Stamp Set – CLEAR

103083

 Embossing Buddy

101731

 Whisper White Craft Ink

132133

 Stampin’ Chalk Marker

109132

 White Embossing Powder

129053

 Heat (Gun) Tool

119246

 Rhinestones

Weekly Deals

We hope you enjoy this week’s Weekly Deals!

Dress Form Pop’ N Cuts Item # 130100
Regular Price: $21.95
Discounted Price: $16.46
Circles #2 Originals Die Item # 114526
Regular Price: $15.95
Discounted Price: $11.96
3 Inch Circle Originals Die Item # 122125
Regular Price: $17.95
Discounted Price: $13.46
Chevron Textured Impressions Embossing Folder Item # 127749
Regular Price: $7.95
Discounted Price: $5.96
Set Designer Frames Textured Impressions Embossing Folder Die Item # 123130
Regular Price: $8.95
Discounted Price: $6.71
Peekaboo Frames Bigz L Die Item # 124587
Regular Price: $32.95
Discounted Price: $24.71
Argyle Textured Impressions Embossing Folder Item # 127750
Regular Price: $7.95
Discounted Price: $5.96
Ahoy, Matey Ensemble – Digital Download Item # 130078
Regular Price: $14.95
Discounted Price: $8.97

How to create your own “Glitter Paper” …

Hello Stampin’ Friends,

I’m back today to put a little “sparkle” in your day!  My card share today is an easy technique that I love to do when I need a quick card but want to jazz it up!  I will see how easy it is to make your own glitter paper.

I used the “Watercolor Wonder” Designer series paper, it is so pretty I just can’t keep my hands off this stuff!  Cut your designer paper to the size you want.  I decided to use it as my card front, so it measures 4″ x 5-1/4″.

000_0857

Place this on a scrap piece of paper and dab the entire VersaMark Ink pad directly onto your designer paper.  You could brayer the VersaMark on, but this is much easier.

Now I move the designer paper onto another scrap piece of paper, or you can use an embossing powder tray, because you will now cover the entire piece with “Iridescent Ice Embossing Powder”…. tap off any excess powder.  Now grab your heat gun and emboss!  You now have a beautiful …. designer … glitter paper!

My greeting comes from the “Friendly Phrases” stamp set, and I stamped it the the Crisp Cantaloupe ink.  This is also the color I used for the base of my card.

I repeated the embossing steps on a scrap piece of designer paper (is there scrap designer paper?  Maybe not) … I then punched out a butterfly using the “Elegant Butterfly” punch.  To finish it off, I added a small string of Rhinestones to the butterfly.

000_0854

The greeting and the butterfly were popped up with Stampin’ Dimensionals.

I hope you enjoyed the card share today.

Thank you so much for stopping by.  And a “Happy Birthday” to my daughter Sarah today!

blog-closing-small

Life Doesn’t Have to be Perfect …

Hello Stampin’ Friends,

I hope you all have a wonderful weekend.  It was cold, but we had sunshine … and I am grateful for that.  Life doesn’t have to be perfect to be wonderful.

I began with the “Retro Fresh” Designer Series paper.  The pattern I picked was so fun and colorful, I didn’t think I needed much else.

000_0849

Since the edges are rounded on the little squares in the designer paper, I decided I wanted all my edges rounded too.  Since my “Envelope Punch Board” was already sitting on the table, I used the corner rounder from there.  I was a little leery about punching though the folded card, but it worked fine.  And trust me … it does so much more than punch corners!

To give it a more dramatic look, I cut out additional squares from the “Retro Fresh” designer paper … no measuring, I just count 4 x 4 blocks!  I popped those up using our Stampin’ Dimensionals.

000_0848

I was so careful to line up the squares horizontally, that I didn’t notice that they were off vertically.  Did you? lol

The greeting is from the “Perfect Pennants” stamp set, I find it very versatile and have used it many times already.

Hope you enjoyed today’s post & quick card.

Have a marvelous Monday!

blog-closing-small

Here is the list of ingredients I used today …

132993

 Retro Fresh Designer Series Paper  / $10.95

133227

 Perfect Pennants Stamp Set – Wood / $29.95

133230

 Perfect Pennants Stamp Set – Clear / $21.95

133774

 Envelope Punch Board / $19.95

Thanks again for stopping by.  You may click on the item number to view the product or make a purchase at my stampin’ store.

You Make the World a Better Place …

Hello Stampin’ Friends,

How are you this fine Sunday? Oops, some of you are on a waaaay different time zone, but I hope you are having a wonderful day too.  I am blessed to have visitors to my blog from all over the world … I would love for you to leave a comment at the end and tell me where “you” are from.

OK … today’s card share is going to look a bit familiar to my stampin’ clubs, at least the layout.   I want to share with you a card that I created using the Sunburst Saying Bundle (stamp set and framelits).

000_0844

As you can see, I have chosen the “Watercolor Wonder” designer series paper again.  I love that paper, but I will start sharing ideas with other paper I have 🙂  I also used the “Banner Framelit” Dies… banners made easy!

My card base color is “Island Indigo” and I have accented it with the Wild Wassabi, and Daffodil Delight.  It really is easy to pick colors when they’re already on the paper (and now listed on the back of the designer paper packet).

000_0843

The little daffodil dots on the bottom are just punched out of the “Owl Builder” punch and then covered with Crystal Effects.  It balances not only the card, but the color.

So today, another quick and simple card to re-create and can be used for a guy or a gal.

Don’t forget to jot me a little note to introduce yourself … your name and where you live.  I’d love to hear from you.

So happy you joined me today, I thank you for that.

Have a super Sunday!

blog-closing-small

Here is the list of ingredients I used today …

133104

 Watercolor Wonder Designer Series Paper  / $28.95

134817

 Starburst Saying (BUNDLE) – Wood / $44.95

134818

 Starburst Saying (BUNDLE) – Clear / $38.95

132172

 Banner Framelit Dies / $26.95

118074

 Owl Builder Punch  / $16.95

101055

 Crystal Effects / $6.25

125583

 Daffodil Delight Seam Binding

You may view or purchase any of these items just by clicking on the item number.  It will take you directly to my stampin’ store.  Shop 24/7 – 365 …

The Starbust Saying Bundle and another item … will bring you to a qualifying order of $50 or more!  Now it’s time to pick out your free Sale-a-bration item!

Thank you.

Thinkin’ Spring …

Hello Stampin’ Friends,

Whew … didn’t think it would take me this long to get back to my computer today!  Sorry for the late post, too many chores last night.  Once I sat down … I was out for the count and woke up around 3:30 this morning!  We’ve all had those days, and now I’m back down in my stampin’ studio!

Today’s card is to inspire you to Think Spring!  I was happy to hear that our forecast of 5 to 8″ of snow has now turned into only 1 t0 3 inches!  I can deal with that.

000_0837

I chose the “Watercolor Wonder” designer series paper.  The design is the Daffodil Delight and Tangerine Tango watercolor sheet.  Those colors are so warming, and that is just what we need right now!

The designer paper is cut to 5-1/4″ x 4″ … that will leave a 1/4″ border when you adhere it to the Whisper White card.

The front of the card is also Whisper White and cut to 5″ x 3-3/4″ … then emboss it using one of your favorite embossing folders and the Bigshot.  My apologies for grabbing the one that was from the Holiday catalog … let’s hope they put it back in the new 2014-15 Catalog!  It’s not on the Clearance Rack so let’s keep our fingers crossed!

000_0839

I used the cute little “Petite Petals” punch found on page 33 of the Occasions catalog.  Center your punch in the middle of your card front that you just embossed and punch.  Then punch out additional flowers on each side of the center flower.

Now … for the ribbon.  You may remember this technique from my February 22nd post (Faux Dipping) where I colored it with marks and spritzed it.  If not, your in luck because this time I took pictures to help explain how I did it.

000_0832

I began with the 3/8″ Whisper White Taffeta Ribbon and colored it with my Daffodil Delight and Tangerine Tango Markers.  Just slide your “brush end” (it also has a writing end) across the ribbon, don’t be afraid to go darker.

Once your finished inking up your ribbon, place it on some paper towel.  The paper towel will absorb some of the ink, that is why it’s OK to go darker when coloring it.  Fill your Stampin’ Spritzer with water and spritz over your ribbon… the more water you spritz on, the lighter your ribbon will become.  Set aside to dry.

000_0834

Tip:  You can the new Heat Tool to dry your ribbon because it actually has a low setting for drying!

I love this technique and it looks so nice with the Watercolor Wonder Designer Series Paper.  Give it a try… it really is quite easy and can add a stunning look to your card.

Thanks for stopping by today.

blog-closing-small

Here is the list of ingredients I used today …

132994

 Watercolor Wonder Designer Series Paper  / $10.95

133322

 Petite Petals Punch / $12.95

109070

 Taffeta Ribbon – Whisper White / $6.95

126185

 Stampin’ Spritzer / $2.95 – Set of 2

119247

 Pearls Basic Jewels / $4.95

 You may view or purchase any of these items just by clicking on the item number.  It will take you directly to my stampin’ store.  Shop 24/7 – 365

Thank you.

See ya later … Alligator

Hello Stampin’ Friends,

Today’s card share is a fun card I created using my FREE Sale-a-bration items!  I teamed up the “Decorative Dots” embossing folder and the “See Ya Later” stamp set.  Both of these items are in our Sale-a-bration catalog and you can get one or both of them for FREE with a qualifying order.

So … what’s a qualifying order?  All you need to do is purchase $50 of your favorite stampin’ supplies, or try something new.  Total is before shipping and taxes.  Stampin’ Up! has made it even easier by bundling some of the great products introduced in the Occasions catalog.  You could just choose one of these, and then one of the free items.  Here are two of my favorites …

This is the “BIRTHDAY BASH BUNDLE

135318G

Birthday Bash Clear Bundle 135318
Price: $55.80
Love to give handmade birthday cards but don’t love to figure out what goes together? Then we have a bundle for you! Our Birthday Bash Bundle has the paper products, accents, and birthday stamp set. The bundle coordinates with the Bannières en folie Stamp Set for even more birthday fun! Available in wood-mount and clear-mount. Coordinates with the Banner Blast Stamp Set. You can add it for FREE at checkout, or you can choose any other Sale-A-Bration free item.Bundle includes:• Remembering Your Birthday Stamp Set
• 8-1/2″ x 11″ Whisper White Cardstock (40 sheets)
• Whisper White Medium Envelopes (40)
• 2013-2015 In Color Stampin’ Write Markers
• Whisper White Baker’s Twine
• Rhinestone Basic Jewels

Here is the “YAY FOR CARDS” BUNDLE … (my absolute favorite!)

135336G

Yay For Cards Bundle 135336
Price: $52.70
If you’re the kind of person who never has enough cards on hand but never has enough time to make a bunch, don’t despair! Our Yay for Cards bundle pulls together what you need to create loads of cards without spending loads of time. Bundle includes:• Happenings Simply Created Card Kit (makes 15 cards; envelopes included)
• On Its Way Simply Sent Kit (makes 8 cards; envelopes included)
• Thanks & Hello Wood-Mount Stamp Set
• Smoky Slate and Strawberry Slush Classic Stampin’ Pads
• Mini Glue Dots

I think they did a fantastic job at putting together these bundles … or card kits, as some would call them.  For those who have a hard time deciding what to get … this gives them everything they need to get stamping!  You can just click on the links (in pink) to get to my on-line store.

Now, on to my card share!  I did a fun little technique today with our “Decorative Dots” embossing folder … I colored it.  This is an easy, and fun technique that you can use on any of your embossing folders (and not as messy as some other coloring of folders).

000_0823

Roll your desired folder through your BigShot (or the new Texture Boutique) – then ink up your brayer with the ink color you want to apply onto your embossing.  Yes, we brayer over the embossing … don’t push to hard, you don’t want to flatten out your embossed images.

I began with “Garden Green” and inked up my brayer with “Tempting Turquoise” … then gently rolled the turquoise over the garden green embossed cardstock.  I was thinking alligator, and I thought the colors looked really fun together.

I stamped up my gator image with the Black StazOn and cut it out using the “Ovals Collection” framelits.  I also added a mat and popped it up with the Stampin’ Dimensionals.

Oh my … almost forgot to say that I pulled out my paper piercer and added some texture around the greeting.  Hmmm… next time I will use the template to do that straight line!  Then I popped it all up.

000_0826

To add a bit of contrast to the card … I simply added strips of black cardstock on to the card front.  I also added some Garden Green and Black strips to the inside … just for fun.

Thank you for stopping by my blog today.

See you later, alligator!

blog-closing-small

Sale-a-bration Inspiration & Weekly Deals …

Hello Stampin’ Friends,

Today I have a Sale-a-bration card share for you.  I’m using the creations from Stampin’ Up!s fabulous Concept Artists … and the blog “Get Inspired”.  Just in case you haven’t seen them, here they are:

https://i0.wp.com/www.stampinup.com/home/images/default-source/corporate-blog-posts/8-sab_cards.jpg

I am also posting a close-up picture of their cards.  I know some of you have a few of these Sale-a-bration items already, I’m sure these will inspire you!

Didn’t they do an awesome job!  I’d love to hear which one is your favorite!

Here are this weeks “WEEKLY DEALS” …

Weekly Deals

We hope you enjoy this week’s Weekly Deals!

Backyard Basics Framelits Dies Item # 129380
Regular Price: 24.95
Discounted Price: 18.71
Gold Metallic Encore Pad Item # 132141
Regular Price: 9.95
Discounted Price: 7.46
Basics Glimmer Brads Item # 121003
Regular Price: 4.95
Discounted Price: 3.71
Paper Doily Sizzlits Die Item # 125592
Regular Price: 21.95
Discounted Price: 16.46
Primrose Petals 3/8″ Stitched Satin Ribbon Item # 126844
Regular Price: 8.95
Discounted Price: 6.71
Summer Starfruit 3/8″ Stitched Satin Ribbon Item # 126846
Regular Price: 8.95
Discounted Price: 6.71
Season By Season Kit – Digital Download Item # 130060
Regular Price: 9.95
Discounted Price: 5.97

Please let me know if you have any questions, or need help with any of the items you saw here today.

Thank you for dropping by …

Have yourself a wonderful day.

blog-closing-small

Watercolor Birthday …

Hello Stampin’ Friends,

Another round of snow to deal with yesterday.  You just never know how big your driveway is until you have to shovel it … twice!  Well … if I look at the bright side, I did get some much needed exercise today 🙂

Today’s card share was inspired by a questions from my stampin’ friend Kathie.  She wanted to know what you would do with the “watermark” stamp in the “Happy Watercolor” stamp set.  So here’s one idea …

000_0795

I decided to do a rainbow effect with the stamp.  I chose Real Red, Elegant Eggplant, Pacific Point, Gumball Green and Daffodil Delight inks.  I did stamp off … after inking up my stamp, before stamping it onto my card front.

I think the hardest part of creating this card is keeping a straight line.  Once my watermarks were done, I chose the Happy Birthday stamp from the “Perfectly Penned” stamp set.

I matted it with Basic Black and added a black taffeta bow.  I did not realize until the card was completed and I was writing down my ingredients that I found out that ribbon is discontinued.  I think I will be sorting out my ribbons better this weekend!

I don’t like to use items that you cannot purchase, however you could substitute this ribbon for the pretty 1/8″ Black Taffeta or the 1/4″ Pacific Point Stitched Taffeta Ribbon.

000_0793

To finish off my card, I added my trusty rhinestones in the corner … colored black with a Sharpie.  It just anchors the card.

Hope you enjoyed today’s colorful watercolor birthday.  Stop back tomorrow for another card using the “watermark” stamp and “Happy Watercolor” stamp set.

Have a wonderful day ~

blog-closing-small

Here is a list of supplies used for today’s card …

 ITEM

 PRICE

 DESCRIPTION

128703

$16.95

 Happy Watercolor Stamp Set – WOOD

122892

$12.95

 Happy Watercolor Stamp Set – CLEAR

133188

$29.95

 Perfectly Penned Stamp Set – WOOD

133191

$21.95

 Perfectly Penned Stamp Set – CLEAR

119246

$4.95

 Rhinestones

Clicking on the item number will link you to my on-line store.  Thank YOU!