Just Sayin’… Two-day is Special

Hello Stampin’ Friends,

Today I have something special for you … two card shares and a treat.  Why you ask?  Well, today is my 200th blog post!  I am really excited to have shared my passion of stampin’, some of my travels, and even a bit of my home life & family with you.

Yesterday I shared a few of my favorite things from the new Occasions Catalog, and told you that I would create a cute card for you with the Just Sayin’ bundle.   In honor of my 200th post, I didn’t bake a cake, but I have BLOG CANDY!  Keep reading …

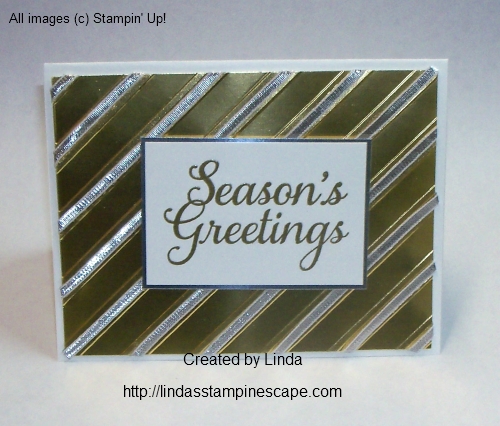
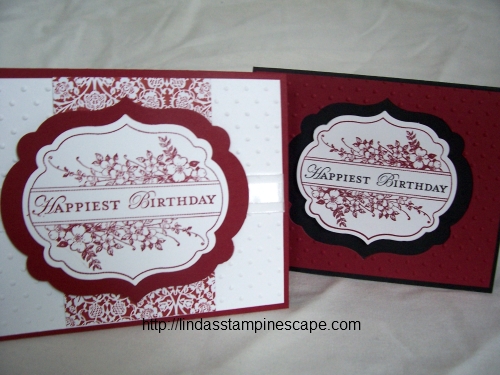
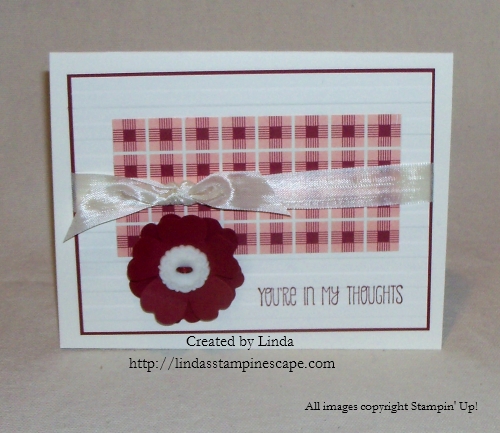
The first is with the beautiful “Watercolor Wonder Designer Series Paper” …

000_0573

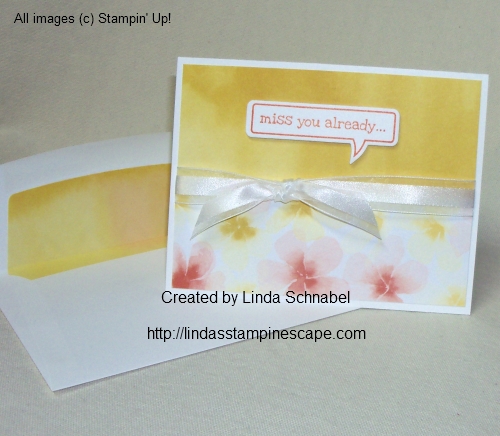
The card is sweet and simple to make.  I used two different patterns from the “Watercolor Wonder” designer paper.  The patterns coordinates perfectly so it’s easy to pick 2 to pair up.  Then, I simply stamped the “miss you already” greeting from the Just Sayin’ stamp set in Tangerine Tango, and cut it out with the coordinating “Word Bubble” framelits.

Ahh yes, and I must not forget the beautiful “Organza Ribbon“.  I keep at least 2 rolls on hand at all times because it works so nicely on a number of different styles of cards.

So, how are you liking the Just Sayin’ stamp set so far?  And how about the coordinating framelits?  No cutting … I love that!

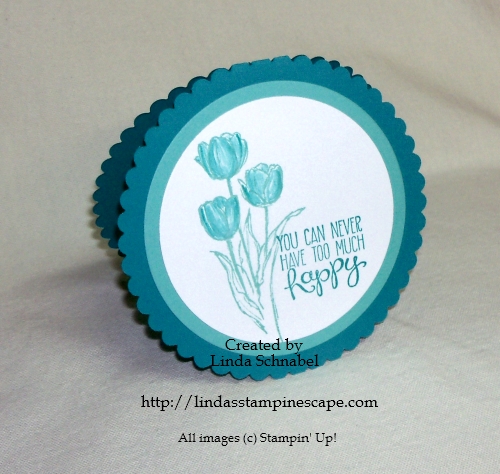
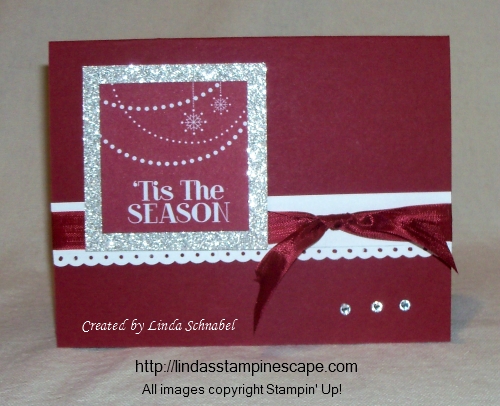
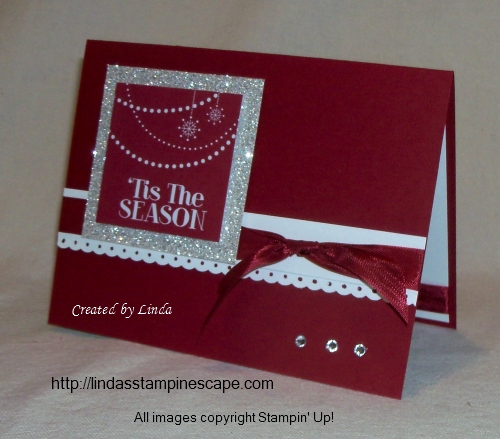
OK … on to the next card.  With Valentine’s Day coming up, I just wanted to say “Love Ya”!

000_0578

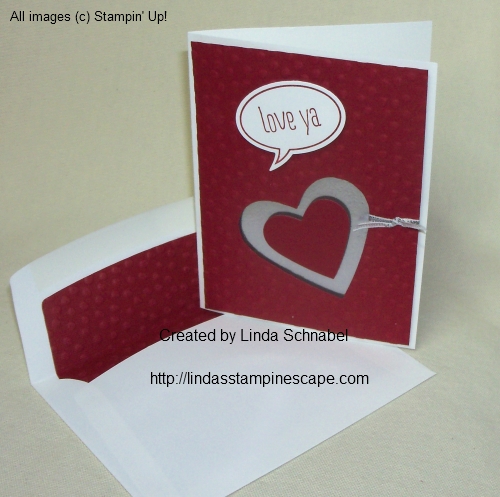
Oh my, it appears as if I have another “SNEAK PEEK” … this time it comes from the upcoming Sale-a-Bration Catalog!  The texture you see on the card comes from the “Decorative Dots” Embossing folder in the Sale-a-bration catalog.  (I am currently booking “stampin’ parties” if you’d like to get you folder and more for free… contact me).

Once I textured the cardstock for the card and coordinating envelope, I used the “Hearts Collection Framelits” to create the focal point of the card – the hearts.

I wanted to add a bit of “zing” to the card, so instead of leaving the background of the heart plain, I simply dabbed my “Versamark” onto the white cardstock, then heat embossed it using silver embossing powder and our spiffy new heat gun.  Did you know it has two temperature settings?  One is for drying … the other is for embossing!

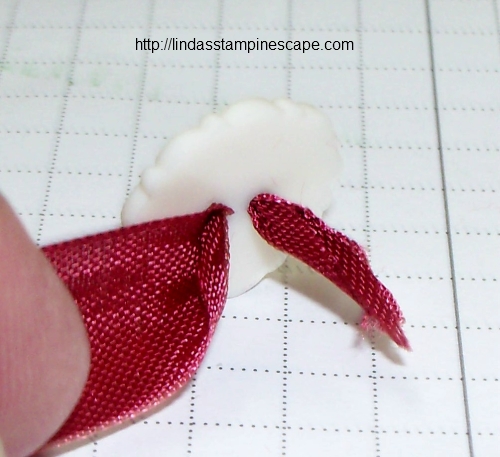
What better greeting from the Just Sayin’ stamp set goes better with hearts than “Love Ya”.  I used Cherry Cobbler for both the ink and cardstock.  I then finished it off with a cute little bow made with the Silver Ribbon.

Both of the cards have coordinating envelopes.  These were created with the use of the “Envelope Liner Framelits“.  I think it adds such a nice touch when sending your hand stamped cards.

000_0573  000_0578

OK … Now how do you like this dynamic duo – the Just Sayin’ Bundle?  Well, I love them.  In fact, I love the stamp set so much (and because we’re celebrating my 200th post) I’m giving away a “Just Sayin’ Clear Stamp Set“!!  That’s right … BLOG CANDY!

000_0581

All you have to do is comment on what “you” think about this duo!  One name will be randomly chosen on Monday night at midnight (central time) … and then I’ll post the winner on Tuesday.  You will have 24 hrs to send me your contact information (lindaluvs2stamp@aol.com) so I can get your stamp set out to you!  Good Luck … and thanks for following my blog!

Thanks for stopping by today!

blog closing-small

Here is a list of supplies used for today’s card …

 ITEM

 PRICE

 DESCRIPTION

134819

$43.95

 Just Sayin’ Bundle (Save 15%) – WOOD

134820

$37.95

 Just Sayin’ Bundle (Save 15%) – CLEAR

132994

$10.95

 Watercolor Wonder Designer Series Paper

132172

$26.95

 Envelope Liner Framelits

Clicking on the item number will link you to my on-line store.

Circle me happy …

Hello Stampin’ Friends,

As I said yesterday … I would make you a card from some of the items listed in the “Weekly Deals.”

Today’s card will feature the “Circles Collection Framelits” and the “Bermuda Bay Ink Pad“.  You will also get a “Sneak Peek” from the the New “Blessed Easter” stamp set!  Available January 3rd … tomorrow!!

Circles Collection Framelits Dies

Circle Collection Framelits Dies
Item # 130911
Regular Price: $26.95
Discounted Price: $20.21

Bermuda Bay Classic Stampin' Pad

Bermuda Bay Classic Pad Item #131171
Regular Price: $5.95
Discounted Price: $4.46

I have always wanted to make a “Circle” card, and since I was featuring the Circle framelits, I thought… “no better time than the present!”  What do you think?

000_0565B

I used the Bermuda Bay and Coastal Cabana cardstock and inks.  To create the circle card, you begin with a “folded” piece of cardstock.  Align your circle die (here I used the largest, which is the scallop) above the fold.  This will give you a folded card.  If you place it under the fold… you will end up with 2 circles.  Next, I layered the colors by size so I would end up with the white center.

I then inked up the flower from the “Blessed Easter” stamp set (in the new Occasions catalog) with the Coastal Cabana ink … “omitting” the greeting.  The greeting on today’s card comes from the stamp set “Yippee Skipee” found on page 37 of the main catalog.

000_0566

To complete my card and add a bit of dimension, I used my blender pen and added some of the Bermuda Bay color into the tulips.

Thanks for stopping by today.

Have an awesome week!

blog closing-small

Here is a list of supplies used for today’s card …

 ITEM

 PRICE

 DESCRIPTION

130911

$20.21

 Circle Collection Framelits

131171

$4.46

 BermudaBay Ink Pad

131197

$6.95

 BermudaBay Cardstock

131341

$18.95

 Yippee Skippee Stamp Set – WOOD

131344

$14.95

 Yippee Skippee Stamp Set – CLEAR

102845

$9.95

 Blender Pens (Set of 3)

Clicking on the item number will link you to my on-line store.

Happy Valentine’s Day …

Hello Stampin’ Friends,

Brrrrrrrrrrrrrrrrr …. it’s cold outside!  Woke up to minus 11 yesterday, and not much better today and it’s been topped off with some snow!

Glad to see you came back to check out what I did with that extra heart!  Well, it’s a super simple Valentine’s card.

000_0545

I grabbed my “Season of Style” Washi Tape … also from the Holiday catalog, and simply created lines  across on my card.   Washi tape is so fun and easy to use.  I secured the left side behind my card base, then brought it “through” the heart, so it was under one side and over the other!

Next I took the “Small Heart Punch” and punched 3 hearts out of the Silver Glimmer Paper.  Then I aligned all 3 hearts down the side of the card.  Each of the silver glimmer hearts were “popped” up using the Stampin’ Dimensionals.  I’ve just got to add that dimension!

Next, I dug out my trusty … “Tiny Tiny Wishes” stamp set and added my Valentine’s greeting directly under the washi tape.  Can’t get much easier than this!  Quick, Simple & Cute!

000_0547

Thanks for stopping by today… sniff, sniff (wiping away tear) … this is my last post this year.  See you next year.  I will have so much more to share with you in 2014.

I want to “Thank You” for following my blog this past year … I was amazed to see that I have 12000 hits in only 6 months of blogging.  My blogger friends tell me that’s “pretty darn amazing”.  I say … I have amazing stampin’ friends!  Again, Thank You!

I wish you a very Safe and Happy New Year!

blog closing-small

Here is a list of supplies used for today’s card …

 ITEM

 PRICE

 DESCRIPTION

125599

$26.95

 Hearts Collection Framelits

132155

$4.95

 Season of Style Washi Tape

117193

$5.95

 Small Heart Punch

124005

$4.95

 Silver Glimmer Paper

128748

$36.95

 Teeny Tiny Wishes Stamp Set – WOOD

127802

$26.95

 Teeny Tiny Wishes Stamp Set – CLEAR

Clicking on the item number will link you to my on-line store.

Countless Sayings ….

Hello Stampin’ Friends,

 Today I am going to share with you a bit of being a demonstrator.  No, it is not a scary word, in fact …. It’s a whole lot of fun, and sharing!  I’ve got the pictures to prove it 🙂  Just keep reading …

As demonstrators we receive sneak peeks at the catalogs and we’re able to pre-order stamps and accessories!  We also have in our stampin’ community many, many resources for samples…

 There is the “Stampin’ Connection’s Stamper’s Showcase” were demonstrator’s share their cards, scrapbook pages, and projects with each other. There are currently over 337,000 samples in the gallery!

 We also have our “Stampin’ Success” magazine that is loaded with samples, instructions, and great tips for running your business.

Today I am going to share with you some of the wonderful projects in our latest copy.  The “star” of these projects is the “Countless Sayings” Stamp Sets 1 and 2… the latest in our photo-polymer stamps. 

  countless-sayings-blog

So get a cup of coffee, sit back and enjoy the beautiful projects ….


COUNTLESS SAYINGS CARDS

There are quite a few, so take your time looking them over.  I love how quick and easy these cards are to make, with our busy lives it’s nice to be able to create something so cute, so quickly!

 Cards_LG

Stamps

Countless Sayings 1 Photopolymer Stamp Set
Countless Sayings 2 Photopolymer Stamp Set

Paper
Whisper White Cardstock

Ink
Bermuda Bay Classic Stampin’ Pad
Calypso Coral Classic Stampin’ Pad
Crisp Cantaloupe Classic Stampin’ Pad
Pink Pirouette Classic Stampin’ Pad
Pistachio Pudding Classic Stampin’ Pad
Smoky Slate Classic Stampin’ Pad
Jet Black StazOn Pad

HANGING HEARTS

This is actually on the cover … and I must say, great minds think alike!  I was thinking of hanging hearts in the candy store window for Valentines Day… I am adding some in glimmer paper too.

HangingHearts_LG

Stamps

Countless Sayings 1 Photopolymer Stamp Set
Countless Sayings 2 Photopolymer Stamp Set
Dictionary Stamp

Paper
Calypso Coral Cardstock
Crisp Cantaloupe Cardstock
Pink Pirouette Cardstock
Smoky Slate Cardstock
White Vellum Cardstock
Subtles Designer Series Paper Stack

Ink
Calypso Coral Classic Stampin’ Pad
Smoky Slate Classic Stampin’ Pad

Accessories & Tools
Stampin’ Dimensionals
Brayer
Full Heart Punch
Big Shot
Hearts Collection Framelits Dies
White crochet thread

I hope you enjoyed these beautiful projects, I look forward to sharing more ideas with you. 


If I have peaked your interest in the joining our fabulous stampin’ family … CLICK HERE!  Refill your coffee and watch this video.


Thanks for stopping by, and have a wonderful day.

blog closing-small

Silver and Gold Greetings …

Hello Stampin’ Friends,

OK … so how many of you did I stump with my “Stay Gold” comment or wonder who the heck Johnny and Ponyboy were?  It’s from the movie “The Outsiders” …

The Outsiders is a 1983 American drama film directed by Francis Ford Coppola, an adaptation of the novel of the same name by S. E. Hinton (taken from Wikipedia)

Outsidersposter.jpeg

The film is noted for its cast of up-and-coming stars, including C. Thomas Howell (who garnered a Young Artist Award), Rob Lowe, Emilio Estevez, Matt Dillon, Tom Cruise, Patrick Swayze, Ralph Macchio, and Diane Lane.

Ponyboy Curtis was played by C. Thomas Howell and Johnny Cade was played by Ralph Macchio… the main characters in the film.  I like this movie and watch it whenever it’s on.  It truly launched the careers of many of it’s cast.

Today’s card share …

000_0436

Staying with the “gold” theme … I followed the same technique as yesterday, embossing the gold foil sheet but I used the “Stylish Stripes” emboss folder on today’s card.  Then I secured the beautiful “Silver 1/8″ Ribbon” along the double stripes to create a cool effect.

I promise I won’t go into the background of the holiday song … Silver and Gold sung by Burl Ives.  However, I will ask … do you know what movie that hails from???

Keeping my card simple … I just added the “Season’s Greeting” greeting from the “Joy to the World” stamp set.  Again, I heat embossed it with gold emboss powder, then backed the greeting with the Silver Foil paper.  The base of the card is Whisper White.

Many of the items used for this card are found in the Holiday catalog, and you can view by clicking on any of the “highlighted” words.

000_0440

Have a great day ~

blog closing-small

Here is a list of supplies used for today’s card …

 ITEM

 PRICE

 DESCRIPTION

 132622

$3.95

 Gold Foil Sheets

 132174

$7.95

 Stylish Stripes Impressions Emboss Folder

 131796

$21.95

 Joy to the World Stamp Set – WOOD

 131799

$16.95

 Joy to the World Stamp Set – CLEAR

 132137

$4.95

 Silver 1/8” Ribbon

 132178

$3.95

 Silver Foil Sheets

Clicking on the item number will link you to my on-line store.

Simplicity is Golden

Hello my Stampin’ Friends,

A happy Monday to you all.  Today’s card share began with a just a thought …. something simple.

So many of us have busy, busy lives, yet we still want to show how much we care by sending hand-stamped cards, right?  So here’s my simple solution ….

000_0428

I used the beautiful Gold “Foil Sheets” and simply rolled them through the Sizzix BigShot with the “Petals-a-Plenty” embossing folder.  The foil sheets are single sided and come 2 – 12 x 12 sheets for only $3.95!  You can do 12 cards with just 1 package!

The base for the card is “Very Vanilla” … and to give it that truly “Old Fashioned” look, I tied a pretty “Victorian – 5/8″ Crochet Trim” bow.  I thought it helped to tone down the gold just a bit, and maintain the beauty of the card.

The greeting “Deck the Halls” comes from the stamp set “Christmas Messages” which is found in the Holiday catalog and is ON SALE!  It was heat embossed in Gold, but if you wanted a quicker method … just stamp the greeting using the “Gold Metallic Encore Pad” found in the Holiday catalog.

000_0424

Finally, I simply punched out the greeting with the 2  1/2″ Circle punch.  I know many of you have this punch after we created our “flip cards” in class.

Remember, by clicking on any of the highlighted items, you can see what they look like.  Thank you.

Have a wonderful week …

and as Johnny said to PonyBoy … “Stay Gold”.

blog closing-small

Here is a list of supplies used for today’s card …

 ITEM

 PRICE

 DESCRIPTION

 132622

$3.95

 Foil Sheets – GOLD

 131790

$28.95

 Christmas Messages – WOOD

 131793

$20.95

 Christmas Messages – CLEAR

 120906

$16.95

2 ½” Circle Punch

 106824

$7.95

Petals-a-Plenty Embossing Folder

 108481

$4.95

 5/8” Crochet Trim – Victorian

Clicking on the item number will link you to my on-line store.

Wishing you Joy …

Hello Stampin’ Friends,

I hope you had a wonderful weekend.  I’m sure many of you are busy getting ready for your Thanksgiving celebration, and upcoming holiday season.

Today I would like to share with you a card you can create so simply with the “Oval Collections Framelits”.

They were a must have on my list because I think they compliment your scrapbooking so well.  Funny thing is … I use them on my cards so much more!

000_0401

I sized the first oval based on the greeting, then used it to cut out the Winter Frost Designer Paper.  The greeting was then stamped with Island Indigo directly onto the card base.

The Island Indigo ring around the greeting is actually a piece that was double cut … the first piece was used as a mat for another card.

To complete that card I added the beautiful “Frosted Finishes” Embellishment.  It coordinates so nice with the design on this paper and adds that bit of “bling” you like for the holidays.

000_0404

Thanks for stopping by …

blog closing-small

Here is a list of supplies used for today’s card …

 ITEM

 PRICE

 DESCRIPTION

 129381

$26.95

Ovals Collection (Framelit) Die

 131796

$21.95

 Joy to the World – WOOD

 131799

$16.95

 Joy to the World – CLEAR

 132183

$6.95

 Winter Frost Designer Series Paper Pack

 132150

$6.95

 Frosted Finishes Embellishments

Clicking on the item number will link you to my on-line store.

Hope is beautiful …

Hello Stampin’ Friends,

I hope you had a wonderful weekend.  Mine was good … I had one of my Technique Club groups this Saturday morning.  I was asked if I had the stamp set “Blooming with Kindness”, my response was … “why yes I do”.  So today’s card share is a card that I created using this beautiful stamp set.

000_1383

The card itself is quite simple to create.  I began by inking up the flower image with VersaMark™ and then heat embossing with “Clear” Embossing powder.  Once embossed, I inked up a sponge dauber with Pink Pirouette ink and applied it over the clear embossed flower.  The flower appears magically, and gives the card a soft glow.

I paired up the Pink Pirouette with Early Espresso … the stark contrast of colors blend so beautifully together.  I didn’t want to stamp on the Espresso but I thought that it still needed something.  That something was texture … so I used the Delicate Designs Embossing Folder and ran the lace scallop down the side.

The word “Hope” is part of the “Blooming with Kindness” stamp set, and is part of the reason I bought it.  I love the greetings and the font… so pretty.  I used the Large Oval punch for the greeting and the Scallop Oval to mat our greeting.

000_1383

This card was a Make -n- Take from one of my Star’s Meeting, I was showcasing embossing techniques.  This is a form of the “Emboss Resist” technique.

Sandy my friend… so this is the card I created with the stamp set, I hope you and the rest of my readers enjoyed it.

Thank you so much for stopping by.  Have a great week!

blog closing-small

Here is a list of supplies used for today’s card …

 ITEM

 PRICE

 DESCRIPTION

 131961

$19.95

 Blooming with Kindness – WOOD

 126422

$14.95

 Blooming with Kindness – CLEAR

 102892

$15.95

 Sponge Daubers

 127023

$11.95

 Delicate Designs Embossing Folder

 119855

$19.95

 Large Oval Punch

 119856

$26.95

 Scallop Oval Punch

Clicking on the item number will link you to my on-line store.

Making Christmas cards & gifting a breeze…

Hello my stampin’ friends,

Today I wanted to share with you a few items that I think may make your holiday’s go a bit smoother.

If you really wanted to send those “hand-stamped” cards this year (cuz we ran out of time last year) … I have the perfect solution:

The Holly Jolly Greetings Simply Sent Kits will help you achieve your goal, and how cute are these!

132159L

Holly Jolly Greetings Simply Sent

132159

Price: $14.95

Create oodles of cards quickly and easily with the Holly Jolly Greetings Simply Sent kit. Materials for 12 holiday photo cards: printed cards with die-cut photo notches, note card for handwritten or printed message, closure stickers. Finished card size: 5″ x 7″. Acid free, lignin free.

When it comes to gift giving, nothing is quicker or cuter than our boxes all dolled up.  I must admit, I have a soft spot for the first one with the window … we used this at our holiday retreat to store gift tags.  Now you can bundle and save!

Tag It Bundles 20% OFF

Our two Tag It bundles include the tags, the ribbon, and the boxes to make your own pretty packages.

Item

Description

Price

Includes

135811

Holiday Tag It Decorative Box Bundle

$19.95

  • Stamp a Tag Kit
  • Cherry Cobbler 1″ Stitched Edge Grosgrain Ribbon (10 yards)
  • Decorative Window Gift Boxes (6 boxes)

135812

Holiday Tag It Extra-Large Box Bundle

$18.95

  • Stamp a Tag Kit
  • Cherry Cobbler 1″ Stitched Edge Grosgrain Ribbon (10 yards)
  • Extra-Large Gift Boxes (3 boxes)

The two Holiday Tag It Bundles are only available October 29 – November 19, 2013.

Have an awesome Thursday!

blog closing-small

Tis the Season for Sweet & Simple …

Happy weekend stampin’ friends!

Another weekend is upon us … it seems the days are just flying by so fast.  Hard to keep up sometimes!  I’m sure you feel the same way.

As I was sitting at my stampin’ table thinking of what I was going to create for you, I thought … “it’s got to be quick & simple”.  A pretty card, that’s easy to make.  So here is what I came up with …

000_0348

I first saw the stack of tags sitting on my table from the “Season of Style Designer Journaling Tags” in the Holiday catalog.  There are 35 die-cut, printed tags that were created to just slide into the divided page protectors and coordinate with the Seasonal Stripes Album.  I thought … why just for scrapbooking!  I need a card and I need it fast!

132808S 132259S

I picked the “Tis the Season” and matted it with our “Silver Glimmer Paper”… who doesn’t love a little glitz for the holidays.  I wanted to add a bit of Whisper White to my card, to pull out the white on the tag.  It looked OK, but I wanted that extra touch, so I added a strip punched out with the “Dotted Scallop Ribbon Border Punch“.

000_0351

Next I added my ribbon just because I wanted ribbon … and I thought it “tied” the card together.  Get it … “tied” – ha ha… my granddaughter is rolling her eyes, she didn’t think it was funny 🙂  Guess I’ll keep my day job and not run off to be a stand up comedian.  Back to the card … I also added a strip of ribbon to the inside of my card just to jazz it up a bit.

To finish off the card and create a nice balance, I added another touch of glitz, the 3 rhinestones.   So simple … so pretty, and that’s how we want to make our holiday cards.

Thanks for stopping by today.

Enjoy your weekend!

blog closing-small

Here is a list of supplies used for today’s card …

 ITEM

 PRICE

 DESCRIPTION

 132808

 $4.95

Season of Style Designer Journaling Tags

 124005

 $4.95

Silver Glimmer Paper

 119275

 $15.95

Dotted Scallop Boarder Punch

 120992

 $6.95

Cherry Cobbler Seam Binding

 119246

 $4.95

Rhinestones

Clicking on the item number will link you to my on-line store.  Thank you!

Sweater Weather Thank You …

Hello to all my Stampin’ Friends today,

The chill is on, on this first day of November… our high today should peak at around 47 degrees.  That may be warm for some of my followers.

My card share today is a warm “Thank You” created with the help of the “Sweater Weather” Designer Series paper.  If you click on the highlighted link … you can view the designer paper.  For those of you who follow daily, you know that I have used this designer paper quite a few times already.  Today’s actually has that “sweater” feel …

000_0346

I chose the sweater pattern paper because the color “Tangerine Tango” adds such warmth to the card.  Using the designer papers really makes creating card so easy.  The color combinations are already there and the diversity of the patterns make it fun to work with.

Since banners are so “hot” right now, and they make for a quick and easy card, I have used them today.  The espresso piece also comes from the Sweater Weather designer paper, and of course our “Burlap Ribbon” makes quite a statement!  The combination of these two products really gives the card that rustic feel … and it adds great texture.

Since I was going for the more rustic look, I wanted to add an element to the card that would also give the appearance of securing my banners (can’t just have them flying around… we want that “manly” look).  So I chose the “Candy Dots” from the Neutrals Collection … I think they look like rivets!   They are adhesive backed so you can apply them directly to your project, or … you can used them with the coordinating Candy Dots Brad Bases (sold separately) to create your own 3/16″ colored brads!

000_0345

Last but not least is our greeting… Thank You, which comes from the “Perfectly Penned” stamp set – don’t you just love it.  This was one of those stamp sets that when I opened the catalog … I just had to have.  I love the beautiful font, and have used it on so many different styles of cards.  I think it adds the perfect touch to finish off today’s card.

I hope you enjoyed today’s card share … stay warm, and thank you for stopping by!

Have a beautiful Friday,

blog closing-small

Here is a list of supplies used for today’s card …

 ITEM

 PRICE

 DESCRIPTION

 128703

 $16.95

Perfectly Penned – WOOD

 122892

 $12.95

Perfectly Penned – CLEAR

 130934

 $5.95

Candy Dots: Neutrals Collection

 132140

 $7.95

Sweater Weather Designer Paper

 132140

 $7.95

Burlap Ribbon

Clicking on the item number will link you to my on-line store.  Thank you!

“You’re In My Thoughts” card and more …

Hello stampin’ friends …

Today is our last day to order any of the 25 pre-selected stamp sets at a 25% discount.  I will be sharing several cards with you from some the stamp sets in this list, so the post is a bit longer than usual, but you will want to stick around for the  a “featured stamp set” …. A Dozen Thoughts.  I have created a special card for you today with this very versatile greeting stamp set.

DemoHeader_25for25_demo_October22-28_NA

Let’s begin with my “Best Friend” card from the Label Love stamp set.  This card also features 3 of the new In-Colors: Pistachio Pudding, Strawberry Slush, and Coastal Cabana.

Label Love –101_1260

Next I have 2 birthday cards that I created when the Apothecary Art stamp set first came out.  The second card with the “Cherry Cobbler” background was created with the left-over piece of card stock from cutting the mat for the first card.  Ahhh … we stampers let nothing go to waste.

Apothecary Art –000_1107

“For You” card featuring the “Gorgeous Grunge” Stamp Set:000_0176

Gorgeous Grunge!!! page 109 / Clear – 130517 $13.46 / Wood – 130514 $18.71

GORGEOUS GRUNGE

How am I doing so far?

Are yo ready for another sample?  Ok … my next card is from the “Gently Falling” stamp set.  This is one of the cards that my technique club made last year when they learned the “Faux Tile” technique.

100_5947

Gently Falling  – pg 65 / Clear – 123804 $21.71 /  Wood –128430  $29.96

123804L

Ok … I think it’s time to share my featured card / stamp set …  First the stamp set!

A Dozen Thoughts – pg 59 / Clear – 131059 $14.21 / Wood – 131056 $20.21

131059L

Now the card … Simple but pretty.

000_0332

I began with Very Vanilla cardstock, and the “Birthday Basics” Designer Series Paper.  I thought this pattern was cute for a simple style of card.

Next, I stamped the “You’re in my Thoughts” greeting onto the cardstock … yes stamped, before I ran it through the Bigshot with the “Stripes” Folder.  Just make sure your ink is dry before putting it into your folder.  If it does get ink on it, just be sure to clean off the folder before your run another one through.

The flowers were created with the “Pansy” punch… punch 2 flowers.  The bottom flower is curled under and the top flowers petals are curled up.  You can use a bone folder to curl or a pencil.  There are dimensionals between the two punched flowers and to pop it off the card.

I chose the “Very Vintage Designer Buttons” for the center of my flower.  There are three different styles in the buttons, I used one of the two 3/4″ buttons.  I wanted to thread something through the holes of the button, but didn’t like the Bakers twine because it is white, and I was working with vanilla.

000_0327

So… yesterday I told you how easy the Seam Binding is to use, so not only did I use it for my bow, I threaded it through the button.  If you make a nice pointy end on your seam binding, it will pull through nicely.  I then just cut off the edges and secure the ribbon to the button, and the button to the flower with the “sticky strip”… it holds awesome!

000_0331

Any words that are highlighted in pink, will take you to my on-line store to view or purchase … just click on them.

If you would like to view the entire list of 25 stamp sets on sale at 25% OFF, click directly on the flyer below

Humongous_List_of_Stamps_on_Sale_NA_th

While I have you here… I wanted to share that the opportunity to purchase select single markers (including the new color kit) will end on October 31st.  Here is the list …

6a00d8354941d869e2019affbcf4c2970b-500wi

Please let me know if you have any questions or need help.

Have an awesome day!

blog closing-small

Warmth & Wonderful Christmas Greetings …

Hello Stampin’ Friends,

I hope you are having a wonderful weekend!  I have another Christmas card to share with you today.  I guess my mind is just on Christmas these days … I’ve been placing candy orders at work (for Christmas) and I’m preparing for my Holiday Retreat at home, so … Christmas, Christmas, Christmas.  I don’t mind, it’s quite fun.

I did however have a bit of a break today as our town celebrated Trick or Treat.  I had an Alien invasion … and he brought his kitty along!  lol …  It is my youngest grandson Isaiah and his sister, Hailey.

000_0307-small

Here is my little alien revealed… A bit of a shock for Hailey I see!  Makes for good scrapbooking captions, doesn’t it!!

000_0308-small

We didn’t have too many trick or treaters, so as I was busy designing cards (Eileen was cutting) … I set the bowl of candy out and let them have fun!  To my surprise, there was still candy remaining in the bowl.

Now … on to today’s card share.  It is a simple card but heck, when you have to make a bunch of cards, simple is the way to go.

I started with a Whisper White base, then embossed the next layer of Whisper White with the “Northern Flurry” Embossing Folder.  I love the way layering white on white looks.

000_0316

Believe it or not, the strip of designer paper was a scrap piece left from my club cards this month.  It comes from the “Season of Style” paper pack in the Holiday Catalog.

I then topped off the designer paper with the “Cherry Cobbler Seam Binding” … this is one of my favorites for ribbon.  The seam binding lays nicely and ties so easily.  One tip though … when tying your bow, don’t pull from the ends because it frays easily, grab it closer to the knot.

I looked around a bit for a greeting that I thought would like nice with this card… then I found it in the “Warmth and Wonder” stamp set.  This is a Hostess set from the Holiday catalog.

000_0317

You can your “Warmth & Wonder” Stamp set for free with qualifying sales / order of $150 or more.

131883L

Ask me how you can do an on-line party (lindaluvs2stamp@aol.com) then we’ll get you this set and more for free!  We all need supplies for our Christmas cards, so get in touch with your friends and let’s get together!

Enjoy the rest of your weekend,

blog closing-small

Here is a list of supplies used for today’s card …

 ITEM

 PRICE

 DESCRIPTION

 131880

 Hostess

Warmth & Wonder – WOOD

 131883

 Hostess

Warmth & Wonder – CLEAR

 120902

 $7.95

Northern Flurry Emboss Folder

 132181

 $6.95

Season of Style Paper Pack

 120922

 $6.95

Cherry Cobbler Seam Binding

Clicking on the item number will link you to my on-line store.

Naturally Amazing Specialty Paper …

Hello Stampin’ Friends,

Hope you had a wonderful weekend!

Today I’d like to share with you the amazing “Natural Composition Specialty Paper” … and 2 very different ways to use this versatile product.  The designer paper comes with 2 sheets each of 6 single sided designs – no need to chose between sides on this one!  The patterns on the “Natural Composition Specialty Paper” have raised, shiny images, as if they were embossed.

Our first card is a super simple card with just a little surprise.

000_0297

It’s time to take out your brayer again… you can actually brayer any color onto this specialty cardstock, we used the Cherry Cobbler, and because the pattern is a clear emboss, the natural background comes through.

We added a simple tag with the “Vintage Trinkets” and pinned it to the beautiful “Victoria Crochet Trim”.  Sometimes simplicity is more beautiful than all that layering.  This is a perfect card when you need something quick, but want a touch of elegance.

Our next card is equally simple … just stamp and emboss.  Yes, you can emboss on this wonderful cardstock.

000_0293

The flowers come from the “Serene Silhouettes” stamp set and are embossed in gold.  The birthday greeting comes from the stamp set “Perfectly Penned”.  I love the natural tone of the card.

If you don’t have your package of  “Natural Composition Specialty Paper” … you may want to stock up, because it can be used for so much more.  I just wanted to show you two of my favorite techniques on this paper.

Here is a list of supplies used for today’s card …

 ITEM

 PRICE

 DESCRIPTION

 126917

 $12.95

Natural Composition Specialty Paper

 132073

 $24.95

Serene Silhouettes – WOOD

 127324

 $17.95

Serene Silhouettes – CLEAR

 128703

 $16.95

Perfectly Penned – WOOD

 122892

 $12.95

Perfectly Penned – CLEAR

 109129

 $4.75

Gold Embossing Powder

 129053

 $29.95

Heat Gun

 102395

 $12.95

Brayer

 118764

 $5.95

Vintage Trinkets

 118481

 $6.95

Victoria Crochet Trim

Clicking on the item number will link you to my on-line store.

Thanks for stopping by …

Have a great week!

blog closing-small

TWO 4 TUESDAY: Scrapbook page & Fun Technique!

Hello Stampin’ Friends,

I missed you yesterday.  I was off catching up with friends, preparing for my upcoming Holiday Retreat, and just life in general.

So, today I will share 2 projects!  First is a Fall Scrapbook page, and the second is a fun technique that I shared with my clubs last year.

My fall page is all about the beautiful colors of fall.

100_5941

The leaves were created with the “Autumn Accents” Bigz die (127812) found on page 192 of our annual catalog.  This die makes collecting leaves quick and easy.  You will also see the “textures” on some of the leaves … a little roll through the BigShot with the “Perfect Polka Dots” embossing folder and the Core’dinations (129956 / pg.157) sandable cardstock – Neutrals collection.  Yep, a little sanding highlights the texture by exposing the core color which is lighter than the outer layers.  Simple to make … just add your pictures and some journaling and you have another page done!

My second project is a cute fall card using the “Faux Tile” Technique:

100_5947

I did create this card last year.  If you have not noticed, we have discontinued the glossy cardstock – which I used here.  If you don’t have any left in your stash … go to any office supply store and purchase the glossy photo cardstock, it works the same.

You will need the “Simply Score” Scoring Tool (122334 / pg.178) for this technique.  By using the  glossy cardstock, you eliminate a couple of steps from the original “Faux Tile” technique.  Cut your cardstock to the desired size for your card.  Place onto “Simply Score” tool and score every 1/2 inch.  Turn carstock 45 degrees (on it’s side) and score every 1/2″ creating a tile pattern.  Now, just simply stamp your images onto the card.  I used the “Gently Falling” (pg.65) stamp set.  My final step was to brayer over the entire piece … careful not to push too hard, you want your “grout” lines to show.

If you don’t have access to the glossy … you can use our Whisper White, score, and stamp, the next step would be to lightly tap your VersaMark pad onto the tiled area (Not too hard … you don’t want VersaMark in the creases).  Then emboss with clear embossing powder.  This will give you a that real tile / grout look!  Just takes a bit longer than the “simple version” described above, but stands out a bit more.

I’d love to hear what you think about this technique.

Thanks for stopping by … I will be back tomorrow with another fun project.

blog closing-small