Scrapbooking: More than a hobby … Perfect for Gifting

Hello Stampin’ Friends ~

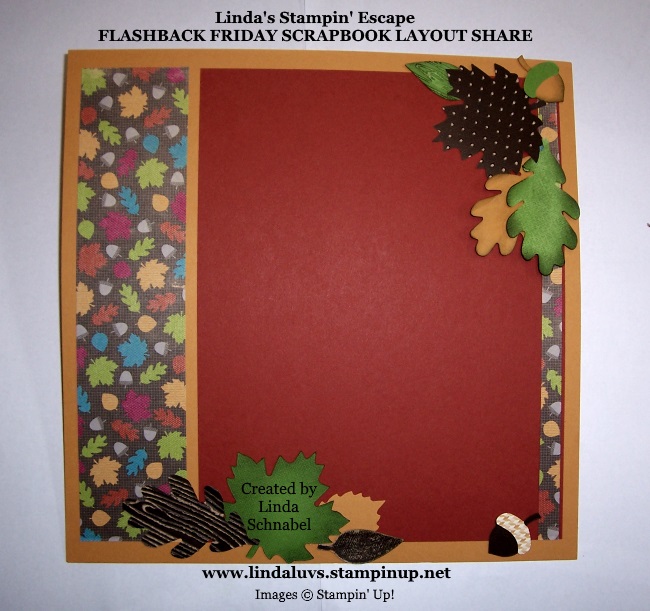
Scrapbooking is more than just a hobby; it’s a beautiful way to preserve those cherished memories and create something truly special for loved ones. Recently, I found myself looking for the perfect gift for my friend’s daughter on her wedding day. I wanted to give her something that would capture the essence of her special day and allow her to look back on it for years to come. That’s when I decided a personalized scrapbook would be the perfect choice.

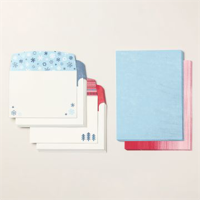
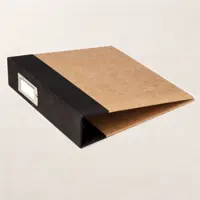
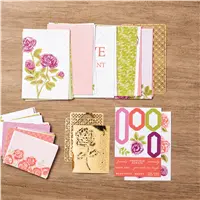
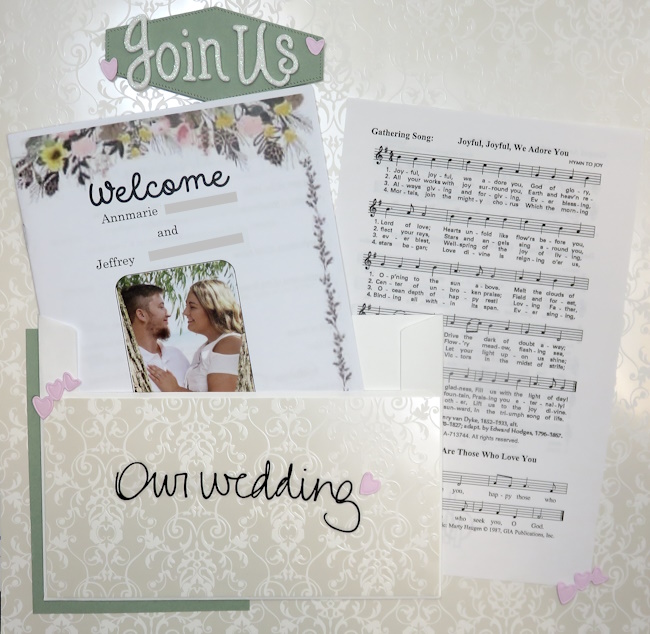
I chose to make the book truly unique, I added the couple’s names to the front cover. This simple touch instantly made it more personal, a keepsake that they could treasure forever. When I opened the scrapbook to start working on the first page, I found myself inspired by their wedding invitation. The delicate details and the soft colors were a perfect starting point. I incorporated elements from the invitation, using it as a background to set the tone for the rest of the book.

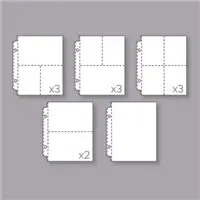
To add a bit of whimsy and love, I included little pink hearts, which I cut using the Wanted to Say Dies. These hearts added a sweet and romantic touch to the page, perfectly capturing the feeling of the day. On the following pages, I used the Nested Essentials Dies to frame the most important moments. These dies are perfect for highlighting those precious memories and giving them the attention they deserve.

Scrapbooking is a wonderful way to tell a story, to relive special moments, and to create a keepsake that will be treasured for years. Whether you’re celebrating a wedding, a birthday, or any other special occasion, a scrapbook allows you to preserve those memories in a way that is both creative and personal. If you’ve never tried scrapbooking before, now is the perfect time to start. It’s not just about placing photos on a page; it’s about creating a narrative, capturing emotions, and making something that will be cherished forever.

I will be sharing more inspiration so, I’m hoping you’ll give it a try! You can create a scrapbook for a friend, a family member, or even for yourself. You’ll find joy in the process, and the result will be a beautiful reflection of the moments that matter most.

Thank you for joining me today!

Try 3-D Scrapbooking to Enhance your Photos!

Hello Stampin’ Friends,

Today I have a 3-D project to share with you that has a touch of scrapbooking flair! As the temperature drops, there’s no better time to embark on a journey of artistic expression, and the Bee Mine Suite is here to make it even more enchanting. This whimsical assortment features an array of “bee”utifully designed stamps & papers; from buzzing bees and honeycomb patterns to sweet sentiments that evoke the warmth of heartfelt emotions. 

I want to share and inspire you with this cute creation ….

Let’s start with what makes this a 3-D project … this cute little picture frame that I picked up at the $$1.25 Store! This is a cute picture frame to begin with and holds a 4″ x 3″ photo, so that is the measurement of my designer paper. These cute little projects make the PERFECT Grandparents Gift on Valentines Day and cute to have around the house as your 3-D Scrapbook. Friends love these too!

The photo montage can be easily moved into your scrapbook. I attached the bee and jar of honey with a glue dot (Just enough to hold it) and then using your Take Your Pick tool… you can remove it as well to go into your scrapbook. 

The sentiment, bee and jar of honey all come from the Bee Mine Suite.  I used the Circle Die from Stylish Shapes and the banner die from Nested Essentials to embellish my creation and to create the focal point! And yes, that is my Armani again. This one is going to his mama for Valentines Day ❤

Whether you’re assembling a scrapbook filled with cherished memories or working on a whimsical 3-D project, the Bee Mine Suite provides the perfect elements to bring your vision to life. I’ve got links to the products used today below.

Thank you for joining me today.

Don’t miss out on the opportunity to turn your projects into extraordinary works of art. Click, create, and let your imagination soar with the Bee Mine Suite today!

Creating Christmas Memories

Hello Stampin’ Friends,

Welcome back, crafting enthusiasts! Are you all geared up for the holiday season? There’s something about the magic of Christmas that fills the air with warmth and joy. And what better way to capture those cherished moments than with the Beary Christmas Memories & More Cards and Card Pack & Envelopes from Stampin’ Up!

We’ve explored the world of these fabulous Christmas-themed cards and envelopes and today we’ll discover the immense versatility they offer for creating stunning projects, as I share a delightful scrapbook page designed by the creative minds at Stampin’ Up!

The beauty of these Memories & More Cards lies in their versatility. While they’re perfect for creating traditional holiday cards, they’re not limited to just that. You can use them in a multitude of creative ways:

  1. Scrapbooking: Create beautiful scrapbook layouts like the one we’re about to explore.
  2. Decor: Incorporate these cards into your holiday home decor projects, such as table centerpieces, garlands, or framed art.
  3. Gift Tags: Cut out portions of the cards to make adorable gift tags that will add a special touch to your presents.
  4. Journaling: Use them in your journals to capture the memorable moments of the season. In fact, hand them out and have your family write down their feelings on the cards, then match them up with a photo …. EASY Scrapbooking and you have captured their feelings for a lifetime of memories. ❤

So, are you ready to embark on a creative journey this holiday season with these delightful supplies? I know I am! Get your hands on the Beary Christmas Memories & More Cards and Card Pack & Envelopes and let your creativity run wild.

Let’s make this holiday season even more memorable with handmade crafts, cards and scrapbook pages that will be treasured for years to come.

Merry crafting, everyone!

Memory Keeping with Memories & More

Hello Stampin’ Friends ~

Pocket pages are a great way to scrapbook—you can use small details mixed with photos and journaling to add interest without putting in a lot of work! Preserving your memories this way is super easy and it’s fun for both avid crafters and people who are just starting out.

As you craft, don’t be afraid to figure out different ways to use cards and stickers. That’s what we did with the Bright & Beautiful Memories & More Card Pack in our scrapbook pages. We fussy cut a balloon from one of the 3″ x 4″ (7.6 x 10.2 cm) cards and added 2022–2024 In Color Baker’s Twine. We loved the personal touch that this gave to our pages. We also used the bullet tip of a Night of Navy Stampin’ Write Marker to jot down a few memories from the day. We finished the card with a few Loose Silver Sequins to add some shine.

We love scrapbooking with Variety Pack 6″ x 8″ (15.2 x 20.3 cm) Photo Pocket Pages because they can be as simple or as complex as we want them to be. Plus, our photos can be the focal point of our project while still finding subtle ways to add interest. Now it’s your turn! Use our pages as an example or create some pages that are all your own!

These are not my photos / pages but taken from our own Stampin’ Up! newsletter. I hope you enjoyed it as much as I did.

Thank you for stopping by today.

Saturday Scrapbook Page Parade …

Hello Stampin’ Friends ~

Today I’m going to to take you into how I started my amazing journey with Stampin’ Up! … SCRAPBOOKING!!

I’m going to share a Parade of Scrapbook layouts /pages that I created back when … the layouts are still relevant today with a change of designer papers, you can create a whole new look!! These layouts are GREAT for beginning scrapbookers.

Join me in a stroll down memory lane ….

One of the easiest pages to create, this is actually a 6 x 6 with 4″ squares of designer paper and coordinating cardstock created around 2004! The alphabet stamps with a circle punch and die cuts for the “Hoot” created my theme … and then the owl punch.

For my second layout ….

Super simple layout with a tropical flair … I stamped some flowers on the background just to create some dimension to the page, added a strip of designer paper to the bottom and coordinating cardstock for my photo mats. The coconut cocktail was created using a circle die / or punch … whichever you prefer and then I cut out part of the top and added my accessories! How cute, fun and easy was that!!

My third layout …

Oh my gosh … how easy is this layout! I used an actual road map … what a great way to highlight your road trip. Grab a map or two of the areas you visit and then used it to pin point where you have been. I found some cardstock that coordinated with the colors on the map (good thing Stampin’ Up! has so many amazing colors).

If you don’t have dies to cut out your headers / titles for your pages … Use your computer to print one out. Again, super simple and a great way for beginners to get started.

For my last layout, I’m sharing a page I created with scraps …

My Card Club was creating “window” cards so all the orange, lime green and black dots are left over from their cards, so I attached them to a piece of black 12 x 12 and created a really fun backdrop for my page. Here is a great example of using your printer to create your title. The cats were actually punched out of designer paper (I love that Stampin’ Up! coordinates dies & punches to the designer paper) … makes for an easy page. To finish it off … I just added my sweet little grandbaby in the center!

I thank you for walking down this path with me today, and I hope you are inspired to whip up a few easy scrapbook pages … you’ve got some layouts now.

Enjoy your Saturday!

I may just start adding scrapbooking back into my stamping … What do you think? Please comment below.

Card Parade from our Artisan Team!

H-E-L-L-O Stampin’ Friends!! Happy Friday!

Today I’d like to do something a little different, you’ve seen my card parades … now I’m going to be sharing cards created by our Artisan Team using the Designer papers that are now on sale. I do not have the directions for these but they are too cool not to share!!

The “Artist” and the designer paper they used will be listed BELOW their work. Enjoy ….

Created by global Artisan Design Team member Leah Fedynak, feature the following products:

• Sweet Symmetry Designer Series Paper

Created by global Artisan Design Team member Martin Stone, feature the following products:

• Sweet Symmetry Designer Series Paper

Created by global Artisan Design Team member Susan Wong, feature the following products:

• Bloom Where You’re Planted Designer Series Paper

Created by global Artisan Design Team member Tami Hewlett, feature the following products:

• Bloom Where You’re Planted Designer Series Paper

Created by global Artisan Design Team member Tammy Wilson, feature the following products:

• In Good Taste Designer Series Paper

Created by global Artisan Design Team member Tatiana Tobin, feature the following products:

• You’re a Peach Designer Series Paper

Created by global Artisan Design Team member Anna Pickering, feature the following products:

• Tidings of Christmas Designer Series Paper

Created by global Artisan Design Team member Angela Meiritz-Reid, feature the following products:

• In the Wild Designer Series Paper

AMAZING … Right! I just had to share these works of art with you! I hope you enjoyed them.

Thank you for stopping by my blog today. Have an amazing weekend!!

Simply Sunday: Scrapbooking Halloween from Scraps!

Hello Stampin’ Friends ~

Today I’m going to share with you a quick -n- easy scrapbook page that was created out of scraps!

Our clubs had created a card where we were punched out colors of cardstock with our 2″ Circle punch so we ended up with a whole bunch of left over circles.  Not wanting anything to go to waste, I used the circles to create the background for today’s scrapbook page.  I simply just glued the circles on using the Tombo Multi-Glue.

The title was created from my computer, the kitty’s were created from the retired “Spooky Night” Designer Series paper… but our cat punch is still available to punch kitties for your page.  I thought it was appropriate since she was dressed as a little kitty cat!

Don’t ever pass up the chance to use up your scraps … this was fun and easy to create!

Still time to join me and your fellow stampers for a Stamp Club …

Thanks for checking out my blog today.

Hope you day is a beautiful one!

Today’s Supplies used to create the scrapbook page … 


Flashback Friday: Scrapbooking

Hello Stampin’ Friends ~

Today I am sharing some scrapbook pages that I did a “few” years back, however they are still relevant today.  Lately I have been talking about getting back to the basics; stamps, ink and paper … and that is exactly what I’m showcasing on our pages today!

I have always felt that the photos should be the focal point of your page, and then the journaling.  Embellishments are great and they are fun, but I have seen pages that are embellished to the point were I could not “see” the photo!! What?

Let’s begin with the simplest of pages … just stamping!

This was a 6 x 6 page in my “Brag Book” … I took two complimentary colors and put them together and then just stamped my images with VersaMark™.  This makes it easy to create a background with multiple colors without multiple inks!  Super Simple … a little gold cardstock to pop my photo and a little glitter to add some pizzazz.  There is plenty of room to add some journaling, I would probably print it on vellum and then add it to my page.

My next page is also creating a background but with multiple colors …

This is a FUN page to make … get yourself an “Uninked Spectrum Pad” on page 202 of our annual catalog and ink it up with your favorite colors.  Here I have Old Olive, Crushed Curry, Pumpkin Pie and Cajun Craze and have create multi-colored Oak leaves.  The other leaves solid but using the same colors that were “stamped off” first so they appear lighter.

A simple heading “FALL” made with scraps and you are now ready to add your pictures.  If you want to add embellishments to highlight the photo, may I suggest die cutting your leaves and placing them at the corner of your photo.  Although this stamp set is no longer available … we have many beautiful coordinating stamp sets and dies that you can use.

Next up is a cute page created with sponging ….

Remember, we’re back to basics here … Stamps, Ink and Paper.  Super simple page creating a beach and water.  The Crumb Cake paper was sponged with Crumb Cake ink to create the texture of sand.  We tore the edges of our paper and then sponged them with White Craft Ink to create the illusion of waves.  Don’t put that sponge away yet … We used the same sponge with the White Craft Ink to create soft wispy clouds in our sky.

My last page uses punches to create “color blocking”…

The color “blocks” actually create a frame around my photo showcasing the picture itself while giving us space to add some fun stamping elements and a header.  On this page, I actually stamped color on color … this creates a bolder image than if you would have done them all in Versamark.

The color blocking is a playful way to add dimension to your page and the colors just say “Spring” … gotta love that. Hope it’s coming to our town soon!!

I hope you enjoyed this little parade of pages and that it inspired you to pull out your pictures and do some scrapbooking.

Thanks so much, and have a great weekend.

Throwback Thursday: Scrapbooking at the Historical Society

Hello Stampin’ Friends ~

Today I’m going to share some photos of a scrapbooking event I did a few years back.  One of the pictures actually showed up on my Facebook page as a memory so I thought I’d share with you all.

The Historical Society supplied the pictures and I supplied the layouts and materials. I was really excited about this… I had so much fun looking up the historical information for the pages! They included a tour of their research area!

It is actually a unique way to scrapbook as it fit more within a “genealogy” style because the information and pictures were historical and not personal … Our first page is “Historic West Bend”

The photos included Main Street, our Theater, the now Historical Society Building which used to be the jail and county building and then our Train Depot … which we all know the train tracks were removed in West Bend.

They wanted a fun way to show people their vast resource (research) center. The Washing County Historical Society does so many fun things to involve the communities and showcase the facility and a friend of mine gave them my name as a scrapbooker.

Although these pictures are of people “I don’t know” … it’s more about the HISTORY, so if you are scrapbooking your genealogy lineage or just going back in time on your scrapbooks for your children, don’t be afraid to include the history, it is really fascinating! I had a blast learning about what the culture was like in the early beginnings of our county and town.

So have fun with your scrapbooks and add a little history … you’ll enjoy discovering some amazing facts.

Have a great day and thank you for going down memory lane with me.

Halloween Week: SCRAPBOOK

Hello Stampin’ Friends ~

Today I’m going to share with you a quick -n- easy scrapbook page that was created out of scraps! Last year our Stamp Club made a Halloween card using the Seasonal Chums bundle … No longer a bundle but the stamp set and dies are still available.

And I used the cut out circles to create the background for today’s scrapbook page.  I simply just glued the circles on using the Tombo Multi-Glue.

The title was created from my computer, the kitty’s were created from the “Spooky Cat” bundle and “Spooky Night” Designer Series paper … also from last year (sorry … but we have to use up that paper sometimes!). I thought it was appropriate since she was dressed as a little kitty cat!

I wish all my scrapbooking would go this quick -n- easy! I need to remind myself to “Keep it Simple” because the photo is your reason for scrapbooking in the first place 🙂 

Thanks for checking out my blog today.

Hope you day is a beautiful one!

Today’s Supplies used to create the scrapbook page …


Flashback Friday: Autumn Fun

Hello Stampin’ Friends ~

Thought it was time to have some fun and reminisce about past fall fun! I’ve got two “punch” cards to share with you today and a scrapbook layout.

Halloween is one of my favorite holidays (I love them all) but this is the time of year you can take a peek into the dark side all will having some fun… Halloween.

This card was created a few years back with this awesome border punch! If you punched on a 3 x 3 square piece, it created this frame … I’m sure some of you still have this border punch, so try it out because it also worked great when I used this frame on my scrapbook pages!

Now here is a really fun Halloween card created with punches …

I used the owl punch to create the ghosts (just flipped them upside down) … the pumpkins were created with oval and circle punches (3 each) and then you sponge the edges – I’m using Pumpkin Pie cardstock with Pumpkin Pie ink and then they are just layered together to create the pumpkin. They are so cute!

To make the gravestone I used a label punch …. I think the current “Everyday Label” punch would work great for the headstone! Then the stone was engraved (lol) handwritten by me.  It was just a super fun card to make.  Here is this years using the Paper Pumpkin September 2018 kit…

I simply used all the items in the kit to create this one … the headstones were the tags, and the ghost and bat were also in the kit… as well as the “spooky”.

My final share today is a quick and easy scrapbook layout…

You could easily replicate this page using the Natures Poem Designer paper and Natures Root Framelits dies. Actually this layout would be cute anytime of the year! It’s been a while since I got any scrapbooking done, maybe someday soon!

Thank you for stopping in and checking out my Friday Flashback! I love going back and looking at things I’ve done years ago.  Some can stay in the past (LOL) and some are timeless.

Have a wonderful day and hope to see you back tomorrow.

Throwback Thursday: Autumn Memories

Hello Stampin’ Friends ~

How are you doing? We got a little peek of sunshine yesterday but there is rain in the forecast for the next 7 days! I like my fall to have warm sunny days with crisp cool nights … the sun of the leaves, so pretty!

Let’s have some fun and explore some cute scrapbook page layouts today! I’ll be sharing some memories of autumns past with some scrapbook pages I have done years ago …

With all the fancy gadgets and dies out there now days, we have a tendency to forget how simple yet pretty creating your own “designer” paper can be!  You can totally recreate this page by using the beautiful leaves in the “Rooted by Nature” stamp set.

To create the multi-colored leaves; you could either use the baby wipe technique or ink up the “UnInked Spectrum Pad” on page 202 of the annual catalog.  My suggested colors are …

Now there is a beautiful fall color line up!  You can also see that while some images are stamped in full color, some are stamped without re-inking so you get a nice light coloring … this adds dimension to your page just by stamping!

My next page is one of my all time favorite layouts … I also had a great time with my daughter and her two little girls that day.  Cassie, the little blond picking pumpkins asked me what size pumpkin she could get, and I told her “anyone” she could lift!!  I could not believe how strong she was … or should I say determined!!

There is not a lot of stamping on this page layout, just a little decorative edge and an alphabet set which you can find on pages 174 and 175 on the annual catalog.  The color blocking is a fun way to coordinate a page and really make your pictures pop off the page!

I hope you enjoyed my little stroll down memory lane and I thank you for coming along with me.  If you have any questions about scrapbook layouts or how to get started with stamping in your scrapbooks … message me.

Have a great day ~

Suggested products ….


SCRAPBOOKING: Lori’s First Halloween

Hello Stampin’ Friends ~

Today I’m going to share with you a quick -n- easy scrapbook page that was created out of scraps! A couple of weeks ago our Stamp Club made a Halloween card …

And I used the cut out circles to create the background for today’s scrapbook page.  I simply just glued the circles on using the Tombo Multi-Glue.

The title was created from my computer, the kitty’s were created from the “Spooky Cat” bundle and “Spooky Night” Designer Series paper. I thought it was appropriate since she was dressed as a little kitty cat!

You won’t want to miss out tomorrow … I’m using the Graveyard Gate Bundle. It’s been a HOT search on Pinterest!

Thanks for checking out my blog today.

Hope you day is a beautiful one!

Today’s Supplies used to create the scrapbook page …


Memories and More by Stampin’ Up!

Hello Stampin’ Friends ~

Today I want to share an amazing new product designed by Stampin’ Up! that coordinates with our Stampin’ Up! suites, product collection and exclusive colors.

The Memories & More by Stampin’ Up! Coordinating packs make it easy to put projects together quickly. Card packs are perfect for cardmaking, memory keeping, or any other project you can dream up. This simple, affordable system makes it easy to get started with just a few basic products.

Amazing right! I love the ease and stress free way of scrapbooking this system offers along with the versatility to flow into your other stamping creations.

Please let me know if you have any questions about Memories and more or our other products.

Thank You for checking out my blog today …

I hope your day is a good one!

Product showcase … just click on the products below to view more about the product or to begin your shopping ~


Throwback Thursday: Happy Easter

Hello Stampin’ Friends ~

Today I’m bringing back a really cute Easter card and a scrapbook page! With the products we currently have in our catalog today, you could easily recreate either of these two projects.

My “technique” that I was teaching when these were created was “Dying your Glimmer Paper”.  I taught my classes how to use your ink refills and either a sponge dauber or the Stampin’ Spritzers to color the Glimmer paper … NOW you don’t have too! With the beautiful colors of Glimmer Paper Stampin’ Up! has brought out for Sale-a-bration all you have to do is punch! No fuss required!

The first is my bunny card …

Both the bunny and the eggs were created with a combination of circle and oval punches … now, I think I would use the Layering Circle and Oval Framelits. You will have a greater choice of sizes this way. The little bunny tail was made with a flower punch.

I used the same format on my scrapbook page as I did on my card.  That is one thing that I have always taught in my classes.  Use what inspires you to create what ever you need.  How do you like the little chick I tucked inside the cracked egg? Again, made with the oval 🙂

OK, I have one more card that I want to share with you that I created using the “Dying your Glimmer Paper” technique …

You could easily recreate this card using the Sale-a-bration Glimmer paper. And you know what … the “Petite Petals” punch that I used to make this card is still in the catalog!!  You know what else would be cute … the Elegant Butterfly punch.

Just because something is old (Created 2014) … doesn’t mean it can’t be new again!

Thank you for stepping back in time with me today, I hope this inspires you to get creative and have some fun!

Have yourself a wonderful day ~


Below is a list of products I used and suggested products to create that projects shown.  You can purchase any of these items by clicking on the item.  Remember that you will receive a FREE Sale-a-bration item with a qualifying purchase of $50 or more.