Christmas Wishes in Silver …

Hello Stampin’ Friends,

Hope you are having a good weekend.  It’s a bit chilly here in Wisconsin, and I have to admit … I have turned the heat on a time or two!

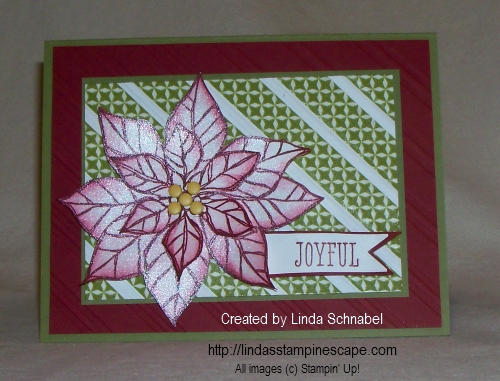
In my last post, I shared with you a simple card using the “Joyful Christmas” stamp set, so I wanted to show you another that is entirely different.

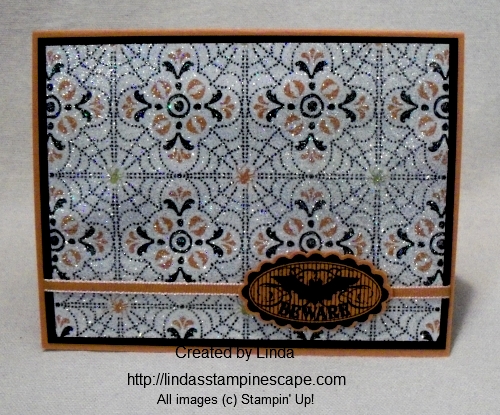
Today’s card share is a non-traditional but stunning Christmas card.  Normally we don’t think of using black for Christmas cards, but paired with the beautiful Silver Foil Sheets, you can’t go wrong.

000_0282

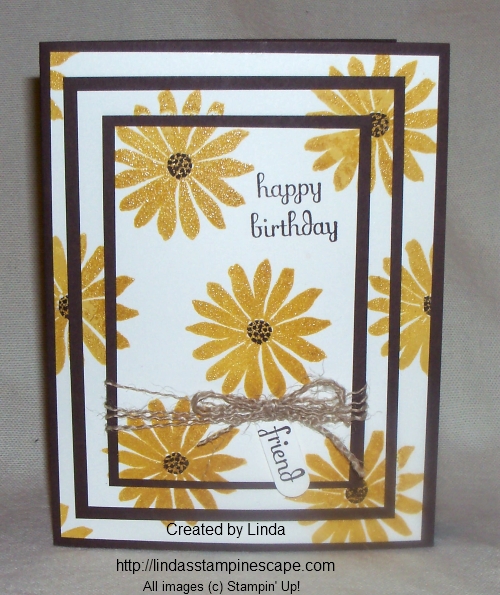
I teamed up this color combination with the “Triple Time” Technique to create this elegant card.  It really was quite easy to create.  I began with a 4 x 4 inch square in the silver foil.  I cut my black mats 1/2″ smaller.  With that in mind, the silver squares are: 4″ x 4″, 3-1/4″ x 3-1/4″, and 2-1/2″ x 2-1/2″.  The black will measure: 3-1/2″ x 3-1/2″ and 2-3/4″ x 2-3/4″.

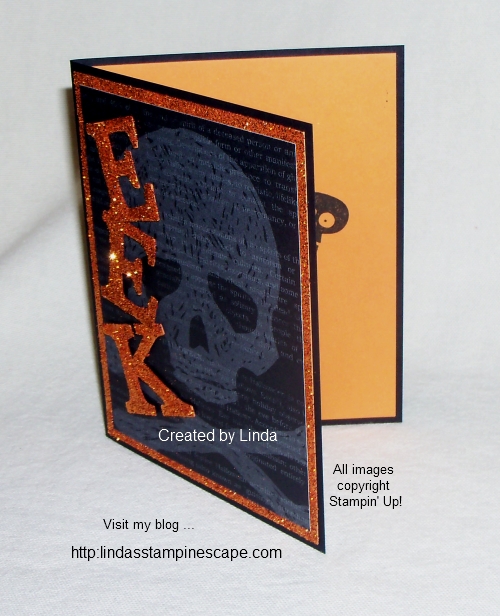
Once all your layers are cut, you take out the black mats, stack up the silver … then stamp and emboss.

I used the Silver Metallic Encore pad as my ink medium, then the silver embossing powder.  You will notice some gaps between the layers of silver… it’s OK because your black mats will cover that up.  Be sure to align your stamped image before assembling.

000_0288

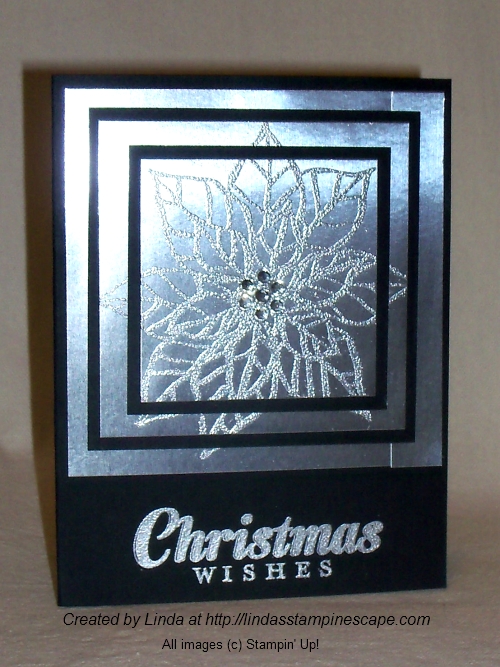
My Christmas Wishes come from the “Joy to the World” stamp set, and are also stamped with the Encore pad, then embossed with the silver embossing powder.

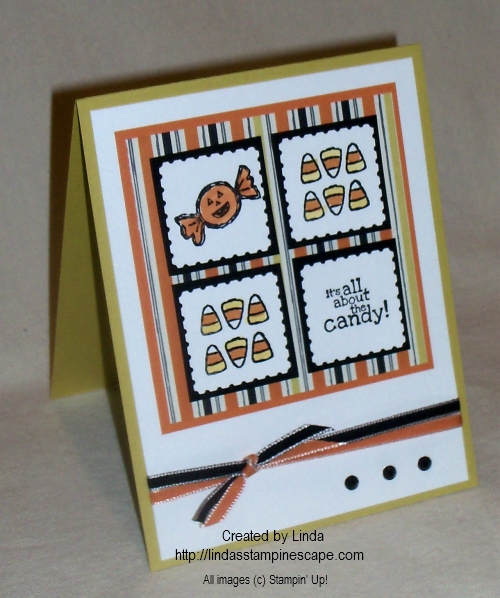
Hope you enjoyed the two different styles of the poinsettia, Joyful Christmas stamp set.

Thanks so much for sharing your day with me.

Stop back again for more inspiration.

blog closing-small

Here is a list of supplies used for today’s card …

 ITEM

 PRICE

 DESCRIPTION

 131802

 $22.95

Joyful Christmas – WOOD

 131805

 $16.95

Joyful Christmas – CLEAR

 131796

 $21.95

Joy to the World – WOOD

 131799

 $16.95

Joy to the World – CLEAR

 132178

 $3.95

Silver Foil Sheets

 109131

 $4.75

Silver Embossing Powder

 129053

 $29.95

Heat Gun

 119246

 $4.95

Rhinestones – Basic Jewels

Clicking on the item number will link you to my on-line store.

TWO 4 TUESDAY: Scrapbook page & Fun Technique!

Hello Stampin’ Friends,

I missed you yesterday.  I was off catching up with friends, preparing for my upcoming Holiday Retreat, and just life in general.

So, today I will share 2 projects!  First is a Fall Scrapbook page, and the second is a fun technique that I shared with my clubs last year.

My fall page is all about the beautiful colors of fall.

100_5941

The leaves were created with the “Autumn Accents” Bigz die (127812) found on page 192 of our annual catalog.  This die makes collecting leaves quick and easy.  You will also see the “textures” on some of the leaves … a little roll through the BigShot with the “Perfect Polka Dots” embossing folder and the Core’dinations (129956 / pg.157) sandable cardstock – Neutrals collection.  Yep, a little sanding highlights the texture by exposing the core color which is lighter than the outer layers.  Simple to make … just add your pictures and some journaling and you have another page done!

My second project is a cute fall card using the “Faux Tile” Technique:

100_5947

I did create this card last year.  If you have not noticed, we have discontinued the glossy cardstock – which I used here.  If you don’t have any left in your stash … go to any office supply store and purchase the glossy photo cardstock, it works the same.

You will need the “Simply Score” Scoring Tool (122334 / pg.178) for this technique.  By using the  glossy cardstock, you eliminate a couple of steps from the original “Faux Tile” technique.  Cut your cardstock to the desired size for your card.  Place onto “Simply Score” tool and score every 1/2 inch.  Turn carstock 45 degrees (on it’s side) and score every 1/2″ creating a tile pattern.  Now, just simply stamp your images onto the card.  I used the “Gently Falling” (pg.65) stamp set.  My final step was to brayer over the entire piece … careful not to push too hard, you want your “grout” lines to show.

If you don’t have access to the glossy … you can use our Whisper White, score, and stamp, the next step would be to lightly tap your VersaMark pad onto the tiled area (Not too hard … you don’t want VersaMark in the creases).  Then emboss with clear embossing powder.  This will give you a that real tile / grout look!  Just takes a bit longer than the “simple version” described above, but stands out a bit more.

I’d love to hear what you think about this technique.

Thanks for stopping by … I will be back tomorrow with another fun project.

blog closing-small

“She Believed” Card Share …

Hello Stampin’ Friends<

It’s finally Friday, and I hope you have a wonderful weekend planned.  I’m meeting with my Saturday Stampin’ Technique club in the morning, and then I start preparing for the upcoming Holiday retreat.  I’ve got some wonderful projects planned for my group, and I can’t wait to get started.

Today I have another card share from Gloria’s Impressionistic Stampers Fall Regional, and downline member (Star’s) Brenda Morateck.  It’s a beautiful card showcasing the new In-Colors …

100_2214

Let me start with the colors … Crisp Cantaloupe, Pistachio Pudding, and Strawberry Slush.  They look so good together.

The stamp set used to create that “watermark” flowers is “Secret Garden” which is found on page 94 of our annual catalog.  Might I just say that each of the flower centers were created “dot by dot” with our “White Gel Pen” (105021).  It really ties in all the colors of the card.

The greeting comes from “Feel Goods” stamp set on page 25 of our current catalog.  I love this greeting set and use it often.  The greeting and the mat (Pistachio Pudding) were die cut with the “Labels Collections” (125598) Framelits.

100_2215

To finish off the card … the beautiful Strawberry Slush (130023) 3/8″ Ruffle Stretch Ribbon was added.  Brenda shared a tip that she received from her talented up-line, Debi Krebsbach … When using using ribbon, only adhere it to the card where it will be showing (not under the greeting).  This is a fantastic “money saving” tip, especially if you are making multiple cards.

Thanks for stopping by today …

I will have more samples from the Impressionistic Stampers Fall Regional to share with you tomorrow.  Till then, have a great day!

blog closing-small

Simply Beware … Glitter Technique

Hello Stampin’ Friends,

We are over the hump and on our way to the weekend!  We are also half way through our Halloween week card share.

Today’s card is super simple and super glittery!  I began with one of my favorite patterns from the “Witches Brew” Designer Series Paper.  Cover the entire piece with the VersaMark™ … I actually just dab the pad right onto the paper.

000_0245

Then I dip it into my “Iridescent Ice” Embossing Powder.  When you heat this… watch closely to make sure it is melting properly.  That’s it!  I love the way this looks, and the technique has several names, but I call it the  “Dazzling Diamond Dust” technique.

I also embossed the “Beware” which comes from the “Halloween Bash” Stamp set located on page 21 of the Holiday catalog.  After embossing, I added the Black Stampin’ Glitter (132206) to just the bat, to tie in that “sparkle”.

I said it was simple … and you can do this to any Designer Series Paper.  So if you have someone that loves that “glitz”, just add this simple technique and they’ll be starry eyed, and think you are the bestest!

000_0248

Hope you are enjoying my Halloween card feast … only 2 days left!  So get your “booty” back here tomorrow because you won’t want to miss this quick -n- cute card either .

Have an awesome day!

blog closing-small

Celebrating a creepy Halloween …

Hello Stampin’ Friends,

How are you liking the Halloween card share so far?  Today I am going to show you the “Joseph’s Coat” technique, with a bit of a  twist.

The colors I have chosen to use today are: Basic Black, Pumpkin Pie, Summer Starfruit, and Whisper White.  I am also using the same Designer Paper I used yesterday, from the Witches Brew Designer Series Paper pack.

100_2191

First thing I did was measure my stamp so I could get the color effect I was looking for.  I used a 1 inch strip of white, starfruit and pumpkin and taped them (on backside) together.  Make sure they are butted up to each other very tight, with no gaps.

100_2173

Next, ink up the Halloween greeting stamp from the “Halloween Hello” stamp set with VersaMark™ and stamp it over the multi-color strip of cardstock … then heat emboss with clear embossing powder.

Then, using black ink … ink up your brayer and roll it back and forth over the image until covered evenly.  Take a paper towel and whip off excess ink from the embossed area … your greeting will “appear” but will have a “smudgy” look to it.  I think it gives it a bit of a “spooky” look, which is perfect for this time of year.

100_2193

I added the new Pumpkin Pie Chevron Ribbon (130015) to give the card a “pop” of color.  To balance out the card I added 3 rhinestones colored with a black Sharpie … then put a pop of Starfruit behind them so they would stand out more.

I’ll be back … tomorrow with another Halloween themed project.

Thanks for stopping by.

blog closing-small

EEK … an awesome stampin’ technique!

Hello Stampin’ Friends,

Yesterday I kicked off a week-long Halloween project share.  Each day I will share with you some fun, frightening and creative projects.  I also have some new stampin’ techniques and tips for you.  My reason for sharing early … is it will give you time to order any supplies you need to create your own Halloween projects.

Today’s card is a bit more frightening, but not difficult to create at all.

100_2188

All you will need is our “Witches Brew” (132185) Designer Series paper, the Black & Orange Stampin’ Glitter (132206), and the “Typeset Alphabet” (127533) Bigz Dies… Oh, and don’t forget your favorite adhesive!

  134925LI prefer the “SNAIL” (104332) Adhesive, however, some of you like to use the Multipurpose Liquid Glue (110755) because it holds so well, and it will work great for this project too.  You will also want the “Silicone Craft Sheet” (127853) I think it’s a must have item for all your stampin’ projects.

You see …

The silicone sheet resists any of our adhesives and makes doing this project super simple!  I just run my Snail Adhesive over the cut out alphabet, then cover it with glitter.  Viola … that easy!  This will work great for you glue lovers too.

 100_2168  100_2170

Here’s a great stampin’ tip and cost saver, for those of you who make multiple cards… To create the “glitter paper” look underneath the Designer Series paper skull, I just ran my Snail adhesive around the edges, then covered it with our glitter.  No need to paint or die your Silver Glitter paper … just “snail” and stick your glitter!    Glitter lovers rejoice!

Now, for a peek inside …

100_2185

I used the “Halloween Hello” stamp set to wish my recipient a Halloween greeting  but it seems my little friend is a bit shy and isn’t going to show you at this time.  Just click on any of the “highlighted” stamp sets or accessories to view them.

Hope you enjoyed the card and stampin’ tips I’ve shared today.  Let me know what you think about them … I’d love to hear from you.  Sharing on a blog is much quieter than my classes … I miss the oooohs and aaaahs!  lol

Have a wonderful day,

blog closing-small

Hello Autumn …

Hello Stampin’ Friends,

Today I’m going to share with you, my rendition of summer turning into autumn on a card.

I began with Whisper White layered onto Whisper White.  I took my top piece and created a “reverse mask” … take a piece of old or scrap paper and cut out a section that you can sponge and stamp.  If you are not comfortable cutting a mask with your paper cutter… you can easily create a “reverse mask” with the use of one of our many framelit dies or by punching out that area.

000_0225

Now … place your “reverse mask” and begin sponging, leaving the center a bit lighter to create a beautiful dimension on your card.  Next, you can stamp your image (please note that if you use cardstock, you will see it does not go to the edge).   I used only Wild Wasabi for the sponging and the stamping.  The color difference is all in the way you sponge … start light, you can always add more (but you can’t take away).  I prefer the regular sponges.

Remove your reverse mask, and you will have a beautiful design element on your card.  If you’d like, you could just stamp a greeting to complete the front.  However, since I wanted to show the transition to fall … I added my fall leaf.  I used the “Magnificent Maple” stamp set found on page 18 of our Holiday Catalog.   For the leaf, I began with So Saffron then did the rock and roll technique to edge the leaf with Wild Wasabi and Tangerine Tango.

000_0225

I added (sponged with sponge dauber) a little more So Saffron into the center of the leaf to make it “pop” a little more!

I used the “Happy Day” stamp set found on page 112 of our Idea Book & Catalog for my greeting.  To finish off the card, I added Stampin’ Dimensionals to “POP” up the front piece with all the stamping.

Thanks so much for stopping by and welcoming autumn in with me!

blog closing-small

SMILE! … I have an easel card for you!

Hello my Stampin’ Friends!

Smile!  On day four of my “I Am Me” Designer Series paper showcase, I have decided to use the paper with the cute little camera’s on.   Here is a pic of all the sheets and their backsides!I AM ME DSPWith that in mind … I decided to make my card a “picture” card.  It’s really easy when you use the framelits … I chose the NEW “Circle Collections” (130091) Framelits to match the lens of the cameras!

This is my sister Ruthie.  We were at our family reunion and were having fun with the photo opportunities!  I believe that was back in the 90’s … She looked great, glad you can’t see my hair-do! LOL

000_0190

I figured since I was using a photo on the front of my card, I would make an “easel card”.  How cool is that … and easy.  I used the “Happy Day” stamp set (W-130294 / C-130297) for both the front and inside of the card.  You will find this stamp set is great for scrapbooking too.

000_0191

To hold the card front (easel) in place, I used the Brights Collection (130931) Candy Dots … how “yummy” are they!  And I combined them with the Candy Dots Brad Bases (132293) page 171.  I love the way the look together.

I also like how the candy dots and the circle framelits tie into the camera theme of the card.

000_0192

To create the easel …  begin with a half sheet of cardstock 4-1/4″ x 11″ … fold it in half to create your base.  Now “fold” the top flap of your base card in half.  Create your card front (4-1/4″ x 5-1/2″) and secure to the bottom half of the top flap of your base card.  You can see by the photo that only the bottom half of the top flap and the card front are adhered together… this allows the card to lay flat for mailing.

I have 3 more cards coming in my “I Am Me” Designer Paper Showcase.

Thanks for stopping by!

blog closing-small

Wheely Sweet Friend …

Hello Stampin’ Friends,

Happy Tuesday to you!  Today is day 2 of my “I Am Me” designer series paper share and I have teamed it up with the “wheely” fun stamp set … Cycle Celebration!

I also have a great stamping tip for you today … so sit back and enjoy the ride 🙂

000_0183

The designer paper is so fun and colorful and I wanted to highlight it,  so I chose “So Saffron” as my cardstock.   I added a touch of texture with the “Needlepoint Border Expressions Folder” and ran it down the edge of the card.

I’m excited to show you how I got the curved edge on my “tag” …

Once you have chosen the size cardstock you will be using for your tag, you can find a coordinating size “Oval Framelit” to cut the top!

000_0180     000_0181

Place the top of the cardstock “under” the framelit on top to cut … then be sure to layer the bottom end of the cardstock “OVER” the framelit so it does not cut.

** I only rolled my framelit slightly past the cutting edge so that I did not damage the rest of the cardstock.

How cool is that!!  Just think of the cool edges you can make now … and you have another use for your framelits 🙂

000_0184

The greetings were colored in with my markers, something fun you can do with any stamp to make it multi-colored.

I just have to point out that yummy little “Candy Dot” that anchors my tag.  Today I used it with the “Base Brads” … wow, that really makes the candy dots stand out.

Thanks so much for stopping by!

blog closing-small

 ITEM

PRICE

 DESCRIPTION

 130270

$21.95

Cycle Celebration – WOOD

 130273

$16.95

Cycle Celebration – CLEAR

 130138

$10.95

I Am Me Designer Series Paper

 129381

$26.95

Oval Collections Framelit Dies

 129383

$7.95

Needlepoint Border Expressions Folder

 130931

$5.95

Candy Dots – Brights Collection

 132293

$2.95

Base Brads

Dare to Dream card …

Happy Friday Stampers!

Whew … we made it.  Just kidding, I saw a poster that said that, but I must admit, I am happy the weekend is almost here.

Yesterday I told you that I would be sharing a card with you, that I created from a picture that inspired me.  I saw the picture on Pinterest and though it would make a beautiful card.

000_0157

It’s hard to believe but I began with Whisper White cardstock!   Although the cardstock I used for matting  is Calypso Coral… my camera made it look a bit pink.  The background for the card was created entirely by sponging.

Here is my inspiration …

31.05.12-Serengeti

If you click on the picture… you can see it in all it’s grandeur, and if you look closely, you can see the elephants.  I hope you find it as inspiring as I did.  I often look at nature for inspiration in designing and in the color pallets I choose.

For my card, I started with the foreground or “land” part of the card.  I sponged Basic Gray ink, layering it to create highlights and low-lights.  Then I moved into the sunset … beginning with Daffodil Delight, Calypso Coral and then Marina Mist.    I added the clouds next, using the Whisper White Craft Ink.

000_0161

The trees (from Serene Silhouettes) were stamped with the Black StazOn, as was the “Dare to Dream” from the Loving Thoughts stamp set.  If you click on the stamp set name, it will take you to the page so you can view the entire stamp set.

I hope you enjoyed today’s card and feel inspired to go outside and take a walk, or stamp a card for a friend… better yet, with a friend!

Have a great weekend,

blog closing-small

Happy Birthday Friend …

Hello Stampin’ Friends,

How are you this fine Thursday?  My wish for you is a marvelous day!

Today I am going to share with you, a birthday card that I made for a dear friend of mine who’s birthday is on Friday.  We have been friends since the 5th grade (and that’s all I’m going to say about that) lol.

000_0155

My technique today is triple time.   Simply layer your 3 light colored cardstock together when stamping, then separate and mat.  I just love this technique, it’s easy and looks cool.

I have used the “Secret Garden” stamp set with the Crushed Curry ink.  When using the new ink pads … you can emboss, which I did with the clear embossing powder.   Then I colored the centers in with the Chocolate Chip marker.  I wanted to give my card a fall flair.

To continue with the fall theme, I choose to use the “Burlap Ribbon” … however in a very different way.  I cut the surged edge off and then pulled it apart.  The strings from the burlap ribbon add even more texture because it kinked.   I’ve seen this done before and always wanted to try it … what was I waiting for!

000_0154

Here are the ingredients for today’s card …  the item numbers are linked to my on-line store.  You will be able to see a picture and a description of the product, just by clicking on it.

Normal

 ITEM

 PRICE

 DESCRIPTION

 131940

 $25.95

Secret Garden – WOOD

 129144

 $18.95

Secret Garden – CLEAR

 128577

 $37.95

Fabulous Phrases – WOOD

 120501

 $26.95

Fabulous Phrases – CLEAR

 132140

 $7.95

Burlap Ribbon

 109130

 $4.75

Clear Embossing Powder

 129053

 $29.95

Heat Gun

 119857

 $15.95

Word Window Punch

000_0155

Thanks so much for stopping by today.  Tomorrow I’m going to share a card that was inspired by a photo!

Have a fabulous day!

blog closing-small

My Thoughts on Fall Card …

Hello Stampin’ Friends,

I hope you are doing well.  I have had an exciting couple of days …

First, I sent out an invitation to my annual Holiday Retreat and it has filled within 36 hours of the announcement!  Holy cow, I feel like Garth Brooks … selling out his concert in record time.  I am so thrilled to be able to host my stampin’ retreats for you.

Second, I held my Christmas in July… Oops August Stamp Camp, and although we didn’t have the attendance we normally do – we had a great time!  There were great cards, door prizes, and the ladies got treated to a plate of “Candyman on Main” Chocolates!  I think my new job as manager of the candy store is a big hit!

smileys-thanks-771216

Thanks to all who are signed up for retreat and those who attended the stamp camp!

Today I wanted to share a different fold style of card, with a fall flair.  With this heat wave we’ve been having, I’m looking forward to those “warm” … not hot days, and cool nights.

Speaking of “cool nights” … I used the “Sweater Weather” Designer Series Paper for my card.  I never favored the “Crushed Curry” before but it really makes this card pop, and works so beautifully with the Chocolate Chip and Tangerine Tango colors.

I used the “Falling Leaves” stamp set as my focal point … and the “Rock -n- Roll” technique to get the multicolored leaf.

000_0136

The “Falling Leaves” stamp set is a “Two-Step” Stamp, so you’ll get two techniques in one!

Rock -n- Roll Technique:

** Begin inking up your solid stamp with the lightest color, I used Crushed Curry.  Then touch the sides of the stamp with your darker color –  in this case I used the Tangerine Tango.  Because my new pads are soooo new … they are very juicy, so I bounced my fingertip across the stamp to blend them a bit more.  Then I topped it off with the “detailed stamp / outline of leaf” with the chocolate chip.

000_0134

Since I had a bit of ink left on my bold/solid stamp … I huffed (using your breath to re-moisten the ink) my stamp and stamped the image onto the inside of the inner card.  It comes out very light but adds a touch of color.  If you don’t want to huff, you can always re-ink and then stamp off.

Lastly,  I stamped “my thoughts” from the stamp set “Field Flowers” in chocolate chip.

So the “trick” to this card is quite simple …. it’s just a card inside (or on top of) a card!  The larger or “back” folds in from the left to the right, and the small or inner card folds from the right to the left.  You fold the larger flap over the small card (when open … like it’s shown above) and then the small flap is folded to close the card.

000_0136

Here is the list of supplies used …

128430

Gently Falling Stamp Set – Wood / $39.95

123804

Gently Falling Stamp Set – Clear / $28.95

128583

Field Flowers Stamp Set – Wood / $24.95

122762

Field Flowers Stamp Set – Clear / $17.95

132184

Sweater Weather Designer Series Paper / $10.95
127821 Woodgrain Embossing Folder / $7.95
120906  2-1/2” Circle Punch / $16.95

I love the look, it gives you a unique dimension to your card.  Hope you enjoyed!

blog closing-small

Sweet and Simple Birthday …

Hello my stampin’ friends,

How are you today!  I wanted to take a step back from the Holiday catalog and create a simple birthday card for you.

I love our Designer Series paper, you have seen it on many of my cards recently.  It’s because it can make card making so easy.  Our birthday card today showcases the “Birthday Basics” designer paper.  I think I’ll use this paper again this week so you can really see how perfect the patterns are for your celebration creations!

130145L

I chose the “Bermuda Bay” from the designer paper for my coordinating cardstock, it’s fun and bright.

The stamp set I’m using is “Bring on the Cake” from our catalog – page 14.  It’s a great birthday set to have, all of the different fonts will work well with the many styles of birthday cards we need to make (from young to … well, not so young).  I’m in that … not so young group, and lovin’ every minute of it.

128490L

Oh ………………. would you like to see the card!

I’m such a tease, my club members are used to me describing or showing them how to do the card, before they actually get to see it!  I guess I just like to build up to that excitement.  Drum roll please!

Remember, I did say it was simple …

000_0100

It is simple, but it is sweet.  I love using the framed punch technique, so easy to create but it really has a bit of a “WOW” factor.  Gotta’ love that “Dotted Scallop Ribbon Border” punch.

Here are the steps to make your punched frame…

Begin with a 3″ x 3″ square.   Slide your cardstock into the punch and CENTER the cardstock for each side before punching.  That’s it … simple.  It’s the 3″ x 3″ that makes it work so easily.

The cardstock for your greeting (if you want a bit of a border around the edge like I do) cut your cardstock to 1-7/8″ x 1-7/8″ or for more of a border … 1-3/4″ x 1-3/4″.

I have here the list of ingredients for you.  You may click on the item numbers for your shopping ease if you are from the US.  (I would like to send a shout out “HELLO” to my friends from Canada, Australia, New Zealand, the United Kingdom, and India for visiting my site this past couple weeks!  Thank you)

128490

Bring on the Cake Stamp Set – Wood / $38.95

121958

Bring on the Cake Stamp Set – Clear / $27.95

130145

Birthday Basics Designer Series Paper / $10.95
119247 Pearls – Basic Jewels / $4.95
119275  Dotted Scallop Ribbon Border Punch / $15.95

I must admit, I had a bit of a struggle not adding more to the card but I had a request to keep it simple.  Isn’t that how we want life?

I also want to thank all my many US friends who follow my blog.  I am truly honored that “all” of you take time out of your day to visit my blog.  Let me know if there is something “you” would like me to share.

Enjoy the day and thank you again for stopping by.

blog closing-small

It’s All About the Candy!

Hello Stampin’ Friends,

It’s Monday again… and we start another week.  I spent the entire weekend creating and cutting Christmas cards for my upcoming Stamp Camp.  I know, it sounds crazy but now is the perfect time to get a sneak peek and your hands on all the new Christmas sets and accessories in the Holiday catalog.

In keeping with the Holiday catalog, I created a cute card for you today.  It is not “Christmas” but yet another fun holiday …. Halloween!  I just have to share another Halloween idea, I enjoy it too much.

000_0095

Today’s card uses the stamp set “Halloween Hello” and the “Witches Brew” Designer Series Paper.  Love the paper … I think I’m going to frame this sheet and take it down to the candy store with me!  What do you think about that idea!

000_0098

I really was thinking about the candy shop when I was creating this card.  I just completed my first two weeks there.  The card was really simple to create, something that many of my stampin’ friends (customers) appreciate.  Everyone is so busy, quick and simple is always a good thing.  Don’t worry … I’ll share some “embellished” card samples too.

The color pallet came from the Witches Brew designer paper shown below: Summer Starfruit, Pumpkin Pie, Basic Black and I switched it from Very Vanilla to the Whisper White.  I wanted my candy to “pop”.134925LI have to share with you a fun technique that I love to do… “color” my rhinestones!  As long as you have a “Sharpie” … you can have any color rhinestones you want.  I must say, I really do like black rhinestones!  It’s a fun, inexpensive embellishment.  You can also color the pearls too!   I’m telling you – you will fall in love with this technique.

000_0097

Here is a list of the ingredients used for the card.  To make ordering easier, you can just click on the item number and it will take you to that page.  Or you may contact me, I would be happy to help you with your stampin’ needs.

131718

Halloween Hello Stamp Set – Wood / $18.95

131721

Halloween Hello Stamp Set – Clear / $14.95

132185

Witches Brew Designer Series Paper / $10.95
119246 Rhinestones – Basic Jewels / $4.95
119253 1/8” Taffeta Ribbon –  Pumpkin Pie / $5.95
119261 1/8” Taffeta Ribbon – Basic Black / $5.95
122344  Postage Stamp Punch / $15.95

Hope you had a wonderful weekend.  I’ll see you back here tomorrow for another fun card!

Have an awesome Monday!

blog closing-small

JOYFUL CHRISTMAS …

Hello Stampin’ Friends,

Today I am “joyful” and I’m sharing with you another Christmas card.  I know many of my stampin’ friends are already planning their cards, so here’s another sample from the beautiful “Joyful Christmas” stamp set (Wood – 131802 / Clear – 131805) … and you can find that in our Holiday catalog on page 27.

000_0085

I have been dying to use my new “Stylish Stripes” Folder (132174) also in the holiday catalog on page 22, and it became the focus on the card.  My decision to use the poinsettia came later.  I saw a card from fellow demonstrator  LeeAnn Greff, who used strips of designer series paper between the lines from the folder… loved the idea!  So, inspired by her card, I used the new “Season of Style” Washi tape (132155) on page 25.

000_0086

The washi tape fit nicely inside the lines when I flipped the embossed cardstock over (you can use it either way), then I matted it with Old Olive cardstock.  Next I embossed the Cherry Cobbler and lined up the two pieces together (if you want to do this quickly … cut your cardstock larger than needed and cut it down to fit together).  I love the way the two embossed pieces flow together when using this layering technique.

Next I stamped my poinsettia with Cherry Cobbler ink (twice) and cut out both the overall image and then the small flower inside the large, so I could create extra dimension.  To give it the soft look … I just sponged the edges, however the flower came alive when I spritzed (Smooch Spritz – 118772 / pg.165) both pieces of the poinsettia.  It blended the sponging so nicely and the shine just made it pop.  (Funny how lighting and camera angles can change the look… you barely saw the shimmer on the first card shown)

000_0082

To finish off the flower, I added the cute new “Candy Dots” (130933) from the Soft Subtles collection on page 147.  Then I used my marker to ink up the word “joyful” from the greeting (included in stamp set) to finish off the card.

Are you getting ready for your Christmas cardmaking?  Let me know when you get started.

Have an awesome day!

blog closing-small