Itty Bitty Christmas bundle …

Hello Stampin’ Friends ~

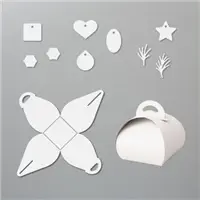
For the past few days I have been sharing cards I created with the Itty Bitty Christmas bundle. It is amazing how different each card turned out … I wanted to show the different elements of the stamp set and dies to demonstrate how versatile this bundle is.

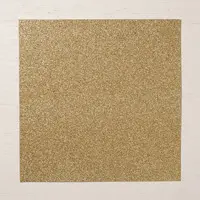
The first card is bursting with holiday flair and is decked out in gold.  The floral pattern really highlights the greeting and ties in the gold throughout the card so nicely. The Shades Spruce and Cherry Cobbler look so regal together and are compliments of the Wrapped in Plaid Specialty Designer paper.

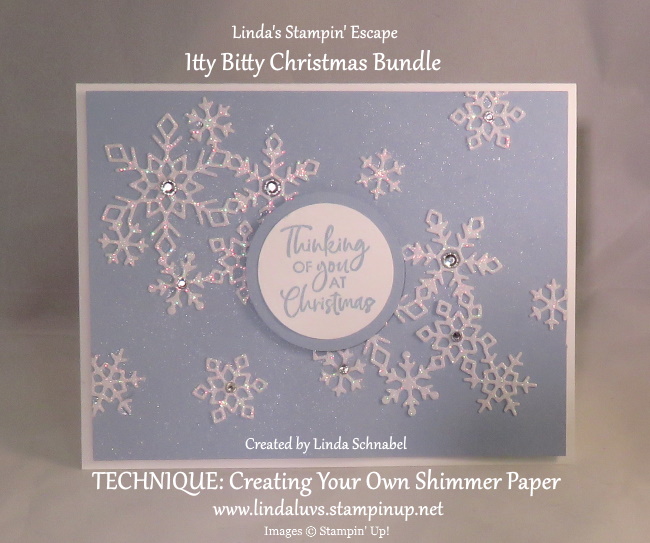
My second card is so different from the first in that we have created our own “Shimmer” paper by spritzing the beautiful Seaside Spray from our 2019 – 2021 In Color collection.  For a little more sparkle, the snowflakes are cut from the Sparkle Shimmer Paper! But wait … there is one more layer of sparkle when I added the Rhinestones to the snowflakes.

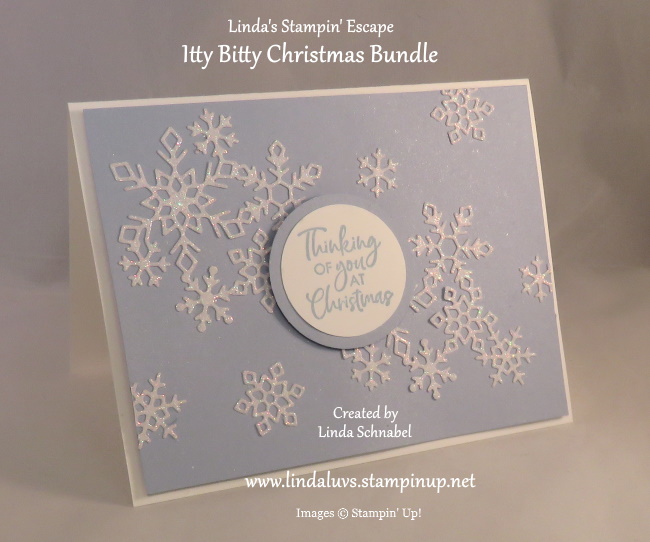
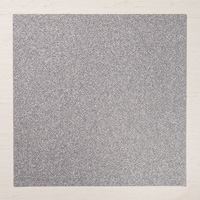
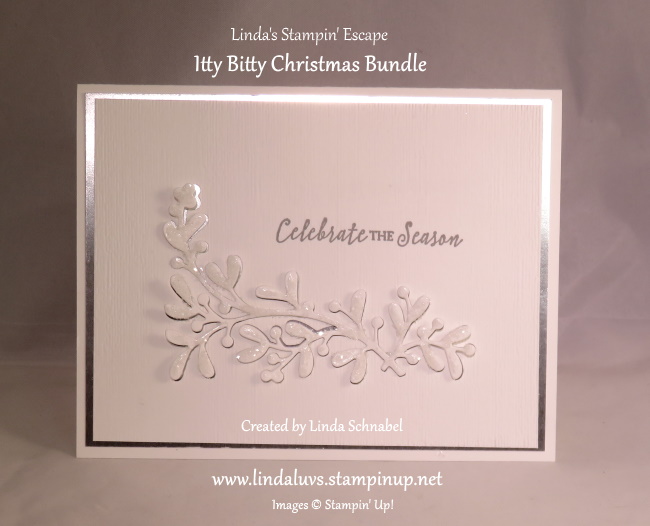
My last card of the three is just simply elegant and done with White and Silver … and yes, graced with a touch of glitter. Instead of die cutting the image and adhering it to the base as I did in the first card, I actually cut it out of the front and used it to impose a second layer to the card… stunning.

If you didn’t know these 3 cards were from the same stamp set/dies … you might not know that they were!  Stop back tomorrow and I will show you how these holiday cards will be turned into everyday cards!!

Thanks for checking in with me today … meet you back here tomorrow.

Have some fun today!

Celebrate the Season in White …

Hello Stampin’ Friends ~

I am thrilled to share the last of the Itty Bitty Christmas card samples (well … at least for now) It is very simple to create but oh so beautiful. I began with Whisper White, a half sheet for my base and then a 3-7/8″ x 5-3/8″.  I ran this piece through the my die cut machine using the delicate foliage die.

The die cut piece of foliage will go back into the cut / negative space of our cardstock but popped up slightly to expose the cardstock below it.  This is the lovely Silver Foil sheets cut into a 4″ x 5-1/2″ piece which creates a elegant look to the card.

After I cut out the foliage image, I embossed the negative piece using the Subtle folder … this just gives the card a little texture.  I used the Smoky Slate ink to stamp my image directly onto my embosses sheet … and it worked nicely.  If you are afraid to do this, just stamp the greeting before you emboss it.

At this point is when I began to assemble the card … the only thing I used to help pop up the foliage was the mini glue dots.  After I took pictures for the blog of my cards, I decided to add the dazzling new Ice Stamping Glitter. Because the die is so delicate, it gives the foliage a subtle icy look. It is so pretty … wish the camera could see what our eyes can.

If you decide to make your Christmas cards this year, remember … simple can be stunning!  For those of you who like a little more, go right ahead, there are plenty of ways you could embellish this card.  Your cards should always be a reflection of you even when you case (copy and share everything).

Thank you so very much for hanging out with me today! I’d love to hear what you think the cards from Itty Bitty Christmas that I shared with you.

Enjoy this beautiful day ~

TODAY’S STAMPIN’ SUPPLY LIST … 


Christmas Snowflakes …

Hello Stampin’ Friends ~

I am back today with another beautiful card from the Itty Bitty Christmas Bundle … this card is done in the gorgeous Seaside Spray from our 2019 – 2021 In Color collection. This soft hue in blue tone is perfect for a snowflake card.  We added some shimmer to the cardstock by spritzing it with a combination of rubbing alcohol and our Shimmer Paint.

The snowflakes were cut from the Christmas Layers dies which are teamed with Itty Bitty Christmas for the bundle.  Purchasing these as a bundle will save you 10% … it’s like FREE Shipping! A good deal, either way.  I used the Sparkle Shimmer Paper for my snowflakes … however, I consider this “glitter” paper. We made the “Shimmer” paper by spritzing on our Shimmer paint mixture.  You can see it much better in this photo ….

Our snowflakes are attached with the Multi-purpose glue … it the tip is too large for you, put some on a piece of scrap paper and use a tooth pick to apply.  This was a tip given to me by one of my club members.   Our greeting, from the Itty Bitty Christmas stamp set and the Seaside Spray mat were both punched using our circle punches.  The greeting and the entire front were popped up with the help of our trusty Stampin’ Dimensionals!!

Our club members adorned their cards with Rhinestones…. they loved it because they could use as many as they wanted on their cards!!  What girl doesn’t like a little bit of bling anyway.  I just love stamping with my club members, many are like part of my family now … we share so much together!

I have one more card for you tomorrow using the Itty Bitty Christmas Bundle. I love how totally different the first two have been.  I hope you are enjoying the samples. If you would like to order any of the supplies used to make this card, you can contact me directly or use the images below to start your shopping.

Thank you so very much for stopping by …

Have a wonderful day!

TODAY’S STAMPING SUPPLY LIST … Click on any item for more information or to begin shopping.  Thank you!


Simply Sunday: Itty Bitty Christmas

Hello Stampin’ Friends ~

Hope you are enjoying your weekend, it’s a bit chilly here … I don’t think any of us are used to that!!  I think it’s the perfect weather to stamp!! Today I have a simply but pretty card I’d like to share. I have used the Itty Bitty Christmas Bundle.  I think it’s one of those “overlooked” bundles in the catalog … I love it! So many greetings and some amazing die cuts.  Let me show you …

Just starting to create my Christmas showcase of cards and I started began with the Itty Bitty Christmas Bundle and paired it with the Wrapped In Plaid Specialty Designer Series Paper.  I also used the Gold Foil paper to pull out the gold from the designer paper.

The Gold Foil was cut 4-3/4″ x 3-1/4″ which makes it large enough to place the die onto it and cut out your design … your plaid paper will cover it nicely.  You get the beautiful gold trim around your designer paper and your design cut out.

I used Whisper White cardstock for my inside and for the greeting which is stamped in the Shaded Spruce ink, then punched it out using the Pretty Label Punch.  To highlight the red in the Wrapped In Plaid Specialty Designer Series Paper … I added the Red Rhinestones.  A few Stampin’ Dimensionals to pop up the greeting and then the designer piece and our card is complete.

This card would look pretty without our die cuts for those of you who are new to stamping and may not have a die cutting machine yet, but the sure do add a nice touch!

I hope you enjoyed todays card … I will be sharing more of the Itty Bitty Christmas Bundle the next few days.

Thank you for taking the time to visit with me today. I hope you have a warm and peaceful day.

TODAY’S STAMPING SUPPLY LIST …. 


Curvy Keepsake Cuties …

Hello Stampin’ Friends ~

Thought we’d have a little fun today seeing some fun and creative ways to use your Mini Curvy Keepsake die …

Let’s start are weekend with a little sparkle!!  These cute little treat keepers are so quick -n- easy to make and you can use any of our four glimmer papers, and don’t stop there … you can also use the beautiful foils we have too.

Another quick -n- easy way to create cute holiday treat boxes is using some of the beautiful designs in our Designer Series papers. We have many beautiful holiday papers right now …

This designer paper has retired but I find it’s a great way to use up my papers and put a smile on anyone’s face!  Who wouldn’t love getting such a cute little gift …


If you missed my latest creation with the Monster Bash Designer Series paper … These little cuties are to die for (well, not literally) your trick or treaters, co-workers or friends will be thrilled.


Mini Curvy Keepsakes Box Dies 150644

Last but not least is a real treat keeper designed for the biggest gift giving time … Christmas.  Can I get a little “Ho … Ho… Ho”  Simple to create with just a few punches, my Santa Curvy Keepsake will even fit in the stocking.  Making it with cardstock, makes it a little more durable.

These would be so cute on the fireplace mantle … on a co-workers desk, where ever Santa would leave a little treat.  A nice chocolate truffle fits perfectly in the Mini Curvy Keepsake box!

Have fun creating these quick -n- easy little treat boxes for every occasion … they make perfect little gifts around the table for baby showers, brides maids, Thanksgiving … you get the picture.  I have a list of supplies below that I used to create these cuties.

Thank you for joining me this “rainy” Friday … just glad it’s not snow!

Have a great weekend ~

Here is a supply list for some of the items shown above … 


Throwback Thursday … Country Home

Hello Stampin’ Friends ~

Today is Thursday … a throwback Thursday but I’d like to think it’s a “thankful” Thursday. I’d like to share some of my favorite cards from the Country Home stamp set. This is a beautiful set for the time of year however I believe that you can find a friend that would fall in love with this at any time of year.

I made this card for a friend who was brought up on a farm so that milk can brings back memories for both of us … for her, her parents house, for me … visiting my grandpa and grandma on their farm.  The stunning Tin Tile Embossing folder in combination with the Country Home stamp set really warms your heart.

This warm little hello is another one of my favorites of the Country Home Stamp set.  I used to work in a Flower Shop so I was immediately smitten with the dried flower arrangement that I could tuck so neatly into this pitcher … kind of reminds me of my grandma, she had one just like it ♥ 

Sometimes it’s just nice to sit back and reflect on days gone by … especially when you can enjoy that moment with a friend or family.  I hope you enjoy your day today.

Thank you for joining me today …

TODAY’S STAMPING SUPPLY LIST …


A Rosy Celebration …

Hello Stampin’ Friends ~

Yesterday I shared with you the announcement that the Everything is Rosy has been added to the Clearance Rack, along with a parade of cards to show what you can do with this product medley.  Today I’m going to share some of the cards I created.   I also have a fun announcement for you today … check out the video!!

On my first card, we used the Rose Glimmer Paint to stamp the back ground.  It reminded me of old fashioned wall paper and the glimmer added the perfect twinkle.

The rose gold elements that are include in the medley make creating cards easy, but they look like you’ve spent a lot of time on your card.  I’m sharing the next one in two angles so you can see how beautifully the Rose Gold goes with the Night of Navy.

I love the foils that are include with this medley and “everything” coordinates so it takes the guess work out of your creating … the hard part is picking which pattern you want to use, they are all so pretty.  This card may be simple but I think it’s my favorite.

The next card shows how you can tame down a pattern that you might otherwise think is a bit loud.  Some love it, not my first pick but once I got my card together … I loved it!!

Do you agree? Turned out pretty cool … I cut the frame out using the rectangle framelits which really highlighted the greeting. The pretty floral adhesive die cuts add the finishing touch to the card.  I absolutely fell in love with this card when it was completed.

I hope you enjoyed the cards … let me know if you have any questions with this product medley.

NOW … onto the announcement!!

Our newly designed Paper Trimmer is lightweight, portable, and perfect for making stable and straight cuts!  There is not a release date “to date” … they are making sure they have enough inventory to make everyone happy.  I don’t predict a long wait … I’m hoping next month (but don’t hold me to that).

Thank you so much for coming back to check out my cards!!

Hope you have a beautiful day ~

Here is the link for the Everything is Rosy Product Medley ….


Card Parade … Everything is Rosy

Hello Stampin’ Friends ~

Today I’d like to share another Parade of Cards with you … The Everything Is Rosy Product Medley is back and available to purchase for 15% off—but only while supplies last.  Product medleys are new to Stampin’ Up!, and they’re  filled to the brim with cute, coordinating products.  Stampin’ Up! has designed our product medleys to provide you with endless creative possibilities.

The Everything Is Rosy Product Medley includes these exclusive products:

Everything Is Rosy Photopolymer Stamp Set—18 stamps; suggested blocks: a, b, c,
Everything Is Rosy Dies—10 dies; largest die 2-7/8″ x 1″ (7.3 x 2.5 cm)
6″ x 6″ (15.2 x 15.2 cm) Designer Series Paper Stack—48 sheets; 8 each of 6 double-sided designs
6″ x 6″ (15.2 x 15.2 cm) rose gold foil paper—8 sheets
Printed die cuts—2 sheets
Rose gold die cuts—4 sheets; 2 each of 2 designs
Rose gold adhesive backed mirror embellishments—60 embellishments; 1/4″ (6.4 mm)
Melon Mambo 1/4″ (6.4 mm) Ruched Ribbon—10 yards (9.1 m)
Night of Navy/Rose Gold 3/8″ (1 cm) Metallic –Edge Ribbon—10 yards (9.1 m)
Rose Gold Shimmer Paint—1/2 oz. (15 ml)

Here is a parade of cards created with this amazing product medley ….

Here is everything that is included in the Everything is Rosy Product Medley …

If you missed out on this offering last time, or if you were looking for additional product because you used your supply up … you can get it now at a 15% discount! Everything is Rosy is BACK and on the Clearance Rack!!  Go to https://lindaluvs.stampinup.net/ then click SHOP NOW and head to the Clearance Rack.

Thanks for coming by today, and check back tomorrow as I share the cards I created with these beautiful products and accessories.

Have a great day ~


Reflections of World Card Making Day …

Hello Stampin’ Friends ~

I just want to take this time to thank all of you that stopped by my Stampin’ Escape Facebook page yesterday to celebrate World Card Making Day.

We had some fun with games, special offers and more … So I’d like to thank those who participated as well …

I want to thank everyone who played the “You are My Sunshine” game … making words out of the letters from that phrase.

Each winner will receive a package of the new holiday rhinestones …

I’d like to thank Andrea Morris for booking an October Stampin’ party … with such, she won FREE SHIPPING on her entire order! Now that is a nice savings …

I also want to thank Kris Harmsen for participating in the “Pick a Anchor” game and winning FREE Glimmer Paper along with her order….

Many participated in the “Guess How Many Kisses” Game … and Dawn Chapman came up victorious with only 3 kisses away from the correct answer.

And one of the first we played but last to be revealed was a picture and getting to know me a little better. From the picture, they were supposed to pick four things about me.  These were my answers …


We had a lot of fun and I think we will have to do this on a smaller scale but more often.  Hope you can join us next time, if you didn’t to join us yesterday.

Thank you for checking in today, I’ll be back tomorrow with my Simply Sunday post.

Have a wonderful day.


Join the PARTY: World Cardmaking Day

Hello Stampin’ Friends ~

Saturday October 5th is World Cardmaking Day and I’m inviting you to join me on Facebook to celebrate!!  There will be games, prizes, card making samples, specials and a whole lot of fun … so I invite you to join me!

The party begins at 9 am and goes to midnight!!  I’ll have fun games for you to join in on, exciting ways to WIN FREE products, and some awesome specials for you to take advantage of.  Meet me on my business Facebook page … Linda’s Stampin’ Escape.


Monster Bash ….

Hello Stampin’ Friends ~

I hope you have been enjoying my parade of Halloween cards and treat containers. Halloween is such a fun holiday to decorate for and it suits kids of all ages! If you scroll down … on the lower right hand side you will find my Halloween Creations all posted nicely on the side for you to view!! It’s a great way to see them all.  If your looking for specific items and directions, just type in “Halloween” or “Monster Bash” into the search box and it will pull up all the posts relating to your search.

Here are some of Stampin’ Up!s creations …

Don’t be afraid to contact me if you need help placing your Halloween order.  Here’s a cute little video to watch …

If you pop on over to my Linda’s Stampin’ Escape Facebook page you can view a video on how to make the cute coffin you see above.  Let me know what I can do for you.

Thank you for stopping by today …

Enjoy your day.

TODAY’S STAMPING SUGGESTIONS for Your Halloween Creations …


Trick or Treaters Delights …

Hello Stampin’ Friends ~

I always love to create special little packaging for my trick or treaters … I don’t get many where I live now so it’s mainly my grandkids!  This year I will create a custom die-cut keepsakes box in record time using the Mini Curvy Keepsakes Dies.  You’d be surprised what can fit into these cute mini boxes.  I cut my boxes out with the Monster Bash Designer Series Paper.  This designer paper  provides a fresh take on favorite Halloween characters and themes.

I was thrilled to see that the set of dies included tags … so I used two of them and teamed it up with the “To Every Season” stamp set.  To every season . . . there is a time for bats, a time for snow, and a time for love. Combine the greetings and images from the To Every Season Stamp Set for tags, treat packaging, or whatever is in season.  I paired it perfectly with the Mini Curvy Keepsakes Dies … these are two tools in my stamping arsenal that will be used all year long.

No craft stash is complete without the essential black ink pad… the Tuxedo Black Memento Ink Pad. You’ll love the coverage this ink gives, and that is why I not only used it in todays tags but in all my projects using the Stampin’ Blends.

he silly ties are from the on my tags are from the Black Scallop Ribbon … on the bat container I cut the edge off the ribbon to attach it and for the one with the spider webs, I actually pulled the rest of the ribbon apart and tied on the shreds!! Like that it looks like spider webs!! lol

Your trick or treaters are going to fall in love with these cute little boxes and you’ll love that they’ll be done quicker than it takes to make a witches brew!

Thank you for hanging out with me today. Enjoy your day.

TODAY’S STAMPING SUPPLY LIST …


Here’s A Card Stamp Set …

Hello Stampin’ Friends ~

Have you ever had a moment when you didn’t know what to say? The “Here’s a Card” Stamp Set can help you say what you want to for any occassion so you can give them a card! We’re positive the lucky recipient of your card will love it.

The samples above show how a casual or avid stamper could coordinate with products from both the annual catalog and the holiday catalog to get cards perfect for any occasion.

In our Congratulations card, we combined this stamp set with the Leaf Punch and the Stitched Nested Dies from the annual catalog with the Feels Like Frost designer series paper from the holiday catalog.

Our Happy Birthday card features the Balloon Bouquet Punch from the annual catalog and the Brightly Gleaming designer series paper from the holiday catalog.

The Hello There card was made with the Stitched Shapes Dies and the Cup of Christmas Stamp Set.
There are so many ways to show someone how much they mean to you, but the Here’s a Card Stamp Set is a great place to start.

These cute card samples and description comes from the Stampin’ Up! home office. I love to coordinate my stamp sets with each other to really get more bang for my buck… many of them are designed to work together.

Thanks for dropping by today.  Hope you enjoyed these cute projects today, I’ll be back tomorrow with something special!

Stay Dry and Have a wonderful day… It’s a wet one out there today. Good day to stamp!

Hauntingly Cute Hand Sanitizer Gift Box

Hello Stampin’ Friends ~

Hope you had a nice weekend and got a chance to check out the Halloween projects I shared yesterday … a card and a treat box! For some, Halloween is all about the candy, for others, they like to hand out practical gifts.  What would you think about creating something that makes those “practical” gifts more fun?  I have a cute little wrap for hand sanitizers that is quick -n- easy to make.

Let’s begin with the outer wrap.  Start with an 11″ x 3″ piece of cardstock.  Score the cardstock at 4-7/8″ and 6-1/8″ … these measurements will ensure the insert sits nicely in the wrap.  Then punch both ends, this will be used to for your ribbon and to close the top.

Attach a piece of 2-3/4″ x 3-1/2″ of designer paper… I used Monster Bash. We finished off the top edge of the designer paper by attaching a piece of ribbon over it and trimming off the edges.

Stamp your greeting and cut out with a favorite die or punch.  I used the coordinating die from the Spooktacular Bash Bundle and pop it up with the new black Stampin’ Dimensionals.

Set your outer wrap aside for now … it’s time to create your inner (inset) piece.  Cardstock should measure 4-1/2 x 2-7/8″ … score at 1″ – 2″ – 3″ and 4″.  Using the smallest of the scallop ovals, place it between the the two score lines closest to the 1/2″ flap. (See photo below).

Once the whole is cut out, you will need to glue the 1/2″ flap to the opposite side to create a box.  The hole needs to be facing up … add glue to the bottom (opposite side with the hole) and set it into the outer wrap between the score lines.  Now you can tuck your Hand Sanitizer into the scallop oval hole.  The Bath & Body Works small hand sanitizers fit perfectly into the oval.

This would make a cute teachers gift, thank you gifts, get well ? Any reason … flu season is coming and why not be prepared and be the cool mom on the block!  This is also a great way to use up some of that designer paper you’ve been hording … lol.

Have some fun creating these cute Halloween gifts for your ghoul friends and then make some more for just for the fun of it … Christmas is coming too!

Thanks so much for joining me today … Let me know if you liked this project, I’d love to hear what you think … just message below.

I also have a supply list below to make your shopping easy, just click on any image for more information or to begin shopping with me.

Just a reminder … Today is the last day of the Buy 3 / Get 1 FREE Designer Papers …

Have a great Monday!

TODAY’S STAMPING SUPPLY LIST …

.


Simply Sunday: Dancin’ in the Moonlight

Hello Stampin’ Friends ~

And a happy Sunday to you! Are you ready for some fun today? I’ve got a playful combination of products to share with you today… the Monster Bash product suite and the September 2019 Paper Pumpkin: Bone Appétit.

Let’s begin with the Coffin Boxes … such a fun way to share a special treat with your trick or treaters this year. I used the beautiful scroll design from our Monster Bash designer paper,  Now grab your sponge dauber and your Daffodil Delight and Pumpkin Pie ink pads.  I sponged on these colors to create a candy corn look directly onto my designer paper.  Little Wink of Stella to give it some shimmer.

Next I  pulled out my Bone Appétit Paper Pumpkin and adhered the vellum circle onto my lid. I took the new BLACK (I just love them) Stampin’ Dimensionals and used it to pop up my skeleton web … not only does it pop up but it give you the “dark sockets” in the skull! A bit creepy!

I added a little greeting direct from the Paper Pumpkin kit and the enamel embellishments are from our Monster Bash Suite. Then I thought it would be cute to give the recipient of this crafty little gift a “hand” … lol

With the same supplies and sponging technique, I created a coordinating card …

I just love these little skeletons and thought it would be cute to have them dancin’ across the card. These little guys are die cut images, as is the tag.  Did you know that if you subscribe for the October kit … you could then purchase this kit too!!  Past kits are available to purchase when you are a current Paper Pumpkin subscriber!

The holiday season will be here before we know it. And along with putting up the Christmas tree and spending snowy nights by the fire, many of my Paper Pumpkin subscribers will be looking forward to opening their holiday kit. Christmastime papercrafting with Paper Pumpkin has become an annual tradition!

Let’s take one last peek at our Halloween themed Paper Pumpkin and Monster Bash combination … I had a blast making these, and I’m sure my grandkids are going to love them!

Thank you for sharing a part of your Sunday with me. Hope you enjoyed my projects.

Have a wonderful day ~

TODAY’S STAMPING SUPPLY LIST …