Road Tripping with Eileen …

Hello Stampin’ Friends ~

Today I’m going to take you along on a little road trip that Eileen and I took to Door County yesterday … Egg Harbor to be exact!

We went up to see one of Eileen’s favorite bands “Tonic Solfa”. I must admit, they are great and I really enjoy seeing them too.  It was an outdoor concert so after our dinner at the Florian II Supper Club (yes, I was so excited to finally get to a supper club again) we went back to Egg Harbor for the show …

It was a beautiful night, a little iffy because of the rain earlier but the show went on as planned.

Let me introduce you to Tonic Solfa…

Here’s one they sang …

And I’ll sign off with the beautiful sunset to a great day with my sister!

Thanks for stopping by today ~


Simply Sunday: Happiness Is …

Hello Stampin’ Friends ~

As promised I’m back to share my Simply Sunday card from the Coffee Café Bundle. This is a fun set to work with!

My background comes from 2 of the different patterns from the Coffee Break Designer Series paper. There are so many cute patterns in this series it was hard to pick which ones I wanted to use … guess that means I have to make more cards!

The greeting  is from the stamp set but I ued my Pear Pizzazz and Early Espresso Markers to color just the part of the stamp that I wanted to use as my greeting! Cool right!

I cut out the greeting using the Stitched Shapes Framelits and then matted it with Early Espresso and Pear Pizzazz ovals from the Layering Ovals Framelits.

I added 3 little hearts to draw your eye around the card … these come from the Mini Treat Bag Thinlits! I tied up this card with a pretty little white bow which compliments the white in both of the designer papers.

Thanks for taking a little break today to check out my blog … hope you enjoyed my card!

Hope you can kick back and enjoy your Sunday.


Ready for Christmas!? Sneak Peek …

Hello Stampin’ Friends ~

Quick post today to share a video introducing an amazing bundle in the upcoming Holiday catalog!

Grab your cup of coffee, kick back and relax while we introduce you into the “Ready for Christmas” bundle …

That was Bonnie, Director of training at Stampin’ Up! sharing some of the many festive combinations you can create with the Ready for Christmas Bundle.

Now you can get ready for Christmas with the Ready for Christmas Stamp Set and Christmas Staircase Thinlits Dies! Even better–buy them together in a bundle and save 10%!

My stampin’ customers’ Holiday Catalogs are on their way to your homes!

If you’re new to my blog or newsletter and would like me as your creative coach (demonstrator) … all you need to do is place a $35 order and I’ll send you a Holiday Catalog and “Welcome” Gift as well!

I want to thank you all for joining me today. Stop back tomorrow for my Simply Sunday post … I’m working with the tasty Coffee Café bundle for an upcoming class, so I’ll share one of my creations!

This bundle is so fun to work with… I had no idea all of the neat cards you can make with the Coffee Café bundle!!

Thanks again and I’ll see you tomorrow ~

Have an awesome day!

Holiday Catalog Sneak Peek: Watercolor Christmas Project Kit

Hello Stampin’ Friends ~

Today I’m sharing a video to introduce you to the Watercolor Christmas Project Kit that will be in the upcoming Holiday catalog!

If you’re one of my customers, you Holiday catalog will soon be on it’s way! You’re going to fall in love with the diversity of the stamp sets, there is truly something for everyone.

Check out the video and see how cute yet east these cards are to make …

So when you get your kit … Invite your friends over, put on your favorite holiday movie, and make Christmas cards! The cards in this kit look time-consuming but take only minutes to assemble, thanks to preprinted elements that look like you watercolored them by hand! All you need is the kit, the Watercolor Christmas Stamp Set, some ink, and some adhesive, and you’re good to go!

Thanks for stopping by ~

Have a great day!


Carols of Christmas …

Hello Stampin’ Friends ~

I’m so excited to share with you one of the cards that my “Carols of Christmas” classes got to make. The excitement is this wonderful bundle is available to order NOW!!

The “Carols of Christmas” bundle is in the upcoming Holiday Catalog which will be released on September 1st, but Stampin’ Up! is offering a pre-order so you can get your stamping started now (by all means … I need too!)  The bundle contains the Carols of Christmas Stamp Set and Card Front Builder Thinlits Dies–all at a 10% discount!

Now I’d like to show you my rendition of the first card you will see in the upcoming video …

I used the “Be Merry” Designer Series paper on a Cherry Cobbler card base. The banner was used to draw your eye to the focal point … the greeting!

The greeting is stamped in Garden Green and then partially in Cherry Cobbler (which is cut down and applied over it’s counterpart) a great way to get tow-tone colors without the coloring!

We added a few stamped accents and then embellished them with a pearl and a die cut holly!

Now I invite you to sit back relax and check out the “Carols of Christmas” video by Stampin’ Up!

How did you like the great suggestions for additional projects? I think my favorite is the framed Vellum that goes over the photo.

Thank you for hanging out with me for part of your day!

Have a great day ~


Thanks man … You’re the best!

Hello Stampin’ Friends ~

And Hello August! Wow.. this summer is going by so fast! Hope you’re out enjoying it. I’m looking forward to a mini get-away with my sister Eileen to Door County to see Tonic Sol-fa

Tonic Sol-fa is an a cappella group from the Minneapolis–Saint Paul region. With a largely pop-music-oriented repertoire, their CDs have sold over 1,000,000 copies, and the group has toured throughout the US and abroad.

OK … back to stamping! As promised, I have another alternative to the July 2017 Paper Pumpkin kit … a bit more man!


I simply used the mountain scene as I did in the original design but did not tuck it behind the circular window but put it boldly in the forefront to create a focal point. 

I cut the notecard in half and stamped the thanks which came from the exclusive stamp set that is included in the kit, as dose the cute little sun and mounted it all on the front. I then mounted that piece onto the white card.

Thanks for stopping back, hope you enjoyed.

Have a happy day ~


It’s Your Day!

Hello Stampin’ Friends ~

While getting ready for my Carols of Christmas class this weekend, I ran across some leftovers from my July 2017 Paper Pumpkin and decided to use them up so here is my alternative to the pre-designed cards in the kit… 

Everything on the card comes in the kit except the Glitter Enamel Dots and I used them to cover up a couple of smudges! With mistakes comes opportunity!!

I also used the oval from the Stitched Shape Framelits to cut out the tulips. The “hooray” gives the card added dimension, and I wanted to make sure I used up all the wooden elements from the kit!

Also … wanted to let you know that today is the last day to cash in on this exciting offer (the best I’ve seen in my 17 years as a demonstrator).

Once you purchase the kit you can check out all the wonderful benefits of being a demonstrator (I can help) and then decide to dabble in the fun or just play with all your new stamping supplies! Your choice!

Contact me with any questions @ lindaluvs2stamp@aol.com

Thanks for checking in on me today, I’ll be back tomorrow with a more manly alternative from the July 2017 Paper Pumpkin kit!

Have a wonderful day ~


Simply Sunday: Daisies

Hello Stampin’ Friends ~

Today I have simply stamped card from our Delightful Daisy bundle that truly highlights the stamp set.

One advantage of working with the Photopolymer stamps is that you can bend or shape them, like I did with my daisy. It gives movement to your card.

To give it dimension, I stamped the blossoms twice so I could cut them out and layer them on top of each other…. a touch of Daffodil Delight in the centers for a pop of color!

The greeting comes from the “Layering Love” stamp set and coordinates nicely with the daisies. Sweet and Simple!

Before I leave you today… I want to invite you to consider joining my team.  There are only a few days left on this amazing offer!

Once you purchase the kit you can check out all the wonderful benefits of being a demonstrator (I can help) and then decide to dabble in the fun or just play with all your new stamping supplies! Your choice!

Contact me with any questions @ lindaluvs2stamp@aol.com

Thanks for stopping by and have a wonderful day ~

The Daisy is Back!!

Hello Stampin’ Friends ~

I’m so excited to let you know that the Delightful Daisy bundle is back and available to order … I have a stunning card to share with you that we made in my Delightful Daisy class earlier this month. 

Speaking of our Delightful Daisy class…  all the lovely ladies who ordered my special class bundle; Your orders were placed and you will get the $5 Bonus Buy from Stampin’ Up!


I teamed up the Daisy Punch with the awesome new “Wood Textures” Designer Series Paper stack … the Whisper White daisies are striking against the deep wood background.  The touch of yellow from the centers really makes the flowers pop. 

The greeting was created using the “Label Me Pretty” bundle … just stamp -n- punch! We colored the pearls with a black Sharpie™ … I wanted it to look like little nail heads that secure the label to the card.

I love both of these bundles and find them versatile and easy to use! I think the daisies are perfect for sending a little cheerfulness in a card!

Hope you enjoyed today’s card as much as the ladies in my class and I enjoyed making it.

Thanks for stopping by my blog today …

Hope your day is full of cheer!


TODAY’S STAMPIN’ SUPPLY LIST …


Don’t You LOVE Sneak Peeks?!!

Hello Stampin’ Friends ~

Yesterday Stampin’ Up! posted the new Holiday Catalog on the demonstrator site for all of us to see … It’s AMAZING!!! I already have 5 bundles on my list plus a whole bunch of fabulous new designer papers, stamp sets and embellishments!

I can’t share it with you until September 1st … but if your on my mailing list and have ordered with me in the past 6 months … I’ll be sending you the Holiday Catalog.

NOW … if YOU would like to purchase from the Holiday catalog beginning August 1st… a whole month early – then I invite you to join my team of Star’s!

You’ll have LOTS of fun if stamping is your hobby
or if you ever dreamed of making an income from crafting!

Only a few days left on this awesome deal!

Cost is only $99.00 for $125 in product that YOU choose!

THIS MONTH ONLY Stampin’ Up! is adding “The Carols of Christmas” stamp set and these awesome tools to YOUR kit for FREE ! That’s an additional $72.00 in FREE Product!    ALL THIS FREE…

There are MANY perks for being a part of my team!  I host retreats, a private facebook page, meetings with recognition, training and more!
Join just for the fun, or to have the support to build your own business …your way!
NO OBLIGATION! ANYONE CAN JOIN!

JOIN HERE

Cost is only $99.00 for $125 in product that YOU choose!  PLUS the $72 worth: Free Stamp set and gift pack!

Please let me know if you have any questions, I’m here to help!
You can message me at:
Linda Schnabel | Linda’s Stampin’ Escape | 262-334-1009


Texture made easy!

Hello Stampin’ Friends ~

Today I want to share with you a new product video. Stampin’ Up! has introduced “Embossing Paste”.  I’ve seen this in craft stores but never really tried it before.

Texture made easy! Stampin’ Up! trainer, Brandi, shows you just how easy it is to add texture and interest to your papercrafting projects using our brand-new Embossing Paste.

After watching this video, I’ve been inspired to play … What do you think? Looks like we can create some really cool cards & projects with the embossing past!

Thanks for hanging out with me and watching the video.

Have a great day ~


TODAYS STAMPIN’ SUPPLY LIST …


August Stampin’ Classes Announcement …

Hello Stampin” Friends ~

Today I’d like to share a full list of August classes with you and that I have opened up a second “Carols of Christmas” Class! I’ve had such an interest in this class that the second will be held on …

Tuesday, August 1st @ 6pm.  

COST: $10 or FREE with $35 purchase

Here are the Classes, dates and times. All classes will be held at my Stampin’ Studio …


Much needed …  

A COFFEE BREAK CLASS   

DATE: Wednesday, August 9th  /  TIME: 6 pm

COST: $10 or FREE with $35 purchase

Coffee creations are on your horizon with this bundle of products. The stamp images coordinate seamlessly with the framelits to help you create coffee cups of all shapes and sizes. The die includes a piece to create an embossed cup sleeve for a realistic looking cup.

* * *

And for some birthday fun …

BIRTHDAY MEMORIES CARD CLASS

DATE: Thursday, August 17th  /  TIME: 6 pm 

COST: $10 or FREE with $35 purchase

The nostalgic works of art you create with this intricate, colorful imagery will delight any audience and leave everyone wishing they had another birthday coming this week!

* * *

THE EASTERN PALACE CARD CLASS

DATE: Wednesday, August 23rd  /  TIME: 6 pm

COST: $10 or FREE with $35 purchase

Bold imagery with detailed, Eastern-inspired opulence will have you stamping up a whole new world of possibilities. The coordinating dies create beautiful focal points for stamping or embellishing. Many die pieces nest within each other to create one of a kind die cut images.

* * *

There will be specials, great cards and lots of fun!!

Please note that the photo’s represent the bundles we will be working with and not necessarily the exact projects/cards. Thank you.

You can RSVP for the “Carols of Christmas” Class on August 1st or any of the other classes. All the July classes filled to capacity quickly, so RSVP early.   email: lindaluvs2stamp@aol.com

Thanks for checking out my class list … hope to see you there!

Have a fabulous Friday ~

Positively Picturesque … Part 2

Hello Stampin’ Friends ~

Hope you enjoyed yesterday’s cards … I’m back today with the second round of the July 2017 Paper Pumpkin kit. You will see the remaining 2 cards from the kit and my Alternative Project.  Here is a shot of yesterday’s cards …

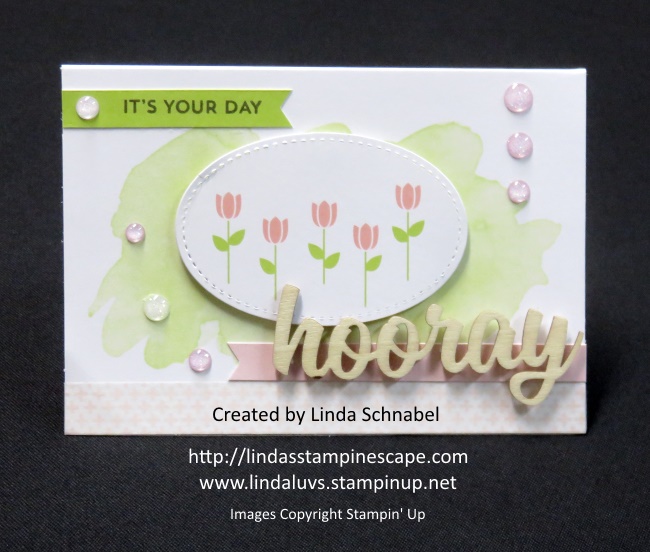
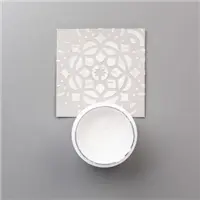
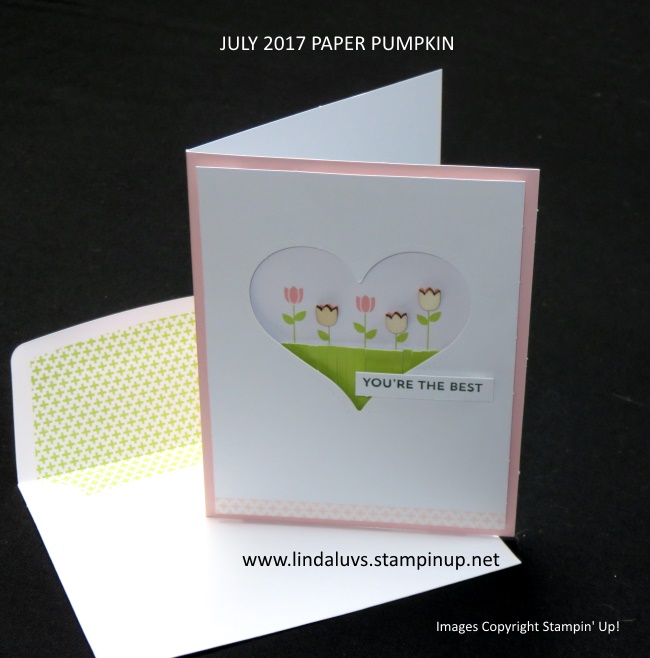
Here is the 3rd of the 4 card designs in the kit. It’s actually quite “Springy” Love the little tulips and how they are nestled into the heart like a little puppet show! The tulips are pre-printed so no worry about stamping solid images or “straight”! Even the grass was pre-cut for us! Wonder if they do lawns? lol

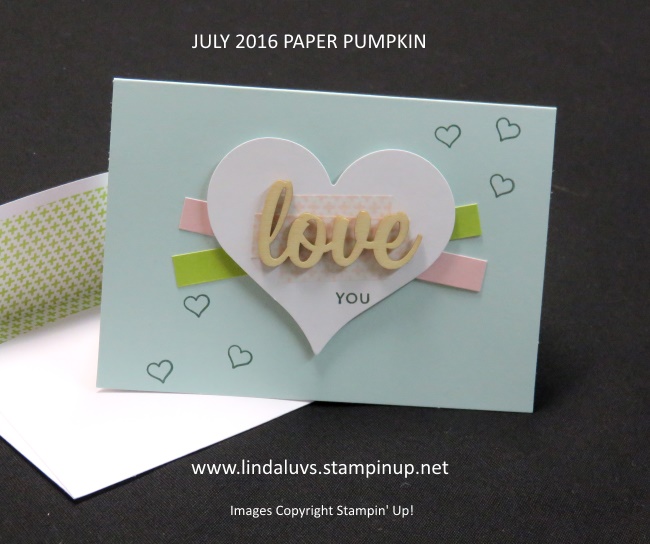
The last card is created using the heart that was popped out of the 3rd cards front panel. The little colored banners are die cut stickers … how easy is that! Then we add a little Washi Tape onto the heart and add the “love” with the enclosed glue dots.

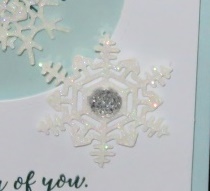
I almost forgot to stamp the “you” so it was added after I assembled the card (lucky!). The hearts were suppose to be stamped in the Soft Sky but I like the contrast of the Tranquil Tide … so just like Frank Sinatra … I did it my way!

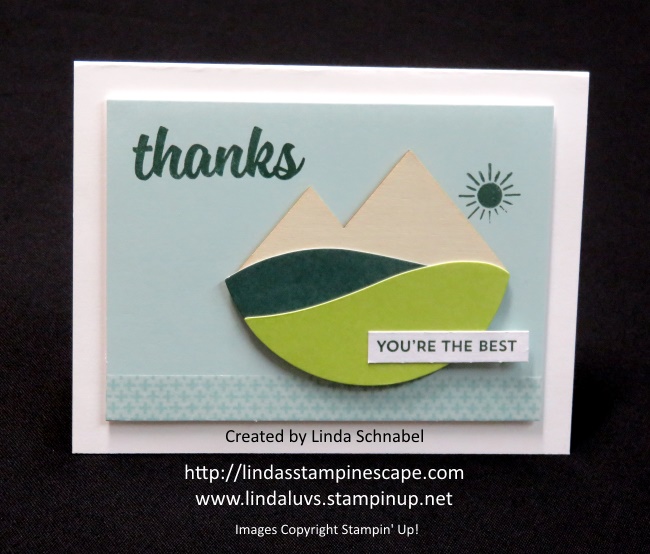
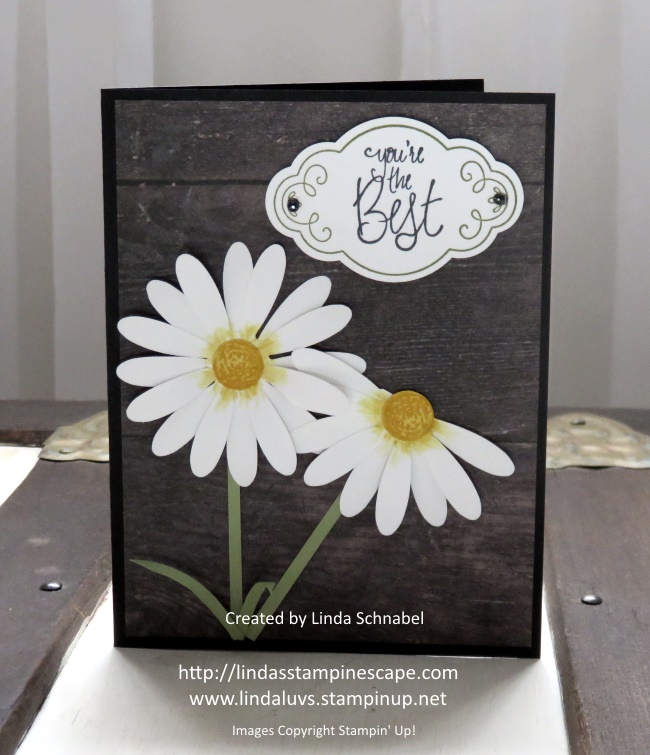
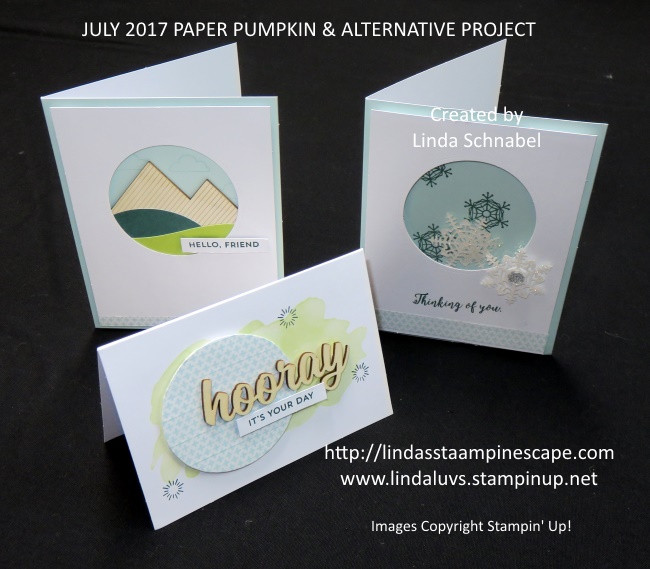
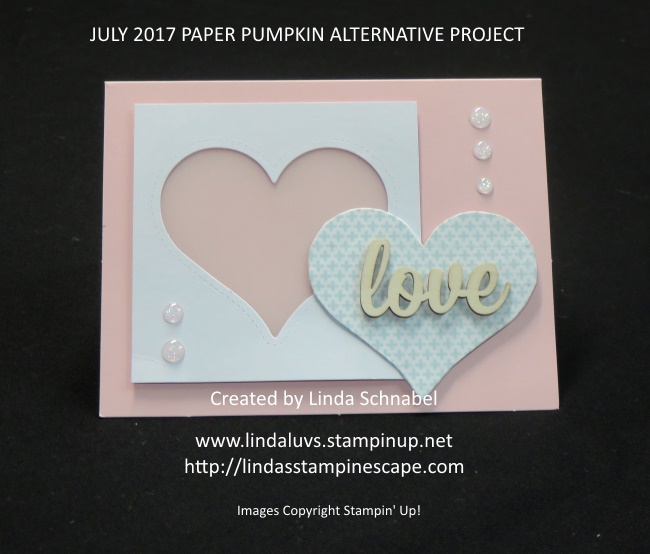
For my alternative card, I choose to use the “heart” again … in fact, I used both the heart and it’s negative on the same card …

I popped out the heart and covered it with the Washi Tape that was used on the first cards (Yes … we got 2 colors of washi tape) and then cut down the negative to fit the card. Before mounting it onto my card base, I put a piece of “Vellum Cardstock” behind it to give it a different look.

I attached the Washi Heart onto the card and added the “love” … I thought about coloring it but changed my mind because I really wanted it to stand out, and it does with the natural wood look.

Lastly I used a few of the “Glitter Enamel Dots” to add a touch of bling to the card! I just love those glitter dots!!

I appreciate you coming back to check out the second round of cards. Hope you liked them … I still have left over supplies!! Maybe I’ll make even more.

If you want to know more about Paper Pumpkin, email me at lindaluvs2stamp@aol.com  or click on one of the links below and start  your subscription!

Thanks again and have a great day!


TODAY’S STAMPIN SUPPLY LIST …


Simply Sunday: Paper Pumpkin Alternative Part 1

Hello Stampin’ Friends ~

Sorry for the late post but I had some technical difficulties but I wanted to share so I worked on it till I got it solved! Never under estimate the power of a determined stamper!!

Yesterday I shared the Paper Pumpkin video with ou and promised alternatives today for my Simply Sunday …

There is nothing simpler than a kit that comes right to you and is packed with everything you need to create awesome projects! Here is the first of 4 card designs included in the July 2017 kit …

I actually did the washi tape on the circle first (instead of the stamping) and then placed the circle and “hooray” onto the card so I knew just where I wanted to stamp my starburst images! Then I stamped the little greeting and assembled.

Here is the card from which the circle came from and the second of 4 designs …

The first thing I did on this card was to place the white front onto the blue card base along with the wood mountain, so I could see exactly where I wanted to stamp my clouds. Once I got the first cloud placed, I removed everything and stamped a few more clouds.

The first thing I thought of when I saw this kit was “Shaker Cards” so I teamed that up with the beautiful “Color Theory” bundle. Here is my alternative to the July 2017 Paper Pumpkin kit …

This card was super simple to make! Everything is ready for you … I added a window sheet to the back of the white piece and then wrapped the “Foam Adhesive Strips” around the circle.  I also added some around the edges so everything was at the same height.

The snowflakes were cut from the Dazzling Diamonds Glimmer Paper and highlighted with the Faceted Gems!

Thanks for hanging around today, I hope you enjoyed my vision of this kit! I will be back tomorrow with the second half of the 4 cards.

Have a wonderful evening ~


Todays Stampin’ Supply List …


Positively Paper Pumpkin!

Hello Stampin’ Friends~

Summer is at its peak right now, and working with your Positively Picturesque kit is the perfect way to spend some downtime between your fun summer activities.

Watch this instructional video for tips and tricks!

I love this one! Hope you enjoyed the video!

I’ll be back tomorrow with my Simply Sunday … nothin’ simpler than another version of an already super cute card kit! Won’t want to miss it!!

Thanks for checking in on me today … hope yours is a good one!