Pretty Pines – Guest Stamper: Barb W.

Hello Stampin’ Friends ~

I hope you had a wonderful Christmas…

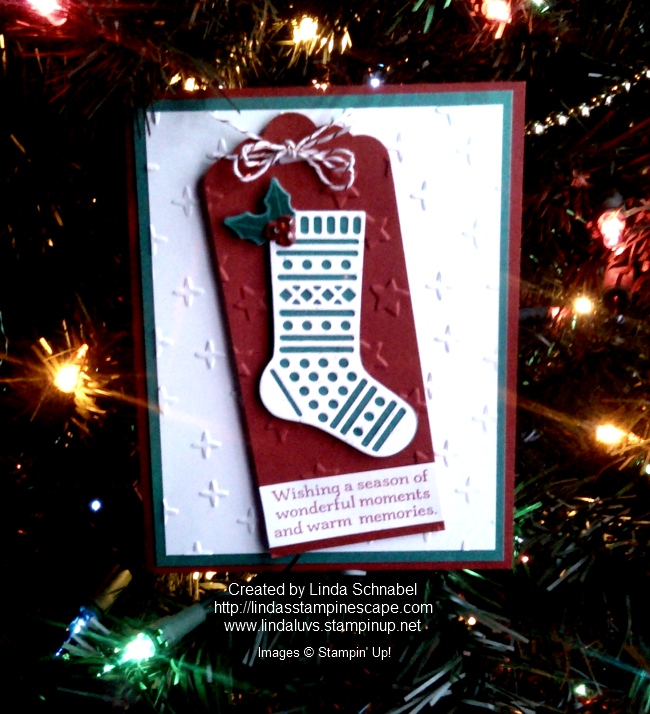
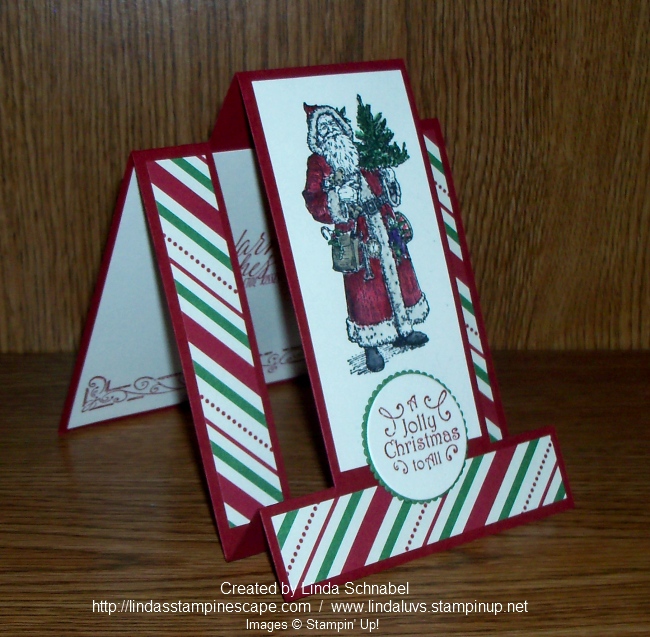
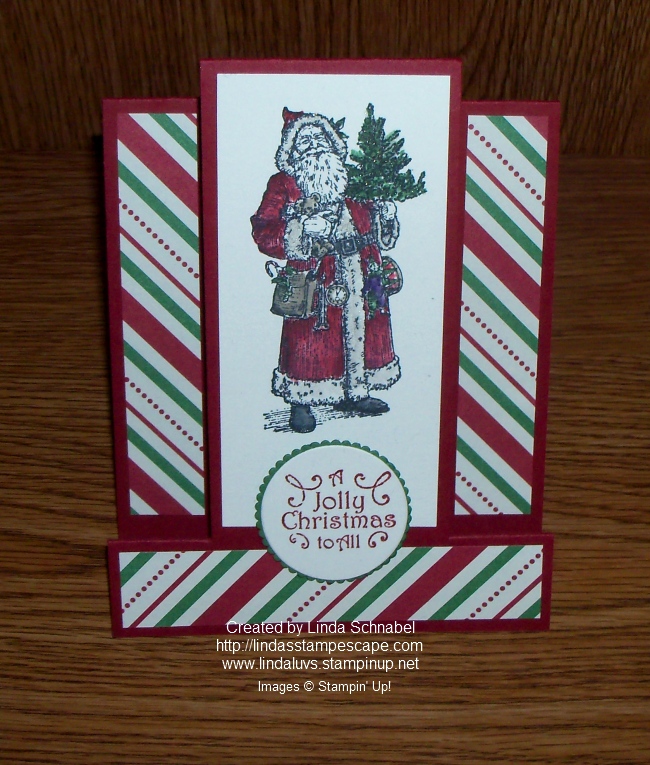
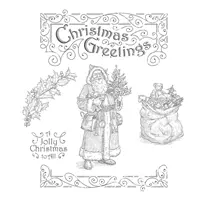
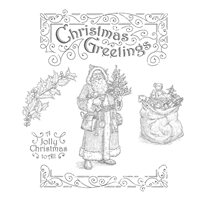
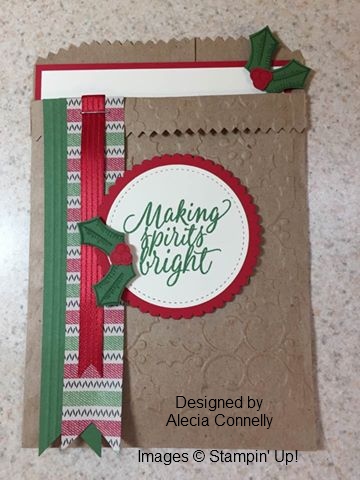
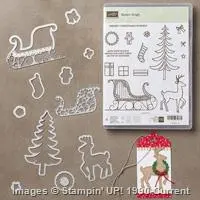
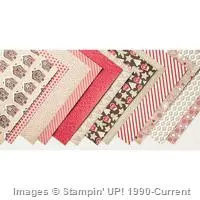
I’m back up an running (for now) so I wanted to share a beautiful Christmas card from one of my club members, Barb … She is using the Pretty Pines Bundle. Since I do not have this set, thought I’d share.

barb-wallish

I also want to remind you that these are the last few days in which you can get the great bundles in the Occasions catalog at a discount.  If they do carry over into the next catalog … they will not be bundled.

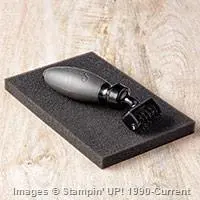
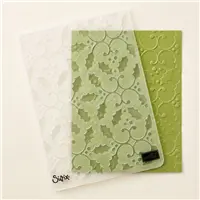
Barb also used the “Cable Knit Dynamic Impressions Folder” … these are different than our regular folder because it gives a deeper impression. If you’d want an even deeper impression,  give it a little spritz of water before running it through the BigShot.

With only a few days remaining of the Occasions catalog (ends Jan.3rd), I just wanted to share a quick reminder of my DECEMBER SPECIAL & that today is the last day…

When you place a $50 order with me, you will receive my Step Card with the written instructions, my two club cards and a hand stamped Thank You card. 

With the END OF YEAR CLEARANCE SALE going on right now, it’s a great time to stock up on some items you need, or give a gift to a stampin’ friend.


*** If you place an order of $150 or more (before shipping & taxes) you will receive all of the above items, hostess benefits (Do Not Use the Hostess Code) … Three (3 or more) Virtual Rewards points AND I will send you the NEW WATERCOLOR PENCILS for FREE beginning January 3rd when the Occasions Catalog is Live!!

You can find out more about my Virtual Rewards Points by clicking on the Loyalty Icon below or on the side bar to your right.

Loyalty Rewards Button

Thank you for coming back to check out my post today, let me know if you have any questions.

Have a safe and Happy New Year’s Eve ~

blog-closing-small       dec2016-hostess-code


click-to-view   

So in Love Stamp set & Detailed Thinlits

Hello Stampin’ Friends ~

I appreciate your loyalty as I limp through my computer difficulties … Today I have another SNEAK PEEK from the upcoming Occasions Catalog.

If you loved the Detailed Floral Thinlits dies, then you will love the new “So in Love Stamp set and Detailed Thinlits.  Grab a cup of coffee or hot chocolate and join me in watching this new video …

Carrie, from the training team at Stampin’ Up!, shares some beautiful project ideas and tips for using the So in Love Stamp Set and So Detailed Thinlits Dies from the 2017 occasions catalog.

If you haven’t seen the Detailed Floral Thinlits dies, check them out now …

Whether using the “Detailed Floral Thinlits Dies” or the “So in Love Detailed Thinlit Dies” you can create an elegant card or card wrap in just seconds. Delicate doesn’t have to be complicated!

Thank you for coming back to check out my post today, I hoping to be back with some final shares from our Holiday Catalog.

Have yourself an awesome day!

blog-closing-small       dec2016-hostess-code


click-to-view   

A Sale-a-bration is Coming ….

Hello Stampin’ Friends ~

Today I want to share a new product with you… The Pretty Pocket Card Kit from our Sale-a-bration catalog.  Did you get yours?

Stampin’ Up! trainer, Donna, demonstrates how quick and easy it is to create beautiful cards using the Pretty Pocket Card Kit. Get this kit for FREE with a qualifying purchase during Sale-A-Bration–January 4-March 31

Thank you for coming back to check out my post today.

Have a warm and wonderful day ~

blog-closing-small       dec2016-hostess-code


click-to-view   

Merry Christmas …

Hello Stampin’ Friends,

Just wanted to send you Christmas greetings on this wonderful day.  I hope you are having a joyous day with family and /or friends.

Peace Gift image

I will be back with you shortly. Till then, take good care and share a holiday smile with someone who may need one.

Merry Christmas ~

Linda

Wednesday Wow … Sneak Peak!!

Hello Stampin’ Friends ~

Hard to believe this year is winding down … it went so fast!! And before we know it, all the excitement of Christmas and the Holidays will die down as well, but don’t fret … January is just as exciting for all of us stampers and scrapbookers!

We are about to kick off our most exciting time of the year … Sale-a-bration and our NEW Occasions Catalog. Today I’m sharing a SNEAK PEEK with you …


sw_sendinglove_create_dec2016

Introducing our …

Sending Love Suite
With bold designs and traditional colors, this irresistible suite is one you’ll want to add to your stamping collection.  We’ll be using some of that holiday love we’ve stored up to keep the excitement going into next year for Valentine’s Day and beyond.

Just a reminder … If you’re looking for that last minute gift, I have Gift Certificates available for your stampin’ friends! Just contact me and I’ll get you all taken care of.

Thank you for checking out my blog today. Let me know if you recieved your 2017 Occasions Catalog yet. I always send one to myself so I know when they’re coming, and I haven’t gotten mine yet, but they should be coming soon!!

Have a great day today!

blog-closing-small       


click-to-view   

Shakin’ Up Christmas …

Hello Stampin’ Friends ~

Yesterday I told you that I would “jazz” yesterday’s layout / card.

The left over piece from the tree out of 3-1/2″ x 4″ piece of Dazzling Diamonds Glimmer paper is now being backed with a piece of “Window Sheet” and the foam strips to create a SHAKER CARD!!

img_20161218_095817

I used the “Mica Flakes” in the Holiday Catalog (pg.41) to use in my shaker card.

The background is also the Dazzling Diamonds Glimmer paper and thought I would run it through the BigShot using our Softly Falling impressions folder. It is VERY subtle but adds a really cool touch to the card.

The greeting comes directly from the “Santa’s Sleigh” stamp set … You know I bundled this awesome duo. I then highlighted it with a touch of gold foil cardstock … it coordinates with the gold Mica Flakes.

img_20161218_095804

I finished off the card and topped the tree with a gold star from the Metallic Shapes in the Annual Catalog and two of the circle shapes to anchor the greeting.

Thank you from stopping back today …

I hope your day is a good one. Stay Warm!


blog-closing-small       dec2016-hostess-code


click-to-view   

img_20161218_095817

Simply Sunday … early Monday!

Hello Stampin’ Friends ~

Last Saturday I shared a card with you that my Stampin’ Club members made. Can see the tree on the left?

000_3898

I cut the tree out of 3-1/2″ x 4″ piece of Dazzling Diamonds Glimmer paper, so of course we had left overs and we all know we are not going to throw that away!!

I showed my class a quick card they could put together with the leftover glimmer paper, and here it is …

img_20161218_095647

We used the Emerald Envy cardstock to back the cut out image … with a little sponging on that cardstock, you can create a bit more dimension.

We added texture to the background with the help of our Softly Falling impressions folder. This folder has really come in handy during our holiday season of cardmaking… I just love it.

I added a quick greeting from our … you guessed it – “Tin of Tags” stamp set! I used the 1-3/4″ Circle punch to punch out the greeting and a pop of Cherry Cobbler behind it.

Simple and cute and made from left overs! You gotta love that!

Sorry for the hit and miss postings, but I appreciate that you keep checking in on me. I’m still working on my posts and will get them to you as soon as I can. January and the new computer cannot come to soon!

My next post will be the same layout but stepped up!

Thanks again & have a wonderful day.

blog-closing-small       dec2016-hostess-code


click-to-view   

img_20161218_095647

Another Great Year …

Hello Stampin’ Friends ~

Want to make amazing projects without the prep work? Meet Paper Pumpkin—a crafting subscription kit by Stampin’ Up! Because sometimes the best way to get creative is INSIDE the box.

Every month, you’ll receive all the stamps, ink, and paper you need to make a fun, papercrafting project. Everything is precut and ready to go.

Check out the December Paper Pumpkin …

It’s hard to believe that it’s almost time to say goodbye to 2016! It’s also time to document all your memories from the year—enter the December Paper Pumpkin Kit, Another Great Year.

This kit makes memory keeping easy and completely customizable. Use the patterned papers, window sheets, stickers, and washi tape to embellish your book. And, for the first time ever—we’ve included a rotary stamp and Basic Black Stampin’ Write® Marker to help you jot down and journal every moment!

Thank you for coming to check out my post today, I will be back tomorrow with my Simply Sunday – and of course, I will be sharing more for the Holidays.

Have a warm and wonderful day ~

blog-closing-small       dec2016-hostess-code

Try out Paper Pumpkin for a month … or three!

Wishing You a Season of Wonderful ….

Hello Stampin’ Friends ~

Today I have a really cute card to share with you. If you attended my 2016 Holiday Stampin’ Retreat, you may recognize part of it! We made a set of tags using the “Hang Your Stocking” stamp set and “Christmas Stocking” Thinlit Dies (143512 – Bundle & Save 10%) … and with all the demands of the Holidays, I needed a quick card so I used one of those tags ….

img_20161216_082717

I apologize for the poor quality of the photo (my camera died) What next? Oh wait … Don’t ask!! Positive thoughts only 🙂  The color pallet of the card is Cherry Cobbler, Whisper White and the new Emerald Envy.

I used the Sparkle Embossing Folder on the white background and the Lucky Star’s on the tag … a nice contrast but not over powering. The tag is just a simple 2″ wide piece of cardstock with the Scalloped Tag Topper punched at the top.

When cutting the stockings out … I just layered the dies on one color and cut them out, then I switched colors and repeated, this way you can mix and match colors! It’s a lot of fun and a great family project. Have some fun with it, make tags, make cards …  Make Memories

Thank you for taking time out to check out my blog today.

Wishing you a Season of Wonderful ~

blog-closing-small       dec2016-hostess-code

TODAY’S STAMPIN’ SUPPLY LIST …

img_20161216_082717

2017 Occasions Catalog Sneak Peek

Hello Stampin’ Friends ~

Yesterday I shared an offer with you on how you can get the brand-new Watercolor Pencils from the 2017 Occasions catalog for FREE. I will repeat those details below, but first I’d like to share a video highlighting these fabulous pencils!

Shannon West introduces you to Stampin’ Up!’s brand-new Watercolor Pencils from the 2017 occasions (spring/summer) catalog …

So … what do you think? Awesome right! I can’t wait to get mine in my hands so I can explore even more coloring options with the new Watercolor Pencils.

When you place a $50 order with me, you will receive yesterday’s Step Card with the written instructions, my two club cards and a hand stamped Thank You card. 

With the END OF YEAR CLEARANCE SALE going on right now, it’s a great time to stock up on some items you need, or give a gift to a stampin’ friend.

*** If you place an order of $150 or more (before shipping & taxes) you will receive all of the above items, hostess benefits (Do Not Use the Hostess Code) … Three (3 or more) Virtual Rewards points AND I will send you the NEW WATERCOLOR PENCILS for FREE beginning January 3rd when the Occasions Catalog is Live!!

You can find out more about my Virtual Rewards Points by clicking on the Loyalty Icon below or on the side bar to your right.

Loyalty Rewards Button

Thank you for coming back to check out my post today, I will be back tomorrow with more from the Holiday Catalog.

Have yourself an awesome day ~

blog-closing-small       dec2016-hostess-code


click-to-view   

A Jolly Christmas …

Hello Stampin’ Friends ~

Today I want to share a card that I made with the beautiful “Father Christmas” stamp set. I knew when I saw this in the Holiday Catalog … I just had to have it. It’s nostalgic and I can just picture so many different uses with this set.

The card I’m sharing today is called a “Step Card” … it’s not that hard to make with some good instructions and a little cutting skill, you can create one in no time at all.

000_3914

You’ll notice that I used that same paper as the card earlier this week, the “This Christmas” Specialty Designer paper. (This Designer Paper one of the pillow gifts our Retreat Attendee’s received) There are many beautiful patterns.

Santa was simply stamped in the center section with Basic Black Archival Stampin’ Pad (Permanent ink perfect for using with watercoloring techniques). I used my blender pen and Classic Ink pads  to color my image. The Aqua Painters would also work well with this stamp set.

000_3915

The greeting comes directly from the “Father Christmas” stamp set and is highlighted by cutting them out with the “Layering Circle Framelits”. My base colors for today’s card are Cherry Cobbler, Garden Green and Very Vanilla, and you can purchase the “This Christmas” Cardstock Pack to coordinate with your designer paper.

I finished the inside of the card by stamping the bottom of the “frame” that is included in the stamp set and then added the Warm Wishes sentiment from my go to stamp set … “Tin of Tags”.

000_3914

When you place a $50 order with me, you will receive this card with the written instructions, my two club cards and a hand stamped Thank You card.  With the END OF YEAR CLEARANCE SALE going on right now, it’s a great time to stock up on some items you need, or give a gift to a stampin’ friend.

*** If you place an order of $150 or more (before shipping & taxes) you will receive all of the above items, hostess benefits (Do Not Use the Hostess Code) … Three (3 or more) Virtual Rewards points AND I will send you the NEW WATERCOLOR PENCILS for FREE beginning January 3rd when the Occasions Catalog is Live!!

Please let me know if you have any questions concerning today’s card, or the Special Offer I have posted for you.

Thank you for sharing a part of your day with me.  Stay warm and …

Have a Jolly day ~

blog-closing-small       dec2016-hostess-code

TODAY’S SHOWCASE OF PRODUCTS USED …

000_3914

Gift Giving with the Mini Treat Bags

Hello Stampin’ Friends ~

If you’re looking for a cute way to create gift giving bags, we have the answer for you! The Mini Treat Bag dies are quick and easy to use, and great for holding a treat or gift card.

Sit back and enjoy the video, and then I will share a cute idea for a Holiday Gift Card.

Make a few mini treat bags with the Mini Treat Bag Thinlits dies, a Big Shot and your favorite Designer Series Paper. These mini treat bags are cute and so fun to give to away.

On our Holiday Bag, the original designer Alecia Connelly used the new “Holly” Impressions Folder to create texture on the bag.  Alecia is a fellow demonstrator that I was introduced to by being part of the “Leaders” private Facebook page that Stampin’ Up! set up for all demonstrators that are at the Silver Elite level and above … it’s a great place to get stamping ideas and tips for running our stamping businesses.

I asked Alecia if it was OK if I cased her project, she said “share, share, share away!” … This was our Friday Night project at the Holiday Star’s Retreat which I hosted for my downline (the ladies who signed up as demonstrators with me). Gent’s are welcome too! Our group is called the Star’s by Design.


15055601_10208061037703963_8486875946964527836_n

The “Tin of Tags” stamp set and Stitched Framelits were used to create the greeting and focal point to the front of our package.  The holly comes from the “Holly Berry Happiness” stamp set … both of these are my “GO TO” holiday stamp sets!

15037090_10208061037543959_7706639576583014599_n

The inside phrase also comes from the “Tin of Tags” stamp set!  To hold the gift card on, you can use the half punch that is discontinued, or you can do what I do and just stick a couple glue dots on the back!  They hold the card on great and come off easily by rubbing on them a bit (or you can use your adhesive remover).

Hope you enjoyed this cute Holiday Gift Giving Idea. I thank you for stopping by today.

Stay warm and have a wonderful day ~

blog-closing-small       dec2016-hostess-code

TODAY’S HIGHLIGHTED STAMPIN’ SUPPLIES ….

15037090_10208061037543959_7706639576583014599_n

Best Wishes for the Season

Hello Stampin’ Friends ~

I missed you yesterday… besides shoveling snow several times, I have been fighting with my stinkin’ computer! I gave up!!  However, I figured out how to get my pictures, photo editor and everything I need downloaded onto my new laptop so I can share with you at ease!! Yea!!! I’m back!!

Today I want to share my Simply Sunday post with you … a quick and easy card just in case you haven’t started your Christmas cards yet. This one will be easy to re-create and get in the mail in no time at all…

000_3905

I began with the “This Christmas” Designer … Cut you designer paper 4″ x 4-1/4″ then trim 3/4″ off bottom. Then you will  cut a piece of (Very Vanilla) depends on the color in your designer paper to 4″ x 3/4″ … this is for your greeting.

Our greeting comes from the stamp set Holly Berry Happiness … I also used it to brighten up the inside of the card.

000_3907

The bow in the stamp set gave me an idea of how we could jazz it up just a little, so I grabbed the bow punch and put it together and topped off the card. With or without the bow, it’s a quick and cute card to make.

000_3909-2

I want to thank you for hanging with me while I went through my computer problems. Let’s hope this works well and I’ll get back on schedule. I have so many more Christmas Cards to show you!

Have a happy Monday!

blog-closing-small

Rudolph & Santa’s Sleigh …

Hello Stampin’ Friends ~

Back today with the second of my two December Club Cards …

I used Santa’s Sleigh bundle.  I began with the Real Red base and the Candy Cane Lane Designer Series paper for my background. I then stamped Rudolf with Soft Suede onto Soft Suede cardstock …. then cut him out with the coordinating framelit…

000_3898

The sleigh was created by layering two of the die cuts … the main part of the sleigh was cut from the Gold Foil paper and then the ornate outside was cut from Real Red cardstock.

Rudolph’s reins were made with the Candy Cane Lane Bakers Twine … it connects the white from the background and the red from the sleigh so everything coordinates.

We did a partial tree using the Dazzling Diamonds Glimmer paper, another thinlit from the bundle.  We finished off the card with our Greeting from the stamp set, the Metallic Enamel Shapes and a Rhinestone colored red for Rudolph’s nose.

Thanks for spending a part of your Saturday with me!

Enjoy the day ~

blog-closing-small       dec2016-hostess-code

TODAY’S STAMPIN’ SUPPLY LIST …

click-to-view   

000_3898