SNEAK PEEK … Special Reason Card

Hello Stampin’ Friends ~

I hope you had a nice Valentines Day yesterday. As promised I am here today to share a bit more with the Stylish Stems and a sneak peek!

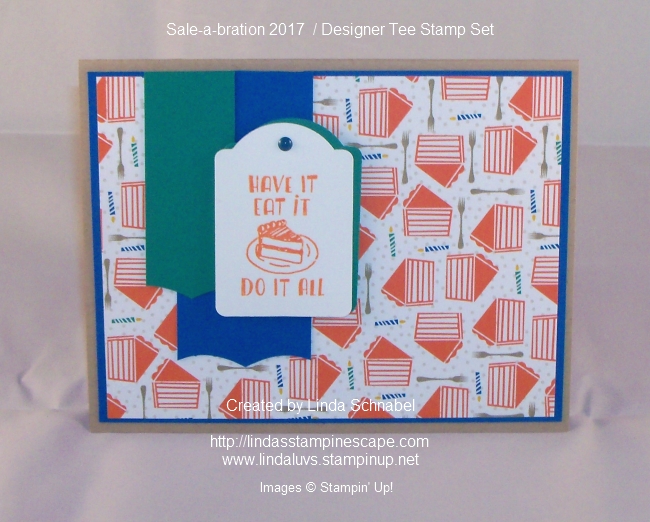
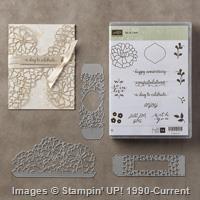
As if Sale-A-Bration wasn’t great already; Stampin’ Up! has added more great to the greatness! Beginning February 21st they will release THREE new exclusive Sale-A-Bration products. Today I’m going to show you one …

000_4079

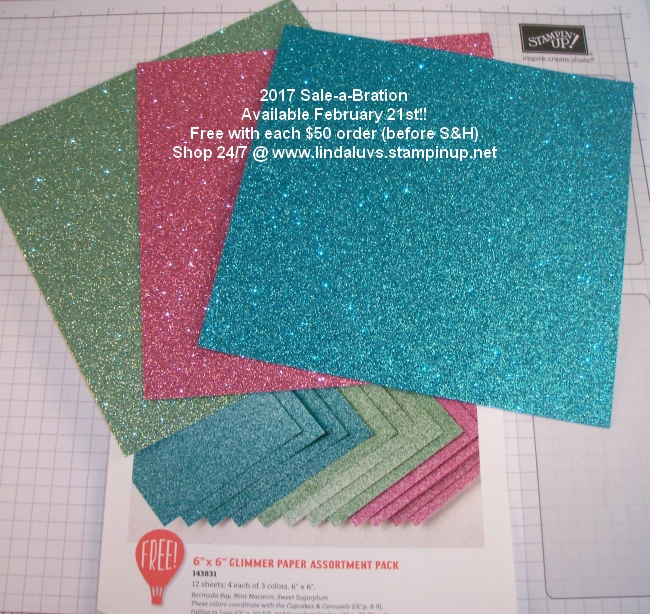
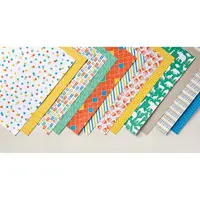
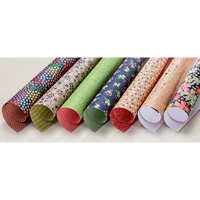
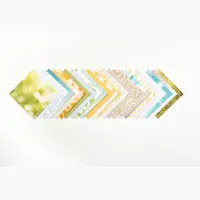
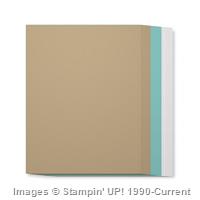
YES!! FREE Glimmer Paper … can’t get better than that. It comes in Sweet Sugarplum, Mint Macaron and Bermuda Bay. There are also 2 new stamp sets being released.

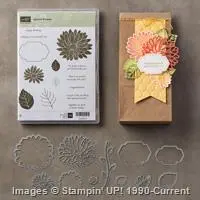
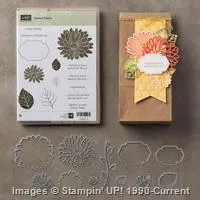
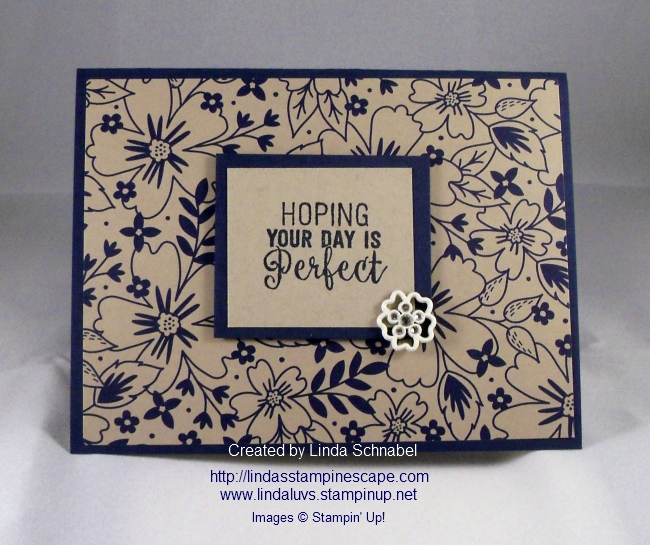
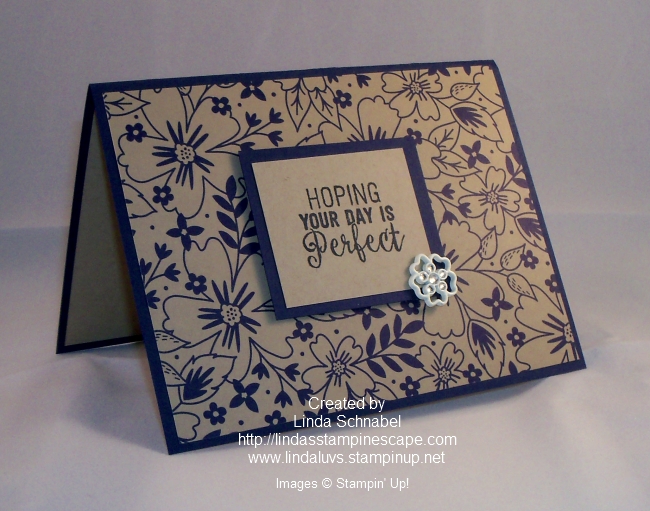
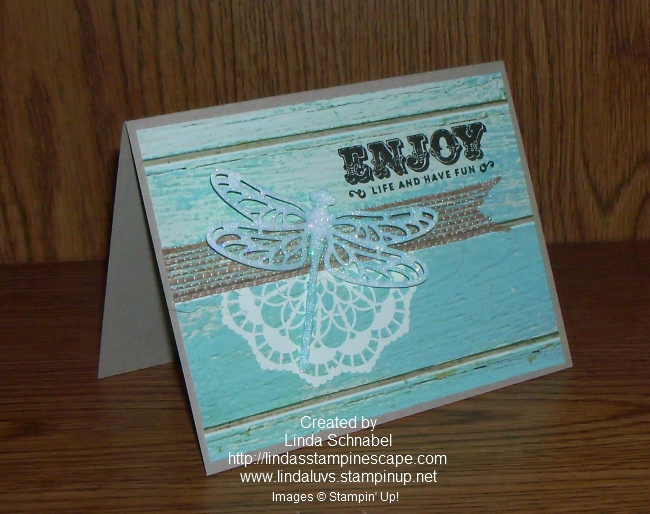
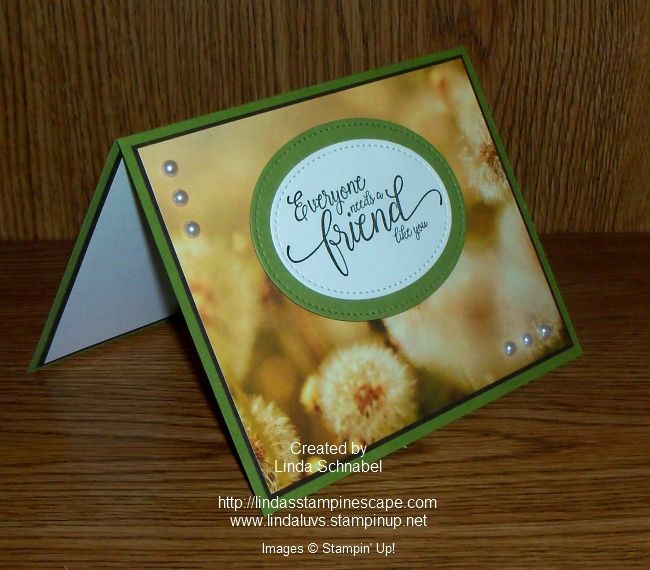
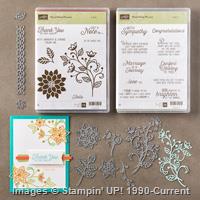
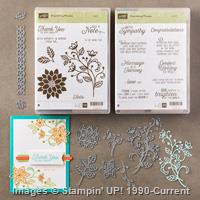
Now … are you ready to see what happens when you mix the Special Reason bundle and the new Sale-a-Bration Glimmer paper? Well wait no longer ….

000_4089

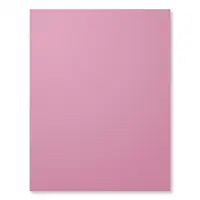
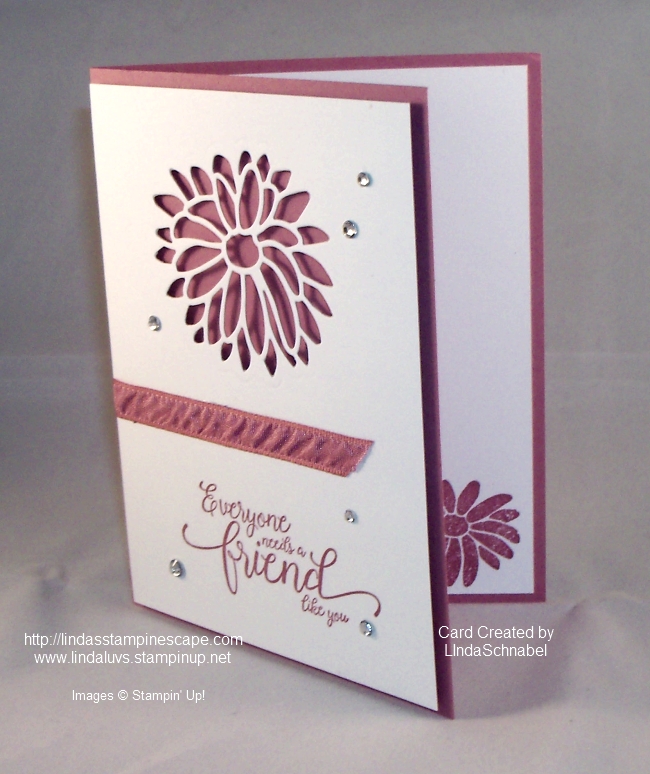
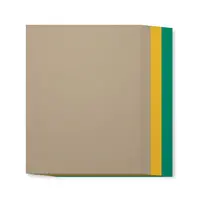
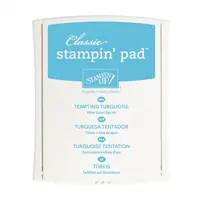
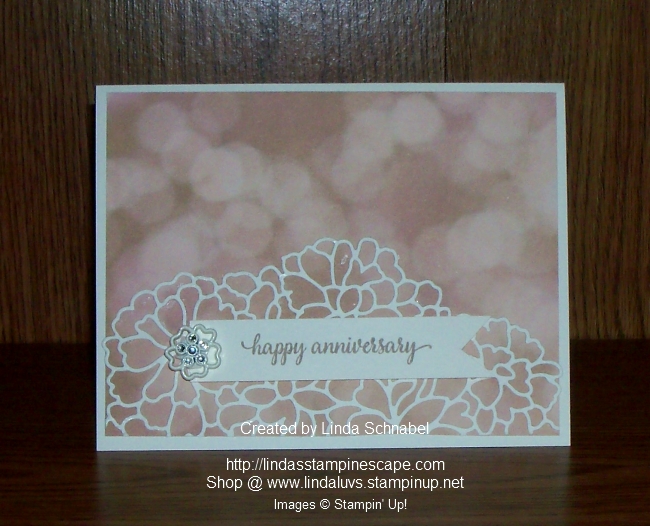
Stunning right! Not hard to create at all. We’ll begin with a Sweet Sugarplum base (which coordinates with the new Glimmer paper) and a 4″ x 5-1/4″ piece of the Thick Whisper White cardstock.

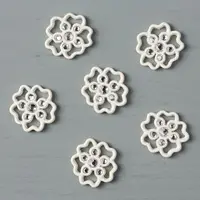
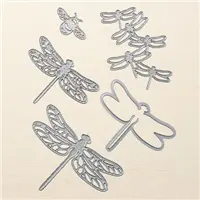
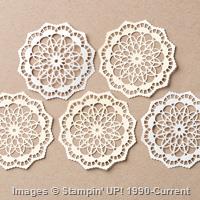
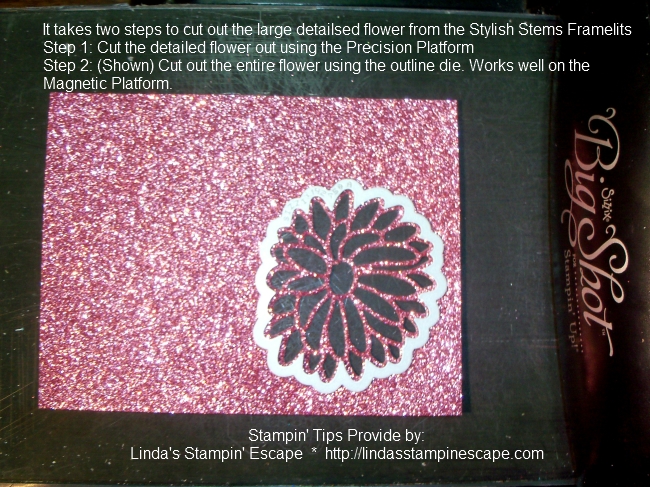
First take the thick cardstock and cut out the largest flower to create a “peek through” …  the 4″ x 5-1/4″ Sweet Sugarplum glimmer paper will be underneath! Oh but I cannot waste… so I cut out my glimmer flower from the “right” side of the paper.

000_4081

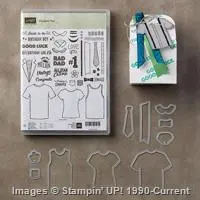
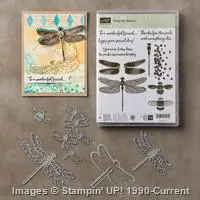
Cutting the large detailed flower takes two steps, you just completed the first. Next you will use the outline die to actually cut the flower out. Today’s card illustrates both ways to use that die.

000_4082

I attached the flower to the front of the card using the Tombo glue – it really holds nice (I will also use this to adhere the finished card front onto the base). I used Stampin’ Dimensionals to attach the white cardstock onto the Sweet Sugarplum glimmer paper.

000_4085

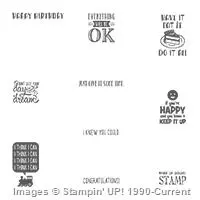
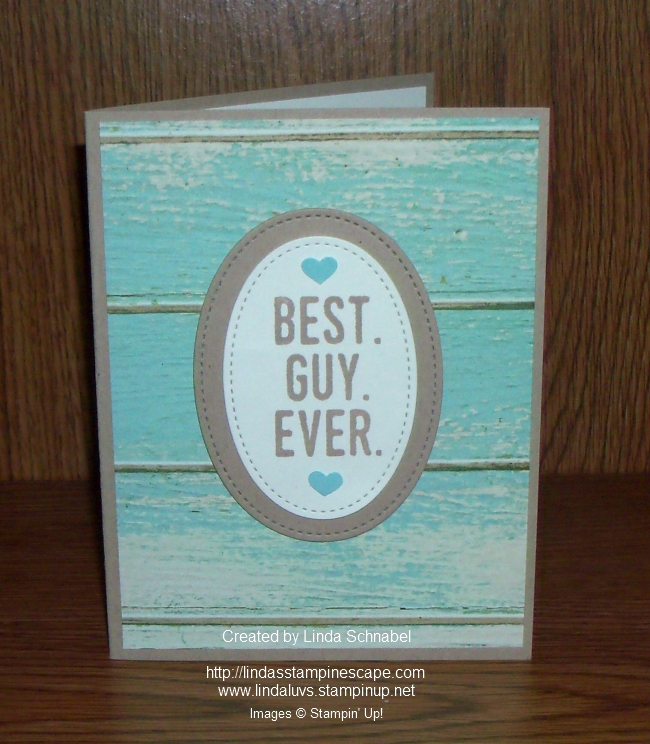
The greeting comes from the stamp set “Special Reason” that’s in our bundle. I backed that with a piece of the Mint Macaron glimmer paper and then cut out the leaves. Our greeting says: There’s no special reason for this card …  INSIDE: … except to let you know how special you are!

I really wasn’t sure that I needed another flower card, but when I saw what could be done with this bundle, well … I had to have it. The bundle in Clear Mount is $45.75 so if you add the pretty Sweet Sugarplum Ruched Ribbon – you can get the Glimmer Paper free (But Remember … it’s not available until the 21st) You will also receive another stamp on your Virtual Rewards card!

000_4089

Thank you for joining me this Wednesday ~

I hope you have an awesome day!

blog-closing-small        starry-purple-background-vector

TODAY’S STAMPIN’ SUPPLY LIST …


Stylish Stems …

Hello Stampin’ Friends ~

Happy Valentines Day to you! Today I’m going to keep my post short, a video that shows you how our new Special Reason stamp set and Stylish Stems work together so sweetly.

I shared my card with you on my Simply Sunday post and I’ll be back tomorrow to share a special card using this amazing bundle and a sneak peek!!

Stampin’ Up! trainer Holly discusses the many ways to use the Stylish Stems Framelits Dies and Special Reasons Stamp Set from the 2017 occasions (spring/summer) catalog.

I love all of the different looks that you can create with this bundle … stay tuned and we’ll explore these together. 

occ17_p42d

Till then … have a wonderful day.

Thanks for stopping by ~

blog-closing-small      starry-purple-background-vector

Highlighted Product … Just click for more information or to begin shopping.


Cute Little Monster

Hello Stampin’ Friends ~

Hope you had time to enjoy the nice weekend we had! So nice to see the sun out again.

Today I’d like to share with you a couple of “monster” projects! These cute projects were created by the “Yummy in My Tummy” stamp set and one of our 2017 Artisan Design Team members Cathy Caines.

When our Artisan Design Team members share their projects on the Stampin’ Up! blog of stamp sets that I don’t have, I like to pass on the creativity to you.

1

The first project consists of this cute monster … a shaker card!!  His tummy is filled with the Sprinkles Embellishments (item 142741) are the perfect thing to use! Cathy even created a fun envelope for her card.

Cathy said “There are lots of options with this stamp set. You could punch out its belly and replace it with so many things including lollipops, mini containers of colored modeling clay, lip gloss, and chocolate eggs. The possibilities are endless and I can’t wait to see what you come up with!”

5

Her next little project used a doily to frame her little monster and turn it into a sweet treat for Valentines day.  How clever!!

Hope you enjoyed these cute little monsters as much as I did.  I am grateful to Cathy for sharing her awesome projects. I think they are so cute.

Thanks for stopping in … and a special thanks to our 2017 Artisan Design Team members Cathy Caines.

Hope you enjoy the day.

blog-closing-small


Simply Sunday: Peek Through Technique

Hello Stampin’ Friends ~

Today we’re pulling out the BigShot to create our Simply Sunday card, which features the Peek Through technique.  This is the technique my Technique Clubs learned this month and this is one of their cards.

It’s a done in our Sweet Sugarplum and Whisper White, in fact, we are using the “thick” Whisper White for today’s technique card. Our base is in the Sweet Sugarplum and our Thick Whisper White is our 4″ x 5-1/4″ front.

000_4077

We are using the Special Reasons bundle found on page 42 of the Occasions Catalog. These special dies create our “Peek Through” by cutting the flower without cutting the edge so it gives you an almost negative image and allows you to see through to the back ground. It also comes with an outline die that will cut out the same flower … so it gives you two uses!

We used the Precision plate with our flower die and placed it onto our thick cardstock and rolled it through. It cut out beautifully and easily releases the pieces, however if you have the die brush you can use that to hurry the process of removing the pieces.

You can see from this camera angle that the entire white front piece has been popped up which creates a wonderful dimension to the flower and the card.

000_4076

The greeting comes from the Suite Sentiments stamp set found on page 54 of the Occasions catalog … you’ve seen me use this stamp set many times.  Did you know that the fonts in this stamp set coordinate with fonts from some of the other Occasions stamp sets! Good to know 🙂

The ribbon is the coordinating Sweet Sugarplum Ruched Ribbon and is used as an anchor to the card. Then just a touch of bling was added to draw your eye around the entire card, and it really completes it.

Thank you so much for joining me this Sunday,

I hope you have a wonderful day.

blog-closing-small          starry-purple-background-vector


TODAY’S STAMPIN’ SUPPLY LIST …


Party Animal & Tee?

Hello Stampin’ Friends ~

So … what do you think of my catchy little title?  Let me explain “tee” comes not from the drink but from the “Designer Tee” stamp set that I used to create the cards.  And … the Party Animal is the name of the designer series paper that I used on my cards! 

Today I have two cards for you, both using the “Designer Tee” stamp set and the Party Animal designer series paper. I hope you had a chance to watch the video yesterday and see how much fun you can have creating with the “Custom Tee Bundle”.

My first card began with the thought of using the stamp with the cake, then I remembered that I had some designer paper that had cake on it!! Love that Stampin’ Up! is always coordinating there products. Once I had my designer paper … that helped me with my color pallet.

keep

The greeting / cake is stamped in Tangelo Tango just like the cake on the designer paper. My card base is Crumb Cake … just like the forks, and then the banners and mat for my greeting was done is Emerald Envy and Pacific Point to pull in the colors of the candles.

I used two punches on this card, the tag punch (Discontinued/ I really need to pull them out of my drawer) and the Best Badge.  It is the Best Badge punch that I used to create my cool banner bottoms. I pulled my cardstock through the front and up (outside) of the punch.

The second card is just a whole lot of fun and so easy to do!!  Again I used the Party Animal designer series paper … love those little dots!! So what better stamp to go with my designer paper than one with a smiley face!  The smiley is done in Crushed Curry – the same as the base of my card, and the words in Pacific Point. 

000_4071

The circles were punched from Crushed Curry, Pacific Point and Emerald Envy.  The punches I used were the 1/2″, the 3/4″, the 1-3/8″ and the 1-3/4″. I love my punches and my dies but sometimes it’s just better to be able to punch, punch, punch! 

Two of the circled were mounted directly to the designer paper, and the other three along with the greeting were all popped up using the Stampin’ Dimensionals.

I hope you enjoyed these alternative cards to the ones you saw in the video. I love showing you different ways to use your products … it’s much more cost effective (and fun!).

000_4071  keep

Have a wonderful weekend, and I’ll see you tomorrow with my Simply Sunday post.

Thanks!

blog-closing-small     starry-purple-background-vector


TODAY’S STAMPIN’ SUPPLY LIST …


Dreamin’ of T-Shirt weather …

Hello Stampin’ Friends ~

Today I’m sharing a video that features the Custom Tee bundle and the Designer Tee Stamp Set.

Get the Designer Tee Stamp Set for FREE with a qualifying purchase during Sale-A-Bration, January 4 – March 31, 2017. This supercool set coordinates perfectly with the Custom Tee Stamp Set and T-shirt Builder Framelits Dies in the 2017 occasions (spring/summer) catalog!

Stop back tomorrow because I’m going to show you what I did with the Designer Tee stamp set.

Thanks for checking in on me …

Hope you have a warm and wonderful day.

blog-closing-small      starry-purple-background-vector

TODAY’S STAMPIN’ SUPPLY LIST …


Hoping Your Day is Perfect …

Hello Stampin’ Friends ~

Hope you’re staying warm … burrrr, it’s cold out there!! But you gotta love Wisconsin, it’s going to be 42 degrees this weekend.  Our boots are always next to our flip flops … lol.

One of the most requested types of cards is “Quick -n- Easy”.  With everyone busy as ever, many of you are looking for quick cards that are still pretty.  My advise to you is … Designer Series Paper! You can create card so easy by using the paper as your background and your greeting as the focal point.

000_4063

Here I used the “Affectionately Yours Specialty Designer paper”.  This designer paper patterns consist of colorful floral designs which include some with copper foil. My greeting comes from my latest “go to” stamp set … “Suite Sentiments”. This is a basic design using my paper cutter to cut out my greeting mat.

You can easily change this up a bit by using any or our punches or fabulous array of framelits and thinlit dies to cut shapes for your greeting. Speaking of punches and dies … you could also use these to add a decorative touch to your card.I used the beautiful “Falling In Love” embellishments.

000_4066

By using any of our beautiful designer papers with any of our cutting tools, you’ll be sure to have a cute card done in just minutes! And don’t forget to add that special touch by adding a punched butterfly, a die cut dragonfly or any of our wonderful embellishments, even a doily would add a nice touch.

Hope you enjoyed my quick -n- easy card and the tips to get creative with a simple design.  Have fun with it, and feel free to share! You can post it on my facebook page Linda’s Stampin’ Escape/facebook.

Thanks for sharing a piece of your day with me!

Hoping your day is perfect.

blog-closing-small     starry-purple-background-vector


TODAY’S STAMPIN’ SUPPLY LIST …


Enjoy Life …

Hello Stampin’ Friends ~

Sorry I’ve been awol, but I’m back today with the card I promised you on Sunday. I said I had a special card that I created with the “destressed wood” designer paper that I used on my Best. Guy. Ever. card.

I may be using the same designer paper but the look it the exact opposite! As with so many of our designer papers they can be used for many different occasions but this was was not only manly enough for a guy card, it reminded me of a beach house …

000_4060

Maybe it’s the destressed wood look or the Pool Party color or the combination of both, but it worked for me. And what do you see around beach houses … Dragonfly’s! My dragonfly is perched upon the Burlap Ribbon found in the Annual Catalog and the pretty little Lace Doilies from the Occasions catalog.

Want to know something neat about those Lace Doilies?  One side is Very Vanilla and the other side is Whisper White!! You can use them on anything and they are so pretty!

You can see that I used the Dazzling Diamonds Glimmer paper for my Dragonfly … but I also gave it a color wash with the blender pen.  I took a little Pool Party from the lid and with the help of my Aqua Painter I gently color washed my dragonfly.  I love the different highlights of color … the white was just too much, adding the touch of color really softened it.

000_4058

My greeting comes from … you guessed it, Suite Sentiments! The font really fits this card well, and it fits the Carousel Birthday stamp set too! This stamp set was designed to coordinate with many of the sets and bundles in the Occasions catalog.  Way to go Stampin’ Up!

So I’m not expecting beach weather in February in Wisconsin … but I can dream! Here are both of the cards – same designer paper, different look!

000_4050 000_4060

Thanks so much for being patient and for stopping back to visit my blog.  It is really appreciated.

So enjoy life today … and have fun!

blog-closing-small             starry-purple-background-vector

TODAY’S STAMPIN’ SUPPLY LIST …


Simply Sunday: BEST. GUY. EVER.

Hello Stampin’ Friends ~

Sorry for the late post, computer troubles again … but my troubles actually worked out in the long run, because I stayed busy in the stampin’ studio creating more cards!

Today I have 3 cards to share with you!! All with the same layout, all with the same stamp set, and all with the same designer series paper pack! By the title of today’s blog: BEST. GUY. EVER. – you can tell that a “man card” was on my mind.

With Valentine’s Day only 8 days away … you’ve seen several cards already but not one specific for males. In the theme of my Simply Sunday’s, nothing creates a quick card like designer paper, and our “Serene Scenery” Designer Paper has awesome patterns for guys! I chose the antiqued wood look …

000_4050

The Crumb Cake base matches perfectly with this paper! And yes, it is one 4 x 5-1/4 sheet … all the texture and depth is actually in the beautiful photography of that paper! Tomorrow I’ll share another card I created with this paper.

Next I chose the stamp set … the wonderful “Suite Sentiments”.  I love this greeting set, it has a little something for every occasion. Today you’ll see it used 3 times. I wanted the greeting to be the focal point of the card so I used the “Stitched Shapes Framelits”. Once cut, I mounted it with the Stampin’ Dimensionals to give it some height. With the help from the Confetti Hearts border punch, I punched out some hearts from the Pool Party paper and attached them to my greeting with glue dots. Nice & Simple.

This card is a simply sweet card to give to one of your friends. The designer paper pattern (Again, “Serene Scenery” Designer Paper) reminds me of a warm summer day, full of dandelions just waiting to make a wish upon. The greeting is from “Suite Sentiments” and again was die cut using the “Stitched Shapes Framelits”. 

000_4053

My color pallet for this card is Old Olive and Early Espresso. I added the Basic Pearls to draw your eye around the entire card and create balance. Besides, they are pretty and your friend will love them!

Can you see the theme here? The same layout, with the same stamp set:”Suite Sentiments”, all with the same designer series paper pack:”Serene Scenery” and die cut with the “Stitched Shapes Framelits”.

The final card I created uses the Cloudy Sky designer paper, it’s realism reminded me of the Ascension of Jesus so I used it to create an Easter card. Simply and pretty. I used the smallest flower from the “Blossom Punch” to make my flowers, and since I already had the pearls out from the previous card, I used them again in the center of my blooms.

000_4055

I know some of you are already gettin’ in the mood for the Superbowl, but I appreciate taking a minute out of your day to check out my post.  My team is out so if I watch it’s only for the commercials or takin’ a peek at the 1/2 time show.  Best bet is you’ll find me in my stampin’ studio 🙂

May the rest of your day be wonderful and your tomorrow even better.

blog-closing-small        starry-purple-background-vector

TODAY’S STAMPIN’ SUPPLY LIST: A purchase of $50 qualifies you for a FREE Sale-a-bration item and a Loyalty (Virtual) Rewards point from me!


Beetles & Bugs Stamp Set …

Hello Stampin’ Friends ~

Today I’d like to share with you some really cute cards from one of our 2017 Artisan Design Team members; Shannon Lane.  Shannon took a stamp set that I didn’t look twice at and created these really cute cards that make me want this stamp set: Beetles & Bugs!

I’m not really into bugs, but Shannon takes this to a whole new level with her first project.  She said “Combined with the Hardwood Background Stamp (item 133035), making this display of (faux!) mounted bugs was so easy! Stamping the beetles was a blast; each piece lined up so perfectly and it was quick and easy to do.”

120361b583795661a8962ff0000f7f0e6

Next Shannon has a birthday card with a bright collage of beetles …

36f361b583795661a8962ff0000f7f0e6

And just in case you have a little girl who likes bugs too ….

482361b583795661a8962ff0000f7f0e6


Thank you so much for stopping by today; I really hope Shannon’s cards inspired you to create with the fun stamp set full of bugs! Who knew.

And Thank You Shannon Lane, our 2017 Artisan Design Team member for sharing the fun and coloroful cards. They really are Cute as a Bug!

Have a great day!

blog-closing-small


What did we do “before” the … BIGSHOT!?

Hello Stampin’ Friends ~

What DID we ever do before we got out BigShots? Some of us did the fussy cutting and the dry embossing but it was a lot of work! Today I’m here with two great video’s that will explain how easy the BigShot is to use and some great tips! It will explain “when” to use each of the plates “magnetic” and “precision” and which cutting dies to use with them. Then I’ll share 3 cards that I had made.

Say hello to your crafty friend—the Big Shot. It’s a manual, multipurpose die-cutting system that you can use to quickly and easily create die-cut or embossed shapes, tags, and 3D items. It’s portable; no electricity required. And we offer a huge array of dies and accessories to make your crafting fun and easy. 


Flourish Thinlits Dies by Stampin’ Up!

My second video is a fabulously fun bundle to work with using your BigShot! Put down those scissors—there’s an easier way to cut detailed flowers and images! Using the Flourish Thinlits Dies and the Big Shot, you can make multiple die-cut flowers in minutes. Watch as we show you how.

Some of you already have this beautiful stamp set and thinlits but if you don’t, just click on the item’s picture below for full details and to begin your shopping.

Don’t forget, Sale-a-bration is in full swing and for each $50 you purchase before shipping & handling, you choose a FREE Sale-a-bration item.  If you don’t have a SAB Catalog CLICK HERE to view.  (SAB = Sale-a-bration)

You will also receive your “Virtual Rewards” points from me for each $50 you spend.  Speaking of Virtual Rewards …

CONGRATULATIONS to SANDY H.

Sandy chose the stamp set: Celebrate Today for her FREE stamp set! Enjoy Sandy and Thank You!

If you want to learn more about my Virtual Rewards program, just click on the “LOYALTY REWARDS PROGRAM” logo on the right side of your screen. If your on the phone, it may be above the post or below… or just message me and I will fill you in.  🙂

Thank you for taking time out of your Friday to visit my blog.

Have a wonderful day and a great weekend!

blog-closing-small     starry-purple-background-vector

TODAY’S FEATURED PRODUCT LIST …


Enjoy Your Special Day …

Hello Stampin’ Friends ~

Today I’d like to share with you another one of the cards that we did as a Make -n- Take at Kathie’s party. We learned two different types of embossing, watercoloring, and how fun the BigShot is!!

We begin with our color pallet: Whisper White, Tempting Turquoise, and Silver! Sounds like a touch of the Southwest! Our base card is Whisper White and the card front Tempting Turquoise … soon to be embossed with the New “Petal Burst Embossing Folder”.  All you need to do is roll it through the BigShot and it comes out beautifully textured.

000_4042

Our next step and second type of embossing is “heat embossing”. You will need the beautiful dragonfly from the “Dragonfly Dreams” bundle.  Next you’ll need the VersaMark ink pad, the Silver Embossing Powder and the heat gun.

Stamp dragonfly with VersaMark, sprinkle with embossing powder (shake off excess) and begin to heat.  Watch the dull powder turn into a shiny silver raised image!! It’s amazing! Our next step was to take the dragonfly framelit from our bundle, and on a separate piece of turquoise cardstock layer one of the circle dies from the “Stitched Framelits Dies” and cut them out on the BigShot.

000_4040

We’re now going to color our dragonfly by pulling some Tempting Turquoise ink from the pad with your Aqua Painter and then gently brush color onto the wings. It’s so easy to do and adds a nice touch of color to our dragonfly. Now we’re going to adhere our layers beginning with the Silver Metallic Doily.

Our greeting comes directly from the stamp set from our “Dragonfly Dreams” bundle. A few rhinestones were added to the card to draw the eye to the dragonfly and to anchor our greeting. Our new stampers were amazed they could make a card with that many techniques … I just reminded them they are just doing 3 simple techniques/steps, and then putting it all together!

000_4042

I hope you enjoyed our card as much as the rest of us did, and that our hint of the Southwest will bring us some much needed sun and a bit warmer temperature!

Thanks for coming by …

Enjoy your day, and I hope it’s special!

blog-closing-small            starry-purple-background-vector

TODAY’S STAMPIN’ SUPPLY LIST …


Any Occasion Stamp Set

Hello Stampin’ Friends ~

Just a quick post today sharing a video featuring the Any Occasion Stamp Set that is FREE during Sale-a-bration with a purchase of $50 before shipping & handling.

Be prepared for any occasion when you get the Any Occasion Stamp Set for FREE with a qualifying purchase during our Sale-A-Bration event–January 4-March 31, 2017.

Thank you for checking in with me today.

Hope your day is full of sunshine and happiness.

blog-closing-small

So In Love … Happy Anniversary

Hello Stampin’ Friends ~

Yesterday I shared with you the “So In Love” bundle, what did you think? Pretty right!

Well today I’m going to share a simply beautiful card that I created using the “So In Love” bundle. I began with with the largest of the dies and knew I just wanted it to highlight my designer paper.

000_4031

I knew I was going to use the Falling in Love Designer Series Paper so I chose the Very Vanilla cardstock as my base and cardstock to be die cut. I used the Precision Base Plate and die brush to cut and discard of the inner pieces with ease.

Next, I layered my designer paper onto my base, and then my die cut piece onto the designer paper.  I then added my “Happy Anniversary” greeting which I stamped in Crumb Cake on my banner.  I added the pretty little “Falling in Love” embellishment to anchor my banner and create and eye catching effect.

000_4029

How simple, and how pretty is this.  You could use this card layout with so many of our pretty designer papers, and there are plenty more greetings to use in this stamp set.

Hope you enjoyed … Thanks so much for stopping by today.

Have an awesome day!

blog-closing-small    jan2017-hostess-code

TODAY’S STAMPIN’ SUPPLY LIST …


So In Love …

Hello Stampin’ Friends ~

Today I have a quick post but it’s packed full of stampin’ tips and samples from the So In Love bundle. We’re going to start with a video …

Carrie, from the training team at Stampin’ Up!, shares some beautiful project ideas and tips for using the So in Love Stamp Set and So Detailed Thinlits Dies from the 2017 occasions catalog.

I also want to share some additional projects that were created with this fabulous bundle …

so-in-love-2

Here you can see the foliage stamp was used to create the background, then the flower was added to compliment the foliage and add some dimension.  A pretty bow and an banner with the “just for you” greeting completes this card. 

Look at the jar in the background … it was wrapped with one of the delicate bands created from the dies. Below the die cut band was used again to turn this simple bag into a beautiful gift bag.

so-in-love-1

If you love pretty, delicate items … this is the bundle for you.  I can image all sorts of beautiful cards and gift packages that you could make for Wedding’s, Anniversaries, Mother’s Day … or a special friend.

Let me know what you think!

Thanks so much for checking my blog out today ~

I hope your day is a good one.

blog-closing-small    jan2017-hostess-code

TODAY’S STAMPIN’ SUPPLY LIST …