Today is my second post for Technique Tuesday. I will be sharing a Stampin’ Up! video tutorial along with my card share… yes, I will have a card for you too. I thought it would be a great way to for you to see how the technique is actually done… almost like being a member of my Technique Club.
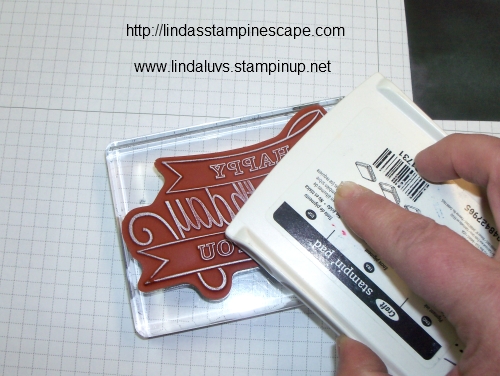
I’m going to start with a Stampin’ Up! video that introduces you to the “Kissing Technique”. Enjoy!
Kissing
with Emily Montoya
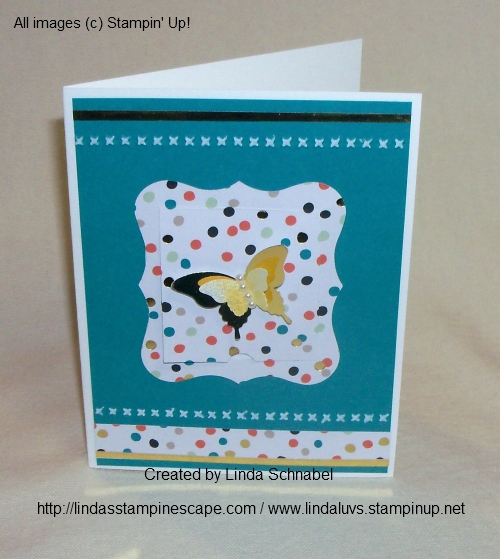
Have you ever heard of the kissing technique?We’re not talking about the technique with your sweetie-we’re talking about the one with stamps! Check out this sample featured in this video, see how the butterflies have an extra texture? It’s the beautiful product of two stamps getting together!
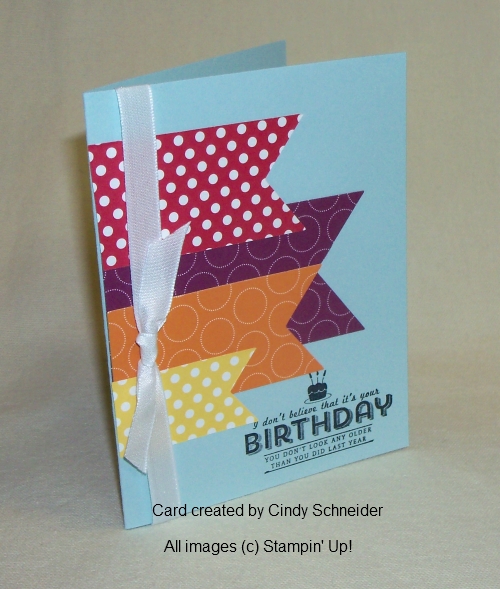
Wasn’t that fun! How did you like the finished cards … so cute. Here is the card that I created using the “Kissing” Technique:
Now for my card …
I thought it would be fun to add a little “kiss” to the frosting on the cupcakes from the “Build a Cupcake” stamp set and kissed it to the “Hello Doily” stamp. I inked up the the frosting of the cupcake and kissed it to the Doily to create the neat pattern you see.
Of course I then had to pull out the coordinating punch “Cupcake Builder”. Ahhh, so much easier than cutting them out. My color pallet for today comes from the Retro Fresh Designer Series Paper: Very Vanilla, So Saffron, Coastal Cabana and Baked Brown Sugar … with a touch of Strawberry Slush added in!
I added a touch of the Retro Fresh DSP and topped it off with the Coastal Cabana Ruffled Stretch Ribbon. Speaking of “topping” things off… I colored 3 of the larger pearls with a red Sharpie, and the put them on my cupcakes.
Finally, my greeting comes from the Perfectly Penned stamp set. I don’t know what I will do when they retire that set… I use it all the time!
Hope you take the time out of your busy day for a little kissing 🙂
Thanks for checking out my blog today! Check out below for a list of today’s ingredients.
Today I want to share with you, an invitation from Stampin’ Up! Those that know me … know this is where my heart lies – with the fun, the friendships and the creativity outlet that Stampin’ Up! provides. Oh, and the money isn’t bad either … and let’s not forget the traveling to beautiful places.
Enough about what I love, let’s get to the invitation!! Watch the video too … so much fun!
You’re Invited!
If you were to guess what 6000 feet of theatrical truss, 20 miles of cable, and 218 one-ton chain motors had to do with Stampin’ Up!, what would you say?
Go ahead . . . take a guess!
Give up?
They are just a few of the many things that go into making Inspire. Create. Share. (our annual convention) a success.
You’d think that bringing enough chain motors to suspend 16–1/2 city busses would be exciting enough, but trust us: it would be absolutely no fun without you!
We want you to join us this year for Inspire. Create Share. and experience one of our biggest parties of the year. Just think—you could spend three epic days and two nights learning new techniques, swap with several thousand brand-new stamping buddies, and take home more free goodies than you could shake a stick at. (No chain motors—we promise!)
But wait . . . there’s more! If you join Stampin’ Up! now, we’ll waive your Inspire. Create. Share. registration fee (an almost $300 USD value). That’s right . . . you can attend for FREE. You just pay your hotel and travel expenses.
And if that isn’t sweet enough, get this: if you join before the end of March, you’ll be eligible for Sale-A-Bration benefits. That means you’ll receive an extra $25 USD worth of products in your Starter Kit! So act now and join us for Inspire. Create. Share. 2014.
Still not sure you want to come? Just check out highlights from last year’s Inspire. Create. Share. We bet that will change your mind!
It’s me again ….
I just want to say I watch this video when life gets a bit overwhelming, which it does for all of us … it reinforces why I am a demonstrator, and reminds me that becoming a full time demonstrator is my goal. I would like to share the words with you …
Look at how far we’ve traveled
look at how much we’ve done
truth is one person can matter
just look at what yours can become
The journey to our destination, is what we remember today
Oh, Oh, Oh, celebrate … the difference that we make
Thinking back at were we’ve started
we can see just how far we have come
with what each of us has created
we see there’s a power in one
The journey is not always easy
but with every step along the way …
Oh, Oh, Oh, celebrate … the difference that we make
Be the Difference (6x)
The beauty of every solution,
is knowing that someone believes
their impact does not go unnoticed,
just look around and see
The journey to our destination, is what we remember today
Oh, Oh, Oh, celebrate … the difference that we make
Be the Difference
I love that song! Each year we have an inspiring theme song, this is one of my favorites. Someday I will share with you the many ways Stampin’ Up! makes a difference. Here’s one …
I earned the incentive trip to Fiji, thanks to my wonderful customers and downline the Star’s by Design. My regret … was opting out and not being able to experience this beautiful opportunity.
Thanks for taking the time to stop by today and check out the invitation. I really hope you consider joining me and this fantastic company … please let me know if you have any questions (contact me @ lindaluvs2stamp@aol.com) I am here to support your decision and to help guide you to the style of business that’s best for you.
How is your weekend so far? Good I hope! I have been busy in my Stampin’ room creating and putting together our annual Spring Retreat. Eileen, my sister and stampin’ side-kick … helps me a lot on these big events, and was here with me. We enjoy doing these so much!
While I was in my studio creating, I came up with today’s card share. I wanted this card to reflect our upcoming spring season (finally)! I knew I wanted to begin with brown – Early Espresso to be exact, because spring is a bit bare of color. Then I thought … why not emboss it with the Woodgrain Embossing Folder. That’s when I decided to use the Core’dinations cardstock!
Once embossed, I used our sanding system to sand off the Early Espresso and reveal the lighter color underneath. You can find the entire Core’dination papers and sanding system on page 157 our our Stampin’ Up! catalog.
I decided to create even more texture by cutting out the center of my card front with the Ovals Collection framelit. Now I needed a base for my card, so I chose the Very Vanilla because it coordinated with the color revealed from the Core’dinations cardstock.
It all flowed so easily… it made me smile! Hmmm … funny how I came up with that one! The greeting “Smile” comes from the stamp set “Happy Day” – which is how this day was turning out.
That’s when I decided to add the flowers. I punched them from the Retro Fresh Designer Series Paper, with the Petite Petals Punch. Both of these items can be found in our Occasions catalog. That’s the one that says… “Celebrate the Everyday”. Oh yes, the punch has a coordinating stamp set and can be purchased as a bundle.
Now … I popped up the entire woodgrain cardstock onto the Very Vanilla, and then popped up each of the 5 pretty Coastal Cabana flowers. I love the color contrast between my flowers and the espresso background. Spectacular!
To complete the look, I added the largest of the pearls to the center of my flower. So … don’t you think my card bloomed into a beautiful spring card?
Below I have the links to the products used here today. Just click on them for more details or to purchase any of the items.
Today is a bit different type of post than my usual … I have a couple of stamping projects to show you today, but I want to share a bit more of me.
Most of you know the main reason I have stayed with Stampin’ Up! for 14 years… it’s the beautiful friendships I have built. Today I’m going to share another reason I love Stampin’ Up!… traveling!
The idea began with my Technique Club and our discussion of traveling and where we all have gone. Some one had brought up the subject of people on the docks handing you animals, which brought me to my story…
I couldn’t remember what I was holding before they put the iguana on my head …. but this will explain it!!
I was trying to get a picture with Flat Stanley. That smile … was me gritting my teeth and asking them to take that thing off my head! LOL
This is the Mexican Riviera cruise that I had earned through Stampin’ Up! I love to cruise! I never thought that I would enjoy being “stuck” on a ship, but let me just say … it is a wonderful experience. Just think, each night you go to bed, and the next day you wake up some place new. And the food … yum!
My date for the evening was of course, Flat Stanley. He went on all our excursions with us. I could make a whole scrapbook of Flat Stanley on this trip!! Oh, and by the way, he never did come home with us … I think the stayed there because we never did find him after that!!
Well … you can’t go to any Stampin’ Up! event without either stamping or having samples every where! It’s so much fun! Here are just a couple of samples…
Some of you know … I love “boots”! They have a very special meaning for me. Here are some cute scrapbook pages. These would work well in our 8 x 8 inch albums.
I still go back and view some of the pictures I have taken to get some inspiration, and that is how I found all these photos. Don’t forget … You can take a layout, or a style of card and create something new using the items you already have.
I hope you enjoyed traveling along with me today. I ask you, if you have ever thought of becoming a demonstrator, we should talk. I have a wonderful group … the Star’s by Design, and we would love to welcome “you” into our group.
Whether it’s a need for additional money, the traveling, some well deserved recognition or the wonderful friendships you build … it’s a great company to work with. Remember, you’re the boss – you set your work schedule around your family, and as little or as often as you’d like.
During Sale-a-bration … Stampin’ Up! is offering additional $$ to the starter kit you design (I’ll help you if you’d like) but it’s still only $99. Talk to me or click on the “join” link for more information or to sign up. There is amazing support … and it starts with me.
Thanks for coming along on my journey today … I would be honored to help you navigate your new adventure.
Today is my second installment of Fast -n- Furious Fridays! Quick and easy cards for when we need a card fast!
I’m not sure if you can get any simpler than today’s card share, except to stamp a greeting onto a piece of cardstock. However, I choose to use the beautiful “Sweet Sorbet” Designer Series paper, which I got free with my Sale-a-bration order. There is still a week left for you to get yours too.
I love using designer paper when I’m in a hurry to make a card because the color and design is already there. My base card is Whisper White … so I added a simple but pretty bow using the white taffeta ribbon.
My greeting comes from the stamp set “Peaceful Petals” which I have been using in my Technique clubs and my Star’s (downline) meetings. You could use any greeting … thus “Fast -n- Furious!”
I hope you enjoyed today’s quick and easy card. Remember, you can use any designer paper, and any greeting to make a lot of cards in no time at all.
Today’s card share is one that I had the opportunity to make at a Stampin’ event hosted by one of my upline – Gloria Helmbrecht. As demonstrators, we look forward to getting together to share ideas and business tips. I generally host a meeting for my Star’s each month … there is a lot of support when you join the Stampin’ Up! and Star’s family.
I’m not real sure where to start on this card as it is packed full of techniques. The background is embossed using the Core’dinations paper… and sanded to create a two-tone look, which adds even more to the dimension.
We used the brayer to create the sandy beach, and then stamped our sand pipers with the Black StazOn ink.
To create the ocean waves … we colored on a block with our markers, and then dragged it across our cardstock.
There was a lot going on with this card, but it turned out beautiful and I learned some new techniques. I will be passing on these and more technique to my Technique Club members within the next year.
My clubs start in September and run through June … we generally have 10 members, and each member gets to be the “Hostess” for a month and receives all benefits just as if she hosted a home party. I cut and prepare all our projects … you can relax and enjoy learning a new technique and creating new friendships.
Let me know if you are interested in either joining one of my stamping groups or joining my family of Star’s!
I have created a list of supplies for this card … just click on the link for details or to make your purchase.
Please remember that items are available while supplies last, or through March 24th… which ever comes first. I know I have the Crisp Cantaloupe ribbon on my list! What is your favorite?
Also … orders of $50+ (before shipping & handling) qualify for a free Sale-a-bration item!
Hope you all had a wonderful weekend. I have an awesome project to share with you today … it is the March Paper Pumpkin Kit, and it is so cool!
Have YOU seen the March Paper Pumpkin kit yet? Watch to see how fun and simple this kit is to put together. Wonder what the surprise will be next month?
“Paper Pumpkin” … try it for a couple of months. They are bigger and better than ever. As a Paper Pumpkin member, can stop at any time, take off for a while, or just keep it comin’ …. It’s a bundle of fun delivered right to your door each month (well … mailbox, it comes to in the mailbox) LOL
Don’t forget … If you sign up before March 31st, You will receive the FREE Markers…a $14.95 Value! Here is a glimpse of the Paper Pumpkin Starter Kit.
I also want to remind you that there are only a couple weeks left of Sale-a-bration … There are several ways to earn FREE product, let me know if I can help you.
Click on any of the links (banners) for more information.
Today’s card share is a from my sister and Star’s by Design Group member, Eileen. My star’s and I love to get together and share card ideas, technique and business tips. It is a great learning experience, it’s fun, and we have become friends.
Eileen’s used the beautiful “Gingham Garden” Designer Series paper, and the “Honeycomb” embossing folder for the detailing on the top of the card.
The greeting coming from our stamp set “Yippee Skippee” and is so elegantly framed with the with the large doily from the “Delicate Doilies” Sizzlit Die. The pretty little butterfly that ties this pretty spring card together comes from the “Beautiful Wings” Embosslits.
Eileen told us that her card was inspired by a card created by Julie Wadlinger. As demonstrators we have many places that we can go to find samples, techniques, and helpful tips for our businesses.
When I think of Stampin’ Up! as a job, I must say … I enjoy the friendships that I have built, the fun, and the travel! I am truly grateful that I have found such an awesome opportunity. I’ve asked myself … “How many other jobs give you the opportunity to create something new every day!?”
Right now is a perfect time to just try it out … you chose $150 worth of products for only $99, and I’ll help you from there.
Join Stampin’ Up! and my Star’s by Design Group!
We’d love to welcome you to the “Stampin’ Up! family” and get to know you!
Join now for only $99 … ($190 $215 value)!!
Build your own personal kit by picking up to $125 $150 worth of any of our high-quality traditional or digital products. We’ll add in a business supplies pack valued at $65 (to help you get your business up and running), and you’ve got a customizable kit worth up to $190 $215!!
You select your own products for your starter kit…
1. A 20% instant income on all purchases (that’s an instant 20% savings) Up to 40% commission on personal / customers sales
2. Extra income. You’ll earn extra income based on your sales and recruiting–how much extra income is up to you. Maybe you just want enough income to pay the electric bill every month, or maybe your goal is bigger–the monthly payment for your new car–it’s your decision!
3. To attend Stampin’ Up! demonstrator events – Convention, Regionals, My Star’s by Design Group events and special events just for my direct recruits.
4. To enjoy your demonstratorship on your terms – as little or as much as you like – what days of the week, how many days of the week – what types of events
5. Support from Stampin’ Up! with support materials, including a stamping magazine, workshop ideas, and audio and video trainings on all kinds of topics available on our Demonstrator Web Site.
6. To receive our full color Stampin’ Success magazine – great tips, techniques, samples
7. To enjoy tax benefits of owning your own business – wouldn’t you love to write off travel for business, designer series papers, the BIG SHOT, and more?
8. Credit for your personal purchases – anything we purchase as Stampin’ Up! demonstrators counts toward our low $300 quarterly minimum, great rewards program, career milestones, monthly overrides, promotions, free mini catalog program
9. To enjoy hostess benefits – as Stampin’ Up! demonstrators we are allowed to be our own best customer and receive all the perks of being a hostess AND a demonstrator.
10. My favorite … the friendships you build!
There are many more benefits that I haven’t even mentioned.
Did I mention that when you join the Stampin’ Up! family, you will have the opportunity to attend our National Convention and have your registration paid for!!
Let’s talk … I’d love to help you in your decision. Please let me know if you have any questions.
Ohhhhh … it was so nice to see sunshine and almost 50 degree’s yesterday, but that is gone. Hope spring is coming soon. But until then, I have a cute card I would like to share with you today. The card was created by one of my Star’s group members, Cindy Schneider.
I love how she began her card with the Soft Sky … still thinkin’ spring, and then added that awesome pop of color with her banners! The banners were created using the ” Polka Dot Parade” Designer Series Paper and the “Banner Framelit Dies”. I have these too and just love them … with just a simple roll through the BigShot, you have a perfect banner!
The banners were tied together (lol) with the “Whisper White 3/8″ Taffeta Ribbon”. Here is another “must have” in your stampin’ supplies. I just showed my Star’s how to die their ribbon. What ever color marker you have … you can have that color ribbon, and just from a purchase of a simple white ribbon. Oh yes, and it ties beautifully.
I was so happy to see that Cindy had utilized the “See Ya Later” stamp set from our Sale-a-Bration catalog. It is so cute, and I have only gotten to use it once. This is one of the items you can earn free during Sale-a-bration, which by the way, only goes through March 31st. Let me know if you need anything.
Hope you enjoyed Cindy’s card share as much as I did, and grateful that she allowed me to post her design. Below is a list of all the ingredients used for this card. You can click on the image for more details or to begin shopping.
A happy Friday to you all. I am excited to announce that I’ve come up with another themed weekday … Fast and Furious Fridays. Each Friday I will post a simple to make card that you can easily copy and reproduce at the speed of light. Well… maybe not that fast, but fast.
My card share today is a masculine card. So simple and most designer papers will fit the bill (except maybe flowers… those, not so much). Today I used the Sweet Sorbet, which is a FREE item in the Sale-a-Bration Catalog. It measures 4″ x 5-1/4″ … that will leave a nice border around the edge, exposing the Basic Black card base.
We women like our bling, but men … they like hardware, so I used the brads to create the effect that the greeting was bolted down. I then added some straps – created with the Word Window punch, and bolted them down too! You could give your brads a more rustic look by pounding them up a bit with a small hammer!
My “Happy Birthday” greeting is great for men or women and has that wonderful nostalgic look. The stamp set is Perfectly Penned and can be found on page 95 of the big Stampin’ Up! catalog or you an click on the link below.
That’s it … I hope you enjoyed my first Fast and Furious Friday! This doesn’t mean that I would have quick & easy cards on other days, but I’m reserving Friday for our fast and furious… you know the weekend is coming up and we want to get our cards done quick.
Thank you from dropping in today and …
Have an awesome weekend!
Here’s what you need to recreate this card … then another look at the card itself.
I think I’m still giggling from last nights stamping club! I like blogging but I don’t know what I would do without my face to face time with my stampin’ friends. We laugh, we cry, we hug, then we laugh some more!
So today’s card share is inspired by my stampin’ friends. I started this card over a week ago and could not get it together… I had all the pieces, but nothing looked right. Last night, I pulled it together in less than 10 minutes.
It began (a week ago) with the idea of spring and daffodils, and I love the traditional white with yellow center daffodils. I embossed the image onto vellum cardstock and then flipped it over and sponged the white Craft ink onto the back using a Sponge Dauber (love those little things). The center was colored in with the Daffodil Delight Stampin’ Write Marker.
Now … this takes a bit to dry so I was off to look for a background. I chose the daffodil and slate striped design from the Watercolor Wonder Designer Series paper. Yes ladies, there’s that paper again! I then created the leaves by folding some scraps in half and then cutting a long skinny leaf that resembled a daffodil leaf.
Once my flower was dry, I wanted to add a bit more dimension to the white, so I added some additional white to the front with the “Stampin’ Chalk Marker”. Just bits of highlights, not too much.
After my stampin’ club members (friends) had gone home is when I pulled the card back out … I cut the center of another daffodil I had made, and added it to the one for my card. Daffodils have those beautiful trumpet centers and I just had to add it.
I chose my greeting, and it’s in honor of all my stampin’ friends “Laughter is the shortest distance between two people”… and hugs, they are a very short distance too 🙂
Thanks ladies for the inspiration, and I hope you all enjoyed today’s card share.
Give someone a smile today, make someone laugh or hug a friend and ….
Have an awesome day!
Here is my list of supplies …If you would like to purchase, just click on the image and it will take you to my stampin’ store.
How are you this fine Wednesday? I am excited to share a fun card with you today. Yesterday I showed you the Weekly Deals, and one of the items on the list was the “Peek-a-Boo Die” – so I want to show you what I came up with last night….
Do you recognize the designer paper? Well actually, it’s the “Good as Gold” Sale-a-bration Card Kit. I used it because it’s a bit thicker than the designer paper and because I love the gold dots in the design!
I chose the frame I wanted to use on my card and then ran the “Good as Gold” through the BigShot. Now I have my frame with a Peek-a-boo Window! Did you know … You can use the window as a pull down or pull up … how fun is that! It just depends on how you place it onto your card.
I then cut a piece of Whisper White cardstock slightly larger than my frame (2-1/4″ x 2-1/4″). I stamped the “You can never have too much happy” verse from the stamp set “Yippee Skippee!” Before attaching my frame, added some texture by using the xxxx’s from the “Needlepoint Border” Embossing folder. I wanted to bring in a bit more white onto the card so I colored the xxxx’s with our White Stampin’ Chalk Marker. Now I could attach my frame.
I also wanted to add a bit more color to the card front so I added some of the extra paper, and I sliced off a piece of the gold envelope liner! While I was add it … I punched out the “Elegant Butterfly” out of gold. Then I layered the smaller “Bitty Butterfly” from my left over embossed designer paper from yesterday’s project! Waste not, want not! LOL
Finally, to finish off the card … I added the Basic Pearls and then popped up the butterfly with the dimensionals.
Here are the items I used to create this project … Click on the photo to view details / purchase. Please note that the “Peek-a-boo Bigz Die” is on sale for $24.71 and will reflect that when you purchase it during the “Weekly Deals” which ends on the 17th of March.
So … How did you like the “Glitter Paper” technique yesterday? So simple, and so pretty! Well that brings me to my exciting announcement… I am featuring a “technique” each Tuesday! Yep, Technique Tuesday and it begins today with the wonderful “Chalkboard” technique!
I also have the weekly deals for you … and are they great! I have them all, so look forward to seeing some projects made with a few of these items!
Today’s card share is simple to do, and looks so nostalgic with the Chalkboard Technique. I have chosen “Another Great Year” stamp set as my featured set today.
I have seen several ways to do this technique … here is my take on it. Simply begin with a piece of Basic Black cardstock and wipe your embossing buddy across it. This will help keep the stray embossing powder off your card and gives you the appearance as if you just wiped off a chalk board! At least you don’t have to clean the erasers! Ooops … showing my age again!
Next, ink up your desired image with the white CRAFT ink. I like to flip my stamps so the rubber is up when inking … it gives you much more control and you can see how exactly where you are placing the ink.
Stamp image onto black cardstock…. Sprinkle the White embossing powder over your inked area, tap off excess, and emboss with heat gun.
Now you can add some designs, or color in parts of the image with our fabulous “Stampin’ Chalk Marker”. It was meant for this technique and is fun and easy to use. Here I highlighted part of the banner and added a simple border around the card.
You can use this technique alone as your focal point as I did today, or frame it with one of our beautiful designer series papers – that would really make it pop! My technique clubs made Christmas cards using this technique, so feel free to experiment … and have fun.
The Chalkboard technique is really hot right now … just take a look around, you’ll be surprised at how many different places you will find it.
Thanks for visiting me today ~
Here is a list of supplies used for today’s card …
I’m back today to put a little “sparkle” in your day! My card share today is an easy technique that I love to do when I need a quick card but want to jazz it up! I will see how easy it is to make your own glitter paper.
I used the “Watercolor Wonder” Designer series paper, it is so pretty I just can’t keep my hands off this stuff! Cut your designer paper to the size you want. I decided to use it as my card front, so it measures 4″ x 5-1/4″.
Place this on a scrap piece of paper and dab the entire VersaMark Ink pad directly onto your designer paper. You could brayer the VersaMark on, but this is much easier.
Now I move the designer paper onto another scrap piece of paper, or you can use an embossing powder tray, because you will now cover the entire piece with “Iridescent Ice Embossing Powder”…. tap off any excess powder. Now grab your heat gun and emboss! You now have a beautiful …. designer … glitter paper!
My greeting comes from the “Friendly Phrases” stamp set, and I stamped it the the Crisp Cantaloupe ink. This is also the color I used for the base of my card.
I repeated the embossing steps on a scrap piece of designer paper (is there scrap designer paper? Maybe not) … I then punched out a butterfly using the “Elegant Butterfly” punch. To finish it off, I added a small string of Rhinestones to the butterfly.
The greeting and the butterfly were popped up with Stampin’ Dimensionals.
I hope you enjoyed the card share today.
Thank you so much for stopping by. And a “Happy Birthday” to my daughter Sarah today!