Hello Stampin’ Friends,
YIKES … I’ve been AWOL for 5 days! Still dealing with my daughters “unknown” illness (it’s been two months) hopefully we will get some answers or something DONE on Thursday. Geez … even the weathermen have a better track record than these doctors, and emergency room technicians.
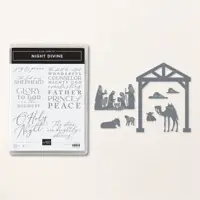
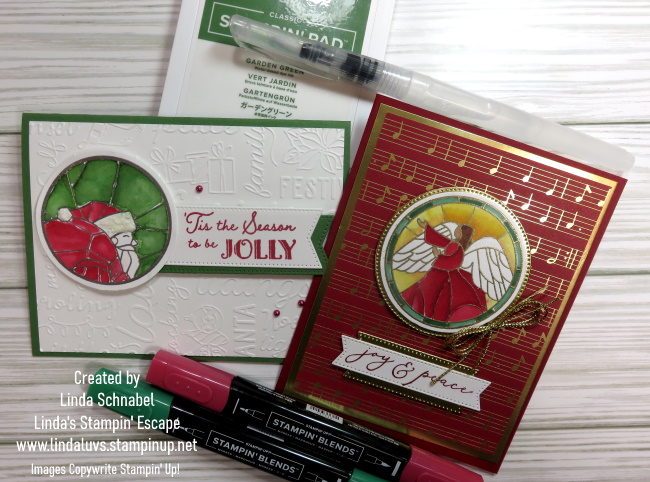
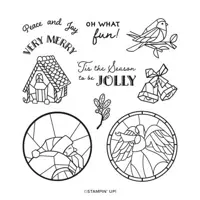
Anyhow … on with the good stuff!! Today I have a beautiful card for you: The Night Divine stamp set, a beacon of elegance, it shines brilliantly in today’s spotlight. Join us as we explore its grace and the stunning Z-Fold creation, marrying Very Vanilla and Gold in a symphony of sophistication.

The Night Divine stamp set is a testament to the beauty of this holiday season and the birth of our Lord. Even in this cards simplicity, the message shines through as it is the focal point of our card when heat embossed in Gold.
The choice of Very Vanilla cardstock sets a tone of refined grace, providing the perfect canvas for the gold accents to shimmer and captivate.

The Z-Fold card highlights our sentiment and places it center stage, adorned in the regal hues of Very Vanilla and Gold. The Z-Fold, known for its dimensional appeal and captivating layout, perfectly complements the elegance of the Night Divine stamp set.
Let the Night Divine bundle guide you to create awe-inspiring cards that celebrate elegance and grace. Thank you for joining me today …. I have a surprise for you!

Surprise! It’s time for FREE SHIPPING! On 14 December 2023, you can shop and save on all qualifying orders of $75 or more. What a great way to stock up on all your favorite products from the catalog, Online Exclusives, kits, and more!
Please keep in mind that because of the Christmas season, the distribution center may fall behind typical shipping timeframes. We will do all we can to return to our regular service levels as quickly as possible. Any orders placed during this promotion are not guaranteed to arrive before or by 25 December.
Let me know if you have any questions, or if you need help placing an order. Thanks again, and have a wonderful day.