Hope your enjoying your weekend. Just wanted to send a quick card share today … My apologies for going AWOL, I have been working hard in my Stampin’ Studio for my 2 upcoming Spring Retreats!
Today’s cards can also be found on My Stampin’ Up! Website (click to view) … I have many of my samples (Old and New) and some great samples from Stampin’ Up! as well.
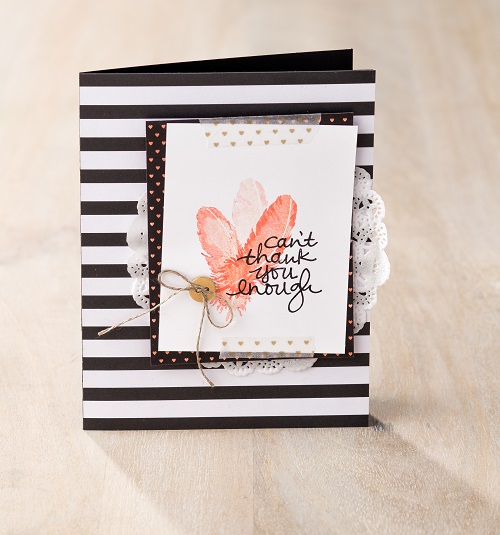
Thanks Tag Card by Stampin’ Up!
Smile Butterfly Card by Stampin’ Up!
Thank You so much from coming back to visit me … I’ll be back tomorrow with a great spring card.
Hope you are enjoying your weekend. I’ve been so busy I never even got to step outside yesterday, but I noticed that the snow was melting … YAY!!! Better yet, I hear there is a warming trend our way. I don’t know about you, but I am ready for spring!
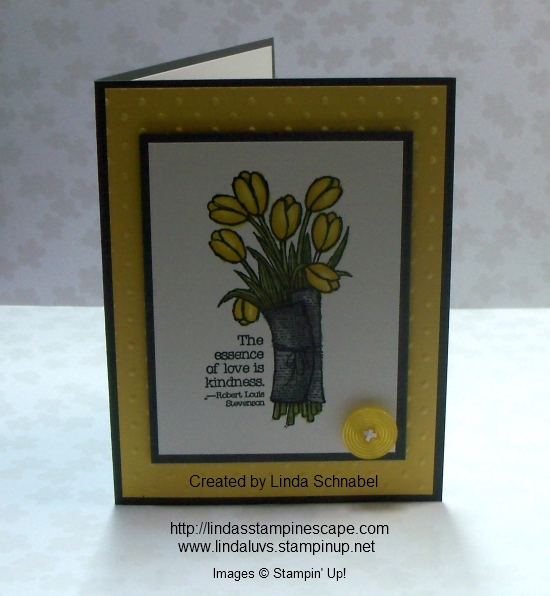
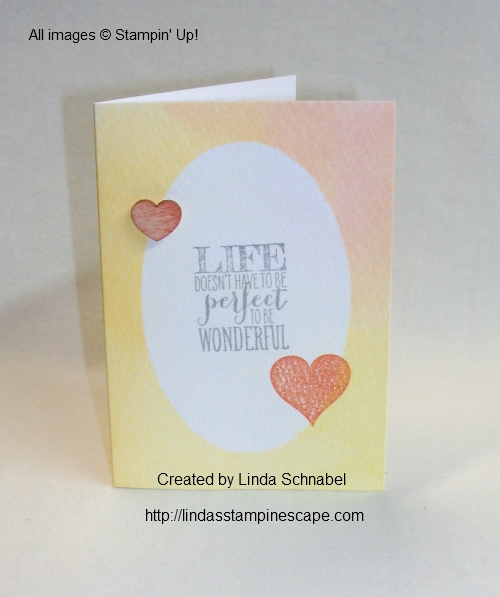
On that note, I can’t wait to share today’s card with you. First time on my blog … the “Love is Kindness” stamp set. And what says spring better than tulips!! I stamped the image with the Momento ink pad and chose the “Daffodil Delight” Blendabilities to color them.
Yellow hues always give you that warm fuzzy feeling. The greens are the “Old Olive” blendabilities, and I used the “Smoky Slate” blendabilities to soften the black on the newspaper. My base card is Basic Gray, again to soften the look of the card instead of the boldness of our Basic Black.
I embossed the Daffodil Delight cardstock with the Perfect Polka Dots embossing folder for a touch of texture and popped up the flower portion to give it dimension.
Just for fun … I added one of the buttons from the “Best Year Ever Accessory Pack”… it is one of the FREE items from our Sale-a-bration Catalog.
Thank you for joining me for today’s post, I appreciate you spending a bit of your Sunday with me.
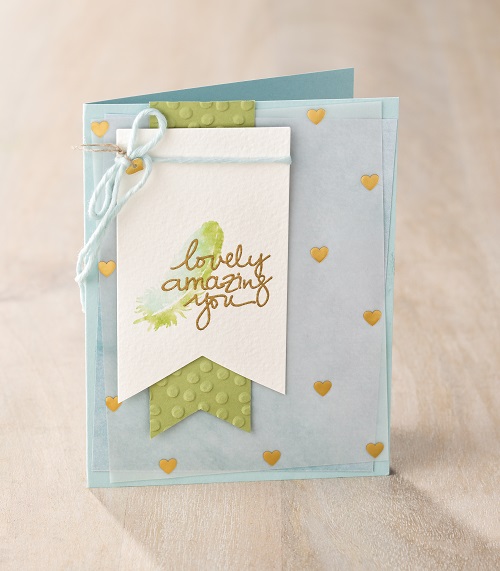
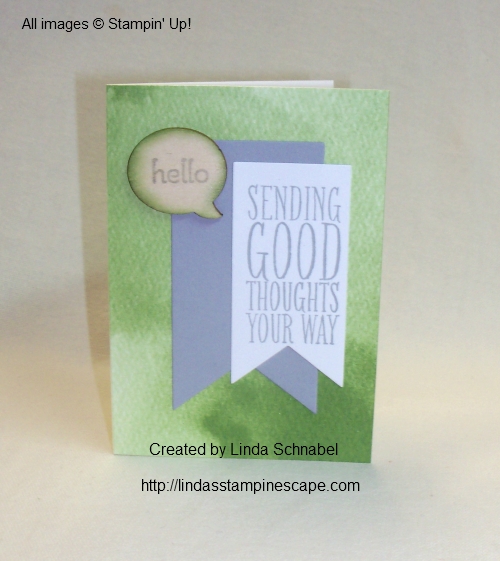
I’m so excited to share my first card made with our newest photopolymer stamp set … “Loving Amazing You”. This great new set is just what you need to spread happiness to all. Its so versatile, you’ll find yourself using it over and over again. Recommended clear block sizes are A, B, C (not included in the set).
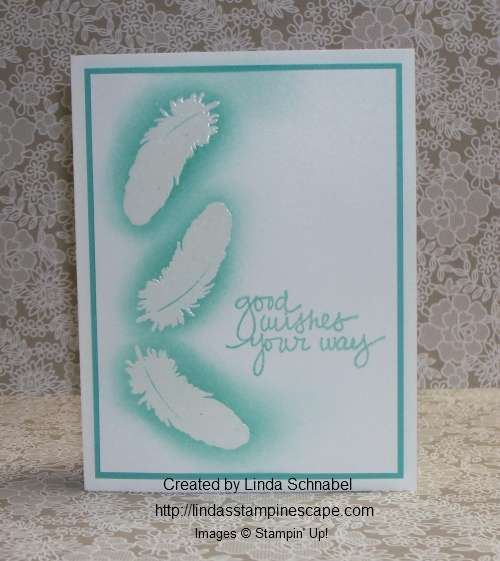
I wanted to create a simple, beautiful card … I love feather and all the greetings. I will definitely be sharing more from this stamp set with you.
I stamped the feather with the VersaMark™ pad and embossed with clear embossing powder. I then sponged “Coastal Cabana” ink over the feathers and also used it for my greeting.
Just a pop of the Coastal Cabana between the two white pieces helps tie it all together. This card could be done in numerous different colors … pick your favorite!
There is a little texture created by embossing but I wanted to add some dimension to the card to I popped up the front with Stampin’ Dimensionals. That is it … simple, yet beautiful.
Yesterday, I told you I would share more of Jen C.’s beautiful cards, and I can’t wait to show you how amazing they are! I’m sure you will enjoy them as much as I did ….
Simply stunning … I love these cards! Again, thank you Jen for sharing these with us. I can’t wait to get my set and begin stamping!
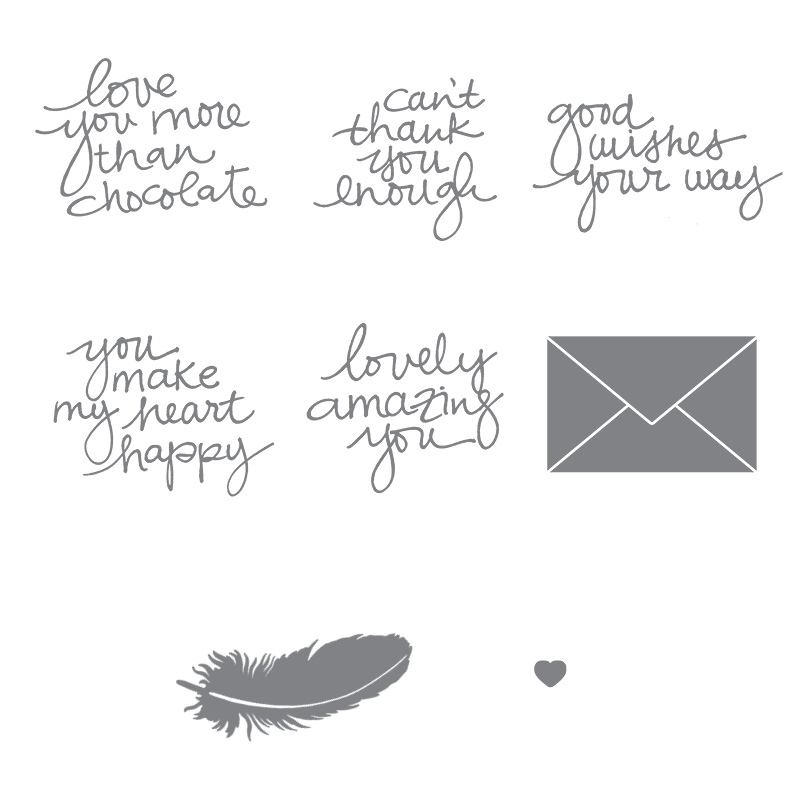
Here is a look at the photopolymer stamp set itself …
Lovely, Amazing You (item #140594) $14.95 / Recommended clear block sizes are A, B, C (not included in the set).
If you would like to purchase this amazing stamp set … JUST CLICK HERE
As promised yesterday, I am going to share with you a beautiful Photopolymer stamp set that was just released! I already ordered mine yesterday because I could not wait to get my hands on it. I truly believe this is a “must have” in everyone’s stamp collection.
This great new set is just what you need to spread happiness to all. Its so versatile, you’ll find yourself using it over and over again. Recommended clear block sizes are A, B, C (not included in the set).
It’s the relationships we share that make life interesting and rewarding. This is what inspired our new stamp set, Lovely, Amazing You (item #140594) $14.95
What are the reasons you give cards, treats, gifts? For me, it’s to thank someone, to wish them well on a special occasion, or often just to say, “Hey, I’m thinking of you.”
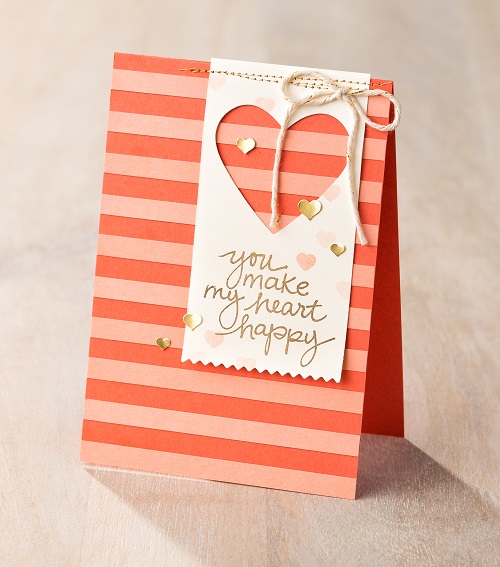
Here are some ways to show your love, admiration, and appreciation. Let people know that you care, that you think they’re amazing, and that you might even love them more than chocolate.
These wonderful projects were shared by Jen C. Big “thanks” for sharing her talent and creativity with all. I will have more of her beautiful cards to share with you tomorrow!
If you would like to purchase this amazing stamp set … JUST CLICK HERE
Thank you for visiting my blog today, I hope your day is filled with happiness!
Happy Monday to you and I hope many of you are warmer than those of us in Wisconsin … burrrrr! It’s a bit nippy here with wind chills down around 35 below.
On that note, I’d like to warm things up by letting you know today is the day we kick off the Occasions and Sale-a-bration Catalogs!
Something else that will warm you up is our beautiful “Painted Blooms” designer series paper. You can’t think anything but spring when you look at this pattern …
The flowers are so beautiful, and this was a left over piece from the card I shared January 3rd!
No fuss with this card, I simply stamped my greeting directly onto the designer paper! I used the “Simply Wonderful” stamp set which you can get FREE during Sale-a-bration which starts today!
If you are not familiar with Sale-a-bration … it is our most anticipated promotion of the year, with many ways to earn Free stamp sets and accessories. You can chose a FREE Sale-a-bration item with each $50 purchase (before shipping & handling)
I couldn’t resist not decorating the inside and you’ll be amazed at how much this beautiful stamp set mimics the designer paper. The stamp set is the new “Painted Petals” from the Occasions catalog – pg. 19. It’s a two-step stamp set so it was easy to stamp the pink petals and green stems. The greeting is also part of this set.
With the purchase of the Painted Petals stamp set, Painted Blooms Designer paper and the Blackberry Bliss ribbon, you will be pretty darn close to getting the FREE “Simply Wonderful” stamp set! Just add some needed cardstock or inks and you’ll be there.
Thank you for visiting my blog today! Please let me know if you have any questions of the products I showed you or Sale-a-bration. I
f you do not have a demonstrator and would like me to be yours, let me know if you need either the Occasions or Sale-a-bration catalog.
It’s getting closer to Christmas, a busy time for all of us I’m sure. So I hope you can escape the craziness and join me for a minute… kick back and relax because I would like to show you a sneak peek from the Sale-a-Bration and Occasions 2015 Catalogs!
I love that Stampin’ Up! is always right on track with the “hot” techniques and latest products for stamping, and I’m excited to share with you the NEW Chalkboard Paper in the Occasions catalog. Cool right? Well hang onto your socks because they also brought us “Chalk Ink” pads!
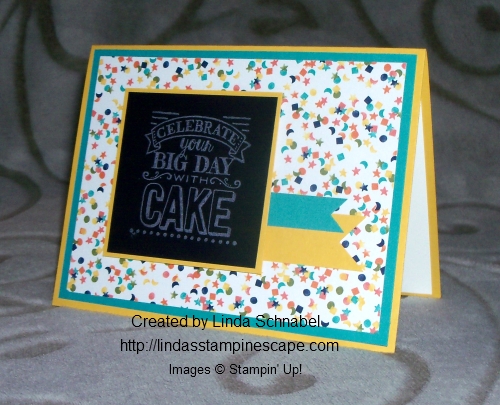
Here is my card share today … This is one of the cards that I did as a Make & Take for my Star’s members for our Christmas party this year.
This paper is a bit heavier and has a smooth grain that pairs perfectly with the Chalk ink and our White Stampin’ Chalk Marker. The chalk ink is permanent and creates a realistic chalk effect. You can find these on page 25 of the new Occasions catalog.
Also from the Occasions catalog is our “Birthday Bash” Specialty Designer Series Paper …. I picked out the Bermuda Bay and Crushed Curry colors from the DSP as my base colors because I thought it was gender neutral. It’s always nice to have cards around that can be used for anyone.
The Chalkboard paper really is the focal point and it highlights our greeting which comes from the “Big Day” stamp set. Yes, you already got a sneak peek from this set on Saturday (click here to view).
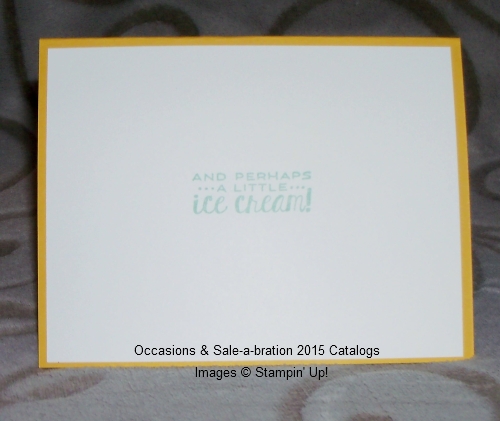
I love stamp sets that have a greeting and words to match that I can put inside …
Ice cream and cake … it’s making me hungry! I think I should have added some designer paper to the inside to add a bit more color! Hmmm … that is why I like stamping with my friends, we share ideas and end up with even better cards! Right ladies!!
Hope you enjoyed the break and I’ll see you tomorrow.
I am really excited to share with you what I created using my December Paper Pumpkin! First I’d like you to watch the video on how to put together the cards in the kit ….
I think the videos are fun to watch, and they inspire me. However I already had my cards created before I watched this months video. I love shaker cards … Who doesn’t?
First I will show you my card from the kit, just a twist from the Stampin’ Up! instructions, and one more way you can put your cards together ….
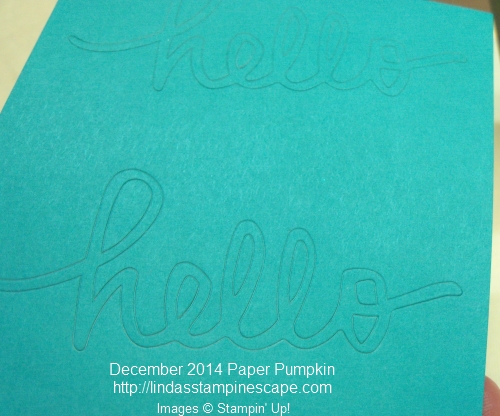
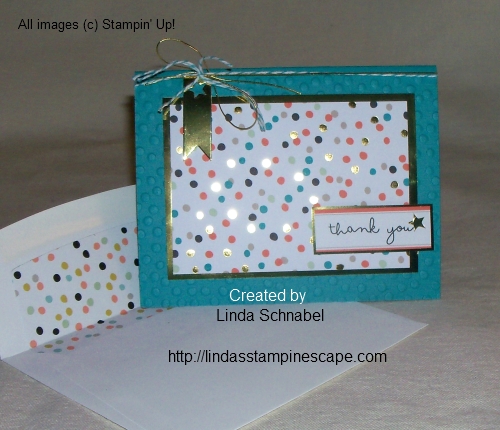
For those of you who know me, you know I’m just like you and don’t want to see anything to to waste! Well, here is what the “greeting” sheet looks like …
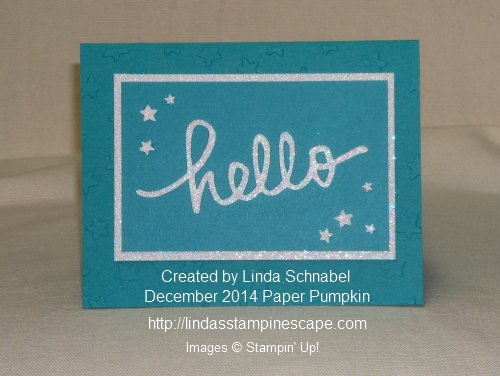
and what do you think I thought of … that’s right, “Make a card out of that!” So I cut off the piece that I had taken my “hello” from, measured it and cut a piece of the “Dazzling Diamonds” Shimmer paper. I just used it a couple of days ago so I still had it out on my stampin’ table.
I love that the greetings are on adhesive sheets so I would not loose the little pieces from the h – e – l … well you get my drift! lol So it was easy to transfer this onto the glimmer paper and add those little pieces to complete the word. I popped up the greeting with our Stampin’ Dimensionals.
Since I used the “Lucky Star’s” embossing folder for some texture on the base – Bermuda Bay cardstock, I punched out some additional stars with the “Confetti Stars Punch”. I attached them with “Crystal Effects” and a tooth pick!
This card was so simple to make, and I think it’s adorable!
My Pumpkin Pals and I get together to put together our kits, plus I always have an alternative product for them. If we don’t get together, I post or send them additional samples ideas.
Paper Pumpkin makes the PERFECT Christmas Gift! Just click on the link above.
Try it out… we have 1 – 3 – 6 or 12 month subscriptions or do it month to month. Let me know if you have any questions, I’d be happy to answer any concerns you may have.
Hope you had a wonderful weekend! Since I took Saturday off from blogging, I figured I would share a special post with you today. I am going to show you a progression of cards, from simple to a touch of glitz.
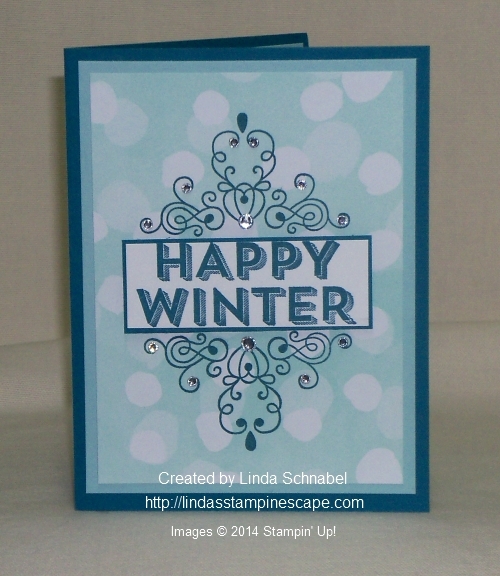
I started ever so simple with the “All is Calm” Specialty Designer Paper and the “Wintertime” stamp set. I haven’t used it yet, but have been dying to get my hands on it and stamp!
My core colors that I used are Pool Party and Island Indigo … even though those are not listed on the designer paper pack, the Pool Party went well with the pattern I chose.
I simply inked up the stamp with the Island Indigo and stamped directly onto the designer paper… assemble and you have a cute and quick card! Simple can still be pretty.
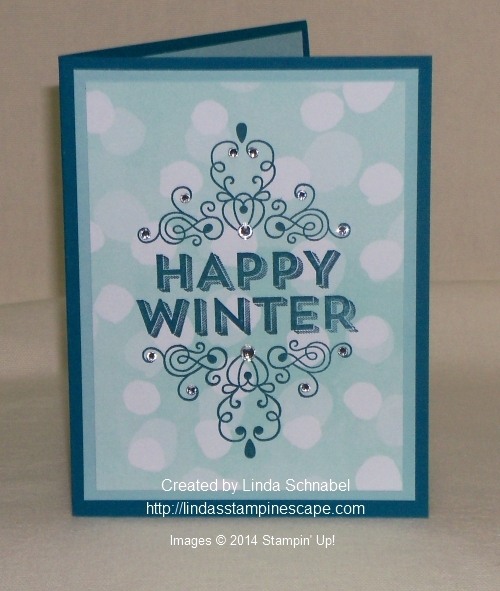
Now … If you’re one of us who like some sparkle to your cards, my next sample illustrates what a few rhinestones can do for your card. Oh my that’s pretty!
If you’d like to step it up a bit more and highlight the greeting, simply stamp another image onto the Whisper White cardstock … cut it out … and mat it with a little piece of Island Indigo.
Wow… that really adds dimension and gives your card a new look.
If you still don’t have enough sparkle … then instead of the Pool Party mat behind the designer paper, you could use our beautiful (and new) Dazzling Diamonds Shimmer paper.
Look at how that makes the entire card pop! So whether you like a more simple and subtle card or full out bling … you can see how easy you can transform your cards.
So head off into your stamp room and have some fun! Feel free to share your projects with me (lindaluvs2stamp@aol.com) I’d love to share your project with our stampin’ friends on Linda’s Stampin’ Escape blog… with your permission of course!
Today I want to share with you our newest “Photopolymer stamp set… Snuggles and Smooches”. It may seem like it is just for Valentine’s Day, but I think it could be used any time of the year when you want to share some affection with those you love.
Two of my favorite images in the set are the swirls. I’m sure you’ve noticed how trendy it is to wind up some Linen Thread or Baker’s Twine and use it as an element on cards and other projects. You can see on this card how the large swirl image helps accomplish a similar feel.
The swirls also create interesting background patterns that can be used with a technique like emboss resist—as shown on this adorable little card.
Or simply stamp—as I did on this tag. The “Love” sentiment works great for creating a chalkboard effect.
There are three heart images in this stamp set. They were drawn to coordinate with three of our heart punches: the Sweetheart Punch, the Hearts Border Punch, and the heart from the Itty Bitty Accents Punch Pack. The “Love” sentiment will also coordinate with either of the Tag Topper punches.
I can’t wait to see what you create with this stamp set—whether it’s a valentine for someone you love, notes of encouragement, memory keeping, or treat packaging.
(From our Concept Artist: Melody H.)
Was I right? Super cute projects today! This stamp set is already available – Click here to view!
Snuggles And Smooches Photopolymer Stamp Set
140326
Price: $15.95
This fun set will surely bring a smile to many faces and is a great way to let others know you love them. Recommended for use with clear-mount blocks A, D, E, and G. Blocks not included with set.
Wow … It’s Sunday already! Boy the weekends just fly by. Come to think of it, so do the weeks and months, it’s already December and another year almost over … wow!
As promised yesterday, I will be sharing more card samples that I created using products from our Year End Clearance. (One of the items I wanted to share is already gone).
Easiest DIY cards ever! Take a printed Watercolor Wonder Designer Note Card. Stamp or write on it. Done! Coordinate with the Watercolor Wonder suite.■ 20 printed cards on watercolor paper: 4 ea. of 5 designs
■ 20 Ivory envelopes
■ Card size: 3-1/2″ x 5″
Here is the “Good as Gold” Card kit … my samples. Stampin’ Up! also has patterns for you to follow in the kit, it’s all there for you and for only $4.39 you can create 8 fabulous cards for slightly over 50¢ a card!!
Good As Gold Card Kit
133512
Price: $10.95$4.39
Quickly create thank-you cards in gorgeous Bermuda Bay and Tangerine Tango with rich gold accents! Also features Basic Black, Pistachio Pudding, and Sahara Sand.Kit includes
• 8 card bases (3-1/2″ x 5″)
• 8 envelope liners
• 1 sheet Gold Foil Tags
• 1 sheet printed die-cut tags
• 8 pieces Gold Elastic Cord (24″ each)
• 8 pieces Bermuda Bay Baker’s Twine (24″ each)
Warm colors and texture-rich designs will make you want to wrap up in your favorite sweater and scarf for a little seasonal crafting. 12 sheets: 2 ea. of 6 double-sided designs. 12″ x 12″. Acid free, lignin free.
Chocolate Chip, Crushed Curry, Sahara Sand, Soft Sky, Tangerine Tango, Very Vanilla, Whisper White.
I have one more item that I would like to share with you … the “Typeset Alphabet Bigz Die”. This works great for your scrapbook pages, cards and projects. We used it a lot for school projects and banners.
Typeset Alphabet Bigz Die
127553
Price: $89.95$53.99
4 dies. Includes 26 letters, 10 numbers, and 1 symbol: ea. 1-1/4″ high. Use with Big Shot and Standard Cutting Pads.
Hope you enjoyed today’s showcase of cards and projects using these fabulous products at unbelievable prices. They would make a great gift for the crafter on your Christmas shopping list… or a little reward for yourself.
Because they are year end closeouts … it’s while supplies last, and some are already gone. Don’t delay.
Thank you so much for stopping by and have a wonderful Sunday ~
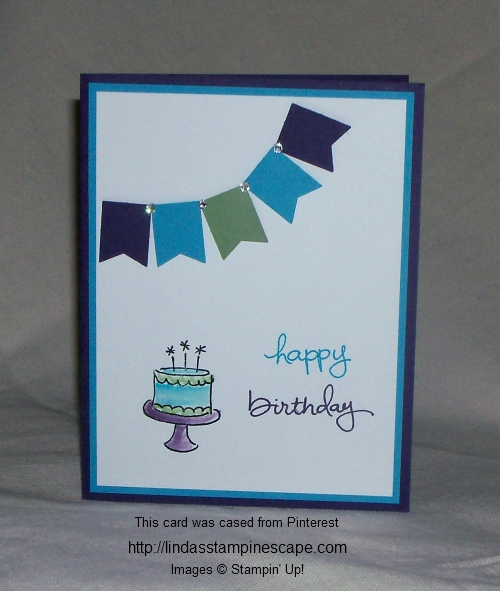
Today I want to share with a card that takes us away from the Christmas theme …. and celebrates birthdays! We all need Birthday cards and I came upon this one going through my card stash.
This is one of the cards that I had cased (copy and share everything) from a Pinterest card and used at one of my stamp camps.
I love the color combination of Tempting Turquoise, Elegant Eggplant, and Wild Wasabi. The stamp set is our “Endless Birthday Wishes” … endless because with such a wide variety of greetings you can put together.
Just click on the product description to view the stamp set direct on my on-line store …
Make celebrations and birthdays a little more fun with this handwritten photopolymer stamp set. Recommended clear block sizes are A, B, and G (not included in the set).
SAVE UP TO 80%! STAMPIN’ UP! YEAR END CLOSEOUT!
STARTS TODAY! Discounts to 80%! Stampin’ Up! will be stocking up the Clearance Rack with lots of new goodies, including holiday products (just in time)! Clearance rack items are available while supplies last so please be ready to order your favorites.
Please let me know if you have any questions or need help…. lindaluvs2stamp@aol.com
Today I want to share with you a different take on the “Gentle Peace” stamp set. This beautiful stamp with it’s stained glass is perfect for the Blendabilities. I did use the Blendabilities and love how easily they blend … but now I want to share my card with you!
I love this card because my focal point is the holy family … I kept the star from the window to shine above them. A simple card but oh so lovely.
I wanted to show you that you can change up a stamp set by omitting or cutting out a part of it and giving it a whole new look. I enjoy hearing what you think … please leave a comment below.
There are only two days left for our Online Extravaganza, and today don’t forget to check out the Door Busters available “today only”.
Door Buster Sale… 30% Off the Blendabilities Bundle (140388) includes all 12 assortments! (except Skin Tone) Plus… When you purchase your bundle today from my on-line store, you will be invited to my FREE Blendabilites class in which you will learn how to use and get the most out of your new markers!
There’s MORE… So you can get started “right away” I will include the Momento Ink Pad and Color Lifter Pen FREE!! They will be with your projects supplies when you get to class. I’ll have everything ready .. just bring your new Markers! With the Stampin’ Up! savings of 30%, the FREE Class, Momento Pad and Color Lifter Pen … your saving over $85!
Here is the list of today’s Door Busters ….
To view the rest of the deals by % of savings – Click on the icons below ….
Save this for the direct link to my on-line store and shop early Monday CLICK HERE to SHOP
Enjoy the savings. For those of you getting the Blendabilities … I will send you the class information shortly.
Today I would like to share with you some wonderful samples from the Stampin’ Up! Get Inspired blog and Senior Staff Writer Cindy B.
Her projects were so pretty I just had to share, it really is beginning to look a lot like Christmas!
If you’re a papercrafter, Christmas is probably one of your busiest times of the year. And I don’t know about you, but I pretty much want everything in this year’s holiday catalog . . . so deciding what to buy has become a serious problem for me! Is anyone else in the same boat? Here are some great samples …
Introducing the beautiful Nature’s Peace Stamp Set . Here’s what it looks like when you emboss it using VersaMark ink, Gold Stampin’ Emboss Powder, and the Heat Tool.
A gorgeous product from the holiday catalog is the Bright & Beautiful Stamp Set. Use it to make a fun gift package. (Tip: cut the top of a Petite Café Gift Bag using the Large Scallop Edgelits Die.)
I used the same stamp set to create a tag that doubles as a Christmas tree ornament—and put it on one of our Takeout Boxes for a cute gift.
Here’s a fast and easy card made using the adorable Cheerful Christmas Stamp Set.
Last of all, check out this idea for a treat bag—again using that awesome Bright & Beautiful Stamp Set.
If you haven’t seen the holiday catalog yet, click here (US)—then tell us which products are YOUR very favorites!
Cindy B.
Sr. Staff Writer
Don’t you just love Cindy’s projects! What wonderful ideas and great tips. You can see Cindy’s post by Clicking HERE!
It’s a bit “chilly” out today but I am grateful that the snow blast that hit our western states did not make it to Wisconsin – or should I say… my neck of the woods! Northern Wisconsin got snow.
Today I am going to share with you the Ornamental Pine Birthday card as promised, and my favorite of this weeks “Weekly Deals”.
Let’s begin with the card ….
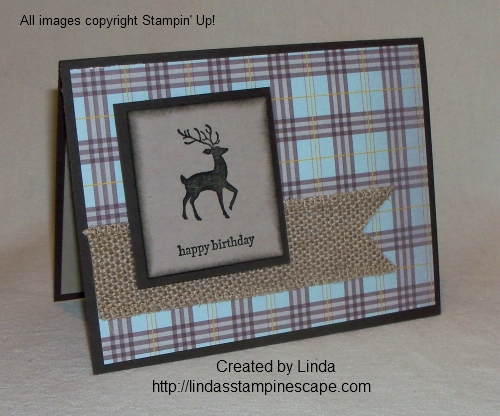
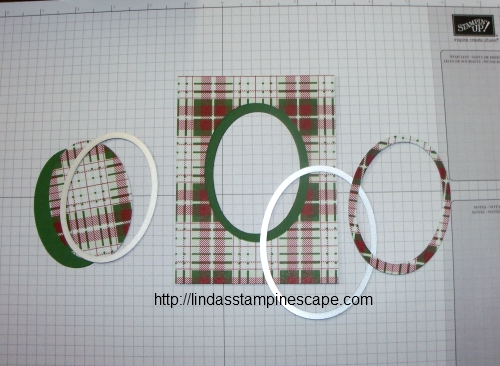
My colors are based off the designer paper pack “Trim the Tree” which includes the Garden Green that I used as my base and my frame. The designer paper is cut 4 x 5-1/4″ … then cut a Whisper White and Garden Green slightly smaller. The white you will stamp on, and the green will be a frame!
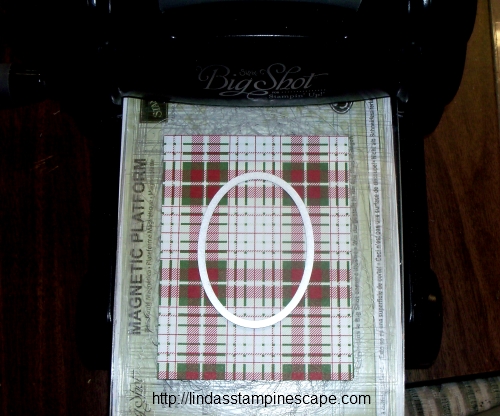
Align the Garden Green cardstock behind the designer paper and using the “Oval Collections” Framelits … you will cut through both pieces.
Take away the Garden Green and place the Trim the Tree Designer paper back onto the BigShot … using the “next size up” oval, align and cut. Now when you place your Garden Green back behind the designer paper … you will have a frame!
Just to recap ….
Next, you will ink up your Pine with Garden Green ink and color in the stem with the Chocolate Chip marker and stamp onto the Whisper White piece you cut earlier. Stamp the pine cone in Chocolate Chip and cut out… yes, you have to fussy cut – sorry!
My “Happy Birthday” greeting comes from the “Making Spirits Bright” … a great set you can use all year long, and the greeting size is perfect!
OK … now for some more fun, let’s talk “Weekly Deals”! My favorite from this weeks bunch of deals is the …. Daffodil Delight Seam Binding! We had some great guesses, but no one guessed it right 😦
Daffodil Delight 1/2″ Ribbon Seam Binding
125583
Price: $6.95 New Price $5.21
Returning favorite now in even more colors! Soft and flowingÑdrapes like silk. 10 yds.
Don’t fret though ladies because I told you that I was going to be full of surprises this year, so each of you who responded will get a bolt of the Daffodil Seam Binding!!
I want you to know why I fell in love with it. It is so easy to work with, and ribbon is always a great way to embellish a card without breaking the bank. Congratulations Olivia, Cheryl, Barb & Nancy! 🙂