Hello, Fall

Hello Stampin’ Friends,

Today I would like to share 2 projects from our Concept Artist Jen C. and to be honest, I couldn’t say it better myself so I’m sharing her post …

Fall is my favorite season. There are so many reasons why: football, hoodies, vibrant leaves, crisp air, and pumpkin spice everything! In honor of the changing of the seasons, I’ve made a couple of fall projects to share.

This first card uses the Four Feathers Stamp Set with the coordinating Feather Framelits Dies. One of my favorite techniques is to “faux watercolor.” To achieve this look, ink your stamp and mist the surface of the inked stamp with water in a Stampin’ Spritzer. Mist a few times, or until you can see small puddles forming.  Then stamp on Watercolor Paper. If you want more bleed, you can mist the paper directly. This is such a simple way to achieve an artistic, watercolor look.

Hello fall_crbFall Feathers Card


The second project I created is a little fall wreath stamped on a Mini Muslin bag.  To darken the Hello Honey ink, it was necessary to stamp the wreath image more than once. Thankfully, this part is easy with photopolymer stamps. I added the second wreath image using Cajun Craze ink. To prevent the ink from smearing, I heat set it using an iron. (When ironing, I always use a piece of copy paper or fabric over my stamped bag to protect it.)

Hello fall_crbFall Wreath Muslin Bag

To add a little sparkle to this treat bag, add a tiny amount of Crystal Effects to a few of the leaves and sprinkle gold glitter on the bag. Shake to remove excess.  This bag is a fun and easy way to give a small gift or treat for fall.

What inspires you this fall season?

Jen C.

Thanks so much for stopping by ~

blog-closing-small


Flippin’ for You!

Hello Stampin’ Friends,

I hope those of you who live near me in Wisconsin got a chance to get outside yesterday … what a beautiful day!  I also hope you all had a chance to look over the Weekly Deals I posted because today I’m going to share with you a few of those!

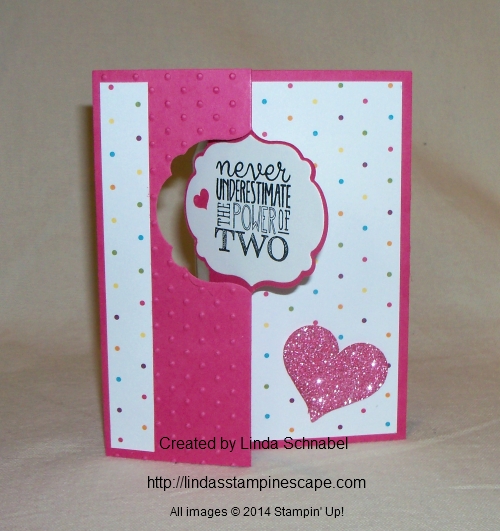
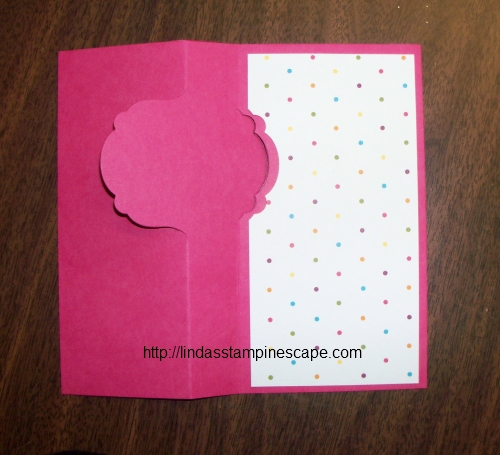
I’ve have the cutest card, stampin’ tips & techniques that you’ll flip over!  Let’s begin with the front of the card.  I used Melon Mambo for my flip card and the “Label Card” Thinlit die – one of our weekly deals … Sweet!

000_1483

Speaking of sweet, I paired the Melon Mambo with the “Sweet Taffy” Designer Series paper.  I cut the designer paper to fit the inside of my card, then I aligned it within the framelit die to cut out the area that flips.

000_1478

Now my designer paper is perfectly notched out and has the perfect mambo frame of color around it.  The Whisper White pieces for the greetings, were cut with one of the thinlits that are included with the card thinlit … it actually contains 9 dies!

000_1479

Because I love polka dots and texture … I used the “Perfect Polka Dot” folder to the left side of my lip card.  I took a picture of how I just tucked that piece into the folder, then folded the card behind the folder.  I did not use any tabs when embossing this folder.

000_1481

My greeting is from “Yippee Skippee” … also on sale this week!  I love this quirky and fun stamp set.  I used the black StazOn™ because I like the richness of the black color, and it smells good! LOL

I snuck the little heart from the “Another Thank You” stamp set to add a bit more color to my sentiments.

The third item from the Weekly deals list that I am using on my card, is the brand NEW “Sweetheart” punch!!  I punched it out of the Silver Glimmer paper and dyed it Melon Mambo!

TO DYE: All you need is a sponge dauber … then you can either use the ink pad or the ink refill.  I prefer the refill because it’s quicker and I get a darker color quicker.  Stampin’ Tip …  I dampen the sponge dauber first (not wet) but it really helps spread the ink evenly over the glimmer paper.

Now, for the inside of the card …

000_1484

I hope you enjoyed today’s card, the stampin’ tips of trimming the designer paper, embossing just a section of a card, and the technique of dying glimmer paper.

I’d love to hear what you think!  Thanks so much for following along.

Have yourself a flippin’ awesome day!

blog-closing-small

Please note that the sales price is not reflected on the ingredient list below … to check the Weekly Deals, just scroll up until you see it listed on the right hand side of the blog – then click on it.  That will take you directly to my “Weekly Deals” on my website.

Tuesday means Weekly Deals …

Hello Stampin’ Friends,

I am really excited to bring you this weeks “Weekly Deals” … Stampin’ Up! has discounted some fabulous items this week including the NEW Heart punch!  Grab a cup of coffee and sit back and take a look … I think this is one of the best I’ve seen so far!

Weekly Deals

We hope you enjoy this week’s Weekly Deals!

133786G Sweetheart Punch Item # 133786
Regular Price: $15.95
Discounted Price: $11.96
Wooden Elements Embellishments Item # 132258
Regular Price: $4.95
Discounted Price: $3.71
Happy Hour Wood Stamp Set Item # 132013
Regular Price: $29.95
Discounted Price: $22.46
Label Card Thinlits Die Item # 133479
Regular Price: $32.95
Discounted Price: $24.71
Yippee-Skippee Wood Stamp Set Item # 131341
Regular Price: $18.95
Discounted Price: $14.21
Gold 1/8″ Ribbon Item # 134583
Regular Price: $4.95
Discounted Price: $3.71
Tangerine Tango Baker’S Twine Item # 134578
Regular Price: $2.95
Discounted Price: $2.21
Write Stuff Ii Digital Kit – Digital Download Item # 120881
Regular Price: $9.95
Discounted Price: $5.97

Two great stamp sets this week … Yippee Skippee, you’ve seen me use that a lot (if you follow my blog) and with Halloween right around the corner, the Tangerine Tango Bakers Twine is going to come in handy!

I love, love, love that they have added one of the “flip card” framelits to the weekly deals! And for you My Digital Studio fans … the Write Stuff download is bright, fun and will work great for those summer pictures you have in your camera!

I’m going to grab a few more of the “Wooden Elements” while they are on sale and the scrumptious Gold Ribbon …Christmas is right around the corner!

Aren’t these the best!? You may click on any of the items descriptions for full details or to begin shopping.  It will take you to my on-line store.

Thank you for stopping by.

blog-closing-small

Trimming the Tree Christmas Card …

Hello Stampin’ Friends,

Welcome to a brand new week! Yesterday I shared a “glitzy” Christmas card so today I’d like to share a card inspired by one of my Christmas trees that I decorated in the past.  I did a nature inspired tree with raffia, cardinals and stars.

100_2325

The card reflects the tree in many ways, the colors are warm and inviting … Crumb Cake, Garden Green and Cherry Cobbler. I used the linen thread to reflect the raffia on the tree.

000_1471

To pull the cherry color in I used the Basic Pearls and colored them with the new Blendabilities “Cherry Cobbler” collection.  I color them while they are still on the paper and then transfer them to my card.

I created a focal point by highlighting the tree with a “Crumb Cake” oval.  I used dimensionals to pop it up and create added dimension to the card.

I even brought the stars in with the use of the “Trim the Tree” paper stack.  I love those paper packs … when I cut down the paper to the desired size (usually 5-1/4″ x 4″) I use the left over pieces to decorate the inside of the card and my envelope.  I love it when everything coordinates … one of the things that drew me to Stampin’ Up!

The sweet “Merry Christmas” greeting is from the “Good Greeting” Hostess stamp set … which you can get for FREE when you host a $300 stampin’ party.  That is in addition to the Hostess benefits you already get.

000_1477

So gather your friends and lets make some awesome cards, pull together a book show, or just place an order yourself.  Choose any of these options, I’d love to help you get your “Good Greetings” stamp set! Contact me today … this offer ends October 31st!

As always, I have the list of supplies that I have used to make this card below.  Click on any one for full details or to begin your shopping experience.  Please let me know if I can help in any way.

Have a wonderful week ~

blog-closing-small


Season of Stars ….

Hello Stampin’ Friends,

It is beginning to get a bit chilly out…  Are you starting your Christmas cards yet?  Are you thinking about them?

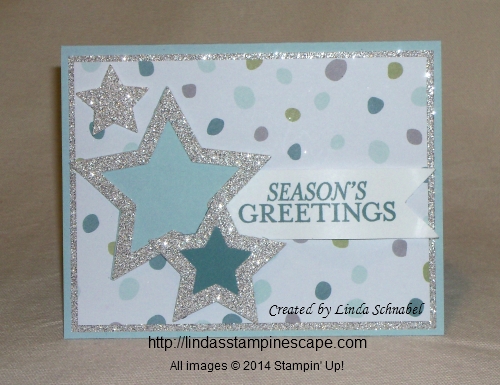
Well, today I would like to share with you a beautiful Christmas card made with one of my favorite new accessories … the Star Framelits!  I teamed it up with the “All is Calm” Specialty Designer Series Paper which will surely soften the winds of winter.

000_1470

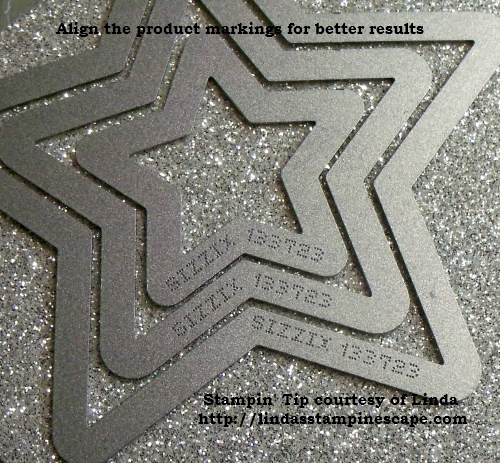
I knew I wanted to use the Silver Glimmer paper, so I layered my stars … smallest and the next two sizes up for my card. I placed all 3 onto the glimmer paper and aligned the product markings on the stars to ensure a perfect alignment.

000_1461

Each BigShot cuts or embosses differently … my stars needed a bit of help coming apart, so next time I will add a bit of a shim by placing a piece of paper into the sandwich as well. This only happened when cutting my glimmer paper and is well worth it.

My base color is the Soft Sky which coordinates with the All is Calm paper and really sets the tone for the card.  I used that and Lost Lagoon behind my stars for an added pop of color.

Adding a layer of the Shimmer paper between the base and the designer paper just adds that “holiday” touch to the card.

000_1468

This angle shows the two smaller stars and the banner are popped up with the Stampin’ Dimensionals. It creates wonderful dimension to the card … and brings it to life!

The greeting comes from the “Bright & Beautiful” stamp set found in the Holiday catalog and is stamped in with Lost Lagoon. The banner was trimmed at the end using the square punch.

The items used for creating this card are listed below, click on anyone of them for more details or to begin your shopping at my on-line store.

Thank you so much for stopping by.

Hope you weekend is a wonderful one ~

blog-closing-small


Happenings Simply Created Card Kit

Hello Stampin’ Friends,

Today I want to share with you one of my favorite card kits … Happenings Simply Created Card Kit.

Think you don’t have time to make your own cards? Think again! Watch what happens when you get your hands on this easy-to-use card kit. You can make 15 cards in just minutes. Everything’s printed, cut, and ready for you to put together. Just add your own adhesive and you’re ready to go. Personalize it with a hand-stamped message (stamp and ink sold separately).

Here is a video showing you how to create these cute cards …


Fun right!  Here is another video showing you alternative projects you can make with this kit …


Aren’t they just fabulous … and so quick and easy to make.  I would love to see what you create!

I have put the links to these products below for your convenience.  Just click on them for full details or to purchase.

Thank you for stopping by … I’ll have more for you tomorrow.

Have a wonderful weekend~

blog-closing-small


Sail Away …

Hello Stampin’ Friends,

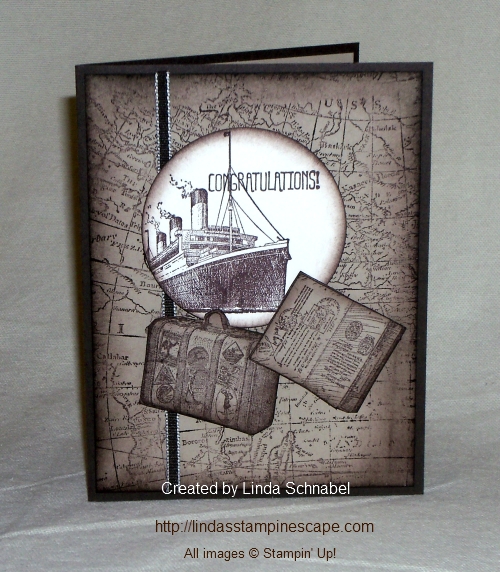
Today’s card share begins with the Traveler stamp set, so sit back, relax and enjoy the trip.

I started with Early Espresso as my base color and then added Crumb Cake and a pop of Very Vanilla.  Our background stamp is the “World Map” … the edges were sponged to created a softer, yet aged look.

000_1456

I used the 2-1/2″ circle punch to create the focal point of my card and highlight the ship.  So I’d be ready to go … I cut out my passport and luggage with our “very sharp” paper snips.  It makes trimming around the baggage (hehehe) easy breezy!

I stayed with the neutral colors but you could go all out and really add some color to this card by coloring the background like a world map!  Have fun with it.

Thanks for stopping by… and enjoy today!

blog-closing-small


Weekly Deals … Now thru Sept.15th

Hello Stampin’ Friends,

I’ve got this weeks “Weekly Deals” for you today ….

CM1634B

If you’re getting punchy for a great deal than this is your week because we have 3 awesome punches on sale!  And who doesn’t need Dazzling Diamonds with the Holidays coming up … it’s on my list!


Weekly Deals

We hope you enjoy this week’s Weekly Deals!

133781G What’S Up Punch Item # 133781
Regular Price: $16.95
Discounted Price: $12.71
2″ Circle Punch Item # 133782
Regular Price: $16.95
Discounted Price: $12.71
Sweet Treat Embellishment Cups Item # 116802
Regular Price: $2.95
Discounted Price: $2.21
Dazzling Diamonds Stampin’ Glitter Item # 133751
Regular Price: $4.95
Discounted Price: $3.71
Blushing Bride Baker’S Twine Item # 134577
Regular Price: $2.95
Discounted Price: $2.21
Modern Mosaic Textured Impressions Embossing Folder Item # 129984
Regular Price: $7.95
Discounted Price: $5.96
Hexagon Punch Item # 130919
Regular Price: $15.95
Discounted Price: $11.96
World Traveler Photobook Template – Digital Download Item # 130066
Regular Price: $17.95
Discounted Price: $10.77


Just click on the item description for full details or to purchase, or you can CLICK HERE to begin shopping the Weekly Deals now.

Thank you for stopping by and …

Have a happy day ~

blog-closing-small

You’re Wonderful …

Hello Stampin’ Friends,

I’m happy to announce the September photopolymer stamp set, You’re Wonderful—inspired by one of our Concept Artists; Melody’s carved stamps.


6a00d8354941d869e201a73e1250c6970d-500wi

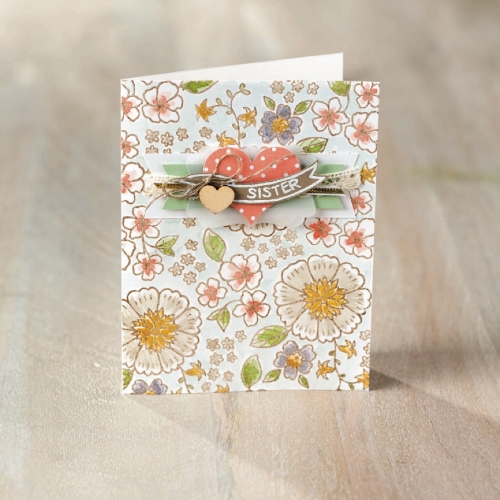
3-youre-wonderful_crbwonderful-birthday

I love the whimsical feel of the scripted sentiment, the fun flow of the banners, and the pops of color from the gorgeous flowers. This card makes me happy.


4-youre-wonderful_crbsister

She used the flower stamps on this card to create her background. She stamped the flowers in sections using Crumb Cake ink, then quickly added Clear Stampin’ Emboss Powder over the damp ink to give the flowers a softer look.

Here is a cute little note card Melody created …

5-youre-wonderful_crbto-my-friend

I love how she framed the flowers –  All 3 cards are beautiful.  You will be able to purchase this new stamp set on my on-line store.

Have a wonderful day ~

blog-closing-small

Make Today a Good One …

Hello Stampin’ Friends,

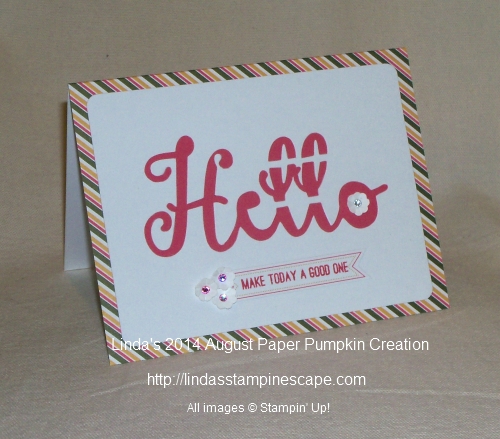
I have another new sample that I created with the August Paper Pumpkin kit … I know, I know, but there are so many different things you can do with this kit!

Today’s card is super simple … Just put a piece of Strawberry Slush card stock behind the die cut greeting and watch it pop!

000_1447

I had to jazz it up a bit with flowers … it added a bit more dimension and drew you eye from the greeting to the verse!

The cluster of three flowers have rhinestones colored with the new Blendabilities markers…. so pretty!

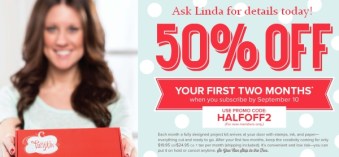
It really is a super time to try out My Paper Pumpkin.  When you sign up by September 10th, you will get your first two months at 50% Off!  Try it … you can cancel anytime (but I’m not sure why you’d want to).  CLICK HERE  Use Promo Code HALFOFF2

Please feel free to ask me any questions … I’m here to help!

PP - 50 off

When you sign up with me … you will be joining my Paper Pumpkin Pals and will be sent a “password” to get into my Members Only Site that will be full of Paper Pumpkin samples!

I also have a Paper Pumpkin Pintrest page and hold a Paper Pumpkin party at least 1 per quarter … where you bring your kit, I bring the treats, and we all stamp together.  It’s a great night out!

TRY IT … Take it for a test drive, two months at 50% Off when you sign up by September 10th.  If it’s not for you … you can cancel anytime (but I’m not sure why you’d want to).

CLICK HERE  Use Promo Code HALFOFF2

Thanks for stopping by … I look forward to having you in my Paper Pumpkin community!

Have a fabulous day ~

blog-closing-small


Halloween Scares & Savings …

Hello Stampin’ Friends,

On this beautiful Sunday I am going to share with you some Halloween card samples … and savings!  Now days we all have a tighter budget, so why not shop our Clearance Rack!

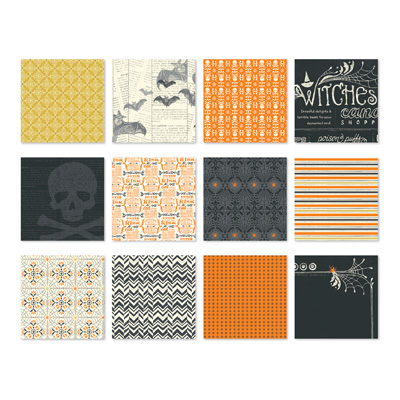
Today I will focus on the Witches Brew Designer Series Paper It’s priced at only $4.39 and one of my Halloween favorites… Now that’s something to scream about!

I love the Clearance rack, because it may be discontinued from the catalog, but it’s still available and discounted, some up to 80%!!

134925LOn my first card I teamed up the Witches Brew DSP with the Bootiful Occasions stamp set ….

000_0261


The second of my card samples really showcases the Witches Brew DSP … to view the original post CLICK HERE.

100_2188


Here is the cute little bat I created with the Witches Brew DSP in the background …

000_0240

Last by not least is the card that I teamed my favorite Halloween designer paper “Witches Brew” with one of my favorite techniques … CLICK HERE to view the original post.

000_0245

Oh well … one more!  Here is the cute sign I put up at the candy store.  I thought it was quite appropriate and downright cute!!  I’ll be using that sign again very soon at the Candyman on Main.

000_0214

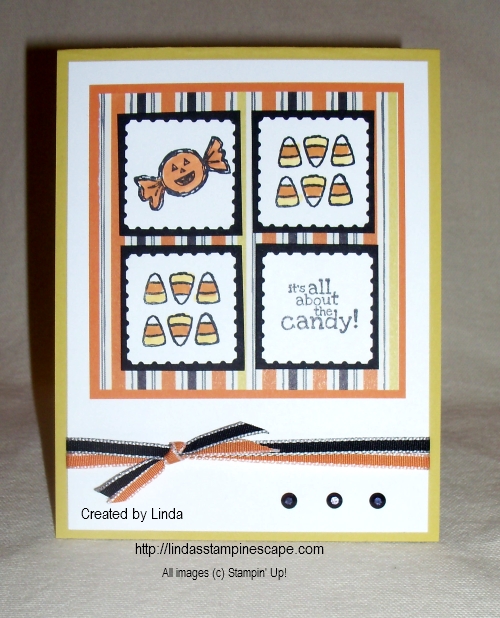
OK … ONE MORE!!  This card is one sweet treat!

000_0095

I hope you enjoyed today’s collection of the Witches Brew Designer Series Paper card samples.  Don’t ever “Be Afraid” to check out all the frightfully awesome products in our CLEARANCE RACK.

Have a beautiful day ~

blog closing-small

Although the Witches Brew states $10.95 … the price at checkout will be $4.39


Gratitude for Days …

Hello Stampin’ Friends,

Today I’d like to share some cute projects created by one of our concept artists, Jen.

There are some darling kits in the new holiday catalog. Today we are highlighting the Gratitude for Days Simply Created Kit. I love the bright colors and patterns. The coordinating stamp set also has some great images for any card or project.

Here are Jen’s creations playing with this cute kit.

1. Add a little pocket and note to a treat or gift. I love being able to tuck a little message inside the pocket. And there are 30 of these cute clips in the kit that are perfect for attaching the pocket to your gift.

Gratitude For Days_crbQuick thanks tag

2. Create a little birthday “card” that holds both a message and a gift card. Use the number stickers to represent your recipient’s age. Stamp on the lined pocket card and add a sweet birthday wish. This is super-quick and easy.

Gratitude For Days_crbGift Card Pocket

3. Use it with Project Life. This kit coordinates beautifully with the Happiness Is Project Life Card Collection. If you cut down the pockets from the Gratitude for Days kit, they become 3″ x 4″ specialty cards—which you can then add as an interactive element to your Project Life layout. Insert the lined card in the pocket with journaling, or use it to store ticket stubs/memorabilia.

The coordinating stamp set is also great for memory keeping. It helps prompt journaling about things you’re grateful for.

Gratitude For Days_crbProject Life

I had a lot of fun playing with this kit. There are so many fun ways to use it!

Thanks for stopping by.  Have a wonderful weekend,

blog-closing-small


Best Friend Ever …

Hello Stampin’ Friends,

I have another new sample that I created with the August Paper Pumpkin kit … this is so fun and easy to use!  I used some of the window sheets to create a little shaker out of the note card and attached it to the base card.  I also showed the cute little envelope that comes with the kit.

000_1444

Have you seen the August Paper Pumpkin kit yet?   Watch to see how fun and simple this kit is to put together.


 Here is the note card …

 000_1370_0001

The September card kit will be on it’s way shortly … as a member of my Paper Pumpkin community,  I will share samples on my blog with you, and e-mail you additional samples for you eyes only.

It really is a super time to try out My Paper Pumpkin.  When you sign up by September 10th, you will get your first two months at 50% Off!  Try it … you can cancel anytime (but I’m not sure why you’d want to).  CLICK HERE  Use Promo Code HALFOFF2

Please feel free to ask me any questions … I’m here to help!

PP - 50 off

Here are a few more samples from past kits!  As a Paper Pumpkin subscriber, you can purchase some of the past kits, and refills!  I love that … If there is a Paper Pumpkin kit that I fall in love with, I can by more to share with my friends (and I do) ask my hostesses … they all received the cute bag!

000_1168


000_1139

000_1172B

Pumpkin2


Pumpkin1

000_1308

TRY IT … Take it for a test drive, two months at 50% Off when you sign up by September 10th.  If it’s not for you … you can cancel anytime (but I’m not sure why you’d want to).

CLICK HERE  Use Promo Code HALFOFF2

Thanks for stopping by … I look forward to having you in my Paper Pumpkin community!

Have a fabulous day ~
blog-closing-small


Holiday Trees …

Hello Stampin’ Friends,

As promised, I am going to show you what I did with the leftover Designer paper from yesterday’s card.

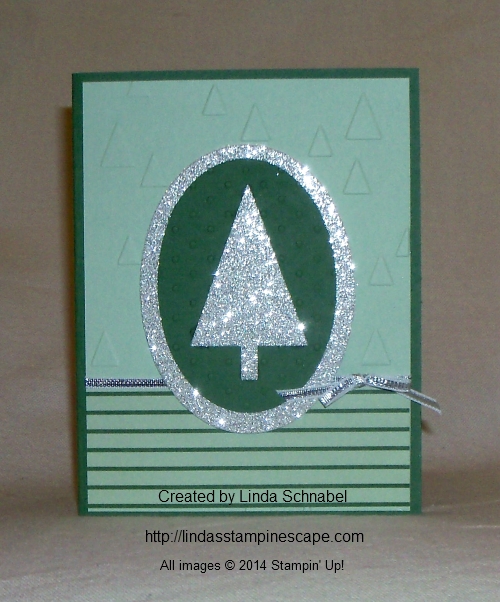
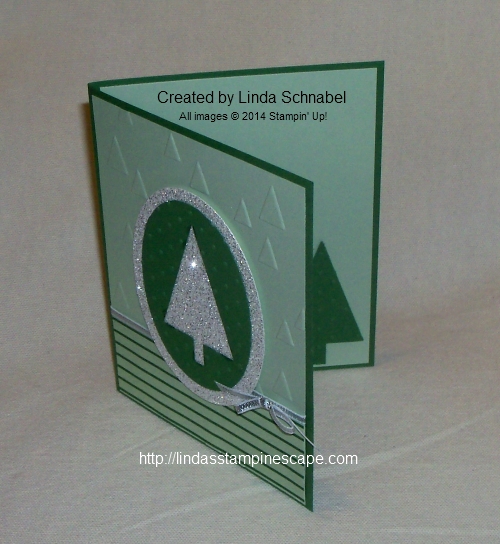
Again I kept it simple and my color pallet was taken from the “Trim the Tree” designer paper; Garden Green and Pistachio Pudding … with a pop of Silver Glimmer Paper.

I used the new “On Point” embossing folder to texture the Pistachio and the Perfect Polka Dots folder on my tree.

000_1433

The tree was punched from the new “Tree Punch” that coordinates with the “Festival of Trees” stamp set.  It was then framed using the Ovals Collection Framelits and Silver Glimmer Paper.

I use the Fast Fuse to attach my framed tree to the Glimmer paper … it holds beautifully.  If you don’t have it yet, then I suggest glue dots or dimensionals, both will work nicely.

I finished off my card with a cute little silver bow, using the 1/8″ Silver ribbon.  So … are you wondering what I did with the tree I punched out?  Check it out … I’ve posted after the list of ingredients.


Here is a list of our current Stampin’ Up! promotions …

contact me hostess special  PP - 50 off

Just click on the picture (link) for full details or CLICK HERE to view the all.

Thank you for stopping back today.

Hope you have a great day ~

blog-closing-small

 Here is a list of today’s ingredients …

000_1439

Thanks again … Have a great day!


Time for a “Man Card” …

Hello Stampin’ Friends,

We are always looking for masculine card ideas, even at Christmas time … well look no further!  I have the answer to your “I need a manly Christmas Card”  search.

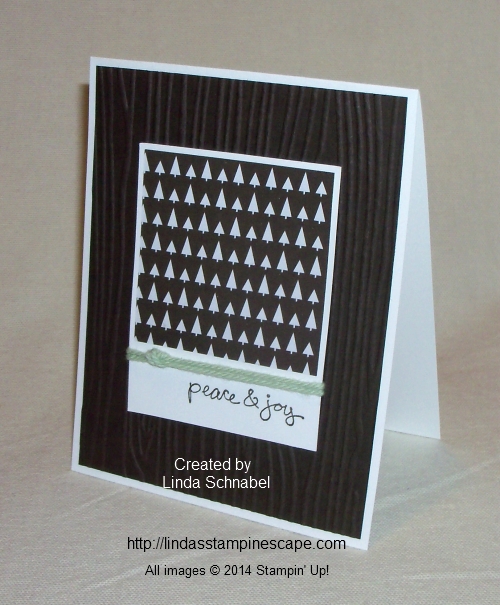
I wanted to keep it simple so I chose the monochromatic color scheme of Early Espresso and Whisper White with just a pop of Pistachio Pudding.

Today I’m using the “Trim the Tree” Designer Series Paper Stack to create my “manly” Christmas card.    This paper stack has so many delightful patterns you will be able to make a ton of great cards with it. I picked the “trees” and teamed it with the Woodgrain embossing folder.

000_1430

Instead of a bow, I used the Thick Bakers Twine and simply tied a knot into it.  It’s great for guy cards and added a nice touch of dimension.

The greeting “peace & joy” is from the exclusive “Good Greetings” hostess set.  Remember you can get this free when you have a qualifying stampin’ party, book show, or order.  Contact me for details.


Here is a list of our current Stampin’ Up! promotions …

contact me hostess special  PP - 50 off

Just click on the picture (link) for full details or CLICK HERE to view the all.

Thanks for stopping in today, tomorrow I will have more with the left-overs from the designer paper!

Have a wonderful day!

blog-closing-small

 Here is a list of today’s ingredients …