Gloria’s regional, stampin’ fun!

Hello Stampin’ Friend,

I’m back!  My apologies for no post yesterday, but I just got home from a Regional event Saturday, and was a bit under the weather (besides my Holiday Stamp-a-stack).  I did not cancel my class, and I must say that stampin’ with the ladies made me feel much better!

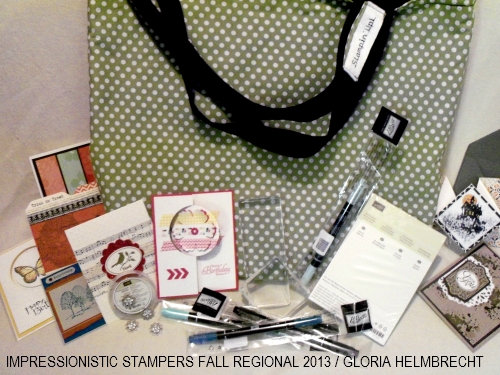
Saturday I attended (and presented) the Impressionistic Stampers Fall Regional hosted by my upline Gloria Helmbrecht.  It was great to see my fellow demonstrators again, some I have not seen in a while! I had an awesome time!  Even lunch was a hoot!!

I helped a little in the planning, but was still surprised to see all the wonderful “goodies” packed in the beautiful bags, Gloria had made for all of us.
100_2199

By all means … these is not all the stamping that we did.  In fact, many of the projects are not shown because I will be using them at future stampin’ events.  There are even some swaps that I did not include, because they will also be used in my events, classes or retreats!

The theme for the regional was “classes” … projects that the demonstrators could take back to their customers and share!  So again, that is why you don’t see all the stamped projects we did.

I will however, share two of the great cards that Gloria did for her “acrylic block” class (I can show you because I don’t have that set, so when I share these techniques with you … they will look totally different!)  That’s also why she gave us acrylic blocks in our bag.

100_2201

The first is a “reflection” technique card … much simpler than it looks.  You will need a brayer … so if you don’t have one, put one on your next order.
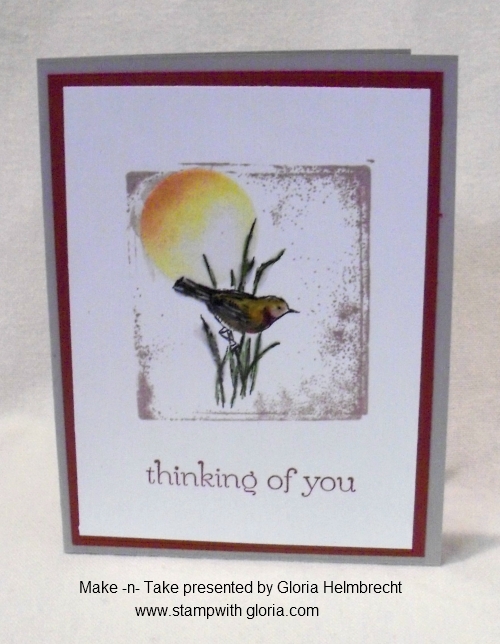
100_2200

The “Thinking of You” card has 2 different techniques that are combined to create this beautiful card.  Many of you will recognize this stamp set … “Simply Sketched”.  It was one of the stamp sets I showcased at my Hostess Appreciation Party.  It is a “Hostess” only stamp set, and I would love to help you get yours for free.

Did I think going to the Impressionistic Stampers Fall Regional was worth it … YOU BET!!  I came home with idea’s for 3 new classes, additional ideas for cards, and a whole lot of catching up with friends!  Let’s not forget the goodies included in that bag!  THANK YOU GLORIA!!!  It was an awesome day.

OK … I’m off to work, but stop back tomorrow and the rest of the week, because I will be sharing some of the fabulous swap cards I received at Gloria’s regional from my fellow demonstrators and my downline members!

Have an awesome Monday!

blog closing-small

Look what’s happening in October … WOW!

B1_HostessPromo_demo_Oct0113_global

Hello Stampin’ Friend,

We’re celebrating Stampin’ Up!s 25th Anniversary this October with some fantastic specials, and they are too good to pass up!  Really pretty amazing!

There are three incredible ways to celebrate Stampin’ Up!’s 25th Anniversary in October:

  1. For Hostesses.  Earn $25 extra hostess dollars on qualifying orders.

  2. For Recruits.  Join Stampin’ Up! for just $25.  That’s right – $25!

  3. For Everyone.  Best of Christmas Stamp Set (October’s Best of set).

FOR HOSTESSES 

6a00e554f4a3a48834019affb6aa46970d-800wi

During October, hostesses will earn $25 extra hostess dollars when you host a $250+ party.  To continue the celebration of Stampin’ Up!’s 25th anniversary, they are offering an extra $25 of hostess dollars on a $250 party (includes hostess workshops, customer orders or online hostess parties).  That means, you can earn $65 in free products (instead of the standard $40).  Yippee!  E-mail me at lindaluvs2stamp@aol.com with any questions or to sign up for your own party this month.

FOR RECRUITS

b1_join_demo_Oct0113_USCASP

Have you been thinking about joining Stampin’ Up!?  Do you want to build a business and be your own boss or just make a little money to help fund your stamping habit?  Do you want to earn discounts and access to sneak peek items?  Do you want to just join a community of fun people for constant inspiration and good times?  Whether you have never signed up before or were previously a demonstrator, this is the promotion for you!  If you have thought about joining my team, please email me at lindaluvs2stamp@aol.com.  This promotion runs from October 7 through October 21 … Let’s get together!

For Everyone…

Every month this year, Stampin’ Up! has released a “Best of…” stamps set that includes images from retired stamp sets.  This month, we are celebrating the Best of Christmas:

6a00e554f4a3a48834019affb697b7970d-800wi

Please let me know if you have any questions, would like to order, or join my team of Star’s and the Stampin’ Up! family.  I’m here for you.

Have an awesome weekend!

blog closing-small

Shake your Halloween Booty …

Hello Stampin’ Friends,

It’s Friday … and it’s time to shake some booty!

Today’s card share is a fun, whimsical Halloween card, and super simple to create.  I brought out the fabulous “Bootiful Occasions” Stamp Set found on page 24 of our main catalog.  To me, this was one of those “must have” stamp sets.  It’s fun, versatile … and who doesn’t love shoes.

Because we’re still on our Halloween themed week – I wanted to showcase fall colors, so I chose the Pumpkin Pie and Basic Black … and added the Elegant Eggplant to make the colors come alive!

000_0261

If you haven’t guessed by now … here’s another design from our Witches Brew Designer Series Paper.  I thought the swirlies (reminds me of the Twilight Zone) worked well with the witches boot.  The boot was stamped in Black StazOn (my favorite) and then colored in with our Pumpkin Pie and Elegant Eggplant marks.  You have to love that everything coordinates … doesn’t that make life easier.

Well I couldn’t stop there … I “HAD TO” add the beautiful Black Stampin’ Glitter (pg. 20) in the Holiday Catalog… easy to apply with our Two-way Glue pen.  I added the Pumpkin Pie 1/8″ Taffeta Ribbon, just because I wanted to “girl it up” a bit.  And to finish it off … Black Diamonds!  Also known as our Rhinestones colored with a black Sharpie!

I did a bit of stampin’ on the inside …

000_0260

The moon was created with the “Reverse Masking” Technique and a sponge, and my little witchy (who grabbed her boot and flew off) is from the “Halloween Hello” stamp set (pg. 21) in the Holiday Catalog.

I hope you have enjoyed my Halloween week, and have been inspired to create some fun projects with the Witches Brew Designer Series Paper, and the fun stamp sets shown.  You can purchase any of these items directly from my website … http://www.lindaluvs.stampinup.net or contact me: lindaluvs2stamp@aol.com … I’d be happy to help you.

000_0261

So have fun this weekend and don’t forget to shake your “booty”.

Thanks for stopping by.

blog closing-small

Simply Beware … Glitter Technique

Hello Stampin’ Friends,

We are over the hump and on our way to the weekend!  We are also half way through our Halloween week card share.

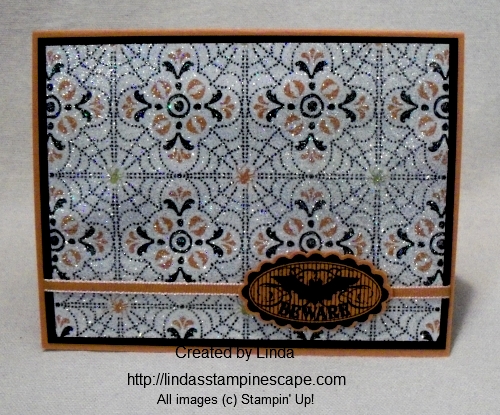
Today’s card is super simple and super glittery!  I began with one of my favorite patterns from the “Witches Brew” Designer Series Paper.  Cover the entire piece with the VersaMark™ … I actually just dab the pad right onto the paper.

000_0245

Then I dip it into my “Iridescent Ice” Embossing Powder.  When you heat this… watch closely to make sure it is melting properly.  That’s it!  I love the way this looks, and the technique has several names, but I call it the  “Dazzling Diamond Dust” technique.

I also embossed the “Beware” which comes from the “Halloween Bash” Stamp set located on page 21 of the Holiday catalog.  After embossing, I added the Black Stampin’ Glitter (132206) to just the bat, to tie in that “sparkle”.

I said it was simple … and you can do this to any Designer Series Paper.  So if you have someone that loves that “glitz”, just add this simple technique and they’ll be starry eyed, and think you are the bestest!

000_0248

Hope you are enjoying my Halloween card feast … only 2 days left!  So get your “booty” back here tomorrow because you won’t want to miss this quick -n- cute card either .

Have an awesome day!
blog closing-small

Celebrating a creepy Halloween …

Hello Stampin’ Friends,

How are you liking the Halloween card share so far?  Today I am going to show you the “Joseph’s Coat” technique, with a bit of a  twist.

The colors I have chosen to use today are: Basic Black, Pumpkin Pie, Summer Starfruit, and Whisper White.  I am also using the same Designer Paper I used yesterday, from the Witches Brew Designer Series Paper pack.

100_2191

First thing I did was measure my stamp so I could get the color effect I was looking for.  I used a 1 inch strip of white, starfruit and pumpkin and taped them (on backside) together.  Make sure they are butted up to each other very tight, with no gaps.

100_2173

Next, ink up the Halloween greeting stamp from the “Halloween Hello” stamp set with VersaMark™ and stamp it over the multi-color strip of cardstock … then heat emboss with clear embossing powder.

Then, using black ink … ink up your brayer and roll it back and forth over the image until covered evenly.  Take a paper towel and whip off excess ink from the embossed area … your greeting will “appear” but will have a “smudgy” look to it.  I think it gives it a bit of a “spooky” look, which is perfect for this time of year.

100_2193

I added the new Pumpkin Pie Chevron Ribbon (130015) to give the card a “pop” of color.  To balance out the card I added 3 rhinestones colored with a black Sharpie … then put a pop of Starfruit behind them so they would stand out more.

I’ll be back … tomorrow with another Halloween themed project.

Thanks for stopping by.

blog closing-small

Totally Batty …

Hello Stampin’ Friends,

Happy Tuesday!  I hope you enjoyed yesterday’s stampin’ tip / technique with glitter, but today we are going to put away the glitter, because it’s time to pull out the punches!

Yep, today’s card share is a sweet and simple punch card.  Punch art is one of my most popular stampin’ events… those classes always fill up fast.  Today we are using the 2-1/2″ and 1-3/4″ circle punches, the owl punch and the 1-3/4″ scallop punch.

000_0238

Again, I began with the “Witches Brew” Designer Series Paper (I’m trying to keep your supplies to a minimum, by using the items over and over).   I matted that with a piece of Pumpkin Pie and backed it with Basic Black.

The tree limb was cut (free handed that one) out of Chocolate Chip cardstock and then embossed with the “Woodgrain” embossing folder.

The moon is easy … punch a 2-1/2″ circle then sponge the edges to create some depth to the paper.

Next I punched out the owl.  To create his wings, I punched a 1-3/4″ circle and cut it in half.  Then I used the scallop punch to create the points on his wings … a small single circle punch would work too.  I just lined up the point where the straight edge meets the curved edge and punched 2 scallops…. then I line up 1 scallop and punch.  Yes, it’s a bit tedious but it looks cool.  If you have an easier way … I would really love to hear how to do it quicker.

000_0240

His little smile and teeth were hand cut … it was easy and again, it makes him look cute (not scary like real bats – but that’s a whole other story!)

To finish off the card I added a simple ribbon, the 1/8″ Pumpkin Pie Taffeta Ribbon.

Tomorrow I have another little stampin’ trick up my sleeve, so stop back and check it out.

Thanks for “hangin’ out” with me today!

blog closing-small

EEK … an awesome stampin’ technique!

Hello Stampin’ Friends,

Yesterday I kicked off a week-long Halloween project share.  Each day I will share with you some fun, frightening and creative projects.  I also have some new stampin’ techniques and tips for you.  My reason for sharing early … is it will give you time to order any supplies you need to create your own Halloween projects.

Today’s card is a bit more frightening, but not difficult to create at all.

100_2188

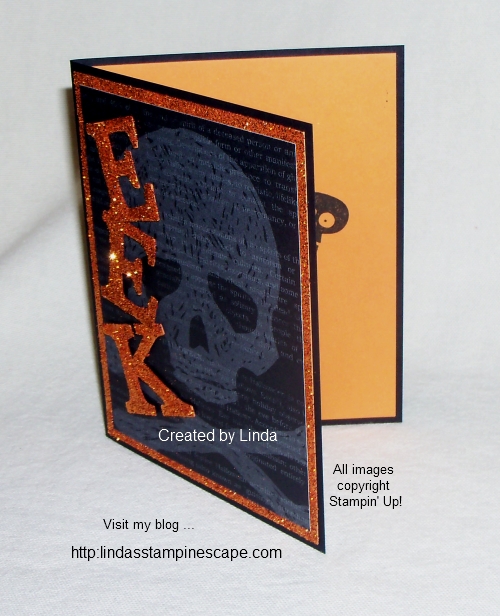
All you will need is our “Witches Brew” (132185) Designer Series paper, the Black & Orange Stampin’ Glitter (132206), and the “Typeset Alphabet” (127533) Bigz Dies… Oh, and don’t forget your favorite adhesive!

  134925LI prefer the “SNAIL” (104332) Adhesive, however, some of you like to use the Multipurpose Liquid Glue (110755) because it holds so well, and it will work great for this project too.  You will also want the “Silicone Craft Sheet” (127853) I think it’s a must have item for all your stampin’ projects.

You see …

The silicone sheet resists any of our adhesives and makes doing this project super simple!  I just run my Snail Adhesive over the cut out alphabet, then cover it with glitter.  Viola … that easy!  This will work great for you glue lovers too.

 100_2168  100_2170

Here’s a great stampin’ tip and cost saver, for those of you who make multiple cards… To create the “glitter paper” look underneath the Designer Series paper skull, I just ran my Snail adhesive around the edges, then covered it with our glitter.  No need to paint or die your Silver Glitter paper … just “snail” and stick your glitter!    Glitter lovers rejoice!

Now, for a peek inside …

100_2185

I used the “Halloween Hello” stamp set to wish my recipient a Halloween greeting  but it seems my little friend is a bit shy and isn’t going to show you at this time.  Just click on any of the “highlighted” stamp sets or accessories to view them.

Hope you enjoyed the card and stampin’ tips I’ve shared today.  Let me know what you think about them … I’d love to hear from you.  Sharing on a blog is much quieter than my classes … I miss the oooohs and aaaahs!  lol

Have a wonderful day,

blog closing-small

Halloween Kick-off …

Hello Stampin’ Friends,

Hope you are enjoying this beautiful Sunday.

Can you believe that September is almost over, where does the time go?!  The passing of September means one thing … Halloween is just around the corner.  Those of you, who know me, know that I love Halloween.  It appears I’m not the only one, as it is the second most celebrated / decorated holiday of the year (second only to Christmas).

On that note, I want to celebrate Halloween all this week with fun and frightening projects with you.  Since it is Sunday … nothing too scary.  In fact, it’s fun … you won’t believe where these cute little pumpkins came from!

100_2179

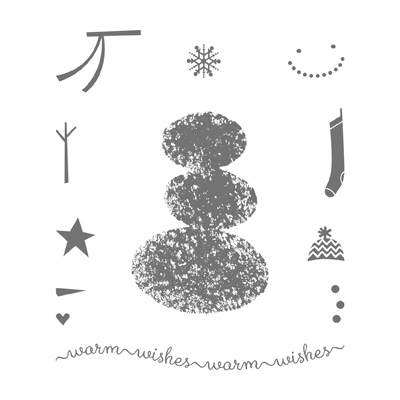
Get out your Holiday catalog and turn to page 25 … You got it!  I used the “Snow Day” stamp set to create my jack-o-lanterns!

131895L

Oh yes … you can see it now, can’t you!  Isn’t that awesome.  How cute is that!  I drew the faces and the vines onto my pumpkins … too easy.   Now … that is a versatile stamp set!

I also used the new Chalk Marker and some glitter to highlight the facial features (eyes, nose, & mouth) and the Argyle Embossing Folder to create some fun texture.

Did You Know?

The original jack-o’-lanterns were carved from turnips, potatoes or beets.     (From the History Channel)

100_2177

Every October, carved pumpkins peer out from porches and doorsteps in the United States and other parts of the world. Gourd-like orange fruits inscribed with ghoulish faces and illuminated by candles are a sure sign of the Halloween season. The practice of decorating “jack-o’-lanterns”—the name comes from an Irish folktale about a man named Stingy Jack—originated in Ireland, where large turnips and potatoes served as an early canvas. Irish immigrants brought the tradition to America, home of the pumpkin, and it became an integral part of Halloween festivities.

So just a little fun and trivia for you today.  Thanks for stopping by!

I’ll have some hauntingly fun cards for you this week, so make sure you stop back.

blog closing-small

Introducing “Everyday Occasions” Card Kit …

Hello Stampin’ Friends,

I have exciting news to share with you today!

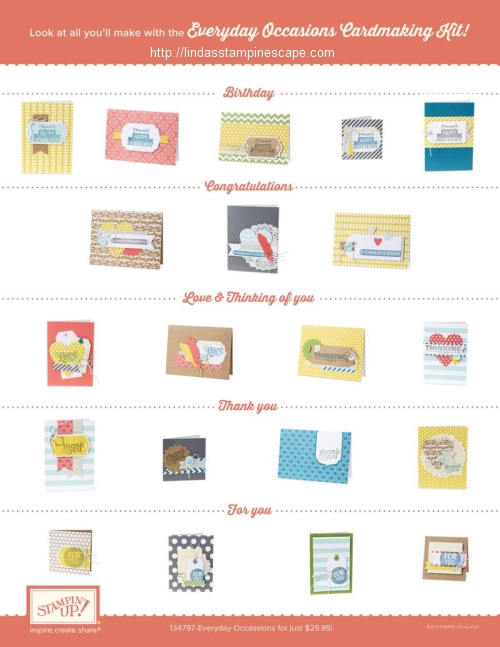
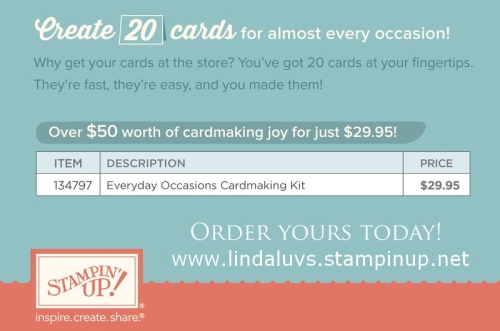
WOW … What can I say except this is an exceptional bargain!  Our NEW “Everyday Occasions” kit … you can make 20 (yes, 20) delightful cards for only $29.95 (plus shipping & tax).  You’ll receive the stamps, ink, pre-cut cardstock, envelopes, fun embellishments and full color photos to create your projects – 20 all occasion cards.

6a00e554f4a3a48834019aff9fa96b970d-800wi

Why go to the store when a birthday, graduation, wedding or even a time for expressing gratitude comes up? The Everyday Occasions Cardmaking Kit puts cards for all of those events right at your fingertips, and best of all, they’ll be handmade! The kit contains everything necessary (minus adhesive and scissors) to create 20 beautiful cards for almost any occasion, and it comes in a beautiful box to store them in.

Here is a view of the cards you can create:

6a00e554f4a3a48834019aff9f0363970b-800wi

The kit also makes the perfect gift for that creative someone you know!

The Everyday Occasions Cardmaking Kit is a fantastic means to introduce stamping & card making to your friends!  It was developed with the new stamper in mind. It is a simple, fun experience at a great price!

Just a note:

If giving this wonderful kit as a gift to a new stamper, you may want to consider purchasing the SNAIL adhesive (104332) and Paper Snips (103579) along with the Everyday Occasions kit.  Christmas is just around the corner … what an awesome gift to receive!  So shop early as this kit is available while supplies last.

6a00e554f4a3a48834019aff9f3135970c-800wi

Whether you purchase for yourself of as a gift, you will delight in the opportunity this fantastic new kit will provide.  If you have any questions, you can always contact me!

Have a wonderful day!

blog closing-small

Happy Birthday to you …

Hello Stampin’ Friends,

Today I’m going to share another “Quick -n- Easy” card for all of you who have a lot of birthday cards to make.  September is full of birthdays in my family… and it even runs into October!

000_0230

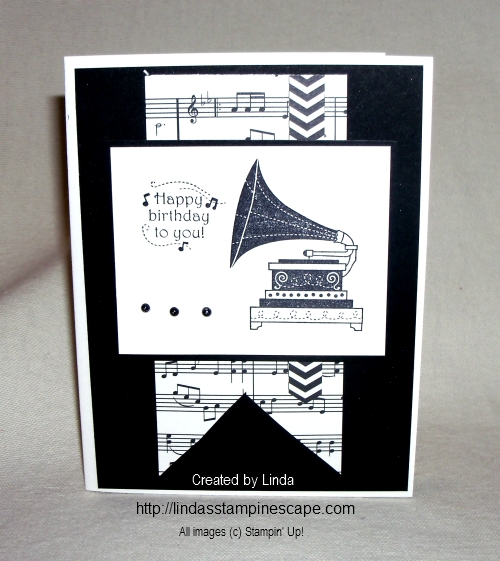
When stampin’ this card for my friend, because we have known each other for ………. we’ll enough about that, I was feeling a bit nostalgic.  So I went to my “go to” nostalgic stamp set “Timeless Talk” – page 19 of our big catalog.

126607S

Of course I’m going to pair it up with the “Modern Medley Designer Series paper.  I know that I have a few of you hooked on that paper.  I love it all … which means you use it “all”… no waste!

126926L

Here I have made a quick banner out of the musical note paper and added another strip of DSP for a contrast.

000_0230

I popped up the stamped section with our “Stampin’ Dimensionals” and to finish it off …. HERE COMES A STAMPIN’ TIP:  I used my black Sharpie® marker to color my pearls.   Oooooooooooh … I just love the way that looks!

Now how sweet and simple is this card!  Easy to make for your BFF (Best Friend Forever).  Celebrate today and call a friend.

I’ve shared several of cards using that set; You can view these just by clicking on the name ... “Sweet Music” , “Simply Timeless” and “Hello There“.

I’ll be back with more stampin’ tips and stamped projects …

Have an awesome weekend,

blog closing-small

Hello Autumn …

Hello Stampin’ Friends,

Today I’m going to share with you, my rendition of summer turning into autumn on a card.

I began with Whisper White layered onto Whisper White.  I took my top piece and created a “reverse mask” … take a piece of old or scrap paper and cut out a section that you can sponge and stamp.  If you are not comfortable cutting a mask with your paper cutter… you can easily create a “reverse mask” with the use of one of our many framelit dies or by punching out that area.

000_0225

Now … place your “reverse mask” and begin sponging, leaving the center a bit lighter to create a beautiful dimension on your card.  Next, you can stamp your image (please note that if you use cardstock, you will see it does not go to the edge).   I used only Wild Wasabi for the sponging and the stamping.  The color difference is all in the way you sponge … start light, you can always add more (but you can’t take away).  I prefer the regular sponges.

Remove your reverse mask, and you will have a beautiful design element on your card.  If you’d like, you could just stamp a greeting to complete the front.  However, since I wanted to show the transition to fall … I added my fall leaf.  I used the “Magnificent Maple” stamp set found on page 18 of our Holiday Catalog.   For the leaf, I began with So Saffron then did the rock and roll technique to edge the leaf with Wild Wasabi and Tangerine Tango.

000_0225

I added (sponged with sponge dauber) a little more So Saffron into the center of the leaf to make it “pop” a little more!

I used the “Happy Day” stamp set found on page 112 of our Idea Book & Catalog for my greeting.  To finish off the card, I added Stampin’ Dimensionals to “POP” up the front piece with all the stamping.

Thanks so much for stopping by and welcoming autumn in with me!

blog closing-small

Carry-over list and card share …

Hello my stampin’ friends ~

Today I want to share with you the “carry over” stamp sets that are not in the catalog but are still available to order.  You guessed it, its Christmas sets!  Plus, I’ll share some of the beautiful cards we made last year at my clubs, classes and the annual Holiday retreat!!

CLICK HERE TO VIEW / DOWNLOAD CARRY-OVER LIST

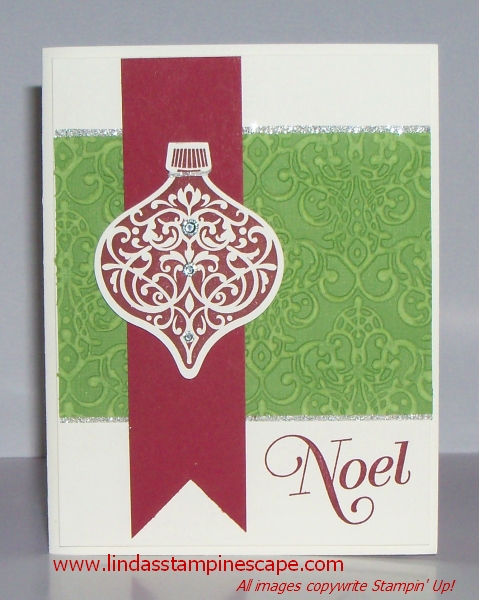
 First, is the “Ornament Keepsakes” stamp set (128048 – W / 128051 – C) and the beautiful greetings from “Greetings of the Season” (128030 – W / 128033 – C) 

101_1251

I used the “Coordinations Cardstock as a background, a Cherry Cobbler banner that draws your eye to our focal point … the ornament!  I then embellished with scraps (you got it) of the Silver Glimmer Paper (124005) and top it off with those precious “gotta have” Rhinestones (119246)


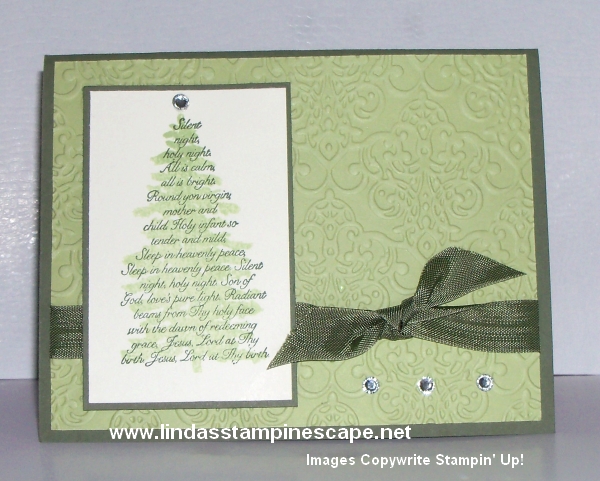
Next, the fabulous Two-Step Stamp Set, “Evergreen” (127970 – W / 127973 – C) You can make this with Always Artichoke and the NEW Pear Pizzazz or go wild and choose another color scheme!

101_1244

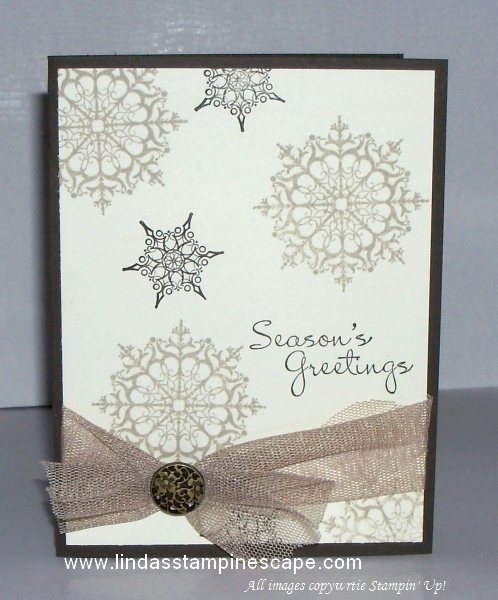
Last but definitely not least … 2 great samples from the stunning “Snowflake Soiree” (127922 – W / 127925 – C) stamp set.  The first is done in a soft neutrals pallet… Early Espresso, Very Vanilla, and Crumb Cake.  It’s such a warm greeting for the holiday season.  I used a brad from one of my favorite embellishments; “Vintage Brads” to tie the card together!

101_1249

The second is so simple, yet simply beautiful.  A very festive card when done in Whisper White and the simply delicious Cherry Cobbler!

101_1247

It’s not too early to start thinking about the Christmas cards that you want to share with your friends and family. 


If you can’t wait and want to purchase any of the items I shared with you today, just click on the link below to get started.

 blog insert - shop now

Thank you so much for stopping by …

I appreciate that you take time out of your busy day to visit me!

blog closing-small

Today’s Guest Stamper … Eileen S.

Hello Stampin’ Friends,

Hope you are doing well on this fine Tuesday.  Today I’m going to share a card that I received for my birthday (no, it’s not my birthday… it’s in April).  I was going through some of my cards and thought you would all like this one.

So grab your Bigshot and a couple of punches, and you will have this cute card in to time.

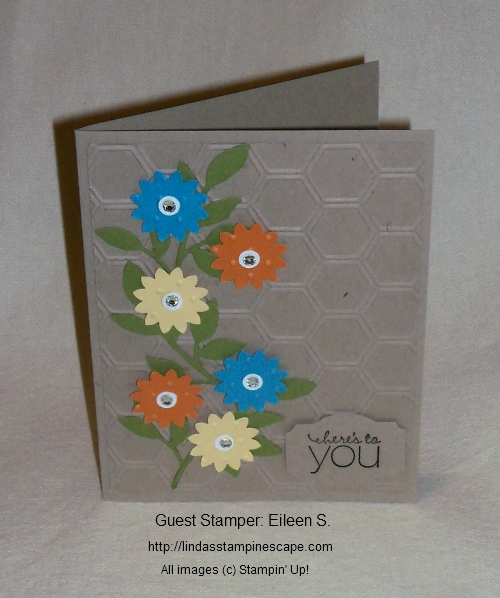
000_0209

First, you’ll be trimming the front piece to 4″ x 5-1/4″ … then run it through the Bigshot using the Honeycomb (129378) folder.

While you have the BigShot ready, grab your Old Olive cardstock and cut out the leaves using the “Little Leaves (114511) Sizzleit”.  Don’t put it away just yet … you will need it to emboss your flowers – they are embossed with the “Perfect Polka Dot” (117335) Embossing Folder.

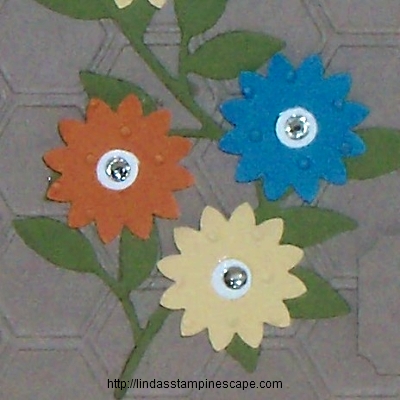
You will need the “Boho Blossoms” punch (119858) to create the flowers, then for the center,  get your Owl Builder punch and use the “eyes” for the center of the blossoms!  To finish off these cute little flowers … just add rhinestones.  What girl doesn’t like a little bit of bling!

000_0208

Although the greeting is no longer in the current catalog, we have many wonderful greeting sets.

I hope you enjoyed my birthday card as much as I did … It’s so cute!

000_0210

Do you want to be a guest stamper?  Send me your cards … All current Stampin’ Up! products* and I’d love to share your work.  Who doesn’t want a little recognition for a job well done.  I love seeing the beautiful cards you make!

SEND TO:

Linda’s Stampin’ Escape

2019 Miller St.   West Bend, WI  53095

Thanks so much for stopping by my blog today.

blog closing-small

Friends are the flowers …

Hello Stampin’ Friends,

Today I wanted to share a scrapbook page with you.  It is one that I did with my Scrapbook Club last year.

September kicks off my 2013-14 club sessions, and it’s so great to see all my stampin’ friends again!  We may start out as strangers at the beginning of the year, but by the end … we have made new friends.  Oh yes, and we have learned some fabulous stampin’ techniques too!

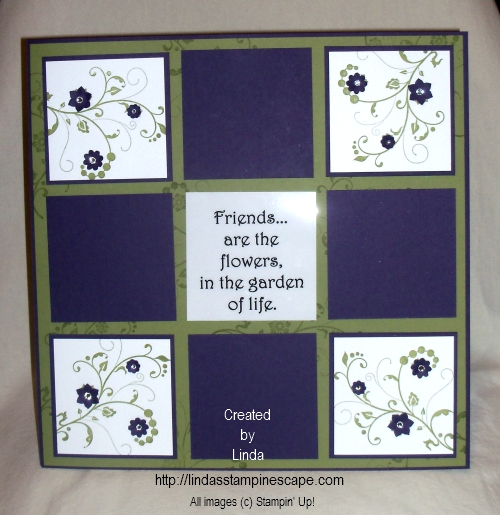
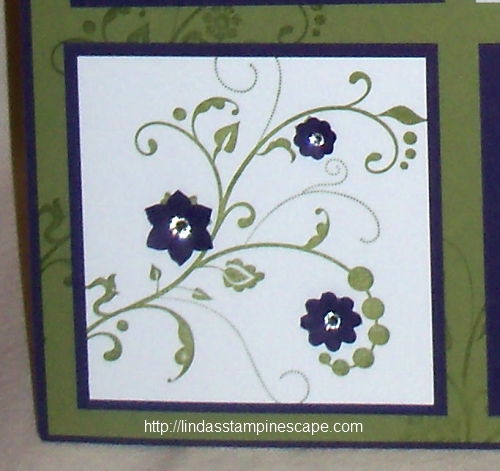
My color pallet for this page was inspired by nature.  Next time you go to the Farmers Market or grocery store, take a close look at the colors … this page was inspired by an eggplant.  I used Elegant Eggplant and Old Olive … and think they look beautiful together.

000_0202

The beautiful stamp used comes from the “Flowering Flourishes” stamp set found on page 118 of our Idea Book & Catalog.  I began with stamping Old Olive ink onto the Old Olive Cardstock … color on color produces a rich and beautiful image.  If you prefer a more subtle image… you can use your VersaMark® pad instead.

I then stamped my image, using the Old Olive onto the white cardstock to really make the image POP!  To highlight the flowers on the stamp, I punched out flowers the “Boho Blossoms” punch.  The Boho Blossom punch can be found on page 183 in the Idea Book & Catalog.

000_0202-B

To add some fun dimension to my flowers … I hold them in the palm of my hand and the push the tip of a pen into the center.  It curls up the petals and leaves a perfect mark for me to place my rhinestone.

Using the rhinestones ( pg.171 / 119246) finishes off the page so perfectly.  This page could be used for “friends”, for a wedding page, your grandmother or mother …. for almost any occasion, and how beautiful.

000_0202

I just used my computer and “Word” to create the verse on the page … each of the white squares are 3 x 3, except for the center and the Elegant Eggplant mat which measures 3-1/4 x 3-1/4.

Don’t forget, you can take this scrapbook page and turn it into a card.  Inspiration for our cards, scrapbook pages and for our color pallets can come from anywhere…. just stop and take a look around you.

Thanks so much for stopping by my blog today!

blog closing-small

Quick & Easy Christmas …

Hello Stampin’ Friends …

and a Happy Saturday to you!  It’s a little gloomy outside today, that’s OK … makes for a great stampin’ day!

This afternoon I’ll be setting up my Stampin’ Studio for my “Christmas Stamp Camp” tomorrow.  So today I thought I would share with you a little inspiration for card ideas.

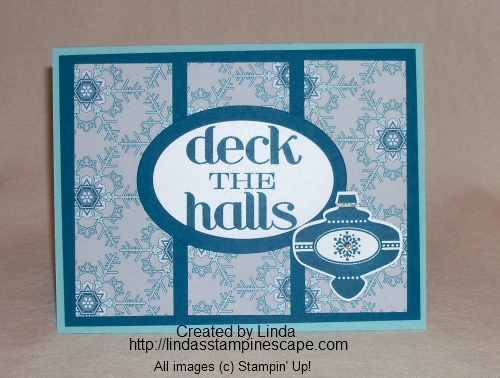
I began with some left over designer series paper from my last stamp camp, and came up with this quick and cute card.  My paper is the “Winter Frost Specialty Designer Paper” located on page 29 of the Holiday catalog.

Because our designer paper is designed to coordinate so nicely, the core colors I am using are the Pool Party and Island Indigo.

000_0195

Next I decided to use the “Deck the Halls” stamp from the “Christmas Messages” stamp set on page 34 of the Holiday catalog.  I love when Stampin’ Up! puts the inner verses for our cards along with the greetings…. makes life so much easier!

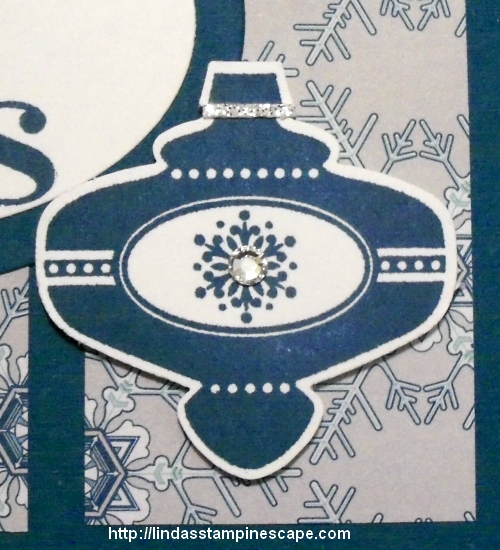
I wanted to jazz it up a bit more, so I added one of those cute new ornaments from the “Christmas Collectibles” stamp set.  And talk about making life easier … Stampin’ Up! has a coordinating punch, the “Christmas Ornament” punch so we don’t have to cut these out!  Both of these items can be found on page 35 of the Holiday catalog.

000_0199

To finish off the card, I added a little bling!  First as sliver of the Silver Glimmer paper, and then a rhinestone in the center of my ornament.

Wow … wasn’t that easy!  And quick!

000_0196

I hope you enjoyed today’s inspiration for Christmas …. Thanks so much for stopping by.

Have an awesome Saturday!

blog closing-small