Hello Stampin’ Friends ~
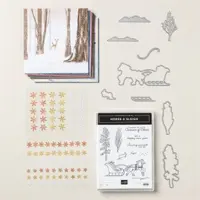
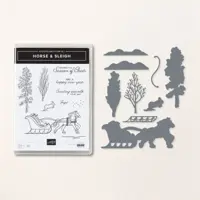
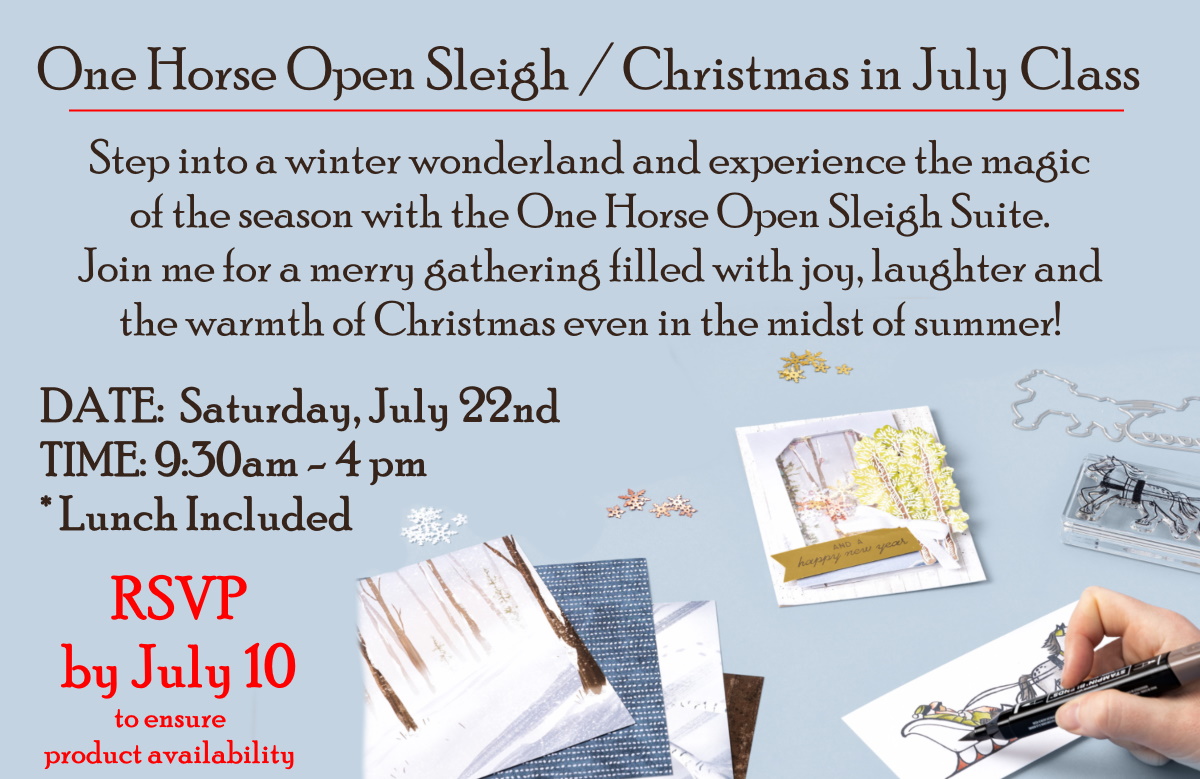
Today I have three Quick & Easy Cards featuring the One Horse Open Sleigh Designer Paper. I will also be sharing the video replay of my Facebook LIVE last night. You’ll hear me talk about the “third” card in my video … can’t wait until you see it. Let’s begin with the video for those of you who did not catch the LIVE.
I also thought I would share the cards here as well so you can get a better look. The first card is super simple to make and I love this “looking down view” on this designer paper. This pack of designer paper is full of amazing patterns.
The second card is not hard to make and looks so cool when you have a landscape pattern like we have here. Remember, this is only half of the paper because each strip is 1″ wide. The Boho Blue and Misty Moonlight really pull the blue tones out of this paper … Wait till you see the what I did with the other 3 panels!!

Since I pulled the blue tones from the first of our designer paper panels, I decided to pull out the pinks and yellow on my next card.
The base is Basic Gray because I love how it looks with the Petal Pink. I also used it to mat my designer series paper panels. Just the the other card, my panels are cut 1″ x 5″ ….

The Petal Pink was cut at 4″ x 5-1/4″ and then the Lemon Lolly; 3-7/8″ x 5-1/8″ then was cut diagonally. I then attached the Lemon Lolly to the Petal Pink and ran it through my embossing machine using the Timeworn Type embossing folder.
The panels are now attached to the card front using Stampin’ Dimensionals. Do you see those leaves on the One Horse Open Sleigh designer paper? I decided to take this paper into autumn and cut out some leaves using the Around the Bend dies in Copper Clay. So pretty.

The Smoky Slate cardstock was stamped with Misty Moonlight with my greeting and then die cut with the Stylish Shapes dies. It was attached to the panels and then adorned with the Copper Clay leaves.
The designer paper may be called “One Horse Open Sleight” but you can use the gorgeous paper in so many ways …. just have fun!! I love the way both these cards turned out, great way to use one sheet of designer paper.
I hope you got a wave of inspiration with today’s cards, and I thank you for stopping by and hanging out with me for a bit.
Have a great day ~