Sweet Strawberry Bundle … Card Tutorial

Hello Stampin’ Friends ~

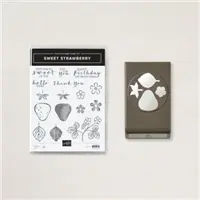
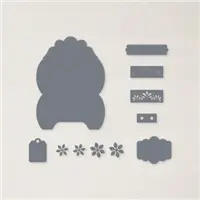
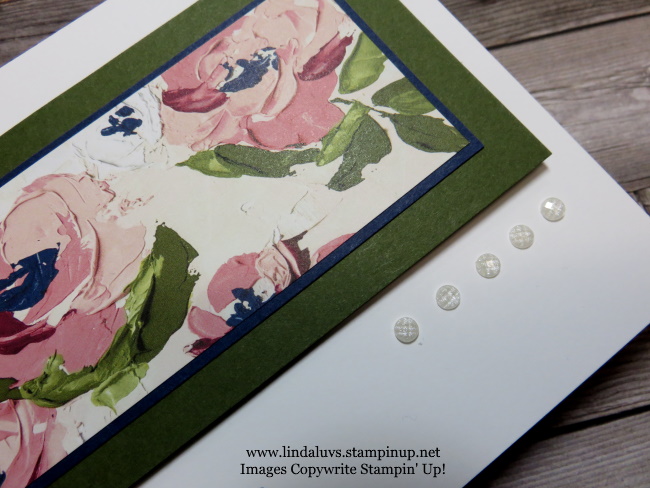
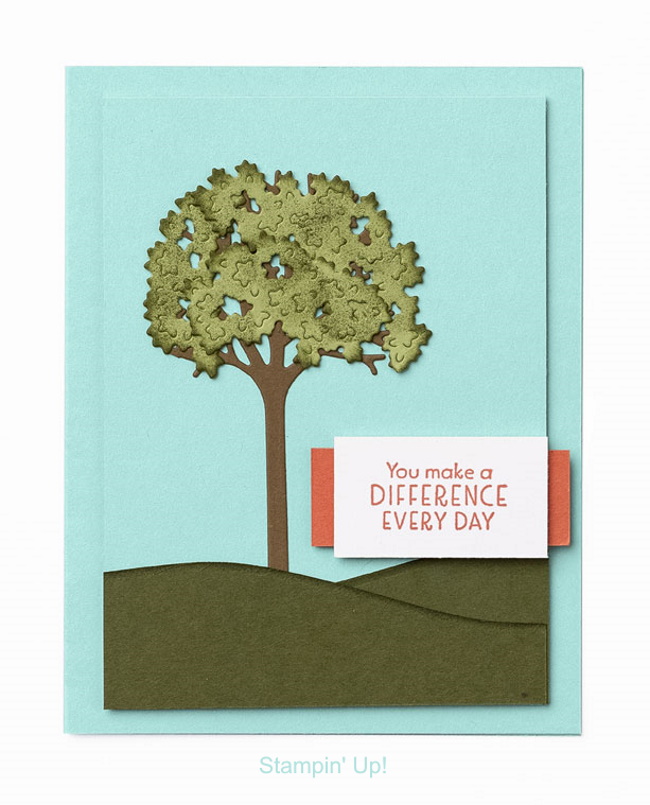
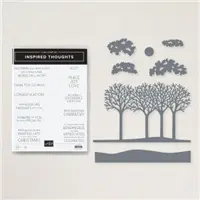
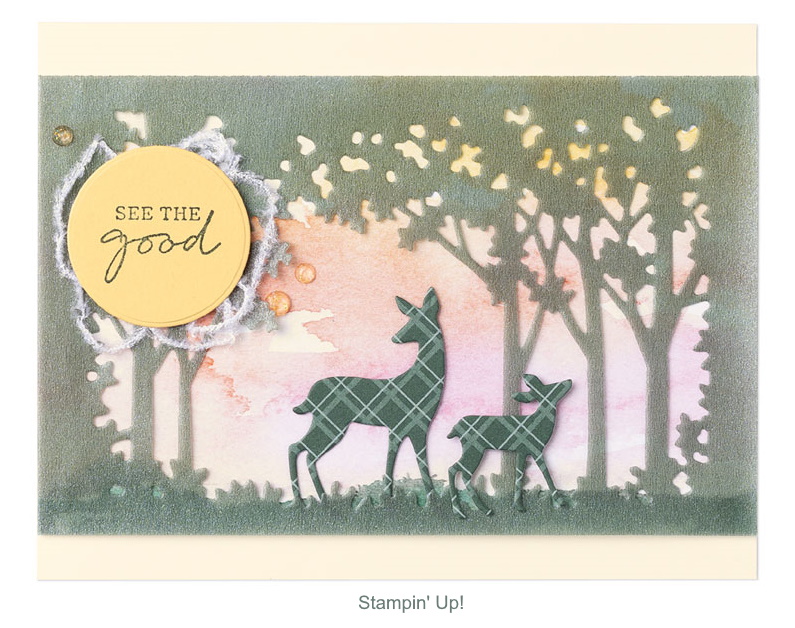
Today I have a cute card designed by Stampin’ Up! from the Sweet Strawberry Bundle …. this is yet another bundle, stamp set and dies that will be retiring soon.

Here are the step by step instructions for the card …

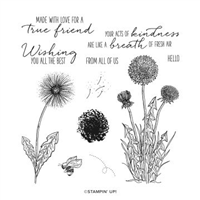
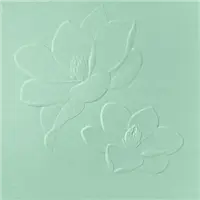
1. Stamp the large flower and stem image and the medium flower outline in Crumb Cake ink on the 5-1/2″ x 4″ (14 cm x 10.2 cm) Basic White Cardstock. Stamp the greeting in Poppy Parade ink. Adhere the stamped cardstock to the card base.


2. Stamp the filler leaf image in Mint Macaron ink three times on the 2″ x 4″ (5.1 x 10.2 cm) Basic White Cardstock. Punch out using the Strawberry Builder Punch and adhere to the card base.


3. Two-step stamp two strawberry images using Poppy Parade ink on the second piece of 2″ x 4″ (5.1 x 10.2 cm) Basic White Cardstock. Stamp the outline in full saturation of ink and stamp off the filler image to create shading.


4. Stamp the stem image on the 2-3/4″ x 2″ (7 x 5.1 cm) Basic White Cardstock to create two stems.


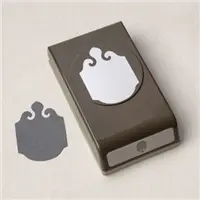
5. Punch out the strawberries and stems using the Strawberry Builder Punch.


6. Adhere the strawberries to the card base using Stampin’ Dimensionals, overlapping slightly. Adhere the stems to the strawberries.


7. Add Glided Gems.

Such a sweet card to give someone who has been done something sweet for you. If you liked the project and would like to purchase the items used to make it, I have listed them below.

Thank you for stopping by today.

Have a good one ~

TODAY’S STAMPIN’ SUPPLY LIST … If you liked the products used in today’s projects, I have links for you below. Just click on the item you would like more information on, or to begin your shopping. It will take you directly to my website. Thank you 

Simply Sunday: Just a Note

Hello Stampin’ Friends ~

I have been busy in my stamping studio preparing for my Spring Stamping Retreat … and totally missed yesterday’s post, sorry! I do however have a cutie for you today. A card that can be shared with a friend or family just to say hello.

If you watched my Tuesday Night LIVE last week then you should recognize this flower ….

This is the flower from the Hand-Penned Petals demonstration that I colored. I used Mint Macaron, Daffodil Delight and Highland Heather Stampin’ Blends to color them. I couldn’t let that pretty little thing just sit there, and it was so easy to pull together this card.

My card base is Basic Gray and I added the addition to the black & white polka dot from the Pattern Party Designer Series paper (a host reward). Then a doily from the Heart & Home collection in the Mini Catalog. It’s also the theme for my Stampin’ Retreat: Heart & Home!

I popped up the greeting and the flower with dimesionals, and speaking of greetings … the “Just A Note” comes from the Flowering Flowers stamp set.

I love that this card is mainly neutral and then our flower gives us that pop of color to really draw your eye in. The greeting was punched with the Lovely Labels Pick a Punch and then added one of the black Classic Black Dots to finish it off.

Thank you for taking time out to of your day to check out my blog.

You have a wonderful day ~

TODAY’S STAMPIN’ SUPPLY LIST … If you liked the products used in today’s projects, I have links for you below. Just click on the item you would like more information on, or to begin your shopping. It will take you directly to my website. Thank you ♥ 

Turn Your Pillow Box Die into a Gift Basket!

Hello Stampin’ Friends ~

Today I’ll be sharing my Facebook LIVE replay for you. We created a cute little Gift Basket from the Pillow Box Die (Retiring) … You’ll be surprised at how easy this is to make!

I have the dimensions for the inner box in the video but I thought I would share them again. Start with a 7-1/4″ x 5-1/2″ piece of cardstock and score at 2″ on all for sides. Then you will cut on the score lines on the 7-1/4″ length sides (ref. Video) You should have also seen the cute little baskets I made for the Mantle Gifts for my Holiday Stampin’ Retreat!

The ladies watching LIVE had plenty of ideas they could use these for … Baby Showers, Wedding Showers, Birthday Parties, on the table for the Holiday’s … a teachers Gift or a cute little gift for a co-worker. The possibilities are endless, and that cute little basket is priceless!

I have listed the ingredients below for your shopping convenience. Let me know if you have any questions.

Stop back tomorrow … I have something interesting to show you using this die!! Thank you so much for joining me today!

TODAY’S STAMPIN’ SUPPLY LIST … If you liked the products used in today’s projects, I have links for you below. Just click on the item you would like more information on, or to begin your shopping. It will take you directly to my website. Thank you 

Throwback Thursday: True Friend Card

Hello Stampin’ Friends ~

I have a pretty card to share with you today… another retiring casualty! I found the layout on Pinterest and it reminded me of a picture, framed and hanging on the wall.

What better designer paper than the FINE ART FLORAL Designer Paper with it’s “actual” painting design ….

The brush strokes come alive in this pattern. I matted the designer paper with Night of Navy to pull out the color from the paper. The larger piece is Mossy Meadow and acts as a frame which creates the picture affect. I chose Basic White as my card base which pulls out the white in the paper and really makes the designer paper POP!!

This picture really allows you to see the brush strokes in the designer paper… it gives you the appearance of texture. I added some texture to the card by adding the Elegant Faceted Gems, it also brought out the white in the designer paper.

The greeting was stamped in Night of Navy to give a nice flow of color, the sentiment is from the Garden Wishes Stamp Set and it completes my card.

If you like this card … grab up your goodies before they are gone. I have the links below for you. The Fine Art Floral Designer Paper is gone, but this layout works beautifully with any of our amazing designer papers.

Enjoy your day, and thank you for taking time out to stop by today.

TODAY’S STAMPIN’ SUPPLY LIST … If you liked the products used in today’s projects, I have links for you below. Just click on the item you would like more information on, or to begin your shopping. It will take you directly to my website. Thank you ♥ 

Faux Step Card with a Twist

Hello Stampin’ Friends ~

I am back today with the “FAUX” Step Card that I changed up a bit … and I’m going through step by step with dimensions on how to recreate this card. Today I’m using the Hand Penned Petals bundle… and I love the way this card turned out. I have this all on video for you to view.

Let’s take a look at the video now …

Dimensions:

  • Card Base: Basic Black: 9” x 4-1/4” then Score at 1-1/4”, 2-1/2” and 5-3/4”
  • Cardstock #2: Basic Black Center Step: 8-1/2” x 2-1/4” then Score and fold at 5-1/2”
  • Cardstock #3: Basic White 3″ x 4″ for inside of card / Scrap of white for greeting and Highland Heather as a mat (Cut with the Layering Circle Dies)
  • Designer Paper #1: Hand Penned Petals (Mint Macaron) for Center Step 2″ x 5-1/4″ and Floral Design paper is 3″ x 4″ and 1″ x 4″.

I find it easiest to lay the card base out flat when attaching the designer paper, as shown in the video.

What a fun twist to the card … placing your “center step” either on the right or the left side of the card. It gives you a totally different look. For my card, I choose to put my center step to the right to balance out the greeting which I let “hang over” the left side … that gives it another dimension to the card.

I love the way this card turned out! Don’t you just love that feeling when you’re done creating something that turned out sooo cool!

I hope you enjoyed the quick coloring technique as well …. it was fun and easy to recreate the watercolor look that you find on the Hand Penned Petals designer paper.

Enjoy making this fun fold … it’s really easy, and I love the twist of placing the “step” off to the side.

TODAY’S STAMPIN’ SUPPLY LIST … If you liked the products used in today’s projects, I have links for you below. Just click on the item you would like more information on, or to begin your shopping. It will take you directly to my website. Thank you ❤

Change is Beautiful ~

Hello Stampin’ Friends ~

Kids? Grandkids? Growing through life can also mean growing pains. Whether they’re climbing their career ladder or moving out for the first time—change can be simultaneously thrilling and scary—but isn’t that what makes life beautiful? Because new beginnings, after all, are simply new adventures. Let your loved ones know you’ll be there to support them through all of life’s chapters!

Paper Pumpkin is our monthly One-Stop Box™ that offers a unique variety of paper projects for subscribers of any skill level to enjoy! These thoughtfully themed and all-inclusive craft kits encourage you to explore your creativity, try new techniques, and discover your potential in papercrafting.

CLICK HERE to learn more about this craft subscription box and consider subscribing.

Thanks for joining me today.

Creating Textured Gift Bags!

Hello Stampin’ Friends ~

Today I’d like to share how fun and easy it is to add texture to our Ombre Gift Bags. They come in the 5 New In-Colors and each one is embossed with a different folder and decorated differently. The Gift bags and many of the items used to create them are are the retiring list.

Please join me, sit back, relax and watch the video and then I’ll share each of the bags including the Soft Succulent which is not seen in the video!

Alright … the cover gives away my surprise! I embossed the Soft Succulent bag with the “Painted Texture 3D” Embossing Folder, it’s so versatile and can be used with so many different styles. I wanted to showcase the new Pansy Petals Designer Series paper as well …

The greeting comes from the Pansy Patch bundle and is stamped in Soft Succulent to coordinate with the bag (and the designer paper). I then punched it out using the Elegant Tag Punch and adorned it with the Soft Succulent Open Weave Ribbon. I completed this bag by adding the Silver Epoxy Essentials.

The Fresh Freesia bag is the first I demonstrated in the video and uses the Magnolia 3D embossing folder … It’s simple but pretty!

I used the folder “side-ways” for this one and decorated it with the Expressions in Ink Ephemera Pack, both the gold elements and the adhesive backed sequins come in the pack!! The gold piece you see here is actually the outer part of the piece I use on my Polished Pink bag …

My Polished Pink bag is embossed with the Tasteful Textile 3D embossing folder and embellished with the our stunning Shimmer Vellum punched from the Medium Daisy Punch which I highlighted with the Expressions in Ink Ephemera Pack!

If you do not like the space on the bottom … you can emboss from the bottom and then your un-textured area will be on the top, that is how Jan Farring did her bags… this means you will have texture on both sides, since I came in from the top, mine is only textured on the front.

My Pale Papaya card is textured on both sides because we embossed side-ways to give it a totally different look …

I used the Hammered Metal 3D embossing folder to texture this back … I really love it embossed sideways, it really gives definition to that area. I highlighted it even more by adding an oval from the Shimmer Vellum and another pretty daisy!! I added the Clear Epoxy Dots from the Silver & Clear Epoxy Essentials to finish off my Gift bag.

I thought I’d have a little fun with the Evening Evergreen Gift Bag …

so I made it into a Christmas Gift Bag!! I used the Tidings of Christmas 6 x 6 Designer Paper and tied it up nicely with the Evening Evergreen Chevron Weave Ribbon.

I hope you enjoyed watching how easy it is to emboss these beautiful Gift Bags to give them some texture and then add a few embellishment (or more if you wish) to get them ready to “Gift”!

Thank you for joining me and checking out my video today …

I hope your day is a good one!

TODAY’S STAMPIN’ SUPPLY LIST … If you liked the products used in today’s projects, I have links for you below. Just click on the item you would like more information on, or to begin your shopping. It will take you directly to my website. Thank you

Simply Sunday: Inspired Thoughts Bundle

Hello Stampin’ Friends ~

Today I’d like to share a card direct from Stampin’ Up! highlighting the Inspired Thoughts Bundle …

We’ve got some step by step instructions for today’s card ….

1. Cut a 5-1/2″ x 8-1/2″ card base from Pool Party Cardstock. Cut a smaller piece of Pool Party to 3-1/2″ x 5″.

2. Die cut the tree base from Soft Suede Cardstock; cut leaves from Pear Pizzazz Cardstock; and cut two hills from Mossy Meadow Cardstock.

3. Die cut the tree base from Soft Suede Cardstock; cut tree branches and piece them together to create one tree.

4. Add color to the leaves and hill with ink and a Sponge Dauber for added dimension.

5. Stamp “You make a difference every day” sentiment using Calypso Coral ink on a 1″ x 1-3/4″ piece of Basic White Cardstock. Layer it on a 2-1/8″ x 1-3/4″ piece of Calypso Coral Cardstock.


6. Adhere individual pieces to the card base as shown. The Pool Party piece, Calypso Coral piece, and front hillside are adhered with Stampin’ Dimensionals.

Thank you for joining me today!

Have a beautiful day ~

TODAY’S STAMPIN’ SUPPLY LIST … If you liked the products used in todays projects, I have links for you below. Just click on the item you would like more information on, or to begin your shopping. It will take you directly to my website. Thank you 

Inspired Thoughts & “Blends, Alcohol & Vellum Technique!

Hello Stampin’ Friends ~

Another awesome bundle retiring … “Inspired Thoughts”. Here is a reminder of two cards that I created using the amazing “Blends, Alcohol & Vellum” technique! This is such a fun technique and creates amazing backgrounds where no two will look alike. The more you play with it, the more you will be hooked!!

Here is the card that I created in the video, I’ll share another with you later in my post.

I have a few tips to share and then I invite you to watch the video;

  1. Make sure you are using 91% (or higher) Isopropyl Alcohol … the 70% will not work properly.
  2. Your room should be well ventilated due to the Alcohol
  3. A paint brush works great, or you could try your old Aqua Painters. (I like the stability of the brush)
  4. Have paper towel or something to clean your brush off with and absorb excess alcohol on your brush.
  5. Pick colors that coordinate well together as some combinations may get muddy… But have fun experimenting!

I had so much fun sharing this technique last night with my stampin’ friends, that I made even more backgrounds!! I was playing around with some color combinations and thought of a sunset, so I layered my colors and this is what developed …

Cool … right!! I made this card just like the one in the video. My Stampin’ Blends colors were: (from the bottom up) Dark Night of Navy, Dark Highland Heather, Dark Calypso Coral, Dark Daffodil Delight and Dark Balmy Blue.

I added a big patch of the Daffodil Delight to create the “sun” area … and once that was created, I used a circular candle holder to trace a circle in that area – wow, doesn’t that look cool!? I also dropped my trees lower, so I had to cut off the bottom, trim the trunks and then glue to bottom back on.

This technique creates such unique background which gives such depth to the card, and then our trees and some really nice texture. Both of these cards were so much fun to create, and I can’t wait to send them out, or give them away as one of my door prizes!!

I want to “Thank you” for spending time with me today, to check out my cards and my video! I’d love to know what you think of this technique, and what colors would you use?

Have a fun and creative day ~

TODAY’S STAMPIN’ SUPPLY LIST … If you liked the products used in today’s projects, I have links for you below. Just click on the item you would like more information on, or to begin your shopping. It will take you directly to my website. Thank you  

Expressions in Ink & Create with Friends

Hello Stampin’ Friends ~

Oh my … Oh my …. I hate to say goodbye! And what make me sadder is that I’m loosing two of my favorites!! Don’t get me wrong, I’m so excited and can’t wait to see all the new stamps and stuff in the upcoming catalog but the amazing “Expressions In Ink” Designer Series Paper AND the “Create with Friends” are both retiring. These papers have ribbons of gold foiling running through the beautiful jewel tone colors like Evening Evergreen, Jade, Magenta Madness, and Pale Papaya….

I understand why it’s retiring …. some of the colors used in the designer paper are also retiring. Here is one of the cards I created using the Pale Papaya (this one is here for another year) ….

The beautiful water color design add such a natural look … as if I created it myself! Luckily it was done for me and I had no mess to deal with!!

I teamed up my Expressions in Ink Designer Paper with the “Creating with Friends” stamp set. This stamp set is fun and easy to work with, and you can create an multitude of options …

Don’t you just love all of the different options for greeting you can create with this stamp set? I kept it simple by just saying … “You’re Amazing” and I stamped it in the Polished Pink and Pale Papaya ink.

Since we are in the holiday spirit … here is a none traditional Christmas card I created with the help of the Tidings & Trimmings bundle (also RETIRING) which is also found in the Annual Catalog.

Lets show off some of our jewel tones with the Just Jade and Evening Evergreen. WOW … this card is stunning in it’s simplicity of greens and gold embossed greeting. Add a few Gilded Gems to finish off your card and you can head to the party early!

Speaking of stunners … this beauty had it’s greeting done on vellum so you could still see the beautiful patterned paper. Are you falling in love with this yet? At first glance I knew I had to have this paper, and of course the stamp set because the go together perfectly.

Oh … I’m not done yet, I have another that I’d like to share with you! Just like on my first card, I used the Daisy punch and highlighted the In Color Shimmer Vellum, the Expressions in Ink Ephemera Pack and the 2021-2023 In Color Jewels. Another simple yet stunning card.

Thanks so much for joining me for my card parade. I’d love to hear what you think about this amazing paper AND awesome stamp set!!

Enjoy your day ~

TODAY’S STAMPIN’ SUPPLY LIST … If you liked the products used in today’s projects, I have links for you below. Just click on the item you would like more information on, or to begin your shopping. It will take you directly to my website. Thank you

Are You Ready to Say Goodbye? Retirement List is here …

Last-Chance Products Ready or not it’s Retirement Time! Stampin’ Up! has just released the list of retiring products and some items are on sale. Now is the time to get those items on your wish list ordered before they are long gone. I highlighted a few of the products below that I adore and are on sale now. Here are my Top 3 Tips for the Retirement List:
  1. In Colors: All 2020-2022 In Color inks, paper, and embellishments are retiring. These items usually sell out quickly so don’t forget to add ink refills and extra cardstock to your craft stash. You don’t want to miss having these gorgeous colors in your collection!
  2. Bundles: Bundles, with their 10% savings, all retire! Even if the bundle items carryover to the next catalog the discount does not – so if you have your eye on a bundle, get it now and save!
  3. Stamps vs. Accessories: Retiring stamps are available through 2 May 2022. All other retiring items, such as paper, embellishments, and dies are only available while supplies last, so you don’t want to wait and miss out.
Have a beautiful day ~
Stampin’ Hugs, Linda

VIEW LAST-CHANCE PRODUCTS LIST ONLINE

Stampin' Up! In Color Collection

Quick Cards with Foam Adhesive Sheets Video

Hello Stampin’ Friends ~

Oh my gosh … this video is perfect for those of us who need to make a quick last minute card! I will share some great tips to make your card making a bit easier, the Foam Adhesive sheet. Grab a cup of coffee and join me for a spell.

Let’s take a look at the video now …

Dimensions:

  • Card Base / Basic Black : 8-1/2” x 5-1/2” then Score at 4-1/4”
  • Basic Black Card front Embossed: 4″ x 5-1/4″ (Scrap to die cut letters out: HELLO)
  • Foam Adhesive Sheet: 4″ x 1-3/4”

This card was so fun to create … a great way to use up some of those scraps and the result is a bold, fun and colorful card!

Don’t we all that some scrap designer paper left over as well, so cut your Foam Adhesive sheet the size of your Designer Paper (Mine was 3″ x 3″) and adhere it to the card front you just embossed. Finish off your card with a cute greeting ….

There are so many ways to use these foam adhesive sheets, but I think that “Use Your Scraps Up” Card is my favorite!!

Have fun creating and thank you for hanging out with me today.

TODAY’S STAMPIN’ SUPPLY LIST … If you liked the products used in today’s projects, I have links for you below. Just click on the item you would like more information on, or to begin your shopping. It will take you directly to my website. Thank you ❤

Spring is Kite Weather …

Hello Stampin’ Friends ~

Warm sunny days with a nice breeze is the perfect time to pull out the kites and enjoy some family time … running, relaxing and watching those kites high in the sky.

Measurements: 

  • Card Base: Pool Party 4-1/4” x 11, scored at 5-1/2”
  • Cardstock #1: Daffodil Delight 4” x 5-1/4”
  • Cardstock #2: Basic White 3-3/4” x 5”
  • Cardstock #3: Basic White 3-1/4” x 4-1/2”
  • DSP #1: 3-3/4” x 1”
  • Cardstock #4: 3-1/2” x 1/2”  
  • Scrap of Daffodil Delight & Basic White Cardstock for stamped kites

Instructions:

  • Fold the Pool Party card base in half and burnish the fold.
  • On the piece of Basic White Cardstock, stamp the kite strings and three clouds in    Momento ink as shown.
  • Color the bows on the kite strings with Pool Party Dark & Daffodil Delight Dark Stampin’ Blends, then accent the shadows on the clouds with Pool Party Light Stampin’ Blends. Accent the clouds with Wink of Stella.
  • Adhere the DSP to the Basic White Cardstock, about 1/8” from the bottom.
  • Adhere the Basic White Cardstock layer to the Daffodil Delight Cardstock, then adhere to the Pool Party card base.
  • On a scrap of Daffodil Delight Cardstock, stamp the kite in Daffodil Delight ink, cut out the image and adhere to the card with Stampin’ Dimensionals.
  • On a scrap of Basic White Cardstock, stamp the kite in Momento ink, color the image with Stampin’ Blends (Daffodil Delight Dark and Pool Party Dark), then cut out the image and adhere to the card with Stampin’ Dimensionals. Accent the centers of the flowers with Wink of Stella.
  • Stamp the sentiment on the strip of Daffodil Delight Cardstock in Momento ink. Banner punch both ends of the sentiment strip using the Banners Pink a Punch and adhere to the card with Stampin’ Dimensionals.
  • Tie a bow using the silver Simply Elegant Trim and adhere to the card using a Mini Glue Dot.
  • Add three Bumblebee In Color Jewels (two medium, one small) to the card front as shown.

Brings back some lovely memories … or I’ll pick up the grandkids and make some more!!

Thank you for joining me ~

Have a wonderful day!!

TODAY’S STAMPIN’ SUPPLY LIST … If you liked the products used in todays projects, I have links for you below. Just click on the item you would like more information on, or to begin your shopping. It will take you directly to my website. Thank you ❤

Thank you Card with Grassy Grove

Hello Stampin’ Friends ~

Today I have one last card from the Grassy Grove bundle. This is a simple layout that would be create for our new stampers, or if you are in need of a quick card.

The designer paper used on today’s card comes from the Symbols of Fortune Designer Series Paper. The grassy image was stamped with Old Olive and our deer in Soft Suede.

The designer paper was attached and then our die cut stamped images were popped up. To finish off the card, the greeting was stamped with VersaMark and embossed with White embossing powder and the heat tool.

I hope you have enjoyed the cards I have shared in the past couple of days, here are a few that you have seen ….

Don’t miss out on this versatile duo! Contact me for more information or to purchase your Grassy Grove Bundle with 10% bundled savings.

Thank you for joining me today … Enjoy your day.

TODAY’S STAMPIN’ SUPPLY LIST … If you liked the products used in today’s projects, I have links for you below. Just click on the item you would like more information on, or to begin your shopping. It will take you directly to my website. Thank you ❤

Simply Sunday: Grassy Grove

Hello Stampin’ Friends ~

Today I have another card from the Grassy Grove bundle. I don’t usually share “die cut” cards on “Simply” Sunday but with just a couple runs through of the Die cutting machine… this beautiful card is done.

The Grassy Grove Bundle is a nature-inspired set that’s as versatile as it is beautiful. It’s ideal for all-occasion cardmaking, and the best part: the images are perfect for both masculine and feminine cardmaking!

You’ll love how the stamps and dies work together to easily create an ornate, framed panoramas, such as a lone deer or a colorful sunset peeking out from behind a grove of die-cut trees. Here the beautiful background is one of my favorite designer papers; the New Horizons Designer Paper.

The Grassy Grove images pair as well with sentiments from other stamp sets as it does with the four all-occasion greetings that come with the bundle. That means you get even more mileage out of the stamp sets you already have in your collection just by adding this bundle!

Don’t miss out on this versatile duo! Contact me for more information or to purchase your Grassy Grove Bundle with 10% bundled savings.

Enjoy this wonderful Sunday, and thank you for stopping by.

TODAY’S STAMPIN’ SUPPLY LIST … If you liked the products used in today’s projects, I have links for you below. Just click on the item you would like more information on, or to begin your shopping. It will take you directly to my website. Thank you ❤