Twelve Weeks of Christmas: Week 10 / Garden Walk

Hello Stampin’ Friends ~ 

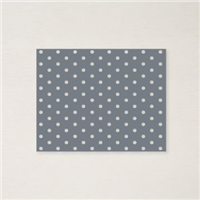
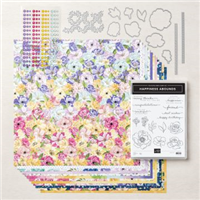
Today I’ll be sharing my Twelve Weeks of Christmas: Week 10 Video along with the individual cards, including a brand new one not shown during the video!! I’m highlighting the amazing and versatile Garden Walk Designer Series paper. You’ll see quick cards, split cards and ways to highlight it. Teamed with the designer paper is the Throughout the Year stamp set. Grab your coffee and let’s take a look at the video ….

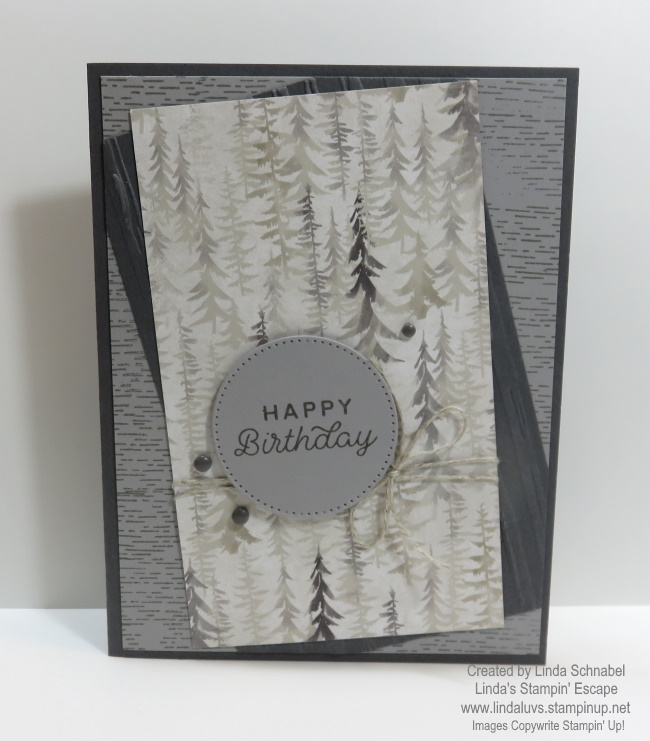
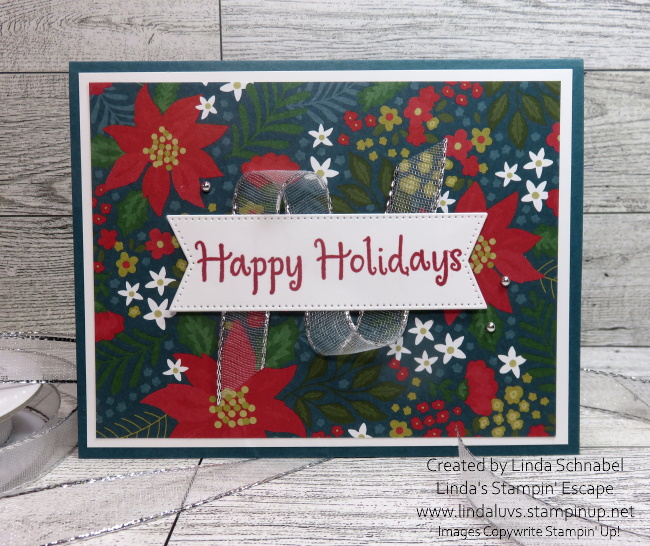
Yesterday I shared the poinsettia card, here is a reminder …

Just to help you see different patterns from the designer paper and different styles of cards! Next up is a collage of banners that’s backlit with some brushed color ….

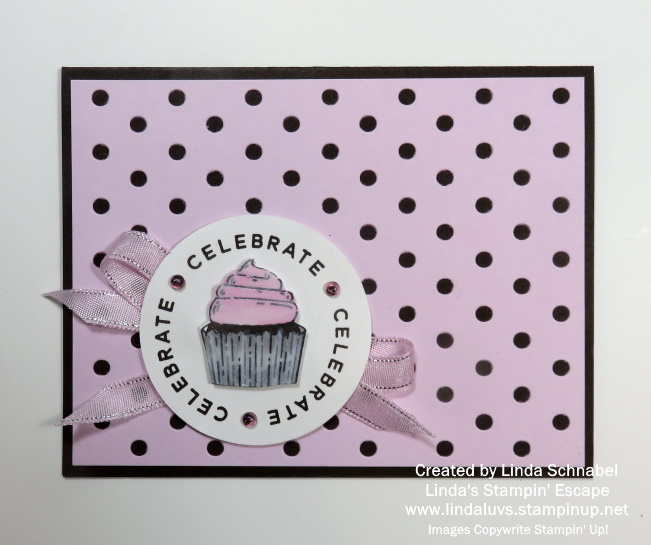
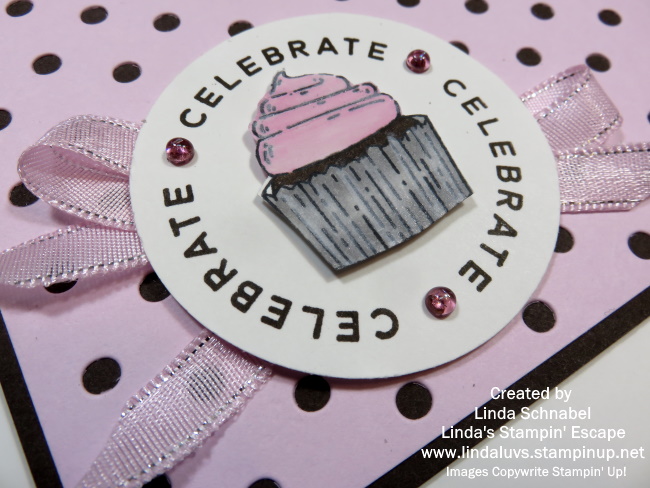
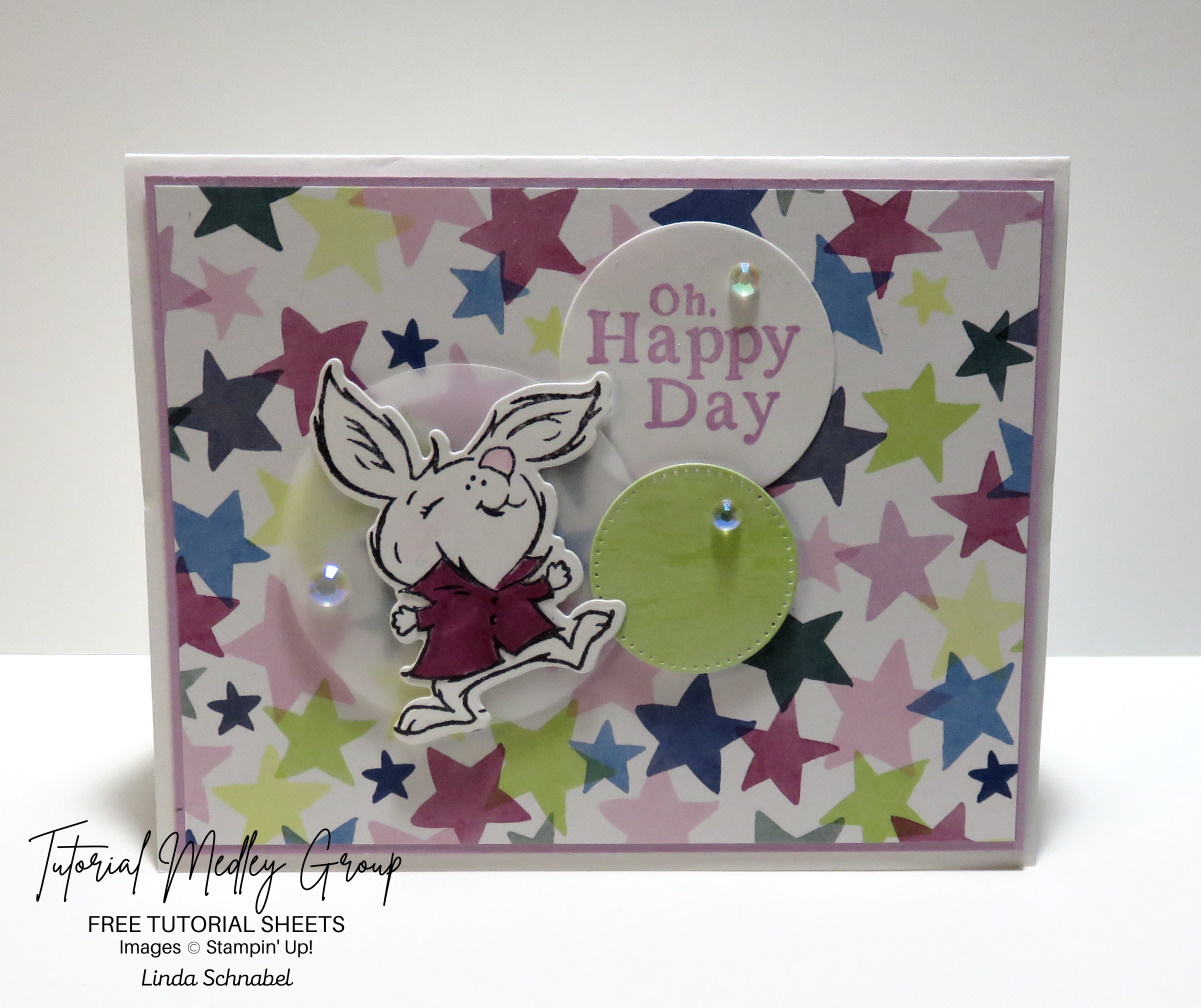
You got to hear how each of these were made so I won’t be covering that here. Our next 2 cards were created when I cut down the 6 x 6 designer paper into 4 – 3 x 3 sheets. Our first is super simple to create and is a great layout when you need to make many cards quickly ….

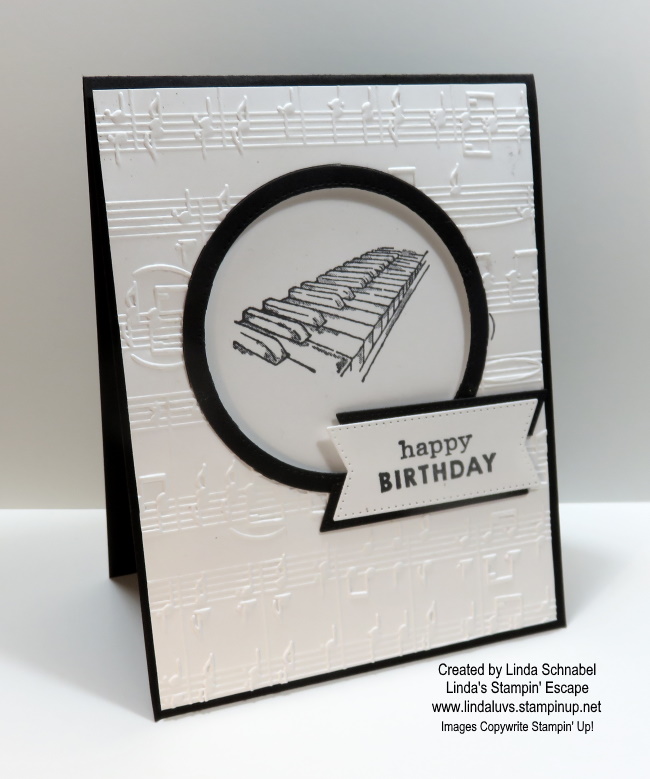
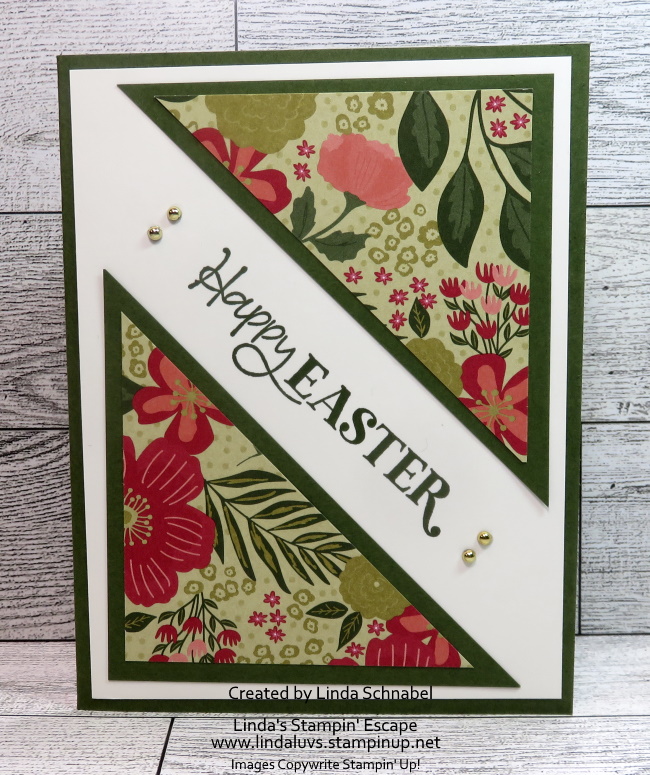
Next is the second of those 4 – 3 x 3 inch squared and is created with one of my favorite / simple card techniques: Split Cards! Simply cut from corner to corner diagonally ….

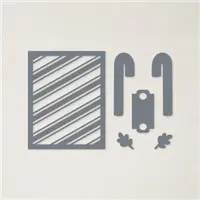
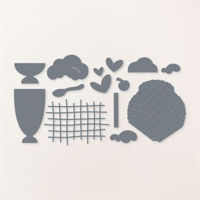
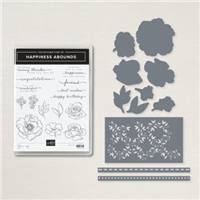
And lastly … this card was created with the help of the Patchwork Pieces dies. Don’t ever be afraid to pull out those dies and experiment! You just may fall in love with your creation ….

With yet another pretty pattern, your creativity can soar and choosing a color pattern is easy, just follow what’s in the paper. My card base is the Calypso Coral which was embossed with the Timeworn Type embossing folder. I wanted some texture on my card, and this made it easy. 

Once I die cut the Garden Walk designer paper with the Patchwork Pieces dies, I mounted it onto Pretty Peacock cardstock … I wouldn’t have put these two colors together myself, but they sure do look good together. 

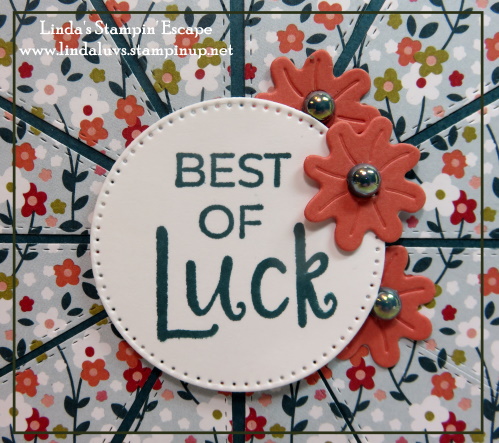
My greeting was stamped in Pretty Peacock and die cut with the Stylish Shapes dies. I then grabbed a flower from another die set to embellish my card. 

Creating all of these cards with the combined elements of Garden Walk Designer paper and the Throughout the Year stamp set brings out the magic of both the paper and stamp set. Add these to your wish list and let your creativity flow! 

Thank you for joining me today … I hope you enjoyed this showcase

Don’t forget …. FREE SHIPPING on Thursday for all orders over $75. Plus, I have a FREE Gift for all who use the Host Code: HJ2ENVG4 

Winter Meadows Designer Series Paper: Create 6 Quick / Beautiful All Occasion cards.

Hello Stampin’ Friends,

Winter brings with it a magical aura, and there’s no better way to capture its essence than with the Winter Meadows Designer Series Paper from Stampin’ Up! This collection isn’t just a celebration of the season; it’s a canvas of versatility waiting to unfold.

Today I’m sharing my video replay of my Facebook LIVE where I create 6 quick & simple cards from one beautiful sheet of the designer paper. Grab a cup of coffee, sit back and relax as I go through how I created these 6 cards.

One of the most striking features of the Winter Meadows Designer Series Paper is its adaptability. The gorgeous grey tone design serves as a perfect backdrop for a myriad of occasions. Its neutral yet captivating pattern allows for a versatile approach in crafting, making it a staple for a variety of celebrations.

Let’s delve into the magic of quick and effortless card-making! Here are six simple yet stunning card ideas utilizing the Winter Meadows Designer Series Paper, promising to spark creativity …

  1. Classic Christmas Charm: Layer the grey tone pretty paper with a Pretty Peacock, add a simple ‘Let it Snow’ sentiment for a simple and pretty holiday card.

2. Winter Wonderland: And a sentiment of ‘Make the Season Sparkle’, pair it with Lost Lagoon cardstock, add a touch of Wink of Stella and adorn with Iridescent Rhinestone embellishments for a serene winter scene.

3. Father’s Day Sophistication: I cut the designer paper to 3 3/4″ x 5″, this card I used the Misty Moonlight to mat it, it’s earthy tone and wrap one corner with Bakers Twine for some texture. You’ll stamp with a ‘Happy Father’s Day’ sentiment to create a refined touch.

4. Birthday Bliss: Next I used the Blueberry Bliss as a backdrop for a colorful birthday card, surrounded by coordinating bakers twine and embellishments. The greeting was created from the Curved Occasions Bundle

5. Holiday Elegance: Trim the designer paper as the others, layer it on the soft Moody Mauve cardstock, add some Wink of Stella and stamp a ‘Happy Holidays’ sentiment. Time to embellish it with Festive Pearls.

6. Winter Season Beauty: Create a layered look with your designer paper with the Snowflake Magic on the Smoky Slate card base, adding a versatile sentiment that suits any occasion. Plus we’re adding a few Festive Pearls to complete our look.

The Winter Meadows Designer Series Paper isn’t just a seasonal delight; it’s a crafting essential that transcends boundaries. Its adaptability and charm make it an invaluable addition to any crafter’s arsenal. With just a few creative tweaks, it effortlessly transitions from Christmas to birthdays to Father’s Day and beyond, promising endless possibilities for beautiful creations.

Thank you for hanging out with me today. If you’ve enjoyed the video / cards, then please press the LIKE button or leave me a comment. Enjoy your day.

A Birthday Celebration / Celebration of Life …

Hello Stampin’ Friends ~

Today would have been Armani’s 4th birthday, as you know… he passed away unexpectedly last Friday from what they believe was a seizure. I’m sharing the Patchwork Pieces card that I created during a Facebook LIVE for him … he LOVES Orange!! This little guy had to come into my stamp room every time he was over and checked out the cards I have made … he’s was the sweetest little guy 🧡!!

Here is the video replay of my Facebook LIVE ….

Wasn’t that fun and easy to create? And by using the designer paper and cardstock, you have enough left over for a second card. Have some fun and die cut some black and turn it into a Halloween card … the possibilities are endless.

So … Do you think he will love this card? The last one he took had flowers, but it was ORANGE!! He even passed up the spaceship over those orange flowers …. told you he was a hoot!

Thank you for stopping by and checking out my blog post today. Have a great day ~

So Creative: Transform from Halloween to Birthday… Card!

Hello Stampin’ Friends,

I’m back with a pop of color, and I promised in my last video that I would show you exactly what you can do with the “leftovers”. Are you ready to take your card-making to the next level? If so, you’re in for a treat (no tricks here!) with our Candy Cane Dies from the clearance rack. These versatile dies offer endless possibilities, and today I’ll show you a simple yet creative way to use them to make a spooktacular Halloween birthday card.

The first step in our creative journey is to choose our cardbase / Basic Black and the I’m using Pumpkin Pie cardstock and will then modify the background die. So simple to trim down this die … just follow the lines and cut with your paper snips.

Now, let’s get creative with those leftover pieces from the tag die. Instead of letting them go to waste, we’re going to use them to create a playful polka dot background for your card. Simply adhere the tag die cutouts onto your cardstock in a random pattern. This will give your card a fun and festive polka dot look, perfect for Halloween.

To complete your Halloween birthday card, use the Wanted to Say Dies to add a birthday greeting. Place the greeting strategically on your card to balance the design, and I layered the greeting over some Vellum cardstock to really create a focal point.

Creating this Halloween birthday card using the Candy Cane Dies has been a blast, hasn’t it? The best part is that it was quick and easy to put together, thanks to these versatile dies.

So, the next time you’re in the mood for some creative crafting, don’t forget to check out the clearance rack for hidden gems like the Candy Cane Dies. With a little imagination, you can transform ordinary dies into extraordinary designs that will delight your friends and family.

Have fun, get creative, and enjoy making one-of-a-kind cards that will leave a lasting impression.

Happy crafting! 🎃🎂👻

A Patchwork of Fun: DIY Birthday Card with a Twist!

Hello Stampin’ Friends,

Are you ready to embark on a creative journey filled with a blast of color and a touch of sass? Well, you’re in for a treat today as we dive into today’s birthday card that’s as fun and vibrant as it gets. So, grab your Patchwork Pieces Dies, Stargazing Designer Paper, and Wanted to Say Dies, because we’re about to get crafty!

Start by selecting your Lemon Lime Twist cardstock for the card base. This lively green hue sets the stage for our vibrant creation. Cut the cardstock to 8-1/2″ x 5-1/2″ and fold it in half – this will be the canvas for your masterpiece.

Now, it’s time to incorporate some whimsical patterns into our design. Take out your Stargazing Designer Paper, and die cut one of each of the Lemon Lime Twist and Pumpkin Pie patterns … This gives you enough for 2 cards. I added a piece of black and white dotted designer paper from some I had laying around to add some fun pops of white. Cut a piece of Basic Black 4″ x 5-1/5″ (same as the Polka dot paper) …This will be the backdrop for our patchwork pieces.

This is where the magic happens! Grab both colors of your Patchwork Pieces and adhere them to the black to create a medley of funky shapes. Arrange them on your card in a random, patchwork-style pattern. Don’t worry about perfection – the more whimsical, the better! Now, trim down the black cardstock to create a border around your funky pattern.

The greeting comes from the Wanted to Say Dies. Cut out the base sentiment from the black and the detail “birthday” from your Lemon Lime Twist cardstock. Stack them and glue them together with your Liquid glue. You can even add a touch of Wink of Stella for some glitz!

Your card is almost ready to dazzle! To really make that greeting POP, punch or die cut a circle from your Vellum Cardstock and attach to the front of your card. If you like, add a few embellishments like sequins, rhinestones, or even a ribbon bow. These little details can take your card to the next level.

There you have it, friends – a DIY birthday card that’s bursting with color, personality, and a sprinkle of sas. Perfect for all ages, this card is sure to bring a smile to anyone’s face. Time to embrace your creative side, laugh a little, and send some handmade joy to your loved ones.

Happy crafting, and even happier birthdays! 🎉🌟🎈

If you enjoyed today’s fun and colorful card and found it inspiring, here’s a list of the supplies you’ll need to recreate the card. Spread joy and connect with others through your handmade creations.

Ready for a Scary Sneak Peek …

Hello Stampin’ Friends,

As promised I have a bit of a sneak peek for your today …. something old (annual catalog) and something new (Mini catalog). My “old” / something from the Annual catalog is the Patchwork pieces dies. The “new” is the Tricks and Treats Bundle. All you Halloween lovers are going to get a kick out of this one ….

This card is just bursting with fun … Love how the rays just shoot out from under the moon, and the haunted house is gently lite not to scare our ghosts away … they are only looking for a safe haven!! lol

My cardbase is a piece of 8-1/2″ x 5-1/2″ Basic Black that’s scored at 4-1/4″ and folded. Next I cut a piece of Lemon Lime Twist at 4″ x 5-1/4″ for my mat which will be used to arrange my die cut patchwork pieces. The pieces were cut from the Stargazing 12″ x 12″ Designer Series paper and another from the Basic Black.

I used the Lemon Lime Twist cardstock as a guide to align the pieces in every other color … starting with the corners and then filling in the rest of the pieces and spacing them evenly. I used my Tombo Liquid glue to secure them to the mat.

Using the Memento Ink I stamped the Haunted House and then I die cut it with the coordinating dies. I stamped the “Trick or Treat” onto Daffodil Delight … then I punched it out with the coordinating 2-3/8″ Circle Punch. Once punched, I used the small blending brush to add some dimension / shading to it.

I used the ghosts from the Glow in the Dark Bats & Ghosts to embellish my card. These little cuties and some fun texture and a glow of warmth. Are you ready for Halloween decorating soon? The Tricks or Treats Bundle will be available on September 6th … not too long yet.

Thank you for coming over to my blog, I appreciate it. Have a great day.

Too Cool Ice Cream Cone Card

Hello Stampin’ Friends ~

Have you ever made a card … thought it was cute …. but the more you looked at it, the more you thought it needed something? That is how I felt about this card I created with the Share a Milkshake stamps & Dies, along with the Wanted to Say Dies.

My cardbase is Early Espresso to coordinate with my chocolate ice cream, or if you’re a Chocolate Shoppe Ice Cream fan (out of Madison, WI) we call that deep rich chocolate; Zanzibar! My background is the Stargazing Designer paper and matted with Basic White. The cone is made from the Pecan Pie cardstock. It looked a little plain so I used the “waffle” die and pow ….. gave my pop I was looking for.

The Happy Birthday base or mat, is also die cut from the Stargazing designer paper and then topped off with the Basic White … a touch of Wink of Stella on our Happy Birthday. Just like building our cone! A few Berry Burst Tinsel Gems (4-pack) to embellish our cone … or you could call them “sprinkles”.

Making ice cream cones is pretty easy with these few ingredients and soooo tasty looking too. And that cone is going to be so good with all the warm weather we’ve been having

Thanks for joining me for a cone… Enjoy your weekend!

Thinking of You on Your Birthday …

Hello Stampin’ Friends,

Today we are Thinking of You on Your Birthday and celebrating with a pretty pink and gray card created with the Circle Sayings and Patchwork pieces dies. There are so many combinations you can make with these two crafting tools in your stamp room… and they are fun to play with!

My cardbase is a piece of 8-1/2″ x 5-1/2″ Bubble Bath scored at 4-1/4″ then scored and folded. Next I cut a piece of Smoky Slate for my mat that will be used to arrange my die cut patchwork pieces. The pieces were cut from the Bright & Beautiful 6″ x 6″ Designer Series paper.

I used the Smoky Slate cardstock as a guide to align the pieces … starting with the corners and then filling in the rest of the pieces and spacing them evenly. I used my Tombo Liquid glue to secure them to the mat.

Using the Memento Ink I stamped the cupcake … colored it with Smoky Slate and Bubble Bath Stampin’ Blends. I stamped the flowers in Bubble Bath and then the “Thinking of You” over the top of the flowers with Memento Ink … then I punched it out with the coordinating 2-3/8″ Circle Punch.

The cupcake is fussy cut and popped up with a Stampin’ Dimensionals as was the entire punched circle when finished. I added a little Wink of Stella to the cupcake – just because!

I love the ombre look on the Bright & Beautiful designer paper, it’s subtle but pretty. Check out how I switched out every other die cut so you would get a two-toned look on our “burst” pattern, it gives it a more distinct color pallet. I have more ways to use this die and will be sharing them with you either LIVE on Facebook and / or right here on my blog.

Thank you for coming over to my blog, I appreciate it. Have a great day. PS: I will not be going LIVE today as I am on vacation … more on that too!

Dots & Spots & Birthday Greetings

Hello Stampin’ Friends,

I’m tickled pink to share today’s card with you. I’m using the Circle Sayings Bundle and a “fun” die I just got called “Dot’s & Spots”. If you like polka dots, I think you’ll like this die! Now if this combination doesn’t spark your curiosity, let me add my color combination of our newest pink, Bubble Bath and Early Espresso. The recipe for this card will result in a cuteness overload!

Just take a peek …

We’ll begin with out cardbase which is the Early Espresso… chosen because of our “chocolate” cupcake. The Bubble Bath is cut to a standard 4″ x 5-1/4″ and then die cut with the Dot’s & Spots. Now don’t throw those die cut dots away because they can be used in a future Shaker Card. I attached the die cut piece directly to my card base using the Liquid glue.

On a piece of Basic White I stamped my cupcake with the Memento Ink and the greeting in Early Espresso. The greeting was punched with the coordinating 2-3/8″ punch from the bundle and the cupcake was colored and fussy cut. I used the Bubble Bath, Smoky Slate and #100 Stampin’ Blends to color.

The cupcake once colored was popped up with the Stampin’ Dimensionals. Behind the the greeting is the new Bubble Bath ribbon from the 3/8″ Sheer Ribbon Combo pack. This pack also includes Azure Afternoon and Lemon Lolly. It has a nice shimmer to it and a touch of silver. It almost makes the card look like a pretty little gift!

Once the ribbon was attached to the greeting, I added Stampin’ Dimensionals and attached it to the card front.

To complete my card I added the Bubble Gum Tinsel Gems – 4 pack onto the greeting. There is no shortage of dimension or texture to this card and it is sooo stinkin’ cute! I’m loving those polka dots, so I’m sure you’ll be seeing a lot more of them.

I’d like to thank you for spending a part of your Sunday with me. I hope you enjoyed today’s colors and finished card. Enjoy your day.

Simply Sunday: Birthday Greetings

Hello Stampin’ Friends,

Today I’m going to share a warm and natural card I created for a birthday and I am using the One Horse Open Sleigh designer paper. This pretty woodsy pattern is just to beautiful not to use it for as many occasions as you can think of.

I used the grays for my base and background; Basic Gray and Smoky Slate so the brown tones in the designer paper would shine through. The Smoky Slate cardstock was stamped with a design you can find in the Gone Fishing stamp set … I think it makes the type of lines you may find on a White Birch tree.

On the Basic Gray mat, I embossed it with the “stripes” from the Stripes & Splatters 3-D embossing folder to give the card a wonderful texture and looked like bark to me.

I stamped the greeting in Basic Gray onto Smoky Slate and then die cut it using the Stylish Shapes Circle die. I used the Linen Thread to add a natural embellishment to the card, and then secured the greeting over the top using Stampin’ Dimensionals. This added some dimension to the card.

Also adding dimension and texture were the Classic Matte Dots in gray that I enhanced the greeting with.

I love the soft tones of the Once Horse Open Sleigh designer paper and how the added little touches to this card really tie it all together. And it is very gender neutral with these colors.

Thank you for taking time out of your Sunday to stop and visit with me. I will share a Christmas card with you tomorrow using this same pattern of designer paper. Till then, enjoy the rest of your day.

Oh Happy Day Card; Great for Kids Birthday

Hello Stampin’ Friends ~

Bunny lovers rejoice!! Today I’m sharing my Oh Happy Day card; and it’s perfect for a kids birthday. I created for the Tutorial Group that I belong to … so, you will get not only the dimensions to today’s card but step by step instructions. Wooo Hoo!

Measurements:

  • Basic White Cardstock:  8 ½“ x 5 ½” and 2 pieces of  3” x 2”. One for bunny & one for greeting.
  • Fresh Freesia: 5 ¼“ x 4”
  • Designer Paper: 5 1/8” x 3 7/8” and scrap of Lemon Lime Twist to die cut.

Instructions:

  • Score your 8 ½“ x 5 ½” White Cardbase at 4 ¼“ then fold and burnish.
  • Attach your Fresh Freesia cardstock to the front of your card base.
  • Layer Stars Bright & Beautiful Designer paper on top of your Fresh Freesia.
  • Stamp bunny onto one small Basic White in Memento Ink
  • Color bunny’s shirt with Berry Burst Stampin’ Blends and the nose with the Bubble Bath Stampin’ Blends
  • Die cut bunny
  • Stamp greeting in Fresh Freesia and die cut with a medium circle die
  • Die cut Lemon Lime Twist Designer Paper with smallest circle die
  • Die cut Vellum Cardstock with one of the larger circle dies
  • Attach Bunny directly onto die cut Vellum Cardstock circle
  • Using dimensionals “behind” the bunny, attach to card front
  • Align greeting by tucking a small area under vellum and secure directly to card front.
  • Using Dimensionals, attach small Lemon Lime Twist circle onto card front
  • Embellish card with 3 Iridescent Rhinestones

Thank you for joining me today … Hope this card brought a little light into your Monday and some inspiration too.

Have a great day ~

National Ice Cream Day Birthday Card!

Hello Stampin’ Friends ~

Happy National Ice Cream Day!! We’re going to celebrate using the Share a Milkshake stamps & Dies, along with the Wanted to Say Dies. What’s your favorite flavor? Today’s treat consists of a waffle cone with a scoop of vanilla, chocolate and topped off with raspberry! YUMMY

My cardbase is Early Espresso to coordinate with my chocolate ice cream, or if you’re a Chocolate Shoppe Ice Cream fan (out of Madison, WI) we call that deep rich chocolate; Zanzibar! My background is the Stargazing Designer paper and matted with Basic White. The cone is made from the Pecan Pie cardstock.

The Happy Birthday base or mat, is also die cut from the Stargazing designer paper and then topped off with the Basic White … a touch of Wink of Stella on our Happy Birthday. Just like building our cone! A few Berry Burst Tinsel Gems (4-pack) to embellish our cone … or you could call them “sprinkles”.

Making ice cream cones is pretty easy with these few ingredients and soooo tasty looking too.

Enjoy your Sunday and I hope you get out and grab some ice cream to celebrate National Ice Cream Day.

Thanks for joining me for a cone!

Playing Happy Birthday to You …

Hello Stampin’ Friends & Happy Sunday! Today is a fun card that is Playing Happy Birthday to you! Piano and musical notes included. With a few simple runs through your Cut & Emboss machine, you can have this done in no time at all.

In basic Black & White, just like the keys of the piano still makes a statement. I ran the Basic White 4″ x 5-1/4″ through the embossing machine using the Merry Melody 3-D Embossing Folder. While your machine is out die cut a circle out of the piece you just embossed. I used the Layering Circle dies but they have since retired. You can use the Stylish Shapes circle dies or the circle dies from the new Reach for the Stars Bundle.

Using the Tuxedo Black Memento Ink … stamp the piano from the Enjoy the Rhythm stamp set on a piece of scrap that is about 3-1/2″ square, this will give you a little wiggle room to center it nicely. Of course you want to “stamp” your piano in the center of your square. Also stamp your greeting.

Using the same size circle and one larger circle … cut out your frame for your piano, then die cut your greeting with the banner from the Stylish Shapes dies. I cut a black one too, then cut it in half to make a fun and creative mat behind my greeting.

Then all you have left to do is assemble your card! Piano behind the embossed white piece, frame around the opening, and then your greeting. Fun and easy to make card!

I hope this inspires you to send a little music into someone’s life. This was much better than me singing happy birthday! hahaha!

Have a great Sunday my friends ~

FUN FOLD: Accordion Z-Fold Birthday Card

Hello Stampin’ Friends ~

Here’s another beauty that will be retiring, the Happiness Abounds Bundle and the Hues of Happiness Designer paper… going to be hard to let this one go. Today I’d love to share this beautiful card with you that is enhance with the Accordion Z-Fold.

For my birthday card I used the Hues of Happiness Designer paper …

I began with my Night of Navy card base and the Hues of Happiness Designer Series Paper … You can see that I have used the coordinating dies to cut the floral pieces for the front. I will share measurement below so your can try out this car too.

Measurements: Card Base: (Night of Navy) 5-1/2″ x 11″ scored at 1-3/4″, 3-1/2″, 5-1/4″ and 7 on the 11″ side. Hues of Happiness and white embosses panels on accordion: 1-1/2″ x 5-1/4″, DSP on inside: 3-3/4″ x 5-1/4″, Folded mechanism: Night of Navy – 3″ x 6″ scored at 3″ on 6″ side and (3) White squares 2-3/4″ x 2-3/4″, Night of Navy mat for the white inside is cut 3″ square and will be placed onto the designer paper as shown. Use the alignment tip that I shared in yesterday’s video.

I used the Painted Texture embossing folder on the two white panels on the inside of the card. Greetings were stamped from the Happiness Abounds bundle in Night of Navy… and to complete my card, I added a few Iridescent Rhinestones. Who doesn’t love a little sparkle?

I hope you have time this weekend to play with these fun folds that I have shared in the past two days. Have fun and enjoy!!

Thanks for stopping by,

Here is a list of supplies used for today’s Fun Fold Accordion Z-Fold Card …

Beautifully Happy & Watercolor Pencils

Hello Stampin’ Friends ~

Today I’m going to introduce you to the magic of Beautifully Happy & Water color pencils, these two make the perfect coloring combination and it’s great for beginner stampers, or anyone of us who just loves to color. The Beautifully Happy Stamp Set can be found in our Sale-a-bration Catalog.

We begin with a plain white (Basic White) piece of paper and stamp your image with the Momento or the StazOn ink. Then I lightly color in my petals with the “Balmy Blue” watercolor pencil … I’m using Assortment 2 (found on page 126) in the Annual Catalog.

Next, I darken the area closest to the center where the flower dips down and again by following the lines in the stamped image. Now you can blend your pencil color with the Blender Pens. These are filled with specialized solution for easier blending. I did the same technique with my leaves in Garden Green, and a little dab of Crushed Curry for the center of my flower.

Once I completed my coloring, which I find so relaxing, in fact … I like to stamp several images and color them all at once, then set them aside for when I need a quick card. The base and front piece for my card are both Basic White. The front piece was embossed with the Timeworn Type 3D Embossing Folder. The flower image was then attached to the front of my card using the Stampin’ Dimensionals.

The greeting comes from the Beautifully Happy stamp set. If those pretty Hollyhocks don’t get you, the beautiful sentiments in this set will. They are a perfect combination to make “beautiful” cards with the perfect sentiment. I used the Double Oval punch to highlight my greeting and pop it up.

To complete the look, I added the Mango embellishments from the Adhesive Backed Milky Dots … my new favorites! You will find them on page 31 of the Jan-April Mini Catalog. The come in four colors; Mango Melody, Night of Navy, Petal Pink and Clear. They just seem to go with anything!

I hope you were inspired to pick up your Watercolor Pencils again, learned a new stampin’ tip, or hack for quick cards. Let me know in the comments below.

Thank you for stopping by today! Have a fabulous Monday.

Here is a list of supplies used for todays card ….