Our retreat stamping was in the bag …

Hello Stampin’ Friends,

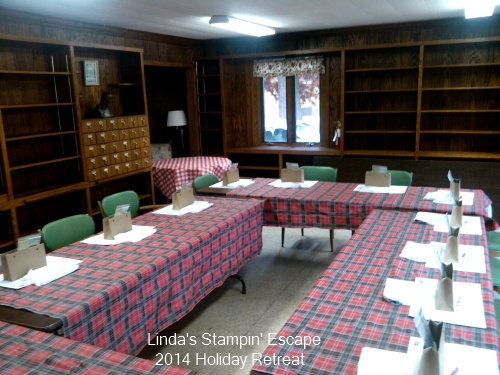
Today is Day 2 of my “Holiday Retreat” series and I would like to take you along to our first stamping session on Friday evening.  After a dinner of hot turkey sandwiches, fruit salad, taco dip & chips and more, we retreated to our stamping area …

Stamp room - blog post

I set up the area before my guests arrive so they can just come in and begin the fun. The projects are pre-cut for them but they still get to do some of the BigShotting, embossing and punching.  On Friday we began with a project, an awesome bag they could take their cards home in and pass on for a gift.

I’m sure some of you recognize the “Paper Pumpkin” bag … One of the benefits of being a Paper Pumpkin supscriber is that you can order “past kits” when available … and this is one of my favorites!  I’ve personally used them many times.   Click Link for more information …

DemoHeader_PastKits_Demo_Feb18_NA

I jazzed it up with our beautiful “Under the Tree” Specialty Designer Series paper found on page 5 of the Holiday catalog. A touch of Old Olive behind it really highlights the snowflake pattern.

000_1613

The precious snowflake comes from the “Snowflake Card Thinlit Dies” and is done in the stunning Champagne Glimmer Paper. I will admit that the large Rhinestones used for the center are now discontinued, but my guests learned how easy it is to color any of their Rhinestones and Pearls with our Blendabilities … we used the “Skin Tone Assortment”.

I swapped out the ribbon from the kit and used the “Natural & Old Olive” Two-Tone Trim for the handles … they look so cool! All the colors came together so nicely to create a beautiful holiday bag that could be given to a man or women.

Tomorrow I’ll be sharing a few of the swap cards that my ladies created … we did an all occasion swap! There was a lot of talent in out stamping group!

The Stampin’ Supply List for today’s project is listed below.

Thanks for stopping by ~

blog-closing-small

Just click on the “Weekly Deals” to view.

Main_weeklydeals_olo_10.7-31.2014_SP_UK


STAMPIN’ SUPPLY LIST ….


Road to the Holiday Stampin’ Retreat …

Hello Stampin’ Friends,

Today I will be sharing a part of our Holiday Retreat with you. Follow me for wonderful trip on our road to the Holiday Retreat ….

10409707_10203171091703724_8630962295075691698_n

Photo was taken by Kris H.

We stay at the beautiful Green Lake Conference Center in Green Lake, WI.  Our house is a 1930 English Manor and nestled beautifully on the lake. This photo was taken during our lunch break … a time set aside so our guests can dine and then explore these beautiful grounds.

63934_740939272609550_6715905335555713241_n

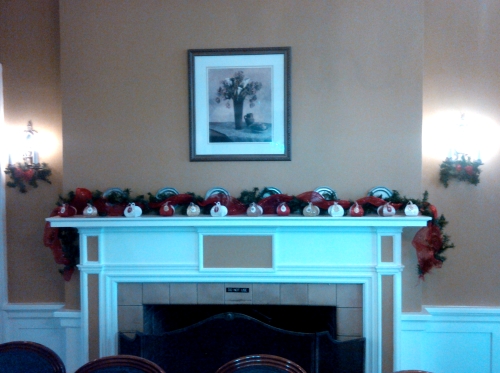
This is the view  inside that greets our stampin’ friends as they arrive…

IMG_20141024_104027

The fireplace is adorned with a touch of Christmas Cheer and the dazzling little Curvy Keepsake boxes. Each guest got to take one home with them. We treat them to many little surprises throughout their retreat stay.

IMG_20141024_103758

Close up shot of our shimmery delights ….

IMG_20141024_103846

We added contrasting tags on our boxes to highlight the snowflake embellishment, and then embellished the snowflake with a rhinestone in the center!

One of the projects our guests made was this cute little Santa box also created with the Curvy Keepsakes die. Both of the boxes were inspired by a collection of boxes I have found on Pinterest.

000_1612

Click here to view my “Curvy Keepsakes” Pinterest Collection

I also have for you, a quick video on how easy it is to create these fabulously fun boxes…

I hope you have enjoyed the journey so far, I will be back tomorrow with more of our Holiday Retreat.

Thanks for stopping by ~

blog-closing-small

STAMPING SUPPLY LIST …

Christmas Super Stars …

Hello Stampin’ Friends,

Today I’d like to share with you some fabulous ideas from our NEW “Holiday Supplement” … that’s right, for the first time ever Stampin’ Up! has released a supplement to our Holiday Catalog!  It is full of new & exciting products designed for you in mind and to meet your Holiday needs by providing fabulous kits for home decor, card making, and memory keeping.
 20141020TH_HolidaySupplement_en-US

CLICK HERE TO VIEW / CONTACT ME TO GET A COPY

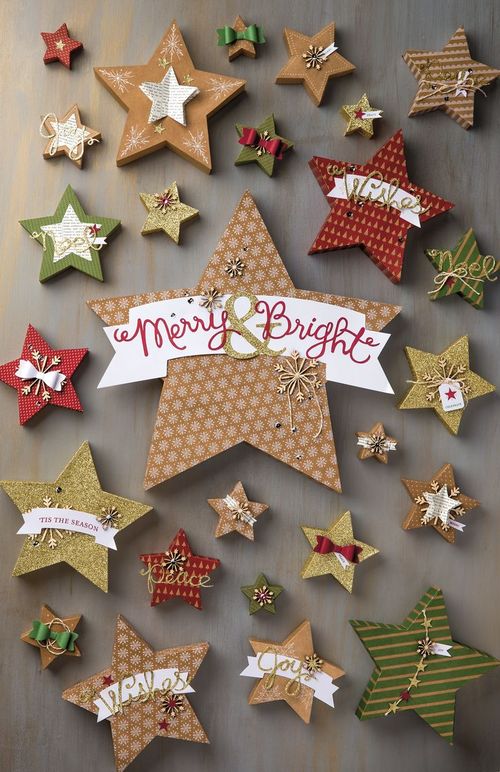
My favorite, and the one I’m going to focus on today is the “Many Merry Stars” Simply Created Kit. Yes, a kit … designed so even novice stampers can create these fabulous stars. I like that, a time saver, especially around the holidays.
6a017744af3aa5970d01b7c6f6e15c970b-500wi

The Many Merry Stars kit is filled with die-cut pieces, peel-and-stick adhesive edges, and accents galore! Easy… yes, but you can still put your own twist to them if you’d like. Here are a few ideas from the home office …

0e8f316c55d8c9d682b830824e8f70bb

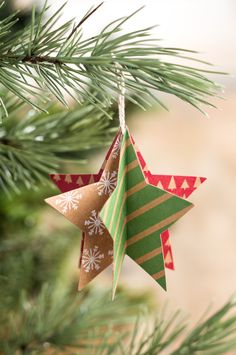
You can make fun and colorful ornaments for your tree with the Many Merry Stars kit from Stampin’ Up!
 

2ef4b8c23454ea3a5054d407bc9d86f9

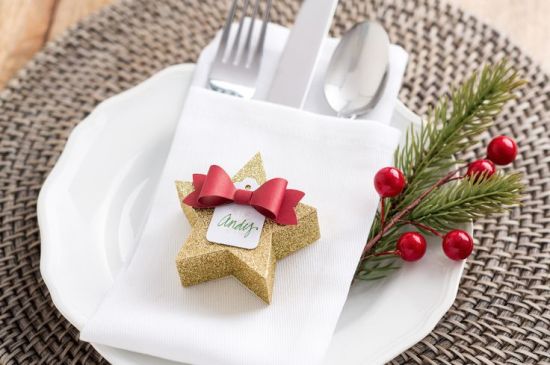
Make your table setting with really sparkle with the adorable star boxes… I love this idea!
8efe677b45c59a1b609dc6fe64d8ef0e

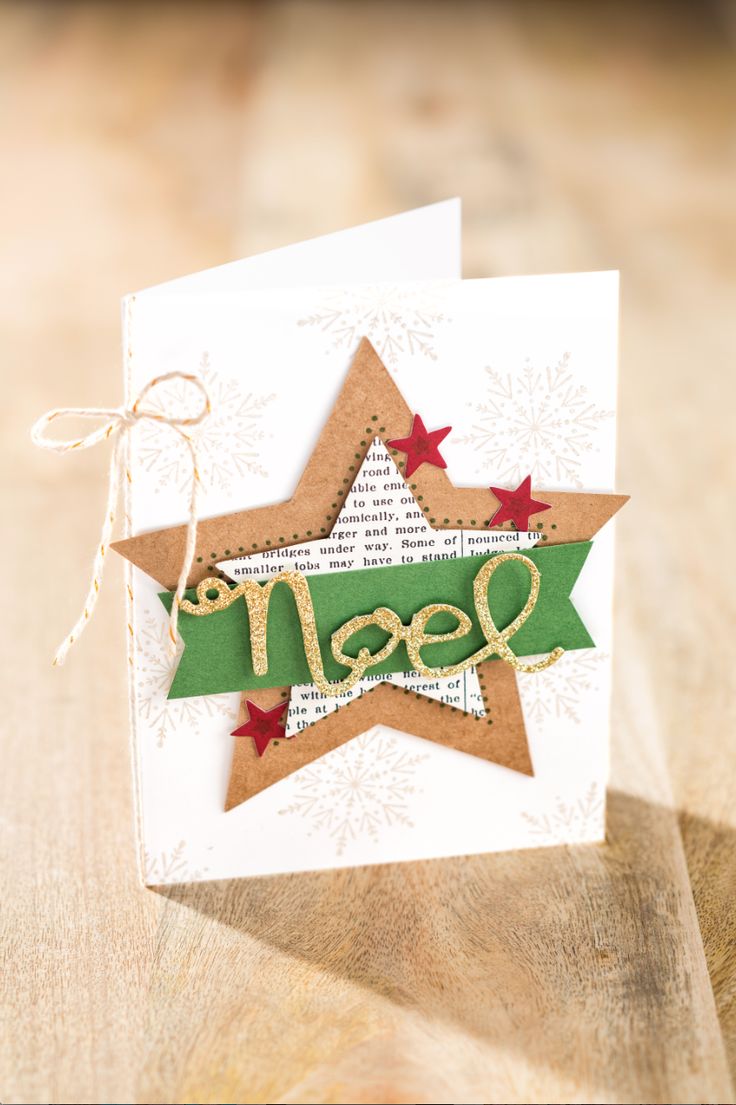
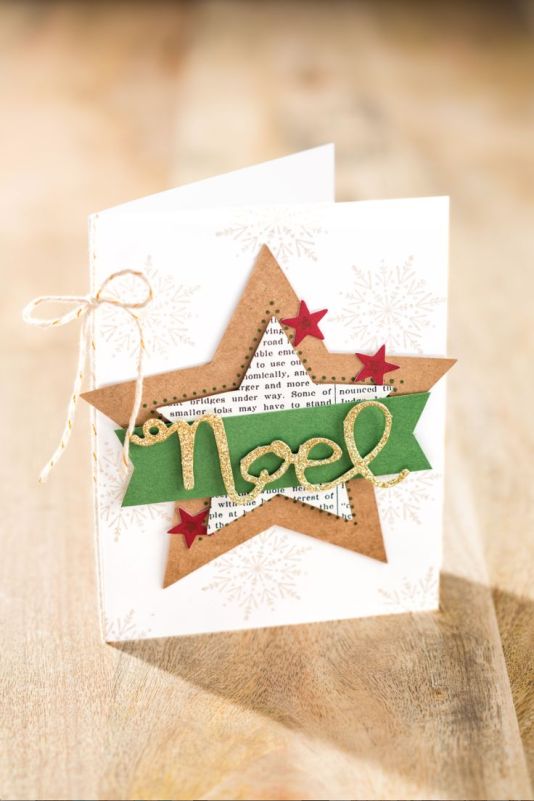
And how about using them for …. Christmas Cards! So, so many things you could do, these are just a few.

 I’ve got mine, and you can be sure my house will be filled with these stars! Heck, I may even use them to “gift” with … because they are so adorable! I will finally have something neat to put those “gift cards” in!

Let me know if you would be interested in getting together to create some of these … we’ll have cookies and hot chocolate too! Just leave me a message below!

Thanks for stopping by today.

Have yourself a terrific Tuesday ~

blog-closing-small

ORDER YOURS TODAY …. Just click on the link below


All is Calm Christmas …

Hello Stampin’ Friends,

I hope you had a wonderful weekend. It’s Monday and back to work for many of us, so I’d like to begin with a simple, calm Christmas card.

Yesterday I showed you an easy layout which included the dimensions you’ll need to make the card. I also suggested that you could use this layout for any type of card, so today I’m here to show you …

000_1606

The card was created using the Lost Lagoon cardstock and “All is Calm” Designer Series paper. The pop of Whisper White really makes the “Merry Christmas” stand out. The greeting comes from the “Making Spirits Bright”, found on page 48 in the Holiday catalog.

All of the layers are “popped” up, using the Stampin’ Dimensionals … it gives so much depth and texture to the card.

I couldn’t resist adding the beautiful silver glimmer snowflake to really make the card feel like Christmas. The snowflake comes from the Snowflake Card Thinlet Dies (9 dies) in our Holiday Catalog.

000_1608

Hope you enjoyed my Christmas version of the simple layout I shared yesterday, and thank you for stopping by.

Have a great week ahead ~

blog-closing-small

LINDA’S STAMPIN’ SUPPLY LIST


Introducing … Gentle Peace Stamp Set

Hello Stampin’ Friends,

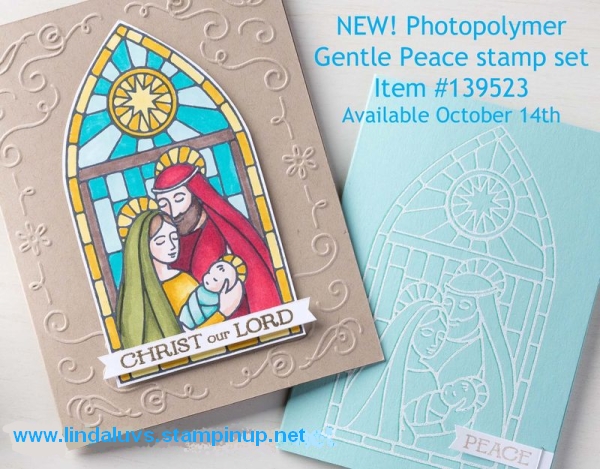
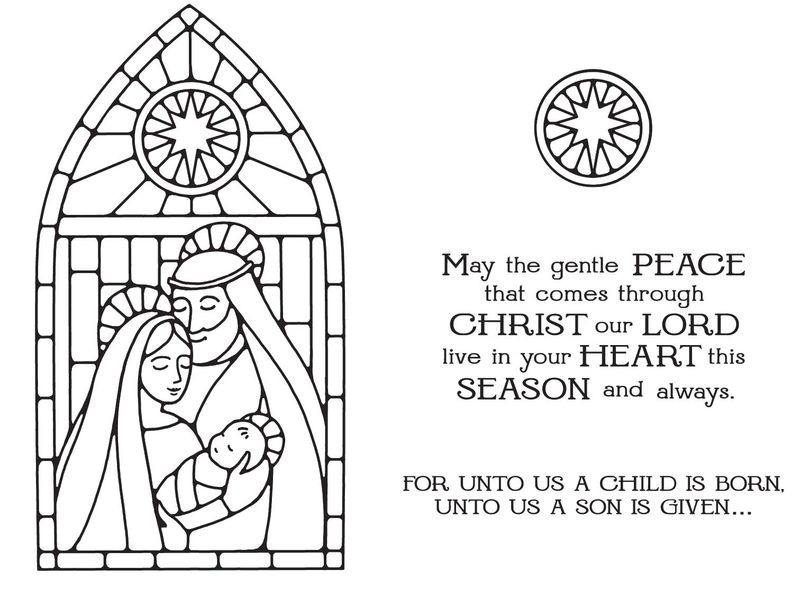
Today I have a new product share for you.  A brand new photopolymer stamp set just in time for Christmas, and it looks like a beautiful stained glass window.

6a00e554f4a3a4883401bb0794c762970d-800wi

Designed specifically with our new alcohol-based Blendabilities markers in mind, it’s perfect for any coloring medium you prefer.  You can see by the second sample, you can create an amazing card just by embossing it too. Whether you want to do super-detailed cards or something simple but meaningful–Gentle Peace is a great choice!


6a00e554f4a3a4883401b8d0799282970c-800wi

Gentle Peace is available beginning October 14th, but you can pre-order it NOW.  I recommend that, because I have a feeling this one is going to go on backorder pretty much instantly! The set is clear photopolymer and costs just $15.95. Email me today and I will put the order in bright and early on the 14th so none of us misses out! lindaluvs2stamp@aol.com

I look forward to connecting with you …

Stop back this week as I will be sharing more Halloween fun with you.

Have a wonderful Sunday.

blog-closing-small

Time for Weekly Deals!

Hello Stampin’ Friends ~

CM1634B

It’s time for the weekly deals and today I’m going to list my favorites, CLICK HERE to view all the products on sale this week.

I’m going to start with one of my all time favorite products … the Silver Glimmer Paper.

With Christmas just around the corner this stunning, no-mess way to add glitter accents is perfect for your card making. The glitter won’t brush off this cover-weight paper!

Here are a couple of my Christmas Cards using the Silver Glimmer paper …

000_1433 000_1470

HOT STAMPIN’ TIP: When cutting with framelits, place your framelits on the un-glittered side … Because it is cover weight (a bit heavier than cardstock) and has a protective layer, cutting from the back side works beautifully.

The next product I would like to showcase is the “This and That Journal” … what a perfect gift for a your kids or grandkids, then invite them over to embellish the cover (if you haven’t done it for them).  Journals are an age-old gift and are very popular now.  It’s a gift that keeps on giving through out the year!

Again, these are just two of the items I love, there’s more framelits and punches and ribbon – Oh my!

CHECK IT OUT HERE

I have put the links for the key ingredients for my cards below.

Thank you for stopping by and enjoy your day ~

blog-closing-small


Simply Sunday: Christmas

Hello Stampin’ Friends,

I hope this Sunday finds you and your family well. Today I would like share with you a quick yet beautiful card, along with a paper-savings tip!

I will begin with the “Trim the Tree” Designer Series Paper Stack and the Cherry Cobbler 1″ Sheer Linen Ribbon.  My intent was to create a card that looked as magnificent as a present under the tree!

000_1542

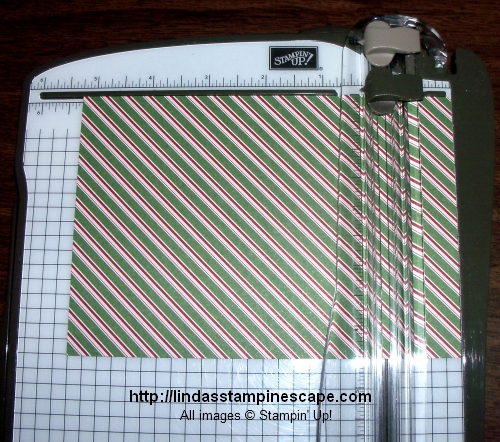
The Trim the Tree DSP is 4-1/2″ x 6-1/2″ and will have to be trimmed down.  Put your paper into the cutter horizontally (longest length) to 5-1/4″ and trim.

000_1547


Now turn 90º – align paper to 4″ mark and trim.

000_1548


Here is what you have … save your extra pieces as you will be using them!

000_1549

As you can see, the skinny piece goes on the inside of your card, and the wide piece fits nicely on your envelope.  You will need to trim off just a small piece!  No scraps! HINT: Be sure to get it on securely as it needs to run the the post office machinery.

000_1545

The greeting is from our Hostess special … YOU can earn it FREE by hosting a stampin’ party or placing a qualifying order of $300… gather your friends, it’s that easy.  Contact me for more information.

I hope you found this post as fun as a present under your tree!  Enjoy your paper savings!  To purchase any of these items just click on the links posted below.

Thank you for coming to my blog and have a great day!

blog-closing-small


Guest Stamper: Vicki T.

Hello Stampin’ Friends,

Today I would like to share a card from our Star’s Group gathering.  Our theme for our card swap was Christmas and this is Vicki’s card …

000_1529

It is made with the beautiful Wondrous Wreath stamp set from the Holiday Catalog.  The beauty of this set is that you can layer the colors and Vicki has demonstrated that so well.

It also coordinates with the Wonderful Wreath Framelit Dies … and when you bundle the two, you can save 15%, which can be used for more of your Christmas shopping!

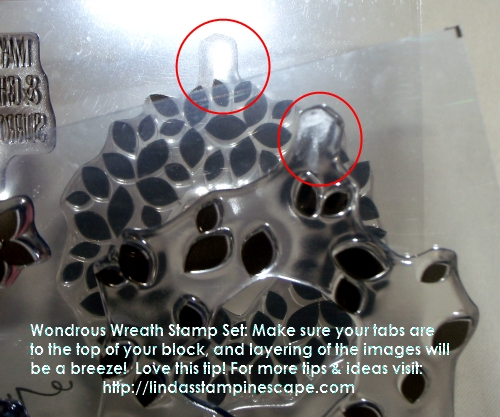
Vicki also shared a valuable tip with us … there are tabs on the stamps themselves and are there to aid you in lining up your layers properly! Genius!

000_1535

You will definitely be seeing more from this stamp set! Thanks Vicki for the beautiful card.

Have a wonderful day ~

blog-closing-small


Guest Stamper … Jenny’s Christmas Card

Hello Stampin’ Friends,

Hope you had a nice weekend … it looks as if we are in for a fabulous week here in Wisconsin.  Warm days and cool nights and today being the first day of Autumn – I love it!

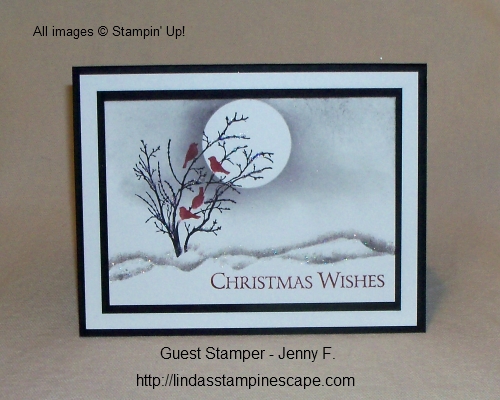
Today I am going to share a card from my sideline / stampin’ sister Jenny F… we did her card as a Make & Take at our meeting. Jenny used a masking technique and sponging, as I did yesterday but it’s a totally different look, another beautiful Christmas card.

We began by stamping our greeting … you can choose any greeting that you have at home or one of the new ones in our Holiday catalog.

000_1499

The second step was a torn piece of paper, a sponge and the gray ink to create the layers of snow.  Just lightly pull the ink into the paper to add a bit on ink and a softness to the line.

Next, was the Serene Silhouette stamp set and we used markers to color it so our birds could be red.

The moon was created next with a mask made from the 1-1/4″ circle punch and two-way glue pen.  The two-way glue pen when applied and then let dry, will work like a post it … sticky but removable.  Once the circle is placed on the card, you simply sponge around it to create clouds, then lift it off and you’ll have the Moon!

Lastly we added glitter … always a holiday favorite on your cards.

Thank you for stopping by today, hope it’s a good one.

blog-closing-small


Christmas in Pink -n- Gray

Hello Stampin’ Friends,

Hope you are having a wonderful weekend so far.  I hosted the last of my clubs for the month yesterday and this afternoon I’m off to work.  I have to train a new employee today.

Yesterday I promised that I would share the Christmas card that I pulled together at my Star’s meeting on Friday.  I tried to use as much of the paper I had already cut, so I stuck with the Whisper White but swapped the Rose Red for Going Gray.

I already had the Pink Pirouette seam binding cut so I thought … what goes good with pink? Hmmmm… GRAY! I have been known to make a few cards with some very non-traditional Christmas colors so here’s my first for the season …

000_1491

I used the tried and true “Lovely as a Tree” and stamped it in Smokey Slate, then used the greeting from the beautiful “Wondrous Wreath” stamp set. This set comes with the coordinating framelits, so you can bundle the two and save yourself 15%!!

Combining the embossing technique with our decorative masks creates a beautiful effect, especially when you sponge the embossing with an ink to really make them POP! A touch of dazzling diamonds glitter on the tree really gave our card that holiday effect.

The sweet and soft Pink Pirouette seam binding is added for additional dimension, and it just looks prettier!

What better way to finish off your card then to add some star’s to the inside too, and the easiest way was to use our new “Confetti Star’s Punch”. I even slid a piece of Pink Pirouette cardstock behind it to tie our color pallet together and finish off the card.

000_1493

Not bad for creating a card on the spot! The layout was inspired by the card my club members made this month, so I hope they enjoy another sample.

You may begin shopping by clicking on any of the items used for today’s card.

Thank you for taking time out of your weekend to stop and see me.

Have a beautiful day ~

blog-closing-small


Trimming the Tree Christmas Card …

Hello Stampin’ Friends,

Welcome to a brand new week! Yesterday I shared a “glitzy” Christmas card so today I’d like to share a card inspired by one of my Christmas trees that I decorated in the past.  I did a nature inspired tree with raffia, cardinals and stars.

100_2325

The card reflects the tree in many ways, the colors are warm and inviting … Crumb Cake, Garden Green and Cherry Cobbler. I used the linen thread to reflect the raffia on the tree.

000_1471

To pull the cherry color in I used the Basic Pearls and colored them with the new Blendabilities “Cherry Cobbler” collection.  I color them while they are still on the paper and then transfer them to my card.

I created a focal point by highlighting the tree with a “Crumb Cake” oval.  I used dimensionals to pop it up and create added dimension to the card.

I even brought the stars in with the use of the “Trim the Tree” paper stack.  I love those paper packs … when I cut down the paper to the desired size (usually 5-1/4″ x 4″) I use the left over pieces to decorate the inside of the card and my envelope.  I love it when everything coordinates … one of the things that drew me to Stampin’ Up!

The sweet “Merry Christmas” greeting is from the “Good Greeting” Hostess stamp set … which you can get for FREE when you host a $300 stampin’ party.  That is in addition to the Hostess benefits you already get.

000_1477

So gather your friends and lets make some awesome cards, pull together a book show, or just place an order yourself.  Choose any of these options, I’d love to help you get your “Good Greetings” stamp set! Contact me today … this offer ends October 31st!

As always, I have the list of supplies that I have used to make this card below.  Click on any one for full details or to begin your shopping experience.  Please let me know if I can help in any way.

Have a wonderful week ~

blog-closing-small


Season of Stars ….

Hello Stampin’ Friends,

It is beginning to get a bit chilly out…  Are you starting your Christmas cards yet?  Are you thinking about them?

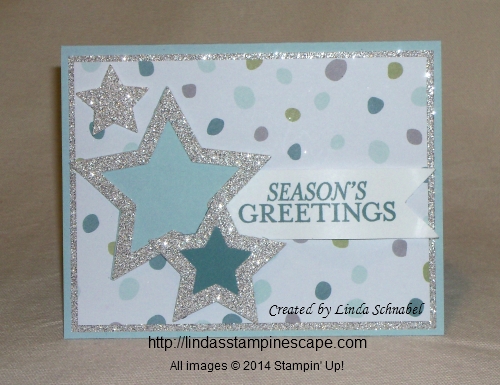
Well, today I would like to share with you a beautiful Christmas card made with one of my favorite new accessories … the Star Framelits!  I teamed it up with the “All is Calm” Specialty Designer Series Paper which will surely soften the winds of winter.

000_1470

I knew I wanted to use the Silver Glimmer paper, so I layered my stars … smallest and the next two sizes up for my card. I placed all 3 onto the glimmer paper and aligned the product markings on the stars to ensure a perfect alignment.

000_1461

Each BigShot cuts or embosses differently … my stars needed a bit of help coming apart, so next time I will add a bit of a shim by placing a piece of paper into the sandwich as well. This only happened when cutting my glimmer paper and is well worth it.

My base color is the Soft Sky which coordinates with the All is Calm paper and really sets the tone for the card.  I used that and Lost Lagoon behind my stars for an added pop of color.

Adding a layer of the Shimmer paper between the base and the designer paper just adds that “holiday” touch to the card.

000_1468

This angle shows the two smaller stars and the banner are popped up with the Stampin’ Dimensionals. It creates wonderful dimension to the card … and brings it to life!

The greeting comes from the “Bright & Beautiful” stamp set found in the Holiday catalog and is stamped in with Lost Lagoon. The banner was trimmed at the end using the square punch.

The items used for creating this card are listed below, click on anyone of them for more details or to begin your shopping at my on-line store.

Thank you so much for stopping by.

Hope you weekend is a wonderful one ~

blog-closing-small


Holiday Trees …

Hello Stampin’ Friends,

As promised, I am going to show you what I did with the leftover Designer paper from yesterday’s card.

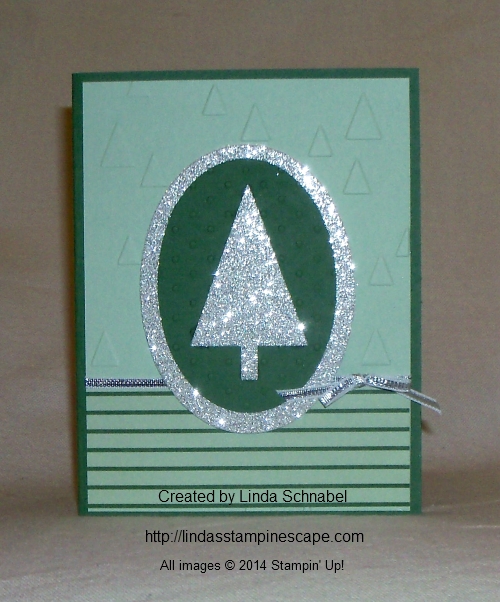
Again I kept it simple and my color pallet was taken from the “Trim the Tree” designer paper; Garden Green and Pistachio Pudding … with a pop of Silver Glimmer Paper.

I used the new “On Point” embossing folder to texture the Pistachio and the Perfect Polka Dots folder on my tree.

000_1433

The tree was punched from the new “Tree Punch” that coordinates with the “Festival of Trees” stamp set.  It was then framed using the Ovals Collection Framelits and Silver Glimmer Paper.

I use the Fast Fuse to attach my framed tree to the Glimmer paper … it holds beautifully.  If you don’t have it yet, then I suggest glue dots or dimensionals, both will work nicely.

I finished off my card with a cute little silver bow, using the 1/8″ Silver ribbon.  So … are you wondering what I did with the tree I punched out?  Check it out … I’ve posted after the list of ingredients.


Here is a list of our current Stampin’ Up! promotions …

contact me hostess special  PP - 50 off

Just click on the picture (link) for full details or CLICK HERE to view the all.

Thank you for stopping back today.

Hope you have a great day ~

blog-closing-small

 Here is a list of today’s ingredients …

000_1439

Thanks again … Have a great day!


Time for a “Man Card” …

Hello Stampin’ Friends,

We are always looking for masculine card ideas, even at Christmas time … well look no further!  I have the answer to your “I need a manly Christmas Card”  search.

I wanted to keep it simple so I chose the monochromatic color scheme of Early Espresso and Whisper White with just a pop of Pistachio Pudding.

Today I’m using the “Trim the Tree” Designer Series Paper Stack to create my “manly” Christmas card.    This paper stack has so many delightful patterns you will be able to make a ton of great cards with it. I picked the “trees” and teamed it with the Woodgrain embossing folder.

000_1430

Instead of a bow, I used the Thick Bakers Twine and simply tied a knot into it.  It’s great for guy cards and added a nice touch of dimension.

The greeting “peace & joy” is from the exclusive “Good Greetings” hostess set.  Remember you can get this free when you have a qualifying stampin’ party, book show, or order.  Contact me for details.


Here is a list of our current Stampin’ Up! promotions …

contact me hostess special  PP - 50 off

Just click on the picture (link) for full details or CLICK HERE to view the all.

Thanks for stopping in today, tomorrow I will have more with the left-overs from the designer paper!

Have a wonderful day!

blog-closing-small

 Here is a list of today’s ingredients …


Festival of Trees …

Hello Stampin’ Friends,

So sorry I missed you yesterday … I was not on holiday, but was having technical difficulties, but I’m back and as promised I have the “Good Greetings” and “Festival of Trees” card to share.  Actually, two cards today!

A sweet and simple card for Saturday (now Sunday) that will brighten anyone’s holiday spirit.  I picked  Cherry Cobbler and Almost Artichoke for my color pallet.

The tree I used, one of five in the set is fun to use when you pop that second color in with the coordinating dots!  They even have garland included in this set.  If only decorating our trees at home where this easy!

000_1424

My background was embossed with the “On Point” embossing folder that is also in the Holiday catalog.  You know … you could use it for a cute Birthday card – just have them pointing as if they were arrows!  Or for those of us from Wisconsin, turn it upside down … Ice cycles falling from our roof!  LOL

My greeting of course is the “Good Greetings” stamp set… Free with a qualifying party of order.  I used the square punch to create the banner ends and then curled them up for a more dramatic look.  A pretty little bow created with the bakers twine completes our first card.


contact me hostess special

I used the same color pallet and stamp sets as I did for the first card.  I love showing how versatile the stamp sets are, and how different cards can look when just changing up a background.

On this card, I stamped the background with the “Good Greetings” stamp set instead of using the embossing folders.  I think this is a fun, creative way to use your greetings!

I created my focal point on this card with the use of the Oval Framelit dies, it really shows off our floral tree so beautifully.  The trees on both cards were popped up with Stampin’ Dimensionals.  I love that extra dimension on a card.

000_1428

This card was completed by tying a simple bow with the Cherry Cobbler seam binding… it adds a bit more elegance to the card, where the bakers twine fit better on our first card.  Each type of ribbon has a purpose, and I’m so glad we have a wonderful variety to choose from.

Hope you enjoyed today’s showcase of the Good Greetings and Festival of Trees stamp sets.  The Festival of Trees can also be purchased in a bundle, with a coordinating punch!  I love coordinating punches… and Bundles!  Who doesn’t love to save 15%!

Thank you for stopping back …

I hope you have a wonderful day.

blog-closing-small

You may click on the image for more details or to begin shopping at my on-line store.