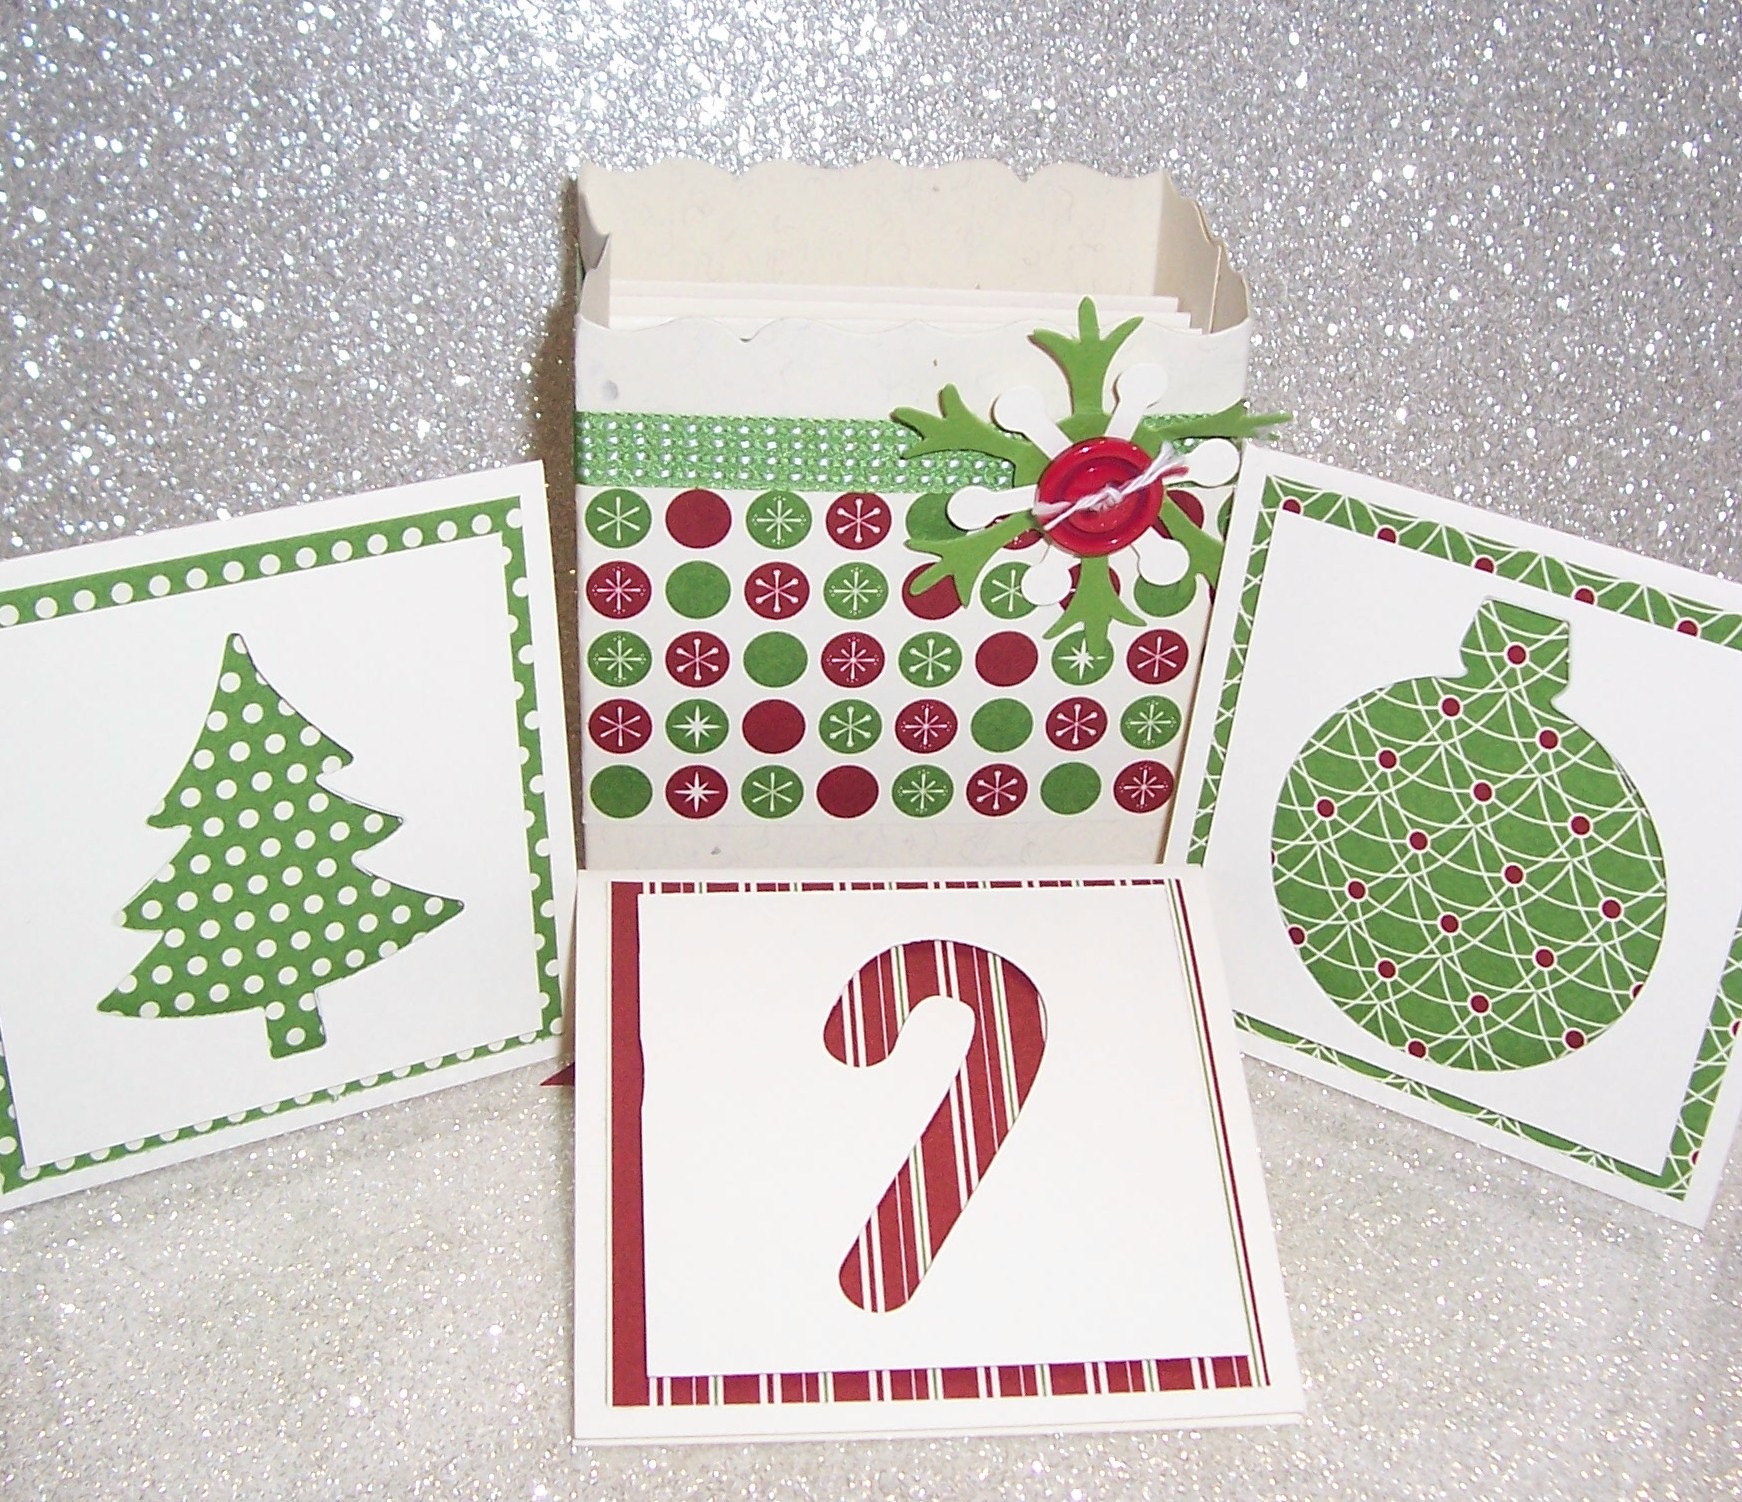
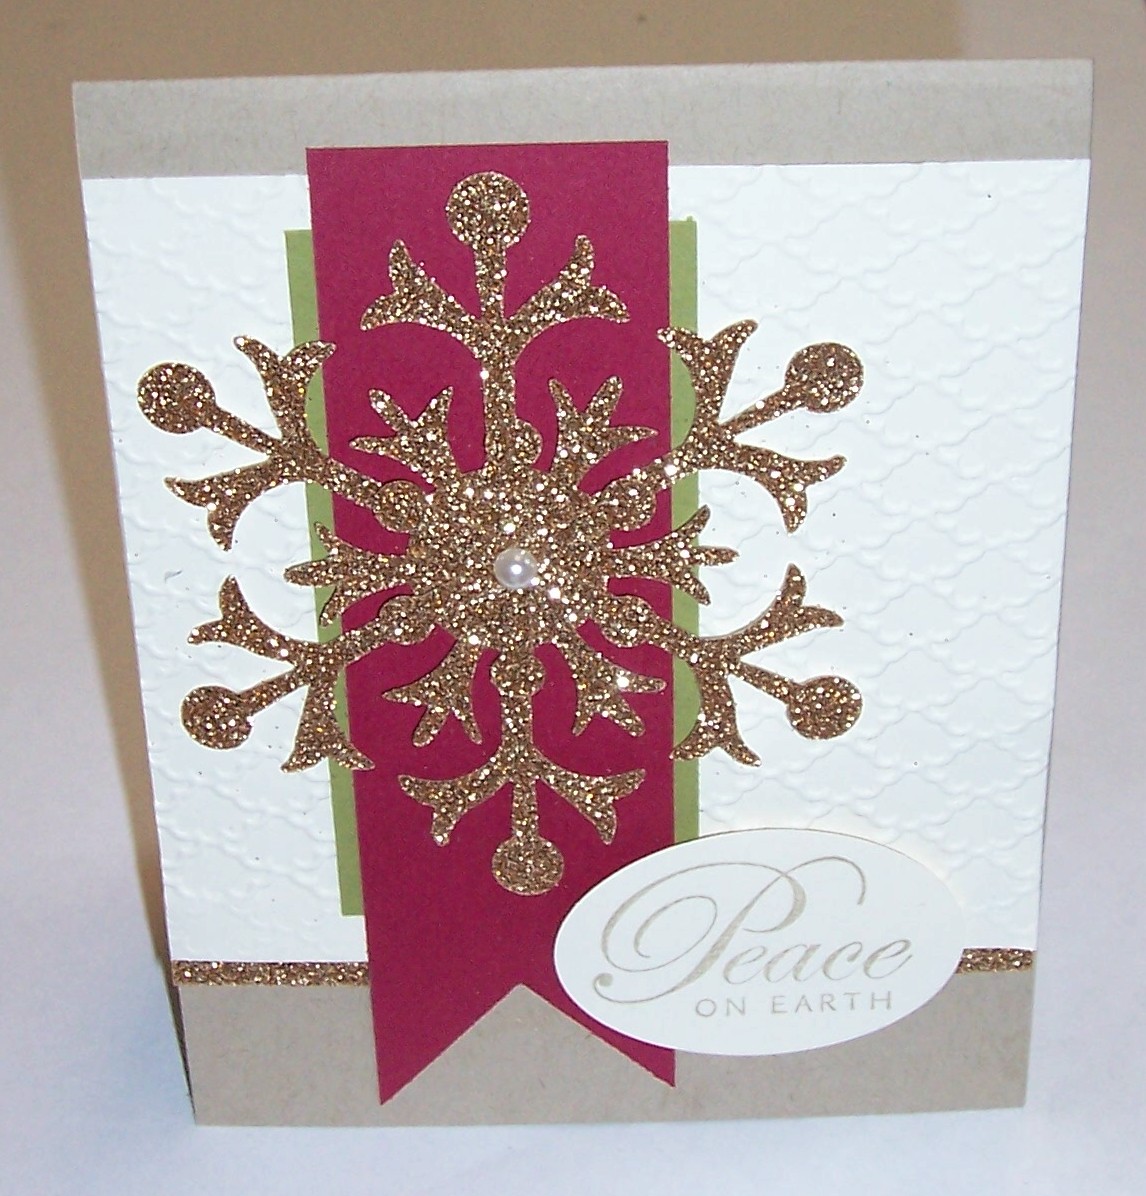
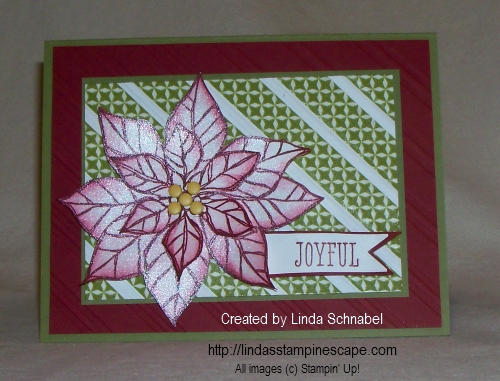
Tis the Season for Sweet & Simple …

Happy weekend stampin’ friends!

Another weekend is upon us … it seems the days are just flying by so fast.  Hard to keep up sometimes!  I’m sure you feel the same way.

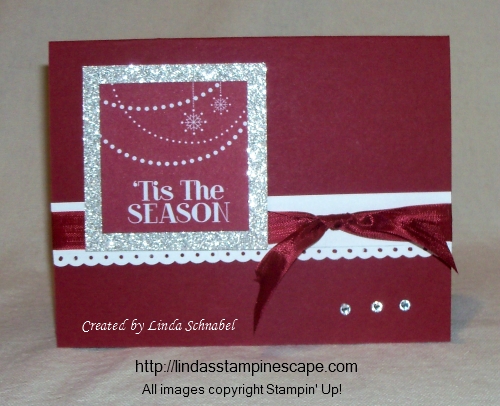
As I was sitting at my stampin’ table thinking of what I was going to create for you, I thought … “it’s got to be quick & simple”.  A pretty card, that’s easy to make.  So here is what I came up with …

000_0348

I first saw the stack of tags sitting on my table from the “Season of Style Designer Journaling Tags” in the Holiday catalog.  There are 35 die-cut, printed tags that were created to just slide into the divided page protectors and coordinate with the Seasonal Stripes Album.  I thought … why just for scrapbooking!  I need a card and I need it fast!

132808S 132259S

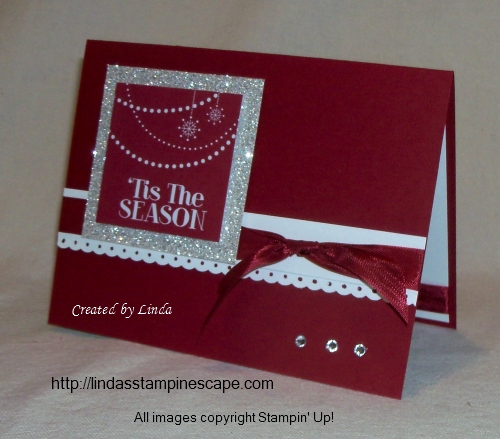
I picked the “Tis the Season” and matted it with our “Silver Glimmer Paper”… who doesn’t love a little glitz for the holidays.  I wanted to add a bit of Whisper White to my card, to pull out the white on the tag.  It looked OK, but I wanted that extra touch, so I added a strip punched out with the “Dotted Scallop Ribbon Border Punch“.

000_0351

Next I added my ribbon just because I wanted ribbon … and I thought it “tied” the card together.  Get it … “tied” – ha ha… my granddaughter is rolling her eyes, she didn’t think it was funny 🙂  Guess I’ll keep my day job and not run off to be a stand up comedian.  Back to the card … I also added a strip of ribbon to the inside of my card just to jazz it up a bit.

To finish off the card and create a nice balance, I added another touch of glitz, the 3 rhinestones.   So simple … so pretty, and that’s how we want to make our holiday cards.

Thanks for stopping by today.

Enjoy your weekend!

blog closing-small

Here is a list of supplies used for today’s card …

 ITEM

 PRICE

 DESCRIPTION

 132808

 $4.95

Season of Style Designer Journaling Tags

 124005

 $4.95

Silver Glimmer Paper

 119275

 $15.95

Dotted Scallop Boarder Punch

 120992

 $6.95

Cherry Cobbler Seam Binding

 119246

 $4.95

Rhinestones

Clicking on the item number will link you to my on-line store.  Thank you!

Warmth & Wonderful Christmas Greetings …

Hello Stampin’ Friends,

I hope you are having a wonderful weekend!  I have another Christmas card to share with you today.  I guess my mind is just on Christmas these days … I’ve been placing candy orders at work (for Christmas) and I’m preparing for my Holiday Retreat at home, so … Christmas, Christmas, Christmas.  I don’t mind, it’s quite fun.

I did however have a bit of a break today as our town celebrated Trick or Treat.  I had an Alien invasion … and he brought his kitty along!  lol …  It is my youngest grandson Isaiah and his sister, Hailey.

000_0307-small

Here is my little alien revealed… A bit of a shock for Hailey I see!  Makes for good scrapbooking captions, doesn’t it!!

000_0308-small

We didn’t have too many trick or treaters, so as I was busy designing cards (Eileen was cutting) … I set the bowl of candy out and let them have fun!  To my surprise, there was still candy remaining in the bowl.

Now … on to today’s card share.  It is a simple card but heck, when you have to make a bunch of cards, simple is the way to go.

I started with a Whisper White base, then embossed the next layer of Whisper White with the “Northern Flurry” Embossing Folder.  I love the way layering white on white looks.

000_0316

Believe it or not, the strip of designer paper was a scrap piece left from my club cards this month.  It comes from the “Season of Style” paper pack in the Holiday Catalog.

I then topped off the designer paper with the “Cherry Cobbler Seam Binding” … this is one of my favorites for ribbon.  The seam binding lays nicely and ties so easily.  One tip though … when tying your bow, don’t pull from the ends because it frays easily, grab it closer to the knot.

I looked around a bit for a greeting that I thought would like nice with this card… then I found it in the “Warmth and Wonder” stamp set.  This is a Hostess set from the Holiday catalog.

000_0317

You can your “Warmth & Wonder” Stamp set for free with qualifying sales / order of $150 or more.

131883L

Ask me how you can do an on-line party (lindaluvs2stamp@aol.com) then we’ll get you this set and more for free!  We all need supplies for our Christmas cards, so get in touch with your friends and let’s get together!

Enjoy the rest of your weekend,

blog closing-small

Here is a list of supplies used for today’s card …

 ITEM

 PRICE

 DESCRIPTION

 131880

 Hostess

Warmth & Wonder – WOOD

 131883

 Hostess

Warmth & Wonder – CLEAR

 120902

 $7.95

Northern Flurry Emboss Folder

 132181

 $6.95

Season of Style Paper Pack

 120922

 $6.95

Cherry Cobbler Seam Binding

Clicking on the item number will link you to my on-line store.

Merry Little Christmas …

Hello Stampin’ Friends,

Today’s card share is a simple holiday wish.  I love using the new foil sheets in the Holiday catalog …

I began with the idea of embossing the “Foil sheets” on page 28 of the Holiday Catalog, I chose the silver.  The foil sheets are thicker than paper, but not as thick as cardstock… so they are very easy to use.

000_0305

Not really sure why I chose the color Real Red to go with my card … I guess it just called out to me.  However, this simple pattern could be repeated with any of our beautiful colors as well.

My emboss folder of choice was the new “Stylish Stripes” – pg. 22 of the Holiday catalog.  Don’t you just love the simplicity of this embossing folder and the way the stripes run, it just emulates Christmas.  It gives it a classy look done in the silver foil.

Once my silver foil sheet was embossed, I searched for a greeting.  I wanted something that expressed just a bit more than Merry Christmas or Happy Holidays … so I chose the “Merry Little Christmas” stamp set on page 27 of the Holiday catalog.  Stamped it in Real Read onto Whisper White cardstock …. Hmmm, I needed something to tie these together with the foil.

000_0306

Then it hit me … wrap the Cherry Cobbler Bakers Twine “into” the grooves of the Stylish Stripes embossing folder!  Genius!  OK … well maybe I’m not a genius, and it could possibly have been done before, but I thought it looked really cool!   I love the “candy stripe” look that it adds, especially with the silver.  Who say’s you can’t be fun and classy  at the same time!

To finish it off, I tied a little bow and secured it to the greeting, then popped my greeting up with the Stampin’ Dimensionals.

Hope you enjoyed today’s card … I’d love to hear what YOU think.

Have a simply awesome day!

blog closing-small

Christmas Wishes in Silver …

Hello Stampin’ Friends,

Hope you are having a good weekend.  It’s a bit chilly here in Wisconsin, and I have to admit … I have turned the heat on a time or two!

In my last post, I shared with you a simple card using the “Joyful Christmas” stamp set, so I wanted to show you another that is entirely different.

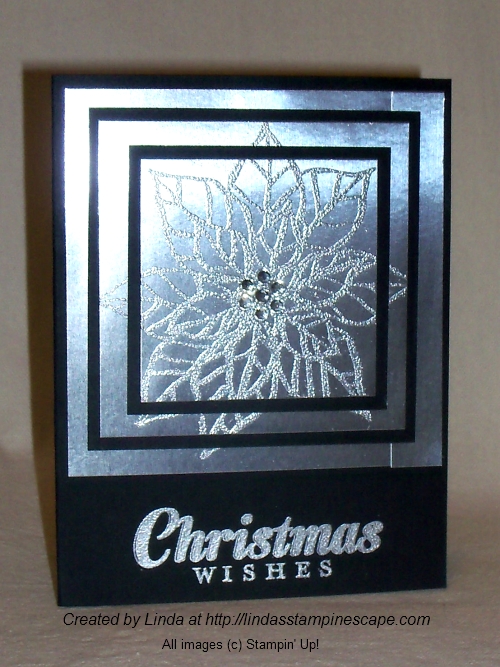
Today’s card share is a non-traditional but stunning Christmas card.  Normally we don’t think of using black for Christmas cards, but paired with the beautiful Silver Foil Sheets, you can’t go wrong.

000_0282

I teamed up this color combination with the “Triple Time” Technique to create this elegant card.  It really was quite easy to create.  I began with a 4 x 4 inch square in the silver foil.  I cut my black mats 1/2″ smaller.  With that in mind, the silver squares are: 4″ x 4″, 3-1/4″ x 3-1/4″, and 2-1/2″ x 2-1/2″.  The black will measure: 3-1/2″ x 3-1/2″ and 2-3/4″ x 2-3/4″.

Once all your layers are cut, you take out the black mats, stack up the silver … then stamp and emboss.

I used the Silver Metallic Encore pad as my ink medium, then the silver embossing powder.  You will notice some gaps between the layers of silver… it’s OK because your black mats will cover that up.  Be sure to align your stamped image before assembling.

000_0288

My Christmas Wishes come from the “Joy to the World” stamp set, and are also stamped with the Encore pad, then embossed with the silver embossing powder.

Hope you enjoyed the two different styles of the poinsettia, Joyful Christmas stamp set.

Thanks so much for sharing your day with me.

Stop back again for more inspiration.

blog closing-small

Here is a list of supplies used for today’s card …

 ITEM

 PRICE

 DESCRIPTION

 131802

 $22.95

Joyful Christmas – WOOD

 131805

 $16.95

Joyful Christmas – CLEAR

 131796

 $21.95

Joy to the World – WOOD

 131799

 $16.95

Joy to the World – CLEAR

 132178

 $3.95

Silver Foil Sheets

 109131

 $4.75

Silver Embossing Powder

 129053

 $29.95

Heat Gun

 119246

 $4.95

Rhinestones – Basic Jewels

Clicking on the item number will link you to my on-line store.

Christmas filled with …

Hello my Stampin’ Friends,

Wow … the weekend is upon us again.  I cannot believe how fast this year has gone, and Christmas is just around the corner.

Today’s card share is a little love and inspiration for your Christmas card making.  This card began with scraps!  Of course, you and I know, anything bigger than a 1″ piece is probably not scrap.

000_0278

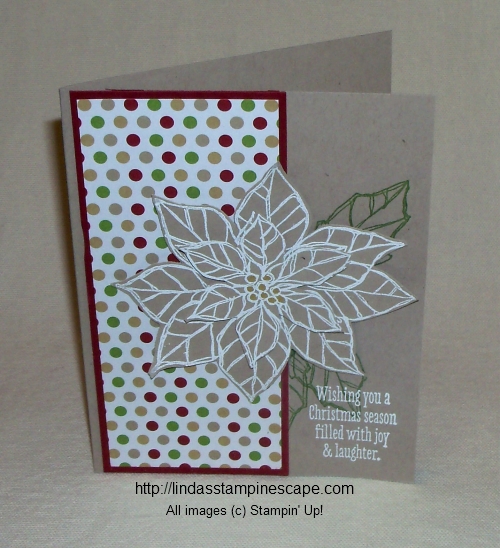
I began with the “Season of Style” Designer Series Paper Stack that was cut off a card with a “boo-boo” (also known as a mistake).  Oops … we don’t make mistakes, only new opportunities and design changes!  I adhered that to my Crumb Cake  cardstock.  It’s easy picking colors when the designer paper has all the colors combined so nicely.

Then I thought …. hmmm, I think the poinsettia from the “Joyful Christmas” stamp set would look nice on here.  So, I heat embossed it in white (because I never saw a Crumb Cake colored poinsettia)!  I embossed two, and cut both out … first the entire flower, then just the center piece so I would have the beautiful dimensional flower.

I used Stampin’ Dimensionals between the two layers of the poinsettia, and, to mount the poinsettia to the card.  I did stamp the leaves, in Gumball Green (also in the designer paper) directly onto the card front.

Last, I embossed my greeting, taken from the “Christmas Messages” stamp set.  Both stamp sets and the designer paper  used today can be found in the Holiday catalog.  Don’t have one?  Let me know and I will get one out to you… they are good through January 2nd.

So as I stated in my opening, my card share is a little love … my greeting to wish you all, not just a Christmas season filled with joy and laughter, but the entire year.  You … my stampin’ friends have been so good to me, and I appreciate you, and enjoy our time together!

000_0280

I also want to be your inspiration to stamp, and share your beautiful cards with others, because we all know, everyone enjoys getting a hand stamped card.

PS.  I think I would add “pearls” to the center of the card to finish it off!

Have a wonderful day!

blog closing-small

Guest Stampers Card Share …

Hello Stampin’ Friends,

The weekend is here so I’ll make this post short and sweet.  Short with words … sweet with more card shares!

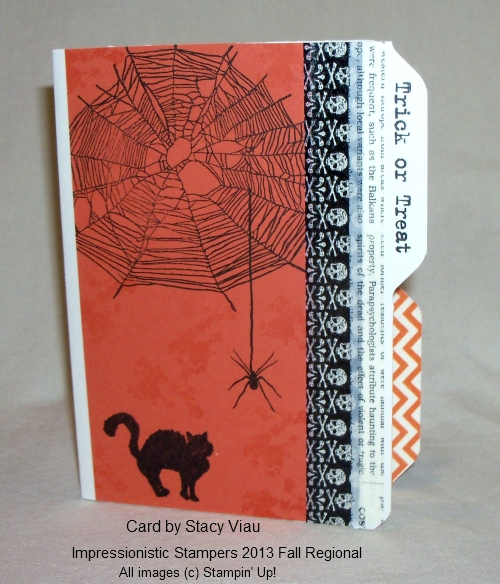
The first is a really cute Halloween card from Stacie Viau …

100_2213

I think this is such a neat card!  Stacy used the new Envelope Punch Board!  The also used the Bite Me Photopolymer Stamp Set and the “Witches Brew Designer Washi Tape”.

The new Envelope Punch Board is currently on back order, they sold out much quicker than they expected.

The second set of cards that we made during Gloria’s “Monochromatic” class…

000_0265

I had not used my “Gorgeous Grunge” stamp set because I wasn’t sure what to do (we got it FREE at Convention)  … I’m not really into grunge, but I truly love this card we made.  Oh … and there is another but I couldn’t show you because my “technique clubs” will be using this in the near future!  OK … so now I’m hooked on “Gorgeous Grunge”.

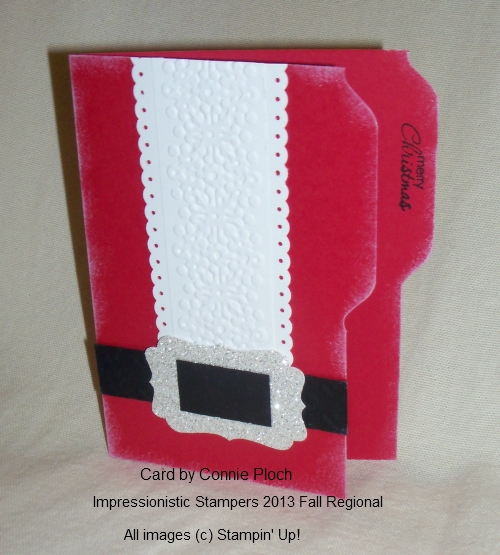
The last card share is from Connie Plout …

000_0268

Connie also used the Envelope Punch Board to create her card … Oh – I can’t wait to get mine!  This card is just too cute.

Hope you enjoyed the card share, and thanks for stopping by!

Have a wonderful day.

blog closing-small

Star’s cards to share …

Hello Stampin’ Friends,

I’m back with more from the Impressionistic Stampers Fall Regional.  I’m happy to share the following cards with you, as these are some very talented demonstrators and I’m proud to say they are “Star’s” … members of my group.

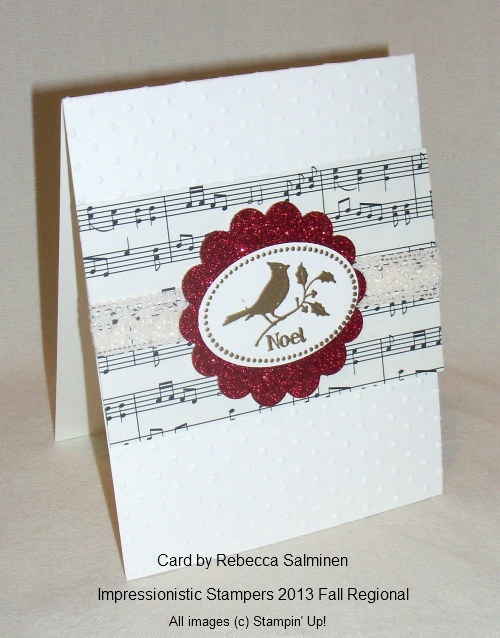
I’ll begin with one of the newest members to our Star’s group – Rebecca Salminen.  She is in my second level, and we welcome her to our stampin’ family.  Here is her swap card –

100_2207

Rebecca used the Warmth & Wonder Stamp set which is a “Hostess” only stamp set from the Holiday catalog … so pretty embossed in gold.  Can’t go wrong with “Modern Medley” Designer Series Paper!  Can’t tell you how many times I have used it on my cards … love it, love it, love it!

I also love the pop of color by using the Red Glimmer Paper.  All I can say is … “Nice job, Rebecca”!

The next card is from my direct downline member and friend … Connie Heersma.

100_2208

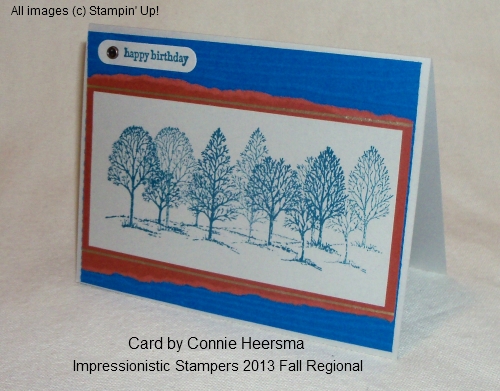
Connie has brought together some bold colors to create this fall Birthday card … and using the ever popular “Lovely as a Tree”.  This really is an awesome “go to” stamp set … so versatile!  The double stamping creates beautiful dimension.

Hope you enjoyed today’s card share, I will continue tomorrow with more from our regional event.

Thanks for stopping by.

Enjoy the day!

blog closing-small

NEW! Pop & Place Holiday Tag-Making Fun

Hello my stampin’ friends,

Today I am interrupting my card share… to share an awesome new product!  The Pop & Place Holiday Gift Tags and Stamp set!  Just in time for the holidays ….

6a00e554f4a3a48834019affc6548e970d-800wi

Add that handmade touch to your holidays quickly and easily with the new Pop & Place gift tag products! There are more than 70 die-cut tags of all different sizes and shapes in the tag book, which you can purchase either by itself or as part of a great new bundle either with ink and clear bock, or just the stamp set and tags book.

Chose from four easy options! Click on any of the product names to view the items:

Item

Description

Price

134975

Pop & Place Holiday Gift Tags Book

$9.95

134623

Christmas Tagables Photopolymer Stamp Set

$13.95

135921

Pop & Place Holiday Gift Tags Bundle includes:

  • Pop & Place Holiday Gift Tags Book
  • Christmas Tagables Photopolymer Stamp Set

$19.95

135290

Pop & Place Holiday Gift Tags Starter Bundle includes:

  • Pop & Place Holiday Gift Tags Book
  • Christmas Tagables Photopolymer Stamp Set
  • Soft Suede Classic Stampin’ Spot
  • Clear Block C

$24.95

Here are the images you’ll be getting in the adorable and FUNNY Christmas Tagables stamp set!  You’ve got to read these … Don’t you just love the one that says, “this gift was handmade, so no, you can’t return it.” Too funny!  I totally know who I’m giving that one too. lol

6a00e554f4a3a48834019affc5b17f970b-800wi

So … If your looking for the perfect gift to give that “they’ve got everything” kind of person, look no further… they will love this fun and creative gift.  Get one for yourself too, gather a group of friends and have a “tag making” night… beverages optional.  It’s always a great night when spent with friends!

It’s the perfect solution for all of you that are so busy, but LOVE to add that “handmade” touch.

I’ll be back tomorrow with my card share from “regionals”.

Thanks for stopping by my blog today…

Hope your day’s a great one!

blog closing-small

Carry-over list and card share …

Hello my stampin’ friends ~

Today I want to share with you the “carry over” stamp sets that are not in the catalog but are still available to order.  You guessed it, its Christmas sets!  Plus, I’ll share some of the beautiful cards we made last year at my clubs, classes and the annual Holiday retreat!!

CLICK HERE TO VIEW / DOWNLOAD CARRY-OVER LIST

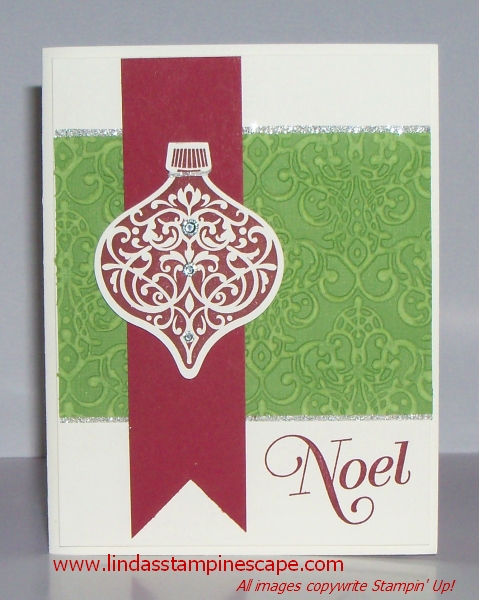
 First, is the “Ornament Keepsakes” stamp set (128048 – W / 128051 – C) and the beautiful greetings from “Greetings of the Season” (128030 – W / 128033 – C) 

101_1251

I used the “Coordinations Cardstock as a background, a Cherry Cobbler banner that draws your eye to our focal point … the ornament!  I then embellished with scraps (you got it) of the Silver Glimmer Paper (124005) and top it off with those precious “gotta have” Rhinestones (119246)


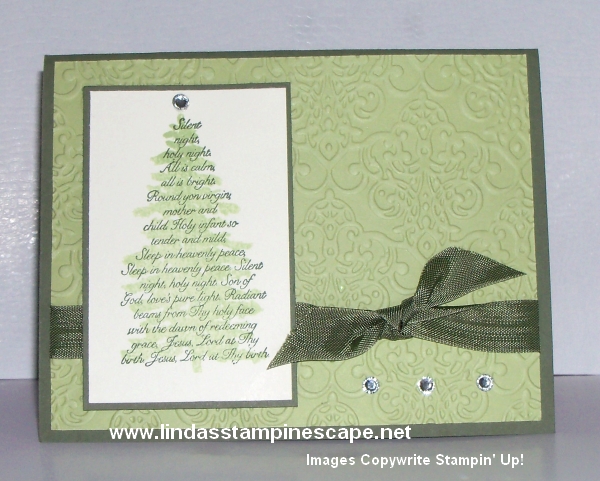
Next, the fabulous Two-Step Stamp Set, “Evergreen” (127970 – W / 127973 – C) You can make this with Always Artichoke and the NEW Pear Pizzazz or go wild and choose another color scheme!

101_1244

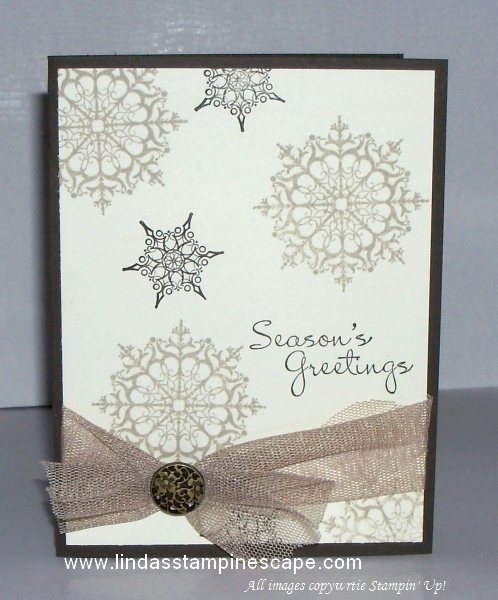
Last but definitely not least … 2 great samples from the stunning “Snowflake Soiree” (127922 – W / 127925 – C) stamp set.  The first is done in a soft neutrals pallet… Early Espresso, Very Vanilla, and Crumb Cake.  It’s such a warm greeting for the holiday season.  I used a brad from one of my favorite embellishments; “Vintage Brads” to tie the card together!

101_1249

The second is so simple, yet simply beautiful.  A very festive card when done in Whisper White and the simply delicious Cherry Cobbler!

101_1247

It’s not too early to start thinking about the Christmas cards that you want to share with your friends and family. 


If you can’t wait and want to purchase any of the items I shared with you today, just click on the link below to get started.

 blog insert - shop now

Thank you so much for stopping by …

I appreciate that you take time out of your busy day to visit me!

blog closing-small

Quick & Easy Christmas …

Hello Stampin’ Friends …

and a Happy Saturday to you!  It’s a little gloomy outside today, that’s OK … makes for a great stampin’ day!

This afternoon I’ll be setting up my Stampin’ Studio for my “Christmas Stamp Camp” tomorrow.  So today I thought I would share with you a little inspiration for card ideas.

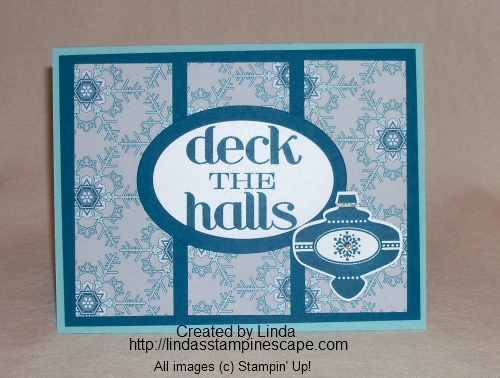
I began with some left over designer series paper from my last stamp camp, and came up with this quick and cute card.  My paper is the “Winter Frost Specialty Designer Paper” located on page 29 of the Holiday catalog.

Because our designer paper is designed to coordinate so nicely, the core colors I am using are the Pool Party and Island Indigo.

000_0195

Next I decided to use the “Deck the Halls” stamp from the “Christmas Messages” stamp set on page 34 of the Holiday catalog.  I love when Stampin’ Up! puts the inner verses for our cards along with the greetings…. makes life so much easier!

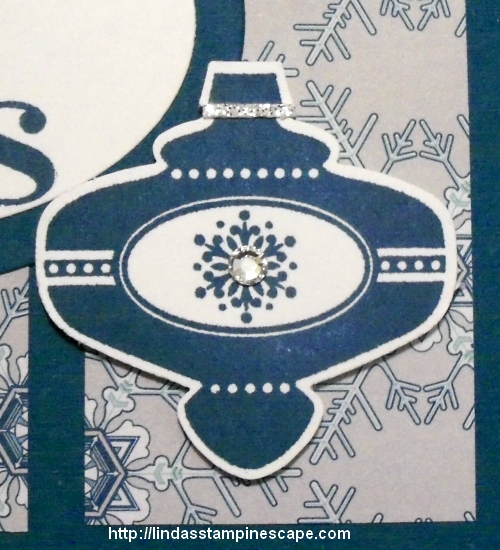
I wanted to jazz it up a bit more, so I added one of those cute new ornaments from the “Christmas Collectibles” stamp set.  And talk about making life easier … Stampin’ Up! has a coordinating punch, the “Christmas Ornament” punch so we don’t have to cut these out!  Both of these items can be found on page 35 of the Holiday catalog.

000_0199

To finish off the card, I added a little bling!  First as sliver of the Silver Glimmer paper, and then a rhinestone in the center of my ornament.

Wow … wasn’t that easy!  And quick!

000_0196

I hope you enjoyed today’s inspiration for Christmas …. Thanks so much for stopping by.

Have an awesome Saturday!

blog closing-small

Greetings Around the World …

Hello Stampin’ Friends,

A bit chilly here is Wisconsin this morning, but fall is approaching so we were expecting it.  I love the cool nights and warm days… it makes for great bonfire weather!

Well enough of that, time to move on to my last card in the series of cards I created with the “I Am Me” Designer Series Paper.  I hope you have enjoyed the cards I have shared so far…  I would love to hear your thoughts on them.

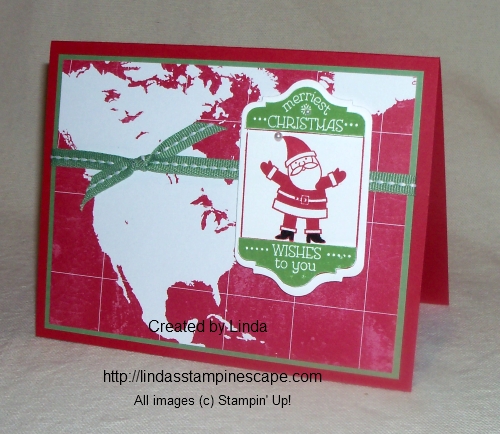
Today’s card will take you around the world with a very special fellow … Santa Claus, also known as Saint Nicholas, Father Christmas, Kris Kringle.

100_1778

I have teamed up my designer paper with the Ronald McDonald House Charities stamp set “Tag It”.  Please note, that with each purchase of the “Tag It” stamp set … $3 will be donated to the Ronald McDonald House Charities.

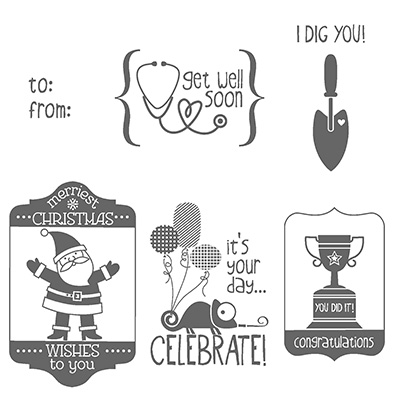
* If you click on the RMHC name, it will take you to their website, where you can find out more about this wonderful charity.  Here are the stamps included in the stamp set.

130303L

To create the look on the tag, I first stamped the image in Real Red, and cut it out using the “Chalk Talk Framelit Dies which coordinate with the Tag It stamp set.

Next, I stamped the image Wild Wasabi and cut out the area I wanted to highlight.  I then used our Stampin’ Dimensionals to “pop” it up.

I did add a pearl to finish off Santa’s hat … then just add a ribbon, and your done!

100_1779

I thought this was a fun way to showcase the designer paper with the world map.  I think it was also make a good scrapbook page to those of you who travel… hmmm, there’s an idea!

Again, I would love to hear your thoughts on my series of cards done with the “I Am Me” designer series paper.

To view any of the products highlighted today … just click on the “highlighted” words.

Stop back tomorrow as I will share a bit of my Stampin’ Up! incentive trip to San Diego.

Thanks so much for stopping by today!
blog closing-small

Simple Holiday Layout …

Hello Stampin’ Friends,

I missed you yesterday!  I spent the day with my granddaughter, something we have not done in quite a while… it was a good day!

So … today I am going to share with you, two holiday cards created with the same template (or layout).  I have used this layout on another card and just love it!  I find most of my stampin’ audience loves simple but pretty cards.

Life is so busy now days, that simplicity seems to be the norm.  However, you will soon see that you do not have to give up beauty to create simple cards.

First is my “Celebrate Halloween” card …

000_0140

I used the “Halloween Bash” stamp set and the “Witches Brew” Designer Series paper (132185), both found on page 21 of the Holiday Catalog.

The pumpkins were created by punching 3 circles each of the 1″ circle punch (119869) and the 1/2″ circle punch (119868).  You will find both of the punches on page 182 of our Idea Book & Catalog.  Next, I sponged the edges of the circles to create dimension, then layered them.  I used “Tangerine Tango” ink and cardstock.  Then I just drew the little faces on the assembled pumpkins.

The greeting was created by using my markers directly onto the stamp – omitting the words I did not want to use, thus creating the simple greeting of “Celebrate Halloween”.  You can use this technique on any stamp.

The banner for both my cards today were created from a 4-1/2″ x 2-1/4″ piece of designer or glimmer paper.   I like the size fits well with this layout.

You will also notice that I have used the “Envelope Liner Framelit Dies” (132172) on both of my projects today.  These are found on page 37 of the Holiday catalog.

Here’s my second card “Joy to the World” …

000_0145

I used the stamp set “Joy to the World” which you can find on page 24 of the Holiday Catalog, I have used this set many times already and it’s just September!  I’m gearing up for my holiday classes!

Next I chose the beautiful “Champagne Glimmer” paper (127885) found in the Idea book & Catalog.  I think the glimmer papers add a touch of elegance to any card… I just simply cannot resist these beautiful papers (comes in three colors: Red, Silver and the Champagne).  I teamed it up with the Early Espresso and Very Vanilla cardstock … LOVE this combination of color.

To add some extra flair and texture to my card, I embossed the background with the “Petals of Plenty” (116824) Folder on page 191.  Then created little flowers with the “Boho Blossom” Punch (119858) on page 183.  I think they coordinate nicely together!  Then top it off with the beautiful “Pearls” (119247) on page 171.  They really do complete the card.

I hope you enjoyed today’s cards created with the simple layout of a banner, greeting, and a bit of embellishing!  I would love to see what you can create with this layout.

Enjoy the wonderful weekend.

blog closing-small

Holiday Retreat is coming ….

Hello Stampin’ Friends,

My apologies for skipping my post yesterday, but my daughter needed me … so I had to be there for her.  I’m happy that she wanted her Mom.  Sometimes as they get older, they tend to talk to their friends instead of their Moms.  Yes, she is OK.

Today I wanted to share a bit about my Holiday Retreat … the announcement comes out today!  It is one of my most anticipated events.  We had a wonderful time last year and I am so looking forward to getting together again this fall.
We stay on the beautiful Green Lake Conference center grounds…

000_1301

at the Christian Writing Center … and 1930’s English Manor.

000_1304

We stamp, we eat, and we have a blast hangin’ out with our friends and making new ones.

000_1299

There a fun surprises …

000_1286

fantastic rooms …

cwc-gray-room

and good food… Oh yes, one price covers it all!

Here are just a few of the projects we did last year … some are cased, and some are my original designs.  Either way – we have a great time stampin’ together.

000_1291

100_5933

Hope you enjoyed a glimpse into our retreats.  You should consider joining us sometime.

Hope you had a wonderful weekend!

Thanks for stopping by …

blog closing-small

JOYFUL CHRISTMAS …

Hello Stampin’ Friends,

Today I am “joyful” and I’m sharing with you another Christmas card.  I know many of my stampin’ friends are already planning their cards, so here’s another sample from the beautiful “Joyful Christmas” stamp set (Wood – 131802 / Clear – 131805) … and you can find that in our Holiday catalog on page 27.

000_0085

I have been dying to use my new “Stylish Stripes” Folder (132174) also in the holiday catalog on page 22, and it became the focus on the card.  My decision to use the poinsettia came later.  I saw a card from fellow demonstrator  LeeAnn Greff, who used strips of designer series paper between the lines from the folder… loved the idea!  So, inspired by her card, I used the new “Season of Style” Washi tape (132155) on page 25.

000_0086

The washi tape fit nicely inside the lines when I flipped the embossed cardstock over (you can use it either way), then I matted it with Old Olive cardstock.  Next I embossed the Cherry Cobbler and lined up the two pieces together (if you want to do this quickly … cut your cardstock larger than needed and cut it down to fit together).  I love the way the two embossed pieces flow together when using this layering technique.

Next I stamped my poinsettia with Cherry Cobbler ink (twice) and cut out both the overall image and then the small flower inside the large, so I could create extra dimension.  To give it the soft look … I just sponged the edges, however the flower came alive when I spritzed (Smooch Spritz – 118772 / pg.165) both pieces of the poinsettia.  It blended the sponging so nicely and the shine just made it pop.  (Funny how lighting and camera angles can change the look… you barely saw the shimmer on the first card shown)

000_0082

To finish off the flower, I added the cute new “Candy Dots” (130933) from the Soft Subtles collection on page 147.  Then I used my marker to ink up the word “joyful” from the greeting (included in stamp set) to finish off the card.

Are you getting ready for your Christmas cardmaking?  Let me know when you get started.

Have an awesome day!

blog closing-small

Reverse Spotlighting Wow’s …

Hello Stampin’ Friends,

I hope you had a wonderful weekend.  A bit dreary here in south eastern Wisconsin but I love that everything is still so green around here.  Usually at this time of year, everything is dried out and brown.

On Saturday I posted the “Reverse Spotlighting” technique instructions, and promised to post a couple of cards to showcase this technique.  So after taking Sunday off, I have two beautiful cards to share with you today.

First, I would like to start with a card that was created per the instructions that I gave to you on Saturday.  My color combination is Pink Pirouette and Early Espresso.  I love those two colors together.

The stamp set I used is “Betsy’s Blossoms” (Wood – 131955 / Clear – 126006) found on page 87 of the Idea Book & catalog…. the big one.

000_0070

Just as the instructions stated, you stamp your imaged onto the cardstock … I did the pink onto Whisper White, then punched out sections of my flowers with the 1-1/4″ Circle Punch (119861) found on page 182.

Then I stamped three flowers using Pink Pirouette ink onto Pink Pirouette cardstock and cut them out.  Now you just line up the images and secure, and then assemble the rest of the card.

The greeting “get better” is from the stamp set “A Dozen Thoughts” (Wood – 131056 / Clear – 131059) in the Idea Book & Catalog on page 59.  You can use a marker to eliminate the first “better” or just use the stamp pad to ink the area you want to use.  The entire greeting is … “Better get better”.

I used the “Word Window Punch” (119857) on page 180 and the “Modern Label” (119849) punch on page 181.  And to finish it off … I used the pretty “medium” size pearls ( 119247).

On the second card I wanted to give the classic “Reverse Spotlighting” technique a bit of a twist!  Instead of using punches … I used the “Framelits” – Oval framelits (129381) to be exact!   You will find these on page 186 of the catalog, along with the other framelits.

You follow the same concept, but you won’t have to do as much cutting … and who doesn’t love that!

I decided since I was going to give this technique a new twist, I would use a new stamp set.  My choice was the beautiful poinsettia from the stamp set “Joyful Christmas” (Wood – 131802 / Clear – 131805) and you will find it on page 27 of the Holiday Catalog.  If you need one … let me know.

I can’t wait any longer to show you …. I JUST LOVE THE WAY THIS CARD TURNED OUT!!

000_0074

I kept the color pallet on this card very simple … Cherry Cobbler and Whisper White, with the Silver Glimmer paper (124005) to give it that “WOW”.  The “Rhinestones” (119246) accent nicely with the glimmer paper and still keep the overall feel – clean and simple.

Again, I stamped the Cherry Cobbler ink onto both the Whisper White and Cherry Cobbler cardstock.

The white cardstock is actually “popped up” and away from the glimmer paper to give it more dimension.

I hope you enjoyed today’s cards … and I would love to hear your thoughts, so please feel free to comment.

Have a wonderful week …

blog closing-small