Twelve Weeks of Christmas: Week 7 / Gifting Creativity

Hello Stampin’ Friends,

Looking for a unique gift that sparks creativity and brings loved ones together? Enter Paper Pumpkin – a delightful subscription box packed with everything needed to craft stunning projects. Whether you’re a seasoned crafter or a complete novice, Paper Pumpkin invites you to explore the joy of creating beautiful handmade crafts while making cherished memories with family and friends.
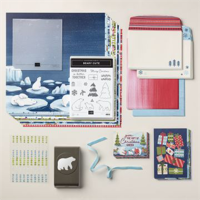
Let me share the fun of Paper Pumpkin with our October Christmas Kit ….

But why is Paper Pumpkin the perfect gift? Here are a few reasons:

  1. Shared Experience: Gifting a Paper Pumpkin subscription isn’t just about providing a crafting kit; it’s about sharing an experience. Imagine the joy of gathering around a table with family and friends, eagerly unboxing the latest kit, and embarking on a creative adventure together.
  2. Accessible Creativity: Not everyone feels confident in their crafting abilities, but Paper Pumpkin is designed for all skill levels. It’s a fantastic way to introduce loved ones to the world of crafting without overwhelming them. The guided instructions make it accessible and enjoyable for everyone involved.
  3. Monthly Surprise: The anticipation of receiving a new kit each month adds an element of excitement and surprise. It’s like unwrapping a present filled with creative possibilities every time the mailbox clinks!

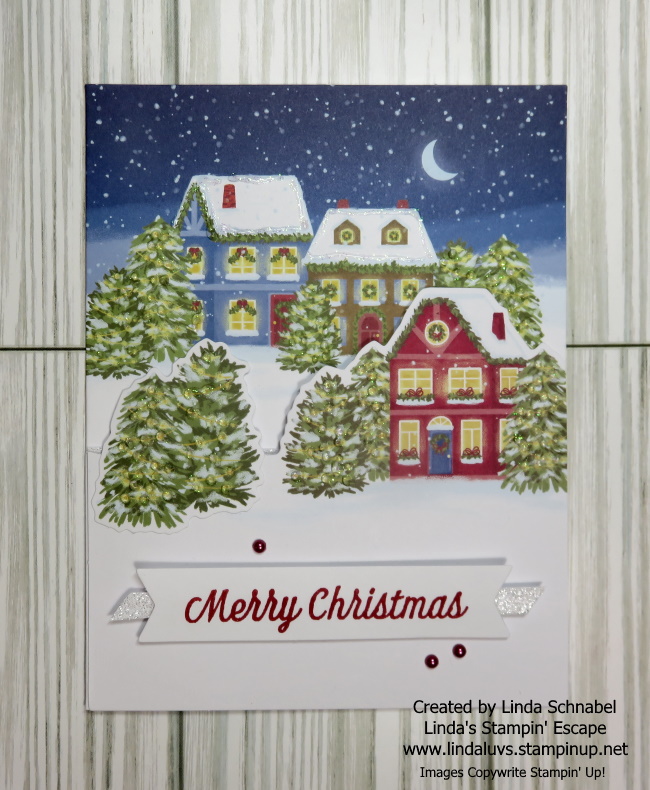
Let’s take a closer look at the Alternative Projects. My first was a simple take on the card by just removing one of the house stacks ….

The second card I took the houses from the landscape card and paired it with a card base that was colored with a Blending Brush and then spritzed with Wink of Stella….

The third card used the cardbase from the houses of our second card and added the Beary Cute Bears! The greeting comes from the “So Very Merry” from the Online Exclusive line. I inked “each” word separately and stamped it. I also added a scarf and hat to my bear “after” the Facebook LIVE ended…. I also added some snow from the scrap glitter paper around the banners in the kit!!

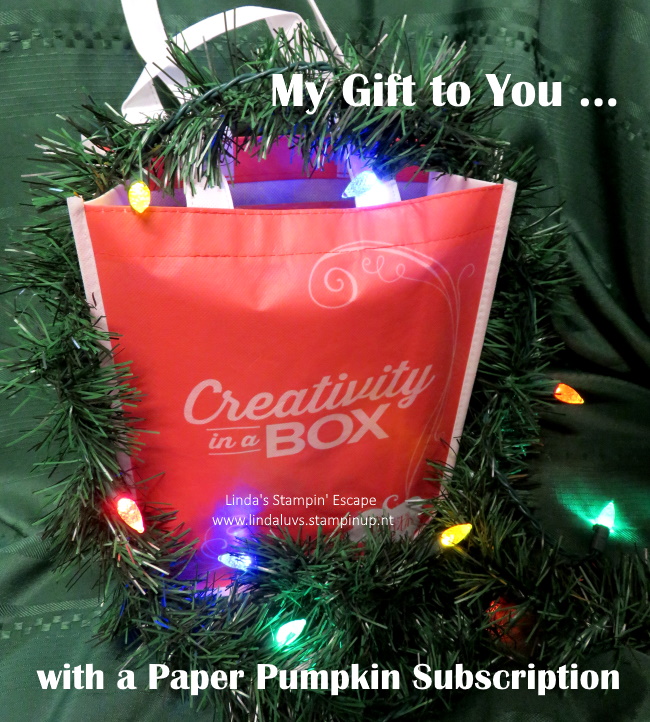
So, how can you gift this wonderful experience? Consider presenting your loved ones with a Paper Pumpkin subscription. It’s a gift that keeps on giving, delivering monthly doses of creativity right to their doorstep. AND … to sweeten the deal, I have a special offer: when you purchase a Paper Pumpkin subscription for yourself or as a gift, you’ll receive a complimentary Paper Pumpkin Bag to enjoy yourself! It’s a gift to them, from you, and a little something for you too.

Join the Paper Pumpkin family today and spread the joy of creativity among your loved ones. Whether it’s a cozy family crafting session or a get-together with friends, Paper Pumpkin brings people together through the magic of creativity.

Ready to gift the joy of crafting? CLICK HERE to get started!

Thanks for hanging out with me today! Let me know if you have any questions about Paper Pumpkin. I have some of the subscription links for you below as well.

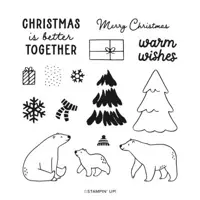
A Beary Cute Christmas Together

Hello Stampin’ Friends ~

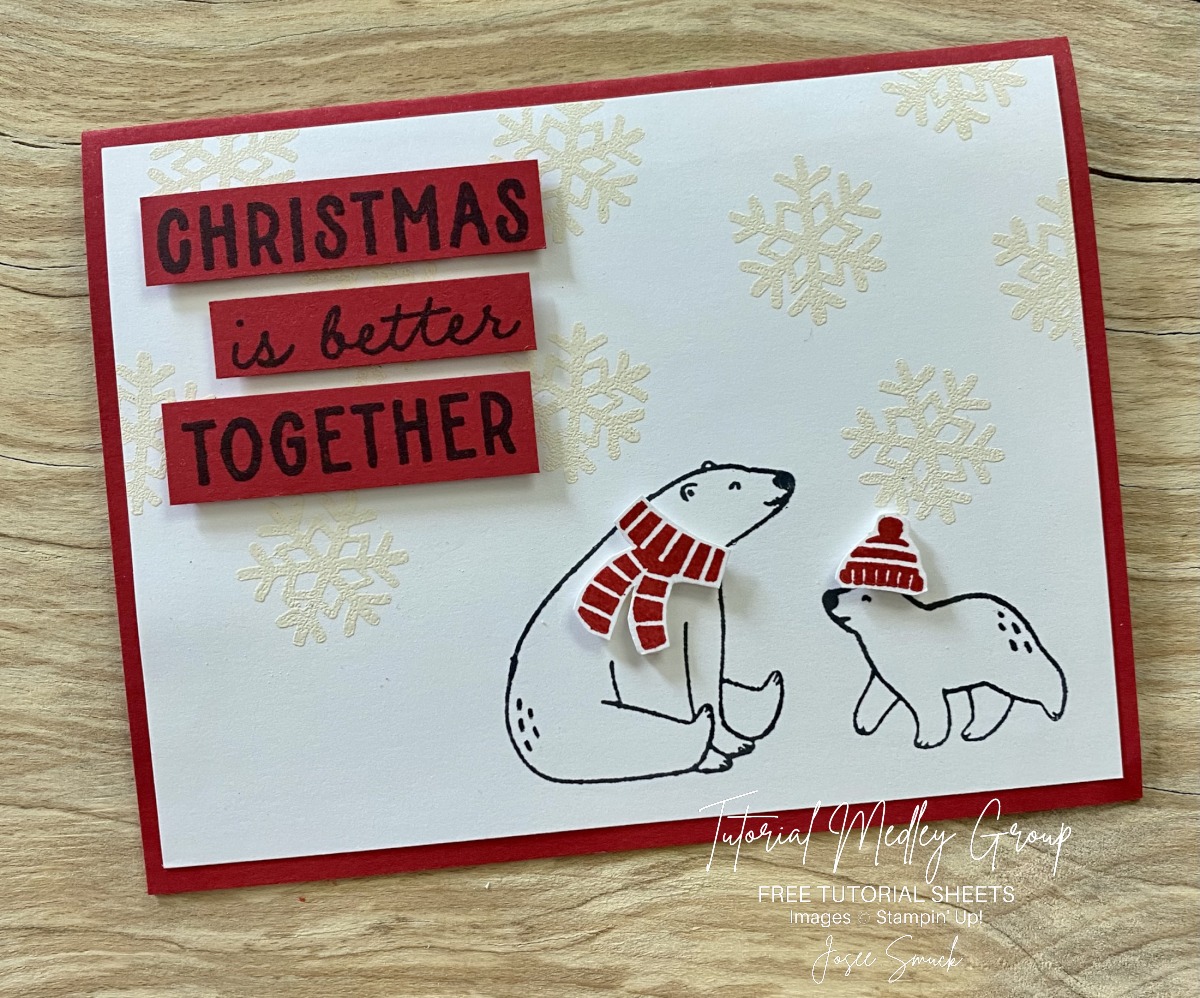
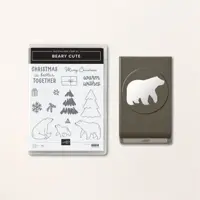
Today I have a “Beary Cute” card for you from a fellow design artist from the Tutorial Group I am part of. You will get the measurement and instructions to recreate this card yourself. If you don’t have these supplies yet, I will have everything listed at the end of the tutorial. Enjoy ….

Measurements:

  • Real Red : 5 ½ x 8 ½
  • Basic White: 4” x 5 ¼”

Instructions:

  • Score and fold the Real Red cardstock at 4 ¼.
  • Stamp the bears using Memento Black ink.
  • Use the Versamark ink pad to stamp the snowflakes randomly on the Basic White cardstock.
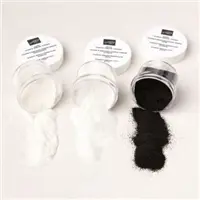
  • Sprinkle White Embossing Powder on cardstock and tap off excess.
  • Heat until totally melted using the Heat Tool. Adhere the layer to the card.
  • Stamp the greeting on Real Red cardstock using Memento black ink. Cut each line using a Paper Trimmer. Adhere the greeting using Dimensionals.
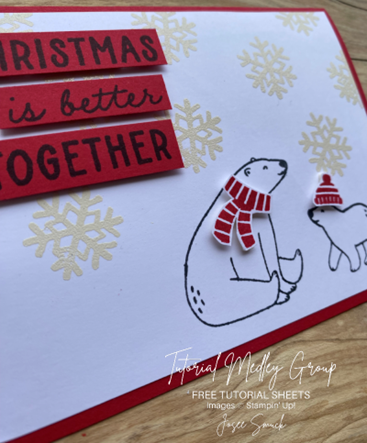
  • Stamp the scarf and hat on a piece of Basic White cardstock. Cut them out using Paper Snips. Add them to the card using Dimensionals.

So cute and so simple to make!! I hope you enjoyed today’s card share and felt inspired to pull out your stamps and start creating.

Thank you for stopping by today ~

Simply Sunday: Christmas Everywhere Cards

Hello Stampin’ Friends,

The holiday season is fast approaching, and what better way to spread the Christmas cheer than with heartfelt greetings sent to your loved ones? If you’re looking for a creative and meaningful way to send warm wishes, our “Christmas Everywhere” card kit is the perfect solution to holiday cardmaking.

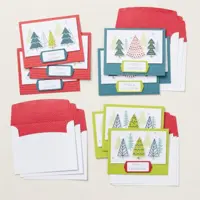
One of the best things about our “Share the Joy of Christmas” card kit is that it comes with everything you need to create nine charming Christmas cards. No need to scramble for supplies or spend hours browsing for the perfect decorations; we’ve got you covered.

This kit includes: 

  • Enough supplies to create 9 cards—3 each of 3 designs
  • 9 coordinating envelopes
  • Christmas Everywhere photopolymer stamp set
  • One Lost Lagoon Ink Spot
  • Printed card bases, printed die-cut labels and images with red glitter, adhesive, and a clear block
  • Finished card size: 5-1/2″ x 4-1/4″ (14 x 10.8 cm)
  • Coordinating colors: Granny Apple Green, Lost Lagoon, Pecan Pie, Pretty Peacock, Real Red

This holiday season, let our card kit be your companion in sending warm Christmas wishes to friends and family across the globe. Make this Christmas truly special by sharing the beauty of trees from around the world and spreading the joy of the season.

With three unique card designs and three copies of each, you can send warm Christmas wishes to a variety of recipients. Whether it’s family, friends, coworkers, or distant relatives, these cards are the perfect way to let them know you’re thinking of them during this special season.

The “Share the Joy of Christmas” card kit is more than just a creative project; it’s a meaningful way to send love and warmth to the people who matter most to you. Celebrate the diversity of our planet and the magic of the holiday season with these beautifully crafted cards. Order your kit today and start spreading the joy of Christmas, one card at a time!

Thank you for sharing a part of your Sunday with me.

Have a beautiful day ~

Simple Gift Idea: Hot Chocolate Holder

Hello Stampin’ Friends,

Looking for a thoughtful yet simple gift idea that’s sure to warm hearts this holiday season? Look no further than a delightful Hot Chocolate Packet /Holder! Whether it’s for teachers, colleagues, or anyone who enjoys cozy winter treats, this little package is a surefire way to spread some cheer. Inside, you’ll find the makings of a delicious cup of hot cocoa along with a special touch – a tube of crushed candy canes to infuse that beloved peppermint flavor. Let’s dive into how you can create this delightful and festive gift!

Measurements:

  • Cardstock: Real Read 8 ½” x  5 ½”
  • Cardstock 2:  Basic White: 4” x 4”
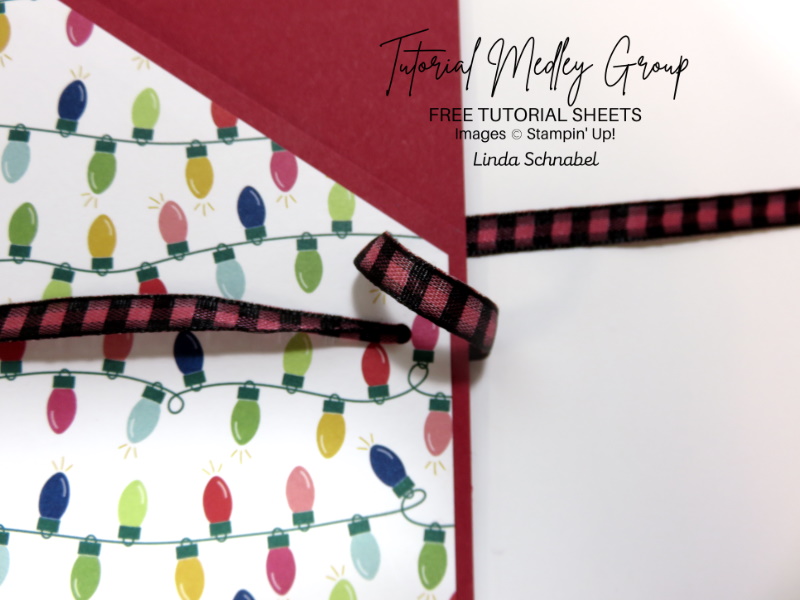
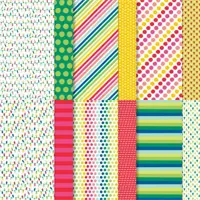
  • Merry Bold & Bright Designer Paper: 5 1/8” x 4”
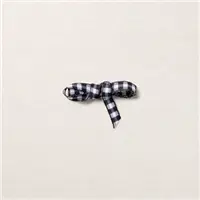
  • Black & White Gingham Ribbon: 12”

Instructions:

  • Score 8 ½” side of cardstock at 4 ¼”.  Fold and Burnish.
  • Card base: Make a tick mark at 2-3/4″ along the 5-1/2″ side and cut from the tick mark to where the center score line meets the top edge
  • Designer Paper: Make a tick mark at 2-5/8″ along the 5-1/8″ side and, with the tick mark along the right side, cut from the tick mark to the opposite left corner
  • Attach the piece of designer paper to the front with diagonal cut, leaving a border around the edges.
  • Take your Tear & Tape adhesive and run it along the bottom edge of that was not cut. This creates the pocket to hold your Hot Cocoa Mix.
  • Punch your first hole about 5/8” from the edge and about 1/2″ from the diagonal.  Doesn’t have to be perfect.  Punch second hole about ½” lower. This holds our treat tube.
  • Use your Real Red Stampin’ Blend to color your Black & White Gingham Ribbon. Let Dry.
  • Feed ribbon through bottom hole from the front side – pulling it through to the front side, feed it through the top hole.  This creates a loop that will hold your treat tube.
  • Tuck your Treat Tube into loop and pull firmly.  Tie in a bow.
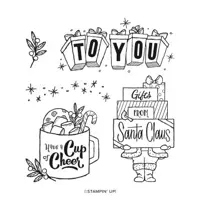
  • Stamp the “Cup of Cheer” image in Memento Ink onto White cardstock. Let Dry.
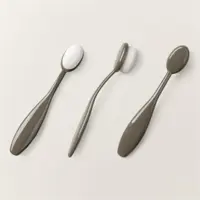
  • Use small Blending Brush to brush on Balmy Blue ink.
  • Using Stampin’ Blend; color as desired.  I used the three shades of Natural Tones for my cookie.
  • Die cut image with Largest Circle from the Stylish Shapes Dies
  • Attach with Stampin’ Dimensionals. 

NOTE: I used Crushed Peppermint (Candy Canes) and Nestle Hot Chocolate packets that I found at Walmart.  Treat Tubes can be found on Amazon under “Treat Tubes for Crafting / Candies”.  

I just love how this turned out, and so easy to make! You will definitely spread cheer when handy out these tasty treat. If peppermint isn’t your thing, I found Mini-Marshmallows and Salted Caramel treats as well.

I’d love to know if this inspired you to create some of these treat packets for those on your Christmas list!! They make great stocking stuffers too!!

Thank you for joining me today.

The Enchanting world of the Oh Holy Night Product Suite

Hello Stampin’ Friends,

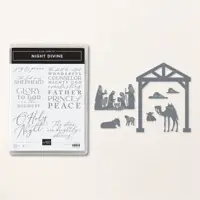
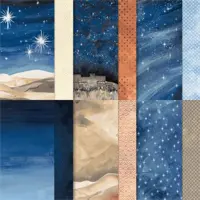
Welcome to an exciting showcase of holiday magic! Today, I’m thrilled to share a captivating video replay from my Facebook journey, unveiling the enchanting world of the Oh Holy Night product suite. As we dive into the festive season, join me in exploring the three cards that serve as luminous beacons, each illuminating a unique facet of this delightful collection. Let the festivities begin!

Glory to God Card …

Measurements for Glory to God:

Night of Navy Base: 8 ½” x 5 ½” / Score & Fold at 4 ¼”

Vanilla (Front/Inside) Cut 2 – 5 ¼” x 4”

Gold: 3” x 3”

Designer Paper: 2 ¾” x 2 ¾”

Ribbon as needed / Stampin’ Dimensionals

Joy and Peace Card …

Here is another view so you can see the dimension!!

Measurements for Joy & Peace Card

White Base: 8 ½” x 5 ½” / Score & Fold at 4 ¼” / Plus enough Whisper to cut out 4 point star and stamp greeting

Pretty Peacock Mat:  5 ¼” x 4”

Hologram Trio Specialty Paper: 5” x 3 24” plus enough to cut a star out

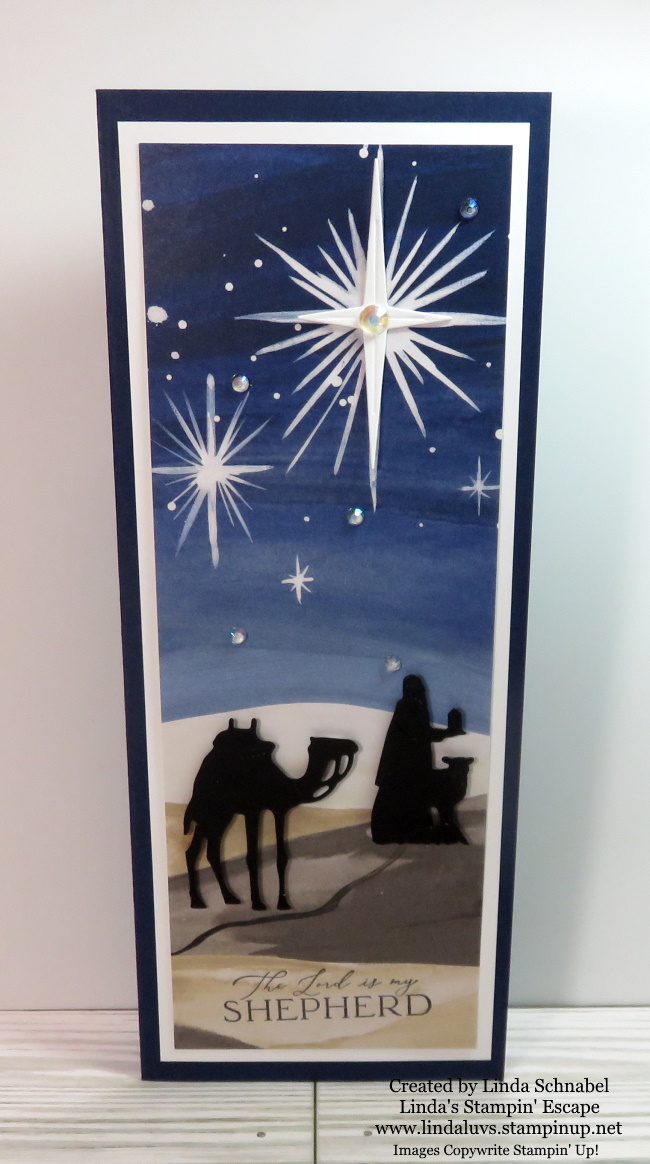
The Lord is my Shepard Card …

Measurements for Joy & Peace Card

Night of Navy Card Base: 9 1/4” x 8″ / Score & Fold at 4″

Basic White (Front & Inside) Cut 2 – 9″ x 3 3/4″ pieces, plus enough Basic White to cut out 4 point star and stamp greeting

Designer Paper: 8 3/4″ x 3 1/2″

Black scrap to cut out camel and king

As we wrap up this festive journey through the Oh Holy Night product suite, I hope the video highlighted the three radiant cards and have sparked a sense of holiday wonder in your hearts. As you explore the possibilities within this enchanting collection, may you find the perfect expressions to share with your loved ones or add a touch of holiday spirit to your surroundings.

Thanks for joining me today ~

🌟🎄 #OhHolyNightMagic #HolidayJoy #FestiveRevelry

Celebrate the Season with the Joy of Christmas Suite

Hello Stampin’ Friends ~

Today we will be celebrating the upcoming season with the Joy of Christmas Suite. Many of you are beginning your holiday cardmaking, and what better way to do so than with beautiful handmade Christmas cards? The Joy of Christmas Suite from Stampin’ Up! offers everything you need to create stunning holiday greetings that will warm the hearts of your loved ones.

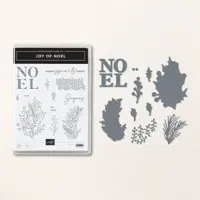
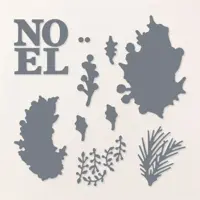
In this blog post, we’ll focus on two exquisite components of this suite: the Joy of Noel dies and the Joyful 12 x 12 Specialty Designer Paper. I’ll also demonstrate how to make a simple yet elegant Christmas card, embellished with Gold Festive Pearls, using Cherry Cobbler cardstock and Gold Foil. Let’s dive into the world of festive creativity!

The Joy of Noel dies are the perfect addition to your crafting arsenal this holiday season. These intricate dies allow you to effortlessly create stunning holiday-themed designs that will leave a lasting impression. One of the standout features of these dies is the word “Noel,” which adds a touch of elegance to any project.

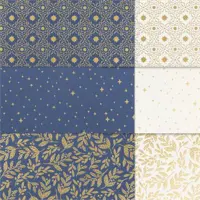
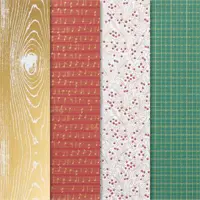
The Joyful 12 x 12 Specialty Designer Paper is a delightful collection of holiday-themed patterns and designs. With its rich color palette and intricate patterns, this paper is ideal for creating beautiful cards and projects. It includes metallic accents that add a touch of opulence to your creations, making it the perfect choice for your Christmas-themed projects.

  • Cherry Cobbler cardstock (8.5″ x 5.5″, folded in half to create a 4.25″ x 5.5″ card base)
  • Gold Foil (4″ x 5.25″)
  • Joyful 12 x 12 Specialty Designer Paper (3.75″ x 5″)

Using the Joy of Noel dies and a die-cutting machine, cut out the word “Noel” from the Gold Foil. This is a great paper saving technique. Now you can attach the Gold Foil to your Cherry Cobbler Cardbase, and the Joyful Designer paper over that. Using Dimensionals, attach your “NOEL” to the cardfront.

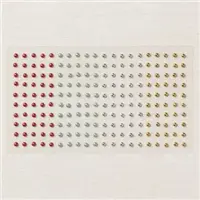
Add Gold Festive Pearls to the card to enhance its elegance. You can place them strategically around the “Noel” die-cut or as you prefer.

With the Joy of Noel dies, Joyful 12 x 12 Specialty Designer Paper, and other coordinating products, you can create beautiful, heartfelt Christmas cards that will bring joy to your loved ones. This simple yet elegant card, adorned with Gold Festive Pearls, is just a glimpse of the endless possibilities this suite offers.

So, gather your supplies, let your creativity shine, and share the magic of Christmas with handmade cards that truly convey the spirit of the season.

Happy crafting ~

From Scraps to a Stunning Christmas Card

Hello Stampin’ Friends ~

What do you do with your scraps when cutting for your main cards? Rather than letting them collect dust or tossing them, why not turn them into something extraordinary? In this blog post, I’ll walk you through a creative endeavor using leftover pieces of the Joy of Christmas designer paper. Get ready to unlock the full potential of those remnants!

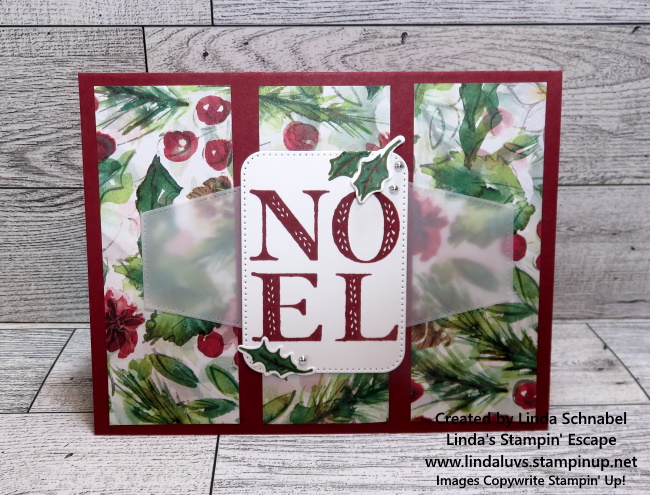
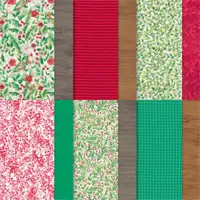
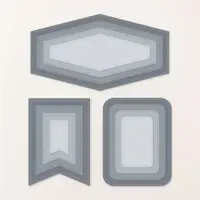
I used leftover pieces of Joy of Christmas designer paper to create my background. Then, I gathered up my Joy of Noel bundle to compliment the designer paper, and some vellum cardstock along with the Nested Essentials Dies … to create my focal point.

From the Joy of Noel bundle, I chose the NOEL for my project’s theme. In this instance, the greeting was selected to serve as the focal point. The choice of stamp sets the tone for the entire piece.

Utilizing the Nested Essentials dies to cut the vellum cardstock …. the translucent quality of vellum adds a touch of sophistication to your creations, enhancing the overall visual appeal. When you layer the vellum over the leftover designer paper it allows the intricate patterns to peek through. This layering technique adds depth and visual interest.

I took my creation a step further by incorporating additional embellishments, which were created by stamping, coloring and cutting out the holly leaves from the Joy of Noel bundle. I also used the Festive Pearls to complement the color scheme and theme of the project.

Don’t let those leftover designer paper scraps go to waste. With a bit of creativity and resourcefulness, you can transform them into stunning works of art. In this project, I repurposed remnants of Joy of Noel designer paper and combined them with vellum to create a visually captivating masterpiece.

So, the next time you find yourself with leftover paper, remember – the possibilities are endless! Happy Crafting!

A Beary Merry Christmas

Hello Stampin’ Friends,

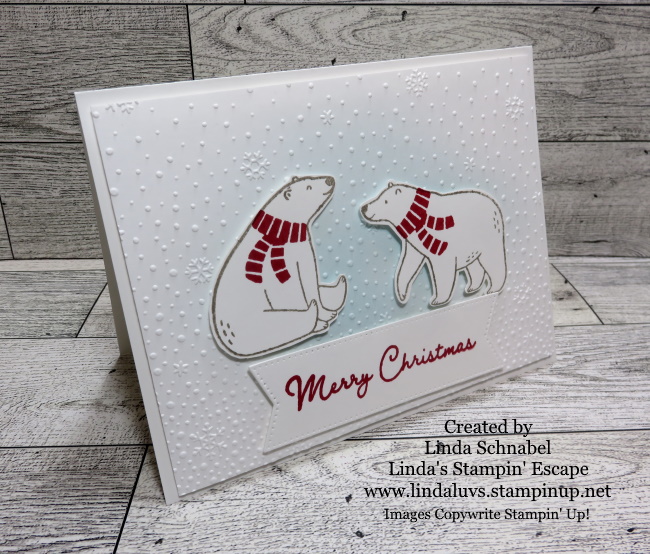
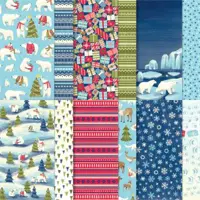
ooking for a great way to spread cheer with a heartfelt, handcrafted Christmas card to your loved ones? Today, I’m excited to showcase the Beary Cute Christmas bundle, a delightful collection of stamps, designer paper, and a bear punch that will help you create charming and festive cards. Whether you prefer the personal touch of hand stamping or the convenience of designer paper, this bundle has you covered.

Here is a replay of my Facebook LIVE that will take you step by step through 2 different style cards….

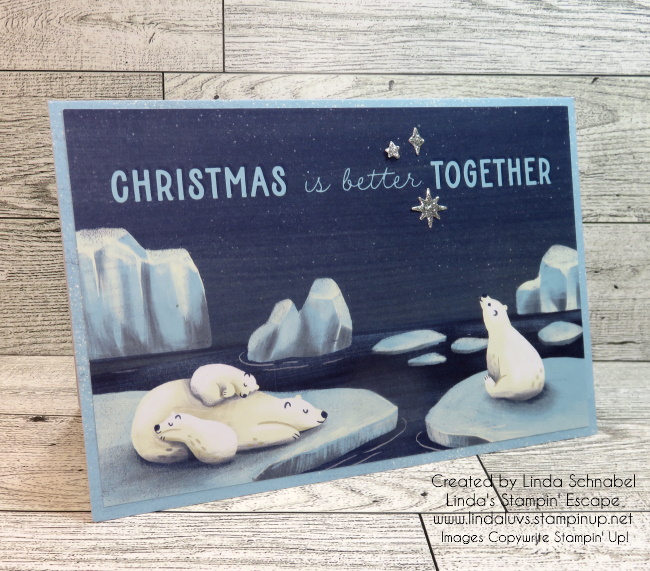
Let’s take a close up look that those cards. We’ll start with the card that I created with the designer paper. There are so many cute animal figures that you can fussy cut to create any layout you wish.

The next card is also from the video and used a soft background created with the blending brushes to create the focal point, just as I did on the first card with the vellum circle from the Stylish Shapes die. The Real Red really makes this card striking! Let’s take a look ….

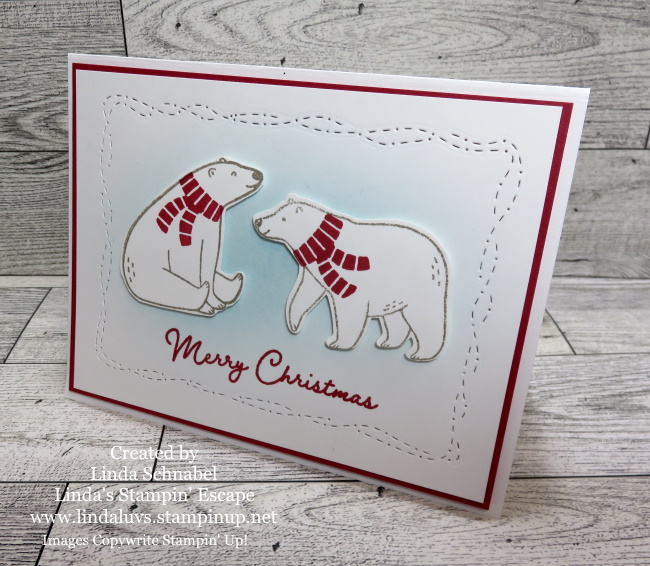
I shared a third card on the video that has the same layout as the card above, but instead of embossing the card front with the Snowflake embossing folder, I used the Stitched with Whimsy to create a border that adds texture in a totally different way….

With the Stitched with Whimsy dies, I stamped the greeting directly onto the front but then added a Real Red mat behind my card front to really pull the “red” out! Totally making it pop! Both are cute, but even with the exact same layout, they look so different.

The Beary Cute Christmas bundle offers a delightful and versatile way to create charming Christmas cards. This bundle provides you with everything you need to spread holiday joy. So, gather your supplies, unleash your creativity, and start crafting those beary cute cards to share with your friends and family this holiday season.

Happy crafting!

Creating Christmas Memories

Hello Stampin’ Friends,

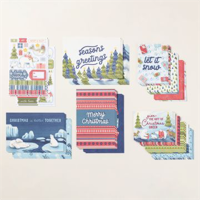
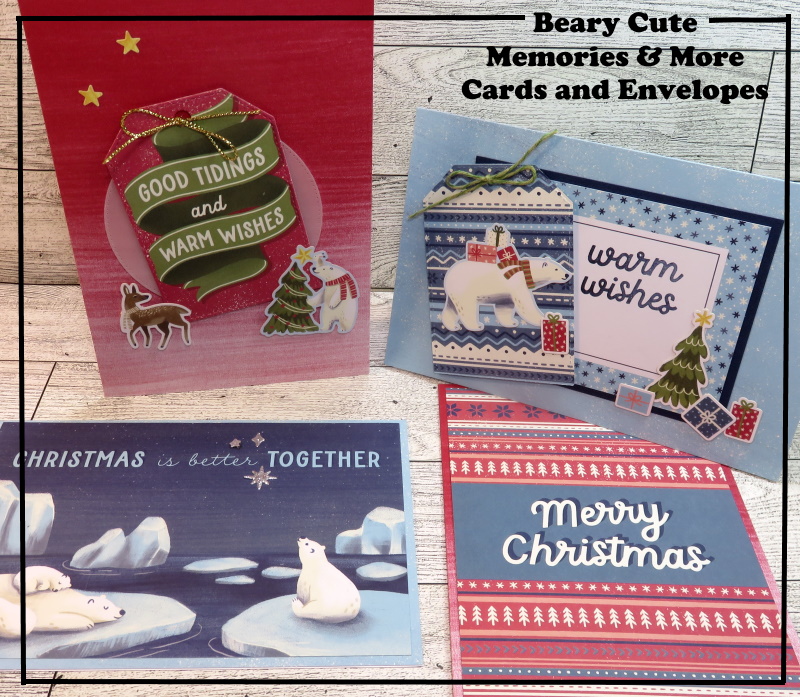
Welcome back, crafting enthusiasts! Are you all geared up for the holiday season? There’s something about the magic of Christmas that fills the air with warmth and joy. And what better way to capture those cherished moments than with the Beary Christmas Memories & More Cards and Card Pack & Envelopes from Stampin’ Up!

We’ve explored the world of these fabulous Christmas-themed cards and envelopes and today we’ll discover the immense versatility they offer for creating stunning projects, as I share a delightful scrapbook page designed by the creative minds at Stampin’ Up!

The beauty of these Memories & More Cards lies in their versatility. While they’re perfect for creating traditional holiday cards, they’re not limited to just that. You can use them in a multitude of creative ways:

  1. Scrapbooking: Create beautiful scrapbook layouts like the one we’re about to explore.
  2. Decor: Incorporate these cards into your holiday home decor projects, such as table centerpieces, garlands, or framed art.
  3. Gift Tags: Cut out portions of the cards to make adorable gift tags that will add a special touch to your presents.
  4. Journaling: Use them in your journals to capture the memorable moments of the season. In fact, hand them out and have your family write down their feelings on the cards, then match them up with a photo …. EASY Scrapbooking and you have captured their feelings for a lifetime of memories. ❤

So, are you ready to embark on a creative journey this holiday season with these delightful supplies? I know I am! Get your hands on the Beary Christmas Memories & More Cards and Card Pack & Envelopes and let your creativity run wild.

Let’s make this holiday season even more memorable with handmade crafts, cards and scrapbook pages that will be treasured for years to come.

Merry crafting, everyone!

Beary Cute Gifts For You

Hello Stampin’ Friends,

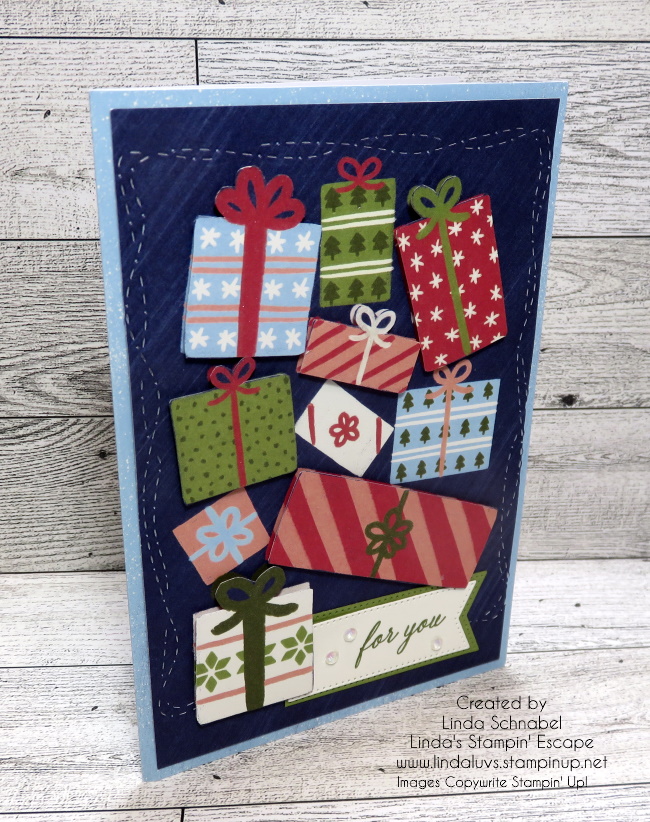
Yesterday, we explored the Beary Christmas Memories and More Card pack, and I showed you how to create some delightful and easy-to-make holiday cards. Today, we’re continuing our creative journey with these cards by exploring the art of layering. I’m using the same two cards, and cutting out the presents on one to layering a few onto the first card … you can actually get two card from 3 of these 4′” x 6″ present cards.

One of the most enjoyable aspects of crafting is experimenting with different techniques and materials to make your creations stand out. Layering is a fantastic way to enhance the visual appeal of your cards. The key to successful card layering is to be adventurous and have fun.

Layering looks great with texture so I used the Stitched with Whimsey dies to create some fun texture around the edge. I added Wink of Stella to each of the bows on the packages that I popped up. My greeting was stamped in Old Olive from the Sparkling Snowflakes stamp set and then die cut with the banners from the Stylish Shapes dies.

So, if you’re ready to have some fun with your holiday card-making, give this layering tip a try. The Beary Christmas Memories and More Card pack offers an excellent canvas to spark your creativity. With a little patience and a sprinkle of festive magic, your layered presents will be sure to spread joy and cheer to your loved ones this holiday season.

Hope the cards that I have shared these past two days have inspired you to try some fun and easy layering techniques.

Thank you for checking out my blog … Have a great day.

Twelve Weeks of Christmas: Week 4

Hello Stampin’ Friends,

The holiday season is just around the corner, and what better way to spread joy and warm wishes than by sending heartfelt Christmas cards to your loved ones? If you’re looking for a simple and delightful way to craft your own Christmas cards, Stampin’ Up! has the perfect solution with their Beary Christmas Memories & More Cards and Envelopes. In this blog post, we’ll explore the ease and creativity that comes with using these wonderful products to craft your own personalized Christmas greetings.

Today I have a video with 4 cards to share with you …

One of the key advantages of using Stampin’ Up! Beary Christmas Memories & More Cards and Envelopes is that the cards are pre-designed and ready to use. The cards feature delightful Christmas-themed designs that instantly set the festive tone for your holiday greetings. These designs include adorable bears, festive ornaments, and cheerful patterns that are sure to bring a smile to anyone’s face.

Creating your Christmas cards from scratch can be time-consuming, but with these pre-designed cards, the process becomes a breeze. You can simply pick the cards that resonate with your style and sentiments, saving you precious time during the busy holiday season.

While the cards are pre-designed, there’s plenty of room for personalization. You can add your own heartfelt messages, family photos, or even embellishments like ribbons, stickers, or glitter to make each card truly your own. This is a great way to make your cards unique and memorable.

Creating Christmas cards with Stampin’ Up! Beary Christmas Memories & More Cards and Envelopes is a delightful and stress-free way to share your love and warm wishes during the holiday season. These pre-designed cards, accompanied by coordinated envelopes, make the process of crafting your own cards easy and enjoyable.

With the freedom to add your own personal touches, you can create cards that are as unique as the people you’re sending them to. So, make this holiday season extra special by sharing your love and creativity with your friends and family through personalized Christmas cards.

Thank you for taking time out of your Sunday to stop by for a visit ….

Happy crafting!

Jolly & Bright Christmas …

Hello Stampin’ Friends,

We maybe celebrating Halloween on my Facebook Page but here on my blog … it’s all about Christmas. It is sneaking up on us quickly so I’m hoping to inspire you with today’s cutie from the Merry & Bright Bundle!

Measurements: 

  • Lemon Lime Twist: 5 ½” x 8 ½”
  • Basic Black: scraps
  • Real Red: scrap
  • Shaded Spruce: scrap
  • Granny Apple Green: scrap
  • Crushed Curry: scrap
  • Melon Mamo & Granny Apple Green Foil: scraps
  • Night of Navy Shimmer: scrap
  • Vellum: 2 ½” x 3 ¼”
  • Merry Bold & Bright: 3 ¾” x 5”

Instructions:

  • Cut a 5 ½” x 8 ½” Lemon Lime Twist card base. Fold in half.
  • Cut a 3 ¾” x 5” multi-color designer paper panel.
  • Round the corners of the designer paper using the circle punch.
  • Adhere the designer paper to the card base.
  • Cut a 2 3/8” x 3” piece of vellum using the Nested Essentials dies.
  • Stamp the sentiment pieces onto a scrap piece of Shaded Spruce, Real Red, & Granny Apple Green cardstock using Craft White ink. Let dry completely. Cut.
  • Lay the sentiment pieces onto the vellum for placement.
  • Stamp “Jolly” onto the vellum using Jet Black Stazon ink.
  • Adhere the sentiment pieces to the label using Stampin’ Dimensionals.
  • Add adhesive ONLY to the BACKSIDE of the sentiment behind the cardstock pieces.
  • Adhere the label to the card front.
  • Cut a star from Crushed Curry cardstock and adhere to the top of the sentiment using a Stampin’ Dimensional.
  • Cut a light bulb from Melon Mambo Foil, Granny Apple Green Foil and Night of Navy Soft Shimmer paper.
  • Cut the wire and (3) bulb sets from Basic Black cardstock.
  • Adhere the colored bulbs to the bulb pieces.
  • Slide the completed bulbs onto the wire and adhere to the card front using Stampin’ Dimensionals. Tack the ends of the wire if needed.

Thank you for stopping by today, I hope this fuels your holiday stamping. Some of my stamping friends are done, and some are like me and haven’t started YET!! Have YOU started your holiday cardmaking?

Have a great day ~

Twelve Weeks of Christmas: LIVE Tonight

Hello Stampin’ Friends,

Are you ready to explore the world of stunning Stampin’ Up! designer papers and take your cardmaking skills to the next level? If so, you’re in for a treat! Tonight I’m going LIVE with Week #2 of my Twelve Weeks of Christmas.

📆 Date: Today 10/24/23

🕕 Time: 6:30 pm Central Time

📍 Location: Facebook Live Event / Click Here

This evening, I’m thrilled to invite you to a Facebook Live event where we’ll dive into the art of showcasing these beautiful designer papers. I’ll be sharing not one, but TWO incredible ways to make your creations shine.

🌟 Quick & Simple Layout for Easy Cardmaking: Perfect for beginners and those who love a straightforward approach to crafting. You’ll learn how to create stunning cards with ease, using the charm of Stampin’ Up! designer papers.

🎉 Fun Fold Design for That Extra WOW Factor: For those looking to elevate their card game, I’ve got a delightful fun fold that’s bound to impress both you and the lucky recipient of your masterpiece.

To join, simply visit my Facebook page at [Linda’s Stampin’ Escape] at 6:30 Central Time. Make sure to click the notification bell so you don’t miss a thing!

Don’t miss out on the fun – we can’t wait to see you there! 💖✂️💌

See you tonight! 🌈

#CraftingWithPassion #StampinUp #FacebookLive

Stamp with Me: Follow Along Video

Hello my Stampin’ Friends,

Today I’m sharing the video for my Stamp with Me and you can follow along at your own pace. You’ll be able to pause it when needed and then carry on. It’s a simply yet fun layout the has texture and dimension to the card.

Grab a cup of coffee, your supplies and join me ….

I hope you enjoyed stamping with me, and as I stated in the video … I would love to see your card!! This easy to assemble layout is perfect for any season and any reason.

Thank you so much for joining me today, I appreciate your time.

Have a beautiful and blessed day.

Last Nights Leftovers … Crafters Heaven!

Hello Stampin’ Friends,

If you’re like me, you’ve probably been busy creating beautiful holiday cards, and you might just have a pile of leftover die cuts from your previous projects. Well, fear not! Today, we’re going to embrace the Joy of Christmas suite of products and turn those remnants into a cute and quick Christmas card that will warm the hearts of your recipients.

The Joy of Christmas Suite: A Festive Wonderland

Before we dive into our crafting adventure, let’s talk about the Joy of Christmas suite of products. This collection is a true winter wonderland for crafters, featuring everything you need to create stunning holiday cards and decorations. With its rich colors, whimsical designs, and versatile elements, the Joy of Christmas suite is sure to make your crafting sessions joyful and memorable.

The suite typically includes:

  1. Christmas-themed Paper: High-quality, double-sided paper with charming holiday patterns.
  2. Stamps and Dies: Coordinating stamp sets and die cuts for easy card-making. (Save 10% when bundled)
  3. Embellishments: Currently Unavailable.

Now, let’s put those leftover die cuts to good use and create a delightful Christmas card!

All you need is your card base, I’m using Shaded Spruce, then my 4″x 5-1/4″ piece of Designer paper and then I took the left over piece from yesterday’s card and popped it onto a piece of Shaded Spruce designer paper …. And there you have it! In just a few easy steps, you’ve transformed your leftover die cuts into a cute and quick Christmas card that’s sure to bring a smile to someone’s face.

Remember, the Joy of Christmas suite of products is all about embracing the festive spirit and spreading joy through your creations. So, dig into your crafting supplies, unleash your creativity, and enjoy the magical process of making handmade Christmas cards. After all, there’s nothing quite like receiving a thoughtful and homemade card during the holiday season.

Happy crafting, and don’t forget to join me LIVE on Saturday for my World Cardmaking Day LIVE on Facebook…..