W-Fold Card: Open If You Dare …

Hello Stampin’ Friends ~

Yesterday I shared the “To Every Season” Bundle with you, today I’m pairing it with the “Spooktacular Bash” Bundle and delivering it to you on a spooky little card featuring the W-Fold!!  Are you ready??  Open if you dare ….

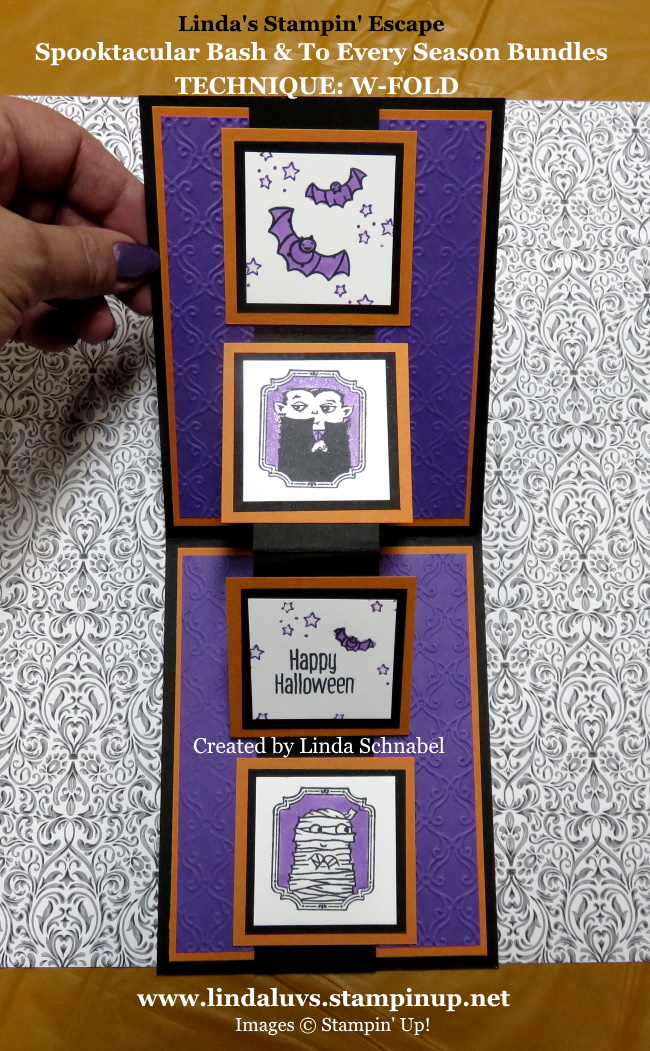
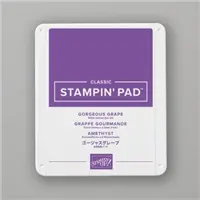
The background is Gorgeous Grape and stamped with Gorgeous Grape using both the “To Every Season” and “Spooktacular Bash” stamp sets, which is then layered over Pumpkin Pie over a Basic Black base.

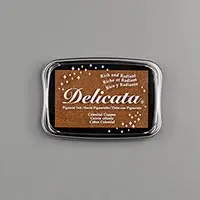
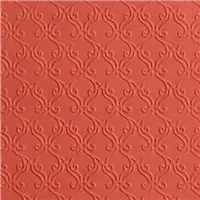
The coffin was cut from a template I made from the cute little Coffin Treat Boxes also found in the Monster Bash product suite. I embossed it with the Stylish Scroll Embossing Folder and with a light dragging of the Celestial Copper Delicata Metallic Ink Pad across the raised image you create some added dimension and sparkle!

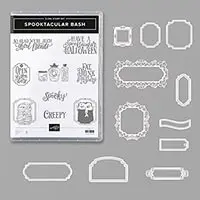
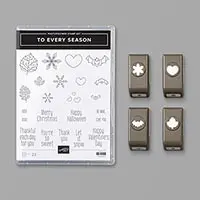
The greeting is from the Spooktacular Bash bundle and die cut with the coordinating (and layering) dies… and lets not forget about those cute little bats which were punched from the To Every Season punch pack .  Notice the sparkle … you guessed it, Wink of Stella!!

NOW IT’S TIME TO OPEN …

The “W-Fold” is created to POP out your images! This is the fold that our September Club members learned this month. Can you tell that the center 2 images are popping right out of your card? Keep opening ….

I tucked some fun little creatures inside the card to wish you a Happy Halloween! We layered the inside the same as the outside of the card, but instead of stamping on the grape … we embossed it just like we did to the coffin lid!

Now it’s fully open so you can see how nicely the card lays down. and a better look at our stamped images.  The were all colored in the grape and then Wink of Stella was added over them.  The inside band is what makes the W and our images pop.

I love that I can use the “To Every Season” Bundle with the “Spooktacular Bash” Bundle and then take it onto the next holiday! I’m all about purchasing products that I can use throughout the year … maximizing my money!! If you have to have the products you saw today … just click on the images below and it will take you to my on-line store.

Stop back tomorrow and I will show you how I take both of these bundles onto the next holiday!!

Thank you for checking out my blog … have a wonderful day!!

Today’s stamping supply list … 


To Every Season …

Hello Stampin’ Friends ~

I’m back with a special card direct from Stampin’ Up!  This one little bundle can

To every season . . . there is a time for bats, a time for snow, and a time for love. Combine the greetings and images from the To Every Season Stamp Set for tags, treat packaging, or whatever is in season.

Cut out snowflakes, hearts, bats, and leaves for your projects using the Every Season Punch Pack.You’ll use this multi-occasion punch set again and again.

Punches are a quick and easy way to add die-cut shapes that add interest and depth to your projects. And punches are a great way to cut out stamped images—many of our stamp sets have coordinating punches. Our punches are high quality, affordable, and easy to use.

You’re thankful for friends and family both near and far. When is the last time you told them? This card is the perfect way to share your feelings.

The To Every Season Bundle comes with a stamp set and the Every Season Punch Pack, which is perfect for cutting out those adorable leaves that make this card pop. To get the bundle, click on the images under the “Shopping List”.

Thank you for joining me again today.  I hope you enjoyed today’s bundle … stop back tomorrow and I will show you what I did with this! A fun new fold

Enjoy your day ~

Today’s Stamping Supply List … Just click on an image to learn more or to begin your shopping experience with me.  Thank you.

Simply Sunday: Spooktacular Dracula!

Hello Stampin’ Friends ~

Today I have another card share from the Monster Bash Suite bundle … this includes all of the coordinating products.  This is actually a step up from my usual Simply Sunday as we will be using the beautiful dies that are included in this suite. I try to stay away from die cutting on my Simply Sunday posts but this suite is too cute and easy to play with.

This card was not part of my Halloween Bash class … two of the cards we made included a fun fold and a shaker card!  In fact, I have had additional interest in this class; I will be hosting another ♥ Here is the information …

Today’s card was created by me and my 4 year old Great Grandson … he loves using the Bigshot!!  His GG (me) shows him how to layer and he makes it go. lol  He cut both of the delicate frames out for me.  The large is cut from Lovely Lipstick and the small is cut from Basic Black … both of these ornate frames are included in the die set that comes in the bundle.

We stamped Dracula and also die cut him from a coordinating die. Love how these layer…

We colored the background of Dracula’s picture in Lovely Lipstick and then added Wink of Stella to it. It really adds dimension to the picture.  The frame was colored with Soft Suede and then was layered onto our ornate frame.

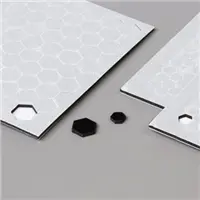
Our second ornate frame showcases our greeting which comes from the coordinating stamp set; Spooktacular Bash Cling Stamp Set.  I’ve also added “Wink of Stella” to the frame which coordinates with the background we created behind Dracula.  A touch of ribbon behind our greeting and black enamel dots from the Monster Bash Enamel Shapes.

Junior likes Stampin’ Dimensionals as well so he helped me pop up the greeting and Dracula.  We added a strip of this pretty Monster Bash Designer Series Paper pattern to the inside of the card to coordinate with the front and our card is done!

I hope you enjoyed our card today … Junior and I sure had fun making it!  I might have to invite him over to help me bigshot all the pieces for our upcoming Halloween Bash class.

Thank you for sharing a part of your Sunday with me.

Enjoy your day ~

TODAYS STAMPING SUPPLY LIST …..


Halloween Bash Coffin Treat Boxes …

Hello Stampin’ Friends ~

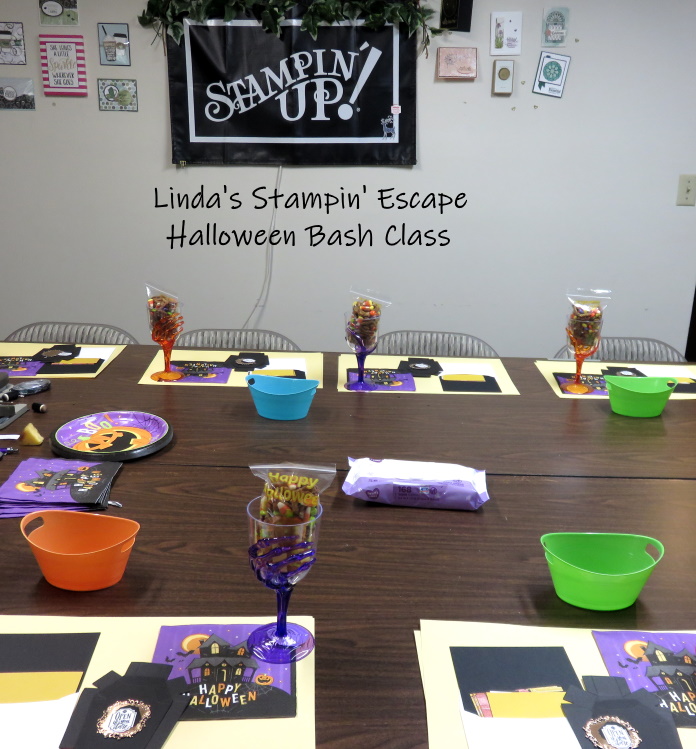
How are you on this beautiful day? Last night I held my Halloween Bash …

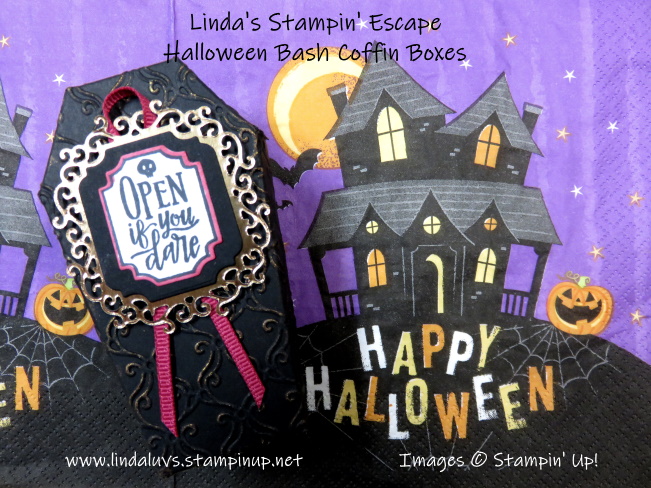
Although I don’t share all our creations, I would like to share one.  It is the Monster Bash Coffin Boxes which make the perfect little treat box for those very special Trick or Treaters in your life.  These would also make good table décor, gift boxes or name place holders, with a treat of course at your Halloween Bash!!

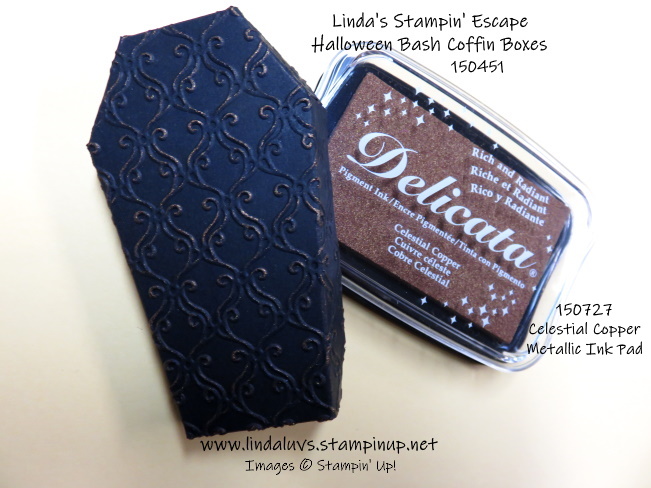
These little beauties come pre-cut and pre-scored in a package of 12 so all you have to do is glue them together.  If you would like to dress them up a bit, you can emboss the lid with the Stylish Scroll Embossing Folder like we did in class.  The we used the new Copper Metallic Ink pad to “age” our coffin a bit.  With a gentle touch, simply drag the ink pad across the raised (embossed) images on the lid.

The cute little greeting, the black mat and the ornate copper background were all cut from the dies included in the Spooktacular Bash Bundle! Love our bundles because you can save 10% and that savings is also included when you purchase the entire product suite as a bundle… Nice!  That is what I did because I had to have it all.  I will share more of the product suite with you this month.

We added a piece of Lovely Lipstick ribbon behind our greeting and then I put a piece of Lovely Lipstick cardstock through my shredder and tucked it into the box to hold my treats.  I like using my cardstock this way because then it coordinates with the colors I use in the rest of my project.

I hope you enjoyed our little treat boxes as much as we did making them. They really are quick -n- easy to do and will add the prefect touch to your Halloween party. Better yet, when you see the excitement in the eyes of your special little trick or treater when you give them this fun Halloween treat.

I have a few people interested in a second class … If you would like to join us, let me know and I will host another.  We had a great time and everyone loved the projects we did!!  email me at lindaluvs2stamp@aol.com or message me below.

Have a wonderful day and thank you for stopping in to see me.

TODAYS HALLOWEEN BASH STAMPING SUPPLY LIST …


Friday the 13th: Monster Bash Cards

Hello Stampin’ Friends ~

For those of you who enjoy staring at the moon… you’re in for a treat this week.  Get ready for the harvest moon effect — when it will seem like five consecutive nights of full moons. And for the first time in 19 years, Wisconsinites will get a full moon on Friday the 13th, and it won’t happen again until August 13, 2049!!

I have a full moon for you …

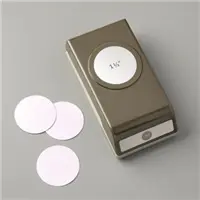
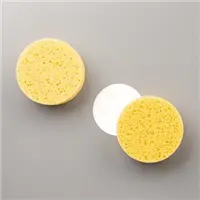
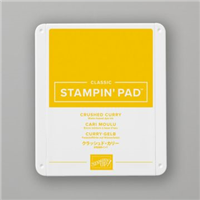
The inside greeting also comes from the “Spooktacular Bash” stamp set and was stamped onto the Very Vanilla cardstock.  I then punched a 1-1/2″ circle from a piece of scrap cardstock and used it as a “mask” so I could sponge a moon onto the card … just to add a little more drama. I used Crushed Curry for my moon, which coordinates with the Monster Bash Designer paper!

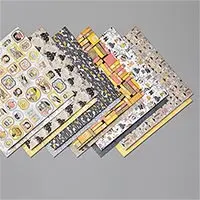
There are so many cute patterns in the Monster Bash Designer paper and this is one of my favorites.  I love anything that makes my card making quick and easy! BUT … it has to be cute, handsome or beautiful!! We won’t skimp on looks!

I have another cute card for you, both of these I have shared earlier but I couldn’t resist sharing these on Friday the 13th!!  I have more samples but can’t share them yet, they are for my Halloween Bash Class tonight.  I really like the vintage looking pattern on this card (actually, the background is another pattern/color in the paper pack).

Our handsome couple comes from yet another pattern in the Monster Bash Designer series paper.  The beautiful frame behind the picture comes from the coordinating die set.  This vintage look of this could be used for a “real” anniversary card or anything you choose … just replace our couple with a sentiment or a flower pattern.

Thank you so much for joining me today, I’ll be back tomorrow at my usual time with another great card.

Have a beautiful day.

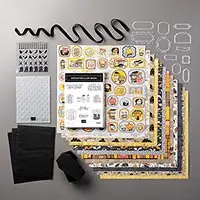
TODAY’S STAMPIN’ SUPPLY LIST: I have listed the entire Monster Bash Suite (One number and you’ve got it all) and the bundle, along with each product I used seprately. There is a 10% Discount on the Bundle (including when you purchase it in the suite).


Simply Sunday: Scrapbooking Halloween from Scraps!

Hello Stampin’ Friends ~

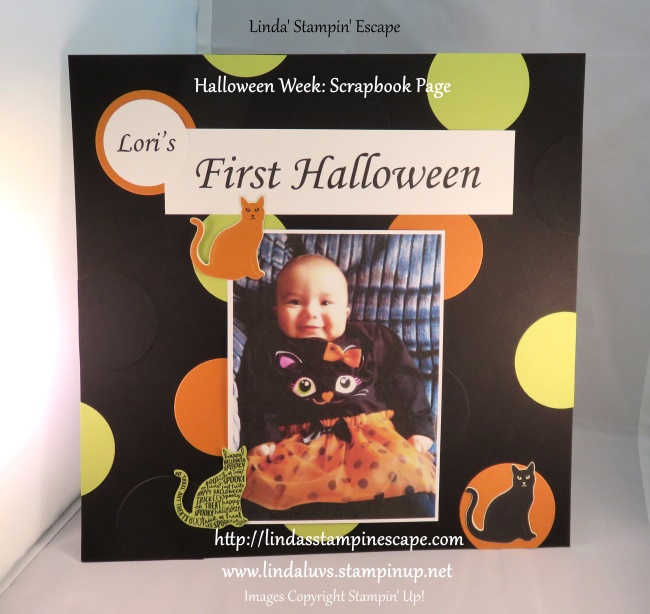
Today I’m going to share with you a quick -n- easy scrapbook page that was created out of scraps!

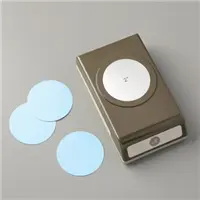
Our clubs had created a card where we were punched out colors of cardstock with our 2″ Circle punch so we ended up with a whole bunch of left over circles.  Not wanting anything to go to waste, I used the circles to create the background for today’s scrapbook page.  I simply just glued the circles on using the Tombo Multi-Glue.

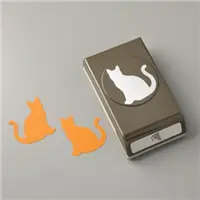
The title was created from my computer, the kitty’s were created from the retired “Spooky Night” Designer Series paper… but our cat punch is still available to punch kitties for your page.  I thought it was appropriate since she was dressed as a little kitty cat!

Don’t ever pass up the chance to use up your scraps … this was fun and easy to create!

Still time to join me and your fellow stampers for a Stamp Club …

Thanks for checking out my blog today.

Hope you day is a beautiful one!

Today’s Supplies used to create the scrapbook page … 


Halloween Bash Stamp Class Announcement …

Hello Stampin’ Friends,

Step fright this was as I invite you in to my chambers for a Spooktacular event … My Halloween Bash Stamp Class!  It’s going to be a thriller of a night as we create 5 bewitching Halloween projects!  Don’t be a zombie on Friday the 13th of September, mark your calendar (or grave stone) and join your fellow stampers for an eerily good time …

The cost for the Halloween Bash Stamp Class is only $25.00 and includes all of your Halloween Bash supplies, embellishments, envelopes and anything extra to complete your projects (something sweet perhaps?) This is the perfect class if you are looking for special cards / gift ideas for our favorite spooky holiday … Halloween .

The only thing you need to bring is your favorite adhesive … everything else is ready for you!

Join us for a fun evening out stamping * snacking * creating * and meeting new friends (or bring yours along!)


I am so excited to be able to invite you to our 2019-20 Stamp Clubs!!

My clubs are starting in September and we’re looking forward to stamping with you!  This years Stamp Clubs will be highlighting Techniques and Fun Folds, plus I’ll be celebrating 20 years with Stampin’ Up! So expect more fun and surprises throughout the year.

There is no cost to the stamp club, however a $30 Minimum Order is required. You get what your ordered, plus a minimum of 2 projects and instructions!
* The minimum order allows each club member to receive HOSTESS BENEFITS for one month (more FREE stamping goodies)

Call me to reserve your spot at [262] 334-1009

Join the Club & Make new friends!

Monsterversary …

Hello Stampin’ Friends ~

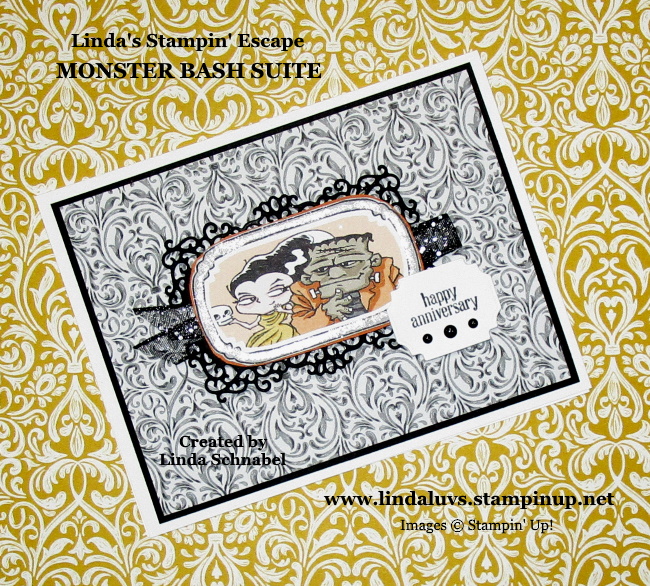
Hope you had a great weekend and that you had a chance to check out yesterdays Monster Bash card. A quick -n- simple card with plenty of “spooky” and cute Halloween characters. Speaking of those bewitching characters … we’re joining them to celebrate an anniversary today! I fell in love with the beautiful filigree designer paper, so that will be the base of todays card …

Our anniversary couple was cut from another fun pattern of the Monster Bash Designer paper and I painted the frame with … you guessed it “Wink of Stella”. I just had to add a little glitz to the anniversary card.

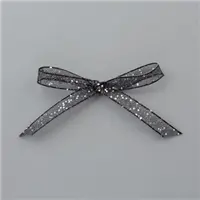
The frame was die cut using one of the elaborate frames from the Ornate Frames Dies in the suite … because this one was not the height I needed, I again the cut it in half lengthwise and adhered it to the back to create a mat.  This left a gap between the top and bottom, so I tucked in the beautiful Black Glittered Organdy Ribbon ribbon!! The added sparkle pairs nicely with the Wink of Stella.

The greeting comes in the “Itty Bitty Greeting” stamp set from the Annual Catalog. I stamped into onto Whisper White and cut it out using another of the dies from the Ornate Frames Dies included in the bundle. Then I used one large black enamel dot and two of the small dots from the Monster Bash Enamel shaped and popped the entire assembly onto the card with our Stampin’ Dimensionals.

I find this Monster Bash product suite so fun to create with.  In fact, watch for a fun class announcement this week. If you love all things Halloween, you are going to love this upcoming class.  Make sure your on my mailing list and / or follow my Linda’s Stampin’ Escape Facebook page.  

Thank you for sharing your day with me!

Have a great day.

TODAY’S STAMPIN’ SUPPLY LIST: I have listed the entire Monster Bash Suite (One number and you’ve got it all) and the bundle, along with each product I used seprately. There is a 10% Discount on the Bundle (including when you purchase it in the suite).


Simply Sunday: Monster Bash Suite

Hello Stampin’ Friends ~

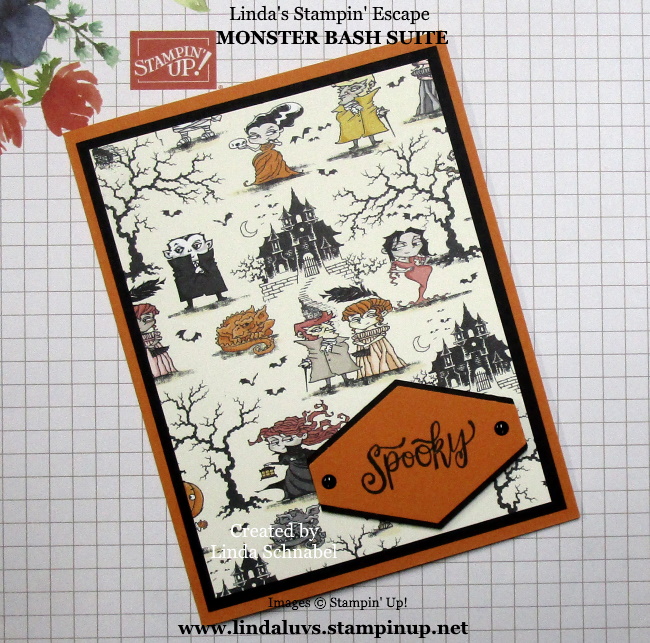
With the Holiday Catalog going live in a little more than a week, I just couldn’t wait to share a bit of the SPOOKY side today.  I am using products from the Monster Bash suite … keeping it simple but the pattern I picked from the Monster Bash Designer paper, you don’t need much else! This pattern boosts Haunted Houses, Vampires, Bats and more …

With just this dazzling piece of designer paper, some layering of Basic Black and Pumpkin Pie, topped off with a simple greeting … you have a cute card!

The greeting comes in the coordinating “Spooktacular Bash” stamp set. I stamped into onto the Paper Pumpkin cardstock and punched it out using the Tailored Tag punch, the punched out another piece in Basic Black … cut it in half lengthwise and adhered it to the back to create a mat.  I used the large black enamel dots from the Monster Bash Enamel shaped and popped it onto the card with our Stampin’ Dimensionals.

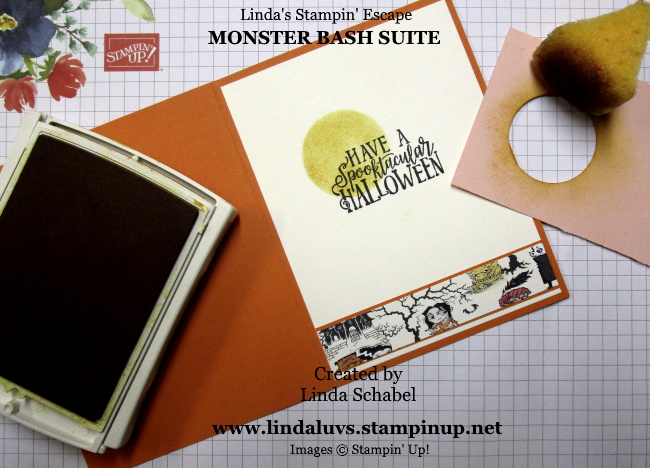
The inside greeting also comes from the “Spooktacular Bash” stamp set and was stamped onto the Very Vanilla cardstock.  I then punched a 1-1/2″ circle from a piece of scrap cardstock and used it as a “mask” so I could sponge a moon onto the card … just to add a little more drama. I used Crushed Curry for my moon, which coordinates with the Monster Bash Designer paper!

I like to cut one sheet from each designer paper pack into 4′ x 6″ pieces … this forces me to use my cardstock and quit hoarding it!! lol  I can then trim the pieces down to fit my card, which I did here and then used the piece I trimmed off to compliment the inside of the card. It’s so cute.

Hope you enjoyed the card.  Sorry for the late post today … I spent Friday with my great-grandson, daughter and grand-daughter shopping and going to the movies.  We went to see Toy Story 4, and yes, I cried!!   And Saturday was Eileen’s sons 50th birthday … so we spent the entire day and late into the evening with him. ♥ Needless to say, I did not get much stamping done this weekend!

Thank you so much for joining me today, I’ll be back tomorrow at my usual time with another great card.

Have a beautiful day.

TODAY’S STAMPIN’ SUPPLY LIST: I have listed the entire Monster Bash Suite (One number and you’ve got it all) and the bundle, along with each product I used seprately. There is a 10% Discount on the Bundle (including when you purchase it in the suite).


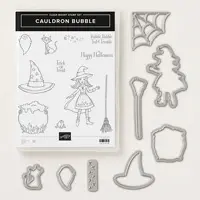
Cauldron Bubble Stamp Set

Hello Stampin’ Friends ~

I am was having technical difficulties … stinkin’ computer would not let me access my files, who knows! But I got it all back this morning so just a quick post to share my favorite Halloween goodies on the Clearance Rack.  I will be back tomorrow this my “Magnolia” Class pics.  You’re going to love this card … even more when you find out how easy it is to do.

Cauldron Bubble Clear-Mount Stamp Set (147710) Price: $21.00 $15.75

Here are some cute samples of what you can create with this stamp set … and the framelits dies are also ON SALE and available!!

Cauldron Framelits Dies (147914) Price: $28.00 $16.80

What do you think?  Are you a Halloween fan? If so, you can now get this cute stamp set and coordinating dies On Sale!

Thank  you for hanging out with me today. I’ll see you tomorrow with the Magnolia Lane suite …

Have a good day ~


Halloween Week: SCRAPBOOK

Hello Stampin’ Friends ~

Today I’m going to share with you a quick -n- easy scrapbook page that was created out of scraps! Last year our Stamp Club made a Halloween card using the Seasonal Chums bundle … No longer a bundle but the stamp set and dies are still available.

And I used the cut out circles to create the background for today’s scrapbook page.  I simply just glued the circles on using the Tombo Multi-Glue.

The title was created from my computer, the kitty’s were created from the “Spooky Cat” bundle and “Spooky Night” Designer Series paper … also from last year (sorry … but we have to use up that paper sometimes!). I thought it was appropriate since she was dressed as a little kitty cat!

I wish all my scrapbooking would go this quick -n- easy! I need to remind myself to “Keep it Simple” because the photo is your reason for scrapbooking in the first place 🙂 

Thanks for checking out my blog today.

Hope you day is a beautiful one!

Today’s Supplies used to create the scrapbook page …


Flashback Friday: Autumn Fun

Hello Stampin’ Friends ~

Thought it was time to have some fun and reminisce about past fall fun! I’ve got two “punch” cards to share with you today and a scrapbook layout.

Halloween is one of my favorite holidays (I love them all) but this is the time of year you can take a peek into the dark side all will having some fun… Halloween.

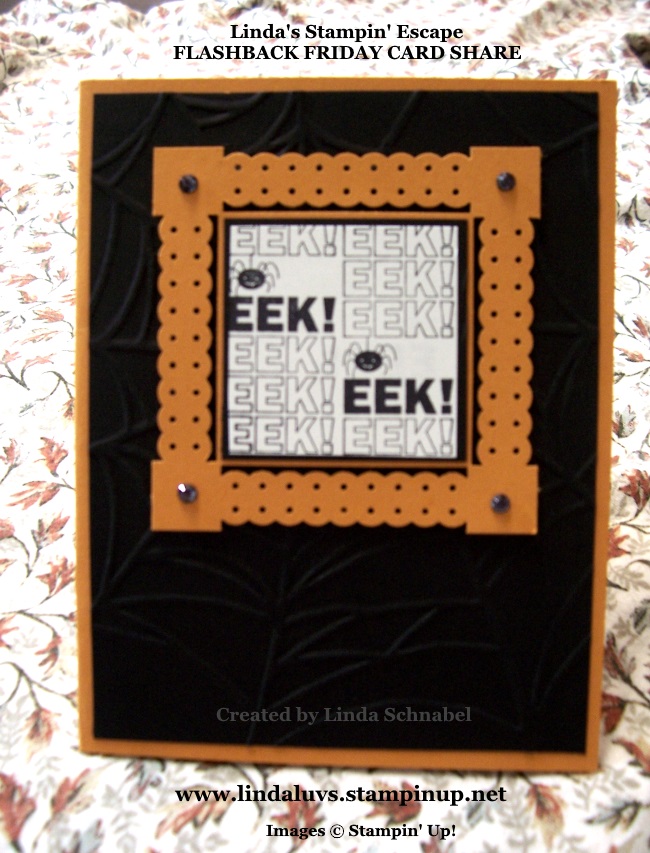
This card was created a few years back with this awesome border punch! If you punched on a 3 x 3 square piece, it created this frame … I’m sure some of you still have this border punch, so try it out because it also worked great when I used this frame on my scrapbook pages!

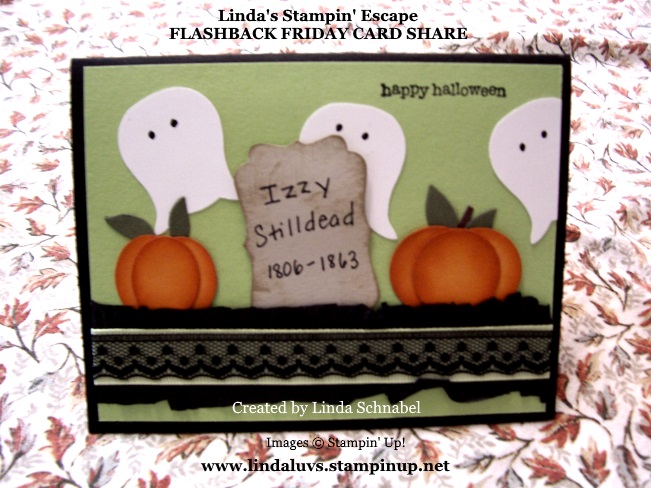
Now here is a really fun Halloween card created with punches …

I used the owl punch to create the ghosts (just flipped them upside down) … the pumpkins were created with oval and circle punches (3 each) and then you sponge the edges – I’m using Pumpkin Pie cardstock with Pumpkin Pie ink and then they are just layered together to create the pumpkin. They are so cute!

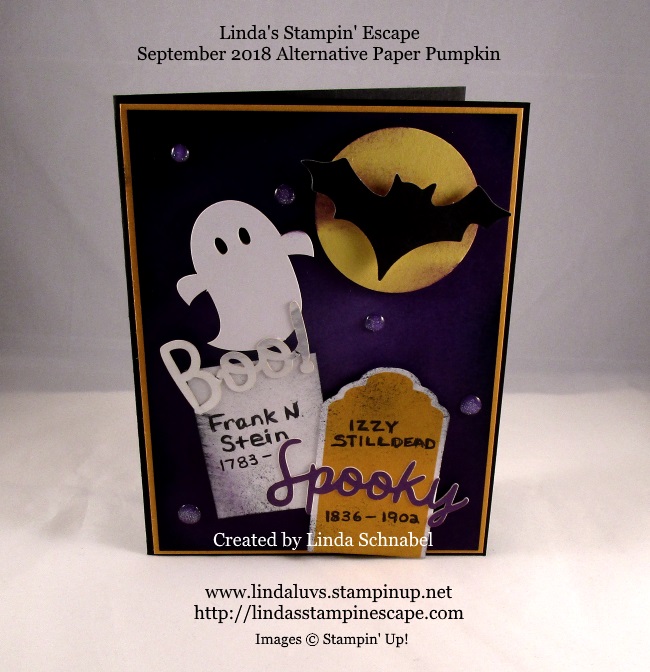
To make the gravestone I used a label punch …. I think the current “Everyday Label” punch would work great for the headstone! Then the stone was engraved (lol) handwritten by me.  It was just a super fun card to make.  Here is this years using the Paper Pumpkin September 2018 kit…

I simply used all the items in the kit to create this one … the headstones were the tags, and the ghost and bat were also in the kit… as well as the “spooky”.

My final share today is a quick and easy scrapbook layout…

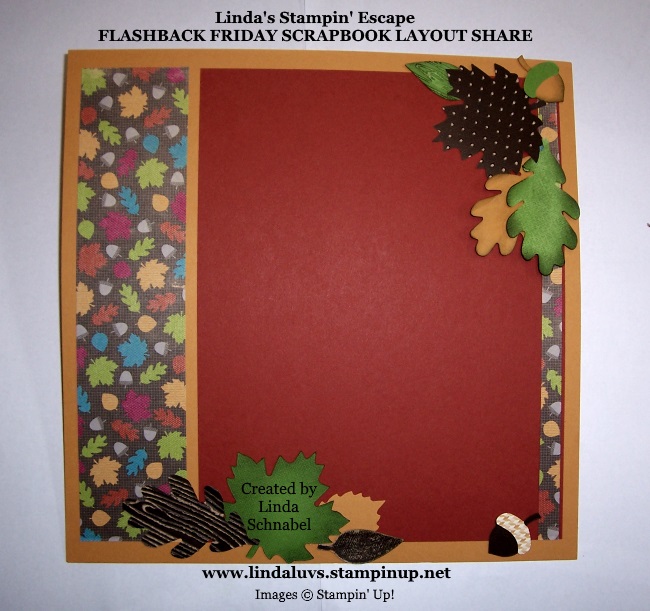
You could easily replicate this page using the Natures Poem Designer paper and Natures Root Framelits dies. Actually this layout would be cute anytime of the year! It’s been a while since I got any scrapbooking done, maybe someday soon!

Thank you for stopping in and checking out my Friday Flashback! I love going back and looking at things I’ve done years ago.  Some can stay in the past (LOL) and some are timeless.

Have a wonderful day and hope to see you back tomorrow.

Ready to get spooky?

Hello Stampin’ Friends ~

Today I’m sharing a little something old (not too old) and something new.  I must say that I am a bit of a Halloween nut! I don’t decorate as much as I used to but I still love crafting fun Halloween goodies and watching scary movies with all the lights out!! Not into gory … ghost stories are more my thing! lol

To pay homage to my ghosties, I have created this card …

A couple of weeks ago I shared my cute little Halloween boxes with you …  Look! A matching treat bag with my ghosties on it!! lol

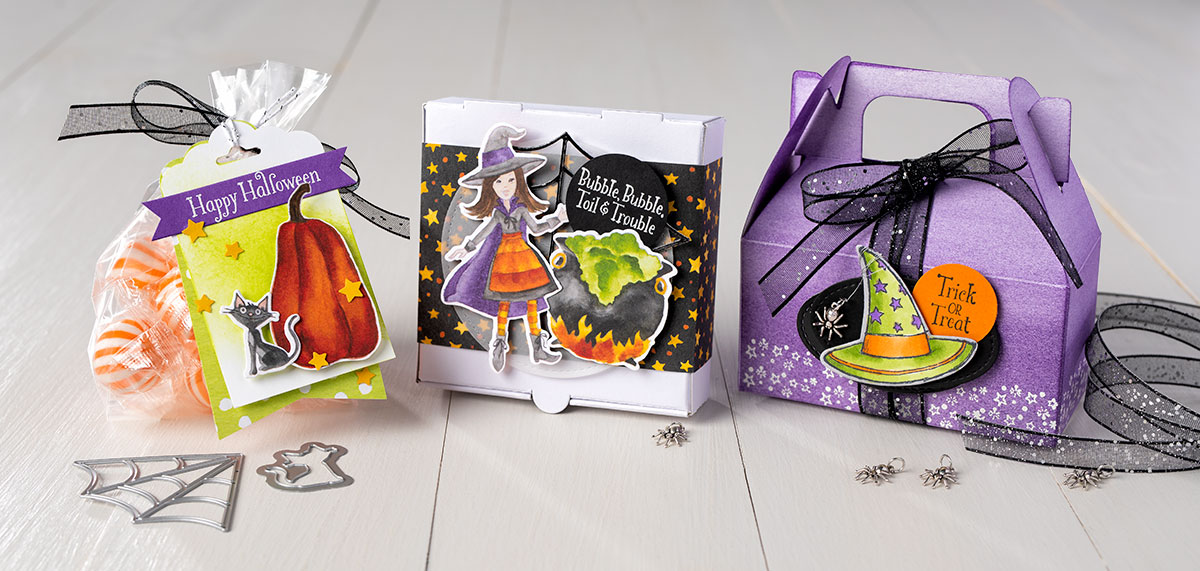
Oh, and I have more … Just in case you’re feeling a little witchy or have gone a bit batty lately… here are a few more bewitching little treat bags! Oh my, I have to stop with the puns!

There’s nothing quite as cute as a spooky lil’ witch! Here’s more frightfully fun and perfectly adorable treat bags…

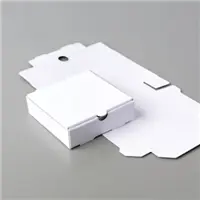
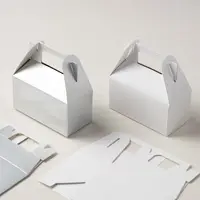
Take a close look … we’re using the cello bag for the first project, the Pizza Box for the second and last but not least is the Mini Gable boxes – spritzed with Gorgeous Grape!! I LOVE IT!!  (Put some rubbing alcohol in your spritzer with a few drops of ink refill to create the purple Gable box).

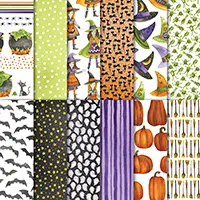
All of the projects you have seen here today were created with the products from the Toil and Trouble Suite on pages 48 and 49 of your Holiday Catalog.  The amazing Toil and Trouble designer paper coordinates with the Cauldron Bubble Framelits Dies (that is eerily awesome) and don’t forget those creepy little spiders you see crawling around, they are the perfect accent to the spider web die.  Ewe … they look almost real in this photo!!

Thank you for daring to drop in on this spooky trail of treats! I hope I have inspired you to create some Halloween fun of your own… make it a family affair. (Adams Family, Munster Family … OK, I’ll stop, besides I’m showing my age!!)

Have a Fun and Spooktacular day ~

Today’s Spooktacular Supply List …


Spooky Graveyard …

Hello Stampin’ Friends ~

Today I have my alternative Paper Pumpkin project to share with you … I may have gotten a bit carried away with the spooky side of things – lol

So I took the tags and cut them down to turn them into headstones and created a graveyard! The cute little ghost and the bat along with the greetings were all included in the Paper Pumpkin kit …

Since I sponged my background, I added a little sponging on my gravestones to age them a bit.  Not included in the kit was the moon which I just punched with the 1-1/2″ Circle punch. Oh yes … and I had to add a few orbs in the grave yard … the cute little Glitter Dots really did the trick.

Hope you enjoyed taking a haunted hike with me today through my spooooky graveyard, thanks for joining me.

Have a safe and fun day ~


Halloween Treat Bag & Tutorial

Hello Stampin’ Friends ~

I hope you had a chance to view all the cards and projects for Halloween that I shared with you yesterday.  Today, as promised, I have another 3-D project for you along with the instructions so you can create it too!  These are super cute -n- easy Halloween bags, however, with a switch of designer paper … you can have these for any holiday or family occasion!
I used many of the items in the Toil & Trouble product suite found on pages 48 and 49 of the Holiday Catalog. Halloween is one of my favorite Holidays … it’s the “fun” one for me.  Fun to decorate, fun with the kids … and candy!

I have several photos for you to take you step by step through the process of making these cute bags … except the decorations – those are just elements that I cut out (with the help of the coordinating dies) from the designer paper!

You will need any 12 x 12 piece of designer paper.  Cut in half … You will have 2 – 6″ x 12″ pieces and can create 2 treat bags from this one sheet.
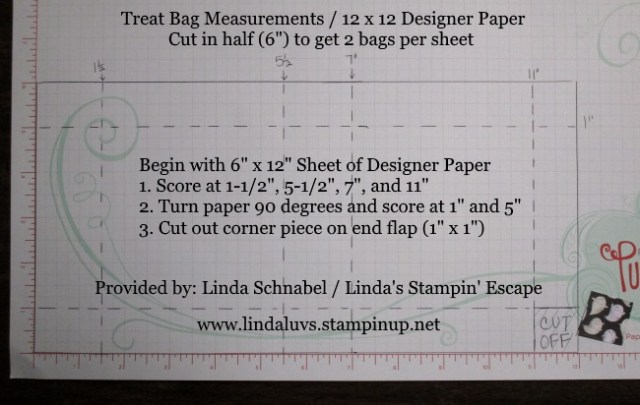
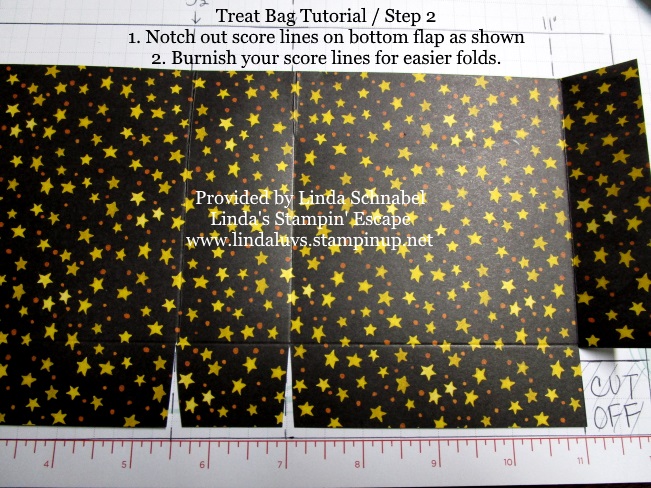
Once you have your paper cut, you will place it on your Simply Score board or you can use your paper cutter with the scoring blade. Lay it on the board as shown … 12″ should be horizontal (the long way).  Now you’ll score at 1-1/2″, 5-1/2″, 7″ and then 11″.  The last 1″ will be your flap that holds the bag together.

Now turn your paper 90° so the short side is at the top (horizontal) and score at 1″ and 5″ … this will be the top piece that gets folded over to create the two tone look and the bottom flaps!
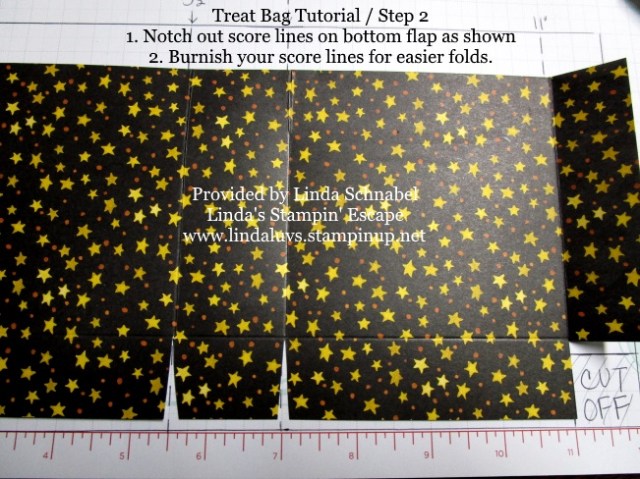
I always fold over (burnish) all my score lines – it just makes it easier to assemble.  You will notch out the score lines on the bottom (that is edge that has the piece cut out) See sample above.  Before you assemble you bag – You will fold over the top flap to reveal the second pattern and glue that flap down.  Now you are ready for assembly.

You can see on this next picture (on the flap) the two tone patterns from folding down the top flap.
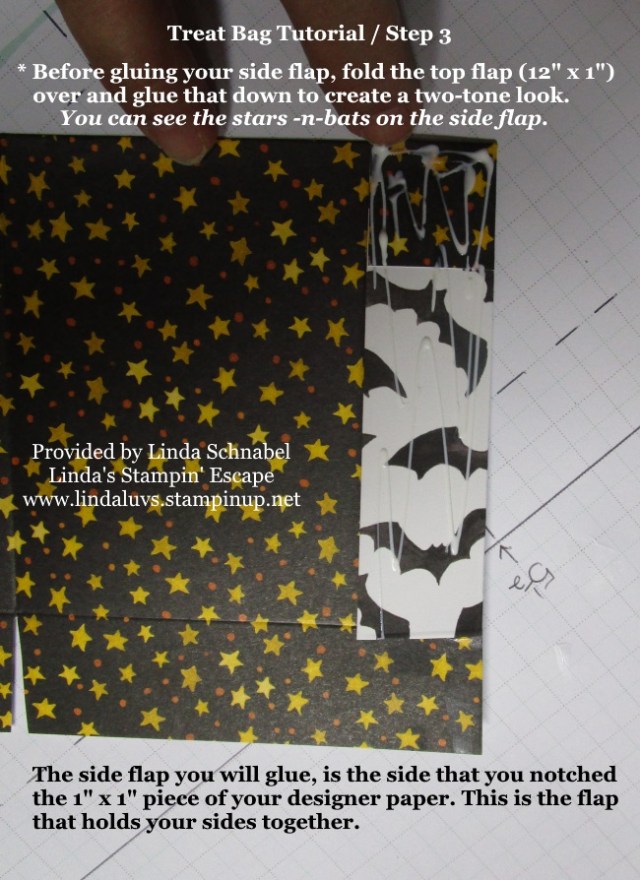
On the flap that has the 1″ x 1″ piece notched out … fold the flap in (the stars are actually the inside of this bag) and then align the flap with the opposite side of your bag.  I like using glue for creating bags because it allows you to move your flaps a little when aligning (it’s more forgiving) … the sticky strip and adhesives like that – once they’re down … they are down and there is no fixing that.  The glue holds beautifully once set.

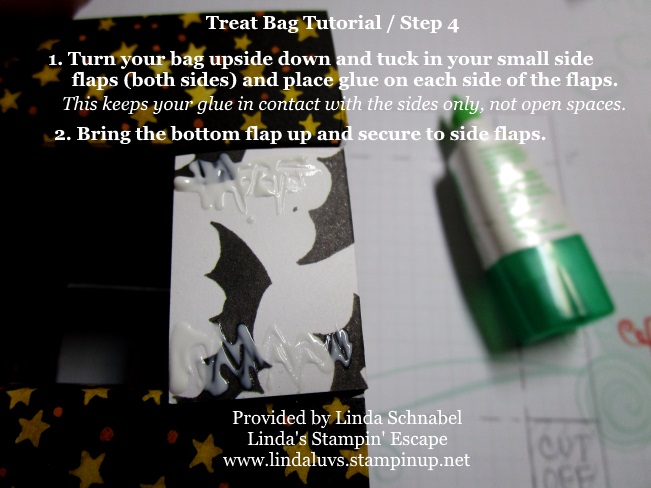
Next you will add glue to the two small flaps to begin your bottom …
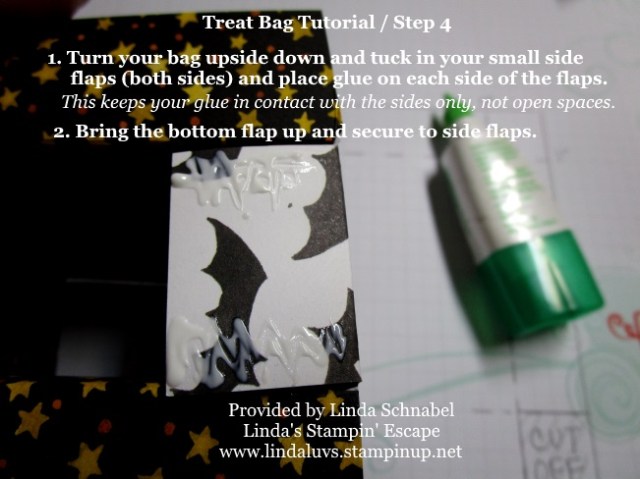
Add your glue to the sides of the flap as shown, and be sure to glue both of the small flaps. Then flip the bottom flap over the two small flaps and check your sides to see if they are aligned (so you don’t get a crooked bag).

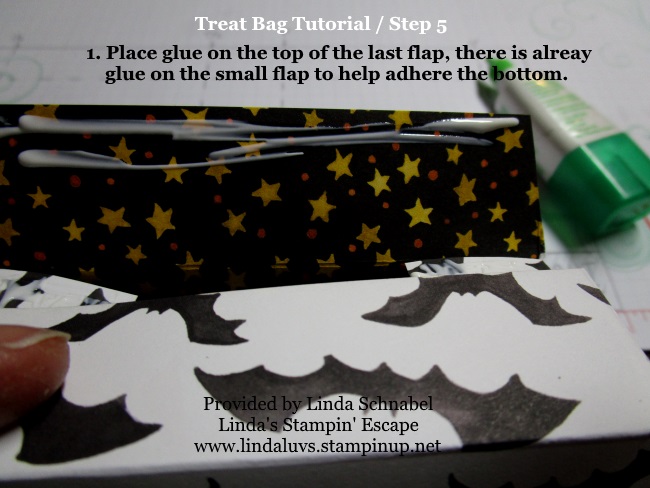
Next you will add glue to the very top of the top flap (shown in picture below) and fold over.  There is a little glue exposed from the small flaps the will help hold the top flap to the entire bottom.

Here’s a stampin’ tip: To ensure the bottom is secure, sit your bag up and then I use a pencil with the eraser side down and give a firm push on the bottom and make sure all flaps are down and secure.  Walla … Your done.

Now if you’d like, you can decorate the bag ~

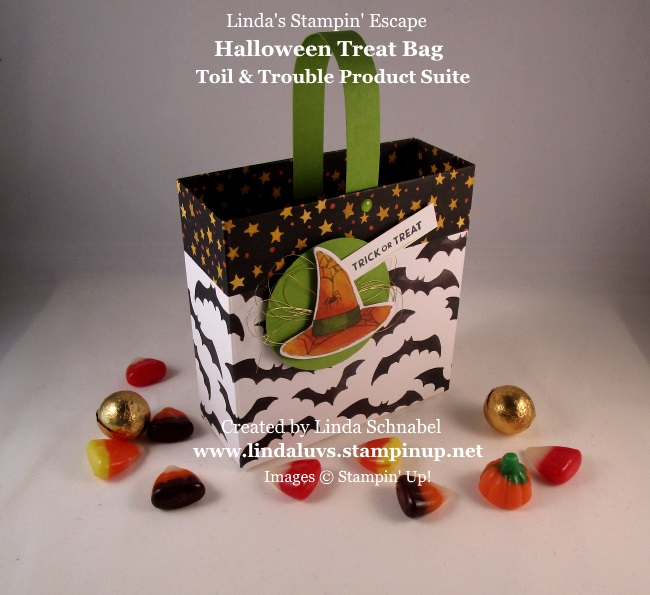
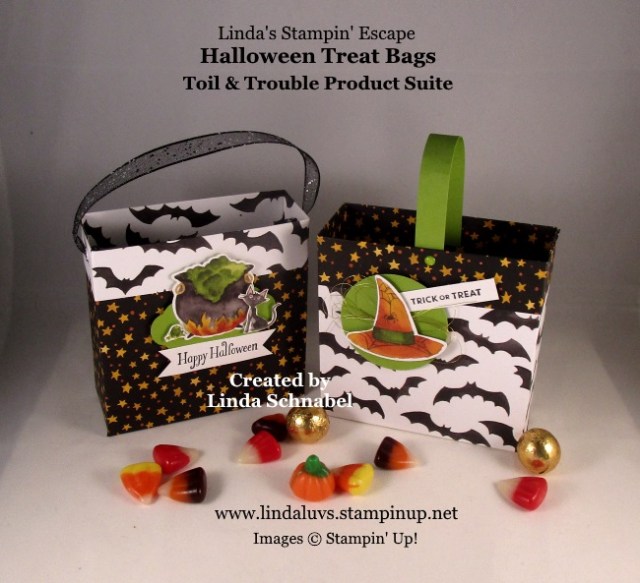
On this bag I highlighted the bats and used the stars as my topper.  Here I punched out a 2″ circle and used the hat from another pattern in the Toil & Trouble designer series paper.  I wrapped a little gold thread around my fingers and then placed it onto a stampin’ dimensional to hold it in place… I thought the gold tied in with the stars nicely. This one was finished off with a simple cardstock handle 🙂

On my second bag I just folded my score lines opposite from the first to expose the stars and highlight them!

The base for my decoration was the Pretty Label punch and embellished with cut out pieces from the designer places … all popped up to create some fun dimension! The Happy Halloween greeting comes from the coordinating stamp set and the ends were punched to create a banner.  To finish off this bag, I used the beautiful Black Glittered Organdy ribbon to create my handle… oh so cute!!

I hope I inspired you to pick up some of this amazing paper and even the Toil & Trouble bundle so you can create these cute little treat bags for your special little ghouls and goblins.

Thank you for joining me today … let me know (below) how you liked the projects and the tutorial. Either Like or Comment … I would appreciate the feedback.

Have a fun day ~

TODAY’S STAMPIN’ SUPPLY LIST ….