The past two days I shared a card created from Stampin’ Up! highlighting the Seasons Blessings stamp set, so today I have the Step-by-Step Video to share with you.
Sit back and relax while you watch how easy it is to create these little cuties ….
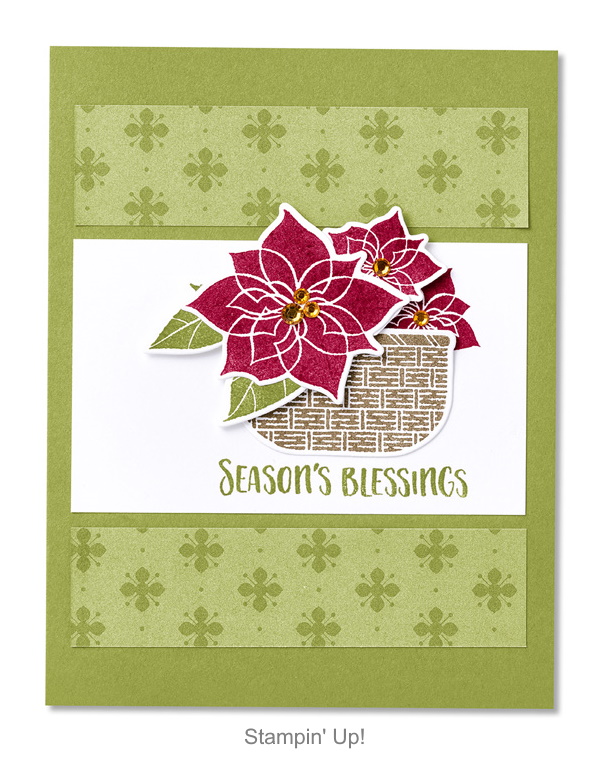
Here is the other card ….
I hope you enjoyed both of the cards I have shared featuring the Season’s Blessings bundle. Stampin’ Up! has a program that highlights a bundle once a month and I always like to share them with you!
Thank you for stopping by today. I invite you to come hang out with me tonight for my Facebook Live … I will be creating a fun project tonight using the Time of Giving Bundle.
Have a wonderful week ~
TODAY’S STAMPIN’ SUPPLY LIST … If you liked the products used in todays projects, I have links for you below. Just click on the item you would like more information on, or to begin your shopping. It will take you directly to my website. Thank you ♥
Yesterday I shared a card created from Stampin’ Up! highlighting the Seasons Blessings stamp set, today I’d like to show you another one. This are cute with simple layouts and easily “cased” … Copy And Share Everything!
We’ve got some step by step instructions for today’s card ….
1. Cut a piece of Old Olive Cardstock from the Regals Cardstock Assortment to 8-1/2″ x 5-1/2″ (21.6 x 14 cm) and score at 4-1/4″ (10.8 cm). This is your card base.
2. Adhere two pieces of Old Olive paper (3-3/4″ x 1″; 9.5 x 2.5 cm) from the Regals 6″ x 6″ (15.2 x 15.2 cm) Designer Series Paper Assortment, approximately 1/2″ (1.3 cm) from the top and the bottom of the card base.
3. Stamp the sentiment in Old Olive ink on Basic White Cardstock (3-3/4″ x 2-1/4″; 9.5 x 5.7 cm). Adhere to the card base between the two pieces of Designer Series Paper.
4. On Basic White Cardstock (4-1/4″ x 2-3/4″; 10.8 x 7 cm), stamp one basket in Soft Suede ink, one large and two small poinsettia bunches in Cherry Cobbler ink, and leaves in Old Olive ink.
5. Use the basket, poinsettia, and leaves dies to cut out the stamped images. Adhere to the Basic White Cardstock using Stampin’ Dimensionals.
6. Adhere three Pumpkin Pie rhinestones to the center of the large poinsettia image and one to the center of each small poinsettia image.
I hope you enjoyed both of the cards I have shared featuring the Season’s Blessings bundle. Stampin’ Up! has a program that highlights a bundle once a month and I always like to share them with you!
Thank you for stopping by and checking on my blog today.
Have a wonderful week ~
TODAY’S STAMPIN’ SUPPLY LIST … If you liked the products used in todays projects, I have links for you below. Just click on the item you would like more information on, or to begin your shopping. It will take you directly to my website. Thank you ♥
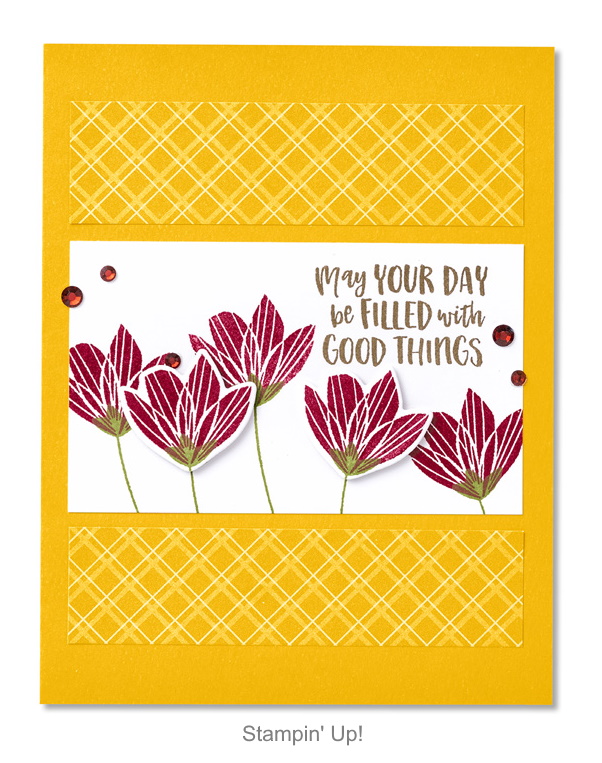
Today I’d like to share a card direct from Stampin’ Up! highlighting the Seasons Blessings stamp set …
We’ve got some step by step instructions for today’s card ….
1. Cut a piece of Crushed Curry Cardstock from the Regals Cardstock Assortment to 8-1/2″ x 5-1/2″ (21.6 x 14 cm) and score at 4-1/4″ (10.8 cm). This is your card base.
2. Adhere two pieces of Crushed Curry paper (3-3/4″ x 1″; 9.5 x 2.5 cm) from the Regals 6″ x 6″ (15.2 x 15.2 cm) Designer Series Paper Assortment, approximately 1/2″ (1.3 cm) from the top and the bottom of the card base.
3. On the Basic White Cardstock (3-3/4″ x 2-1/4″; 9.5 x 5.7 cm), stamp the sentiment in Soft Suede ink, three stems in Old Olive ink, and three flowers in Cherry Cobbler ink. Adhere to the card base between the two pieces of Designer Series Paper.
4. On the other piece of Basic White Cardstock (1-1/2″ x 2-1/4″; 3.8 x 5.7 cm), stamp two stems in Old Olive ink and two flowers in Cherry Cobbler ink. Use the stem and flower dies to cut out the stamped images. Adhere the die cut images to the card front using Stampin’ Dimensionals.
5. Adhere two large and two small Cherry Cobbler rhinestones to the card front.
Thank you for joining me on this Sunday.
Have a beautiful day ~
TODAY’S STAMPIN’ SUPPLY LIST … If you liked the products used in todays projects, I have links for you below. Just click on the item you would like more information on, or to begin your shopping. It will take you directly to my website. Thank you ♥
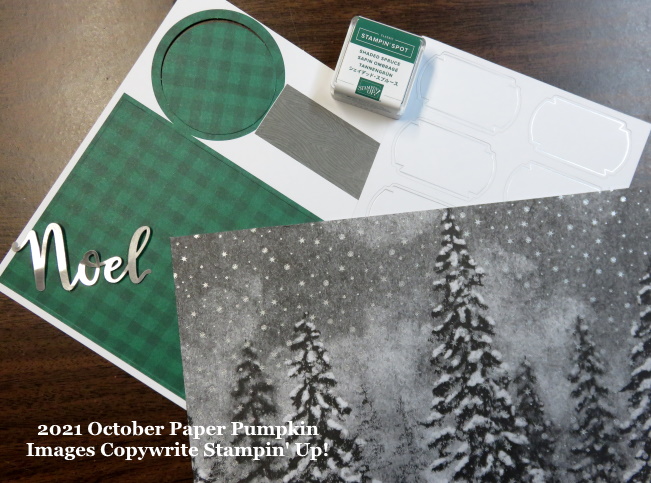
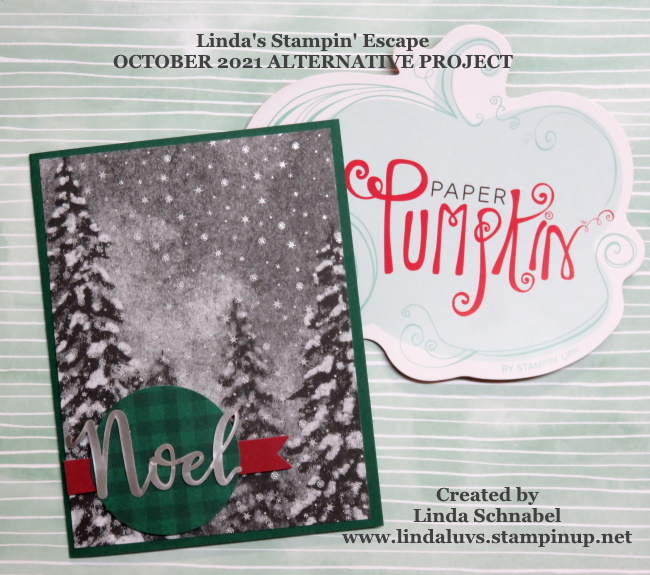
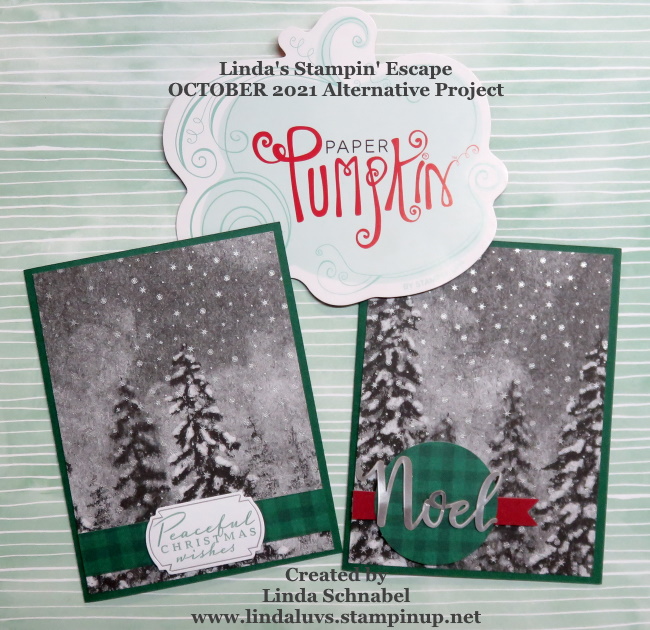
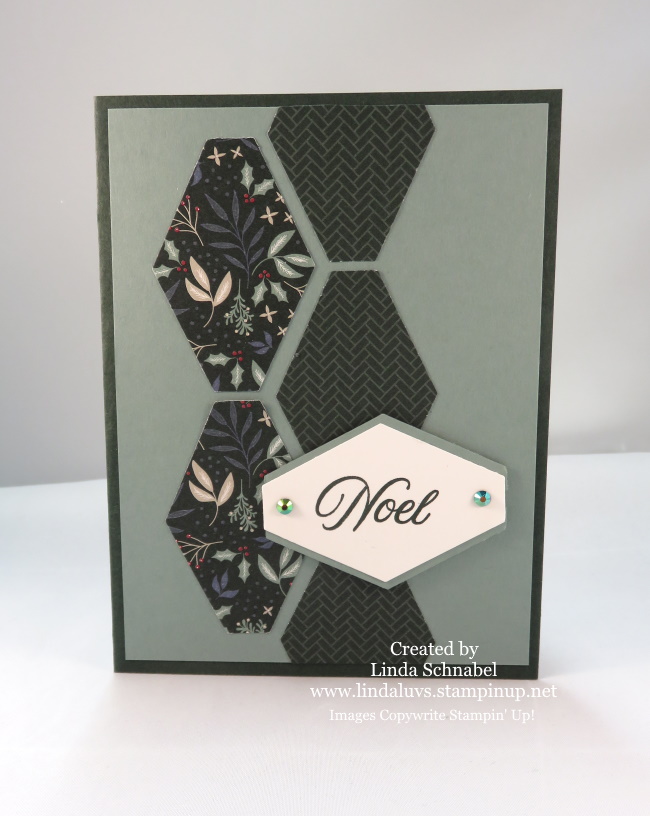
I’m excited to share two cards with you today!! Both are alternative projects to the October 2021 Paper Pumpkin kit. You’re getting two cards today because the Paper Pumpkin cards beautiful design is not only on the front, but on the back as well … so with just a little trimming, you can double your card count!! Here are the pieces I used from the kit …
Can you see how the card laid out can easily be doubled … LOVE IT!! So I trimmed it down to 5-1/4″ … then I folded it in half, and cutting on the fold down to 4 inches, creating the two pieces. Then I took a sheet of Shaded Spruce, cut it in half and used the two pieces for my card bases. Then I attached my cut card fronts onto my card bases …
On my first one I cut down the card front from the other card in this kit to use as an accent on this card. I then stamped the greeting that is include in the kit with the Shaded Spruce ink pad (also included in the kit) I popped it up and it completed my card!
My second card uses a few other pieces; the banner and circle and the Noel … so no stamping needed on this one. I used the Glue Dots to attach the “Noel” and then I popped up the entire greeting and placed it in the lower left hand corner, trimming off the left side of the banner.
I also cut 2 … 4″ x 5-1/4″ Basic White for the inside of my card … those I stamped with the trees included in the kit. (It matches the trees shown on the enveloped below) I love that you get “everything” you need to create beautiful cards, and that there is the ability to change up the design … or double it, like we got to do in this kit!
I’m sharing the video again today for those who may have missed it yesterday….
I hope this inspires you to try out some of our upcoming Paper Pumpkins! Here is a peek of our November Paper Pumpkin …
I hope you enjoyed the alternative projects and how you can “stretch” your kit … and still get amazing cards! You can click on any of the links below to begin a Pre-Paid Subscription or you can CLICK ON THIS LINK to start the monthly subscription.
Thank you for taking time out of your weekend to hang out with me today.
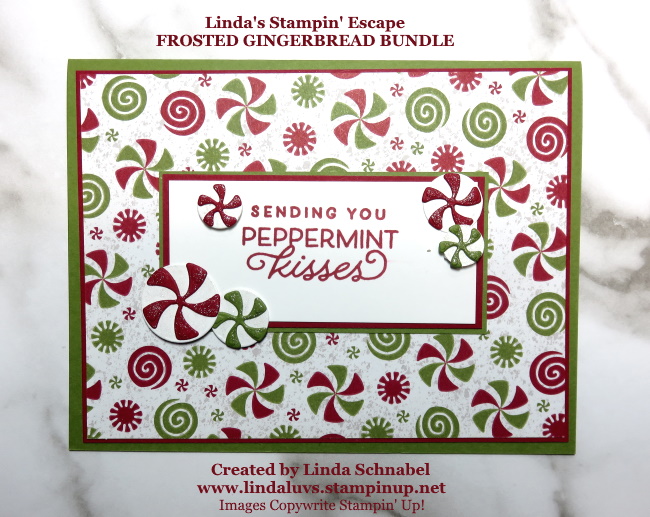
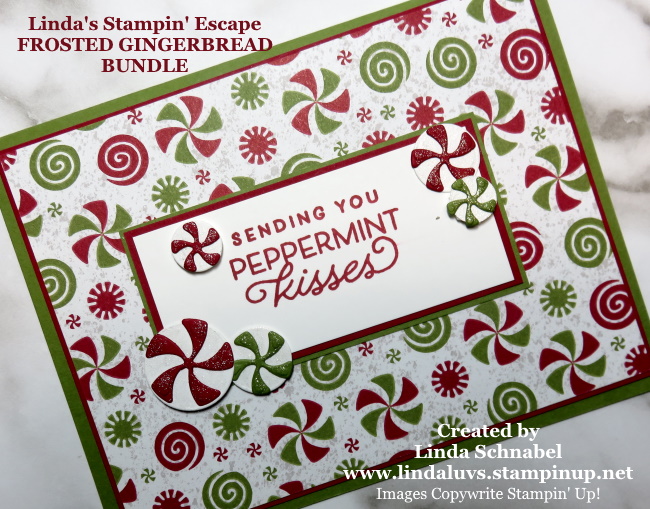
I’m working on my upcoming Stamping Retreat and having a blast … I can’t wait to share all the amazing projects with my guests. One of the the suites we are creating with is our Gingerbread & Peppermint. This card is “not” one of the retreat cards, but I wanted to share this cutie as it highlights the Designer Series paper from the Stampin’ Up! Aug. – Dec. Mini Catalog …
This simple layout is sweet when you need to create many Christmas cards and all of those candies brighten anyone’s day.
The candies were created with the coordinating dies and are done in Cherry Cobbler and Old Olive …
I had to add the Wink of Stella to my candies to make them glisten. There are several circle dies and candy tops that will help you create some needed depth and texture to the card.
Don’t you just love a quick -n- easy cards … especially when you have a BIG Christmas card list. The quicker you get done, the more Hot Chocolate you can enjoy … while your stamping! Hard to think of Hot Chocolate when you are going to have temps in the high 90’s!
Thank you for dropping in and checking out my blog. Enjoy your day~
TODAY’S STAMPIN’ SUPPLY LIST … If you liked the products used in todays projects, I have links for you below. Just click on the item you would like more information on, or to begin your shopping. It will take you directly to my website. Thank you ♥
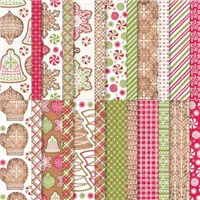
Want to start crafting with kids but not sure where to start? Start here with the Turtle Friends Bundle! The adorable turtle images are a cute entrance into the fantastic world of stamping, and the two-step stamp process allows for more freedom to explore colors, techniques, and their creativity.
The included Turtle Punch is also a great place to start for children as the single punch is easy to use and does not require any separate tools to operate.
The stamp sentiments range from belated birthdays to warm friendship which means you have plenty to choose from and you’ll make use of this stamp set all year round. You’ll make the most memorable birthday cards and invitations with this set!
As always, you’ll save 10% off the individual product prices when you purchase this discounted bundle. Contact me to order your Turtle Friends Bundle today or click on the links below.
Thank you for joining me on this Friday!
Have a great weekend ~
TODAY’S STAMPIN’ SUPPLY LIST … If you liked the products used in today’s projects, I have links for you below. Just click on the item you would like more information on, or to begin your shopping. It will take you directly to my website. Thank you ♥
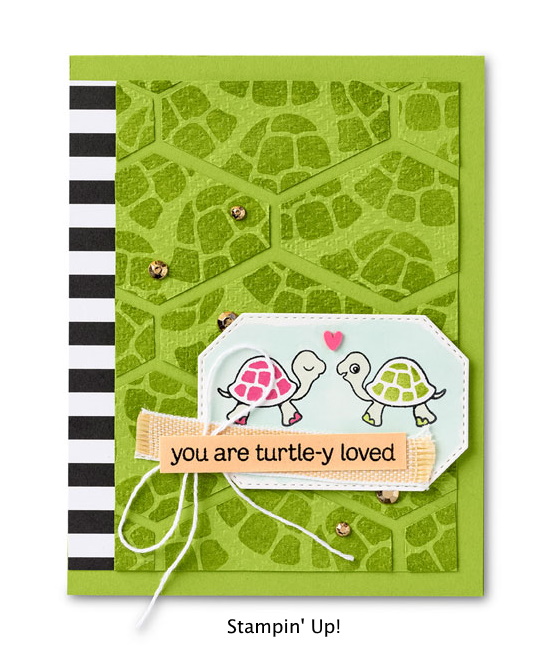
Today I have a cute card direct from the Stampin’ Up! files. A couple days ago I share a couple cards using the Tailored Tag punch … take a look at how it was used on this little cutie
Stamps: Turtle Friends Paper: Granny Apple Green, Pale Papaya, Shimmery White, Pattern Party Designer Series Paper Ink: Granny Apple Green, Polished Pink, Memento Jet Black, Versamark, Light Soft Sea Foam Blends, Dark Polished Pink Blends, Light Granny Apple Green Blends, Light Pool Party Blends Accessories: Pale Papaya & White 1⁄2” Woven Ribbon, Baker’s Twine Essentials Pack, Shaker Shapes, Gilded Gems, Clear Embossing Powder, Black Embossing Powder Adhesives: Stampin’ Seal +, Dimensionals, Mini Dimensionals, Glue Dots, Multipurpose Liquid Glue Tools: Tailored Tag Punch, Hippo & Friends Dies, Tasteful Textile Embossing Folder Tips: Punch out the tailored tags, stamp with the turtle shell image, then emboss with the Tasteful Textile Embossing Folder. Pull on one of the white threads in the ribbon to fray the ends a little
Thank you for stopping over today. Hope our day is a good one.
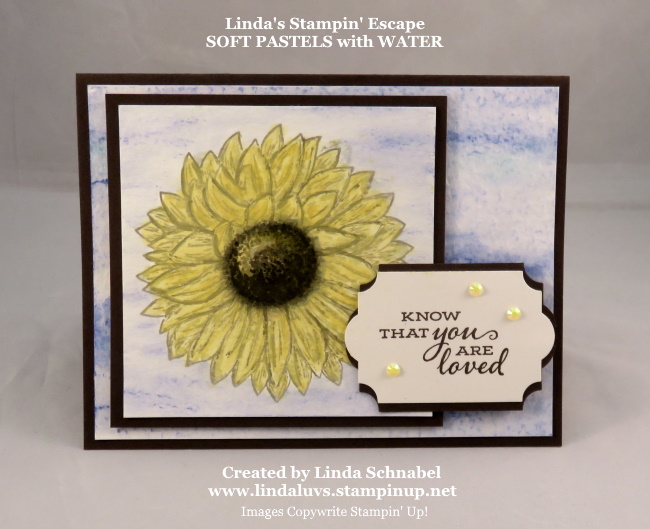
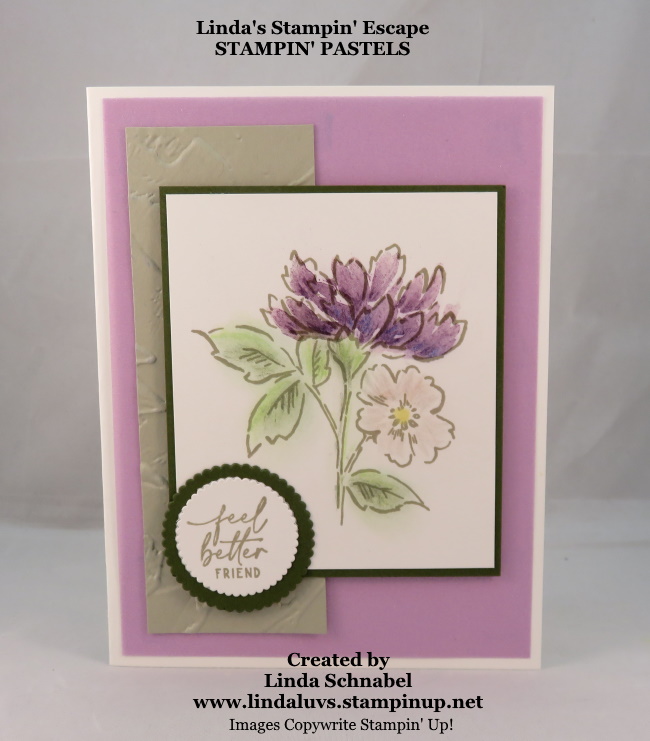
Today I will be sharing the replay of my Facebook LIVE last night along with the finished cards. I’m know for my pretty yet simple cards … but playing with this technique and taking it to the next level was very satisfying… sometimes I think we need a little “escape” and enjoy something you love.
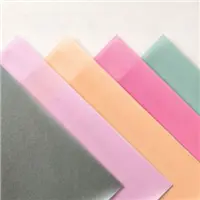
In this video I will show you which papers work best for the water coloring with your Soft Pastels and two different techniques for applying the pastels & water…
I’m so excited about this technique … actually, I find the Soft Pastels so amazing and versatile and an inexpensive medium to create beautiful projects with! You can create different looks must by switching out your paper / cardstock! Just remember, when using water … use the Shimmery White or the Water Color paper.
I also want to point out that you can experiment with other types of mediums on your project, like on this one, I used the Stampin’ Markers to stipple. (Google) Stippling is the creation of a pattern simulating varying degrees of solidity or shading by using small dots. I used the Crumb Cake and Soft Suede Stampin’ Write Markers to stipple. Let’s look at the finished project ~
I love the look of light blue with the Early Espresso and with the stippling of the sunflower center, it all seemed to fall into place and coordinate nicely. I used the “flat edge” to apply the Soft Pastels onto the background piece which is also the Water Color paper.
I stamped the greeting onto the Shimmery White paper as the color matches nicely with the watercolor paper. I used the Everyday Label punch to punch it out … I also punched out a piece from the Early Espresso, cut it in half and used it to mat my greeting.
Oh my … I can’t forget about the pretty In-Color Jewels I added to my greeting, a nice little touch that adds even more texture (you get beautiful texture from the watercolor paper) and a pop of color. I have a list of all the supplies below that I used in today’s project.
Thank you for joining me and taking time out to check out my video today. Take some time out to “escape” and let your creativity flow as you experiment with your new Soft Pastels!
Enjoy your day ~
TODAY’S STAMPIN’ SUPPLY LIST … If you liked the products used in today’s projects, I have links for you below. Just click on the item you would like more information on, or to begin your shopping. It will take you directly to my website. Thank you ♥
Look … another day closer to the weekend and hmmm … Christmas! It’s sneaking up fast and I have been busy creating for my Fall Holiday Stamping Retreat, so Christmas cards are second nature to me right now.
Many of us would love to send out hand-made Christmas cards but do not have a lot of time, so I’m here to help with an … oh so cute, and quick & easy card you can recreate in no time at all …
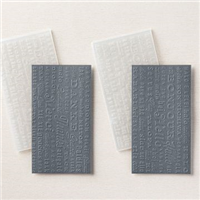
Two simple colors of cardstock; Basic White and Balmy Blue. I used the Time of Giving Stamp Set for the snowflake swirls inside the card and to decorate my envelope.
I used the Wintry 3-D Embossing Folder on the Balmy Blue for both my cards. Then the Wonderful Snowflakes … they are iridescent so the color just dances across them.
If you’re looking for just a little more color … you can use any one of our Stampin’ Blends and color your Snowflakes … and best of all, that iridescence shines right through.
You can create these pretty snowflake cards with ease and in no time at all. It’s a card base with a contrasting piece that measures 3″ x 4-1/4″. I hope you try out this simple layout.
Thank you for visiting my blog today. A simple layout so you can create your Christmas Cards with ease … fun for the whole family!
Enjoy your day ~
TODAY’S STAMPIN’ SUPPLY LIST … If you liked the products used in today’s projects, I have links for you below. Just click on the item you would like more information on, or to begin your shopping. It will take you directly to my website. Thank you ♥
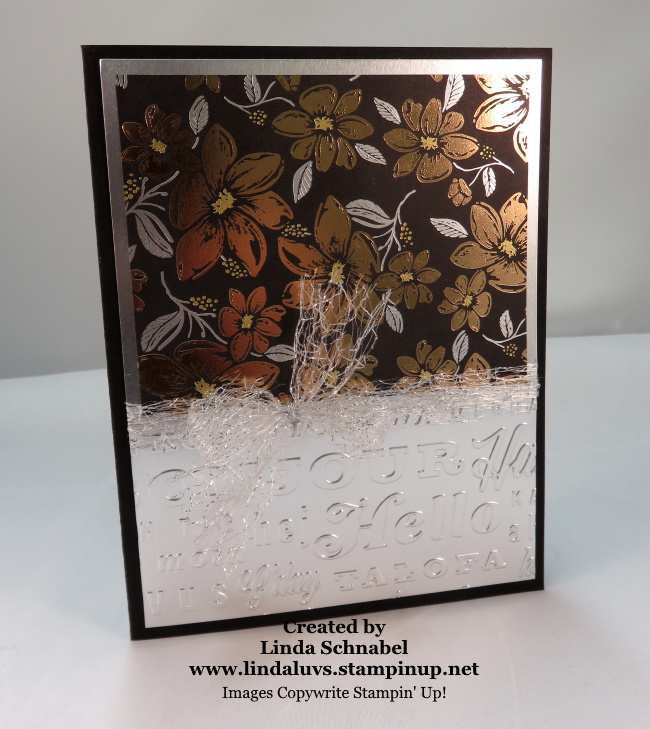
A Happy Monday to you … Today I have a stunning card for you created with the Simply Elegant Designer Series paper. This floral pattern is done in bronze, gold and silver foil.
I accented the silver by adding additional silver foil paper and embossing it with the “Thanks & Hello” Embossing folder … I used the Hello. It adds a beautiful texture and greeting at the same time.
I’m not much for raw edges so I added the Metallic Mesh Ribbon which adds even more sparkle to our foiled card. I used a black card base to draw the black from the designer paper.
Creating stunning cards highlighted with the pretty foil patterns is so easy when using “Simply Elegant” … it’s all in the name!
Thank you for dropping by and checking out my blog today. A simple card that is Simply Elegant! Have a great day ~
TODAY’S STAMPIN’ SUPPLY LIST … If you liked the products used in today’s projects, I have links for you below. Just click on the item you would like more information on, or to begin your shopping. It will take you directly to my website. Thank you ♥
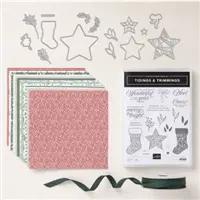
Wooo Hooo … I’m back up and running with a new modem!! Soooo … Today I’d like to share two cards that I created during World Card Making Day for a LIVE Demonstration … It highlights the Tailored Tag Punch and the wonderful products from the Tidings of Christmas Suite.
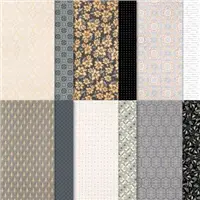
Using one of the sheets from the Tidings of Christmas Designer paper, I punched out 5 shapes, adhering two of one pattern, then flipping the punched shape over and aligning it between the center of the two already attached and then adhering the other two … trim off excess.
The greeting comes from the Tidings & Trimmings stamp set which is part of the Tidings of Christmas Suite. I stamped it in Evening Evergreen on White Cardstock and then punched out with the Tailored Tag Punch, I then punched out a piece from Soft Succulent to use as a mat behind it … it is cut in half and then placed behind the greeting and the entire piece is popped up. I finished it off with the 2020-23 In Color Gems.
On my second card I used two different sheets of the Tidings of Christmas Designer paper so I would have more variation in the paper. If you look closely, you will see two different patterns in the Sahara Sand and again on the white. They are then layered with alternating patterns and the edges trimmed off. This time the greeting was stamped in Soft Succulent and I used it to mat it as well … l love how easy it is to coordinate everything.
Instead of the gems, I used the beautiful Evening Evergreen Chevron Woven Ribbon … it brings out the Evergreen from the card mat and and from the designer paper. The card base is Soft Succulent.
You can create a multitude of patterns and color combinations when using the Tailored Tag Punch and the wonderful products from the Tidings of Christmas Suite. If you don’t have the items you need … I have a list of the supplies below for your convenience.
Thank you for stopping by today and spending some time with me. Enjoy the rest of your Sunday!
TODAY’S STAMPIN’ SUPPLY LIST … If you liked the products used in today’s projects, I have links for you below. Just click on the item you would like more information on, or to begin your shopping. It will take you directly to my website. Thank you ♥
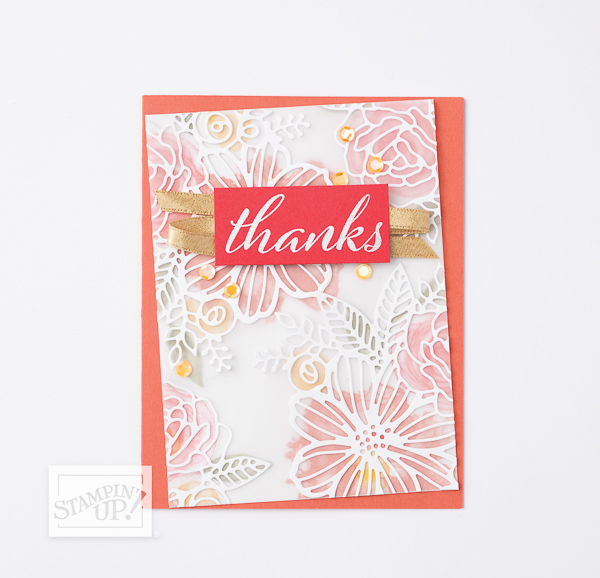
Today I have a pretty card for you along with the step by step tutorial … enjoy! A list of supplies used are located at the end of my post.
Thanks Card
INSTRUCTIONS 1) Cut Calypso Coral cardstock to 5-1/2″ x 8-1/2″. Score at 4-1/4″ along the 8-1/2″ side.
2) Cut Basic White cardstock and Vellum to 3-3/4″ x 5-1/8″.
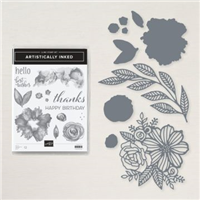
3) Use the grouped detail flower die from the Artistic dies to die cut four sets of flowers from Basic White cardstock.
4) Stamp the flowers and leaves on the Basic White layer using Poppy Parade for the largest flower, Calypso Coral for the medium flower, Crushed Curry for the small flower/flower center, and Old Olive for the leaves. Use the die cut flowers as a loose guide for the layout of the stamped images. You’ll be layering the die cuts over the stamping. Don’t worry about them being exact, the abstract, watercolor is part of the beauty of this set!
5) Once the Basic White layer is mostly covered with stamped flower groups, add a bit of adhesive above the center, where the greeting will cover it. Line up the Vellum on top of the stamped layer. You’ll add more adhesive later, this will just tack it in place for now.
6) Without adding adhesive, line up the die cut image over the stamped images. They will hang off the edges, that will be trimmed later. Once you have the die cuts where you want them, pick up one at a time and use very small dots of Multipurpose Liquid Glue to adhere the die cut in place. Repeat for each die cut. Allow to dry completely!
7) While the glue dried, stamp “thanks” greeting from Artistically Inked stamp on 2-1/4″ x 1″ Poppy Parade cardstock with VersaMark ink. Cover generously with White Stampin’ Emboss Powder. Tap off excess powder. Heat emboss with the Heat Tool.
8) Once the glue is dried on the Vellum and die cut layer, use Paper Snips to trim off the excess die cuts even with the edge of the Vellum and cardstock. Gently lift the edges of the Vellum and add tiny dots of Multipurpose Liquid Glue behind the die cuts to help secure the Vellum to the Basic White cardstock. Allow to dry.
9) Adhere the layers to the card front at an angle. Add a strip of adhesive where the greeting will be added. Zig-zag a 12″ piece of ribbon. Use Stampin’ Dimensionals to add the greeting over the ribbon.
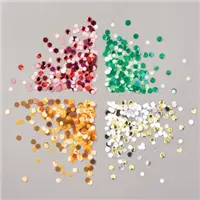
10) Use dots of Multipurpose Liquid Glue to group about 7 orange sequins from the Sequins for Everything set around the greeting.
TIP:The easiest way to add the Sequins for Everything to a project is to add a tiny drop of Multipurpose Liquid Glue on the project where you want the sequin and then use your fingers or the putty tip of the Take Your Pick Tool (#144107) to place the sequin on the glue with the curved side down, like a bowl. This way you don’t drop a gluey sequin on your project where you don’t want it.
Thank you for stopping by for the visit today ~
TODAY’S STAMPIN’ SUPPLY LIST … If you liked the products used in today’s projects, I have links for you below. Just click on the item you would like more information on, or to begin your shopping. It will take you directly to my website. Thank you ♥
It’s Wednesday WOW Day today!! I have so much to share with you today. I will share the recording of last nights LIVE demonstration, the beautiful “finished” card and a special announcement from Stampin’ Up! … let’s do that first!
I’ve started with the basics, just showing you a few of the beginner techniques that work well with the Soft Pastels … remember, these are not chalks. Pastels are “pigments” held with a binding agent to give them their shape. Take a look at the video and then I will share the finished card with you … Sit back and relax and grab a cup of coffee.
I matted my floral design with Mossy Meadow … the coordinating color in our Pastel pallet. Then I used a piece of Sahara Sand which coordinates with my ink color, which I embossed it using the Painted Texture embossing folder
The striking colors in our flower coordinate beautifully with the Fresh Freesia Shimmery vellum that I used as my background … it’s a wow against that flower!!
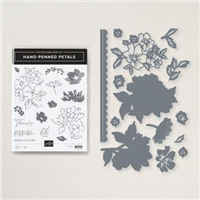
The greeting comes from the Hand-Penned Stamp set and was cut from the Layering Circle dies. Our colors are layered onto our card as easily as the Soft Pastels colors are layered onto our images.
One last thing, I had to add some Wink of Stella to the flower petals … the photo above highlights the Stella and the Shimmery Vellum.
Thank you for hanging out with me today~
Have a “Wonderful Wednesday”!!
TODAY’S STAMPIN’ SUPPLY LIST … If you liked the products used in today’s projects, I have links for you below. Just click on the item you would like more information on, or to begin your shopping. It will take you directly to my website. Thank you ♥
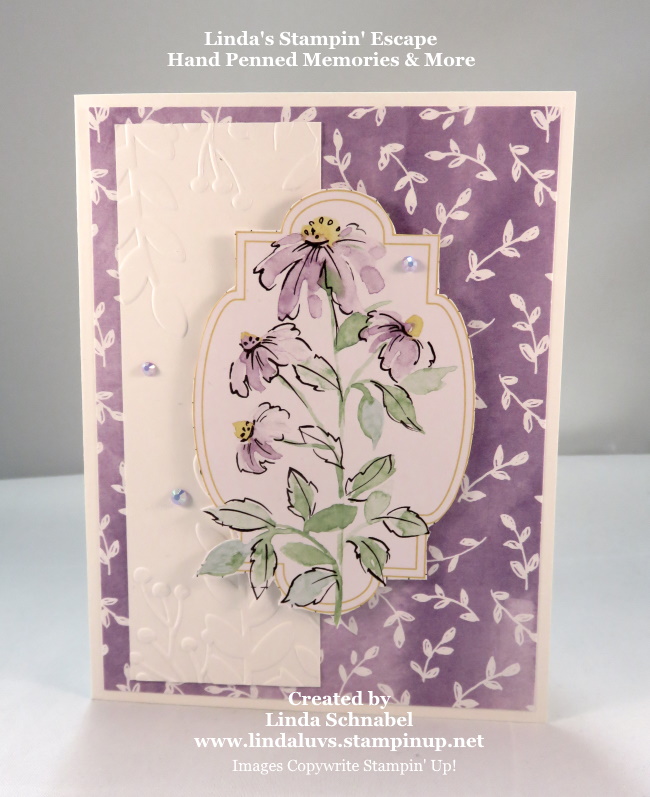
Yesterday shared two cards that I created on World Cardmaking Day in a demonstration for my views … today, I took one of those layouts and stepped it up! Break out the Stampin’ Cut & Emboss Machine ….
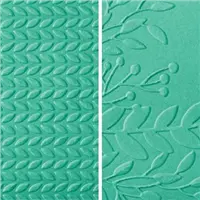
I did today’s card with a Fresh Freesia pattern from the Hand Penned Designer Series paper, and I cut out the pretty image from the card (as in yesterdays card) … but it was time to add some texture so I pulled out my Stampin’ Cut & Emboss Machine and the Greenery Embossing Folder and here is what I cam e up with …
The simple Fresh Freesia and white pattern on the designer paper really allows the cut out flower to become the focal point! The embossed piece of Basic White adds some fun detail and texture. I also added the Freesia In-Color Gems to the card which draws your eye all around the card.
One last thing, I had to add some Wink of Stella to the flower petals …
I think the Stella just adds to the Water Color imagery of the Hand Penned Memories & More Cards … simply pretty.
Thank you for hanging out with me today.
Happy Monday ~
TODAY’S STAMPIN’ SUPPLY LIST … If you liked the products used in today’s projects, I have links for you below. Just click on the item you would like more information on, or to begin your shopping. It will take you directly to my website. Thank you ♥
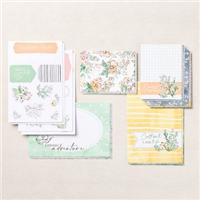
Yesterday was World Card Making Day, and I spent the day with my Stampin’ Friends making cards. I began with the Hand Penned Memories & More Card Pack because they are not just for scrapbooking … the cards were great for card making and loved by new crafters!!
I’m going to share our first stamp session with you so you too can see how easy it is to use these cards to create … Cards!
The first card was created in Fresh Freesia … It’s compliments the paper perfectly! I cut out the pretty image from the card (as shown in video) Wrapped the Fresh Freesia Organdy Ribbon to the back and popped it up onto the front of the card … a few In-Color Rhinestones and the card is complete!
OK … I love this one! The Pale Papaya really makes the green on this card stand out! With the addition to the corner punch, we’ve added texture and another pop of color to our card and the gems just tie it all together.
I had so fun spending my Saturday stamping with you and sharing ideas, tips and more. Hopefully next year we can all gather in one big room and actually “make” cards together.
Thank you for stopping by and sharing a part of your Sunday with me.
Have a beautiful day ~
TODAY’S STAMPIN’ SUPPLY LIST … If you liked the products used in today’s projects, I have links for you below. Just click on the item you would like more information on, or to begin your shopping. It will take you directly to my website. Thank you ♥