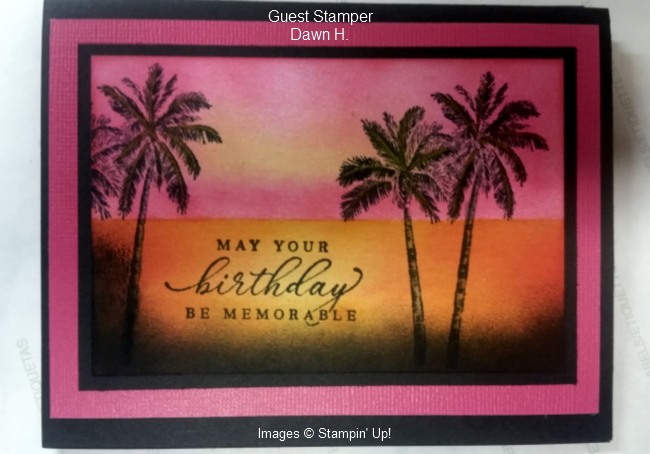
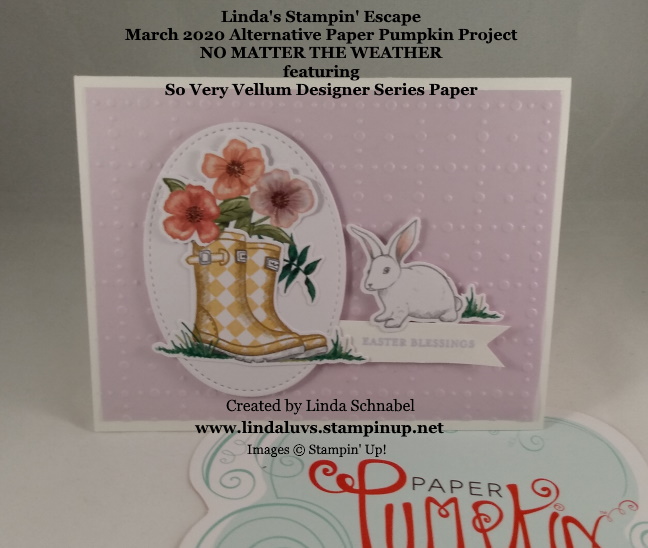
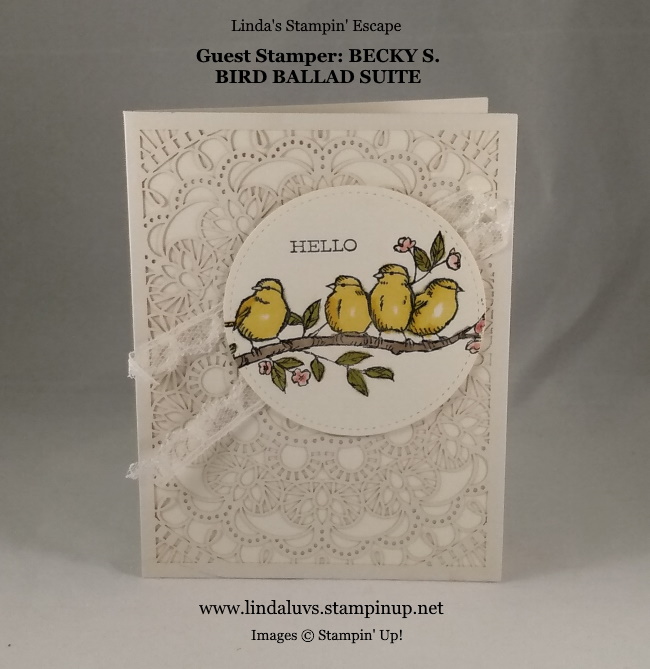
Hello Stampin’ Friends ~
I’m here today to share some cards that remind me of spring … It’s time to bring a little sunshine into our lives. Hope you’re doing well. Sit back and enjoy the parade …
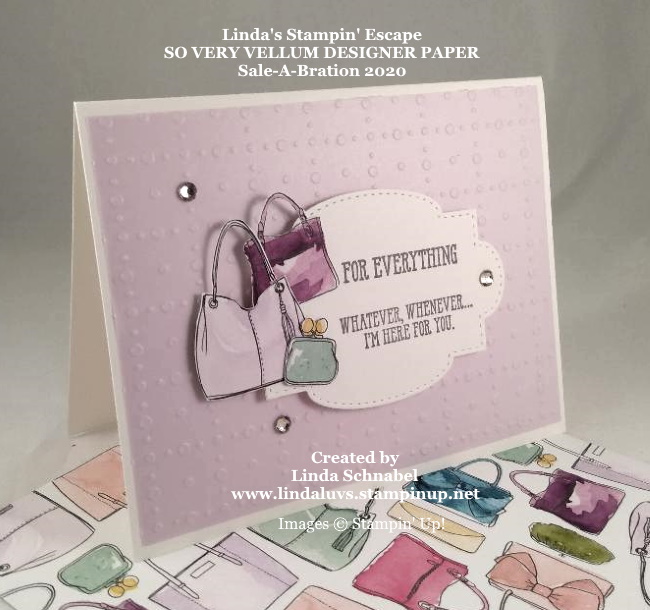
Lets begin with the Perennial Essence Suite. The pretty flowers are stamped onto the Perennial Essence Vellum cardstock and punched with the coordinating Perennial Flower punch … and layered onto more of the Vellum cardstock which comes in three colors: Old Olive, Petal Pink, and So Saffron.

Our vellum is then layered over the stunning Perennial Essence Designer Series Paper which features hand-painted impressionistic imagery in rich colors. I use this designer paper often when I have to make a quick card, because it is so pretty … all you need is a greeting.

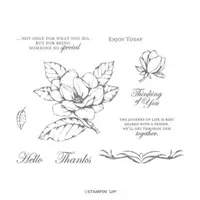
The greeting comes from the Floral Essence Photopolymer Stamp Set which is filled with flowers, petals, leaves, and stalks, sentiments for weddings, birthdays, and loved ones!
And speaking of making quick cards, you will love creating with the Magnolia Lane Suite …
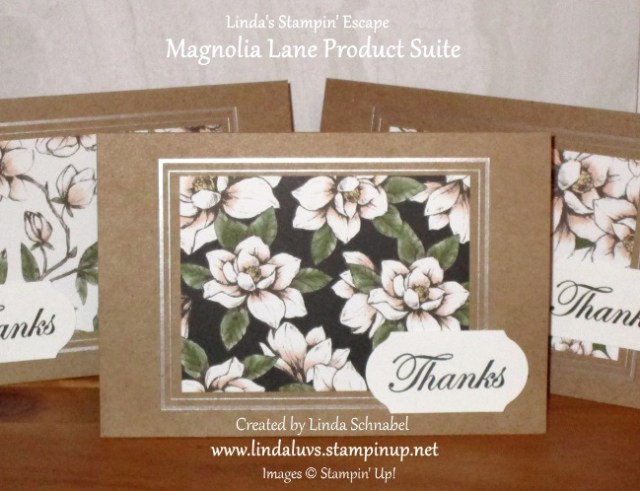
The cards above where created with the Magnolia Lane Designer Series paper and the Magnolia Lane Large Specialty Memories & More Cards & Envelopes … Even the envelopes have liners!!
How simple … the different patterns of the designer paper were cut to fit inside the silver metallic embossing, adhere with your favorite adhesive and then just stamp one of the greetings onto Whisper White cardstock and grab a punch.

The Magnolia Lane Suite Bundle gives you a coordinating selection of products with one simple purchase. It includes the stamp set and tool bundle at 10% off plus one each of the other items listed….
* Good Morning Magnolia Cling Stamp Set (10% off)
* Magnolia Memory Dies (10% off)
* Magnolia 3D Embossing Folder
* Magnolia Lane Designer Series Paper
* Magnolia Lane Large Specialty Memories & More Cards & Envelopes
* Magnolia Lane Memories & More Card Pack
* Magnolia Lane Ribbon Combo Pack
* Magnolia Lane Cork Embellishments
* Stampin’ Blends Combo Pack
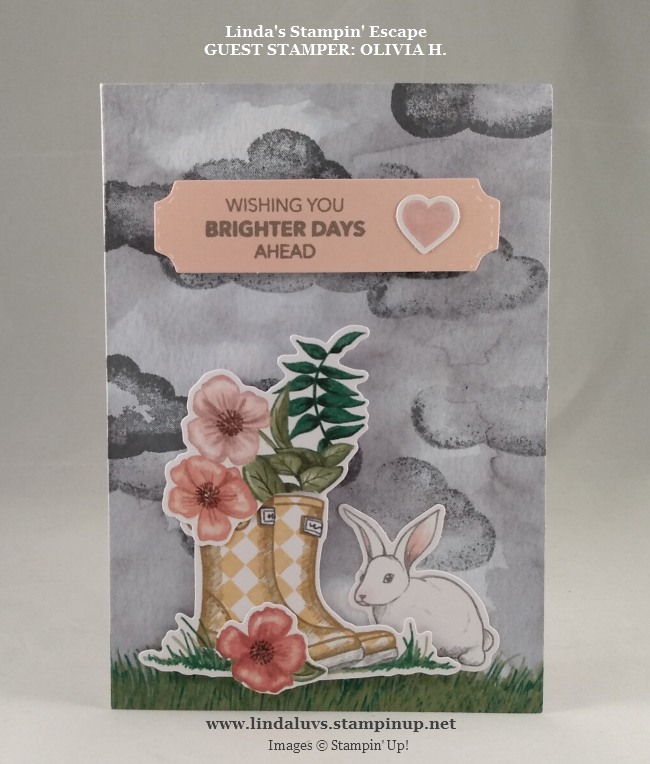
I’m going to share several cards that I made using this product suite so you get an idea of all the different things you can do with your suite. I’ve showed you the designer paper and card pack, now lets focus on the stamp set and how about a fun technique to use with it ….

This technique is called “Spotlighting” … It highlights the image or part of it. I wanted a bit of drama to the card and adding the black between the stamped image really does this. If you would like step by step instructions CLICK HERE and it will take you to the original post. Some subtle sponging and Wink of Stella really takes this card over the top!
If you like glitter and sparkle … this cards for you! I’ve combined the stamp set and the card pack that we used on the first card to create this stunning card …

Just like the Perennial Essence card, vellum was used to stamp our image on. I stamped it with White Craft and then heat embossed it with the White Embossing powder. The color was sponged on from behind to add a soft “stained glass” appearance.
The greeting comes from the stamp set and is matted onto the Silver Foil paper, this ties in with the silver border. The touch of green ribbon comes from the Magnolia Lane Ribbon Combo pack which is also include in the suite. A touch of “Sparkle” Glimmer paper backs the flower and creates an eye catching background.
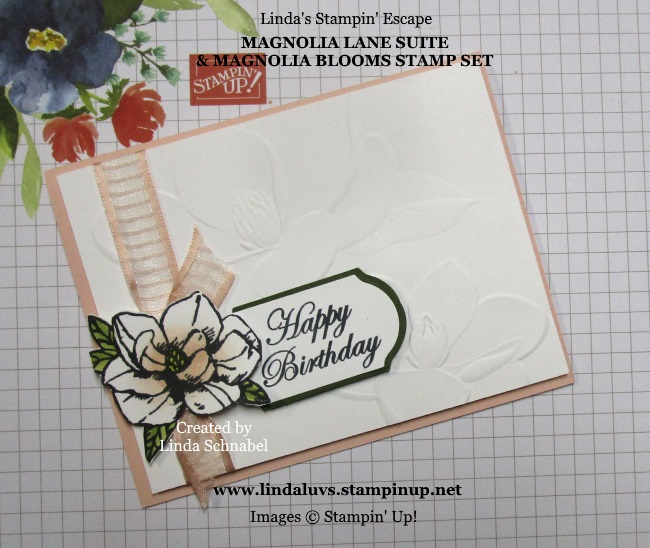
I can’t let you go without showing you the Magnolia 3D Embossing Folder …

This card truly highlights the folder as it is the entire background which adds elegance and a subtle texture and dimension to the card. The flower comes from a companion stamp set; Magnolia Blooms and does not come in the suite of Magnolia products, but coordinates beautifully. A greeting from the suite, a punch and a little ribbon and your card is complete!
Please let me know if you are interested in any either of the product suites or bundles or ??? Don’t forget … April is my birthday month so I’m paying your tax!! FREE TAX in April … you don’t here that very often!
Thanks for walking through my floral garden with me!! Have a wonderful day … Stay safe, healthy and I’ll see you tomorrow!

Please feel free to share or save ...