Simply Sunday: It’s Your Day

Hello Stampin’ Friends ~

Today I have a cute-n-simple card for you … complete with instructions. I always tell you how I made the card, but today and yesterday I’m sharing an on-line card class with Step-by-Step instructions for you to follow.

SW_WotMQ1_Feb1616-3

INSTRUCTIONS
1. Fold a piece of Mint Macaron Cardstock (2-3/4″ x 8-1/2″)
(7 x 22 cm) in half.
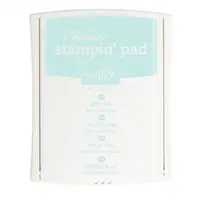
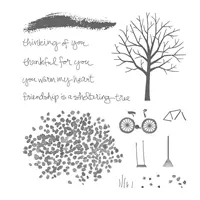
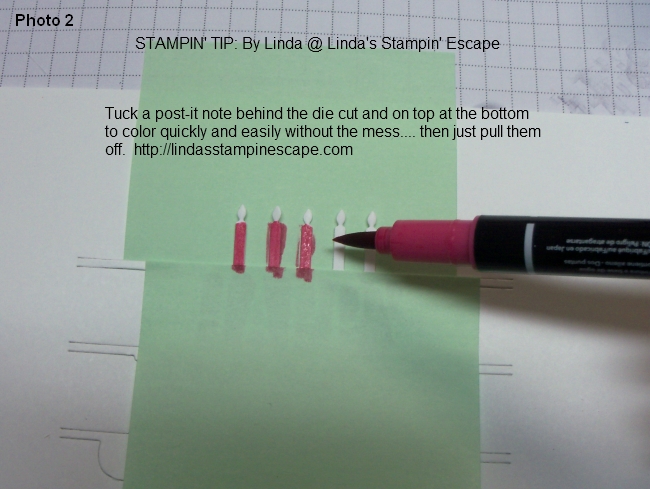
2. Stamp the confetti image multiple times in Mint Macaron ink
on the front of the folded cardstock.
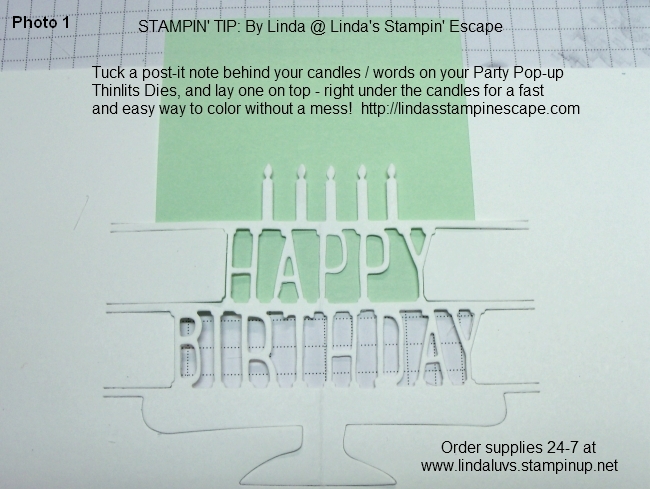
3. Fold the top 3/4″ (2 cm) of the cardstock down to create a tab.
4. Stamp the sentiment in Melon Mambo ink on a piece of
Whisper White Cardstock (1-1/2″ x 3-1/4″) (4 x 8 cm). Punch the
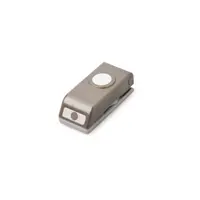
bottom of the stamped cardstock with the Banner Triple Punch.
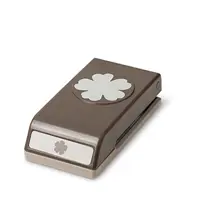
5. Cut a separate banner from a piece of Basic Black Cardstock
(1-1/4″ x 1-1/2″) (3.5 x 4 cm) using the Triple Banner Punch.
Adhere the black banner to the back of the white banner with
a small overhang.
6. Adhere the banner to the folded section of the Mint
Macaron Cardstock.
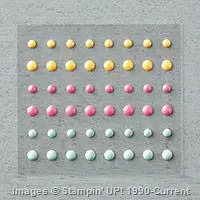
7. Cut a small flower from a scrap of Crushed Curry Cardstock
using the Itty Bitty Accents Punch Pack, and adhere an enamel
dot to the center of the flower. Adhere the flower to the banner.
8. Tie a piece of Baker’s Twine from the combo pack around
the enclosure.
9. Stamp the greeting on a separate piece of Mint Macaron
Cardstock (2-1/2″ x 4″) (6.5 x 10 cm). Add a piece of It’s My
Party Designer Washi Tape to the top of the cardstock and
slip the piece into the enclosure.

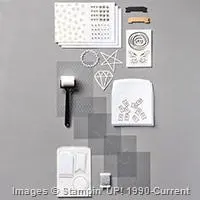
TODAY’S INGREDIENT LIST …

Supply List

Hope you enjoyed the card … I also hope you enjoy your Sunday.
Thanks for stopping by ~
blog-closing-small
SW_WotMQ1_Feb1616-3

It’s Your Day!

Hello Stampin’ Friends ~

Today I have a fun card to share with you … instructions included! If your one of my stampin’ friends who can’t make it to one of my classes – I’ll bring a mini class to you!

Here is today’s card along with instructions and a list of ingredients needed to create the card!

SW_WotMQ1_Feb1616-2

INSTRUCTIONS
1. Fold a piece of Whisper White Cardstock (8-1/2″ x 5-1/2″) (22 x 14) in half
to create the card.
2. Add strips of It’s My Party Designer Washi Tape to the card front.
3. Stamp the sentiment in VersaMark ink on a piece of Basic Black Cardstock
(2″ x 3-1/2″) (5 x 9 cm). Cover the sentiment with White Stampin’ Emboss Powder,
shake off any excess powder, and heat emboss.
4. Cut the top of the stamped cardstock into a tag using the Scalloped Tag
Topper Punch.
5. Adhere an enamel dot to the tag.
6. Cut multiple pieces of Baker’s Twine from the combo pack and add them to
the top of the tag.
7. Adhere the tag to the card using Stampin’ Dimensionals.
8. Run a piece of Whisper White Cardstock (8″ x 5-1/4″) (20.5 x 13.5 cm) through the
Big Shot with the Party Pop-Up Thinlits Dies. Add pieces of It’s My Party Designer
Series Paper behind the cut out letters. Adhere the pop-up piece inside the card.
LIST OF INGREDIENTS …
Thanks for stopping by!  I’ll be back tomorrow with my “Simply Sunday” Series!
Have a wonderful weekend.
blog-closing-small

Put Your Party Pants On!!

Hello Stampin’ Friends ~

The party is not over yet!  If you haven’t heard … Stampin’ Up! released 3 more amazing products for your Sale-a-bration pleasure!  I shared them with you on Tuesday (click here to view) and I know you’ll love them.

Looking for a reason to party? Here they are. Birthday, congrats, thinking of you—and they’re all here in one stamp set. Woo hoo! Today I want to highlight the “Party Pants” stamp set.

141327G

Here are two really cute samples made with the “Party Pants” stamp set. You’ll see more in the upcoming weeks because I couldn’t wait to get may hands on this set …

SW_SABPotW_Feb1616

Remember they are only available through March 31st and you can get them FREE with any $50 you order.  Order $150 and get all three plus $15 in free product! You can see them all here by clicking on the link:  NEW Sale-a-bration Catalog

More great news … The balloon in “Party Pants” matches out newest Balloon Bouquet punch! I love when everything coordinates!!

Thank you for dropping in to see me today … hope you have a fabulous Friday!

Party on …

blog-closing-small


I’m Lost Without You …

Hello Stampin’ Friends ~

Did you enjoy the card swap share yesterday? I will do more of that as our demonstrator group the Star’s swaps. Inspiration comes from many places … swapping, Pinterest, and blogs. I hope you are inspired by the projects I share with you here on my blog.

Today I’d like to share a card with you that I made from a card that I saw on Pinterest. This is also one of the card we make at my last Stamp Camp.

The card features the “Going Global” stamp set and “Going Places” Designer Series paper ….

000_3159

This is an awesome stamp set for those “Masculine” cards we all want, but can be used for any occasion! My base of the card is Sahara Sand and is one of the colors in the “Going Places” Designer Series Paper.

The compass image is stamped with the StazOn and punched with the 2″ Circle Punch.  My greeting was stamped with StazOn on the White Vellum Cardstock.

I thought we were in need of a bold pop of color so I chose Bermuda Bay, and embossed it with the “World Traveler” Embossing Folder (LOVE IT). Then we sponged just a little color over the embossed area to highlight it just a little more.

000_3159

Hope you’re inspired by today’s card. Thanks for stopping by.

Have a wonderful day …

blog-closing-small

TODAY’S STAMPIN’ SUPPLY LIST …


Card Swap Share …

Hello Stampin’ Friends ~

Today I’m sharing the swap cards for my last downline meeting. “Downline” is just a term used for the awesome ladies who have signed up to be demonstrators through me. We do a lot of swapping … at our meetings, at retreats … whenever we can.

Our team is known at the Star’s by Design group … You know what the best part of swapping cards? The diversity!! We all have different styles of stamping and our favorite stamp sets, so we all go home with really cool cards!

We’d love to welcome you to the “Stampin’ Up! family” & get to know you!

Join the fun for only $99

Sweet Deal!!  NOW – March 31, receive an extra $30 in product of your choice in your Starter kit!!  whohoo!

Sign up before March 9th and you could attend our Stampin’ Up! Party … ON STAGE in beautiful Salt Lake City with me!!

No risk – no pressure – join the fun now!

Build your own personal kit by picking up to $125 $155 worth of any of our high-quality stamps, cardstocks and accessories.

Begin your journey now … click JOIN NOW


Here is Kathy’s swap card from our “Star’s by Design” Team meeting …

000_3153

Eileen’s Swap …

000_3150

and my swap (cased) …

000_3149

You can see our styles are different … but each card is unique and beautiful.

I really wish you would consider joining our team of stampers. Our meetings are great, I send newsletters or updates and we love attending Stampin’ Up! events together.

Let’s talk … it’s that easy … and there is no obligation.

blog-closing-small

Weekly Deals & Sale-a-bration Surprise

Hello Stampin’ Friends ~

Yesterday I told you that I would share my card swaps with you, but that will have to wait … I have exciting Sale-a-bration news and videos for you! Today you’ll see the NEW Sale-a-bration items…

Free “NEW” Products During Sale-a-Bration 2016

Supply List

Built for Free Using:My Stampin Blog

Check out the video to learn more about these great new products …

Love glitter but hate the mess? Try our Metallics Glitter Tape. Adhere it wherever you want for super sparkly glitter that stays put. You can also color it to work with any project. Watch as we show you how.

Looking for a reason to party? Here they are. Birthday, congrats, thinking of you—and they’re all here in one stamp set. Woo hoo!
Creating cute cards is as easy as riding a bike when you have this set. Stamp the bike, add a basket, then fill it with flowers, love, whatever you want. Combine individual stamps to build the final image you want in the colors you want.

CHECK OUT MORE WAYS TO SAVE ON STAMPIN’ UP!

Please let me know if you have any questions on our NEW Sale-a-bration items or the Weekly Deals.

I will be sharing those “Swap Cards” with you tomorrow so make sure you drop in.

Thanks for joining me today …

Hope your day is a great one!

blog-closing-small

Thinking of You …

Hello Stampin’ Friends ~

I hope you enjoyed your Valentine’s day … I spent mine with my great grandson ❤ so nice!

Today I’d like to share a card with you that you can easily recreate and send off to your friends. It starts with the “Color Me Irresistible” Designer Series paper. My base card is Soft Sky as is the ink I sponged onto the card front.

000_3145

The “Color Me Irresistible” Designer Series paper takes the work of the “Resist” technique out of your hands so all you have to do is add the color … easy peasy!

Once that was done I punched two flowers from the “Pansy” punch … I curved the petals on the bottom flower down, and the petals on the top flower up. This gave my card much dimension.

The Soft Sky center was punched from the 1/2″ punch, then crumpled and pulled apart, and re-crumbled to create the center you see on my flower.

My greeting comes from the “Sheltering Tree” stamp set, and I stamped it with StazOn so it would cover the “resist” dots … other inks would resist, leaving your greeting spoty.

000_3143

I actually CASEd (Copy And Share Everything) this card from our very own Stampin’ Success magazine. (From Stampin’ Up! for their demonstrators) … another one of the lovely perks we enjoy as demonstrators.

You should think of joining us … we have a great group. Tomorrow I will share a few of our swap cards along with the Weekly Deals.

Till then … Enjoy your day.

blog-closing-small

TODAY’S STAMPIN’ SUPPLY LIST …


You Have My Heart Valentine

Hello Stampin’ Friends,

Today’s Simply Sunday is a card I created using the 2015 January Paper Pumpkin Kits… one of my all time favorites! It was super simple to put together as all these fabulous components are found in the kit … the refill is still available.

All I added to my Valentine’s card is cardstock! Whisper White is my base and makes the the focal point (the heart) really stand out. The Real Red was embossed with the “Happy Heart” textured embossing folder from the occasions catalog.

000_1945

The tag, clip, bakers twine, heart, banners are included in the refill kit. To join in on all the fun … you just need to sign up for Paper Pumpkin. As a subscriber, you receive a pretty package packed with fun every month. You can put it on hold while your away, or just subscribe for a determined length of time.

CLICK HERE to View the Options

3-Month Prepaid Subscription (137859) $59.85 $55
Save on a 3-month prepaid subscription and instantly qualify for a FREE Sale-A-Bration item!

As a special perk for Paper Pumpkin subscribers, Stampin’ Up! offers a selection of past kits and refill kits for purchase, while supplies last. We just added new kits to the offering. Click here to learn more and visit the Online Store to shop.

You can always contact me: lindaluvs2stamp@aol.com to answer any questions you may have.

Thanks for stopping back, and be sure to come back again tomorrow … I have another Valentine’s Day project from my Paper Pumpkin kit!

Have a wonderful day ~

blog-closing-small

You’re So Lovely …

Hello Stampin’ Friends ~

Today I have a new video to share with you … It’s our “You’re So Lovely Project Kit”. Giving a gift? Recognizing a special occasion? Do it up right with a card, tag, or bag you make yourself. We’ll show you the basic steps; you can mix and match colors and pieces to create the look you want.

Here’s the Details …

Makes 12 cards, 4-1/4″ x 5-1/2″ | 10.8 x 14 cm and 12 bags with tags.

Complete the kit using the coordinating stamp set (see below). Stamps, ink, and adhesive sold separately. Instructions included.

Kit includes
* Gold foil card bases
* White envelopes
* Glassine bags
* Baker’s Twine
* Sponge brayer with extra sponge
* Stencils
* Die-cut tags, banners, and accent pieces
* Banner paper clips
* Metallic enamel shapes

Please let me know if you have any questions, I’d be glad to help.

Thanks much for checking in today, I’ll see you tomorrow for my “Simply Sunday” series.

Have an awesome Saturday ~

blog-closing-small

SUPPLY LIST …


Time to Celebrate!

Hello Stampin’ Friends ~

It’s time to celebrate birthdays!! Today I’m going to share a FUN card created with the “Party with Cake” and “Party Pop-Up” bundle. It is really easy to use and I have some great tips to add a pop of color without a mess.

My club members did cards similar to this one, and I’m hosting a class on February 25th to showcase all the things you can do with this fun, fun bundle. You’ll find full details in my events page.

First let me show you the card ….

000_3138

Start with the “It’s My Party” Designer Series Paper … you can make endless cards with this paper stack, combine that with the “It’s My Party” cardstock pack and your ready to go!!

For our greeting … I omitted the “with cake” by putting a post-it note over it before inking up the stamp, then we pulled it off so only the words we wanted were inked.

Next, I took my “Perfectly Artistic” Designer Paper (ends Monday) from our Sale-a-bration catalog to make our balloons. I love our balloon punch with 2 sizes of balloon. (Also bundles with the Balloon Celebration Stamp Set) We tied a knot in our White Bakers Twine and attached it to the balloon with a “rolled up” glue dot!

Ahhhh … Let’s get to the inside and make this card REALLY POP!

000_3141

How fun is this! And it’s really simple to do.  Fold your cardstock in half and use the crease to align your die – there are tabs on the die that you align with the crease.  I used the “Precision Base Plate” to use with my dies … then used the “Big Shot Die Brush” which helps the paper release from the dies.  I LOVE IT!!!

Here’s a great tip for coloring your die cut …

000_3128

Slide a post-it note behind your cut out and one over it …

000_3131

This simple technique allows you to color your pop up dies without getting ink all over everything else!

000_3142

Your birthday person who receives this card will love the surprise inside! This is just one of the two dies in this bundle. I have listed the items needed to make this card, click on any of the items to get the details .

000_3138

Thank you for checking out my blog today, hope you enjoyed the card and the stampin’ tips! I’d love to hear what you think … feel free to post your comments below.

Have a Fabulous Friday!

blog-closing-small

TODAY’S STAMPIN’ SUPPLY LIST …

Happy Valentine’s Day … Friend

Hello Stampin’ Friends ~

As promised I have a card for you, using the Perfectly Artistic Designer Series Paper.  I teamed it up with the “Bloomin’ Love” stamp set and “Bloomin’ Hearts” Thinlits Die.

A perfectly quick -n- cute card for anyone who did not know that Valentine’s Day is only in 3 more days! Managing a Candy store … I don’t forget these dates! lol

I began with a Crumb Cake base and then added my “Perfectly Artistic” Designer Series Paper.  The heart maybe the focal point but the beautiful watercolor background just adds a soft touch to the card.

000_3125

I used the “Thick Whisper White” Cardstock because it holds up so nicely with all the intricate cuts – not all bendy and floppy! I then stamped the flowers with Rose Red and Blushing Bride.

The banner was created with the Triple Banner Punch and stamped “friend” on it.  There is one banner on top of the heart and another underneath it … just to add a bit more dimension.

To complete my card I added a few pearls and popped up the heart with Stampin’ Dimensionals … Sweet, Simple and complete.

I appreciate you stopping in today ~

Hope your day is a good one.

blog-closing-small

TODAY’S STAMPIN’ SUPPLY LIST …


Sale-A-Bration Product of the Week: Perfectly Artistic Designer Series Paper

Hello Stampin’ Friends ~

The more samples you see from this limited-time Sale-A-Bration Designer Series Paper, the more you have to have it! This paper gives you two distinct looks—marbling on one side and watercolor on the other. Also, no two sheets are alike!

blogheader_sabpow_feb0916

Try using small but impactful accents or entire backgrounds that showcase the beautiful patterns to show it off in all sorts of ways. And keep in mind that this Sale-A-Bration reward is only available through February 15, 2016*

*Based on inventory, availability may be temporarily extended.

Stop back tomorrow and check out what I have done with the Perfectly Artistic Designer Series Paper!

Thanks for stopping by ~

Have a great day!

blog-closing-small

Weekly Deals and more …

Hello Stampin’ Friends ~

Today is Tuesday so I’m here to share the newest Weekly Deals with you, plus I will also show you more ways in which you can save!

CM100100B

Let’s begin with the Weekly Deals …

We hope you enjoy this week’s Weekly Deals! Remember, click on any of the items descriptions to get the details on the products you are interested in.

138279G Baker’s Box Thinlits Dies Item # 138279
Regular Price: $33.00
Discounted Price: $24.75
Bermuda Bay Sequin Trim Item # 137910
Regular Price: $5.00
Discounted Price: $3.75
Butterfly Basics Wood Stamp Set-Mount Item # 138813
Regular Price: $48.00
Discounted Price: $36.00
Crushed Curry Baker’s Twine Item # 134586
Regular Price: $3.00
Discounted Price: $2.25
Blossom Bunch Punch Item # 140612
Regular Price: $18.00
Discounted Price: $13.50

 ***************************************************

For further savings you can shop in our Clearance Rack …

CM100300B

CLICK HERE TO VIEW CLEARANCE RACK

Then, if you would like to save on “all” your purchases and be the first to get the new catalogs and pre-order all the new items at a discount, consider joining my team of Star’s! Take a Look / Click Here

JoinChart_SAB2016_Dec0315_USClick Here for more Information

Now is the perfect time to take our “Starter Kit” for a test drive …

             It’s only $99 / Ships FREE and you can choose $155 of your favorite stampin’ supplies! (That’s $56 Free + Free Shipping!)

Take your passion for stamping and Do It for YOU!  There’s no obligation to host workshops or parties, sell products to others or personally purchase anything beyond the kit!

What I do for YOU! 

  • I host gatherings at my home where we share ideas, swap, and play with the newest stampin’ goodies! We have a great group and have a lot of fun together.
  • I also host Demonstrator Retreats … This is a fun get-a-way where we stamp, eat, laugh, swap, and stamp some more!!  It’s a blast!
  • I’m also here to coach you in your business and help you set goals, if that is the type of business you want.

PS … If you are spending $300 or more a quarter on your stampin’ supplies, why not try this and get your goodies at a discount!? CHECK IT OUT HERE

Please let me know if I can help you …

and I thank you for stopping by to check out my blog today.

Have yourself a terrific Tuesday!

blog-closing-small


My Heart Smiles …

Hello Stampin’ Friends ~

Today I have a sweet card to share with you that my stampers made at my last Stamp-a-stack. The card highlights the “Botanicals” bundle… to me it’s one of those stamp sets that you just have to have when you open that catalog!

12647150_10208565104427759_3965182509254073519_n

I have to compliment Stampin’ Up! on creating such an amazing group of stamps, designer paper, dies and accessories. They coordinate so beautifully.

I used the “Botanical Gardens” designer paper to help me choose my color pallet – Cajun Craze, Hello Honey, Mossy Meadow (the Botanical Gardens Paper Pack) and Whisper White.

000_3118

The Hello Honey became the base of my card. I layered the Mossy Meadow and a strip of designer paper on next – that would act as a mat to my Whisper White which I cut the leave border out from the framelit die. There is also a strip of the designer paper on the inside of the card.

Next I cut out the leaf and one of the flowers, popped it up with a dimensional and added one of the beautiful “Botanical Gardens Jewels” to top off my flower.

I wanted more color and dimension to the card so I punched out three flowers from the Itty Bitty Accents Punch Pack. I added a touch of bling with the “Rhinestones” and attached the flower with the “Mini Glue Dots”.

000_3120

Last but definitely not least is our greeting … “My Heart Smiles Just Thinking Of you”. The beautiful verse comes from the “Suite Sayings” stamp set. So many great greetings in this stamp set!

Don’t you just love all the ideas and the wonderful things you can make with this product suite! So so pretty and versatile… I just can’t get enough.

Thank you for visiting today, it’s much appreciated.

Have a joyful Monday and a great week.

blog-closing-small

TODAY’S STAMPIN’ SUPPLY LIST …

000_3118


Simply Sunday: Happy Birthday

Hello Stampin’ Friends ~

Today we will keep it short and simple … I know many of you are preparing for your Super Bowl parties!

So let’s begin with our beautiful stamp set “Helping Me Grow” and the hyacinth flower. I chose Perfect Plum and Whisper White for my color combination … simple.

000_3114

I heat embossed the hyacinth with the White Emboss powder then highlighted the flower by sponging some ink over the flower. It also creates a bit of a shadow around the blooms. Wipe off any excess ink with a tissue so it does not smear.

The greeting was stamped from the Rose Wonder stamp set … you will also notice that I used the die from the Rose Garden Thinlits Dies. I love that Stampin’ Up! creates their stamp sets to coordinate with each other.

000_3112

Sweet and Simple … don’t we all love cards like this! Thank you for stopping in.

Enjoy your game day, no matter what you are doing!

blog-closing-small

TODAY’S STAMPIN’ SUPPLY LIST …

000_3114