Fast and Furious … Masculine Card
Hello Ladies, Gentlemen and Stampin’ Friends!
A happy Friday to you all. I am excited to announce that I’ve come up with another themed weekday … Fast and Furious Fridays. Each Friday I will post a simple to make card that you can easily copy and reproduce at the speed of light. Well… maybe not that fast, but fast.
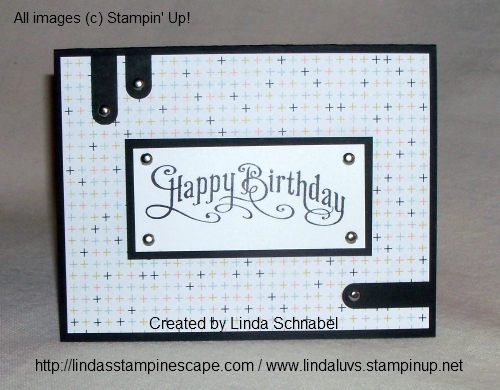
My card share today is a masculine card. So simple and most designer papers will fit the bill (except maybe flowers… those, not so much). Today I used the Sweet Sorbet, which is a FREE item in the Sale-a-Bration Catalog. It measures 4″ x 5-1/4″ … that will leave a nice border around the edge, exposing the Basic Black card base.
We women like our bling, but men … they like hardware, so I used the brads to create the effect that the greeting was bolted down. I then added some straps – created with the Word Window punch, and bolted them down too! You could give your brads a more rustic look by pounding them up a bit with a small hammer!
My “Happy Birthday” greeting is great for men or women and has that wonderful nostalgic look. The stamp set is Perfectly Penned and can be found on page 95 of the big Stampin’ Up! catalog or you an click on the link below.
That’s it … I hope you enjoyed my first Fast and Furious Friday! This doesn’t mean that I would have quick & easy cards on other days, but I’m reserving Friday for our fast and furious… you know the weekend is coming up and we want to get our cards done quick.
Thank you from dropping in today and …
Have an awesome weekend!
Here’s what you need to recreate this card … then another look at the card itself.
FYI … Sale-a-Bration will end March 31st. Please let me know if you need any help with your Sale-a-bration order.
Again, have an awesome weekend.
Inspired by friends …
Hello Stampin’ Friends,
I think I’m still giggling from last nights stamping club! I like blogging but I don’t know what I would do without my face to face time with my stampin’ friends. We laugh, we cry, we hug, then we laugh some more!
So today’s card share is inspired by my stampin’ friends. I started this card over a week ago and could not get it together… I had all the pieces, but nothing looked right. Last night, I pulled it together in less than 10 minutes.
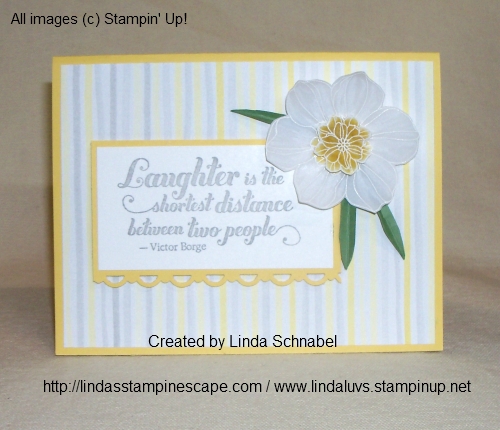
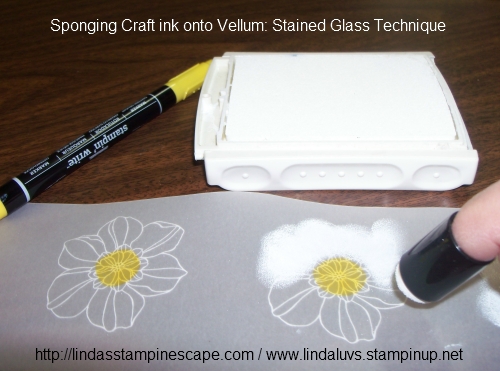
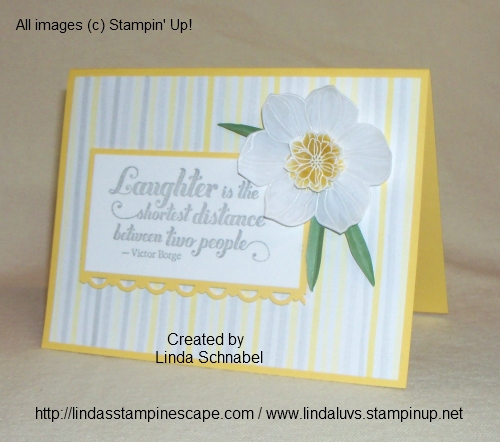
It began (a week ago) with the idea of spring and daffodils, and I love the traditional white with yellow center daffodils. I embossed the image onto vellum cardstock and then flipped it over and sponged the white Craft ink onto the back using a Sponge Dauber (love those little things). The center was colored in with the Daffodil Delight Stampin’ Write Marker.
Now … this takes a bit to dry so I was off to look for a background. I chose the daffodil and slate striped design from the Watercolor Wonder Designer Series paper. Yes ladies, there’s that paper again! I then created the leaves by folding some scraps in half and then cutting a long skinny leaf that resembled a daffodil leaf.
Once my flower was dry, I wanted to add a bit more dimension to the white, so I added some additional white to the front with the “Stampin’ Chalk Marker”. Just bits of highlights, not too much.
After my stampin’ club members (friends) had gone home is when I pulled the card back out … I cut the center of another daffodil I had made, and added it to the one for my card. Daffodils have those beautiful trumpet centers and I just had to add it.
I chose my greeting, and it’s in honor of all my stampin’ friends “Laughter is the shortest distance between two people”… and hugs, they are a very short distance too 🙂
Thanks ladies for the inspiration, and I hope you all enjoyed today’s card share.
Give someone a smile today, make someone laugh or hug a friend and ….
Have an awesome day!
Here is my list of supplies …If you would like to purchase, just click on the image and it will take you to my stampin’ store.
Peek-a-boo Bigz Die Card…
Hello my Stampin’ Friends,
How are you this fine Wednesday? I am excited to share a fun card with you today. Yesterday I showed you the Weekly Deals, and one of the items on the list was the “Peek-a-Boo Die” – so I want to show you what I came up with last night….
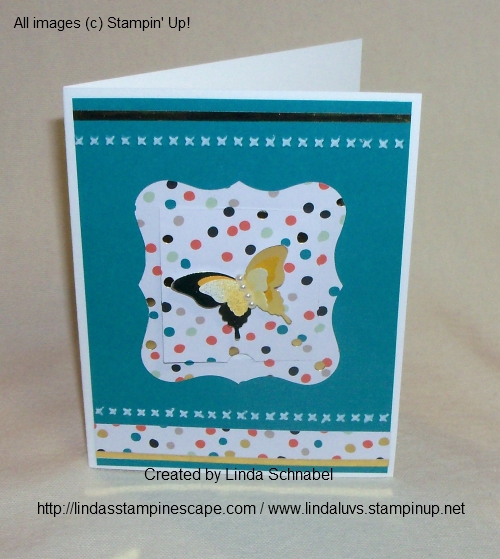
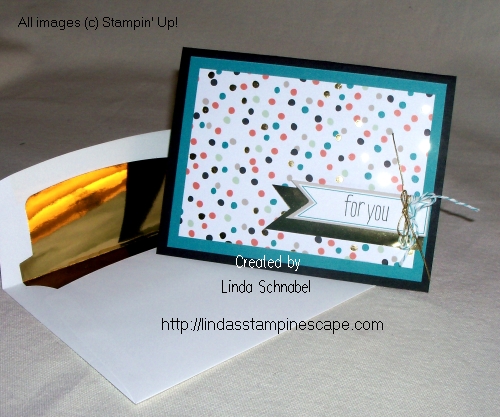
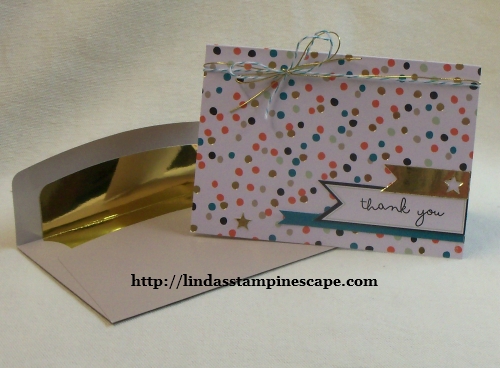
Do you recognize the designer paper? Well actually, it’s the “Good as Gold” Sale-a-bration Card Kit. I used it because it’s a bit thicker than the designer paper and because I love the gold dots in the design!
I chose the frame I wanted to use on my card and then ran the “Good as Gold” through the BigShot. Now I have my frame with a Peek-a-boo Window! Did you know … You can use the window as a pull down or pull up … how fun is that! It just depends on how you place it onto your card.
I then cut a piece of Whisper White cardstock slightly larger than my frame (2-1/4″ x 2-1/4″). I stamped the “You can never have too much happy” verse from the stamp set “Yippee Skippee!” Before attaching my frame, added some texture by using the xxxx’s from the “Needlepoint Border” Embossing folder. I wanted to bring in a bit more white onto the card so I colored the xxxx’s with our White Stampin’ Chalk Marker. Now I could attach my frame.
I also wanted to add a bit more color to the card front so I added some of the extra paper, and I sliced off a piece of the gold envelope liner! While I was add it … I punched out the “Elegant Butterfly” out of gold. Then I layered the smaller “Bitty Butterfly” from my left over embossed designer paper from yesterday’s project! Waste not, want not! LOL
Finally, to finish off the card … I added the Basic Pearls and then popped up the butterfly with the dimensionals.
Here are the items I used to create this project … Click on the photo to view details / purchase. Please note that the “Peek-a-boo Bigz Die” is on sale for $24.71 and will reflect that when you purchase it during the “Weekly Deals” which ends on the 17th of March.
Thank you so much for stopping by my blog today, I hope you enjoyed today’s card share.
Technique Tuesday & Weekly Deals
Hello Stampin’ Friends,
So … How did you like the “Glitter Paper” technique yesterday? So simple, and so pretty! Well that brings me to my exciting announcement… I am featuring a “technique” each Tuesday! Yep, Technique Tuesday and it begins today with the wonderful “Chalkboard” technique!
I also have the weekly deals for you … and are they great! I have them all, so look forward to seeing some projects made with a few of these items!
Today’s card share is simple to do, and looks so nostalgic with the Chalkboard Technique. I have chosen “Another Great Year” stamp set as my featured set today.
I have seen several ways to do this technique … here is my take on it. Simply begin with a piece of Basic Black cardstock and wipe your embossing buddy across it. This will help keep the stray embossing powder off your card and gives you the appearance as if you just wiped off a chalk board! At least you don’t have to clean the erasers! Ooops … showing my age again!
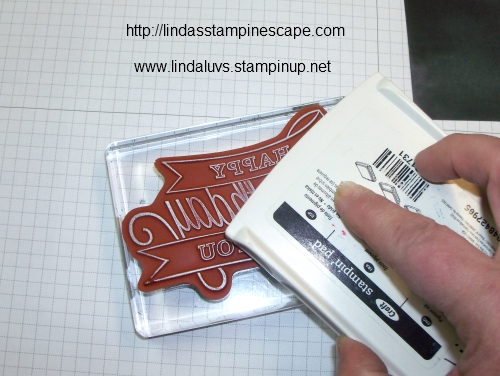
Next, ink up your desired image with the white CRAFT ink. I like to flip my stamps so the rubber is up when inking … it gives you much more control and you can see how exactly where you are placing the ink.
Stamp image onto black cardstock…. Sprinkle the White embossing powder over your inked area, tap off excess, and emboss with heat gun.
Now you can add some designs, or color in parts of the image with our fabulous “Stampin’ Chalk Marker”. It was meant for this technique and is fun and easy to use. Here I highlighted part of the banner and added a simple border around the card.
You can use this technique alone as your focal point as I did today, or frame it with one of our beautiful designer series papers – that would really make it pop! My technique clubs made Christmas cards using this technique, so feel free to experiment … and have fun.
The Chalkboard technique is really hot right now … just take a look around, you’ll be surprised at how many different places you will find it.
Thanks for visiting me today ~
Here is a list of supplies used for today’s card …
|
ITEM |
DESCRIPTION |
|
Another Great Year Stamp Set – WOOD |
|
|
Another Great Year Stamp Set – CLEAR |
|
|
Embossing Buddy |
|
|
Whisper White Craft Ink |
|
|
Stampin’ Chalk Marker |
|
|
White Embossing Powder |
|
|
Heat (Gun) Tool |
|
|
Rhinestones |
Weekly Deals
We hope you enjoy this week’s Weekly Deals!
![]() |
Dress Form Pop’ N Cuts Item # 130100 Discounted Price: $16.46 |
![]() |
Circles #2 Originals Die Item # 114526 Discounted Price: $11.96 |
![]() |
3 Inch Circle Originals Die Item # 122125 Discounted Price: $13.46 |
![]() |
Chevron Textured Impressions Embossing Folder Item # 127749 Discounted Price: $5.96 |
![]() |
Set Designer Frames Textured Impressions Embossing Folder Die Item # 123130 Discounted Price: $6.71 |
![]() |
Peekaboo Frames Bigz L Die Item # 124587 Discounted Price: $24.71 |
![]() |
Argyle Textured Impressions Embossing Folder Item # 127750 Discounted Price: $5.96 |
![]() |
Ahoy, Matey Ensemble – Digital Download Item # 130078 Discounted Price: $8.97 |
How to create your own “Glitter Paper” …
Hello Stampin’ Friends,
I’m back today to put a little “sparkle” in your day! My card share today is an easy technique that I love to do when I need a quick card but want to jazz it up! I will see how easy it is to make your own glitter paper.
I used the “Watercolor Wonder” Designer series paper, it is so pretty I just can’t keep my hands off this stuff! Cut your designer paper to the size you want. I decided to use it as my card front, so it measures 4″ x 5-1/4″.
Place this on a scrap piece of paper and dab the entire VersaMark Ink pad directly onto your designer paper. You could brayer the VersaMark on, but this is much easier.
Now I move the designer paper onto another scrap piece of paper, or you can use an embossing powder tray, because you will now cover the entire piece with “Iridescent Ice Embossing Powder”…. tap off any excess powder. Now grab your heat gun and emboss! You now have a beautiful …. designer … glitter paper!
My greeting comes from the “Friendly Phrases” stamp set, and I stamped it the the Crisp Cantaloupe ink. This is also the color I used for the base of my card.
I repeated the embossing steps on a scrap piece of designer paper (is there scrap designer paper? Maybe not) … I then punched out a butterfly using the “Elegant Butterfly” punch. To finish it off, I added a small string of Rhinestones to the butterfly.
The greeting and the butterfly were popped up with Stampin’ Dimensionals.
I hope you enjoyed the card share today.
Thank you so much for stopping by. And a “Happy Birthday” to my daughter Sarah today!
Sale-A-Bration Inspiration Part 2
Hello Stampin’ Friends,
Today I am going to share part 2 of the “Earn a Free Sale-a-bration item” from the Stampin’ Up! blog “Get Inspired”. Concept artist today is Melody. Hope you enjoy …
Earn a Free Sale-A-Bration Item (Part 2)
During Sale-A-Bration, when you spend $50 USD/ $60 CAD, you earn a free, exclusive product. To make it easier to get to $50 USD/ $60 CAD, we’re suggesting a second bundle of products that work well together and will help you earn a free item. Enjoy!
Anyone who knows me, knows that I am absolutely obsessed with the Undefined Stamp Carving Kit and carving my own stamps. I jump at every opportunity I get to talk about and share what I’ve made with the kit. I just love the creative process involved—and of course, the end result.

Here’s what I included in my Undefined bundle:

Supplies:
Undefined Stamp Carving Kit 133402
Itty Bitty Shapes Punch Pack 118309
Rhinestone Basic Jewels 119246
Sweet Sorbet Designer Series Paper 133521 (FREE with a qualifying purchase!)
(Total supplies equal SAB minimum)
You may look at the samples I’ve made and then at my bundle list and wonder why I’ve included the Stampin’ Pierce Mat. Because the rubber in the Undefined Kit is stiffer than our regular rubber, I have found that it takes more pressure to get an evenly stamped image. The Stampin’ Pierce Mat makes it easier to get an even image without as much pressure.
I’ve included a PDF of my sketches for this stamp set. Feel free to carve your own set if you’d like.
Note: The Undefined Kit comes with four wood blocks. To accommodate five stamps, the smallest stamps were double-mounted.
I’d love to see the fun stamps you’ve carved. E-mail me a link to a blog post or attach a JPEG of your carved creations to undefined@stampinup.com and I’ll add it to the Stampin’ Up! Undefined (http://www.pinterest.com/stampinup/undefined/) Pinterest board.
Melody H.
Concept Artist
Don’t you just love Melody’s cards? What do you think of the “Undefined”? I’d love to hear from you.
I’ll be back tomorrow with a card share designed by me 🙂
Thank you so much for stopping by.
Sale-a-bration inspiration …
Hello Stampin’ Friends,
Some more to share from our “Get Inspired” blogs about Sale-a-bration…
Earn a Free Sale-A-Bration Item (Part 1)
During Sale-A-Bration, when you spend $50, you earn a free, exclusive product. To make it easier to get to $50, we’re suggesting bundles of products that work well together and will help you earn a free item. Enjoy!


Cards, Cards, Cards! Bundle
134998 Hip Hip Hooray Card Kit
131373 On Its Way Simply Sent Kit x 2
131459 Thanks & Hello Stamp Set
You’ll get 36 card bases with envelopes, five stamps, an assortment of clips and Baker’s Twine, a Classic Stampin’ Spot, stickers, Stampin’ Dimensionals, etc.
I recommend selecting the Good as Gold Kit (133512) as your free Sale-A-Bration item. You’ll add eight more cards and envelopes to your stash! That’s 44 cards and envelopes—and you’ll really enjoy mixing and matching all of the pieces to make them your own.
Here are a few of my cards that I made with the Good as Gold Sale-a-bration kit …
I have added cardstock and product to these cards.
Here is what the cards in the kit look like … pretty!
Hope you have enjoyed them, and I hope you get yours for FREE too!
Just click on the product descriptions to view kits and begin to shop. Thanks for stopping by.
Have a nice day ~
Weekly Deals
Hello Stampin’ Friends,
Weekly Deals
Here they are … hope you enjoy this week’s Weekly Deals!
![]() |
Coastal Cabana 3/8″ Ruffle Stretch Trim Item # 130024 Regular Price: Discounted Price: 6.7125 US/9.375 CAN |
![]() |
Strawberry Slush 3/8″ Ruffle Stretch Trim Item # 130023 Regular Price: 8.95 US/12.5 CAN Discounted Price: 6.7125 US |
![]() |
Adorning Accents Textured Impressions Embossing Folders Item # 125601 Regular Price: Discounted Price: 6.7125 US |
![]() |
Large Rhinestone Basic Jewels Item # 129324 Regular Price: Discounted Price: 3.7125 |
![]() |
Midnight Muse 3/8″ Stitched Satin Ribbon Item # 126847 Regular Price: Discounted Price: 6.7125 |
![]() |
Betsy’S Blooms Stampin’ Around Standard Wheel Item # 126943 Regular Price: 6.5 US/7.95 CAN Discounted Price: 4.875 US/5.9625 CAN |
![]() |
2012-2014 In Color Designer Series Paper Stack Item # 130137 Regular Price: Discounted Price: 16.4625 |
![]() |
Everything Easter Ensemble – Digital Download Item # 129363 Regular Price: Discounted Price: 8.97 |
You can click on any of the item descriptions to take you to my stampin’ store for purchasing.
Thanks for stopping by today.
Escape the Winter Blues …
|
||||||||||||
|
||||||||||||
|
Life Doesn’t Have to be Perfect …
Hello Stampin’ Friends,
I hope you all have a wonderful weekend. It was cold, but we had sunshine … and I am grateful for that. Life doesn’t have to be perfect to be wonderful.
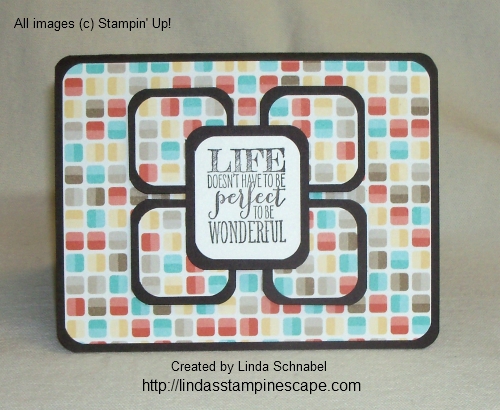
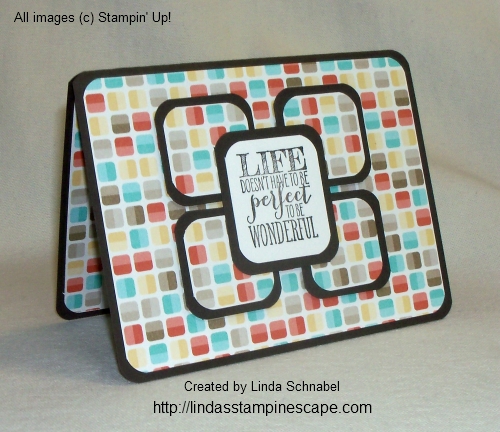
I began with the “Retro Fresh” Designer Series paper. The pattern I picked was so fun and colorful, I didn’t think I needed much else.
Since the edges are rounded on the little squares in the designer paper, I decided I wanted all my edges rounded too. Since my “Envelope Punch Board” was already sitting on the table, I used the corner rounder from there. I was a little leery about punching though the folded card, but it worked fine. And trust me … it does so much more than punch corners!
To give it a more dramatic look, I cut out additional squares from the “Retro Fresh” designer paper … no measuring, I just count 4 x 4 blocks! I popped those up using our Stampin’ Dimensionals.
I was so careful to line up the squares horizontally, that I didn’t notice that they were off vertically. Did you? lol
The greeting is from the “Perfect Pennants” stamp set, I find it very versatile and have used it many times already.
Hope you enjoyed today’s post & quick card.
Have a marvelous Monday!
Here is the list of ingredients I used today …
|
Retro Fresh Designer Series Paper / $10.95 |
|
|
Perfect Pennants Stamp Set – Wood / $29.95 |
|
|
Perfect Pennants Stamp Set – Clear / $21.95 |
|
|
Envelope Punch Board / $19.95 |
Thanks again for stopping by. You may click on the item number to view the product or make a purchase at my stampin’ store.
You Make the World a Better Place …
Hello Stampin’ Friends,
How are you this fine Sunday? Oops, some of you are on a waaaay different time zone, but I hope you are having a wonderful day too. I am blessed to have visitors to my blog from all over the world … I would love for you to leave a comment at the end and tell me where “you” are from.
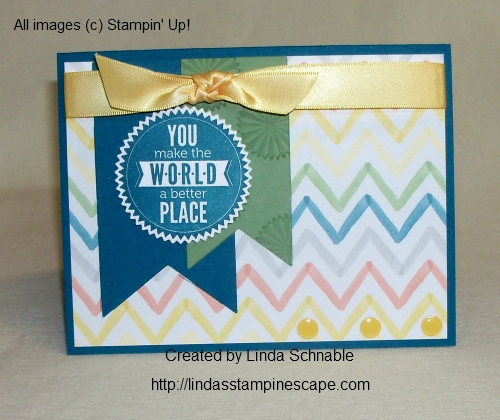
OK … today’s card share is going to look a bit familiar to my stampin’ clubs, at least the layout. I want to share with you a card that I created using the Sunburst Saying Bundle (stamp set and framelits).
As you can see, I have chosen the “Watercolor Wonder” designer series paper again. I love that paper, but I will start sharing ideas with other paper I have 🙂 I also used the “Banner Framelit” Dies… banners made easy!
My card base color is “Island Indigo” and I have accented it with the Wild Wassabi, and Daffodil Delight. It really is easy to pick colors when they’re already on the paper (and now listed on the back of the designer paper packet).
The little daffodil dots on the bottom are just punched out of the “Owl Builder” punch and then covered with Crystal Effects. It balances not only the card, but the color.
So today, another quick and simple card to re-create and can be used for a guy or a gal.
Don’t forget to jot me a little note to introduce yourself … your name and where you live. I’d love to hear from you.
So happy you joined me today, I thank you for that.
Have a super Sunday!
Here is the list of ingredients I used today …
|
Watercolor Wonder Designer Series Paper / $28.95 |
|
|
Starburst Saying (BUNDLE) – Wood / $44.95 |
|
|
Starburst Saying (BUNDLE) – Clear / $38.95 |
|
|
Banner Framelit Dies / $26.95 |
|
|
Owl Builder Punch / $16.95 |
|
|
Crystal Effects / $6.25 |
|
|
Daffodil Delight Seam Binding |
You may view or purchase any of these items just by clicking on the item number. It will take you directly to my stampin’ store. Shop 24/7 – 365 …
The Starbust Saying Bundle and another item … will bring you to a qualifying order of $50 or more! Now it’s time to pick out your free Sale-a-bration item!
Thank you.
Thinkin’ Spring …
Hello Stampin’ Friends,
Whew … didn’t think it would take me this long to get back to my computer today! Sorry for the late post, too many chores last night. Once I sat down … I was out for the count and woke up around 3:30 this morning! We’ve all had those days, and now I’m back down in my stampin’ studio!
Today’s card is to inspire you to Think Spring! I was happy to hear that our forecast of 5 to 8″ of snow has now turned into only 1 t0 3 inches! I can deal with that.
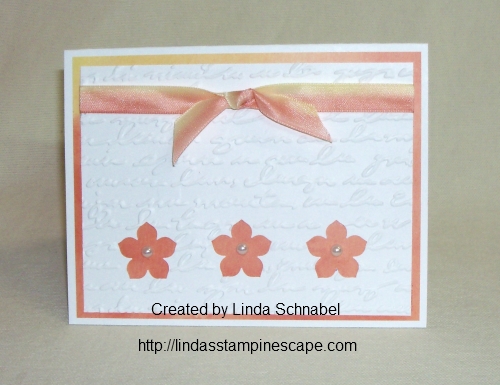
I chose the “Watercolor Wonder” designer series paper. The design is the Daffodil Delight and Tangerine Tango watercolor sheet. Those colors are so warming, and that is just what we need right now!
The designer paper is cut to 5-1/4″ x 4″ … that will leave a 1/4″ border when you adhere it to the Whisper White card.
The front of the card is also Whisper White and cut to 5″ x 3-3/4″ … then emboss it using one of your favorite embossing folders and the Bigshot. My apologies for grabbing the one that was from the Holiday catalog … let’s hope they put it back in the new 2014-15 Catalog! It’s not on the Clearance Rack so let’s keep our fingers crossed!
I used the cute little “Petite Petals” punch found on page 33 of the Occasions catalog. Center your punch in the middle of your card front that you just embossed and punch. Then punch out additional flowers on each side of the center flower.
Now … for the ribbon. You may remember this technique from my February 22nd post (Faux Dipping) where I colored it with marks and spritzed it. If not, your in luck because this time I took pictures to help explain how I did it.
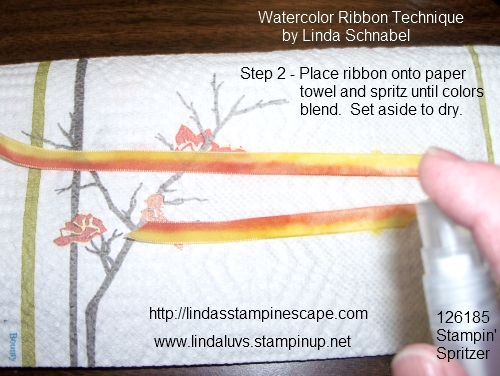
I began with the 3/8″ Whisper White Taffeta Ribbon and colored it with my Daffodil Delight and Tangerine Tango Markers. Just slide your “brush end” (it also has a writing end) across the ribbon, don’t be afraid to go darker.
Once your finished inking up your ribbon, place it on some paper towel. The paper towel will absorb some of the ink, that is why it’s OK to go darker when coloring it. Fill your Stampin’ Spritzer with water and spritz over your ribbon… the more water you spritz on, the lighter your ribbon will become. Set aside to dry.
Tip: You can the new Heat Tool to dry your ribbon because it actually has a low setting for drying!
I love this technique and it looks so nice with the Watercolor Wonder Designer Series Paper. Give it a try… it really is quite easy and can add a stunning look to your card.
Thanks for stopping by today.
Here is the list of ingredients I used today …
|
Watercolor Wonder Designer Series Paper / $10.95 |
|
|
Petite Petals Punch / $12.95 |
|
|
Taffeta Ribbon – Whisper White / $6.95 |
|
|
Stampin’ Spritzer / $2.95 – Set of 2 |
|
|
Pearls Basic Jewels / $4.95 |
You may view or purchase any of these items just by clicking on the item number. It will take you directly to my stampin’ store. Shop 24/7 – 365
Thank you.
Inspiration comes in many forms …
Hello Stampin’ Friends,
Today I want to share with you the wonderful ideas created by our Concept Team, taken from the Be Inspired Blog.
Be Inspired!
Do you ever struggle to find inspiration? Do you need something to jumpstart your creativity? You’re not alone. As concept artists, staying inspired can be challenging at times. We look to various places for inspiration.

We recently made some projects based on a mood board. A mood board illustrates visual direction and conveys a look and feel. We loved the look of this board from http://virrrrrr.blogspot.it. It has soft colors and textures, a spring look and feel—with a fun touch of gold. Here are the projects that this mood board inspired:
Jen

One of my favorite elements on this board is the tufted suitcase chair. I was inspired by the fun colors and pops of gold. I made this mini pinboard to mimic the tufted chair and added colorful elements to it. I love the color blocking on the eggs and created a color-blocked tag to hang on my mini board. It’s the perfect little piece to keep by my computer.
Chrissy

There’s nothing to get your creative juices flowing like a mood board. If you’re finding yourself in a rut, just looking at one is a great creative exercise. It pushes you out of your comfort zone and inspires you to try new things.
The gold polka dots were the first thing that jumped out at me. I love polka dots, and the fact that they are gold just makes them that much more fantastic!
I began my project by putting together a pretty, bright color scheme, then noticed that most of the mood board was pastel. I thought the overall feel of pastel with a few fun, bright pops was so inspiring. That’s when I decided to make my project pastel with bright pink stitching. It added just enough “pop.” I created more polka dots using circle punches (US/CA), then layered the circles in the corner (as you see on the mood board).
I love the handwritten descriptions next to the macarons. There’s something very charming about something that looks handwritten. The So Very Grateful Stamp Set has some awesome greetings. They look handwritten and are perfect for the look I was going for. I’m in love with the finished project. It’s something I’m not sure I would have done on my own—in a good kind of way. It feels new and different, and I think that’s my favorite part about it.
Arika

When creating my card, I tried to mimic some of the elements from the board. The balloons have the same overlapping colors as the mood board. The colors in the chevron stripes also come from the mood board. And I added just a small bit of gold with the Gold Baker’s Twine.
Melody

I was inspired by the colors and patterns on this mood board. The woodgrain background and the Pool Party Designer Series Paper stripes were inspired by the different hangers. The center circle came from the colored eggs—and I couldn’t pass up an opportunity to have some gold dots on my project. The macarons and spoonfuls of ice cream made me think of a celebration, so I picked my “Hooray for today” sentiment from the Geometrical Stamp Set.
Kasia

I was inspired by the bottom row of the mood board. The transparent circles reminded me of the hanging lanterns in the Happy Congratulations Stamp Set. I first embossed the image and the greeting on vellum, then turned it around and stamped the colors on the back. By stamping on the back I was able to create a more subtle look and also reduce smearing of the colors. I stuck with the same color pattern and finished it off with the “scoops of ice cream” colors.
Hope you feel inspired to go create something, too!
Concept Art Team

Hope you enjoyed, aren’t they great? I love the “Thank You” card! Which is your favorite?
Be sure to stop back tomorrow … I have a neat card to share with you.
Have an awesome Friday!!
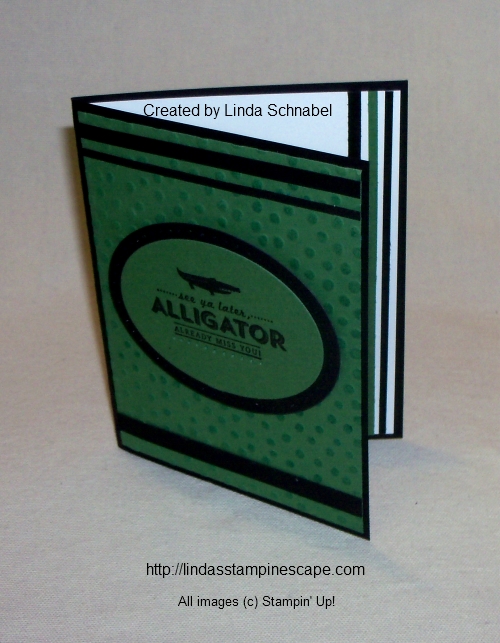
See ya later … Alligator
Hello Stampin’ Friends,
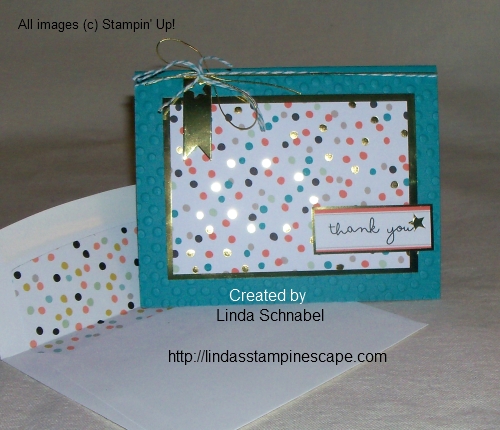
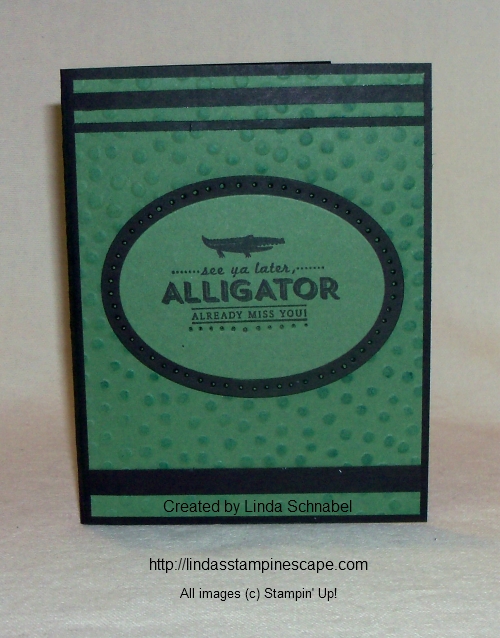
Today’s card share is a fun card I created using my FREE Sale-a-bration items! I teamed up the “Decorative Dots” embossing folder and the “See Ya Later” stamp set. Both of these items are in our Sale-a-bration catalog and you can get one or both of them for FREE with a qualifying order.
So … what’s a qualifying order? All you need to do is purchase $50 of your favorite stampin’ supplies, or try something new. Total is before shipping and taxes. Stampin’ Up! has made it even easier by bundling some of the great products introduced in the Occasions catalog. You could just choose one of these, and then one of the free items. Here are two of my favorites …
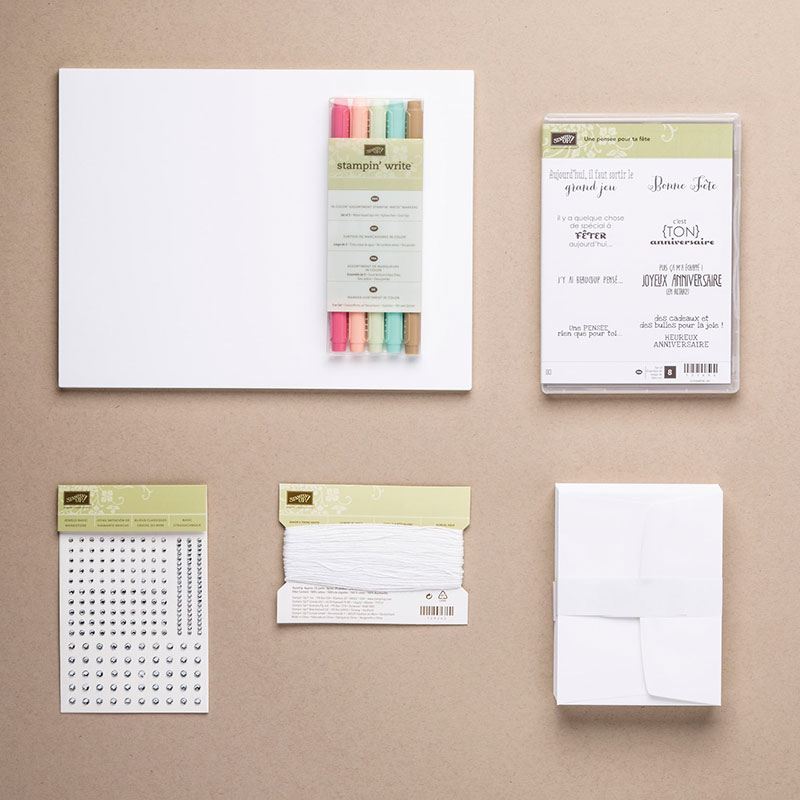
This is the “BIRTHDAY BASH BUNDLE“
| Birthday Bash Clear Bundle | 135318 |
| Price: $55.80 | |
| Love to give handmade birthday cards but don’t love to figure out what goes together? Then we have a bundle for you! Our Birthday Bash Bundle has the paper products, accents, and birthday stamp set. The bundle coordinates with the Bannières en folie Stamp Set for even more birthday fun! Available in wood-mount and clear-mount. Coordinates with the Banner Blast Stamp Set. You can add it for FREE at checkout, or you can choose any other Sale-A-Bration free item.Bundle includes:• Remembering Your Birthday Stamp Set • 8-1/2″ x 11″ Whisper White Cardstock (40 sheets) • Whisper White Medium Envelopes (40) • 2013-2015 In Color Stampin’ Write Markers • Whisper White Baker’s Twine • Rhinestone Basic Jewels |
|
Here is the “YAY FOR CARDS” BUNDLE … (my absolute favorite!)
| Yay For Cards Bundle | 135336 |
| Price: $52.70 | |
| If you’re the kind of person who never has enough cards on hand but never has enough time to make a bunch, don’t despair! Our Yay for Cards bundle pulls together what you need to create loads of cards without spending loads of time. Bundle includes:• Happenings Simply Created Card Kit (makes 15 cards; envelopes included) • On Its Way Simply Sent Kit (makes 8 cards; envelopes included) • Thanks & Hello Wood-Mount Stamp Set • Smoky Slate and Strawberry Slush Classic Stampin’ Pads • Mini Glue Dots |
|