I hope you enjoyed my Simply Sunday cards! Today, we’re stepping things up a notch and highlighting one of the real gems in the Autumn Toile Suite—the ornate background die found in the Amber Autumn Bundle. Honestly, this die was the first thing that caught my eye when I opened the suite, and once you see it in action, you’ll understand why. It’s a showstopper!
This intricate background die creates a stunning, leaf-patterned backdrop that instantly elevates your card designs. The beauty of it is you don’t need to fuss with multiple layers or complicated layouts—just one pass through your die-cutting machine and you’ve got a card front that looks elegant, rich, and detailed.
For today’s card, I started with a Very Vanilla card base to keep things simple. The magic happens when you pair it with the Earthen Toned Metallic Specialty Paper, included right in the suite. I ran the background die through with this paper, and the result is an absolutely gorgeous metallic leaf layer that shimmers and shines. To finish it off, I heat-embossed my greeting in Bronze Metallic Embossing Powder—and die cut with the Textured Notes Dies—so everything ties together beautifully.
Imagine this same design layered over a patterned background from the Autumn Toile Designer Series Paper—wow! The possibilities are endless, and the die does all the heavy lifting for you. That’s the brilliance of this suite: simple stamping and die-cutting turn into cards that look intricate and professional.
If you’re looking to add elegance and ease to your fall crafting, the Autumn Toile Suite is a must-have. With the Amber Autumn Bundle, metallic specialty papers, and coordinating accessories, you’ll have everything you need to create cards that impress without stress. Today’s card is just the beginning—I have more to share with you soon, so stay tuned!
Let me know what you think … comment below, and thanks for stopping by today!
If you missed my LIVE presentations on World Cardmaking Day, I have one of the video replays for you today. I shared the Sweet Candy Cane Christmas Bundle and demonstrated how to turn it into a bright and colorful Autumn card … to maximize your investment. We’re thinking “outside” the holiday and create with your stamp sets all year long!
Let’s take a look at the replay ….
The video explains what you need to do to get the cross hatch design and also shares the dimensions with you so you can easily recreate this card.
I think you could have a lot of fun with this pattern to celebrate many occasions: Red, White & Blue for 4th of July, shades of pink or blue for baby cards, your school colors … you get the idea! Here I used Cajun Craze, Old Olive and Crushed Curry.
I also used the dies for the “mistletoe” and turned them into Oak leaves. This was an easy and fun card to make.
Thank you for joining me today. Have a great day!
Here is a list of supplies that I used for my two cards today ….
I couldn’t resist … I had to share one more card (for now) using the Rustic Harvest Designer paper and bring you the Warmth of the Fall Season. I know you know how to use the “colored” paper so I have another way to highlight the black & white. Let’s take a look at this gorgeous paper …
See, I bet you have ideas spinning around in your head with what you would like to do with all the beautiful colored patterns, but I want to share how to have fun with the black and white.
Yesterday’s card highlighted the “Blending Brushes” and transforming the black and white to a soft fall background. Wait till you see today’s card!! Grab your fall colored ink pads (I’m using Old Olive, Pumpkin Pie, Cherry Cobbler, and Crushed Curry) … then grab your sponge daubers. Don’t have any? I put the link below be cause you are going to want these handle little coloring tools in your stamp collection!
Is this not a WOW card!?! It really takes you right to those beautiful sunny fall days … Call me crazy but I love to look up into the trees when the sun is shining through those beautiful colors, it’s magical. I can almost smell it now. Sorry … drifted off into my happy place for a minute there! lol The paper has the perfect detail of the leaves and some spattering to age them a bit … all I had to do was sponge (dauber) the colors onto it.
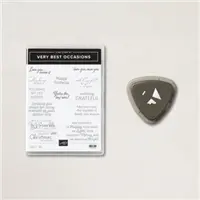
The beautiful sentiment comes from the Very Best Occasions Bundle (pg. 68 in your Jul-Dec Mini Catalog). There are so many heart-felt sentiments in this stamp set and a couple of cute fun ones as well … and as for the bundle, well that is the Very Best Trio Punch.
Get three punches in one with the Very Best Trio Punch! These punches are designed to create perfect corner cutouts and openings you can thread ribbon through. Choose from a straight edge or a detailed corner to add an extra touch to labels, tags, and sentiments. You can punch the detailed corner design two ways: by just rotating the paper clockwise or punch the top and bottom corners so that they mirror each other. This punch is a triple threat that you can use with any stamp set or dies. So let’s get crafting!
Today’s card may look detailed but it is so simple to create with the right tools. I have linked all of the products I used on today’s card for your convenience.
Thank you for sharing a part of your day with me. It’s a beautiful day here in Wisconsin, I hope you are enjoying your day as well.
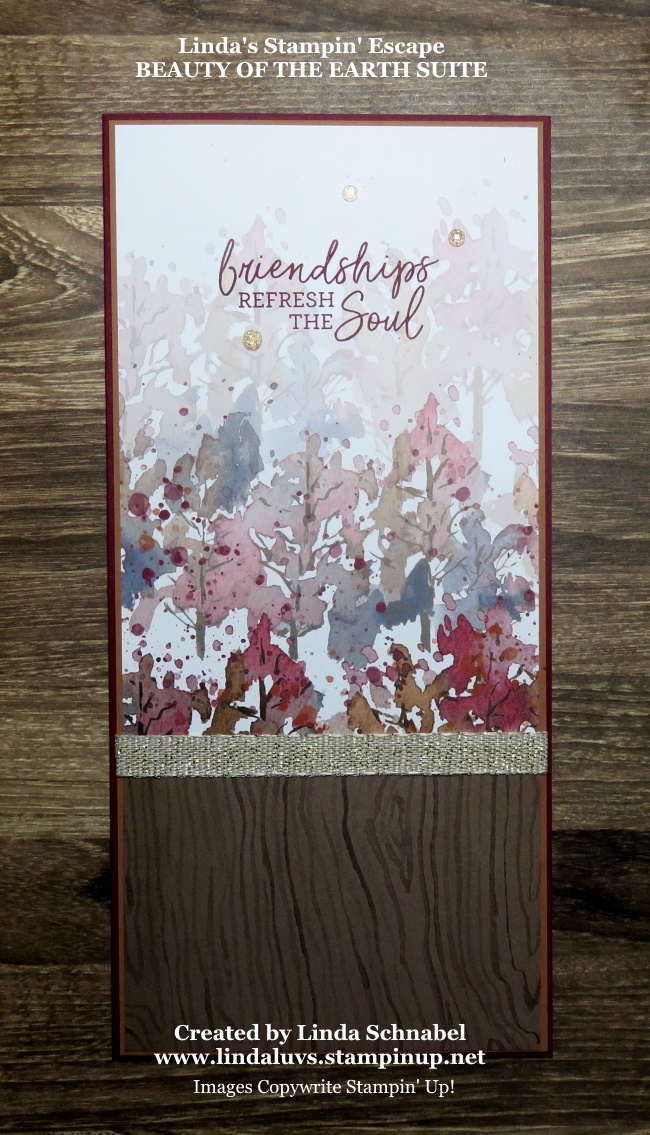
I have a treat for you today … a simple yet beautiful Slim Line card and a parade of other cards that were created from the amazing Beauty of the Earth Suite. I will also be sharing some fun techniques on these cards so, grab a cup of coffee and sit back with me while we go through these creative gems!
I share these because the Beauty of Friendship Bundle is part of the Savings in Bloom promotion. I will share “all” of the items on sale at the bottom of my post.
First up is my Slimline cards, this card fits in a business size envelope … I’m using two different patterns from the Beauty of the Earth Designer paper and joined them together with the pretty Gold Fine Art Ribbon; it has a touch of sparkle, so I had to add the Genial Gems to keep the sparkle going.
The greeting comes from the Beauty of Friendship stamp set / bundle. I chose the Cinnamon Cider as a mat and Merry Merlot as my card base … they pull those colors out of the designer paper. I find this suite / bundle very gender neutral … who wouldn’t love these cards!
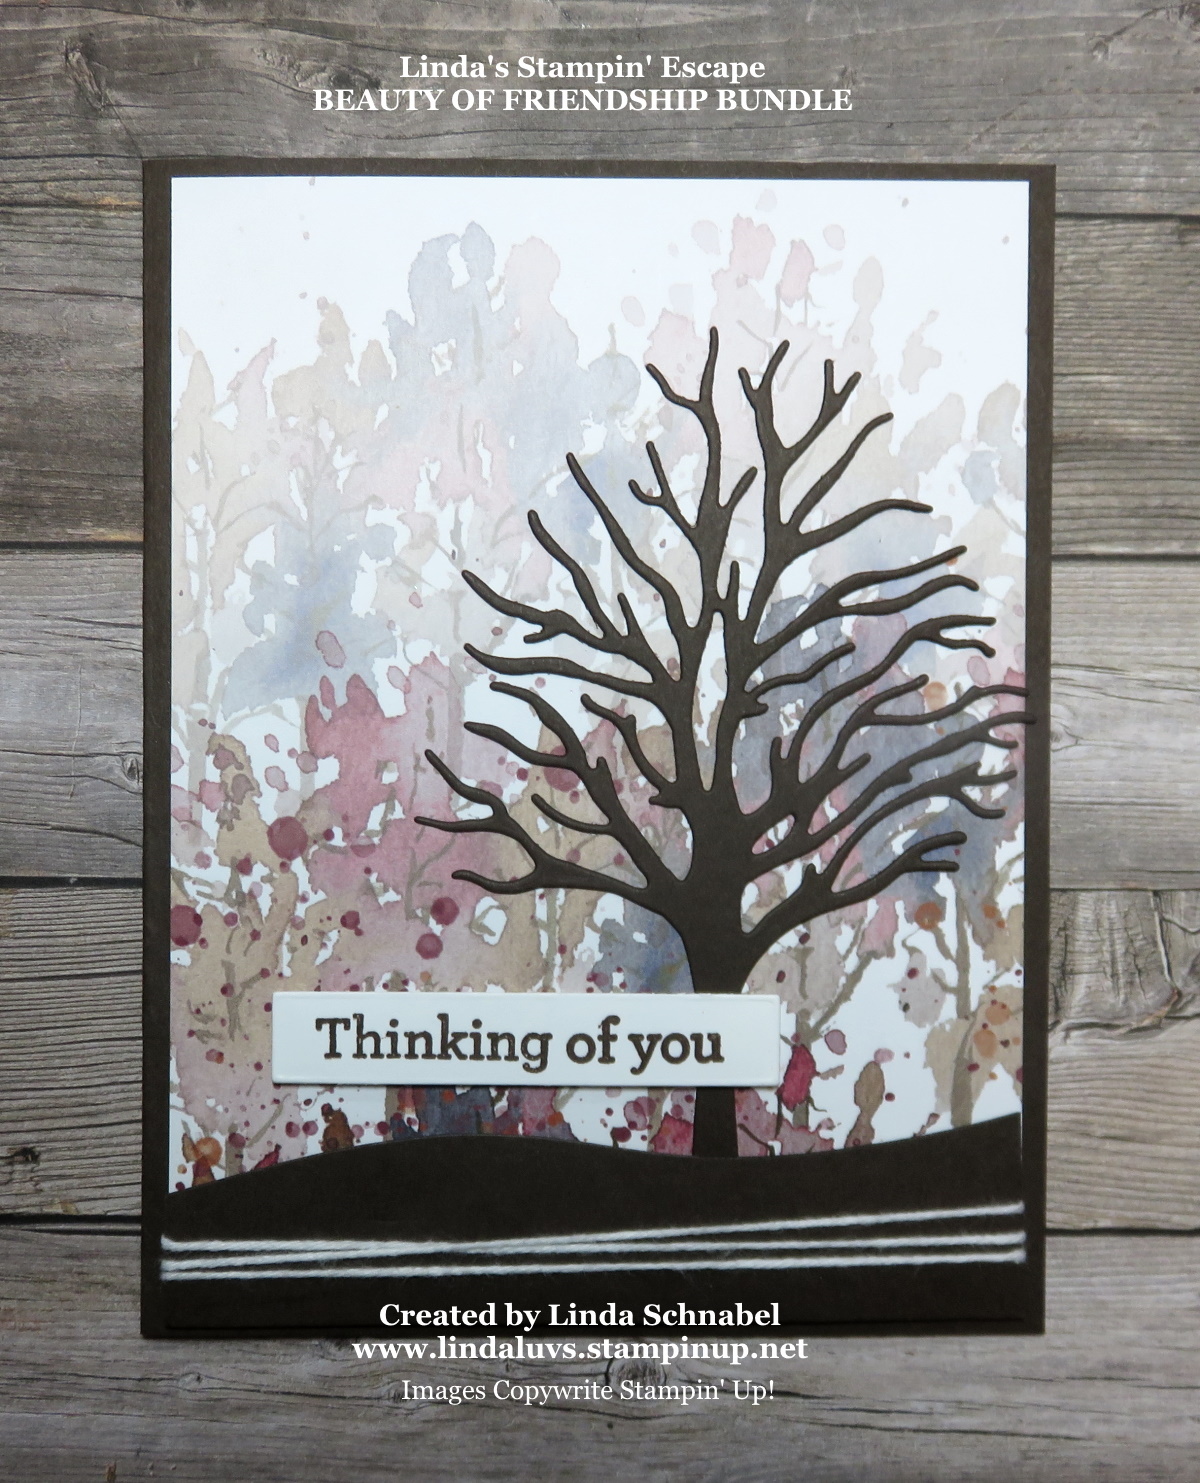
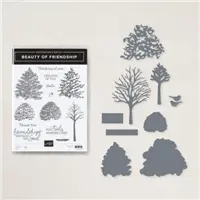
My second card I’m using the same pattern of the Beauty of the Earth Designer Series paper and the Beautiful Trees dies. Another simple card when using your Stampin’ Cut & Emboss machine. The greeting comes from the Beauty of Friendship stamp set included in the bundle.
Ready to see another card using the same paper? The amazing thing is that each one looks sooo different! I used a landscape layout verses the portrait as I did on the first two cards and created this unique card. I also used Night of Navy on this card to pull out the blue in the designer paper.
I created the frame with the Stitched Rectangle Dies … I love this look, it’s new and fresh and highlights the designer paper. I added the tree and greeting from the bundle …
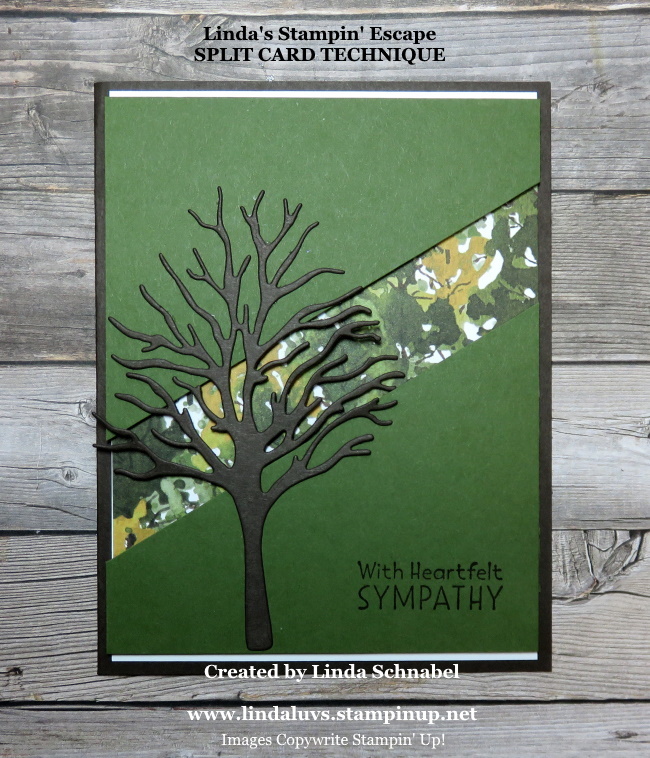
Now lets change things up a little by using a different pattern from our Beauty of the Earth Designer paper and a fun technique … the “Split Card Technique”. I’m using Old Olive and Early Espresso to coordinate with my designer paper. You can watch the video to see how to create this card yourself by CLICKING HERE!
Now I would like to bring in one of the “hottest designer papers” right now, and that is the NEW HORIZONS Designer paper … so many pretty patterns would work perfectly with the dies from the Beauty of the Earth bundle. The watercolor landscapes look so cool with the tree.
The next card I share with you has a card base is Early Espresso …. so is the tree itself, it made the Misty Moonlight designer paper from the Beauty of the Earth Designer paper really pop, and when I added the leaves to the trees … WOW! The leaves on the bottom are just another die cut of the top … just cut up into smaller pieces to lay upon the ground. So pretty!
The last card I have to share with you, has the same watercolor background paper that I used on the “You Inspire Me” card but I’m changing up the seasons. Once the leaves are gone … well, winter comes next, and it makes for the perfect Christmas card …
I just love this card and I used the Chalk pen and Wink of Stella to add snow to my tree! How fun is that! I just wanted to show you that this is not just another tree set, but a bundle / or suite that can be used for any season … or any reason!!
The Beauty of the Earth Suite is still available, but if you are just looking for the bundle … it’s 20% Off right now. I always wonder if Stampin’ Up! will retire a stamp set when they put it on sale … so if this is on your “Wish List”, you may want to consider getting it now and enjoy the extra savings!! You can click on any of the images below for details on the bundles or to begin shopping … it takes you directly to my store.
Thank you for joining me this Sunday for my card parade, I hope you enjoyed the many styles of cards. Please let me know if you have any questions.
TODAY’S STAMPIN’ SUPPLY LIST … If you liked the products used in todays projects, I have links for you below. Just click on the item you would like more information on, or to begin your shopping. It will take you directly to my website. Thank you ♥
I have a treat for you today … a simple yet beautiful Slim Line card and a parade of other cards that were created from the amazing Beauty of the Earth Suite. I will also be sharing some fun techniques on these cards so, grab a cup of coffee and sit back with me while we go through these creative gems!
First up is my Slimline cards, this card fits in a business size envelope … I’m using two different patterns from the Beauty of the Earth Designer paper and joined them together with the pretty Gold Fine Art Ribbon; it has a touch of sparkle, so I had to add the Genial Gems to keep the sparkle going.
The greeting comes from the Beauty of Friendship stamp set / bundle. I chose the Cinnamon Cider as a mat and Merry Merlot as my card base … they pull those colors out of the designer paper. I find this suite / bundle very gender neutral … who wouldn’t love these cards!
My second card I’m using the same pattern of the Beauty of the Earth Designer Series paper and the Beautiful Trees dies. Another simple card when using your Stampin’ Cut & Emboss machine. The greeting comes from the Beauty of Friendship stamp set included in the bundle.
Ready to see another card using the same paper? The amazing thing is that each one looks sooo different! I used a landscape layout verses the portrait as I did on the first two cards and created this unique card. I also used Night of Navy on this card to pull out the blue in the designer paper.
I created the frame with the Stitched Rectangle Dies … I love this look, it’s new and fresh and highlights the designer paper. I added the tree and greeting from the bundle …
Now lets change things up a little by using a different pattern from our Beauty of the Earth Designer paper and a fun technique … the “Split Card Technique”. I’m using Old Olive and Early Espresso to coordinate with my designer paper. You can watch the video to see how to create this card yourself by CLICKING HERE!
Yesterday I shared the next card with you … the card base is Early Espresso and so is the tree itself, it made the Misty Moonlight designer paper from the Beauty of the Earth Designer paper really pop, and when I added the leaves to the trees … WOW! The leaves on the bottom are just another die cut of the top … just cut up into smaller pieces to lay upon the ground. So pretty!
The last card I have to share with you, used the same watercolor background paper but I’m changing up the seasons. Once the leaves are gone … well, winter comes next, and it makes for the perfect Christmas card …
I just love this card and I used the Chalk pen and Wink of Stella to add snow to my tree! How fun is that! I just wanted to show you that this is not just another tree set, but a bundle / or suite that can be used for any season … or any reason!!
Thank you for joining me this Sunday for my card parade, I hope you enjoyed the many styles of cards. Please let me know if you have any questions.
Stop back tomorrow as I have another card that you’ll enjoy!!
TODAY’S STAMPIN’ SUPPLY LIST … If you liked the products used in todays projects, I have links for you below. Just click on the item you would like more information on, or to begin your shopping. It will take you directly to my website.Thank you ♥
I have a treat for you today … a simple yet beautiful Slim Line card and a parade of other cards that were created from the amazing Beauty of the Earth Suite. I will also be sharing some fun techniques on these cards so, grab a cup of coffee and sit back with me while we go through these creative gems!
First up is my Slimline cards, this card fits in a business size envelope … I’m using two different patterns from the Beauty of the Earth Designer paper and joined them together with the pretty Gold Fine Art Ribbon; it has a touch of sparkle, so I had to add the Genial Gems to keep the sparkle going.
The greeting comes from the Beauty of Friendship stamp set / bundle. I chose the Cinnamon Cider as a mat and Merry Merlot as my card base … they pull those colors out of the designer paper. I find this suite / bundle very gender neutral … who wouldn’t love these cards!
My second card I’m using the same pattern of the Beauty of the Earth Designer Series paper and the Beautiful Trees dies. Another simple card when using your Stampin’ Cut & Emboss machine. The greeting comes from the Beauty of Friendship stamp set included in the bundle.
Ready to see another card using the same paper? The amazing thing is that each one looks sooo different! I used a landscape layout verses the portrait as I did on the first two cards and created this unique card. I also used Night of Navy on this card to pull out the blue in the designer paper.
I created the frame with the Stitched Rectangle Dies … I love this look, it’s new and fresh and highlights the designer paper. I added the tree and greeting from the bundle …
Now lets change things up a little by using a different pattern from our Beauty of the Earth Designer paper and a fun technique … the “Split Card Technique”. I’m using Old Olive and Early Espresso to coordinate with my designer paper. You can watch the video to see how to create this card yourself by CLICKING HERE!
Yesterday I shared the next card with you … the card base is Early Espresso and so is the tree itself, it made the Misty Moonlight designer paper from the Beauty of the Earth Designer paper really pop, and when I added the leaves to the trees … WOW! The leaves on the bottom are just another die cut of the top … just cut up into smaller pieces to lay upon the ground. So pretty!
The last card I have to share with you, used the same watercolor background paper but I’m changing up the seasons. Once the leaves are gone … well, winter comes next, and it makes for the perfect Christmas card …
I just love this card and I used the Chalk pen and Wink of Stella to add snow to my tree! How fun is that! I just wanted to show you that this is not just another tree set, but a bundle / or suite that can be used for any season … or any reason!!
Don’t forget it’s Sale-a-bration and you can get a FREE item from the Sale-a-bration catalog with the purchase of the suite or the bundle!! If you choose the suite … just add on a few more items and you’ll have enough to get my FREE Delicate Dahlia Class!
Thank you for joining me this Sunday for my card parade, I hope you enjoyed the many styles of cards. Please let me know if you have any questions.
Stop back tomorrow because I have another card that will knock your socks off!!
TODAY’S STAMPIN’ SUPPLY LIST … If you liked the products used in todays projects, I have links for you below. Just click on the item you would like more information on, or to begin your shopping. It will take you directly to my website.Thank you ♥
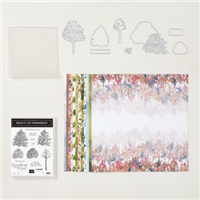
Today I’d like to share a simply beautiful card the Beauty of the Earth Suite that highlights the Beauty of the Earth Designer Series paper and Beautiful Trees dies. These can be found on page 11 of your Annual Catalog.
This suite makes it so easy to create beautiful Fall cards … and well, that IS my favorite season!! I love the smell in the air on a warm Autumn day and the way the sun shines through the leaves now that they have transformed into magical colors, it looks like they are being touched by God himself!
Can’t you just feel the warm sun on your face and while it makes the leaves almost glow …. and them smell of fall …oh my gosh! That is what inspires me! Nature … You don’t need to be an artist to create beautiful cards for your friends and family. And if your in need of the the inspiration and tools to get started, it’s all right here for you. Here is the stunning paper I used for my card ….
Check out this amazing color pallet … perfect for Fall!! Look at the image on the left side, I did exactly what Stampin’ Up! did in this catalog photo!! Our catalogs are also a great place to find inspiration. So you now follow my blog, make sure you follow me “Linda’s Stampin’ Escape” on Facebook and even my YouTube Channel for more inspiration!!
As I said, I took the example out of the Annual Catalog to begin my card. My background is also designer paper, in fact, it’s from the Beauty of the Earth Designer Paper in this suite. The suite includes the designer paper and the bundle 3-D Bark Embossing Folder!
My card base is Early Espresso and so is the tree itself, that made the Misty Moonlight designer paper really pop, and when I added the leaves to the trees … WOW! The leaves on the bottom are just another die cut of the top … just cut up into smaller pieces to lay upon the ground. Simple … right.
Just a little closer Iook at the card so you can see the watercolor detail of my background paper, and how the fallen leaves look. The greeting comes from the Beauty of friendship stamp set / bundle. Because we are still in our Sale-a-bration period through the end of September … You can get a FREE item from the Sale-a-bration catalog with the purchase of the suite or the bundle!!
Hope you enjoyed today’s card and feel inspired by this beautiful season called Autumn.
Thank you hanging out with me today. Have a beautiful day ~
TODAY’S STAMPIN’ SUPPLY LIST … If you liked the products used in todays projects, I have links for you below. Just click on the item you would like more information on, or to begin your shopping. It will take you directly to my website.Thank you ♥
Today I’m bringing the color back to our September 2017 Paper Pumpkin kit … Old Olive, Crushed Curry and Tangerine Tango to be exact!
I had these cute little leaves left over from my kit so I had to do something with them. I was inspired by greenery that is “framed” as artwork for the home.
This simple card just takes the 3 different colors in 1-1/2″ x 3″ strips that were mounted onto a 4-3/4″ x 3-1/4″ Soft Suede mat. The greeting taken from the stamps included in the kit and stamped in Cajun Craze … also included in the September 2017 Paper Pumpkin kit.
I could not resist incorporating the beautiful “Layered Leaves” 3-D Dynamic Textured Embossing Folder … it coordinates so nicely and gives your card a great texture.
WOW … how simple was this card to make, and perfect for the upcoming fall season.
Thanks so much for stopping by. Besides the Paper Pumpkin kit, I have a list of additional supplies below.
OK – there are way too many leaves off the tree’s already … Where did autumn go? This is my favorite time of year and I feel like I was so busy that I missed it!
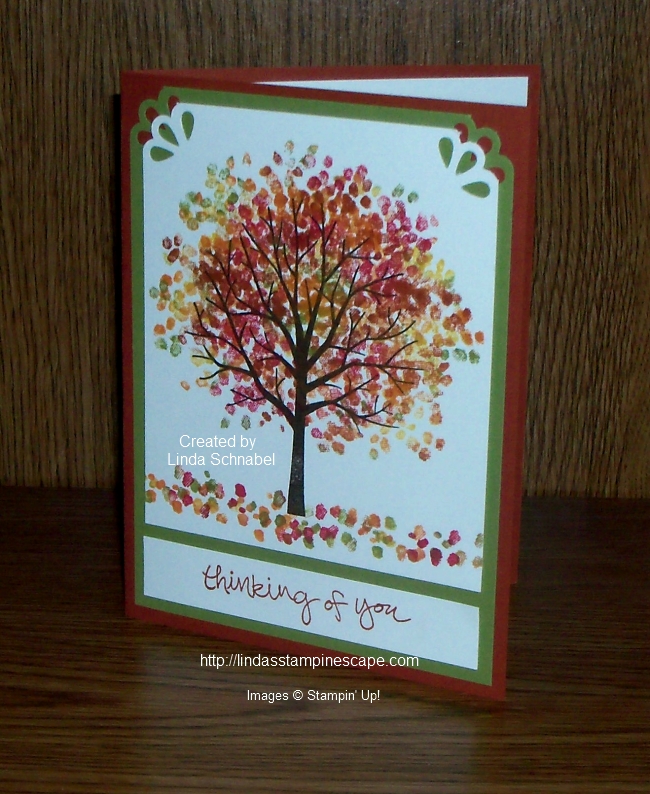
Today I’m sharing a card that I made last year. This was a fun card to make, I used the “Baby Wipe” technique to get all this color …
I knew I wanted to use the “Sheltering Tree” stamp set, and the “Baby Wipe” technique is the easiest and quickest way to create the explosion of color. I laid out a stack of 4 – 5 baby wipes and began dropping ink from the refill bottles.
I used Old Olive, Cajun Craze, Crushed Curry, Pumpkin Pie and Real Red re-inkers, then pressed the leaves into the inked up baby wipe and stamped it onto the tree which was already stamped in Chocolate Chip.
I added the leaves to create my ground cover and then added a greeting which is included in the stamp set. Unfortunately the Curvy Corner Trio Punch was discontinued…. I miss it!
OK – there are way too many leaves off the tree’s already … Where did autumn go? This is my favorite time of year and I feel like I was so busy that I missed it!
So I’m hanging on a little longer by creating a card that I’ll keep on my desk till the snow falls! This was a fun card to make, I used the “Baby Wipe” technique to get all this color …
I knew I wanted to use the “Sheltering Tree” stamp set, and the “Baby Wipe” technique is the easiest and quickest way to create the explosion of color. I laid out a stack of 4 – 5 baby wipes and began dropping ink from the refill bottles.
I used Old Olive, Cajun Craze, Crushed Curry, Pumpkin Pie and Real Red re-inkers, then pressed the leaves into the inked up baby wipe and stamped it onto the tree which was already stamped in Chocolate Chip.
I added the leaves to create my ground cover and then added a greeting which is included in the stamp set. To jazz it up a bit, I punched the corners with our new Curvy Corner Trio Punch … I love the fun design.
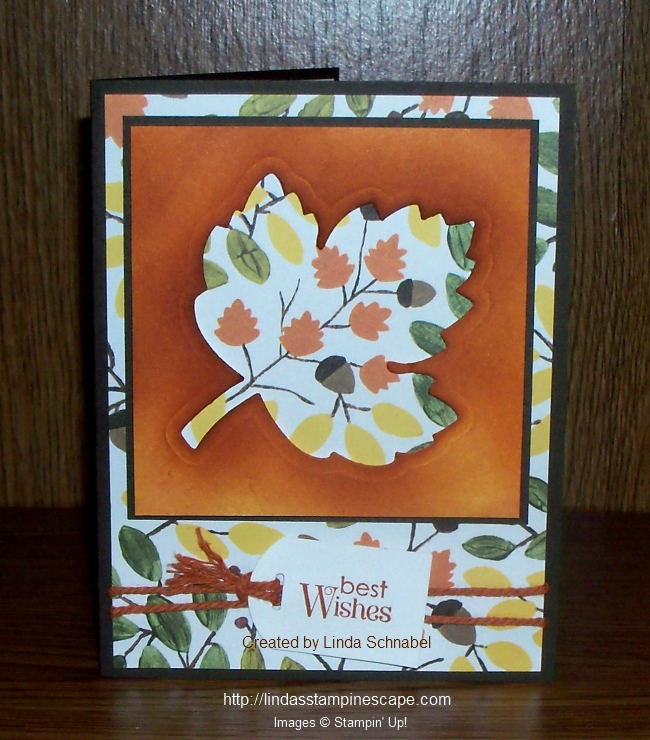
Hope you enjoyed yesterday’s fall card and the fun “Reverse Masking” technique used to create it.
I had someone ask me … “What do you do with the left over items when you make a card?” Well, she was speaking of the piece of paper that I used as a mask to create the leaf on yesterdays card.
Well … Let me show you!!
I that the mask looked pretty after I got done sponging, so I added a bit more sponging and trimmed it down and came up with the 3-1/2″ x 3-1/2″ square. I used dimensionals to raise the leaf above the “Into the Woods” designer paper.
I trimmed off the designer paper and matted the front (leaf) piece to create more impact for my focal point. Without the Early Espresso mat behind the leaf, it just blended in to much. Now the designer on the card front works well with our focal (leaf) point.
The card front sits upon a Early Espresso base and is tied together with a bit of that left-over bakers twine from my September Paper Pumpkin. I created a little tag with the Note Tag and Curvy Corner Trio Punches (I’ll show you step by step soon).
The greeting on the tag comes from the stamp set “Teeny Tiny Wishes … still a staple in my stamp collection.
So … now you know what I do with some of my left-over paper, I use it!