Tag Archives: stampin up card ideas
Faux Dipping Technique + Mono Chromatic Coloring = Beautiful!
Hello Stampin’ Friends,
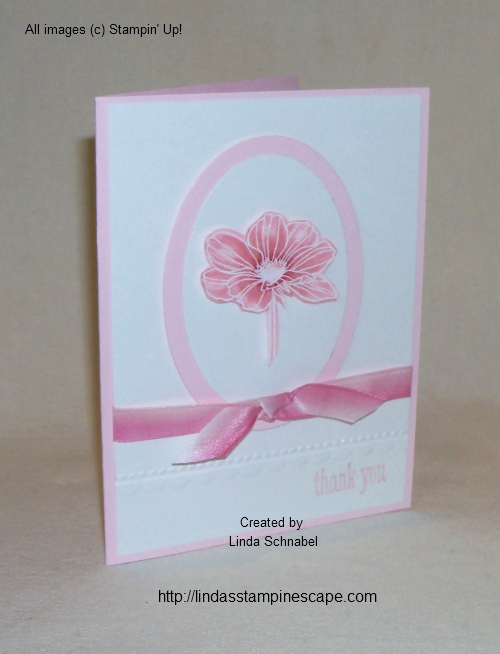
I am really excited to share my card with you today! You didn’t think I was going to show you a technique without following it up with a card did you? I thought the way Stampin’ Up! colored the ribbon was really cool … so I had to try it out.
I didn’t have the ribbon they used, so I used the Taffeta Ribbon in Whisper White. I then ran my markers across the length of the ribbon (as Stampin’ Up! did) starting with the lightest color … Pink Pirouette and finishing with Melon Mambo.
I did however change up the next step… I laid my ribbon across a layer of paper toweling and spritzed it with water. You can find the Stampin’ Spritzers on page 164 of the Idea Book & Catalog. It blended nicely! Once the water absorbed into the ribbon, and excess in the paper towel, I moved the ribbon off to the side to dry. I love the way it looks! I’ll be trying out some additional color combinations this weekend.
I tried to do the same technique on paper, but it did not work the same as it did on the ribbon. You can however create the watercolor look with the Shimmery White paper and the Aqua Pens … but that’s another day, and another card.
For my flower, I tried a technique that I will be showing my Technique clubs in the upcoming month. It is embossed in white embossing powder, and colored in with the Stampin’ Write marker. Both my card stock and my marker are Pink Pirouette. It is unbelievable that you can get that much variation … using the same color marker!
To get the darker color, you simply keep coloring over the same area. To create the light / highlighting … leave it blank or only go over that area once. I did however add a touch of Melon Mambo right around the center of the flower so it matched the ribbon better.
The white card stock you see, is the Shimmery White … it’s so pretty! I wish my camera would capture it better. I embossed the bottom area with the “Needlepoint Border” embossing folder.
The flower was cut out, popped up with Stampin’ Dimensionals, and framed with the “Oval Collection” framelits.
I hope you enjoyed seeing the “Faux Dipping” technique on today’s card share. I’d like to hear from you, are you going to try this technique??
Have a wonderful weekend ~
Here is the list of ingredients I used today …
|
Peaceful Petals Stamp Set – Wood / $28.95 |
|
|
Peaceful Petals Stamp Set – Clear / $20.95 |
|
|
Taffeta Ribbon – Whisper White / $6.95 |
|
|
Stampin’ Spritzer / $2.95 – Set of 2 |
|
|
Shimmery White Cardstock / $7.95 |
|
|
Needlepoint Border Embossing Folder / $7.95 |
|
|
Ovals Collection Framelits / $26.95 |
You may view or purchase any of these items just by clicking on the item number. It will take you directly to my stampin’ store. Shop 24/7 – 365 … Thank you.
You make me HAPPY!
Hello Stampin’ Friends,
Yesterday I showed you a card using the watermark stamp from the “Happy Watercolor” Stamp set, and I will share another card with you today using that watermark!
I also included a few more stamps from the set to give you a better idea of what a versatile stamp set it is. You can find the “Happy Watercolor” stamp set on page 22 of the Occasions Catalog or by clicking on the link.
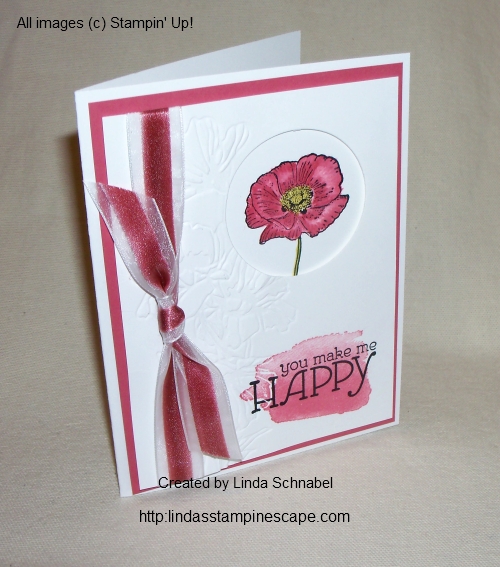
Once I chose the flower, I picked the color I wanted to work with and I thought 2012-14 In-Color “Primrose Petal” was just what I was looking for. The “Primrose Petal” mat was cut to 4″ x 5-1/4″.
Next I cut the Whisper White to 3-3/4″ x 5″ and ran it through the Bigshot using the “Flower Garden Embossing Folder”. Because I wanted the flower pattern on the left side of my card, the pattern is indented instead of protruding (or sticking up). Next I cut out a circle using the “Circle Collection Framelits”. You now have a window for your flower.
The flower was stamped on a separate piece of Whisper White cardstock, using the Black StazOn ink … this is the best ink to use when coloring because it will not bleed.
I don’t color as much as I used to, and I don’t know why because it is so relaxing and fun to do. I love layering the color to give the flower dimension. I used the Primrose Petal ink from the ink pad and blender pen to do most of the coloring. The center was done with the “Summer Starfruit” marker. Both colors are found in the 2012-14 In-color Collection. When competed, this was mounted onto the card front with the use of Stampin’ Dimensionals.
Since I had the marker close by, I decided to dye my Organza Ribbon. Those ladies who stamp with me a lot, know that the white organza ribbon is one of my favorites, because all you need is a marker or an ink pad and you can color you ribbon to match your cardstocks! How cool is that!!
Ok … now my ribbon is off to the side to dry, so I stamped my greeting onto the card with the Black StazOn (let dry… it does not take long) and then I inked up the watermark stamp in Primrose Petals and stamped directly over the greeting. It gives balance to the card … they call it a 3 point card (3 points of interest, that draw your eye around the entire card).
Before mounting the card front onto the mat I added my ribbon, first the long strip, and then tying the second ribbon around it, to create the bow. I’m sure any one of your friends would love to get this card.
I also want to share with you the…
“WEEKLY DEALS”
Please let me know if you have any questions about the steps to make the card, or with the “Weekly Deals”. I will also include a list of the ingredients for today’s card for you below.
Thank you so much for stopping by today.
Have a wonderful Wednesday!
Here is the list of ingredients I used today …
|
Happy Watercolor Stamp Set – Wood / $29.95 |
|
|
Happy Watercolor Stamp Set – Clear / $21.95 |
|
|
Primrose Petals Ink Pad / $5.95 |
|
|
Primrose Petals Cardstock / $6.95 |
|
|
2012-14 In-Color Markers / $14.95 (Set of 5) |
|
|
Blender Pens / $9.95 (Set of 3) |
|
|
Flower Garden Embossing Folder / $7.95 |
|
|
Circle Collection Framelits / $26.95 |
|
|
5/8” Organza Ribbon – Whisper White / $5.95 |
You may view or purchase any of these items just by clicking on the item number. It will take you directly to my stampin’ store. Shop 24/7 – 365 … Thank you.
Watercolor Birthday …
Hello Stampin’ Friends,
Another round of snow to deal with yesterday. You just never know how big your driveway is until you have to shovel it … twice! Well … if I look at the bright side, I did get some much needed exercise today 🙂
Today’s card share was inspired by a questions from my stampin’ friend Kathie. She wanted to know what you would do with the “watermark” stamp in the “Happy Watercolor” stamp set. So here’s one idea …
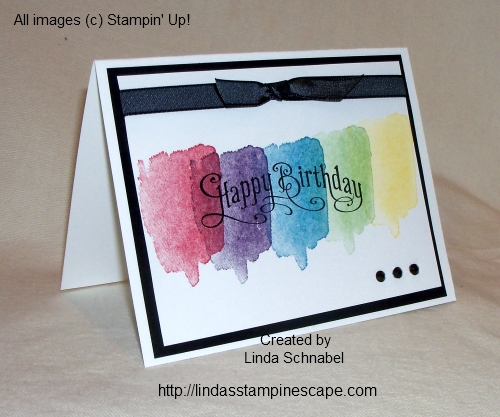
I decided to do a rainbow effect with the stamp. I chose Real Red, Elegant Eggplant, Pacific Point, Gumball Green and Daffodil Delight inks. I did stamp off … after inking up my stamp, before stamping it onto my card front.
I think the hardest part of creating this card is keeping a straight line. Once my watermarks were done, I chose the Happy Birthday stamp from the “Perfectly Penned” stamp set.
I matted it with Basic Black and added a black taffeta bow. I did not realize until the card was completed and I was writing down my ingredients that I found out that ribbon is discontinued. I think I will be sorting out my ribbons better this weekend!
I don’t like to use items that you cannot purchase, however you could substitute this ribbon for the pretty 1/8″ Black Taffeta or the 1/4″ Pacific Point Stitched Taffeta Ribbon.
To finish off my card, I added my trusty rhinestones in the corner … colored black with a Sharpie. It just anchors the card.
Hope you enjoyed today’s colorful watercolor birthday. Stop back tomorrow for another card using the “watermark” stamp and “Happy Watercolor” stamp set.
Have a wonderful day ~
Here is a list of supplies used for today’s card …
|
ITEM |
PRICE |
DESCRIPTION |
|
$16.95 |
Happy Watercolor Stamp Set – WOOD |
|
|
$12.95 |
Happy Watercolor Stamp Set – CLEAR |
|
|
$29.95 |
Perfectly Penned Stamp Set – WOOD |
|
|
$21.95 |
Perfectly Penned Stamp Set – CLEAR |
|
|
$4.95 |
Rhinestones |
Clicking on the item number will link you to my on-line store. Thank YOU!
Rev Up the Fun!
Hello Stampin’ Friends,
Hope you all had a wonderful weekend. I caught a glimpse of the qualifying runs for the Daytona 500 – that means Spring is just around the corner … right? It also inspired my card for today’s share.
With all the beautiful floral stamp sets in the Stampin’ Up! catalog, it seems “man cards” are few and far between. If you are in need of an idea, I hope this inspires you. It will also work great for a kids card.
My color pallet today is simple … Midnight Muse and Whisper White. I chose the “Rev Up the Fun” stamp set and the race car. The greeting is included in the stamp set. The tire tracks stamp is great for the inside of this card … and don’t forget to stamp the envelope too!
I embossed the bottom half of the card with the “Chevron” textured embossing folder. When I was ready to stamp the car, I wanted it to look like it was racing across the card, so I began at the right side, held it down for a bit to ensure I had a nice dark color … then dragged it backwards.
Here’s a tip … Practice, practice, practice. This way you make sure you got a good feel of how you want it too look, and to make sure your not dragging it crooked across the card.
Next I used the “Word Bubble Framelit Dies” and cut out a word bubble that fit the greeting. I set my greetings inside the word bubble dies to make sure they fit, before I cut.
Then I stamped my greeting on a separate piece of white cardstock and popped it up behind the opening. I then added Stampin’ Dimensionals to the rest of the piece before mounting it onto the Midnight Muse mat.
My final step was to add the ribbon … I tied a knot in it before attaching (more manly than a bow). Then I just used my Snail adhesive to adhere the card front to the base.
Thank you so much for checking out my blog today. Hope I inspired you to start your week off by “Rev’in up the Fun”.
Take good care ~
Here is a list of supplies used for today’s card …
|
ITEM |
PRICE |
DESCRIPTION |
|
$18.95 |
Rev Up the Fun Stamp Set – WOOD |
|
|
$14.95 |
Rev Up the Fun Stamp Set – CLEAR |
|
|
$7.95 |
Chevron Textured Embossing Folder |
|
|
$8.95 |
Midnight Muse 3/8” Stitched Satin Ribbon |
|
|
$24.95 |
Word Bubble Framelit Dies |
|
|
$3.95 |
Stampin’ Dimensionals |
I made sure that the items used today will qualify for a FREESale-a-Bration item! Clicking on the item number will link you to my on-line store. Thank YOU!
Thinking of Spring …
Hello Stampin’ Friends,
Today’s card share was created to inspire “spring” to begin! I think most of our 50 states are ready, the East coast has been hit exceptionally hard this year. For those of you in Arizona who are basking in the warm sunshine … we are jealous.
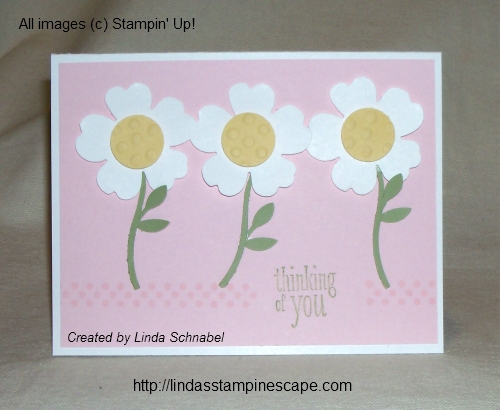
Enough with the weather report … and onto the card. I made this mainly out of punches, except for a little greeting and stamping a bit of an accent. I wanted the flowers to be the focal point.
The flowers were punched with our “Pansy” punch. I embossed the yellow using the “Decorative Dots” embossing folder (FREE Sale-a-bration item) and then punched them with the 3/4″ Circle Punch. It adds some fun dimension to the flowers.
The stem was punched from the “Bird Builder” punch … some leaves were trimmed off, and then added onto the stem to complete the look. It’s best to do this type of work directly on the “Silicone Craft Sheet” … I always use that when I am using my Snail adhesive on a punched images so small. Keeps the adhesive off your work area (No more sticky mess).
I used the dot strip from the “Perfect Pennants” stamp set (also comes in a bundle with the Banner framelits) and the greeting comes from a new stamp set, Peaceful Petals.
Can you guess what colors I used to create this card? Let’s see how many correct guesses we can get.
I hope you enjoyed today’s whimsical card … I thought the flowers looked like they were dancing on a warm summer day! (Wish I was there) lol
Have a Super Sunday!
Here is a list of supplies used for today’s card …
|
ITEM |
PRICE |
DESCRIPTION |
|
$15.95 |
Pansy Punch |
|
|
$12.95 |
¾” Circle Punch |
|
|
w/$50 Order |
FREE |
Decorative Dots |
|
$4.95 |
Bird Builder Punch |
|
|
$29.95 |
Perfect Pennants Stamp Set – WOOD |
|
|
$21.95 |
Perfect Pennants Stamp Set – CLEAR |
|
|
$28.95 |
Peaceful Petals Stamp Set – WOOD |
|
|
$20.95 |
Peaceful Petals Stamp Set – CLEAR |
|
|
$3.95 |
Stampin’ Dimensionals |
The items listed here will give you enough in sales to qualify for a FREESale-a-Bration item! Clicking on the item number will link you to my on-line store. Thank YOU!
Thinking of You …
Hello Stampin’ Friends,
Hope today finds you well. I was a bit under the weather yesterday and had to cancel my Stampin’ Club meeting. I don’t do that very often, but found we had 3 members not feeling well either … so a big “Get Well Soon” to all my club members and any of you who are not feeling well either.
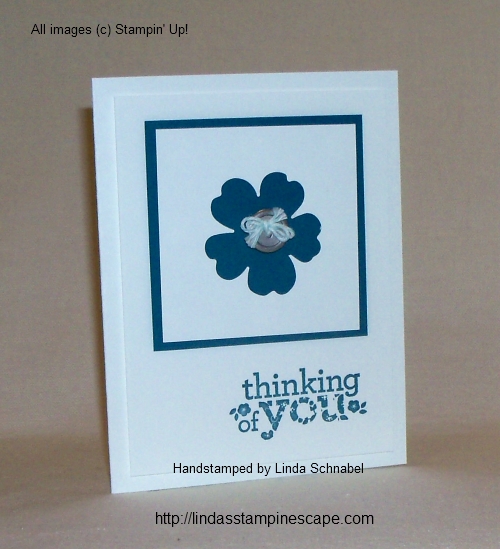
My card share today is a simple & pretty card … Thinking of You. You don’t need a lot of supplies to create this cute card! I began with my basic “Whisper White” for a base, added another layer of Whisper White – 5″ x 3-3/4″… this is the piece I will stamp my greeting on.
For my square mat (I used Island Indigo) 3″ x 3″ and the Whisper White piece that is punched with the “Pansy” punch measures 2-3/4″ x 2-3/4″. I centered the white piece in the punch – making sure the white on the sides was even, and then lining the top of the cardstock to the top of the “Patent Pending” on the punch.
I stamped my greeting “thinking of you” in Island Indigo to match my mat. The greeting comes from the stamp set “Kind and Cozy”. I find this stamp set very versatile … just ask my club members, we have used it several times. In fact, we used it last month on our circle flip card, the circle in the set fits so nicely!

Now we can layer and embellish. I popped up the stamped piece onto the base, the Island Indigo onto the stamped piece, and the punched piece onto the Island Indigo mat. Yes … I popped them all up! It looks so cool 🙂
Once I had it all assembled, I added my embellishment. Today I used the new “Basic Metal Buttons” found in the Occasions Catalog. Then I threaded the Island Indigo bakers twine through the button and tied a bow (it is double threaded). And yes, I popped that up with a Stampin’ Dimensional too.
Don’t you just love how simple this pretty little card is? And you can do it in any color! Just see for yourself ….
I did this card in Melon Mambo. I still used the “Basic Metal Buttons” but this time I embellished them a bit more with the medium size pearls. I also added the smallest pearls to the greeting!
You really could do this in a variety of colors or … Designer Series Paper! Go experiment and have some fun.
Thanks for stopping by today, and know I’m “Thinking of You”.
Have an awesome day!
Here is a list of supplies used for today’s card …
|
ITEM |
PRICE |
DESCRIPTION |
|
$23.95 |
Kind and Cozy Stamp Set – WOOD |
|
|
$17.95 |
Kind and Cozy Stamp Set – CLEAR |
|
|
$15.95 |
Pansy Punch |
|
|
$7.95 |
Basic Metal Buttons |
|
|
$2.95 |
Island Indigo Bakers Twine |
Clicking on the item number will link you to my on-line store. Thank YOU!
Simply Wonderful …
Hello Stampin’ Friends,
Wooo Hooo … we are above zero this morning!! I think that’s wonderful 🙂
Today’s card share is a card that I cased (Copy And Share Everything) from a swap I received at my Star’s downline meeting. I believe it’s from my sister Eileen.
I used the “Retro Fresh” Washi Tape, and based on the color pallet used I stamped my greeting and center flower in Baked Brown Sugar. The flower was stamped with So Saffron.
Wow … it’s that easy. The washi tape piece of cardstock measures 5-1/4″ x 4″. I then started on the left side and began to apply my washi tape. Next, I moved to the right side and applied the washi tape in the same pattern as the left … I finished the middle section last. This helped me space out my washi tape easier.
The flower comes from the “Mixed Bunch” stamp set and was stamped in So Saffron. I then punched it out using the “Blossoms” punch. I know many of my club stampers have these two coordinating items, so if you have your washi tape … you are ready to make cards.
The center was stamped with another flower from the Mixed Bunch set and punched out using the 1″ circle punch. The pop of color in the center is “Coastal Cabana”.
My apologies for the greeting, I did not realize that “Friendly Phrases” was retired until after I had my pictures taken and was ready for the blog. My suggestion would be to use the beautiful “just because” from the stamp set “A Dozen Thoughts”. I’ve used that several times already … the “just because” is one of my favorites.
Don’t forget your Stampin’ Dimensionals because I “popped up” the washi tape section, the flower and both centers. You gotta love how fun and simple this card is!
Thank you so much for stopping by today.
Have a wonderful day ~
Here is the list of ingredients I used today …
|
Mixed Bunch – Wood / $27.95 |
|
|
Mixed Bunch – Clear / $21.95 |
|
|
Retro Fresh Washi Tape / $4.95 |
|
|
A Dozen Thoughts – Wood / $26.95 |
|
|
A Dozen Thoughts – Clear / $18.95 |
|
|
½” Circle Punch / $5.95 |
|
|
¾” Circle Punch / $12.95 |
|
|
Blossoms Punch / $16.95 |
You may view or purchase any of these items just by clicking on the item number. It will take you directly to my stampin’ store. Shop 24/7 – 365 … Thank you.
Live Happy & Enjoy the Weekly Deals …
Hello Stampin’ Friends,
Today’s card share is a reflection of what I showed you the past two days. I also have the NEW weekly deals listed for you today. I am using the “You’re Lovely” Sale-a-bration stamp set, and a similar layout as I did yesterday… like I did for the fab four.
This simple technique of using similar layouts to produce a different looking card can make our busy lives much easier. I know some of you love to sit and create – others like the simple, easy to recreate cards. That is why stamping is so much fun, you can do it your way!
I changed my color pallet from yesterdays Basic Black, Real Red and Very Vanilla, to Island Indigo, Pool Party and Whisper White. I am using the “Quarterfancy” Designer Specialty Paper (left over from the fab four).
I used the floral stamp today, along with the “Live Happy” greeting that comes in the “You’re Lovely” stamp set. This was stamped in Black StazOn. I used my “Blender Pens” and the Pool Party ink pad to color in the flowers. The greeting was stamped in Island Indigo.
The stamped image and the Island Indigo mat where cut out with the “Deco Labels Collection” framelits. I can’t believe that I did not have this collection of framelits! The entire piece was popped up using the Stampin’ Dimensionals.
I finished off my card by embellishing with the Pearls. I love the string of pearls, it makes embellishing your card so easy! You saw me wrap them all around the oval on the baby card from the “Fab Four” post.
Hope you enjoyed today’s card share … stay tuned for the “Weekly Deals” and the list of ingredients for today’s card will follow.
|
|
|
|
||||||||
|
|
|
|
Here is the list of ingredients I used today …
|
You’re Lovely – Wood / FREE with $50 purchase |
|
|
You’re Lovely – Clear / FREE with $50 purchase |
|
|
Quarterfancy Designer Series Paper / $12.95 |
|
|
Deco Labels Collection / $24.95 |
|
|
StazOn Ink Pad / $7.95 |
|
|
Pool Party Ink Pad / $5.95 |
|
|
Blender Pens / $9.95 |
|
|
Pearls Basic Jewels / $4.95 |
Please note that these items were put together so you could receive the “You’re Lovely” stamp set for FREE. Thank you!
Thank you for stopping by my blog today.
Have a wonderful day ~
Lovely & Lace
Hello Stampin’ Friends,
Hope you have a “fab”ulous weekend! Thanks so much for the comments and for sharing my blog! Please … feel free to share with all your friends, that is what stamping is all about, a collection of fun, creative minds.
On January 29th, I introduced that stamp set “You’re Lovely”, from the Sale-a-bration catalog and said that it coordinates with the Deco Labels Collection Framelits (and that I would be ordering them). Well … they have arrived and I got a chance to use them this weekend. I don’t know how I got along without them – they work nicely with our circle punches too!
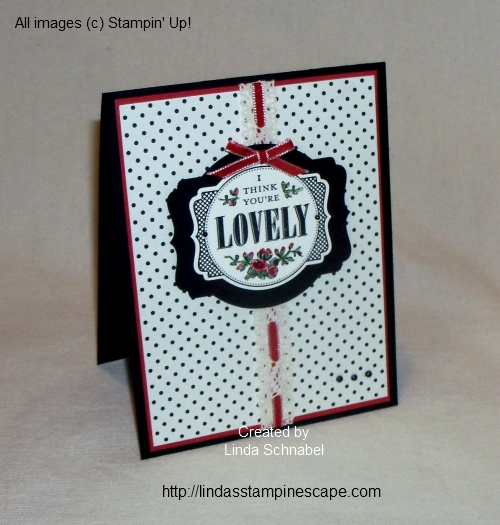
I used the same stamp as I did in January, but will be sure to make more for you with the others. I then cut it out with the Deco Labels Framelit and also cut a mat from Basic Black.
I wanted the pretty flowers to pop, so I used the Real Red ink pad and a Blender Pen to color them in. I went over the greenery with the “Wild Wasabi” Stampin’ Write Marker.
Then I wanted to use some Designer Series Paper for my card and decided to use the “Modern Medley” … I think it suits this stamp nicely.
Next I wanted to add a touch of lace, but with the light background and the polka dots, it was a bit hard to see. So, I decided to thread a pop of color in it. There is a definite pattern in the lace ribbon so I used that for the spacing of the weave.
I used the needle from the “Heartfelt Banner Kit” – the end of the needle is not sharp but still goes through the lace. Once you get the ribbon up to the lace, you just wiggle it through sideways. It’s a bit tricky at first, but once you get the hang of it, it goes pretty good. I also tied a bow (the fork bow) and attached it with Glue Dots.
To finish off my card, I felt I need something at the bottom … so I colored my Pearls with a Black Sharpie Marker (permanent marker) and added them to the bottom to balance out the card. I also added 2 to the greeting to complete the look. I love black pearls! In fact, you can have whatever color you want … Sharpie makes a variety of colors.
I have added my list of ingredients to the bottom of my post … You will notice that if you order the items shown here today – You will get the “You’re Lovely” Stamp set for FREE!
Thank you for stopping by my blog today.
Have a wonderful week ~
Here is the list of ingredients I used today …
|
You’re Lovely – Wood / FREE with $50 purchase |
|
|
You’re Lovely – Clear / FREE with $50 purchase |
|
|
Modern Medley Designer Series Paper / $10.95 |
|
|
Deco Labels Collection / $24.95 |
|
|
5/8” Crochet Trim / $6.95 |
|
|
1/8” Taffeta Ribbon – Real Red / $5.95 |
|
|
Pearls Basic Jewels / $4.95 |
Please note that these items were put together so you could receive the “You’re Lovely” stamp set for FREE. If you click on the item number, it will take you directly to my Stampin’ Store on my Website or go to www.lindaluvs.stampinup.net
Thank you!
Simply Saturday … Valentine
Hello my Stampin’ Friends,
Holy cow … I’m a bit late with my post today! Got caught up in the Winter Olympics and then in my stampin’ room creating. Funny how time flies … one minute it’s 9:30 in the morning the next it’s almost 2 in the afternoon! On that note, let’s get on to the card share.
This Saturday share is simple and easy to make. Sometimes we get so bogged down with trying to make impressive cards that we forget that sometimes simplicity is pretty!
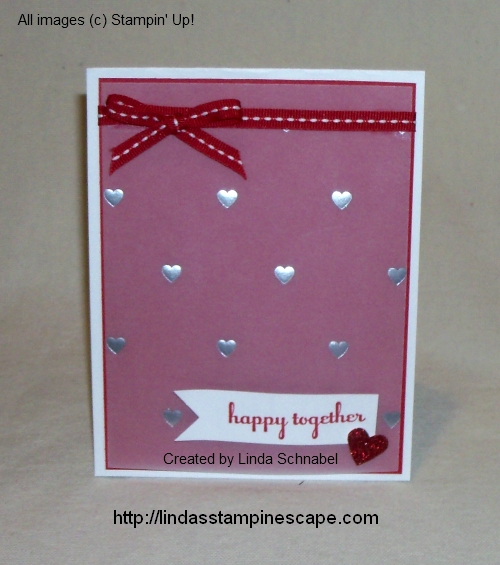
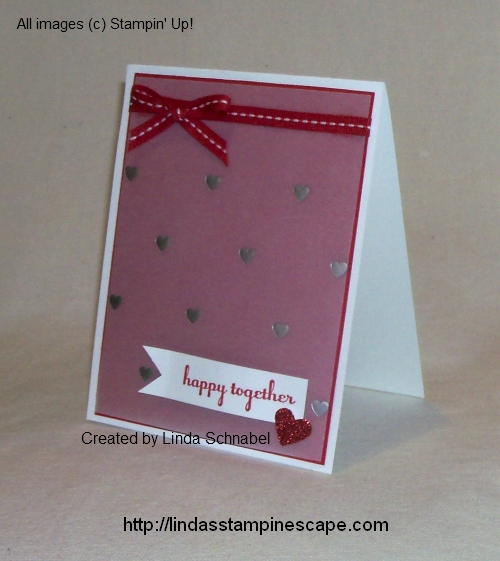
I wanted to make one more Valentine’s card for you …. it’s less than a week away, so I simply layered the beautiful Fancy Foil Designer Vellum in Silver over Real Red mat. My base is Whisper White. Then I added a bow using the Real Red Grosgrain Stitched Ribbon.
Next step was to choose a greeting… I pulled “Happy Together” from the “A Dozen Thoughts” stamp set. I wanted to add a little flair to the greeting, so I turned it into a banner. A simple heart punched out of the Red Glimmer paper was added to finish off the card.
Just think of all the wonderful cards you could make using this layout and some designer series paper!
Have a wonderful Saturday and I’ll see you tomorrow.
Here is a list of supplies used for today’s card …
|
ITEM |
PRICE |
DESCRIPTION |
|
$26.95 |
A Dozen Thoughts – WOOD |
|
|
$18.95 |
A Dozen Thoughts – CLEAR |
|
|
$10.95 |
Fancy Foil Designer Vellum – Silver |
|
|
$5.95 |
Small Heart Punch |
|
|
$4.95 |
Red Glimmer Paper |
|
|
$4.95 |
Real Red ¼” Stitched Grosgrain Ribbon |
Clicking on the item number will link you to my on-line store.
You Make Me Happy …
Hello My Stampin’ Friends,
How are you on this fine day? I hope you doing well.
Last night I had one of my Stampin’ Technique Club meetings and we had a blast. Lot’s of silliness and laughter, it was at times hard to stamp! We blamed it on the full moon.
Today’s card share goes out to all my Stampin’ Friends … because you make me so happy! I really love my job as a demonstrator!
The card is cute and simple, and is a snap to make.
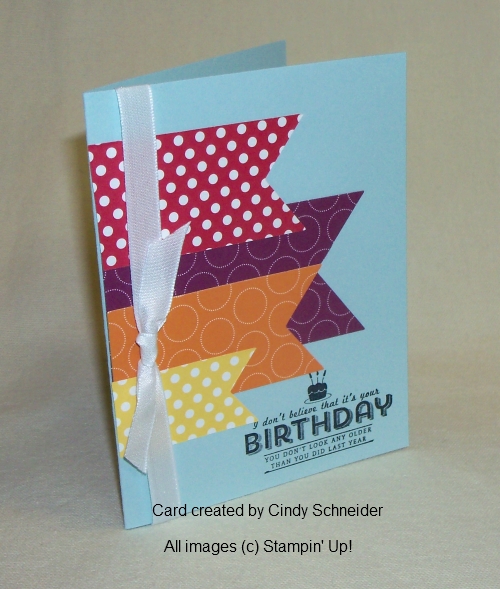
I paired up the Perfect Pennants Stamp Set and Banners Framelit Dies. Now add that to the Watercolor Wonder Designer Note cards and making this card is easy-peasy!
I picked the “polka-dot” card … there are 5 designs to choose from, because it just looked fun! Who doesn’t love Polka-Dots?
I began by stamping my greeting in Smokey Slate and cut it out with the Banner Framelit. Then I added another banner in Tangerine Tango – I chose the tangerine because it coordinates with the color on the card, and it draws the eye right to the greeting.
I simply finished off my card by adding a sweet bow with the Whisper White Taffeta Ribbon.
The Watercolor Wonder Designer Note cards also come with envelopes, so you are ready to send out your card.
Thank you for stopping by today …
Hope your day is filled with “happy”.
Here is the ingredient list for the card. Be sure to keep scrolling down so you can see the weekly deals.
|
ITEM |
PRICE |
DESCRIPTION |
|
$29.95 |
Perfect Pennants Stamp Set – WOOD |
|
|
$21.95 |
Perfect Pennants Stamp Set – CLEAR |
|
|
$26.95 |
Banners Framelit Die |
|
|
$48.50 |
Pennants & Banners BUNDLE / Wood |
|
|
$41.50 |
Pennants & Banners BUNDLE / Clear |
|
|
12.95 |
Watercolor Wonder Designer Note Cards |
|
|
$6.95 |
Whisper White 3/8” Taffeta Ribbon |
Clicking on the item number will link you to my on-line store.
More card shares …
Hello Stampin’ Friends,
Today I would like to share with you, three more cards that we made at our Star’s Christmas Party. We did what we call a “shoebox swap” … each participant designs a card and then cuts, and brings everything needed to make that card, then everyone at the event gets to make each others cards … it’s fun!
Would you be interested in joining in on a shoebox swap? Let me know, I’d love to host it.
I thought I would start with Connie’s card ….
My technique groups should recognize this, we just did the “Stained Glass” technique. Here is another wonderful card idea for you.
Connie used the “Joyful Christmas” stamp set from the Holiday Catalog (good through January 3rd) and the “Silver 1/8″ Ribbon“. I love that Connie did her card with Silver embossing, we did ours in gold …. such a small change can make the entire card look different, and both cards are beautiful.
Next, is Ren’s card. Ren is Connie’s daughter and has been stamping with us for quite a while.
Don’t you just love it! We all love a good “punch” card and this one is so cute! Ren had all the pieces cut so we didn’t even have to cut the door … we just embossed it with the new “Stylish Stripes” embossing folder.
For the wreath, we used the 2-3/8″ Scallop Circle Punch and the 1-3/4″ Circle Punch. The trick here is to punch out the circle first … then center the scallop punch over the circle to create the perfect wreath! The punches along with the adorable “Glimmer Brad – Brights Collection ” are found in our main Idea Book & Catalog.
Now I’d like to share with you, Susan’s card… a Tri-fold Easel Card!
If you’re looking to impress someone, this will do it! This beautiful card showcases the “Modern Medley” Designer Series Paper. Anyone who knows me, knows this is one of my favorite Designer Papers in the catalog …. I find it so versatile.
The greeting “Your Kindness means so much” comes from the stamp set “From My Heart” … also found in the main catalog.
I hope you enjoyed today’s card share … I loved making these beautiful cards with these wonderful ladies. I can’t think of a better day, than stamping with my friends.
If you are interested in any of the items listed to make these cards, you can just click on the link (words highlighted in pink) to view or purchase.
Have an awesome day!
Sparkle with Joy …
Hello my Stampin’ Friends,
Hope you made it through “Black Friday” … that is my day to stay home and relax and begin to decorate for the upcoming Christmas holiday season.
For my card share today, I have decided to focus on the Holiday Catalog… there are so many fabulous items in there!
The focal point of the card is the poinsettia from the “Joyful Christmas” stamp set. Remember, when you click on the items highlighted – you will be able to view the product 🙂 I also want to let you know that “Joyful Christmas” is currently on sale too!!
I heat embossed 2 poinsettia’s in white onto vellum cardstock, and then cut them out. They are adhered together with stampin’ dimensionals, then attached with the dimensionals to give them that “pop” on the card.
I have chosen the “Winter Frost Specialty” Designer Series Paper, I also have the paper pack, both are great additions to your Designer Paper collection. I have used the Midnight Muse as my core color. To accent, I used the “Silver 1/8″ Ribbon”.
I used the “Joy to the World” stamp from the “Joy to the World” Stamp set. Because of it’s design, I chose to color it in, yet leave the rough edges.
To finish it off … I added the smallest of the rhinestones to the designer paper. Ok … so it’s not a card you would send to 100 people (not really cost effective) but if you were looking for that special card for someone who loves “sparkle” … this is the card you were looking for!
Have a fabulous weekend!
Thanks so much for stopping by.
Here is a list of supplies used for today’s card …
|
ITEM |
PRICE |
DESCRIPTION |
|
$22.95 |
Joyful Christmas Stamp Set – WOOD |
|
|
$16.95 |
Joyful Christmas Stamp Set – CLEAR |
|
|
$21.95 |
Joy to the World Stamp Set – WOOD |
|
|
$16.95 |
Joy to the World Stamp Set – CLEAR |
|
|
$12.95 |
Winter Frost Specialty Designer Series Paper |
|
|
$4.95 |
Silver 1/8” Ribbon |
|
|
$4.95 |
Rhinestones (Basic) Jewels |
|
|
$6.50 |
White Vellum Cardstock |