Curvy Keepsake Cuties …

Hello Stampin’ Friends ~

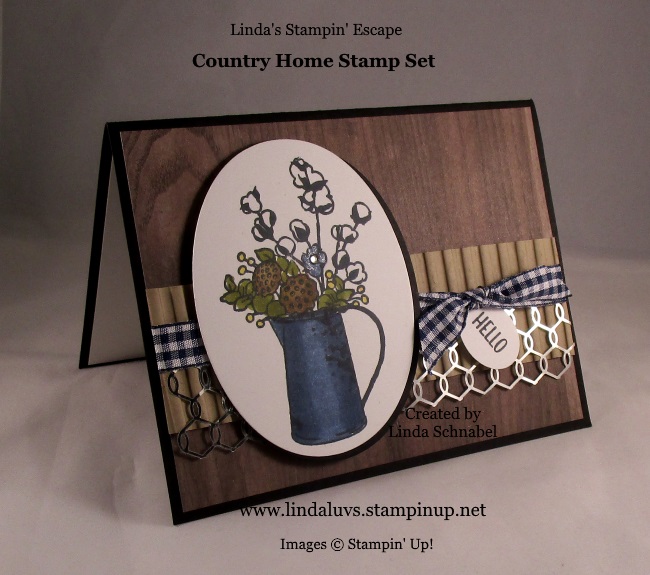
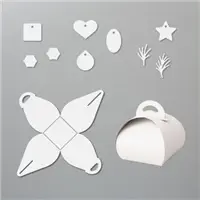
Thought we’d have a little fun today seeing some fun and creative ways to use your Mini Curvy Keepsake die …

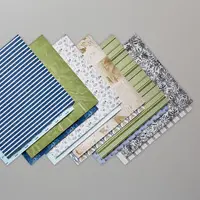
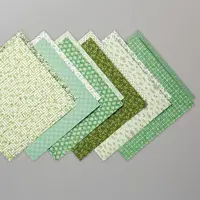
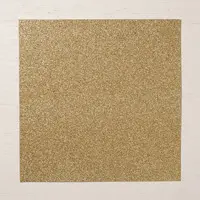
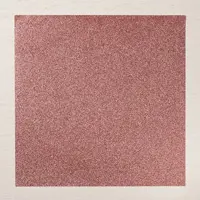
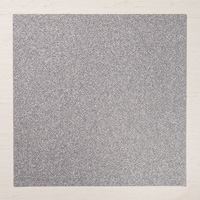
Let’s start are weekend with a little sparkle!!  These cute little treat keepers are so quick -n- easy to make and you can use any of our four glimmer papers, and don’t stop there … you can also use the beautiful foils we have too.

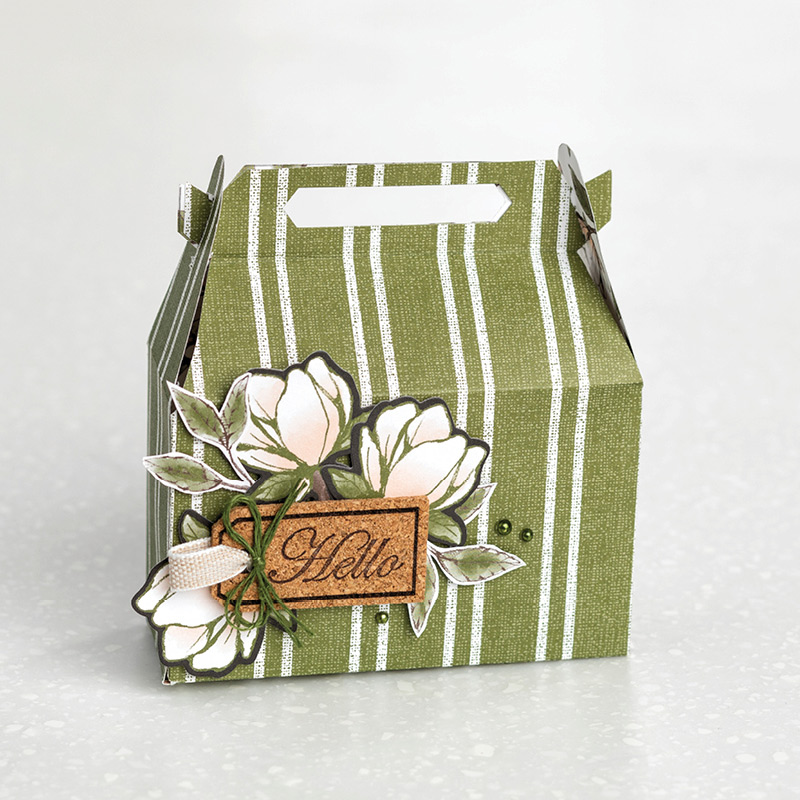
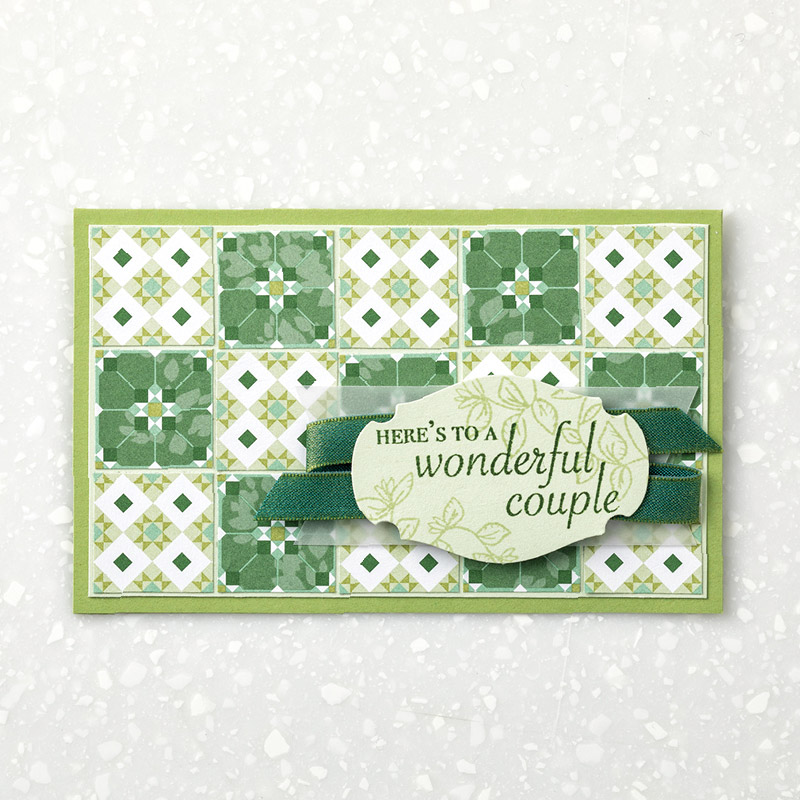
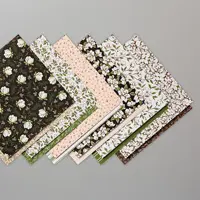
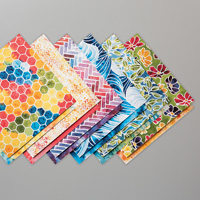
Another quick -n- easy way to create cute holiday treat boxes is using some of the beautiful designs in our Designer Series papers. We have many beautiful holiday papers right now …

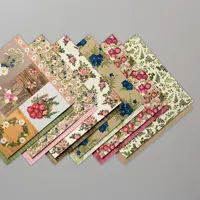
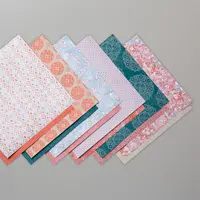
This designer paper has retired but I find it’s a great way to use up my papers and put a smile on anyone’s face!  Who wouldn’t love getting such a cute little gift …


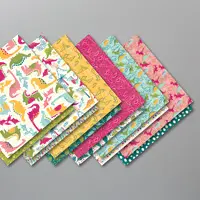
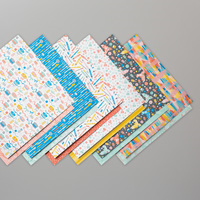
If you missed my latest creation with the Monster Bash Designer Series paper … These little cuties are to die for (well, not literally) your trick or treaters, co-workers or friends will be thrilled.


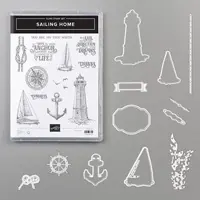
Mini Curvy Keepsakes Box Dies 150644

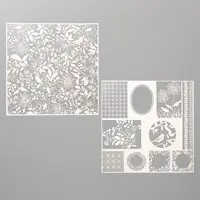
Last but not least is a real treat keeper designed for the biggest gift giving time … Christmas.  Can I get a little “Ho … Ho… Ho”  Simple to create with just a few punches, my Santa Curvy Keepsake will even fit in the stocking.  Making it with cardstock, makes it a little more durable.

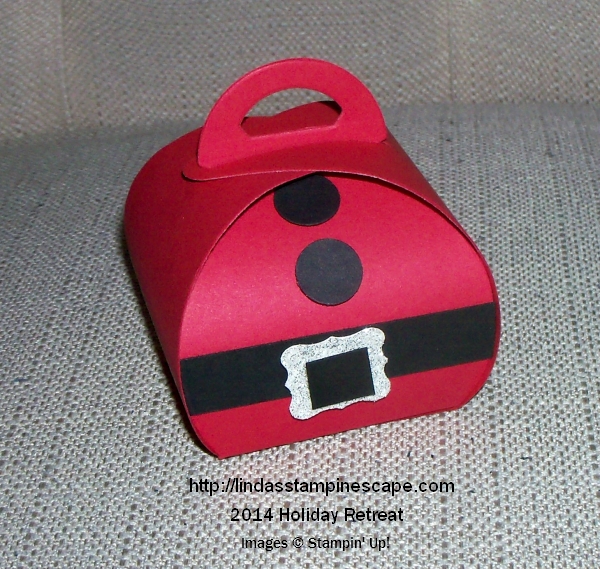
These would be so cute on the fireplace mantle … on a co-workers desk, where ever Santa would leave a little treat.  A nice chocolate truffle fits perfectly in the Mini Curvy Keepsake box!

Have fun creating these quick -n- easy little treat boxes for every occasion … they make perfect little gifts around the table for baby showers, brides maids, Thanksgiving … you get the picture.  I have a list of supplies below that I used to create these cuties.

Thank you for joining me this “rainy” Friday … just glad it’s not snow!

Have a great weekend ~

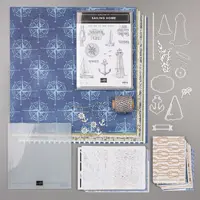
Here is a supply list for some of the items shown above … 


Throwback Thursday … Country Home

Hello Stampin’ Friends ~

Today is Thursday … a throwback Thursday but I’d like to think it’s a “thankful” Thursday. I’d like to share some of my favorite cards from the Country Home stamp set. This is a beautiful set for the time of year however I believe that you can find a friend that would fall in love with this at any time of year.

I made this card for a friend who was brought up on a farm so that milk can brings back memories for both of us … for her, her parents house, for me … visiting my grandpa and grandma on their farm.  The stunning Tin Tile Embossing folder in combination with the Country Home stamp set really warms your heart.

This warm little hello is another one of my favorites of the Country Home Stamp set.  I used to work in a Flower Shop so I was immediately smitten with the dried flower arrangement that I could tuck so neatly into this pitcher … kind of reminds me of my grandma, she had one just like it ♥ 

Sometimes it’s just nice to sit back and reflect on days gone by … especially when you can enjoy that moment with a friend or family.  I hope you enjoy your day today.

Thank you for joining me today …

TODAY’S STAMPING SUPPLY LIST …


Here’s A Card Stamp Set …

Hello Stampin’ Friends ~

Have you ever had a moment when you didn’t know what to say? The “Here’s a Card” Stamp Set can help you say what you want to for any occassion so you can give them a card! We’re positive the lucky recipient of your card will love it.

The samples above show how a casual or avid stamper could coordinate with products from both the annual catalog and the holiday catalog to get cards perfect for any occasion.

In our Congratulations card, we combined this stamp set with the Leaf Punch and the Stitched Nested Dies from the annual catalog with the Feels Like Frost designer series paper from the holiday catalog.

Our Happy Birthday card features the Balloon Bouquet Punch from the annual catalog and the Brightly Gleaming designer series paper from the holiday catalog.

The Hello There card was made with the Stitched Shapes Dies and the Cup of Christmas Stamp Set.
There are so many ways to show someone how much they mean to you, but the Here’s a Card Stamp Set is a great place to start.

These cute card samples and description comes from the Stampin’ Up! home office. I love to coordinate my stamp sets with each other to really get more bang for my buck… many of them are designed to work together.

Thanks for dropping by today.  Hope you enjoyed these cute projects today, I’ll be back tomorrow with something special!

Stay Dry and Have a wonderful day… It’s a wet one out there today. Good day to stamp!

Designer Paper Parade of Projects …

Hello Stampin’ Friends ~

I am excited to share several cards and projects with you today.  These amazing samples highlight the beautiful designer series paper that are currently on sale.  As much as I would like to credit for these beautiful cards and projects, they were created by Stampin’ Up!

We are celebrating the last few days of our Buy 3 / Get 1 Free promotion.

Enjoy these lovely projects …

DINOROAR …

COME SAIL AWAY ….

PERENNIEL ESSENCE …

MAGNOLIA LANE …

FOLLOW YOUR ART ….

PRESSED PETALS ….

GARDEN LANE …

SEE A SILOUETTE …

WOVEN THREADS …

Thank you for joining me today. Enjoy the day!

TODAY’S STAMPIN’ SUPPLY LIST …


Bird Ballad Thanks …

Hello Stampin’ Friends ~

Today I’m sharing another sample created with the Shimmer Detailed Laser-Cut Specialty Paper. Shimmer Detailed Laser-Cut Specialty Paper includes delicately detailed laser-cut sheets with a touch of shimmer. Vanilla on one side, white on the other side. One design is a 12″ x 12″ pattern; the other design has distinct patterns to cut out and use on card fronts.

The laser-cut paper is used over the top of color so it really pops and is framed by using the Layering Squares Dies to create your own frame.

Images in the Bird Ballad Designer Series Paper were hand colored using Stampin’ Blends for a soft, blended look. The birds were cut out of the Bird Ballad Designer Series Paper.  With beautiful birds and colors, you will love this Bird Ballad Designer Series Paper. You can get yours today by clicking the link below.

Lets not forget that our designer papers are on sale right now…

If you scroll back to past posts, you’ll see I have shared many samples from the Bird Ballad, Dinoroar, Magnolia Lane and Come Sail Away Designer Series papers … these are just a few of my favorites.  I have listed the page numbers on the chart above so you can see all the amazing papers.

Let me know if you have any questions about this promotion, todays card or an upcoming class. I’d be happy to answer your questions.

Have a great day and thanks for stopping by.

TODAYS STAMPING SUPPLY LIST …


More Shimmer Specialty Paper: Brayer Technique

Hello Stampin’ Friends ~

I am happy to see so many of you enjoyed yesterday’s card made with the Shimmer Detailed Laser-Cut Specialty Paper by Stampin’ Up!  They shared several tips with us on how to use and enhance this beautiful specialty paper.

Today I’m going to share another card featuring the Shimmer Detailed Laser-Cut Specialty Paper using a brayer technique and products from the  wonderful Bird Ballad Suite …

It’s your day, but it’s also so easy to make their day by creating a project that looks like you went that extra mile! Sponge Brayers are a great tool for adding custom color to the Shimmer Detailed Laser-Cut Specialty Paper.

You simply roll they sponge brayer over your ink pad to pick up the color and then roll they brayer back and forth over your Shimmer Detailed Laser-Cut Specialty Paper and you’ll have a beautiful shimmery accent in any color you choose.

HERE’S A GREAT TIP: Roll your brayer and specialty paper onto another piece of cardstock and you will have created a designer piece of paper all your own with the reverse image from your Shimmer Detailed Laser-Cut Specialty Paper!  It won’t have that shimmer but you’ll get 2 designs for the work of one!!

Hope you enjoyed the beautiful card, brayer technique and creative tip today …

Thank you so much for stopping in to visit. If you like my blog … please share it with your friends.  The more the merrier.

Have a wonderful day ~

TODAYS STAMPING SUPPLY LIST …. click on any of the images for more details about the product or to begin your shopping experience with me.

A Special Shimmer Card

Hello Stampin’ Friends ~

Looking for a unique yet easy to make card? Your friend is going to think you took so much time making this card—but really it’s so simple. Just add a light touch of color with Sponge Daubers on the Shimmer Detailed Laser-Cut Specialty Paper.

A beautiful layer embossed with the Heirloom Frames Dies and 3D Embossing Folder showcases the delicate flowers cut out from the Shimmer Detailed Laser-Cut Specialty Paper.  Add a touch of designer paper and a greeting and your card really pops!! There you have it! A simple way to show your friend you really care.

Hope you enjoyed todays card that was created by our Stampin’ Up! home office.

Thank you for stopping by my blog, enjoy your day!

TODAY’S STAMPING SUPPLY LIST …


Let Hope Be Your Anchor Card with Fun Fold …

Hello Stampin’ Friends ~

Today I’m sharing a masculine card that was created using one of the designer papers that is currently on sale and a fun fold!!  I began with the Sailing Away Bundle and the Come Sail Away designer paper.

The fun fold showcases 2 different patterns from the Come Sail Away Designer paper.  These two patterns together create a wonderful nautical card … great if you need a masculine card. However, the lighthouses and beautiful sailboat could easily be gifted to a girl friend or family member that loves the lakefront and all the beauty it offers.

Both the greeting and the sail boat comes from the Sailing Home Stamp set and the cute little anchor and Bakers Twine can be found in the product suite on page 145 of the Annual Catalog. The greeting flips open …

… and it exposes the perfect little spot to write your personal note to friend or family member. The left side also flips open … It’s just a fun way to present your message. Many of my stampin’ friends are looking for something different from the normal type card.

If you need more space for your message, you can always create a larger inner card … I was just showcasing the designer paper. Don’t like to cover it up too much.

Don’t forget that the Come Sail Away Designer Series paper is one of the papers that are currently on sale.

I hope you enjoyed this fun fold and nautical style featuring the Sailing Home Bundle …

Thank you for joining me today…

I hope you have a good one.

TODAY’S STAMPING SUPPLY LIST …


Celebrate with Cake

Hello Stampin’ Friends,

Take a look at Celebrate with Cake by Stampin’ Up! in the new Beginner Brochure. If you are new to stamping or creating cards this video is for you. With custom note cards and envelopes, you cannot lose when creating these cards for yourself or others.

Don’t forget!  Our DESIGNER SERIES PAPER SALE BEGINS TODAY ….

Here is a list of the beautiful papers that are going to be on the sale …

Enjoy your Wednesday and thank you for stopping in for a visit.

Let me know if you would like more information on the Experience Creativity Brochure … our Annual Catalog or the New Holiday Catalog.

Designer Series Paper Card Parade … Day 2

Hello Stampin’ Friends,

Hope you enjoyed the card share yesterday … today I have another set of cards I’d like to share with you that were created with the Designer Papers that are going on sale tomorrow!!  The holiday catalog will also go live … if you have questions or need help, let me know.

We all love gorgeous Designer Series Paper—I’m no different. By popular demand, Stampin’ Up! is bringing back the Designer Series Paper Sale! During September 4–30, you can buy three packages of select Designer Series Paper, and get one FREE! Take advantage of this excellent opportunity, and get ready to create with lots and lots of pretty paper!
Here is a list of the beautiful papers that are going to be on the sale …

Here are a few samples of cards that I have shared previously using the beautiful designer papers ….

PERENNIAL ESSENCE …

COME SAIL AWAY …

MAGNOLIA LANE …

FOLLOW YOUR ART …

DINOROAR ….

BIRD BALLAD ….

I also want to let you know that I have a few spots left for my Stampin’ Technique Clubs ….  Will you join me?

And my “Halloween Bash” Class …

You can contact me at lindaluvs2stamp@aol.com or call 262-334-1009 to join one of the Clubs or  RSVP for the Halloween Class

Thank you for stopping back today to check out my second set of cards.

Stay dry … it’s a bit rainy today.

Designer Series Paper Card Parade …

Hello Stampin’ Friends,

Happy Labor Day to you!! I hope you have been enjoying your long holiday weekend.

Labor Day signifies the beginning of fall … kids return to school, pumpkins and pumpkin spice everything, the Holiday Catalog goes live in 2 days and so does our fabulous Designer Series paper promotion!!

We all love gorgeous Designer Series Paper—I’m no different. By popular demand, Stampin’ Up! is bringing back the Designer Series Paper Sale! During September 4–30, you can buy three packages of select Designer Series Paper, and get one FREE! Take advantage of this excellent opportunity, and get ready to create with lots and lots of pretty paper!
Here is a list of the beautiful papers that are going to be on the sale …

Here are a few samples of cards that I have shared previously using the beautiful designer papers ….

PERENNIAL ESSENCE …

COME SAIL AWAY …

MAGNOLIA LANE …

GARDEN LANE …

DINOROAR ….

BIRD BALLAD ….

I also want to let you know that I have a few spots left for my Stampin’ Technique Clubs ….

And my “Halloween Bash” Class …

You can contact me at lindaluvs2stamp@aol.com or call 262-334-1009 to join one of the Clubs or  RSVP for the Halloween Class

Enjoy the rest of your holiday and I hope to see you soon …
Thanks for sharing a part of your day with me today.

Two a Wild Rose Trio …

Hello Stampin’ Friends ~

If you’re loving the “To A Wild Rose” bundle … I have a great offer for you! This has been posted before and I just wanted to remind everyone that if you purchase the “TO A WILD ROSE” bundle from me by August 31st, 2019, I will send you all 3 cards with directions and tips to recreate them yourself!! You will also receive a Virtual Rewards point!! You get a Rewards point for each $50 (before ship&taxes) USE HOSTESS CODE: ARQ3KZ9U and place your order by August. 31st. 2019. Cards are ready and will ship as soon as I get your order notification! 

The “True Friendship” card is done with the basic stamping technique of “Color on Color” … I love going back to the basics sometimes, then the technique of sponging color onto the image really adds a soft beautiful touch to the card ….

Today, my “Hello” card features the “Coloring with Stampin’ Blends” technique …

Before I decided how my card would look, I chose my color pallet; Whisper White and Highland Heather. I stamped the rose image with the Momento ink and began to color it with the Highland Heather Stampin’ Blends Duo. I begin by coloring a petal with the light marker, then add the dark marker at the part of the petal that is closest to the center and over the lines in the rose. Then I go back over the dark with the lighter marker to blend the colors … you can always add a little more dark again. I leave the edges of the petals as light as I can.

The center is colored with the Daffodil Delight Dark Stampin’ Marker and then the rose is die cut.  The leaves cut from Pear Pizzazz cardstock.  The lattice piece was cut in Whisper White and Highland Heather and then layered to create an added dimension to the card.  The white base was stamped with the “Hello” from the stamp set and then the entire piece was embossed using the “Subtle” Folder.

Have you fallen in love with this amazing bundle yet?  I find it so versatile and easy to use. How would you like these cards?

I have a SPECIAL OFFER FOR YOU …

If you purchase the “TO A WILD ROSE” bundle from me by August 31st, 2019, I will send you all 3 cards with directions and tips to recreate them yourself!!  You will also receive a Virtual Rewards point!! You get a Rewards point for each $50 (before ship&taxes)  USE HOSTESS CODE: ARQ3KZ9U and place your order by August. 31st. 2019.  I’ve been working on these cards all week so I’ll have them ready to ship as soon as I get your order notification!  Wooo Hooo … they are prettier in person. The blog does not do them justice!

  • I have a special tip for my “HELLO” card that I will be sharing ONLY in the instructions sent with your cards when your purchase the bundle!

Thank you for joining me today and checking out my third To A Wild Rose Card Technique. Let me know if you have any questions on the cards shared today.

Hope your day is filled with beauty … pass it on.

TODAY’S STAMPIN’ SUPPLY LIST … Click on any image for details about the product or to begin your shopping experience. Clicking on it directs you to my website.  Thank you!!


Guest Stamper: Mary P.

Hello Stampin’ Friends ~

Today I have a pretty card to share with you from my friend and fellow demonstrator Mary Polzin … a swap card she made with the Waterfront stamp set.  The scene is stamped with a now retired color (Fresh Fig) but you could use Blackberry Bliss, Pretty Peacock, Mossy Meadow or the beautiful Shaded Spruce.

Mary created a frame adding a lovely layer of texture using the Oval Framelits and the Woodland Embossing Folder… finished off the card by adding a bow tied to the frame.

This is one of those stamp sets that I just had to have but have not taken the time to sit down and play with it … Thanks Mary for the inspiration!!

There are a few specials / promotions I would like to remind you before the end of August …

The Bonus Days redemption period is a great time for you to get a big-ticket item you’ve had your eyes on, or snag fun, new products from the 2019–2020 annual catalog!


Extra … Extra Promotion ….

From July 1 until August 31, receive an additional $30 in product for free in your Starter Kit. So instead of $26 for free, you can get $56 in free product (and of course free shipping as always). That’s right! Choose $155 worth of product for $99 + tax!! And if that wasn’t awesome enough, a $10 coupon code will be gifted to you the following month to use towards an order by October 31st.


My To A Wild Rose Special ….

If you purchase the “TO A WILD ROSE” bundle from me by August 31st, 2019, I will send you all 3 cards with directions and tips to recreate them yourself!! You will also receive a Virtual Rewards point!! You get a Rewards point for each $50 (before ship&taxes) USE HOSTESS CODE: ARQ3KZ9U and place your order by August. 31st. 2019. I’ve been working on these cards all week so I’ll have them ready to ship as soon as I get your order notification!
I have a special tip for my “HELLO” card that I will be sharing ONLY in the instructions sent with your cards when your purchase the bundle!

Take a break, have some fun, get some stamping done …

Let me know if you have any questions about the specials or if you would like to join my Stamp Club, you can message me below or email me at lindaluvs2stamp@aol.com

Thanks for stopping by and sharing a part of your day with me.

Have a great day ~

Bouquet of Roses … Three Techniques!

Hello Stampin’ Friends ~

Well … we made it half way through the week and we are quickly heading into the weekend! I love Thursdays 🙂  Today I have the card I promised to share with you (from yesterdays post) with yet another technique using the To A Wild Rose Bundle.

On Monday I shared the “Blessed” card demonstrating the Three-step Stamping technique …

On Tuesday I showed you the “True Friendship” card and the technique of sponging color onto the image ….

Today, my “Hello” card features the “Coloring with Stampin’ Blends” technique …

Before I decided how my card would look, I chose my color pallet; Whisper White and Highland Heather. I stamped the rose image with the Momento ink and began to color it with the Highland Heather Stampin’ Blends Duo. I begin by coloring a petal with the light marker, then add the dark marker at the part of the petal that is closest to the center and over the lines in the rose. Then I go back over the dark with the lighter marker to blend the colors … you can always add a little more dark again. I leave the edges of the petals as light as I can.

The center is colored with the Daffodil Delight Dark Stampin’ Marker and then the rose is die cut.  The leaves cut from Pear Pizzazz cardstock.  The lattice piece was cut in Whisper White and Highland Heather and then layered to create an added dimension to the card.  The white base was stamped with the “Hello” from the stamp set and then the entire piece was embossed using the “Subtle” Folder.

Have you fallen in love with this amazing bundle yet?  I find it so versatile and easy to use. How would you like these cards?

I have a SPECIAL OFFER FOR YOU …

If you purchase the “TO A WILD ROSE” bundle from me by August 31st, 2019, I will send you all 3 cards with directions and tips to recreate them yourself!!  You will also receive a Virtual Rewards point!! You get a Rewards point for each $50 (before ship&taxes)  USE HOSTESS CODE: ARQ3KZ9U and place your order by August. 31st. 2019.  I’ve been working on these cards all week so I’ll have them ready to ship as soon as I get your order notification!  Wooo Hooo … they are prettier in person. The blog does not do them justice!

  • I have a special tip for my “HELLO” card that I will be sharing ONLY in the instructions sent with your cards when your purchase the bundle!

Thank you for joining me today and checking out my third To A Wild Rose Card Technique. Let me know if you have any questions on the cards shared today.

Hope your day is filled with beauty … pass it on.

TODAY’S STAMPIN’ SUPPLY LIST … Click on any image for details about the product or to begin your shopping experience. Clicking on it directs you to my website.  Thank you!!


God’s Greatest Gifts …

Hello Stampin’ Friends ~

How are you this fine Tuesday? I’m feeling good, thank you.  I hope you did not miss yesterday’s card created with the “To A Wild Rose” bundle.  I have another beautiful card for you today. I love Pink and Gray together so that is our color pallet for today.  This is another one of my Stamping Club Cards …

Our base is Blushing Bride and the front in Basic Gray. We begin by stamping our greeting in White Craft Ink and heat embossing with White Embossing Powder. Once your greeting is done, we stamped our rose onto the Basic Gray with Basic Gray to create a beautiful and subtle background.

Our rose and leaves were stamped with the Basic Gray onto Whisper White cardstock … once dry, we used the Sponge Daubers to “pounce” the Blushing Bride ink color onto our rose image and Pear Pizzazz on the leaves.  DO NOT rub or drag the daubers across the images because it will “re-moisten” the gray ink and smear the two colors together.

The leaves and rose are die cut with the coordinating dies (When you purchase the bundle, you save 10% on your purchase). To finish off my card, I added Wink of Stella to the rose and popped the rose and leaves up with our Stampin’ Dimensionals.

There are always stamping tips and hints while we create in our clubs … the members share their creative ideas as well. Sometimes we end up changing the cards a touch.  I love stamping with my clubs!!

Interested in joining a Stamping Club … CLICK HERE

Hope you enjoyed today’s post and that is peaks your interest in my stamp clubs. Contact me for more information … you can join my scheduled club, have your own private stamp club, or join my OnLine Stamp Club.

Enjoy your day today, and thank you for stopping by.

TODAY’S STAMPING SUPPLY LIST …