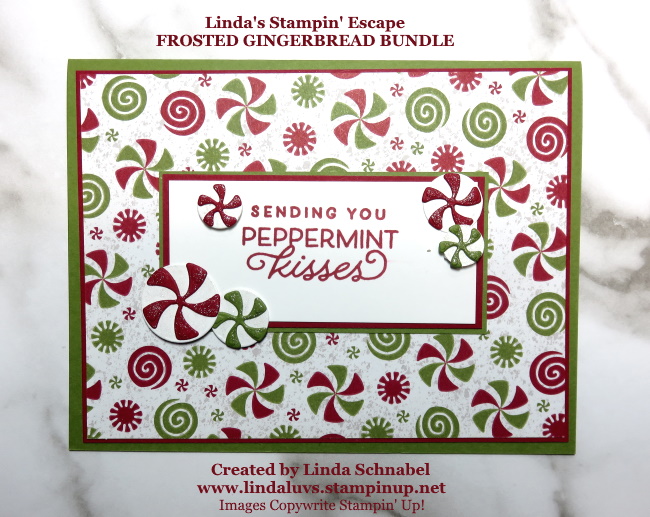
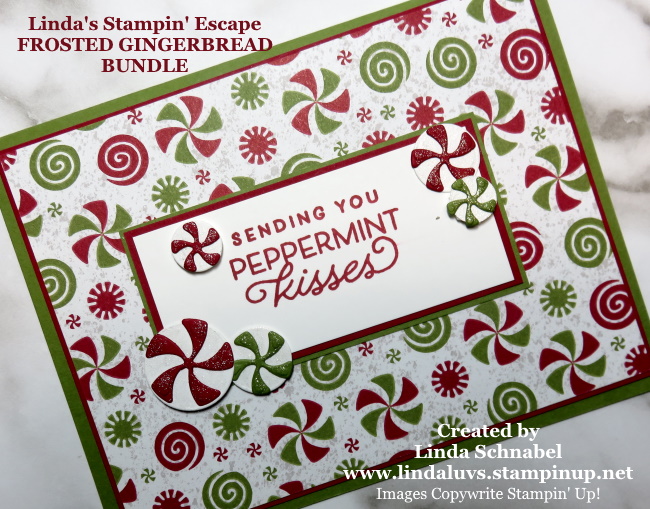
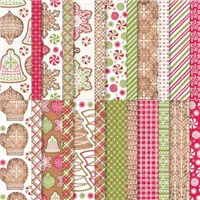
We’re going from spooky to sweet with our Gingerbread & Peppermint Designer Series paper from the Stampin’ Up! Aug. – Dec. Mini Catalog. (Formally the Holiday Catalog) I’m using the coordinating Frosted Gingerbread Bundle to create a sweet holiday card …
This simple layout is sweet when you need to create many Christmas cards and all of those candies brighten anyone’s day.
The candies were created with the coordinating dies and are done in Cherry Cobbler and Old Olive …
I had to add the Wink of Stella to my candies to make them glisten. There are several circle dies and candy tops that will help you create some needed depth and texture to the card.
Don’t you just love a quick -n- easy cards … especially when you have a BIG Christmas card list. The quicker you get done, the more Hot Chocolate you can enjoy … while your stamping! Hard to think of Hot Chocolate when you are going to have temps in the high 90’s!
Thank you for dropping in and checking out my blog. Enjoy your day~
TODAY’S STAMPIN’ SUPPLY LIST … If you liked the products used in todays projects, I have links for you below. Just click on the item you would like more information on, or to begin your shopping. It will take you directly to my website. Thank you ♥
Today I’m thrilled to share with you one of the cards I demonstrated yesterday during my Mini Catalog Launch party. I was sharing the versatility of this amazing bundle! You gotta love it when you don’t have to tuck it away for the year … it’s a go to set!
This card features the use of the holiday lights stamp and the unique dies designed to cut out these fun images …
The design of the card was created to showcase the “double” die to cut out the evergreen image and then to use the single die again to create a mirror image edge. It’s quite easy to use. The white you see to the edge is actually the inside of the card, and was stamped with the coordinating Festive & Bright stamp set.
I wanted texture on my card so I used the Wintry 3-D embossing folder package, and chose the evergreen / pine pattern. Looks nice with the die cut piece.
The light bulbs were colored with our basic Stampin’ Write markers … Real Red, Pacific Point, Daffodil Delight and Shaded Spruce. The card base and ink to stamp the greeting are all the beautiful Shaded Spruce. Of course … I had to add a little Wink of Stella on the lights!
I’ll be back with more from this bundle but just couldn’t resist using this cute string of lights. This is perfect for stamping your envelopes as well. I love me a well rounded stamp set! And I love how Stampin’ Up! coordinates everything so it always looks good.
We are partying all day long with games & demonstrations if want you to join the party!! …
CLICK HERE: To get to my Linda’s Stampin’ Escape Facebook page and join me for my LIVE demonstration tonight … and CLICK HERE FOR THE PARTY!! The Catalog Launch Party is in a “Facebook Group” so just request to be a member … we’d love to have you!
Thank you for checking out my blog today. I hope to see you tonight, and at the party~
TODAY’S STAMPIN’ SUPPLY LIST … If you liked the products used in todays projects, I have links for you below. Just click on the item you would like more information on, or to begin your shopping. It will take you directly to my website. Thank you ♥
Wooo Hooo it’s Friday and I’m thrilled to share 2 FUN cards with you today!! I created these cards for my Aug.-Dec. Mini Catalog Launch party … have you joined us yet??
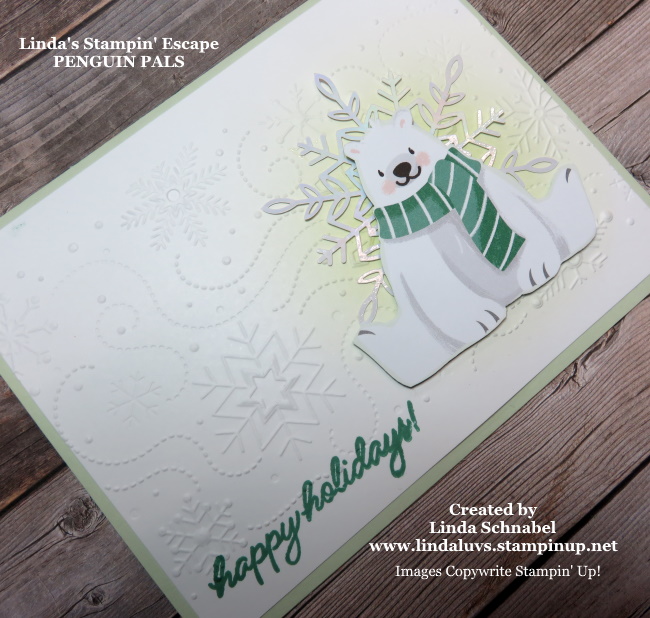
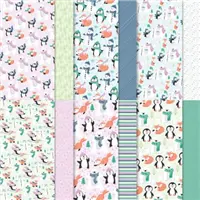
I’m using the festive & fun Penguin Playmates Designer paper. You’re going to love this paper not just because it is sooo stinkin’ cute, but because you can get it for FREE! It’s one of the Sale-a-bration items you can choose. Let’s check out the first of two cards …
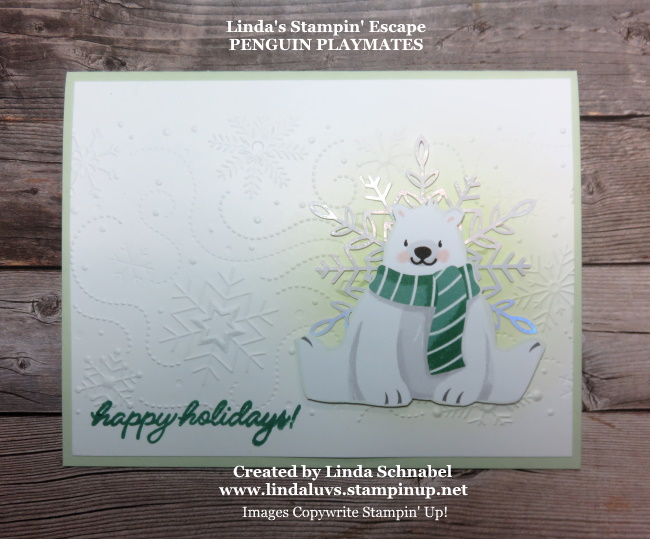
Because we’re showcasing the designer paper, I will tell you that I fussy cut my images out, but he’s a big ‘ole cuddly Polar Bear so he was pretty easy to cut out!! Once my images were cut out, I picked my colors … his scarf is Just Jade so I coordinated my ink with that, then I decided to use Soft Sea Foam for my card base and the ink that I applied with the Blending Brush.
Once I applied the ink … and it dried, I decided to add some pretty texture by using one of the folders from the Wintry 3-D embossing folder. I just fell in love with the snowflakes and swirls! This gave me the idea to tuck one of the Wonderful Snowflakes behind my Polar Bear. The greeting comes from the Festive & Bright stamp set.
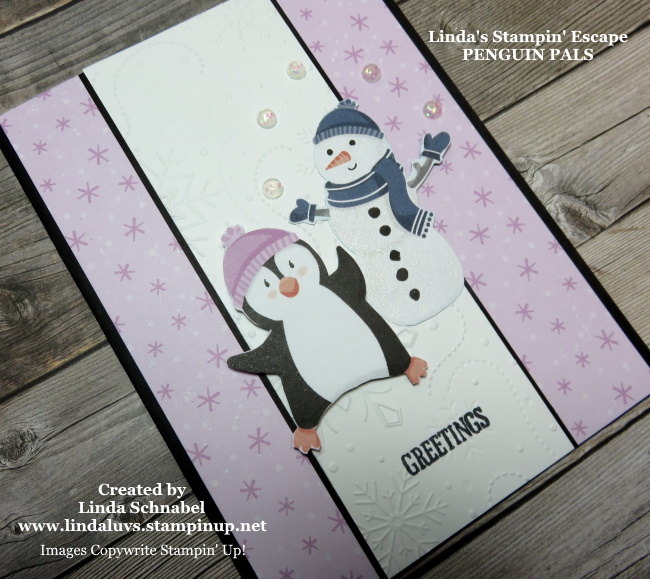
My second card now highlights the sweet little penguin and his snowman buddy! I wanted to highlight the black from the characters so I used in as my card base and my greeting, which also came from the Festive & Bright stamp set.
I used another pattern … which matches my penguins hat as my back drop. I also used the Wintry 3-D embossing folder for texture and to set the stage for my playmates! The snowman is enhanced with Wink of Stella and he’s so happy he started to juggle the cute “Opal Rounds” … also known as snowballs!!
These two are having so much fun … they want you to join the party!! … Join us to see what else I have in store for you this weekend as we “Launch this catalog” and party all weekend!!
CLICK HERE: To get to my Linda’s Stampin’ Escape Facebook page and join me for my LIVE demonstration tonight … and CLICK HERE FOR THE PARTY!! The Catalog Launch Party is in a “Facebook Group” so just request to be a member … we’d love to have you!
Thank you for checking out my blog today. I hope to see you tonight, and at the party~
TODAY’S STAMPIN’ SUPPLY LIST … If you liked the products used in todays projects, I have links for you below. Just click on the item you would like more information on, or to begin your shopping. It will take you directly to my website. Thank you ♥
I’m excited to share the cards that we made last night on my Facebook LIVE … I shared how you can enhance your designer papers using Embossing Paste and the Adorning Designs Decorative Masks. I figured the masks were in the Gingerbread & Peppermint suite for a reason … so that is where I started!
I also wanted to show you that some of the masks line up pretty nice with some of our other designer papers. Here I used the Peaceful Deer bundle and the Peaceful Prints Designer paper from the Sale-a-bration Catalog … which means you can get it FREE with a $50 purchase.
Now join me and watch the video as I show you how easy it is to create these cards! Then I will be sharing the card where I used the Beauty of the Earth Designer Paper!!
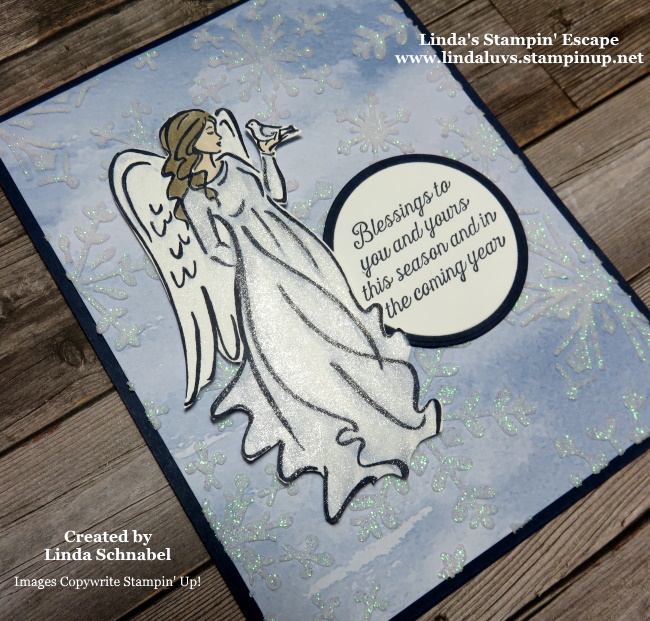
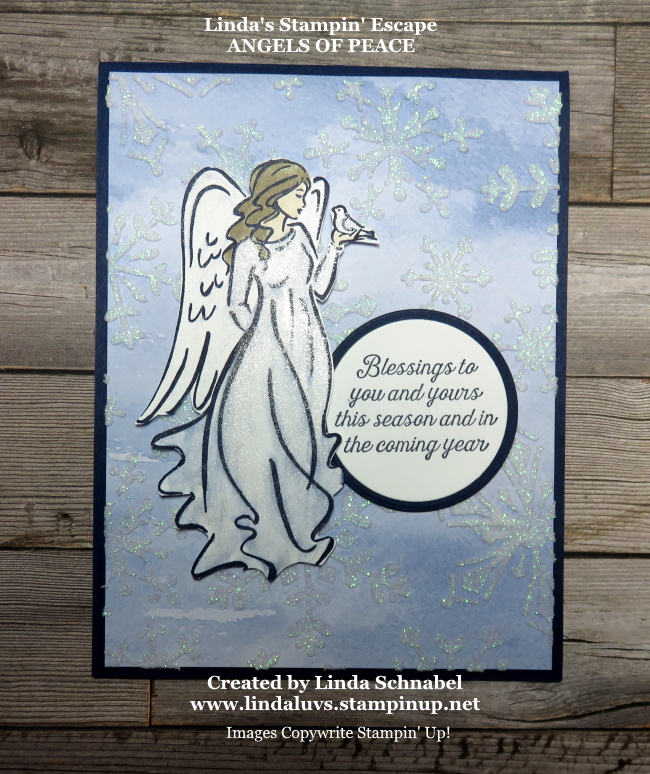
I am thrilled to share my next card with you!! I feel in love with the “Angels of Peace” stamp set the moment I saw it. She is so lovely and delicate and these angels can be used for so many different occasions …
The sentiment “Sometimes angels are just good people with kind hearts”… is the second reason I had to have this stamp set. The water washed background of the Beauty of the Earth designer paper was the perfect background for the snowflake mask and the Sparkling Embossing Paste…. and the angel was meant to go with them.
I stamped my angel in Night of Navy and then gently used the Wink of Stella to add some some sparkle to her. I was VERY careful on the wings as I wanted them mostly white, and the wetness of the Stella will smear the Night of Navy ink. On the other hand … I used the Wink of Stella to pull some of the color out of the lines and into her dress to give it that soft blue look.
The greeting was also stamped in Night of Navy and then cut out using the Layering Circle Dies. I also cut a Night of Navy mat to coordinate with her dress and the card base. It all flows so nicely and completes the card.
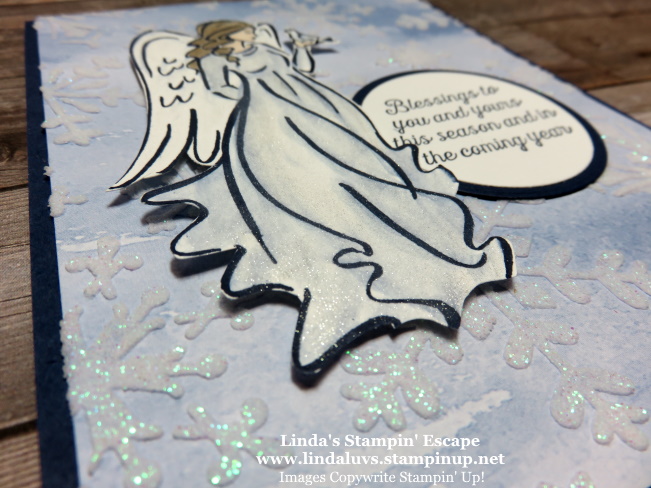
This angle of the photo is to show you the beautiful texture on this card!! The sparkle in the snowflakes is accented by the Wink of Stella on our Angel. One of my favorite cards that I ahve made in a while!
I want to thank you for joining me today, and if you stopped by last night to watch me LIVE. I hope you join me for my Catalog Launch Party, especially this weekend as I share more demonstrations using the NEW products and Sale-a-bration items.
Have a beautiful day, and take good care ~
TODAY’S STAMPIN’ SUPPLY LIST … If you liked the products used in todays projects, I have links for you below. Just click on the item you would like more information on, or to begin your shopping. It will take you directly to my website. Thankyou ♥
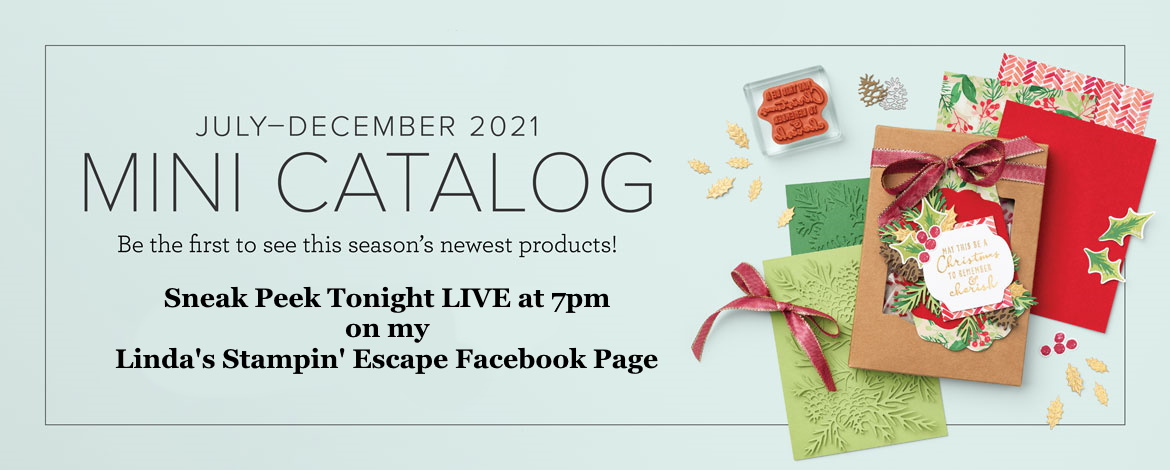
I’m so excited today … I’m going to be hosting a “Catalog Sneak Peek” tonight LIVE on my Facebook Page, and I would like to invite you to join me and your fellow stampin’ enthusiasts.
I do however want to share a real peek inside the catalog by sharing one of the cards created by Stampin’ Up! that really caught my eye!! And let me say … it was not easy to find, so you know it’s going to be a beauty!
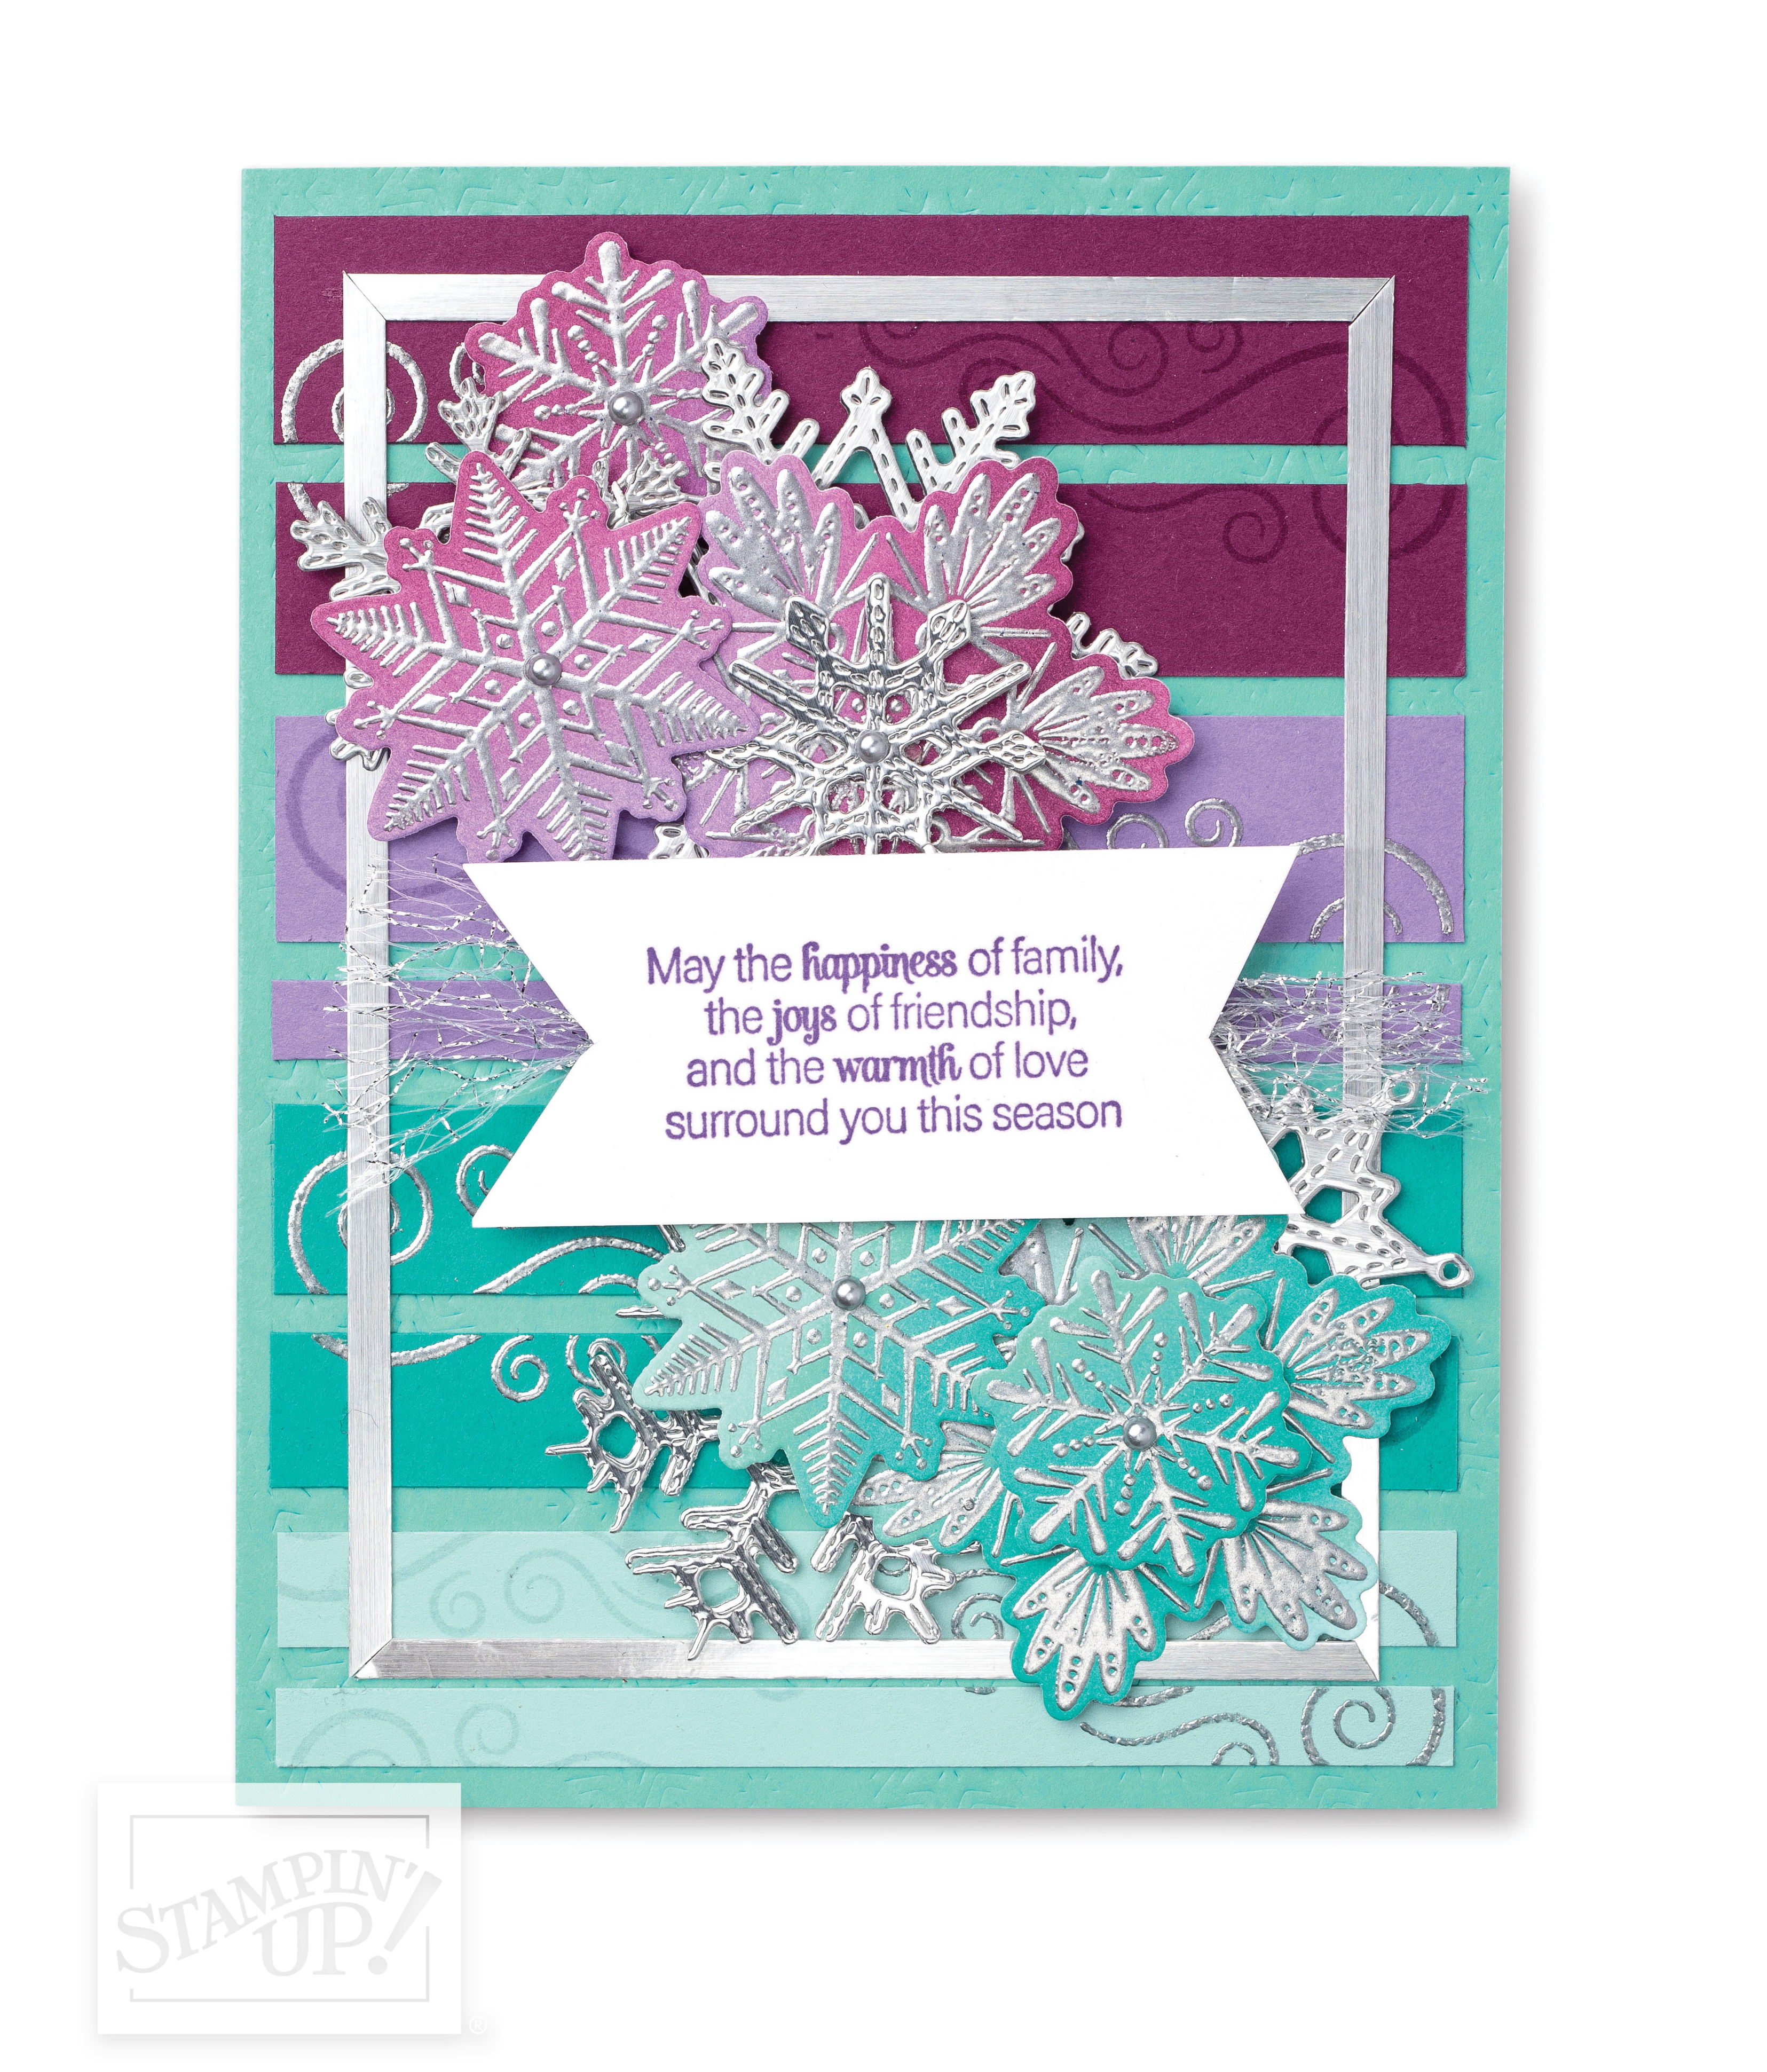
It was created with the Merry Snowflakes bundle which is found on pages 12 & 13 but you won’t find this card there … you have to go to page 65!! The color combination really looks so cool and I Iove the way the snowflakes are layered ….
If you need a catalog and are looking for a demonstrator, contact me… I will get you a catalog and hook you up to my website & YouTube channel for inspiring ideas. If you are outside of my area but order from me, I have sent you a catalog. If you are one of my customers near me, I have a catalog for you!! Please check your emails as I sent one out notifying everyone who has a catalog coming.
Thank you for stopping by, and I look forward to seeing you tonight on my Facebook LIVE as I share some of my goodies from the new Mini & Sale-a-bration Catalogs.
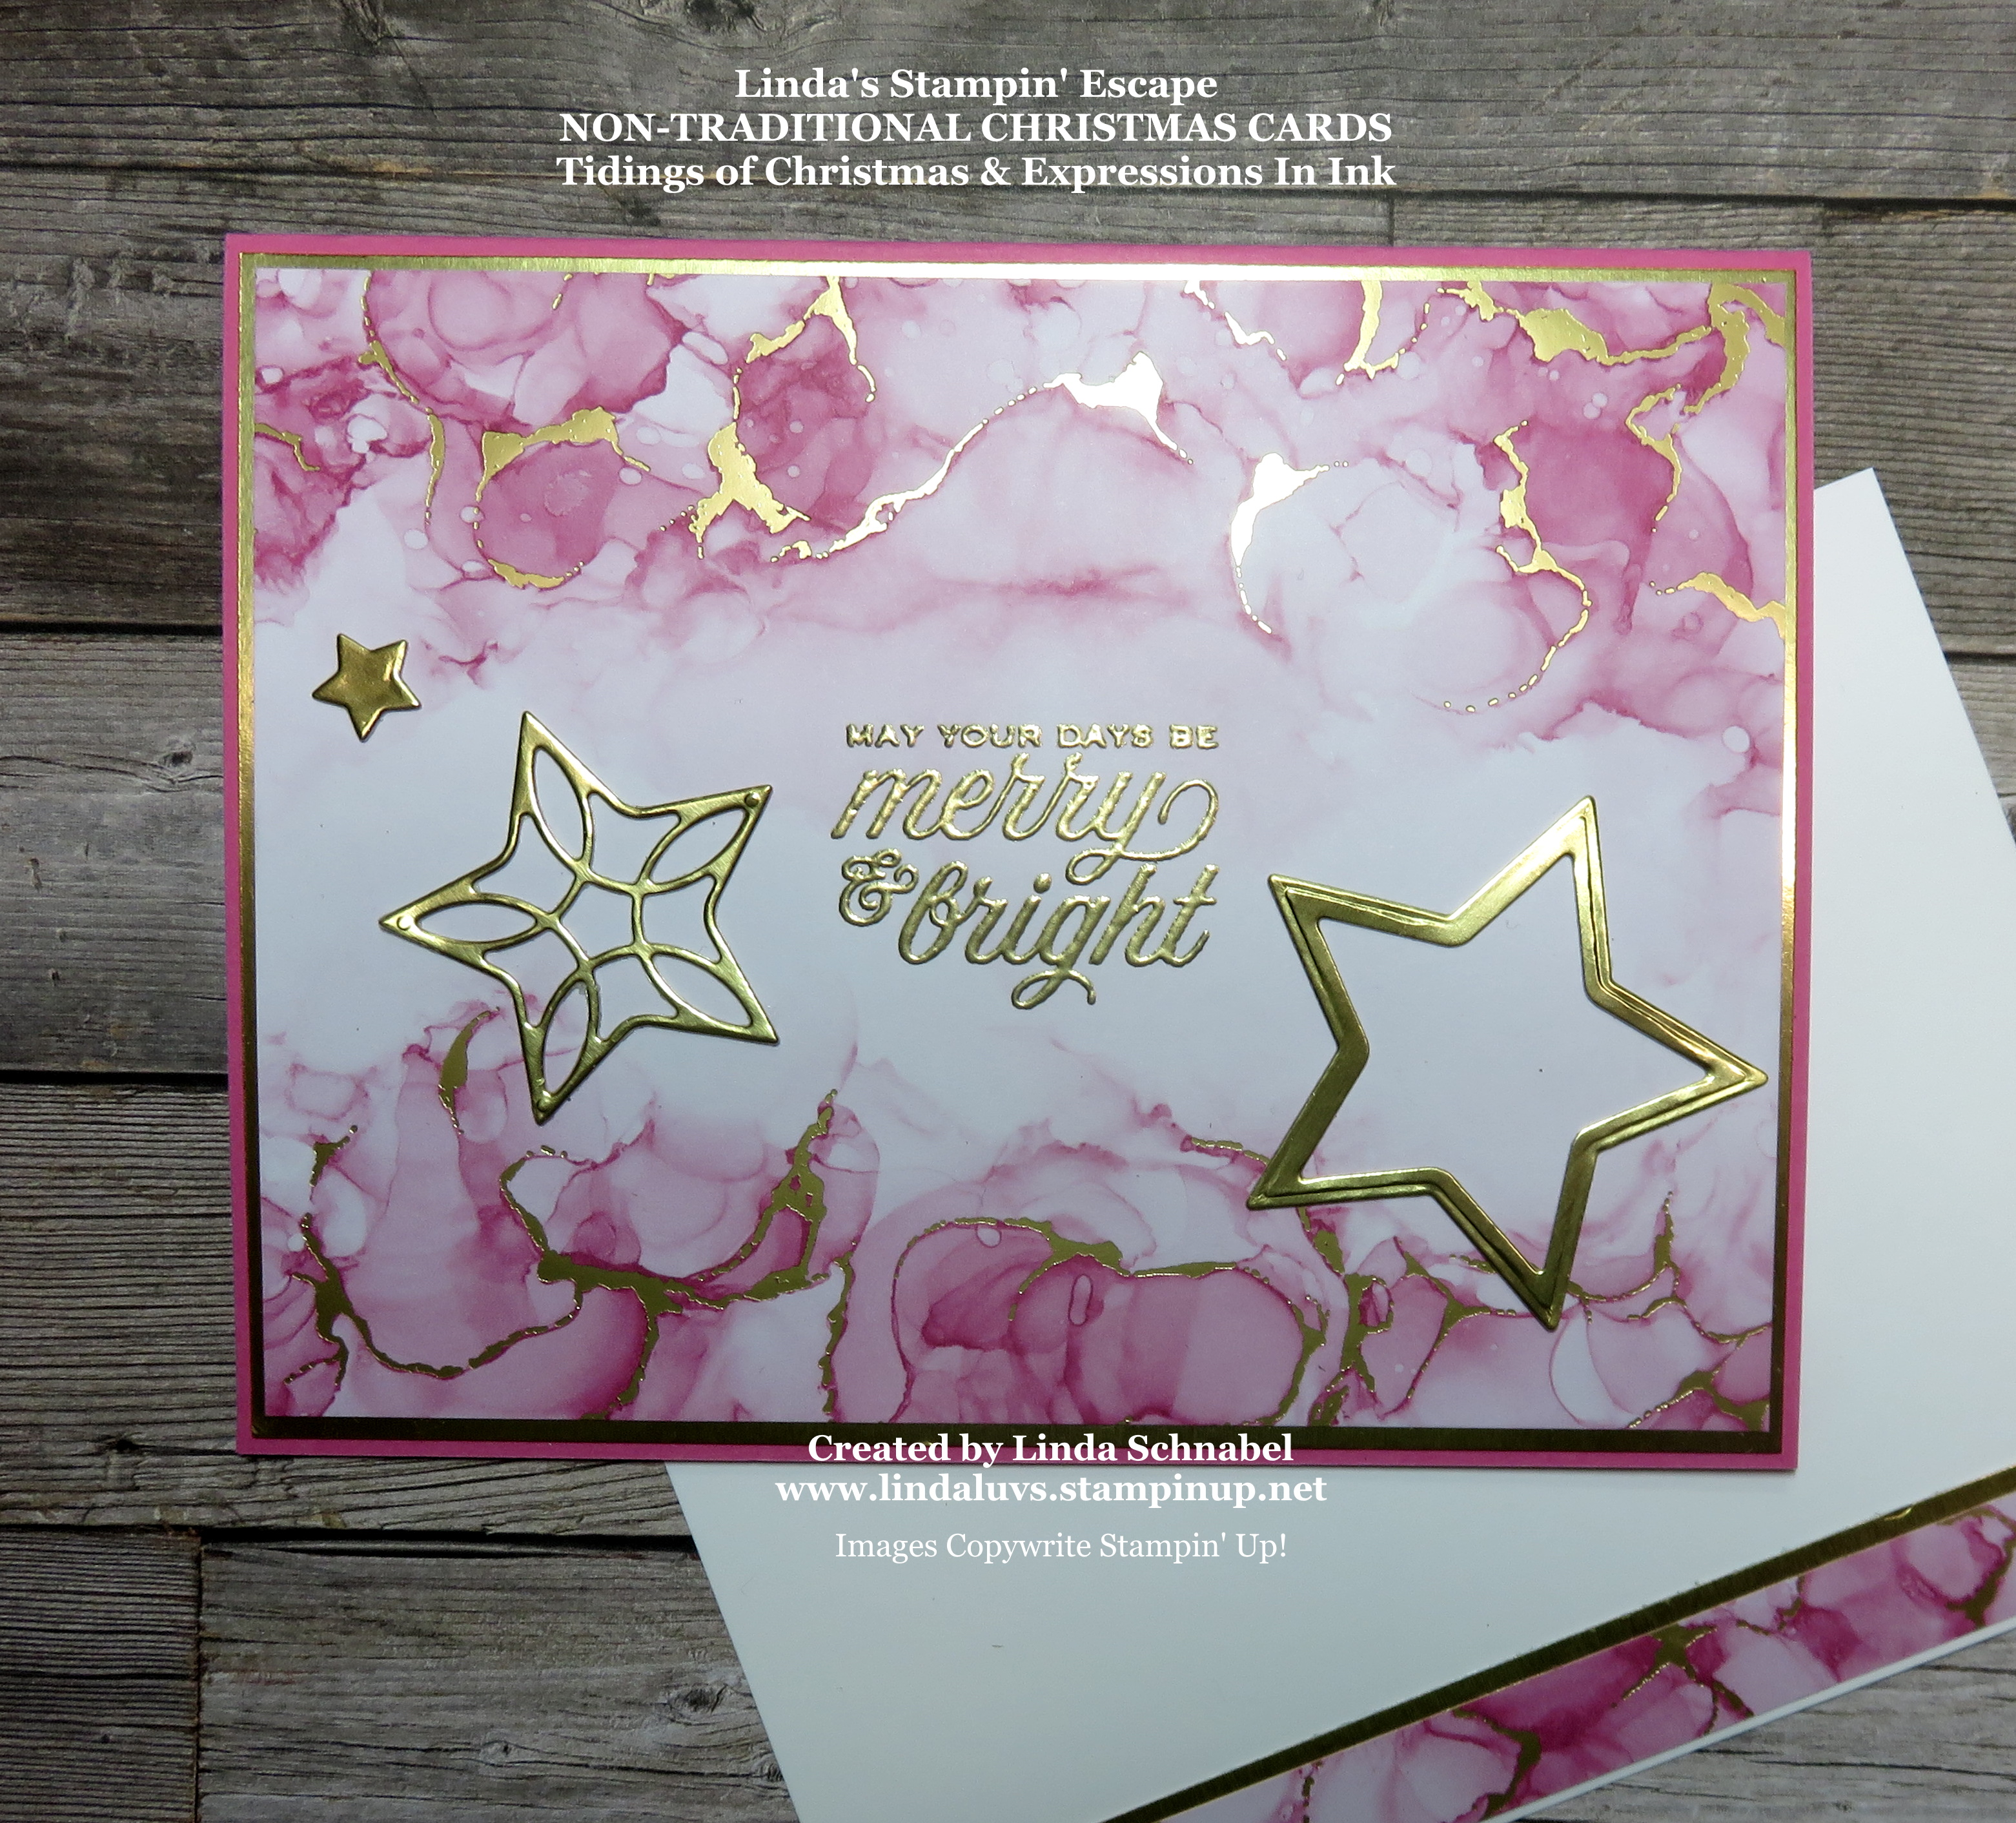
I’m doing a twist on my Simply Sunday today … a simple card to start and then I will gradually add some elements to lift the card to another level. Let’s begin with a little “fun” …. What do you get when you cross the Tidings of Christmas with the Expressions in Ink? A totally non-traditional Christmas card … in “PINK”!!
I began with the stunning Expressions in Ink Designer Series Paper in the new Polished Pink that is beautifully entwined with gold foils, so naturally I would use a Gold Foil mat and a Polished Pink card base.
I stamped the greeting in VersaMark and heat embossed it with the Gold Embossing Powder. My greeting comes from the Tidings & Trimmings Stamp Set. We could leave this card simply as is but, check this out ….
Before I attached the Gold Foil card base, I die cut some of those pretty little starts from the Tidings & Trimmings bundle!! This ads such and elegant touch to our beautiful Expressions in Ink Designer paper.
We went from a simply beautiful non-traditional “PINK” Christmas card to one that is simply stunning! Don’t forget to use the leftover pieces of designer paper to deck out the inside of your card.
Thanks for hanging out with me today!! See, you never know when I’m able to post a “requested” card.
Enjoy and have a beautiful Sunday ~
TODAY’S STAMPIN’ SUPPLY LIST … If you liked the products used in today’s projects, I have links for you below. Just click on the item you would like more information on, or to begin your shopping. It will take you directly to my website. Thank you ♥
CONNECT, CRAFT & COLLECT Stampin’ Up! is gifting an extra $25 in Stampin’ Rewards to all orders that reach the $250+ mark May 4 – June 14! This is the perfect perk for those who host parties or those who place large individual orders. Click here for more details.
TOMORROW IS THE LAST DAY TO ENJOY EXTRA FREE PRODUCT …
JOIN+ STARTER KIT SPECIAL An awesome Starter Kit special is being offered now through May 31st to help kick off of the new 2021-22 Annual Catalog! Choose up to $155 worth of product ($30 more than usual) and pay just $99. Click here for a few more details.
Please let me know if you have any questions about today’s card share, products you’ve seen or our promotions… I’m here to help you.
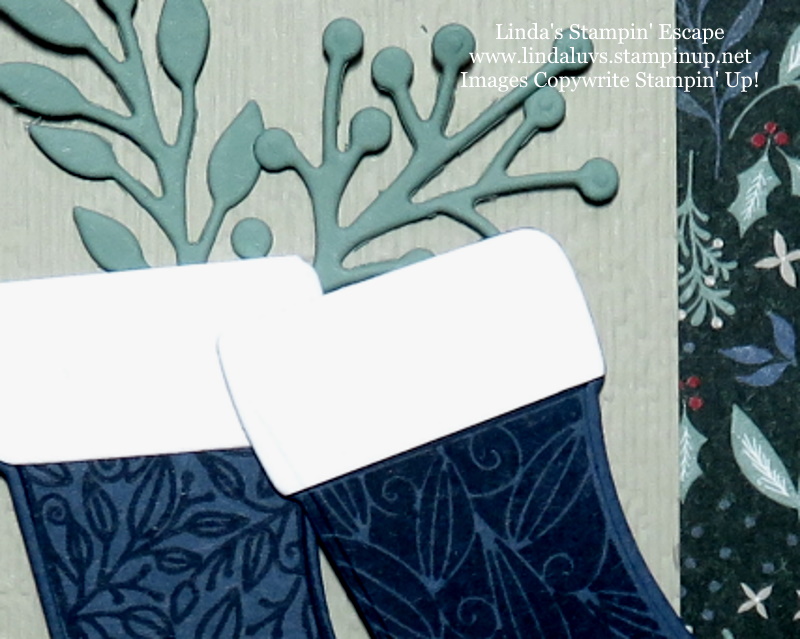
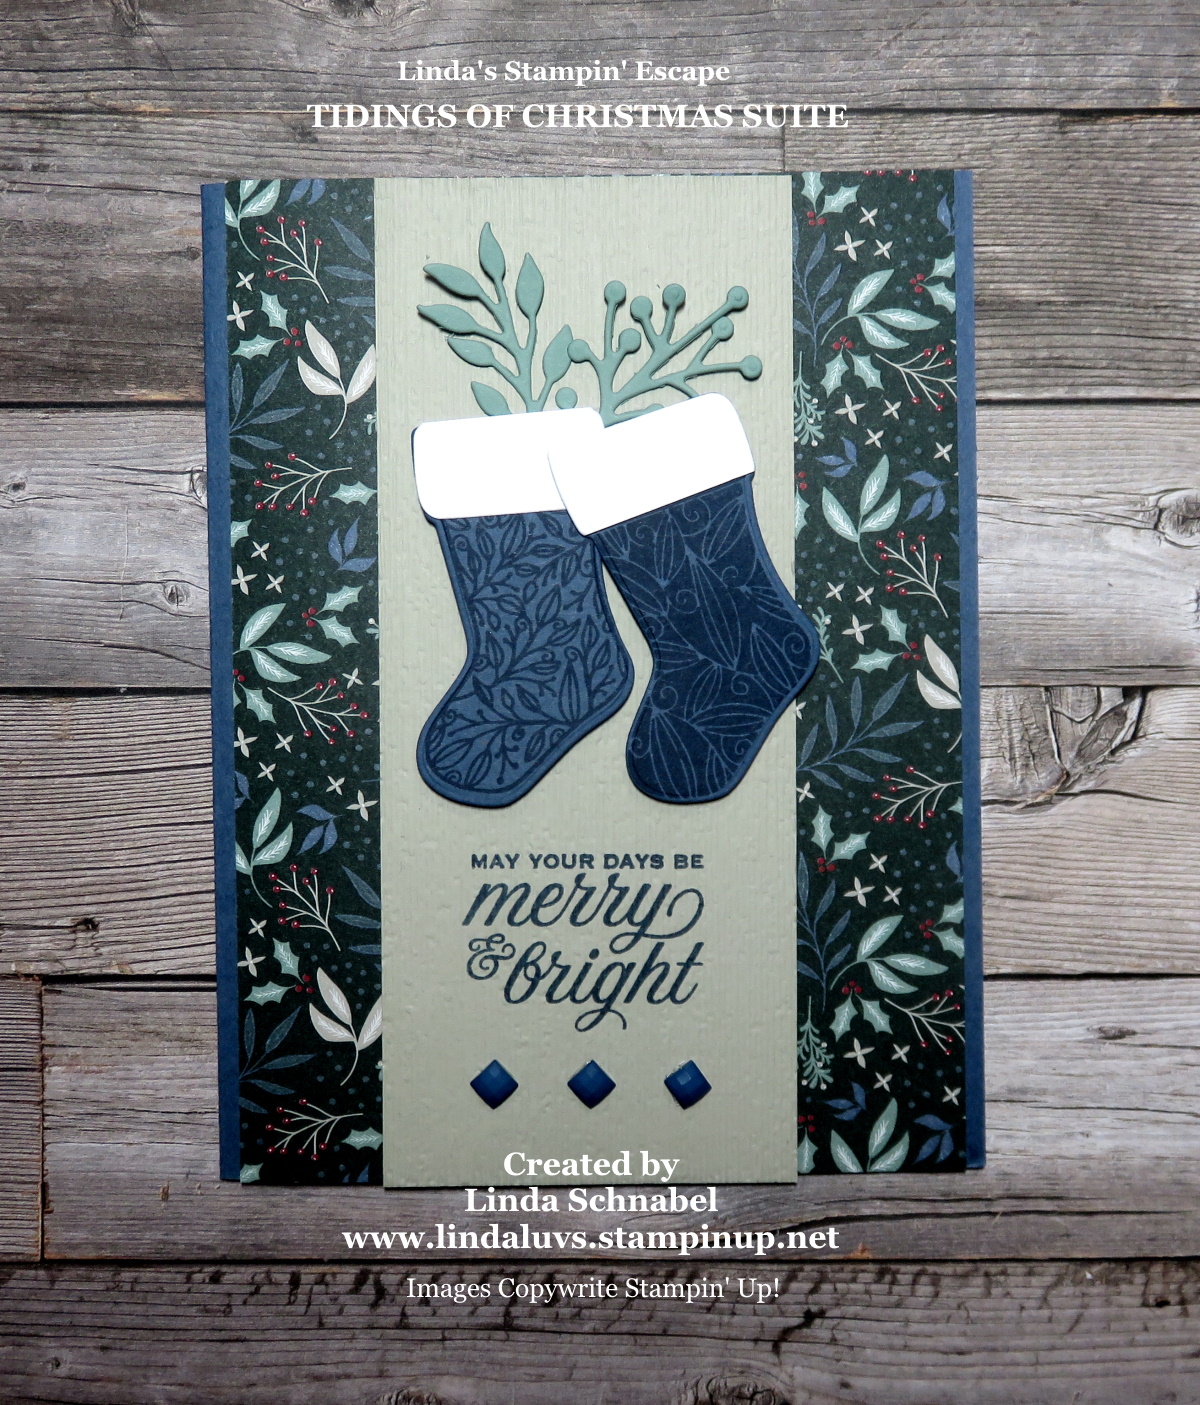
Let the weekend officially begin … How did you enjoy the Tidings of Christmas card that I shared yesterday? Yes? Well … I have another for card for you using this suite and where I’m going to showcase the dies from the suite; the stockings and some greenery …
I love the way this card turned out!! I chose this pattern designer paper from the suite and worked my color pallet from that … Sahara Sand, Misty Moonlight and Soft Succulent. The base is Misty Moonlight, then the background designer paper, the center piece is Sahara Sand.
I stamped the greeting in Misty Moonlight on the Sahara Sand. Then I stamped the stockings in the Misty Moonlight on Misty Moonlight then die cut them The white tops were cut using the top of the stocking die as there is “no” separate die for that.
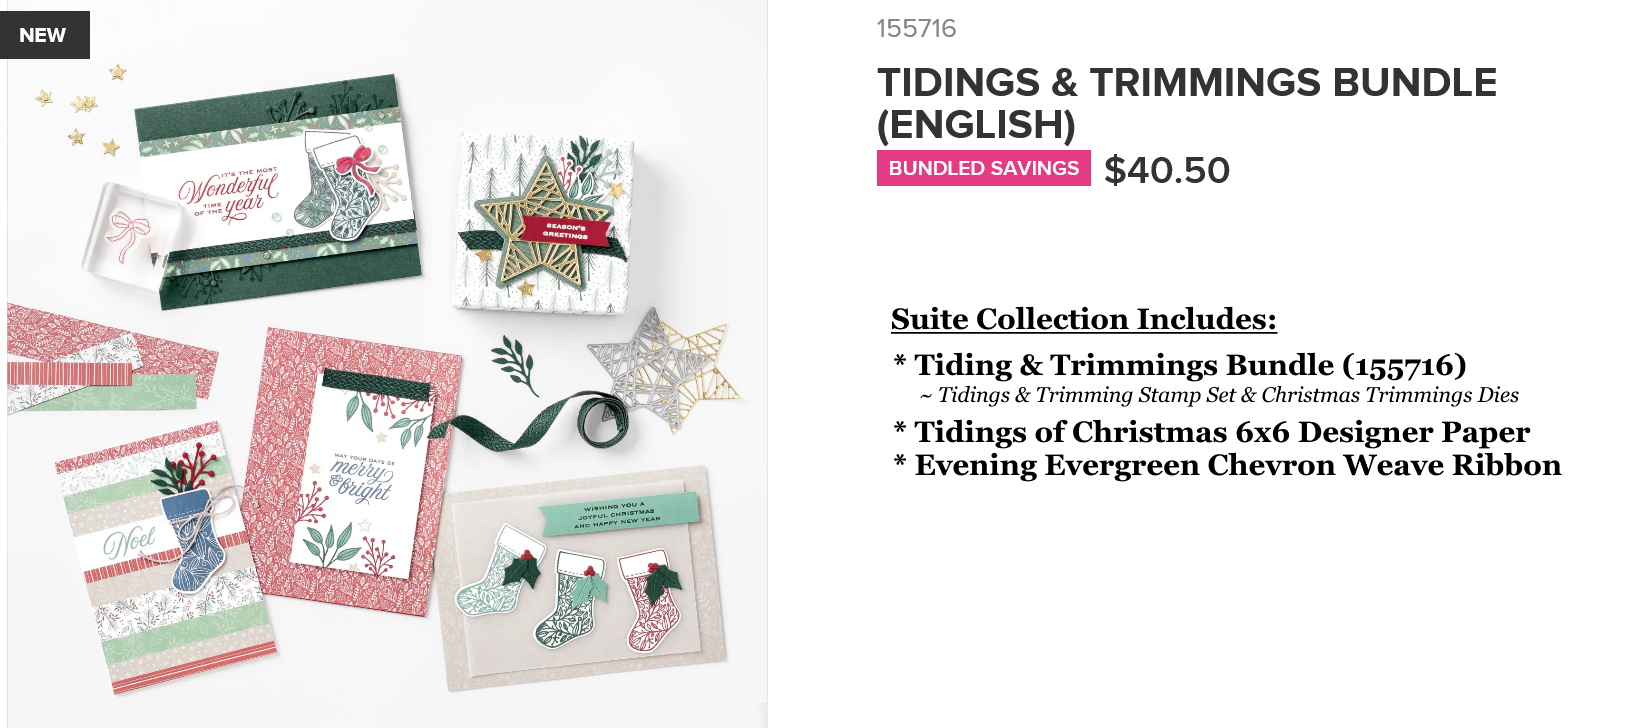
The greenery was die cut from Soft Succulent cardstock and adds such a beautiful touch to the card. The stamp set and dies can be purchased as a bundle, as well as the entire suite ….
The stamped stockings have the same patterns in their design as in the Tidings of Christmas Designer Series paper…. and so do the dies, and that is why they call it a suite. All the products were created to coordinate perfectly!
I couldn’t resist added the new 2020-2022 In Color Square Gems … they are Misty Moonlight!! Plus they add a nice finishing touch to the card. You can find these cute gems on page 142.
I thank you for stopping by today. Do you prefer the traditional colors I used yesterday, or do you like to change up your card colors a bit?
Have a wonderful weekend & stay safe ~
TODAY’S STAMPIN’ SUPPLY LIST … If you liked the products used in today’s projects, I have links for you below. Just click on the item you would like more information on, or to begin your shopping. It will take you directly to my website. Thank you ♥
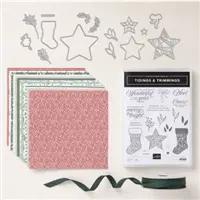
PLEASE NOTE: The “SUITE” pictured first includes the bundle (stamps & dies) and the designer paper and ribbon. The others are pictured if you want to purchase one or more items separately. The cardstocks are sold separately.
CONNECT, CRAFT & COLLECT Stampin’ Up! is gifting an extra $25 in Stampin’ Rewards to all orders that reach the $250+ mark May 4 – June 14! This is the perfect perk for those who host parties or those who place large individual orders. Click here for more details.
ONLY A FEW DAYS LEFT …
JOIN+ STARTER KIT SPECIAL An awesome Starter Kit special is being offered now through May 31st to help kick off of the new 2021-22 Annual Catalog! Choose up to $155 worth of product ($30 more than usual) and pay just $99. Click here for a few more details.
Please let me know if you have any questions about today’s card share, products you’ve seen or our promotions… I’m here to help you.
Today … with a chill in the air, I thought it was the perfect time to share a card that I created using the wonderful Tidings of Christmas. I know many of you start your Christmas cardmaking early, so I thought I’d give you a peek into what I’ve been creating with this suite …. the suite includes …
I start out on the “simple” side and will have so much more to share with you! Here is one of the cards I created ….
I used the pretty Tidings of Christmas Designer Series paper as my backdrop … the pretty papers remind me of Christmas’ past but have an elegant modern touch to them.
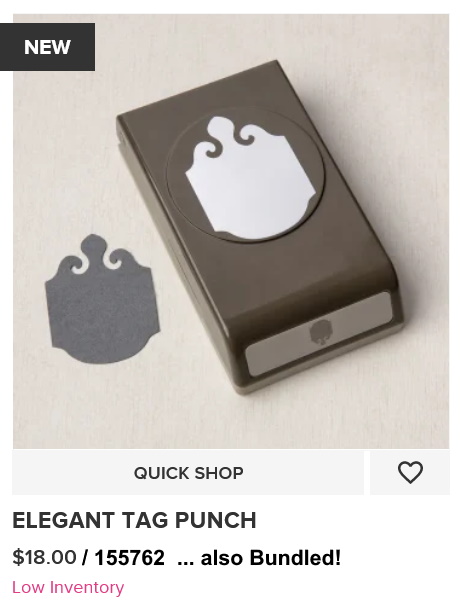
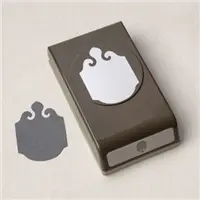
I teamed up my Tidings of Christmas with the “Elegant Tag” Punch. This amazing punch is fun and easy to work with, and you can create an multitude of options!! Here is just one …
I lengthened the punched paper to fit my greeting … you simple punch from the backside. Maybe I’ll create a short video to show you how, along with a tip to make it effortlessly!
Behind the punched greeting which of course is from our Tidings & Trimmings Bundle I added a touch of Cherry Cobbler cardstock and the beautiful Evening Evergreen Chevron Weave Ribbon.
I used the Red Rhinestone Basic Jewels just to add a little around the greeting You can find these cute gems on page 142. It also seems to anchor the tag and highlight the beautiful ribbon.
I thank you for stopping by today. I’d love to hear your thoughts on this new suite!!
Have a great day ~
TODAY’S STAMPIN’ SUPPLY LIST … If you liked the products used in today’s projects, I have links for you below. Just click on the item you would like more information on, or to begin your shopping. It will take you directly to my website. Thank you ♥
PLEASE NOTE: The “SUITE” pictured first includes the bundle (stamps & dies) and the designer paper and ribbon. The others are pictured if you want to purchase one or more items separately. The PUNCH & Rhinestones are NOT included in the suite.
CONNECT, CRAFT & COLLECT Stampin’ Up! is gifting an extra $25 in Stampin’ Rewards to all orders that reach the $250+ mark May 4 – June 14! This is the perfect perk for those who host parties or those who place large individual orders. Click here for more details.
ONLY A FEW DAYS LEFT …
JOIN+ STARTER KIT SPECIAL An awesome Starter Kit special is being offered now through May 31st to help kick off of the new 2021-22 Annual Catalog! Choose up to $155 worth of product ($30 more than usual) and pay just $99. Click here for a few more details.
Please let me know if you have any questions about today’s card share, products you’ve seen or our promotions… I’m here to help you.
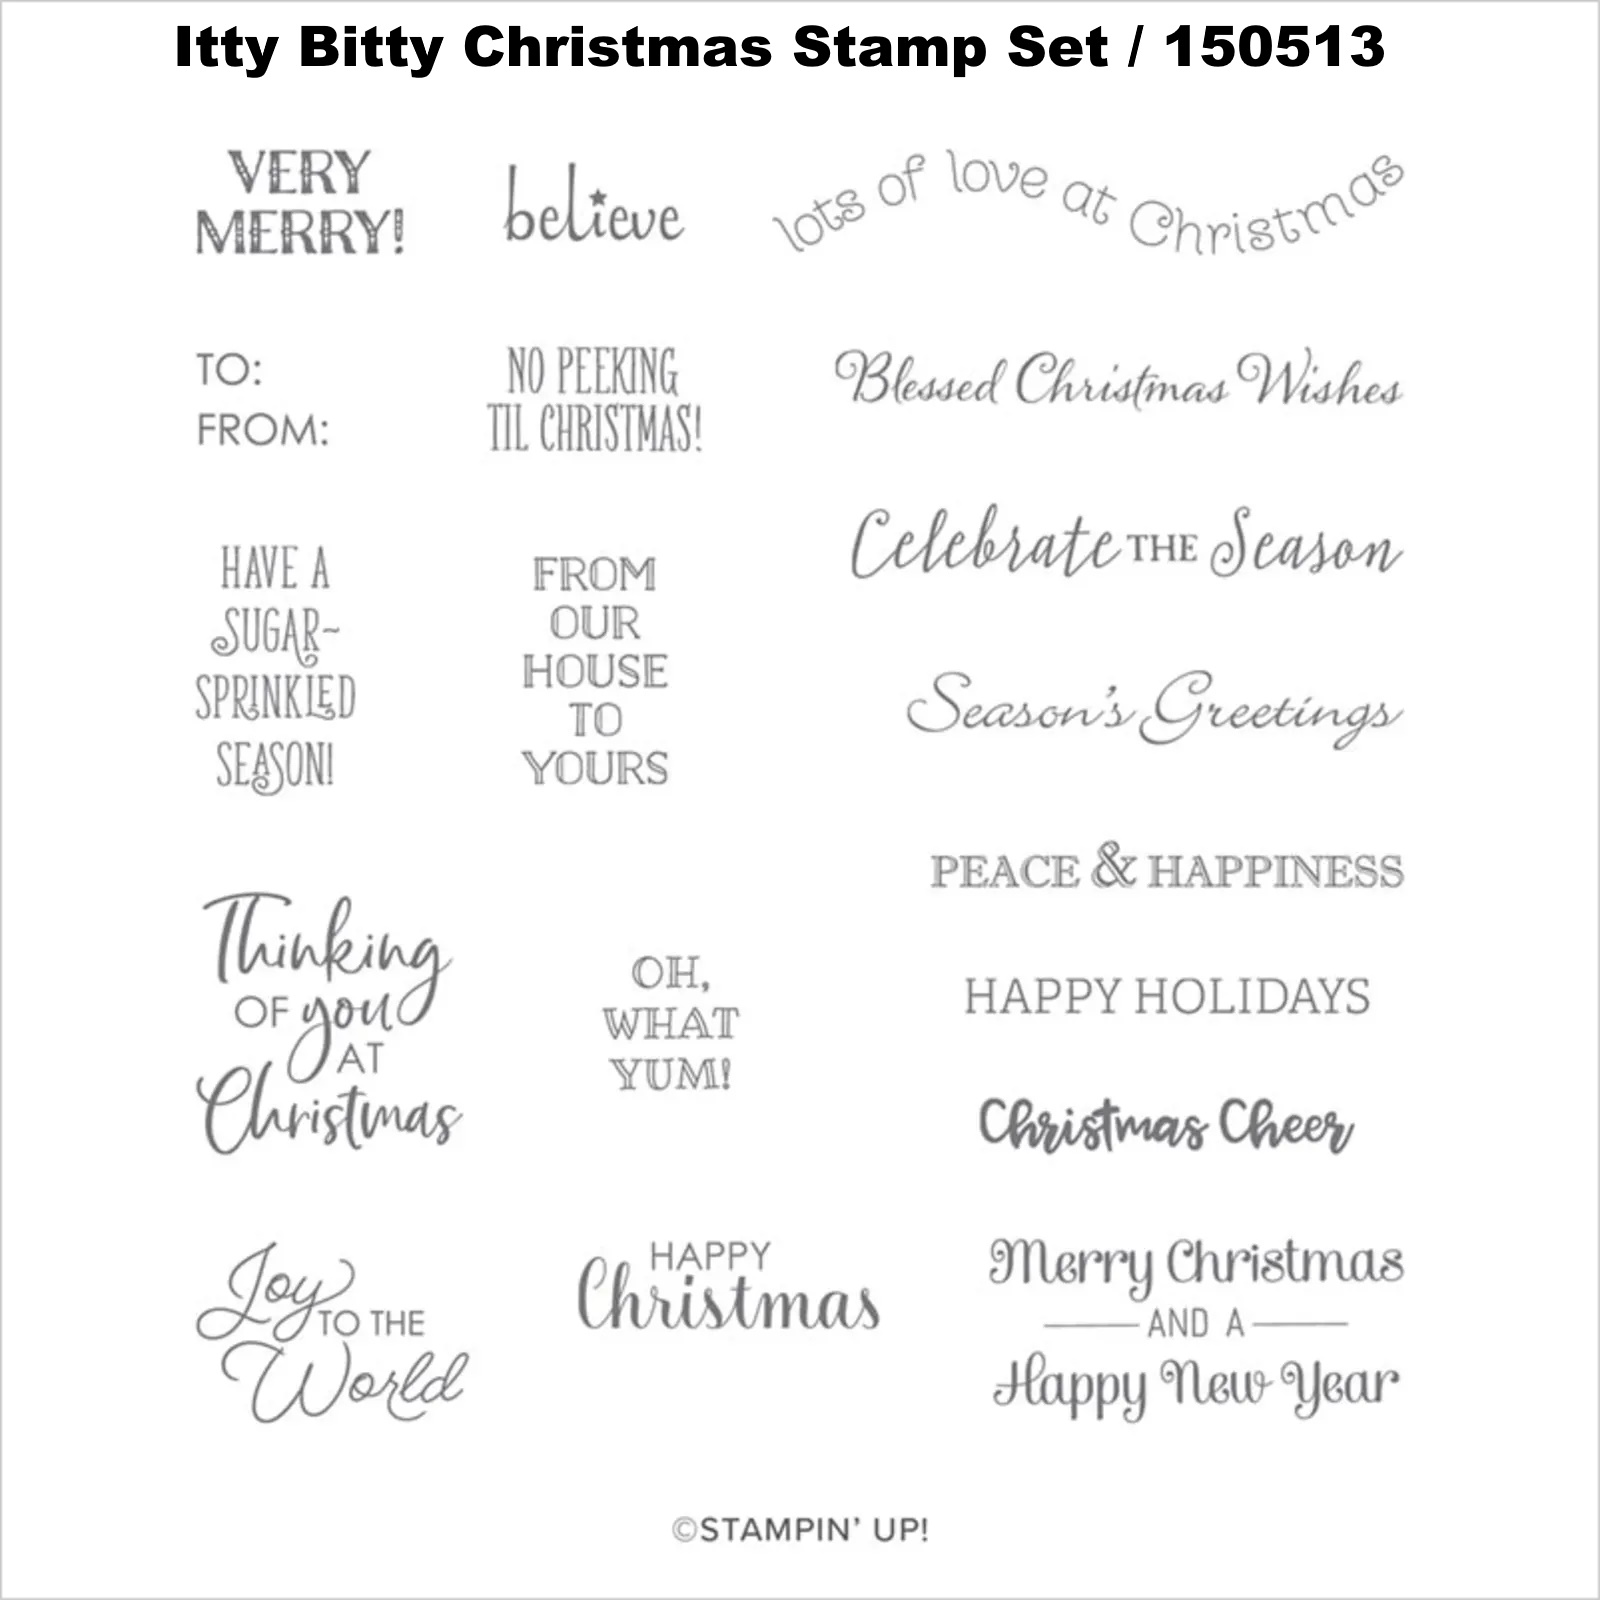
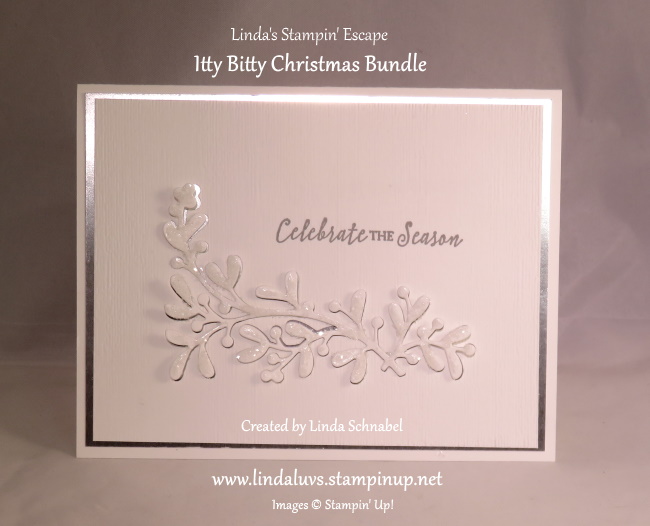
Today I am sharing cards were created with the Christmas Layers Dies. These were paired with the Itty Bitty Christmas stamp set … both of these items are retiring, and I’m taking a look back to share with you some cute cards in case these are on your retiring Wish List!
I wanted to show the different elements of the stamp set and dies to demonstrate how versatile this bundle is.
The first card is bursting with holiday flair and is decked out in gold. The floral pattern really highlights the greeting and ties in the gold throughout the card so nicely. The Shades Spruce and Cherry Cobbler look so regal … You can use the Plaid Tidings Designer paper which is currently on our Clearance Rack!
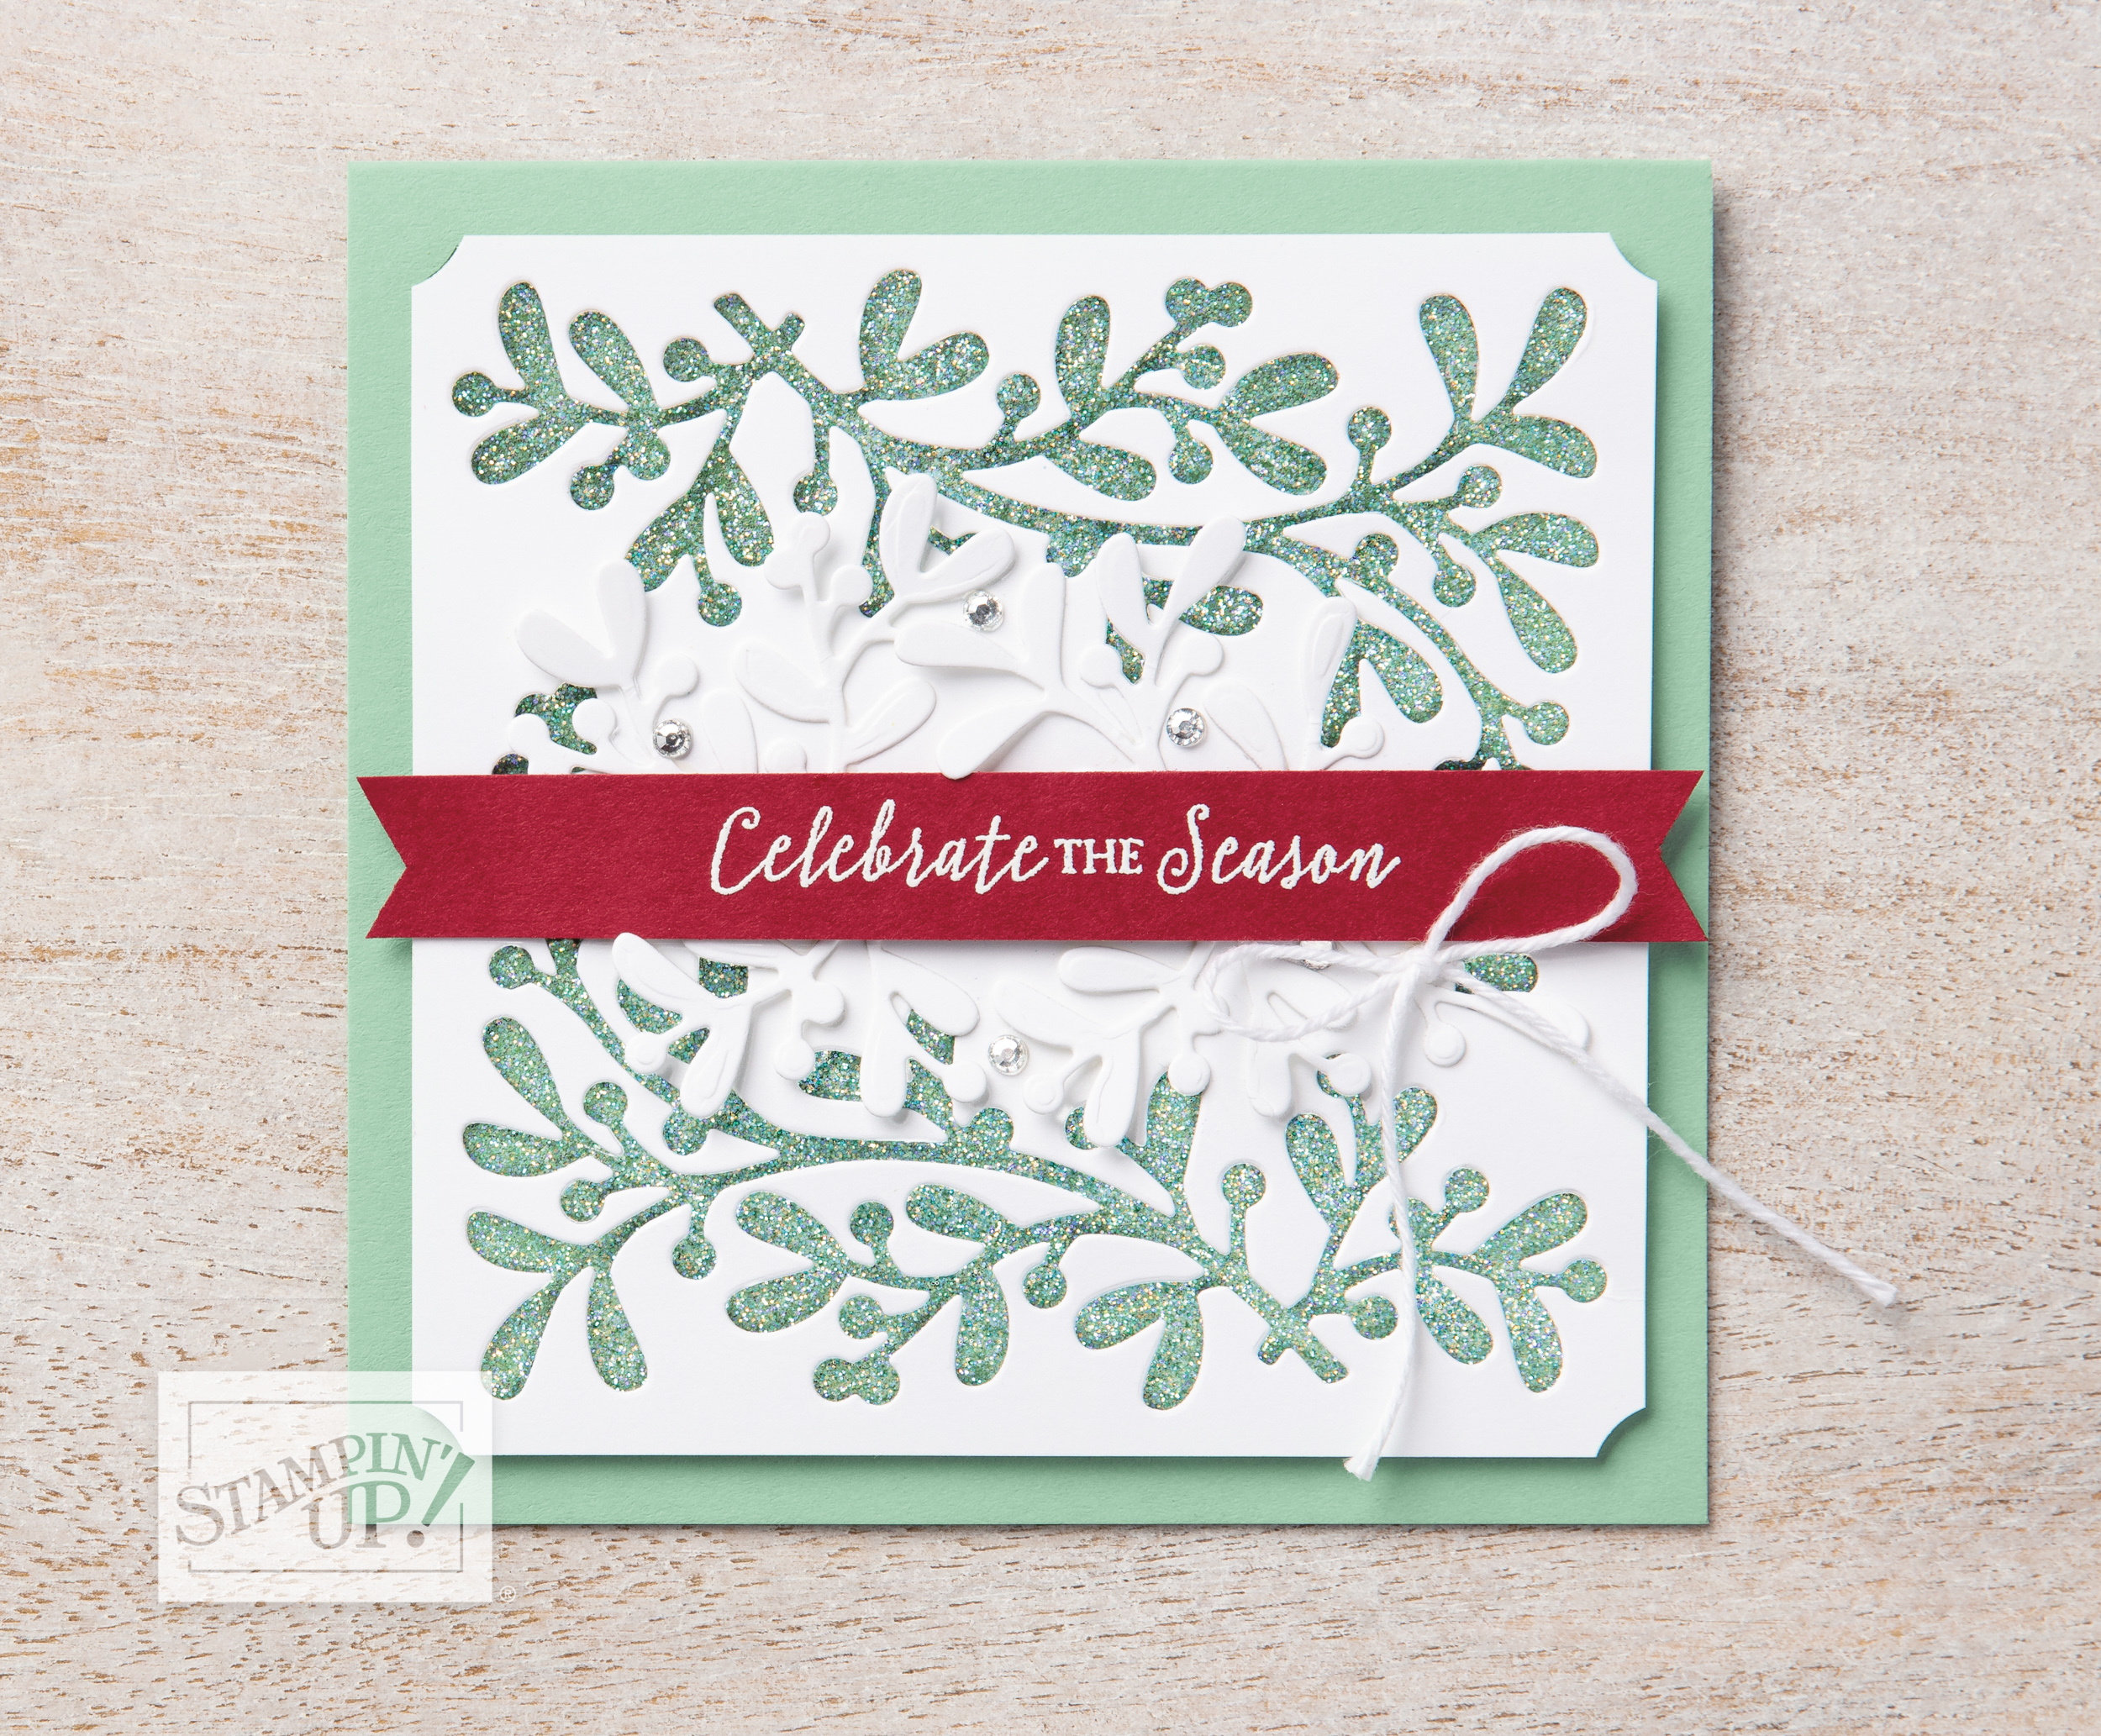
Here is another sample that highlights the floral dies cuts … I love these, they actually look more like a metal embellishment than a die cut piece of cardstock!! They also used the die cut image to create a fun background on this card.
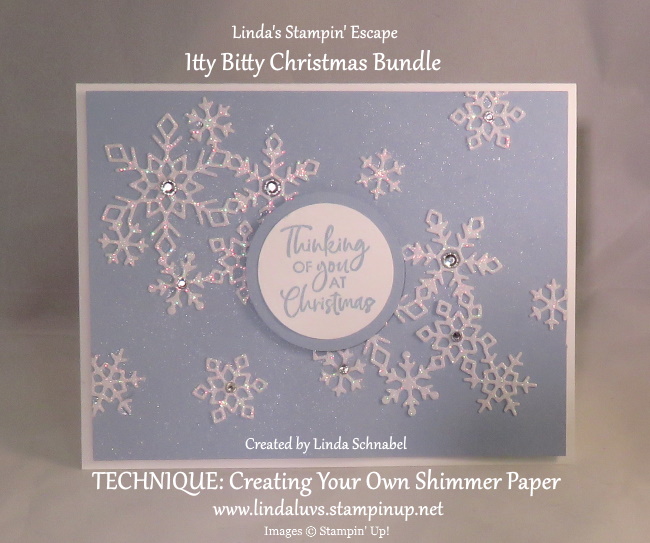
My second card is so different from the first in that we have created our own “Shimmer” paper by spritzing the beautiful Seaside Spray from our 2019 – 2021 In Color collection. For a little more sparkle, the snowflakes are cut from the Sparkle Shimmer Paper! But wait … there is one more layer of sparkle when I added the Rhinestones to the snowflakes.
This card is just simply elegant and done with White and Silver … and yes, graced with a touch of glitter. Instead of die cutting the image and adhering it to the base as I did in the first card, I actually cut it out of the front and used it to impose a second layer to the card… stunning.
I have another samples the highlights the foliage die …
If you didn’t know these cards were from the same stamp set/dies … you might not know that they were! Oh wait … I have one more project that can be created with these stunning dies.
Each of these cards/projects were done with the Christmas Layers Dies and the Itty Bitty Christmas Stamp Set. I have “one more” card sample for you below!!
Thanks for checking in with me today … meet you back here tomorrow.
Have some fun today!
TODAY’S STAMPIN’ SUPPLY LIST …If you liked the products used in todays projects, I have links for you below. Just click on the item you would like more information on, or to begin your shopping. It will take you directly to my website. Thank you♥
How are you today? Hope you are well … Today I’d like to take a walk through the many variations of the Quite Curvy Variety Bundle. Let’s begin with my first …
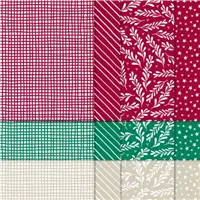
The beautiful Feels Like Frost Designer Series paper teamed up with the Quite Curvy Bundle makes your cardmaking quick and easy! Don’t forget the beautiful silver patterns on the other side of this stunning designer paper.
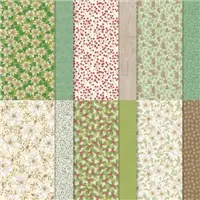
My next card introduces you to the Flower & Field Designer Series Paper (you can earn FREE during Sale-a-bration) It’s so fun and pretty …. great for cheering up your friends and family for any occasion!
Here are three more patterns from the Flower & Field Designer paper using the same layout ….
Aren’t the patterns fun and pretty?! Love them. Next up is my card design from the Curvy Christmas and Classic Christmas Designer paper …
I did use the sample layout as I did in the cards I shared with the new Flowers and Field Designer Paper that is available during Sale-a-bration. The layering of the designer paper and cardstock makes for quick -n- easy card making.
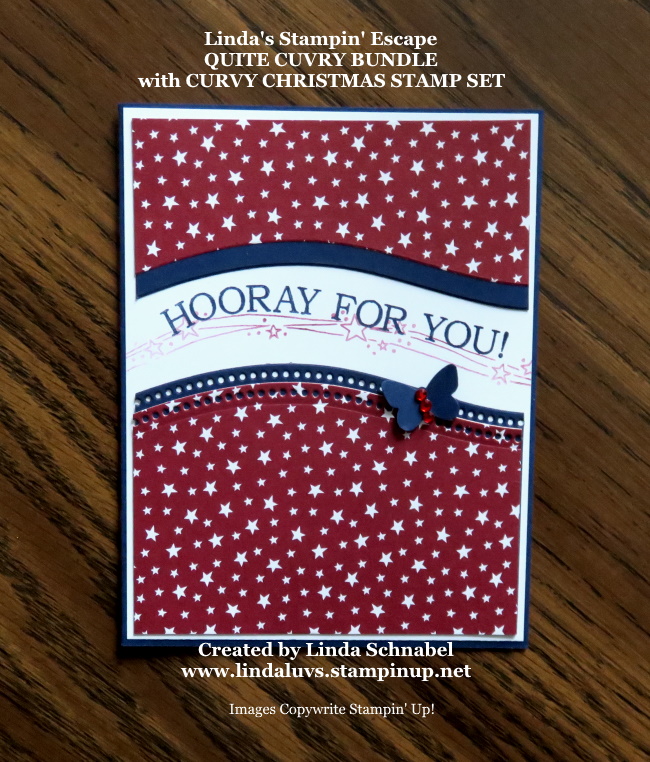
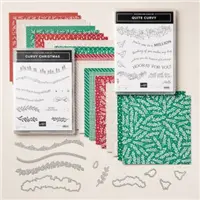
I used the 6″ x 6″ Classic Christmas Designer Paper … you can purchase this in the Quite Curvy Variety Bundle (that has it all) along with the Curvy Christmas stamp set. I chose the pattern with the stars for Christmas, although I’ve seen some amazing cards on Pinterest using this bundle for Christmas. Here’s another …
The brown tone card was created by Stampin’ Up! While I was working on my card with the Stars … it just reminded me of the Fourth of July, our Service Men and Women and a celebration so I swapped out my cardstock to Night of Navy and another holiday was represented!!
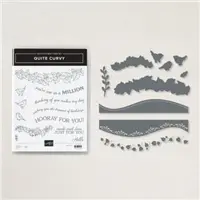
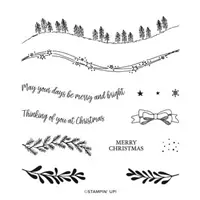
The greeting comes from the Quite Curvy bundle and the stars come from the Curvy Christmasa stamp set. This is such a versatile variety bundle, like me, I’m sure you would like it all.
The last card share I have for you was my latest creation, changing it up by using the die as an edgelit and creating a fun card front and exposing a bit of the inside of the card …
The Quite Curvy bundle will be available later, however the Curvy Christmas is retiring. I have posted the links to the products so you can get a better look at the offerings. Please let me know if I can help you in any way.
Thank you so much for stopping by today… I hope yours is a great one.
TODAY’S STAMPIN’ SUPPLY LIST … If you liked the products used in today’s projects, I have links for you below. Just click on the item you would like more information on, or to begin your shopping. It will take you directly to my website. Thank you ♥
The weekend is slowly sneaking up on us … and so is Christmas! Today I have another card to share with you that I made using the another pattern from the “Classic Christmas” Designer Series paper. This 6″ x 6″ designer paper is included in the Quite Curvy Variety Bundle.
I wanted to create a different look than what I have been showing you so I used one of the other dies as an edgelit so you could see another way to use those dies. It looks so pretty and it gives your card a whole new look.
The greeting comes from the Curvy Christmas stamp set and really highlights the edge of our card, as so those pretty little Red Rhinestones …
I cut the edge just like I showed you in the video where we split the card in two and put our greeting in the center … her we just created a totally different look by leaving the second (or bottom) piece off completely!!
The Red Ribbon accents and coordinates with our greeting (Stamped in Real Red) and the Red Rhinestones. I chose the Shaded Spruce cardstock to add a rich dark green to compliment the red. Contrasting colors have a way of making the whole card pop … and the white base really brings out the white in the designer paper.
The Quite Curvy bundle will be available later, however the Curvy Christmas is retiring … so the Quite Curvy Variety Bundle will be gone too. I have posted the links below that you can click on and learn more about the products.
Thank you for joining me today… I hope you have a wonderful day.
TODAY’S STAMPIN’ SUPPLY LIST … If you liked the products used in today’s projects, I have links for you below. Just click on the item you would like more information on, or to begin your shopping. It will take you directly to my website. Thank you ♥
How are you today? I hope all is well and your house is filled with excitement getting ready for the holidays. Today I have two cards to share with you that I made using the pattern I shared yesterday and the Curvy Christmas stamp set.
I did use the sample layout as I did in the cards I shared with the new Flowers and Field Designer Paper that is available during Sale-a-bration. The layering of the designer paper and cardstock makes for quick -n- easy card making.
I used the 6″ x 6″ Classic Christmas Designer Paper … you can purchase this in the Quite Curvy Variety Bundle (that has it all) along with the Curvy Christmas stamp set. I chose the pattern with the stars for Christmas, although I’ve seen some amazing cards on Pinterest using this bundle for Christmas. Here’s another …
The brown tone card was created by Stampin’ Up! While I was working on my card with the Stars … it just reminded me of the Fourth of July, our Service Men and Women and a celebration so I swapped out my cardstock to Night of Navy and another holiday was represented!!
The greeting comes from the Quite Curvy bundle and the stars come from the Curvy Christmasa stamp set. This is such a versatile variety bundle, like me, I’m sure you would like it all.
The Quite Curvy bundle will be available later, however the Curvy Christmas is retiring. I have posted the links to the products so you can get a better look at the offerings. Please let me know if I can help you in any way.
Thank you so much for stopping by today… I hope yours is a great one.
TODAY’S STAMPIN’ SUPPLY LIST … If you liked the products used in today’s projects, I have links for you below. Just click on the item you would like more information on, or to begin your shopping. It will take you directly to my website. Thank you ♥
Today I have another “DRAPERY FOLD” card for you … from Deb Anderson. Deb caught my Facebook LIVE demonstration on the Drapery Fold and was inspired to try it out … and she shared this sample with me ….
Deb used the Snowflake Splendor Designer Series paper for her card …
It is fairly simple to make and does not need a lot of supplies, and it’s fun! It give you a touch of “fanciness” on your card but slides into the envelope quite easy.
I have a video for you to watch, my Technique Tuesday video from my Facebook LIVE last night. Have a bit of a rest and watch the video …
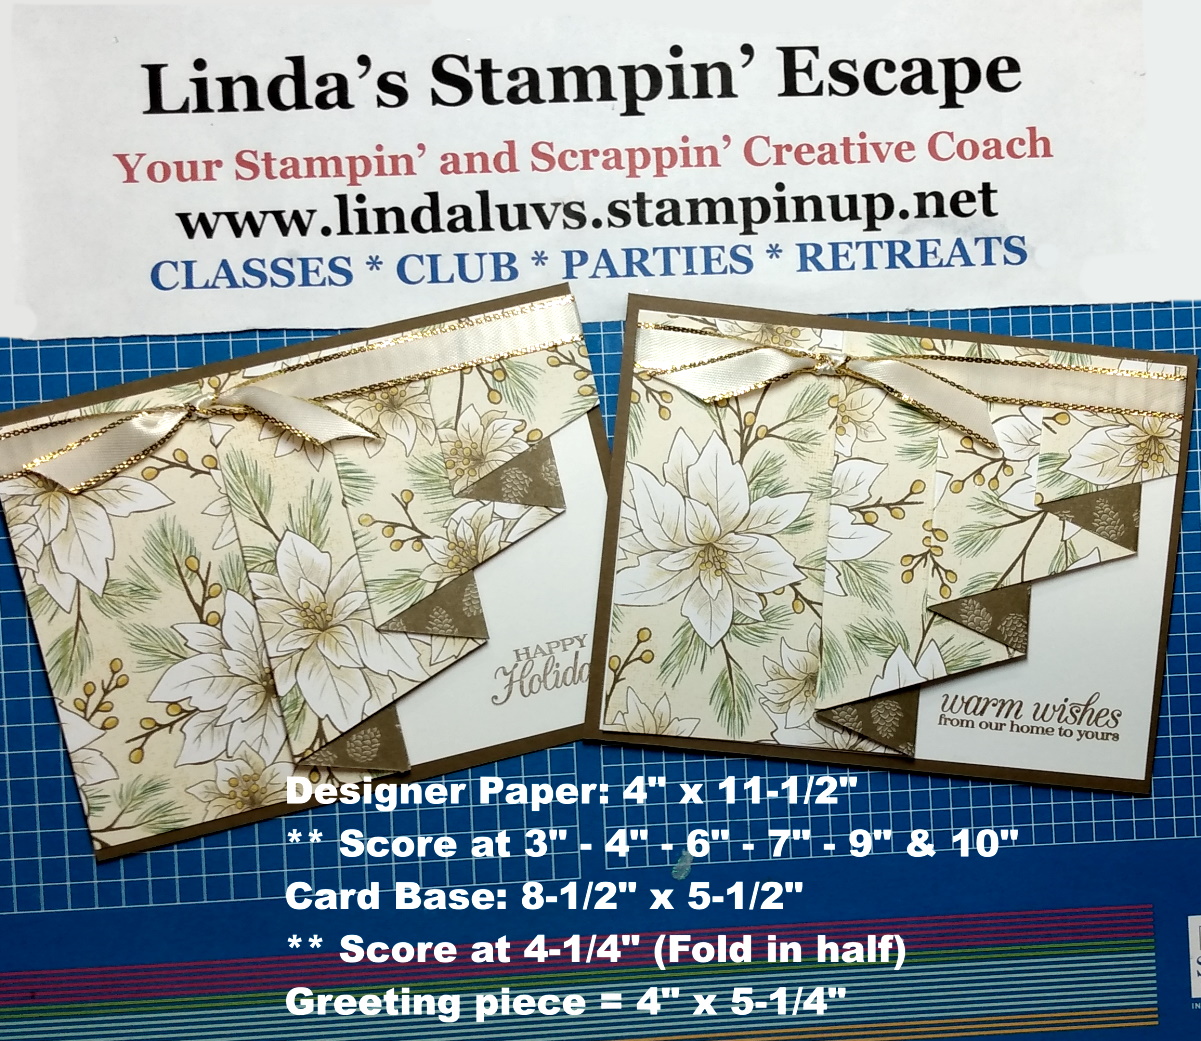
What did you think … ?? This is the type of card that looks fancy but is pretty easy to make. Any designer paper could be used for this style of card. I chose to use the Poinsettia Place suite… such a pretty pattern and a natural background to accent the fold.
I have written down the measurements for you ….
I also showcased both cards in the photo … the one on the left is the one where the drapery fits from end to end, and the one on the right is the one I trimmed off to create a border all the way around my card front.
I hope I inspired you to try out this simple yet pretty “FUN FOLD”, then I’d LOVE to see what you create.
Have yourself a wonderful day, and thank you for spending part of it with me.
TODAY’S STAMPIN’ SUPPLY LIST … If you liked the products used in today’s projects, I have links for you below. Just click on the item you would like more information on, or to begin your shopping. It will take you directly to my website. Thank you ♥
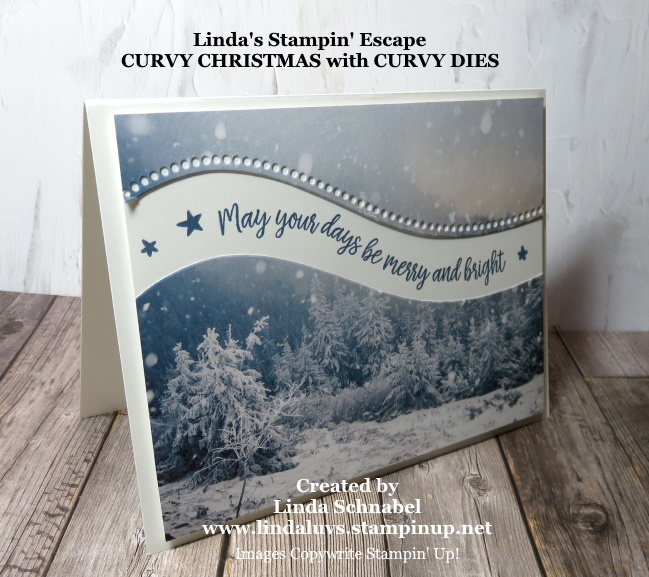
As promised … I am back today with my “Curvy Christmas” card. I can’t believe how easy this was to use and how cool the card turned out. Since I’m going Christmas, I chose the Feels Like Frost Designer Series paper. Once run through the Stampin’ Cut -n- Emboss machine and the Curvy Dies delivered this ……
My base is Whisper White and cut at 8-1/2″ x 5-1/2″ and scored at 4-1/4″. The card front, also Whisper White is 5-1/4″ x 4″. The Feels Like Frost Designer Paper was cut 5-1/4″ x 3″ … and then I ran it through the die cutting machine with the Curvy Die. Once cut you just slide it apart and it exposes the area where you will stamp your greeting.
The greeting comes from the Curvy Christmas stamp set … the little stars are included in there as well. The cool thing about the Photopolymer stamps, is that you can shape them to fit “where” you want it to go.
I secure the bottoms piece before I stamp my greeting but I leave the top so I can adjust it if needed … If I do, I just trim off the excess paper. I am going to host an online class where I can show you more about this fun and amazing product line.
Thank you for joining me today. I hope today kicks off an amazing weekend for you!!
Have a great day ~
TODAY’S STAMPIN’ SUPPLY LIST … If you liked the products used in today’s projects, I have links for you below. Just click on the item you would like more information on, or to begin your shopping. It will take you directly to my website. Thank you ♥
Oh my gosh … can you believe it is the 6th of December already? WOW At times (not always) this year has seemed to fly by … I hope you are all safe, healthy and ready for the holidays!
I have a new card layout I’d like to share with you today along with a big announcement from Stampin’ Up!Let’s begin with their announcement as I have two projects to share with you today …
CLICK HERE TO DOWNLOAD THE RETIREMENT LIST
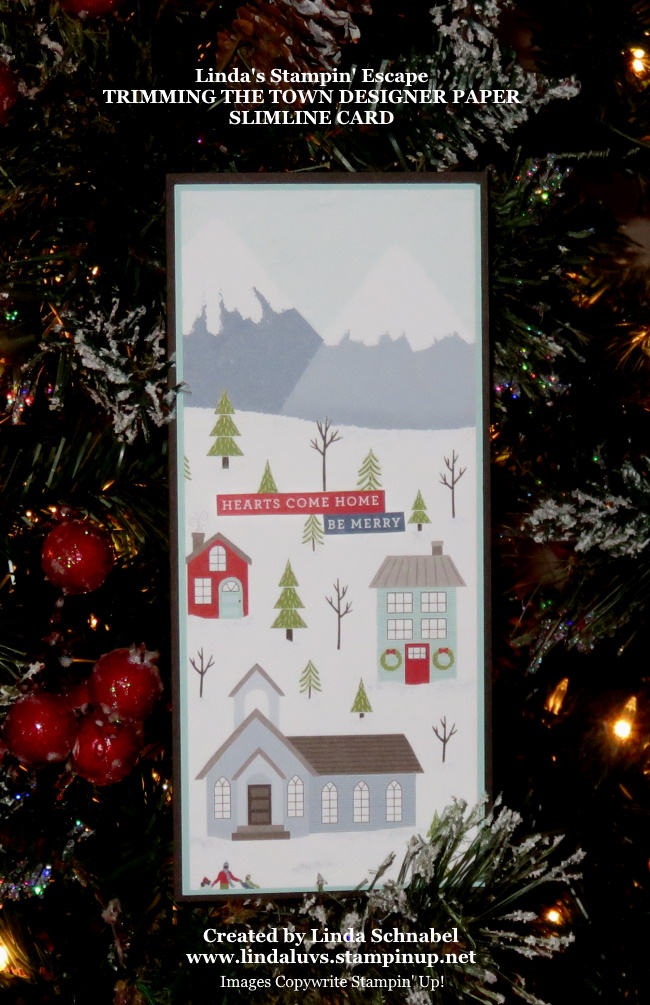
Both of the items I will be sharing today are on the retirement list, let’s begin with the Slimline card … I’ve done these years ago (before someone gave them a fancy name … lol) I think they are fun because they are different from our normal size yet they fit nicely into a business size envelope!
Ok … a little hard to see but there is a Early Espresso card base … 8″ width x 8-1/2″length …. scored at 4′ on the width length and fold in half. My Pool Party mat measures 3-3/4″ x 8-1/4″ and then my Trimming the Town designer paper measures 3-1/2″ by 8″ …. I had a hard time cutting this designer paper pattern because it just looked so cool, but this layout gave me large pieces to work with and show how beautiful this really is.
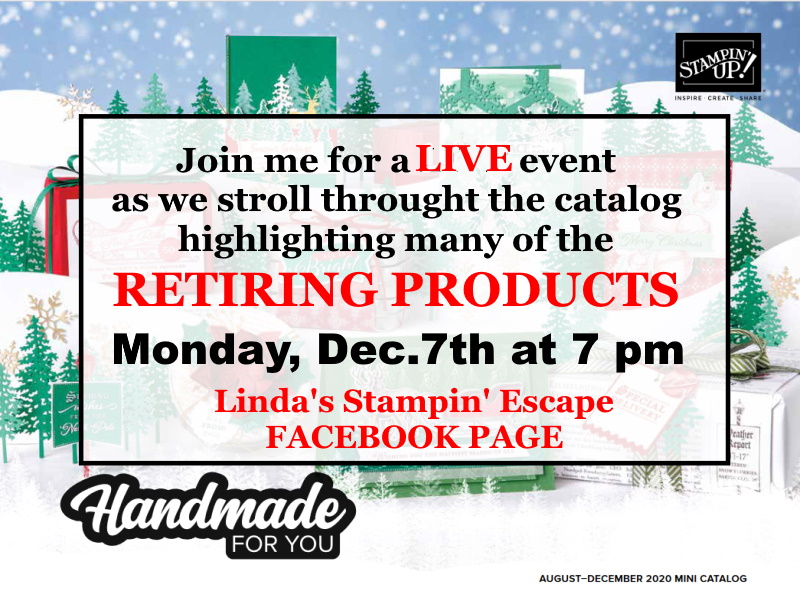
That cute greeting is actually cut from another pattern found in the Trimming the Town Designer paper! Join me for a LIVE event where I go through the Holiday catalog highlighting what is going to retire and many, many samples!!
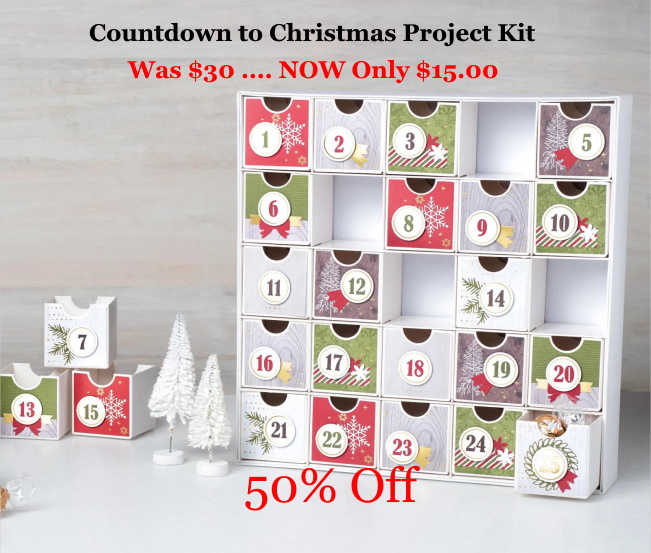
My second project is the Christmas Countdown Kit … this cute Advent type calendar is perfect for hiding those sweet treats as you count down the days to Christmas. Here is what the kit offers ….
I teamed up the kits with the Trimming the Town Designer Series paper. I am using the pattern that I used on my Slimline Card to highlight that pretty paper. I used one of the pieces from the kit as a template …
Thank you for joining me today, and I hope you will join me tomorrow at 7pm on my Linda’s Stampin’ Escape Facebook page for a walk through the catalog as I highlight the retiring items.
Have an amazing day ~
TODAY’S STAMPIN’ SUPPLY LIST … If you liked the products used in today’s projects, I have links for you below. Just click on the item you would like more information on, or to begin your shopping. It will take you directly to my website. Thank you ♥