Winter Meadows Designer Series Paper: Create 6 Quick / Beautiful All Occasion cards.

Hello Stampin’ Friends,

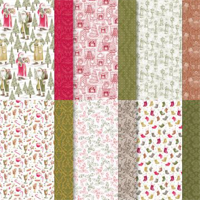
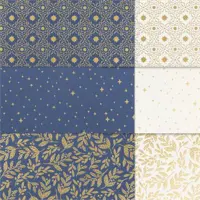
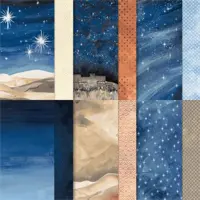
Winter brings with it a magical aura, and there’s no better way to capture its essence than with the Winter Meadows Designer Series Paper from Stampin’ Up! This collection isn’t just a celebration of the season; it’s a canvas of versatility waiting to unfold.

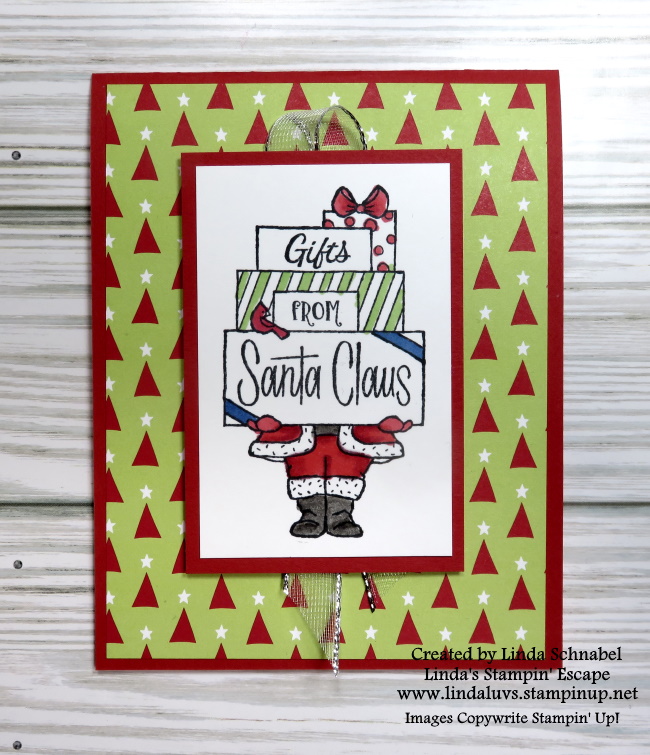
Today I’m sharing my video replay of my Facebook LIVE where I create 6 quick & simple cards from one beautiful sheet of the designer paper. Grab a cup of coffee, sit back and relax as I go through how I created these 6 cards.

One of the most striking features of the Winter Meadows Designer Series Paper is its adaptability. The gorgeous grey tone design serves as a perfect backdrop for a myriad of occasions. Its neutral yet captivating pattern allows for a versatile approach in crafting, making it a staple for a variety of celebrations.

Let’s delve into the magic of quick and effortless card-making! Here are six simple yet stunning card ideas utilizing the Winter Meadows Designer Series Paper, promising to spark creativity …

  1. Classic Christmas Charm: Layer the grey tone pretty paper with a Pretty Peacock, add a simple ‘Let it Snow’ sentiment for a simple and pretty holiday card.

2. Winter Wonderland: And a sentiment of ‘Make the Season Sparkle’, pair it with Lost Lagoon cardstock, add a touch of Wink of Stella and adorn with Iridescent Rhinestone embellishments for a serene winter scene.

3. Father’s Day Sophistication: I cut the designer paper to 3 3/4″ x 5″, this card I used the Misty Moonlight to mat it, it’s earthy tone and wrap one corner with Bakers Twine for some texture. You’ll stamp with a ‘Happy Father’s Day’ sentiment to create a refined touch.

4. Birthday Bliss: Next I used the Blueberry Bliss as a backdrop for a colorful birthday card, surrounded by coordinating bakers twine and embellishments. The greeting was created from the Curved Occasions Bundle

5. Holiday Elegance: Trim the designer paper as the others, layer it on the soft Moody Mauve cardstock, add some Wink of Stella and stamp a ‘Happy Holidays’ sentiment. Time to embellish it with Festive Pearls.

6. Winter Season Beauty: Create a layered look with your designer paper with the Snowflake Magic on the Smoky Slate card base, adding a versatile sentiment that suits any occasion. Plus we’re adding a few Festive Pearls to complete our look.

The Winter Meadows Designer Series Paper isn’t just a seasonal delight; it’s a crafting essential that transcends boundaries. Its adaptability and charm make it an invaluable addition to any crafter’s arsenal. With just a few creative tweaks, it effortlessly transitions from Christmas to birthdays to Father’s Day and beyond, promising endless possibilities for beautiful creations.

Thank you for hanging out with me today. If you’ve enjoyed the video / cards, then please press the LIKE button or leave me a comment. Enjoy your day.

Celebrating the Season: Oh Holy Night Card

Hello Stampin’ Friends ~

As the holiday season unfolds, there’s a unique joy in expressing the magic and significance of this time through heartfelt greetings. In the realm of creative card-making, Stampin’ Up!’s Oh Holy Night Product Suite stands out as a testament to the beauty and reverence of the season, and today’s card is a stunning reflection of the season.

I began with the idea of a fun fold; the Book Binder fold which lends itself beautifully with this suite. The focal point of my card is the Die-cut manger scene from the Gold Foil which also mats the Christmas theme. The sentiment “Oh Holy Night” was heat-embossed in Gold and forms the soul of the card. It’s more than just a design; it’s a visual hymn, speaking volumes about the cherished moments of this special time.

The Oh Holy Night Designer Series Paper and Gold Foil complement the scene flawlessly, adding depth and texture to the overall composition. The combination of these elements creates a visual symphony. I believe when we make cards for our loved ones, it’s much more than stamps, ink and paper … it’s the love we feel for our recipients and the holiday we celebrate.

The magic doesn’t stop there. The card is further elevated with thoughtful touches like the adhesive-backed star trinkets, which sparkle like celestial bodies against the night sky. These stars serve as gentle reminders of hope and wonder, guiding us through the festive season, and carries over into the inside of my card.

Let’s not forget the Night of Navy & Gold Glitter Ribbon, gracefully woven around the card. Its deep hues and shimmering accents enhance the visual appeal and completes the card like a bow on a present. This this card speaks a universal language—one of hope, love, and the spirit of the season.

Thank you for joining me today. I will be back with you tomorrow sharing yet another Fun Fold and card from the beautiful Oh Holy Night Suite.

Effortless Coloring: Stampin’ Blends and the Festive & Fun Stamp Set

Hello Stampin’ Friends,

Are you looking to add a touch of whimsy and color to your holiday cardmaking? Look no further than the delightful Festive & Fun stamp set, coupled with the versatility of Stampin’ Blends markers! Specifically designed for ease and creativity, these tools can transform a our cute giraffe stamp into a vibrant, eye-catching focal point.

One of the standout features of the Festive & Fun stamp set is its charming giraffe illustration. This adorable character becomes a joy to color using Stampin’ Blends. These alcohol-based markers offer smooth and seamless blending, allowing both novice and experienced crafters to achieve professional-looking results effortlessly.

The secret to achieving stunning color depth lies in the layering and blending capabilities of Stampin’ Blends. Begin by selecting your desired shades for the giraffe’s body: Lemon Lolly & Medium Naturals. I used the Real Red, Shaded Spruce and Balmy Blue to color the rest. With the fine and brush tips of the markers, apply the lighter shade as the base layer and gradually add depth by layering the darker shade. I go over again once I lay down the darker color which really blends them and creates a visually appealing finish.

I used the Nested Essentials and Stylish Shapes Dies to highlight my images that are layered upon our festive Beary Christmas Designer Series Paper. I have another card to share … the Designer paper is retired however I wanted to share this fun layout.

Unleash your creativity and bring this adorable giraffe to life with the vivid hues of Stampin’ Blends markers. Even a subtle change in designer papers and layer can add to the festivities! Don’t forget that Wink of Stella on your Star and ornaments!!

Time to grab your Festive & Fun stamp set, Stampin’ Blends markers, and Nested Essentials Dies, and embark on a colorful crafting escapade today!

Thanks for stopping by and Happy crafting!

Celebrating Creativity: The Gift of Giving Stamp Set 🎁

Hello Stampin’ Friends,

Welcome back, fellow crafters! Today, I am thrilled to dive into the delightful world of Stampin’ Blends and the charming rhino from the Gift of Giving Stamp Set. Remember that feeling when creativity meets functionality? Well, I’ve transformed this adorable rhino into an incredible gift card holder!

The versatility of this stamp set is truly remarkable. With a touch of artistic flair and the magic of coloring techniques using Stampin’ Blends, the rhino comes to life in vivid, eye-catching hues. The seamless blending and shading capabilities of Stampin’ Blends add depth and character to every stroke, making the finished product an absolute delight to behold.

What sets this stamp apart is its versatility. Beyond the artistry, it transforms into a functional delight—a pocket, ingeniously crafted to hold the most beloved of holiday presents: gift cards. With a touch of creativity and a dash of festive cheer, this stamp becomes the vessel for heartfelt gifting, embodying the true spirit of giving.

Let’s celebrate the joy of giving and the magic of creativity intertwined in this wonderful crafting journey. Stay tuned for more creative inspirations and let’s continue to spread the joy of crafting together!

Thank you for joining me today. *The designer paper used on this card has SOLD OUT from our discontinuing products. I have listed the links to these products & substitutes so you can begin sharing the joy with this adorable Gift Card.

Unwrapping Holiday Magic: Santa’s Cheer in a Card

Hello Stampin’ Friends,

Today I’m highlighting the ‘Gift of Giving Stamp Set’ this gem encapsulates the essence of the season—Santa himself, adorned in vibrant hues courtesy of our Stampin’ Blends. The Stampin’ Blends make coloring a breeze! Just goes to show, you do not have to color every nook and cranny to make your card attractive.

The centerpiece of this set, Santa’s image, is more than just a stamp; it’s an embodiment of joy and tradition. Colored meticulously with Stampin’ Blends, this jolly figure pops with vivid reds, rich greens, and the warmest of whites, reminiscent of the classic imagery adored by all ages during this magical time.

What sets this stamp apart is its versatility. Beyond the artistry, it transforms into a functional delight—a pocket, ingeniously crafted to hold the most beloved of holiday presents: gift cards. With a touch of creativity and a dash of festive cheer, this stamp becomes the vessel for heartfelt gifting, embodying the true spirit of giving.

So today and throughout the season, let the magic of Santa’s image remind us of the true essence of this wonderful season—love, joy, and the gift of giving.

Thank you for joining me today. *The designer paper used on this card has SOLD OUT from our discontinuing products. I have listed the links to these products & substitutes so you can begin sharing the joy with this adorable Gift Card.

Twelve Weeks of Christmas: Week 8 / Shutter Card Technique

Hello Stampin’ Friends ~

Today I will be sharing the LIVE presentation I did for my Twelve Weeks of Christmas. This is Week 8 and I’m sharing how to create the Shutter Card Technique … it is fun and easy! You won’t think that looking at the card, but when I show you how quickly it goes together … you’ll be heading into your craft room to get your stampin’ groove on!!

Check out the card first, and then the video ….

The first two cards are created with the Winter Meadow Designer Series paper …

Just to recap … I used the second (smaller) square die to create the “anchor” to my Shutter Card, then you can layer it as desired. Don’t forget that Wink of Stella on the berries of our Moody Mauve card because it really adds that touch of Christmas glimmer to your card.

What I did not realize is that the Snowflake Foil Specialty paper has already SOLD OUT from the Retiring List, but use this quick and easy technique I shared with “any” designer paper that has a pattern the can be used in any direction.

The two pattern option is really fun and gives your card a wonderful twist. I hope you try out this technique, it really is much simpler than it looks, and I think my demonstration showed that to you.

Thank you so much for stopping by my blog today. I appreciate that.

Have a wonderful day !

So Very Merry & Coloring Techniques

Hello Stampin’ Friends,

We continue to party over on my FACEBOOK page and I extend an invitation to you to join me in Santa’s Workshop for a spectacular Holiday Stamping Extravaganza! We’ve kicked off our LIVE Demonstration with the So Very Merry Stamp Set in the OnLine Exclusives …. This beautiful set was demonstrated using different coloring techniques.

Our Santa card features the Christmas Tidings embossing folder. Santa is done in the water-coloring technique using or classic ink and Water Painter. We embossed the image in Silver with helps to contain the color when using this technique. I think this watercolor technique lends itself well to the stained glass look of the stamp set.

The second card is the stunning angel and was colored using the Stampin’ Blends and was paired with the “Joyful” Designer paper and Gold Foil …

I showcased several coloring techniques including our Watercolor Pencils … it was a fun stamp session that kicked off several more. The party continues throughout the day tomorrow with a LIVE demonstration at 6:30pm.

Join us virtually at Linda’s Stampin’ Escape Facebook page [CLICK HERE] for live-streamed demonstrations and virtual participation in games and prize opportunities.

Get ready to immerse yourself in a day of creativity, inspiration, and holiday cheer at the Holiday Stamping Extravaganza. Let’s make this season extra special by crafting heartfelt cards, exploring new techniques, and sharing the joy of creativity together.

Hope to see you on my Facebook page!

Here is the list of basic supplies used for these projects …

Holiday Stamping Extravaganza

Hello Stampin’ Friends,

The holiday season is upon us, and what better way to celebrate than with a joyful, creative gathering? I’m thrilled to extend a heartfelt invitation to all fellow crafting enthusiasts to join me in Santa’s Workshop for a spectacular Holiday Stamping Extravaganza!

Prepare for a couple days filled with delightful LIVE demonstrations, engaging games, exciting prizes, exclusive specials, stunning card samples, unique gift ideas, and so much more. Whether you’re a seasoned stamper or just starting on your creative journey, there’s something for everyone at this extravaganza.

Join us virtually at Linda’s Stampin’ Escape Facebook page [CLICK HERE] for live-streamed demonstrations and virtual participation in games and prize opportunities.

Get ready to immerse yourself in a day of creativity, inspiration, and holiday cheer at the Holiday Stamping Extravaganza. Let’s make this season extra special by crafting heartfelt cards, exploring new techniques, and sharing the joy of creativity together.

Hope to see you on my Facebook page!

Dutch Door Christmas Card

Good Morning Stampin’ Friends,

I hope you enjoyed a wonderful Thanksgiving with friends / family. I enjoyed a nice afternoon with family … two of my older grandsons popping in to say hi was a real treat, and then a family friend also joined up.

If you enjoyed my last post with the October “Home for the Holidays” Paper Pumpkin kit, I have one more Alternative Project I just had to share! That is just a festive wonderland of creativity, filled with elements perfect for spreading seasonal cheer. Crafting with these kits opens up endless possibilities, allowing us to think beyond the prescribed instructions and venture into unique projects.

The one particularly exciting alternative project that emerged from my head involved a playful twist on traditional card designs. I took the card front and gave it a little snip—right down the middle— lol. It creates a gateway to fun! I cut my card at 3 1/4″ to the center fold.

By cutting the card front in half, a whole new world of creative opportunities opened up…. I glued the top half of the card “shut”!! I used one of the “house layers” and attached it to the lower half of the card front …. I call this my Dutch Door Card!!

With a touch of glitter glue included in the kit, the divided front turned into an eye-catching feature. The houses became focal points that bridged the gap between the split sections, creating an element of surprise when the card was opened or displayed.

I also used the strips between the glitter banners to hide the raw edge of the top flap on the inside and behind my greeting to highlight it … bling never hurts!! I also added the Festive Pearls to add a pop of color at the bottom of the card.

Crafting is an adventure, and these kits offer the chance to put your imaginative twist on things. The Home for the Holidays Pumpkin kit was a treasure trove of elements waiting to be reimagined, allowing us to create something uniquely ours.

Each monthly kit is another adventure to experience and explore your creativity. That’s one reason I think it’s the perfect gift … whether their new to stamping and crafting or have years of experience.

Thank you for spending your time with me, and checking out my latest creation. Have a wonderful day.

Purchase a Paper Pumpkin Subscription and receive a FREE Tote bag from me ....

Twelve Weeks of Christmas: Week 7 / Gifting Creativity

Hello Stampin’ Friends,

Looking for a unique gift that sparks creativity and brings loved ones together? Enter Paper Pumpkin – a delightful subscription box packed with everything needed to craft stunning projects. Whether you’re a seasoned crafter or a complete novice, Paper Pumpkin invites you to explore the joy of creating beautiful handmade crafts while making cherished memories with family and friends.

Let me share the fun of Paper Pumpkin with our October Christmas Kit ….

But why is Paper Pumpkin the perfect gift? Here are a few reasons:

  1. Shared Experience: Gifting a Paper Pumpkin subscription isn’t just about providing a crafting kit; it’s about sharing an experience. Imagine the joy of gathering around a table with family and friends, eagerly unboxing the latest kit, and embarking on a creative adventure together.
  2. Accessible Creativity: Not everyone feels confident in their crafting abilities, but Paper Pumpkin is designed for all skill levels. It’s a fantastic way to introduce loved ones to the world of crafting without overwhelming them. The guided instructions make it accessible and enjoyable for everyone involved.
  3. Monthly Surprise: The anticipation of receiving a new kit each month adds an element of excitement and surprise. It’s like unwrapping a present filled with creative possibilities every time the mailbox clinks!

Let’s take a closer look at the Alternative Projects. My first was a simple take on the card by just removing one of the house stacks ….

The second card I took the houses from the landscape card and paired it with a card base that was colored with a Blending Brush and then spritzed with Wink of Stella….

The third card used the cardbase from the houses of our second card and added the Beary Cute Bears! The greeting comes from the “So Very Merry” from the Online Exclusive line. I inked “each” word separately and stamped it. I also added a scarf and hat to my bear “after” the Facebook LIVE ended…. I also added some snow from the scrap glitter paper around the banners in the kit!!

So, how can you gift this wonderful experience? Consider presenting your loved ones with a Paper Pumpkin subscription. It’s a gift that keeps on giving, delivering monthly doses of creativity right to their doorstep. AND … to sweeten the deal, I have a special offer: when you purchase a Paper Pumpkin subscription for yourself or as a gift, you’ll receive a complimentary Paper Pumpkin Bag to enjoy yourself! It’s a gift to them, from you, and a little something for you too.

Join the Paper Pumpkin family today and spread the joy of creativity among your loved ones. Whether it’s a cozy family crafting session or a get-together with friends, Paper Pumpkin brings people together through the magic of creativity.

Ready to gift the joy of crafting? CLICK HERE to get started!

Thanks for hanging out with me today! Let me know if you have any questions about Paper Pumpkin. I have some of the subscription links for you below as well.

A Beary Cute Christmas Together

Hello Stampin’ Friends ~

Today I have a “Beary Cute” card for you from a fellow design artist from the Tutorial Group I am part of. You will get the measurement and instructions to recreate this card yourself. If you don’t have these supplies yet, I will have everything listed at the end of the tutorial. Enjoy ….

Measurements:

  • Real Red : 5 ½ x 8 ½
  • Basic White: 4” x 5 ¼”

Instructions:

  • Score and fold the Real Red cardstock at 4 ¼.
  • Stamp the bears using Memento Black ink.
  • Use the Versamark ink pad to stamp the snowflakes randomly on the Basic White cardstock.
  • Sprinkle White Embossing Powder on cardstock and tap off excess.
  • Heat until totally melted using the Heat Tool. Adhere the layer to the card.
  • Stamp the greeting on Real Red cardstock using Memento black ink. Cut each line using a Paper Trimmer. Adhere the greeting using Dimensionals.
  • Stamp the scarf and hat on a piece of Basic White cardstock. Cut them out using Paper Snips. Add them to the card using Dimensionals.

So cute and so simple to make!! I hope you enjoyed today’s card share and felt inspired to pull out your stamps and start creating.

Thank you for stopping by today ~

Simply Sunday: Christmas Everywhere Cards

Hello Stampin’ Friends,

The holiday season is fast approaching, and what better way to spread the Christmas cheer than with heartfelt greetings sent to your loved ones? If you’re looking for a creative and meaningful way to send warm wishes, our “Christmas Everywhere” card kit is the perfect solution to holiday cardmaking.

One of the best things about our “Share the Joy of Christmas” card kit is that it comes with everything you need to create nine charming Christmas cards. No need to scramble for supplies or spend hours browsing for the perfect decorations; we’ve got you covered.

This kit includes: 

  • Enough supplies to create 9 cards—3 each of 3 designs
  • 9 coordinating envelopes
  • Christmas Everywhere photopolymer stamp set
  • One Lost Lagoon Ink Spot
  • Printed card bases, printed die-cut labels and images with red glitter, adhesive, and a clear block
  • Finished card size: 5-1/2″ x 4-1/4″ (14 x 10.8 cm)
  • Coordinating colors: Granny Apple Green, Lost Lagoon, Pecan Pie, Pretty Peacock, Real Red

This holiday season, let our card kit be your companion in sending warm Christmas wishes to friends and family across the globe. Make this Christmas truly special by sharing the beauty of trees from around the world and spreading the joy of the season.

With three unique card designs and three copies of each, you can send warm Christmas wishes to a variety of recipients. Whether it’s family, friends, coworkers, or distant relatives, these cards are the perfect way to let them know you’re thinking of them during this special season.

The “Share the Joy of Christmas” card kit is more than just a creative project; it’s a meaningful way to send love and warmth to the people who matter most to you. Celebrate the diversity of our planet and the magic of the holiday season with these beautifully crafted cards. Order your kit today and start spreading the joy of Christmas, one card at a time!

Thank you for sharing a part of your Sunday with me.

Have a beautiful day ~

Simple Gift Idea: Hot Chocolate Holder

Hello Stampin’ Friends,

Looking for a thoughtful yet simple gift idea that’s sure to warm hearts this holiday season? Look no further than a delightful Hot Chocolate Packet /Holder! Whether it’s for teachers, colleagues, or anyone who enjoys cozy winter treats, this little package is a surefire way to spread some cheer. Inside, you’ll find the makings of a delicious cup of hot cocoa along with a special touch – a tube of crushed candy canes to infuse that beloved peppermint flavor. Let’s dive into how you can create this delightful and festive gift!

Measurements:

  • Cardstock: Real Read 8 ½” x  5 ½”
  • Cardstock 2:  Basic White: 4” x 4”
  • Merry Bold & Bright Designer Paper: 5 1/8” x 4”
  • Black & White Gingham Ribbon: 12”

Instructions:

  • Score 8 ½” side of cardstock at 4 ¼”.  Fold and Burnish.
  • Card base: Make a tick mark at 2-3/4″ along the 5-1/2″ side and cut from the tick mark to where the center score line meets the top edge
  • Designer Paper: Make a tick mark at 2-5/8″ along the 5-1/8″ side and, with the tick mark along the right side, cut from the tick mark to the opposite left corner
  • Attach the piece of designer paper to the front with diagonal cut, leaving a border around the edges.
  • Take your Tear & Tape adhesive and run it along the bottom edge of that was not cut. This creates the pocket to hold your Hot Cocoa Mix.
  • Punch your first hole about 5/8” from the edge and about 1/2″ from the diagonal.  Doesn’t have to be perfect.  Punch second hole about ½” lower. This holds our treat tube.
  • Use your Real Red Stampin’ Blend to color your Black & White Gingham Ribbon. Let Dry.
  • Feed ribbon through bottom hole from the front side – pulling it through to the front side, feed it through the top hole.  This creates a loop that will hold your treat tube.
  • Tuck your Treat Tube into loop and pull firmly.  Tie in a bow.
  • Stamp the “Cup of Cheer” image in Memento Ink onto White cardstock. Let Dry.
  • Use small Blending Brush to brush on Balmy Blue ink.
  • Using Stampin’ Blend; color as desired.  I used the three shades of Natural Tones for my cookie.
  • Die cut image with Largest Circle from the Stylish Shapes Dies
  • Attach with Stampin’ Dimensionals. 

NOTE: I used Crushed Peppermint (Candy Canes) and Nestle Hot Chocolate packets that I found at Walmart.  Treat Tubes can be found on Amazon under “Treat Tubes for Crafting / Candies”.  

I just love how this turned out, and so easy to make! You will definitely spread cheer when handy out these tasty treat. If peppermint isn’t your thing, I found Mini-Marshmallows and Salted Caramel treats as well.

I’d love to know if this inspired you to create some of these treat packets for those on your Christmas list!! They make great stocking stuffers too!!

Thank you for joining me today.

The Enchanting world of the Oh Holy Night Product Suite

Hello Stampin’ Friends,

Welcome to an exciting showcase of holiday magic! Today, I’m thrilled to share a captivating video replay from my Facebook journey, unveiling the enchanting world of the Oh Holy Night product suite. As we dive into the festive season, join me in exploring the three cards that serve as luminous beacons, each illuminating a unique facet of this delightful collection. Let the festivities begin!

Glory to God Card …

Measurements for Glory to God:

Night of Navy Base: 8 ½” x 5 ½” / Score & Fold at 4 ¼”

Vanilla (Front/Inside) Cut 2 – 5 ¼” x 4”

Gold: 3” x 3”

Designer Paper: 2 ¾” x 2 ¾”

Ribbon as needed / Stampin’ Dimensionals

Joy and Peace Card …

Here is another view so you can see the dimension!!

Measurements for Joy & Peace Card

White Base: 8 ½” x 5 ½” / Score & Fold at 4 ¼” / Plus enough Whisper to cut out 4 point star and stamp greeting

Pretty Peacock Mat:  5 ¼” x 4”

Hologram Trio Specialty Paper: 5” x 3 24” plus enough to cut a star out

The Lord is my Shepard Card …

Measurements for Joy & Peace Card

Night of Navy Card Base: 9 1/4” x 8″ / Score & Fold at 4″

Basic White (Front & Inside) Cut 2 – 9″ x 3 3/4″ pieces, plus enough Basic White to cut out 4 point star and stamp greeting

Designer Paper: 8 3/4″ x 3 1/2″

Black scrap to cut out camel and king

As we wrap up this festive journey through the Oh Holy Night product suite, I hope the video highlighted the three radiant cards and have sparked a sense of holiday wonder in your hearts. As you explore the possibilities within this enchanting collection, may you find the perfect expressions to share with your loved ones or add a touch of holiday spirit to your surroundings.

Thanks for joining me today ~

🌟🎄 #OhHolyNightMagic #HolidayJoy #FestiveRevelry

Celebrate the Season with the Joy of Christmas Suite

Hello Stampin’ Friends ~

Today we will be celebrating the upcoming season with the Joy of Christmas Suite. Many of you are beginning your holiday cardmaking, and what better way to do so than with beautiful handmade Christmas cards? The Joy of Christmas Suite from Stampin’ Up! offers everything you need to create stunning holiday greetings that will warm the hearts of your loved ones.

In this blog post, we’ll focus on two exquisite components of this suite: the Joy of Noel dies and the Joyful 12 x 12 Specialty Designer Paper. I’ll also demonstrate how to make a simple yet elegant Christmas card, embellished with Gold Festive Pearls, using Cherry Cobbler cardstock and Gold Foil. Let’s dive into the world of festive creativity!

The Joy of Noel dies are the perfect addition to your crafting arsenal this holiday season. These intricate dies allow you to effortlessly create stunning holiday-themed designs that will leave a lasting impression. One of the standout features of these dies is the word “Noel,” which adds a touch of elegance to any project.

The Joyful 12 x 12 Specialty Designer Paper is a delightful collection of holiday-themed patterns and designs. With its rich color palette and intricate patterns, this paper is ideal for creating beautiful cards and projects. It includes metallic accents that add a touch of opulence to your creations, making it the perfect choice for your Christmas-themed projects.

  • Cherry Cobbler cardstock (8.5″ x 5.5″, folded in half to create a 4.25″ x 5.5″ card base)
  • Gold Foil (4″ x 5.25″)
  • Joyful 12 x 12 Specialty Designer Paper (3.75″ x 5″)

Using the Joy of Noel dies and a die-cutting machine, cut out the word “Noel” from the Gold Foil. This is a great paper saving technique. Now you can attach the Gold Foil to your Cherry Cobbler Cardbase, and the Joyful Designer paper over that. Using Dimensionals, attach your “NOEL” to the cardfront.

Add Gold Festive Pearls to the card to enhance its elegance. You can place them strategically around the “Noel” die-cut or as you prefer.

With the Joy of Noel dies, Joyful 12 x 12 Specialty Designer Paper, and other coordinating products, you can create beautiful, heartfelt Christmas cards that will bring joy to your loved ones. This simple yet elegant card, adorned with Gold Festive Pearls, is just a glimpse of the endless possibilities this suite offers.

So, gather your supplies, let your creativity shine, and share the magic of Christmas with handmade cards that truly convey the spirit of the season.

Happy crafting ~