Welcome back, crafters! Today, we’re diving into some creative card-making using the Let’s Go Fishing Designer Paper. While this specific paper may be sold out, fret not! We’ll explore two card designs that you can recreate using any pretty paper you have on hand.
Our first card features a simple layout paired with the mesmerizing Fractured Glass technique. This technique adds a unique dimension to your cards and is surprisingly easy to create.
You can view “HOW TO” make this card by “CLICKING HERE” and viewing my YouTube video sharing this technique.
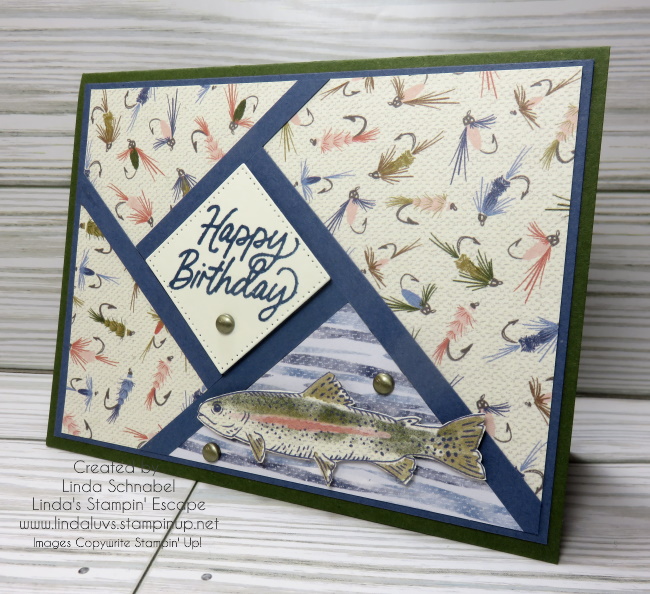
For my second card, we’re going to elevate the design by incorporating a cut piece of designer paper into one of the fractured glass sections. This adds visual interest and complexity to the card while still maintaining the playful theme of Let’s Go Fishing.
This card also includes a bit more layering with a Misty Moonlight mat and Mossy Meadow card base. By incorporating a cut piece of designer paper into the fractured glass design, you’ve taken your card to the next level, creating a visually captivating masterpiece that is sure to make a splash!
While the Let’s Go Fishing Designer Paper may be currently sold out, the creative possibilities with any pretty paper are endless. Whether you’re experimenting with the Fractured Glass technique or adding designer paper accents to your cards, let your imagination run wild! I hope these Two for Tuesday card designs have inspired you to dust off your paper stash and create something beautiful.
Thanks for joining me & Happy crafting!
ATTENTION: If you haven’t already heard, the Retirement List is out, and it’s time to act fast! This list features retiring items from the Annual and Spring Mini Catalogs, including many beloved designer papers, that are being reduced in price before they’re gone for good. Just like the Let’s Go Fishing Designer Paper, these items won’t stick around forever, so don’t miss out on the opportunity to stock up on your favorites.
As the sun casts its golden hues upon the tranquil waters and a gentle breeze whispers through the trees, there’s no denying the allure of a perfect day for fishing. With the weather beckoning us outdoors, it’s time to grab our fishing poles, pack a picnic, and immerse ourselves in the serenity of nature. And what better way to capture the essence of this blissful pastime than with the Gone Fishing Bundle and Let’s Go Fishing Designer Series Paper from Stampin’ Up!
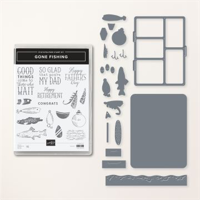
The Gone Fishing Bundle brings together everything you need to create delightful fishing-themed projects. From charming images of fishing rods and tackle boxes to whimsical sentiments celebrating the joy of the catch, this bundle is a must-have for any fishing enthusiast or lover of outdoor adventures.
But the real catch of the day lies in the Let’s Go Fishing Designer Series Paper. With its vibrant colors, playful patterns, and delightful illustrations of fishing scenes, this paper is sure to reel you in hook, line, and sinker. Whether you’re scrapbooking memories of a fishing trip or creating handmade cards for fellow anglers, this paper adds a touch of whimsy and charm to any project.
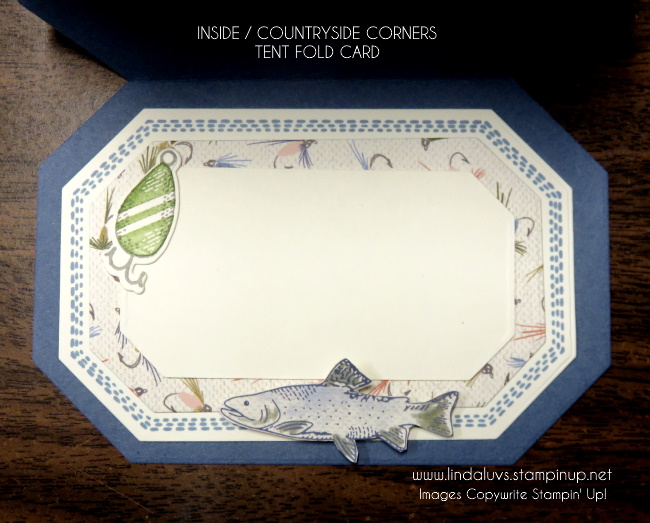
Got a close up here of the inside as well …
But don’t wait too long to cast your line for the Let’s Go Fishing Designer Series Paper. Like the fleeting hours of a perfect day on the water, this paper won’t be around forever. With its retirement on the horizon, now is the time to stock up on this beloved paper before it swims away for good.
So why not seize the day and embark on a crafting adventure inspired by the beauty of the great outdoors? With the Gone Fishing Bundle, Let’s Go Fishing Designer Series Paper, and a touch of creativity, you can capture the magic of fishing and create lasting memories to treasure for years to come.
Thank you for taking time out of your day to stop by and pay a visit.
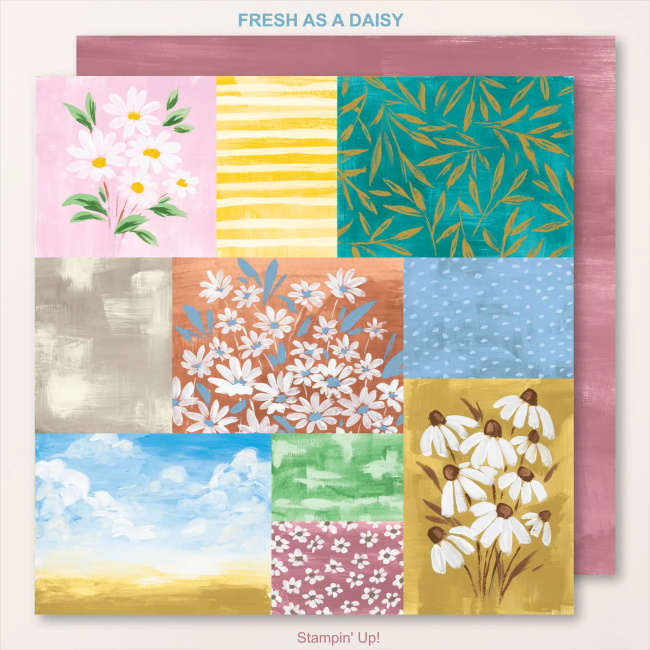
Welcome back to day 2 of my “Fresh as a Daisy” blog series, where we can celebrate the sheer beauty and versatility of Stampin’ Up!’s retiring Designer Series Paper. Today, we’re diving into the realm of quick and easy cardmaking, I’ll be showcasing three delightful designs that will have you reaching for your crafting supplies in no time. And here’s the cherry on top— this Designer Series Paper is now discounted as it retires from the Stampin’ Up! collection.
Join me as we explore how effortlessly you can craft stunning cards with this charming paper, be sure you snag it before it’s gone for good!
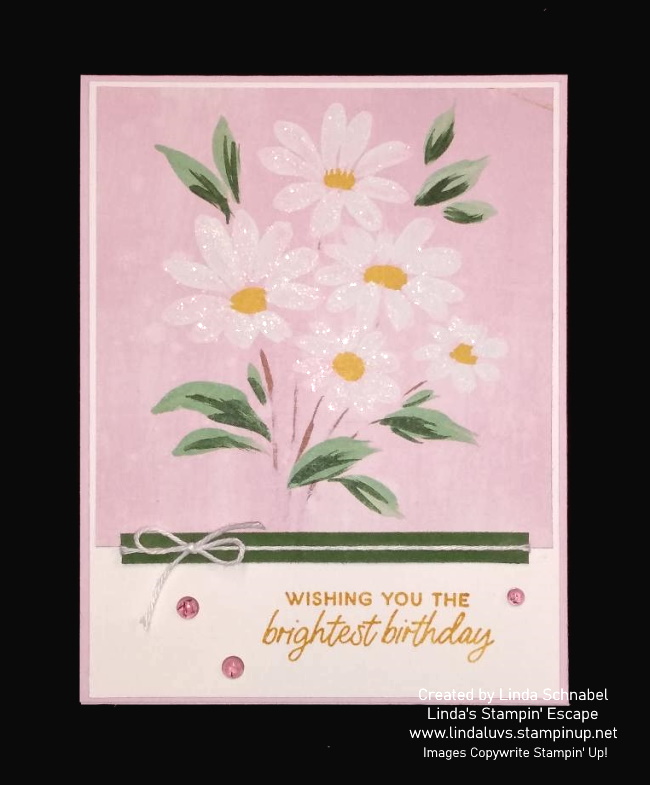
Let me start with the new Bubble Bath (pink) …
The daisies cut to 4″ x 4″ from the sheet and was adhered to a piece of 4-1/8″ x 5-3/8″ Basic White. Our base is 11″ x 4-1/4″ then scored and folded at 5-1/2″. I used a piece of Garden Green scrap for a pop of color and tied a pretty little bow from White Bakers twine. I then stamped my greeting in Crushed Curry to pull that color from the flowers, and added 3 Tinsel Gems (4 pack) that are “Berry Burst” color but looked great on my card. I finished it off with some Wink of Stella on the White daisy petals.
My second card highlights the new Wild Wheat ….
The flower piece cuts to 3-3/4″ x 5-1/4″ and has an Early Espresso mat that measures 3-7/8″ x 5-3/8″ … I then added a strip of Wild Wheat to each side so it stretched out to 4-1/8″ inch. The card front was then layered onto the Basic White base that measures 5-1/2″ x 8-1/2″ then scored and folded at 4-1/4″. Using a piece of scrap, I stamped my greeting in Early Espresso and snipped the ends off at an angle to create a different look.
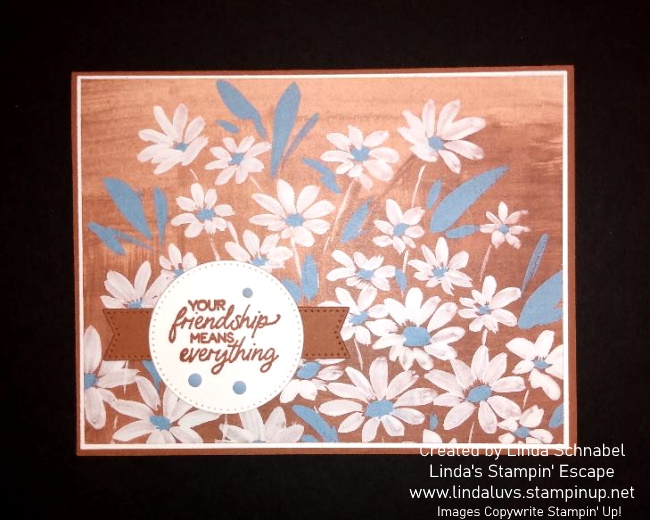
My third and last card for the day highlights the NEW Copper Clay and Boho Blue…
The daisies cut from our designer paper measure 4″ x 5-1/4″ and matted with Basic White measuring 4-1/8″ x 5-3/8″ … this is secured to the Copper Clay base that measures 5-1/2″ x 8-1/2″ then scored and folded at 4-1/4″. I used the Stylish Shapes to cut out my circle for the greeting (stamped in Copper Clay) and the Copper Clay cardstock to die cut the banner. I embellised with the Adhesive Backed Solid Gems in Boho Blue.
I hope you enjoyed and felt inspired by the beautiful “Fresh As A Daisy” Designer Paper … and this is only from one sheet! Thank you for taking time out of your Sunday to visit my blog.
As we bid farewell to our “Fresh as a Daisy” series, don’t miss out on the opportunity to grab this discounted gem before it disappears for good.
Step into a world of creativity and charm with the delightful “Fresh as a Daisy” Designer Series Paper by Stampin’ Up! If you’ve been seeking the perfect touch to elevate your cardmaking, look no further than this collection. With its vibrant colors, intricate designs, and unmatched quality, crafting stunning cards becomes as effortless as a gentle breeze. However, don’t wait too long to indulge in this paper perfection—it’s currently gracing the retiring products list, making now the ideal time to stock up and let your creativity flourish.
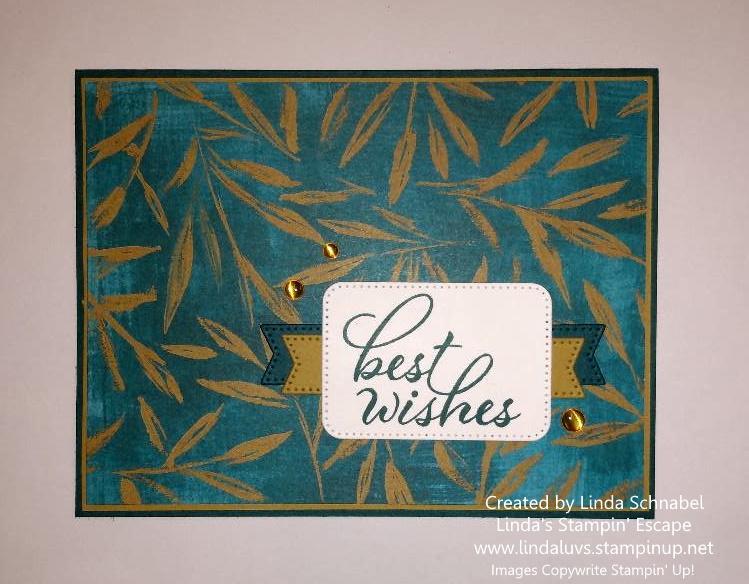
My first card today highlights the “returning” Pretty Peacock and the New Wild Wheat. I am also highlighting the NEW Layering Leaves stamp set (I LOVE this set!!) on both cards today, yesterday I used the greetings from the Cheerful Daisy stamp set.
The designer paper piece cuts to 4″ x 5-1/4″ and has a Wild Wheat mat that measures 4-1/8″ x 5-3/8″ … The card front was then layered onto the returning color; Pretty Peacock that measures 5-1/2″ x 8-1/2″ then scored and folded at 4-1/4″.
Using a piece of scrap, I stamped my greeting in Pretty Peacock and die cut it using the NEW Nested Essentials Dies, then I used the small banner die from the same set and cut two Wild Wheat and two Pretty Peacock banners to create the layering behind the greeting … it creates and nice focal point to the card. I then embellished the card with the Wild Wheat dots from the 2023-25 In Color Dots.
My last card for the day highlights the NEW Bubble Bath and Pebbled Path … I love pink and grey together and this card turned out stunning!
The designer paper that looks like it was painted in Pebbled Path measures 3″ x 4″ and is not matted, instead I used 3 Bubble Bath squares that were die cut from Stylish Shapes and were just “left overs” from my retreat. I also stamped my greeting in Pebbled Path directly onto one of the blocks.
The Pebbled Path base measures 5-1/2″ x 8-1/2″ then scored and folded at 4-1/4″ was stamped with the Daisy image in Pebbled Path to create dimension and a cute background. I really like using the “Color on Color” technique! My daisy and center was stamped in Moody Mauve and then highlighted with a hint of Bubble Bath in the center by using the Sponge Dauber … both were die cut along with extra leaves and they layered onto the front of the card. I then embellished the card with the Pebbled Path dots from the 2023-25 In Color Dots.
Don’t miss out on the opportunity to add a touch of freshness and flair to your creations with the beautiful “Fresh as a Daisy” paper… at a discounted price!! I have added the links below for your convenience.
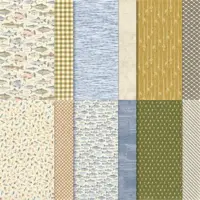
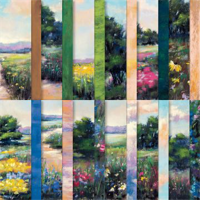
Today I’m sharing 6 cards using the Winter Meadows Designer Series Paper from Stampin’ Up! This collection isn’t just a celebration of the season; it’s a canvas of versatility waiting to unfold and brings the beauty of nature right to your fingertips. Each design of this exquisite paper was hand-painted making it perfect for your creative projects.
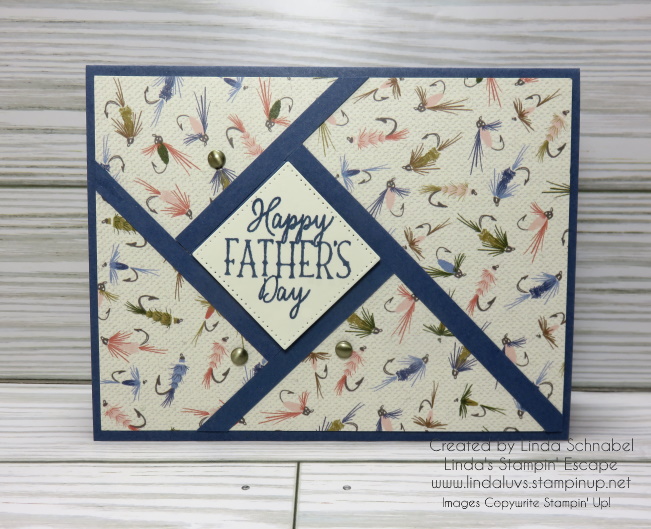
One standout feature is the deer page, meticulously crafted to perfectly fit onto a card front. The repeating pattern allows you to effortlessly cut each sheet into six pieces, providing a seamless background for your cards. Making this paper perfect for Fathers Day or a Birthday!
Let’s delve into the magic of quick and effortless card-making! Here are six simple yet stunning card ideas utilizing the Winter Meadows Designer Series Paper, promising to spark creativity …
Classic Christmas Charm: Layer the grey tone pretty paper with a Pretty Peacock, add a simple ‘Let it Snow’ sentiment for a simple and pretty holiday card. I know many of you create your holiday cards “way” before the snow flies!
2. Winter Wonderland: And a sentiment of ‘Make the Season Sparkle’, pair it with Lost Lagoon cardstock, add a touch of Wink of Stella and adorn with Iridescent Rhinestone embellishments for a serene winter scene.
3. Father’s Day Sophistication: I cut the designer paper to 3 3/4″ x 5″, this card I used the Misty Moonlight to mat it, it’s earthy tone and wrap one corner with Bakers Twine for some texture. You’ll stamp with a ‘Happy Father’s Day’ sentiment to create a refined touch.
4. Birthday Bliss: Next I used the Blueberry Bliss as a backdrop for a colorful birthday card, surrounded by coordinating bakers twine and embellishments. The greeting was created from the Curved Occasions Bundle
5. Holiday Elegance: Trim the designer paper as the others, layer it on the soft Moody Mauve cardstock, add some Wink of Stella and stamp a ‘Happy Holidays’ sentiment. Time to embellish it with Festive Pearls.
6. Sending Warmth: Create a layered look with your designer paper with the Snowflake Magic on the Smoky Slate card base, adding a versatile sentiment that suits any occasion. Plus we’re adding a few Festive Pearls to complete our look.
The Winter Meadows Designer Series Paper isn’t just a seasonal delight; it’s a crafting essential that transcends boundaries. Its adaptability and charm make it an invaluable addition to any crafter’s arsenal. With just a few creative tweaks, it effortlessly transitions from Christmas to birthdays to Father’s Day and beyond, promising endless possibilities for beautiful creations.
As a friendly reminder, while this paper is one of only two designer papers being carried over into the new catalog, there will be a slight increase in price. But trust us, the unparalleled beauty and quality of Winter Meadows Designer paper are worth every penny.
Thank you for hanging out with me today. Enjoy your day.
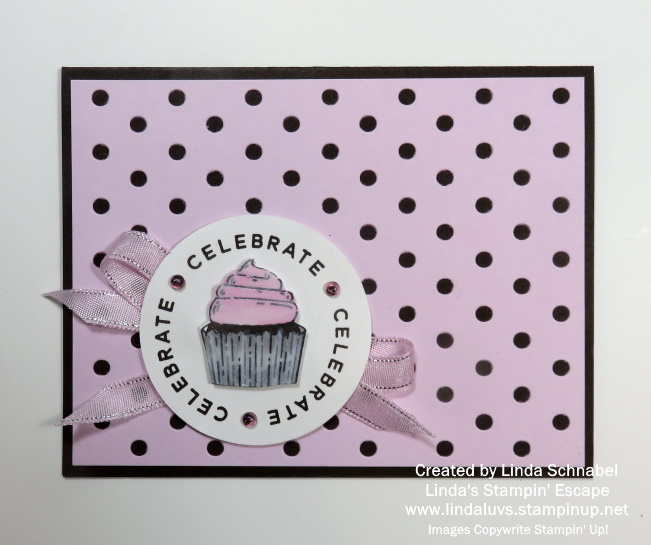
I’m tickled pink to share today’s card with you. I’m using the Circle Sayings Bundle and a “fun” die I just got called “Dot’s & Spots”. If you like polka dots, I think you’ll like this die! Now if this combination doesn’t spark your curiosity, let me add my color combination of our newest pink, Bubble Bath and Early Espresso. The recipe for this card will result in a cuteness overload!
Just take a peek …
We’ll begin with out cardbase which is the Early Espresso… chosen because of our “chocolate” cupcake. The Bubble Bath is cut to a standard 4″ x 5-1/4″ and then die cut with the Dot’s & Spots. Now don’t throw those die cut dots away because they can be used in a future Shaker Card. I attached the die cut piece directly to my card base using the Liquid glue.
On a piece of Basic White I stamped my cupcake with the Memento Ink and the greeting in Early Espresso. The greeting was punched with the coordinating 2-3/8″ punch from the bundle and the cupcake was colored and fussy cut. I used the Bubble Bath, Smoky Slate and #100 Stampin’ Blends to color.
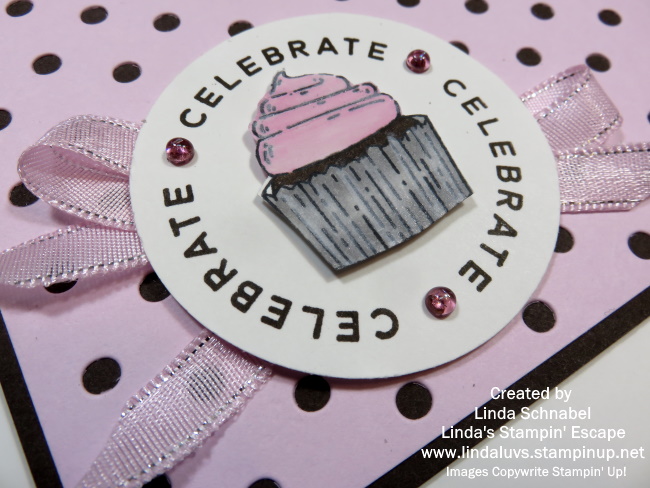
The cupcake once colored was popped up with the Stampin’ Dimensionals. Behind the the greeting is the new Bubble Bath ribbon from the 3/8″ Sheer Ribbon Combo pack. This pack also includes Azure Afternoon and Lemon Lolly. It has a nice shimmer to it and a touch of silver. It almost makes the card look like a pretty little gift!
Once the ribbon was attached to the greeting, I added Stampin’ Dimensionals and attached it to the card front.
To complete my card I added the Bubble Gum Tinsel Gems – 4 pack onto the greeting. There is no shortage of dimension or texture to this card and it is sooo stinkin’ cute! I’m loving those polka dots, so I’m sure you’ll be seeing a lot more of them.
I’d like to thank you for spending a part of your Sunday with me. I hope you enjoyed today’s colors and finished card. Enjoy your day.
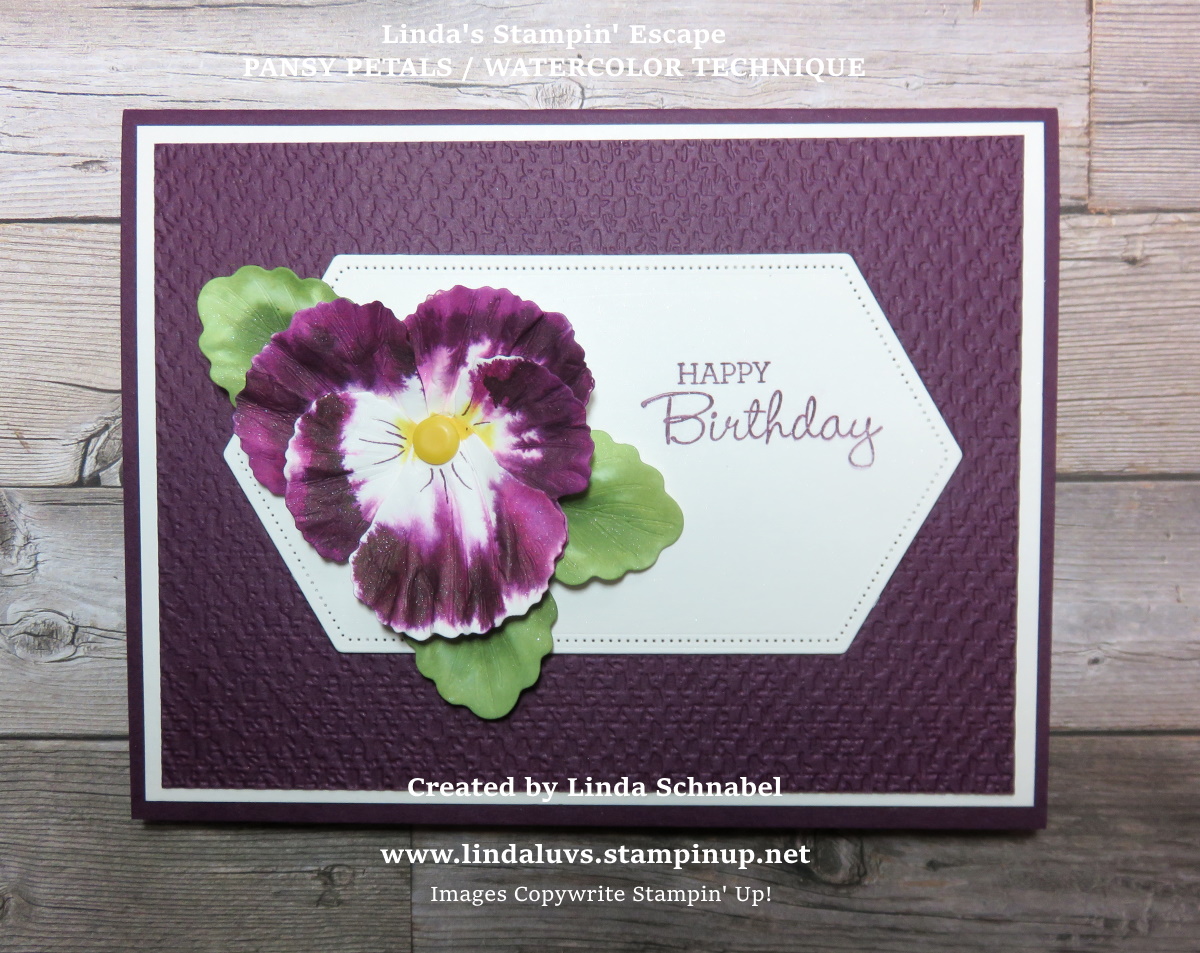
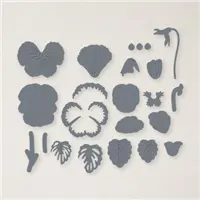
As new trends emerge in the world of crafting, it’s inevitable that we must bid farewell to some beloved classics. Today, I’m going to reminisce about one such gem: the Pansy Patch Stamp Set, and share several cards with you. With its elegant floral appeal and versatile design, this stamp set has been a staple in the repertoire of cardmakers and crafters alike.
For many, the Pansy Patch Stamp Set has been more than just a collection of stamps; it’s been a source of inspiration and creativity. Whether adorning handmade cards, embellishing gift tags, or adding a touch of charm to scrapbook pages, the possibilities with this set have been endless.
One of the standout features of the Pansy Patch Stamp Set is its versatility. You can choose to layer the stamps to create stunning floral arrangements, each petal coming to life with every inked impression. Alternatively, you could opt to use the coordinating dies to cut out intricate pansy shapes, adding dimension and depth to your creations. The beauty of this set was that it allows for endless experimentation and exploration, inviting you to let your creativity run wild.
One of the things that make the Pansy Patch Stamp Set truly special is its ability to effortlessly elevate any project. With a range of beautiful sentiments included, it becomes effortless to convey heartfelt messages and well wishes. From birthdays to weddings, sympathy cards to thank-you notes, the Pansy Patch Stamp Set has been there to help us express ourselves in style.
But as all good things must come to an end, so too must the reign of the Pansy Patch Stamp Set. With its retirement on the horizon, now is the time to pay tribute to this timeless classic and celebrate the joy it has brought to so many. The Pansy Patch Stamp Set has been a true workhorse in my stamping stash.
Ok … I have one more for you, and my favorite!!
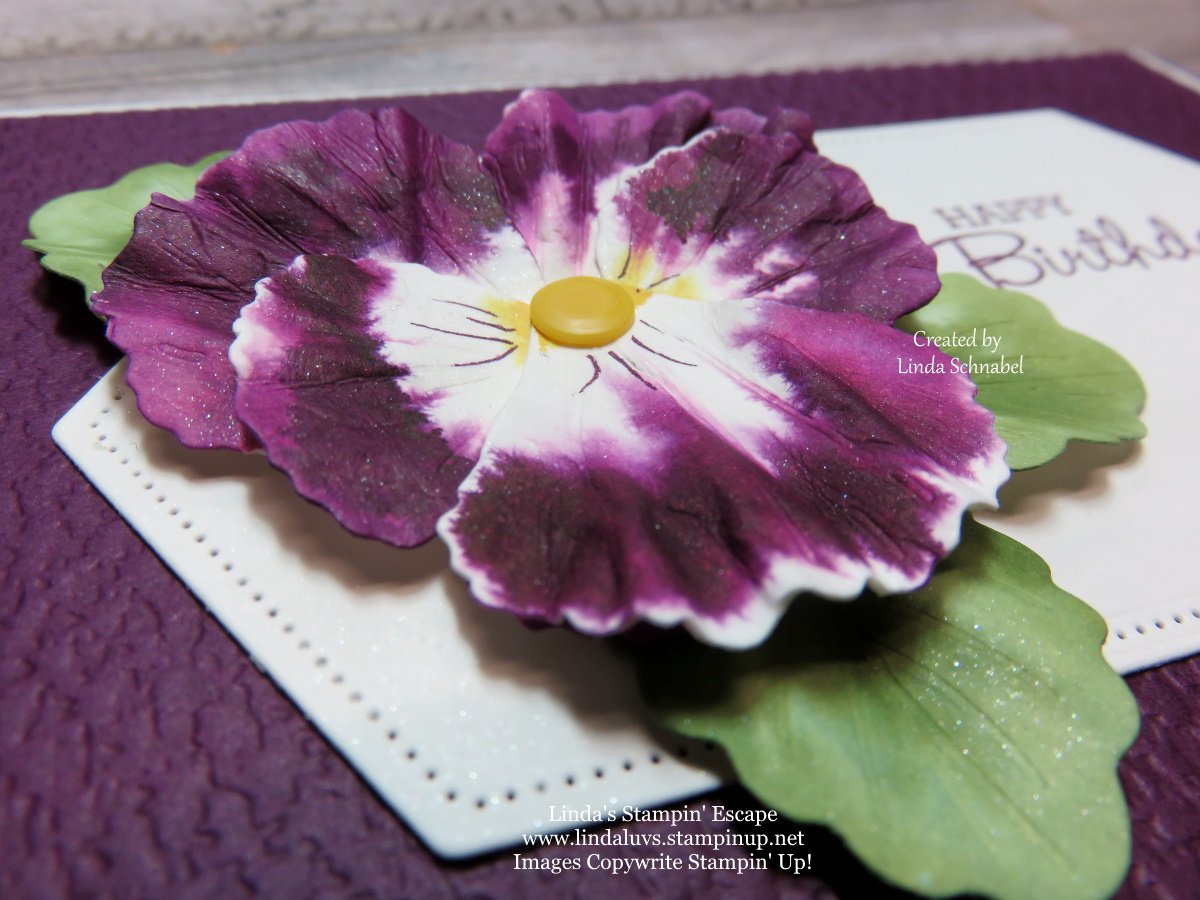
I have created a video for you from a past Facebook LIVE (CLICK HERE TO WATCH) so you can see step by step how I created these beautiful flowers and so you can recreate this too…. They almost look real don’t they?
Isn’t that cool … I am in love with this technique! I loved it when I made pansies from the butterfly punch but these are so much more realistic!! It creates so much texture and depth when you “scrunch” your petals.
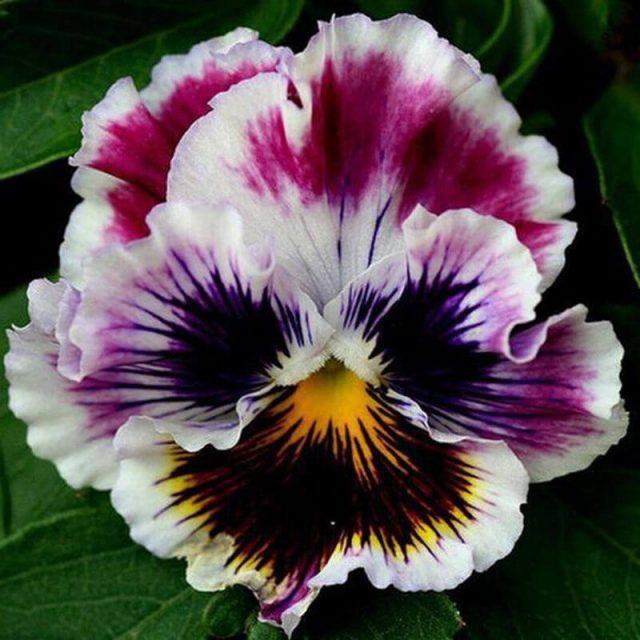
Those little white specs you see are actually the “shimmer” paper making a statement! It really is so pretty and you can do these in any color you’d like! Here is my inspiration to create these amazing pansies ….
Now because shimmer paper has since retired, I use the regular Basic White or you may also use the Thick White cardstock.
Did you enjoy the parade of cards today? I hope it truly showcases this stamp set and coordinating dies versatility. So, if you haven’t already, now is the perfect time to snag your own Pansy Patch Stamp Set before it’s gone for good. I’m sure these will become cherished staples in your creative arsenal. Don’t miss your chance to add a touch of elegance and charm to your handmade cards and gifts with the Pansy Patch Stamp Set. Get yours today and let your creativity blossom!
Thanks for stopping by today!
TODAY’S STAMPIN’ SUPPLY LIST … If you liked the products used in today’s projects, I have links for you below. Just click on the item you would like more information on, or to begin your shopping. It will take you directly to my website. Thank you ♥
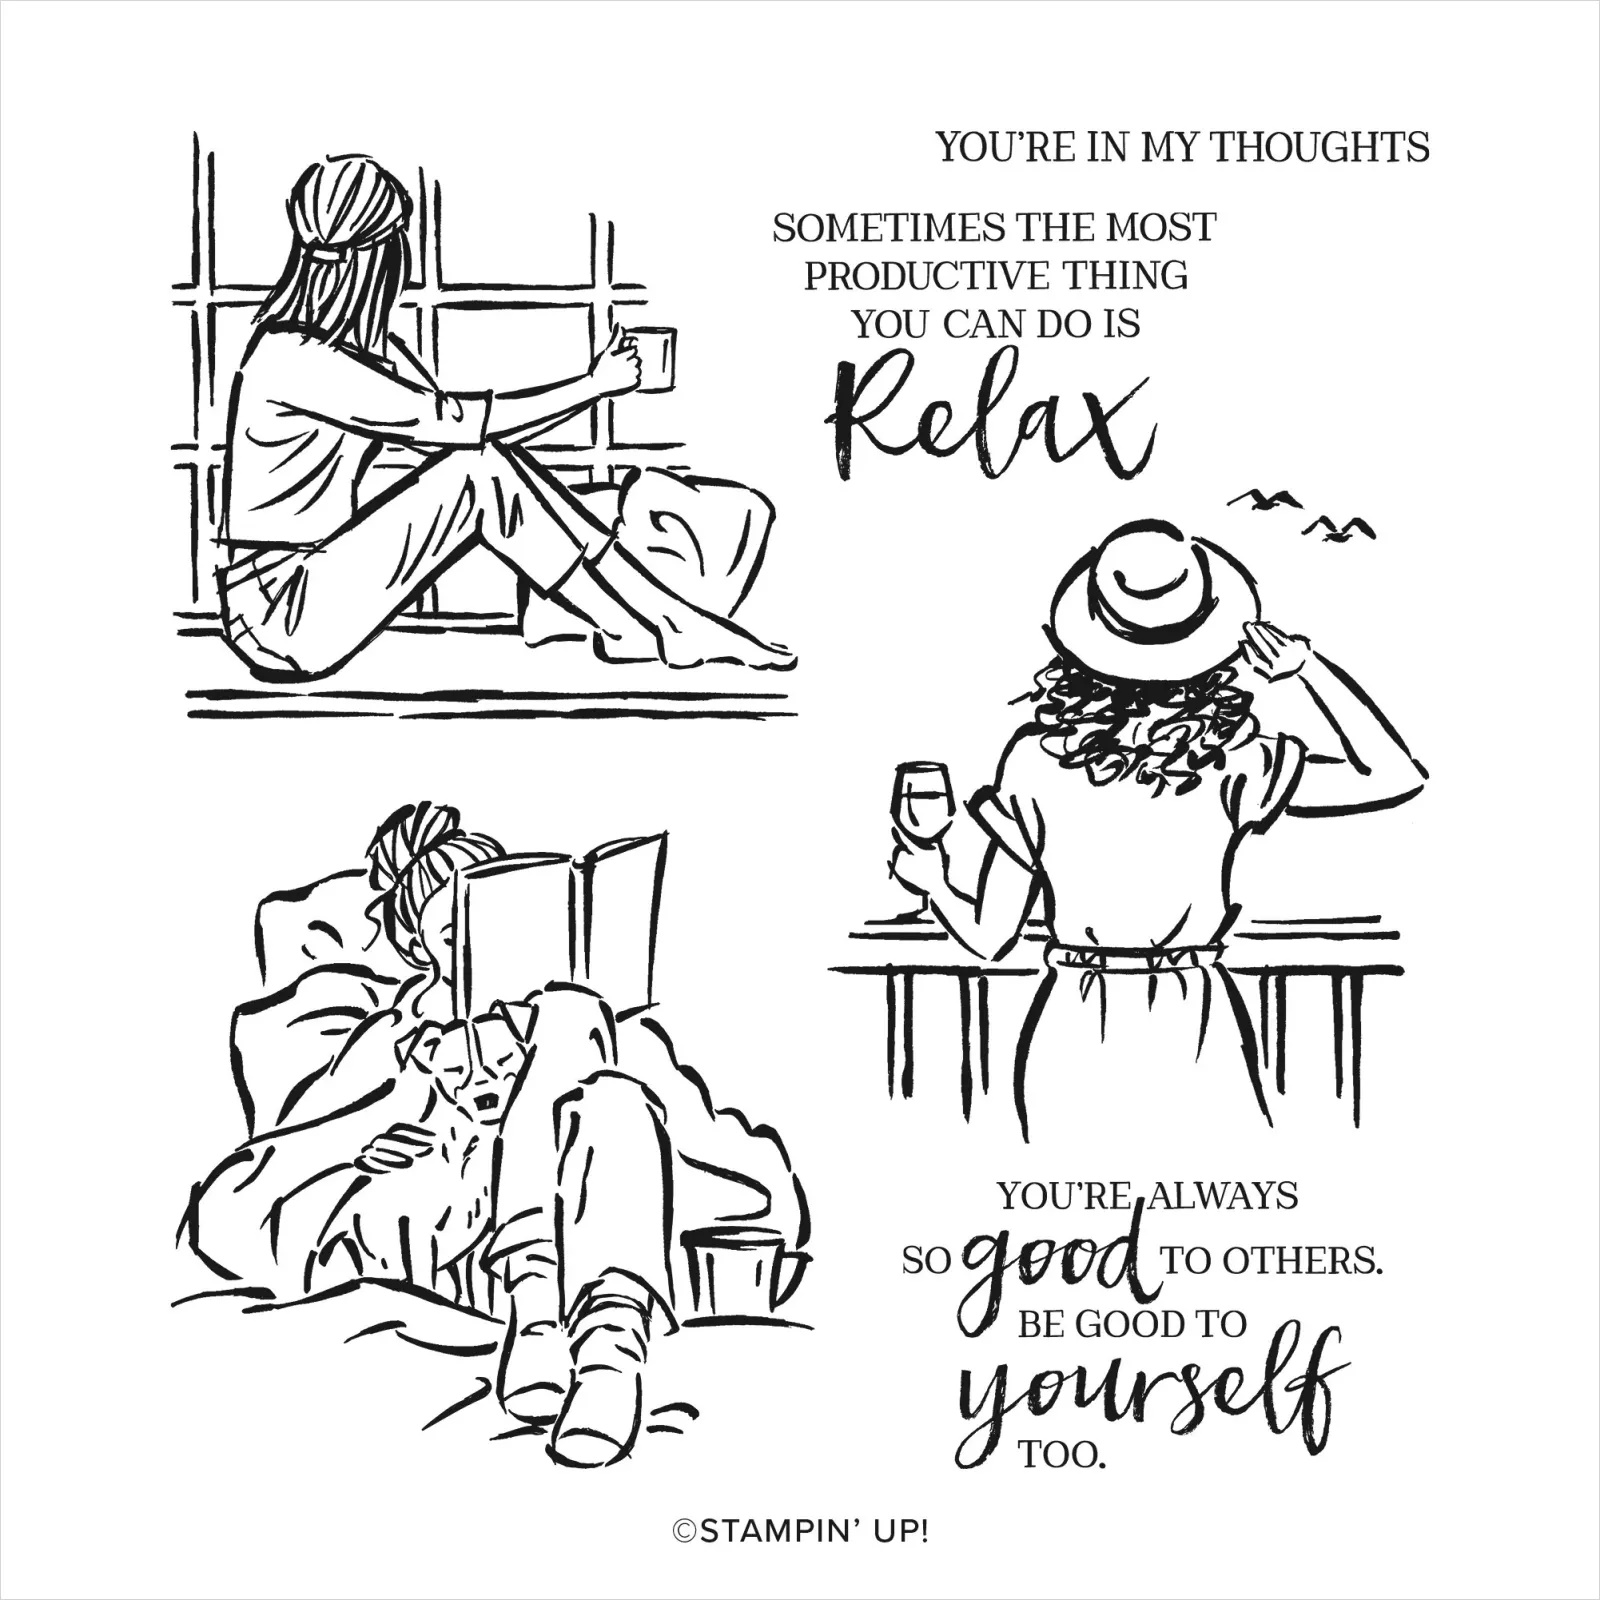
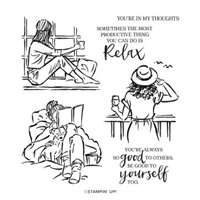
As April approaches, so does the end of an era for many stamping enthusiasts. Stampin’ Up’s retirement list is out, and among the beloved sets bidding us adieu is the timeless “In the Moment” stamp set. This set has been a staple for many of us, offering versatility and creativity for a multitude of projects. As we bid farewell to this classic, let’s take a moment to appreciate its beauty and versatility.
I had to add this stamp set to my collection because it captures the essence of life in a way that resonates deeply with those we make our cards for. The “In the Moment” stamp offers a glimpse into the beauty of everyday moments with its heartfelt imagery and sentiments.
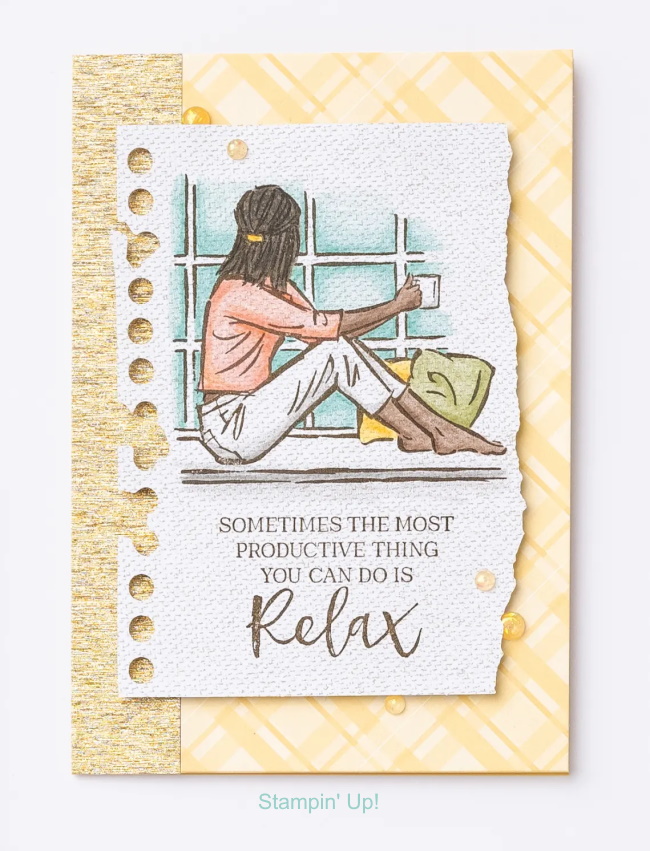
What I love about this set is the line-art images can be colored using your favorite coloring techniques. The intricate line art of the images lends itself beautifully to the soft, ethereal look of watercolors. By simply stamping the images onto watercolor paper and adding a touch of color, you can create stunning works of art that are sure to impress.
Another way to make the most of “In the Moment” is by pairing it with any one of our beautiful designer series paper. The next card highlights the Countryside Inn Designer Series Paper,
At the heart of the “In the Moment” stamp set lies a charming depiction of a woman and her faithful companion, a dog by her side as she reads a book. This captures the simple joy of companionship and relaxation. Whether you’re a dog lover yourself or know someone who is, this stamp is sure to tug at the heartstrings and evoke feelings of warmth and that moment one needs for themselves …. Because you deserve it!
If you love a touch of celestial beauty in your projects, look no further than the Stargazing Designer Series Paper. Paired with the “In the Moment” stamp set, this paper brings a sense of serenity and wonder to your cards. The Stargazing paper adds a magical touch to your crafting.
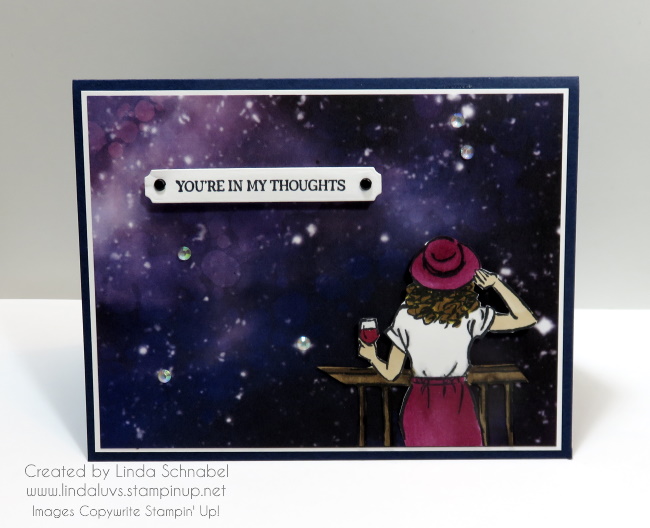
You have to love the image of a woman leisurely enjoying a glass of wine, her gaze fixated on the stars, or make it what you’d like …. watching the sunset, admiring nature’s beauty, or simply lost in her own thoughts, this scene exudes an air of relaxation. It’s a beautiful way to tell someone that they are in your thoughts.
As we bid farewell to the “In the Moment” stamp set, now is the perfect time to stock up on this versatile set and coordinating designer series papers before they retire at the end of April 2024. The “In the Moment” stamp set has something to offer for everyone. Don’t miss your chance to add this classic set to your collection and create heartfelt works of art that will be cherished for years to come.
In today’s blog post, I invite you to join me in celebrating the rustic allure of the countryside, accompanied by the delightful twist of a fun fold technique: the tent fold. The stamp set will be leaving us (retiring) at the end of April so check out some creativity and inspiration.
Let’s take a look at the Countryside Inn ….
Let’s take a look at the video which explains the steps on how I created these cards. They look so pretty with the stamped Countryside Inn stamp and the designer papers ….
I also have the picture of the finished Tent Fold card with the Delightfully Eclectic designer paper (also retiring). You can see how the stamp set creates texture and dimension to our card. It really adds that special touch to your cards.
Thank you for taking time out of your day to join me and watching the video. I hope you enjoyed it and that you were inspired to try making this fun Tent Fold card.
Welcome to a Free Tutorial Sunday, where creativity knows no bounds and fun is always at the forefront! Are you ready to embark on a crafting adventure filled with and easy and innovative fold? Well, you’re in luck because today we’re diving headfirst into a world of paper crafting delight, fueled by the spirit of sharing and the joy of trying something new!
Let me introduce you to the Biggest Wish Thank You “FUN FOLD” Card …
At the heart of today’s tutorial lies the captivating allure of the Biggest Wish Stamp Set and the enchanting charm of the Meandering Meadows Designer Series paper. These two crafting treasures are our companions on this journey of discovery as we explore this easy to make fun fold card and let our imagination run wild, so many different patterns to choose from.
Cardstock Measurements:
Blueberry Bushel Cardstock (card base): 5 ½” x 9 ¼”
Meandering Meadows DSP: 6” x 6” piece
Very Vanilla Cardstock: 5 ¼” x 3 ½”
Very Vanilla Cardstock: Scrap piece for the sentiment
Instructions:
Cut a piece of Blueberry Bushel cardstock to 5 ½” x 9 ¼”.
On the 9 ¼” side, score your cardstock at 1 ½” and 2 ¾”. Turn your paper 180 degrees, and score the other end of your cardstock at 1 ½” and 2 ¾”. Fold and burnish your card base as shown in the top view of the pictures above.
Use a piece of 6″ x 6″ Meandering Meadows Designer Series Paper (DSP) to create the focal points for your card.
Pay attention to the direction of the pattern in your DSP. Cut off ¾” from the top or bottom of your 6″ x 6″ piece, depending on what part of the design you want to keep. You’ll end up with a piece measuring 6″ wide and 5 ¼” tall.
Cut the 6″ x 5 ¼” DSP piece into three pieces. Two pieces will be 1 ¼” x 5 ¼”. The remaining piece will be 3 ½” x 5 ¼”. If you’re using a DSP that has a continuing design, like the one I used, cut the 1 ¼” x 5 ¼” pieces from either side, leaving the 3 ½” x 5 ¼” piece from the middle of the design.
The 3 ½” x 5 ¼”DSP piece is adhered to the center of the card.
The two DSP pieces measuring 1 ¼” x 5 ¼” are adhered to the sides of the card, as pictured. You could also turn these pieces over and adhere them to the sides of the card. Some DSP designs work really well with this option since both sides of the paper coordinate well with each other.
Use the ¾” strip that you cut off your original piece of 6″ x 6″ DSP as decoration on the front of the card. This strip helps bring the design together.
Use Blueberry Bushel ink and the thanks scripted stamp from the Biggest Wish stamp set to create your sentiment. Stamp the sentiment onto a scrap of Very Vanilla cardstock. Punch out the sentiment using the Heartfelt Hexagon Punch.
Before adding the sentiment, you may want to embellish your card a little. Put a few glue dots in the middle of my DSP strip and lay some of the gold Simply Elegant Trim onto the glue dots. This will allow you to shape the trim into a faux bow.
The sentiment is added with dimensionals to give it a little more pop!
Finally, the cards needed some bling, right?! Add a few of the gorgeous Brushed Brass Butterflies on the center panel of the card.
To add your message, simply cut a piece of Very Vanilla cardstock to 3 1/2″ x 5 1/4″. Add that piece to the back of the center panel.
If you enjoy the tutorials and love fun folds and the Meandering Meadow Designer Paper, join me on Tuesday night at 6:30 on my Linda’s Stampin’ Escape Facebook page. I will be going LIVE with a great Fun Fold done two different ways!
Thank you for taking time out to visit … Enjoy your Sunday.
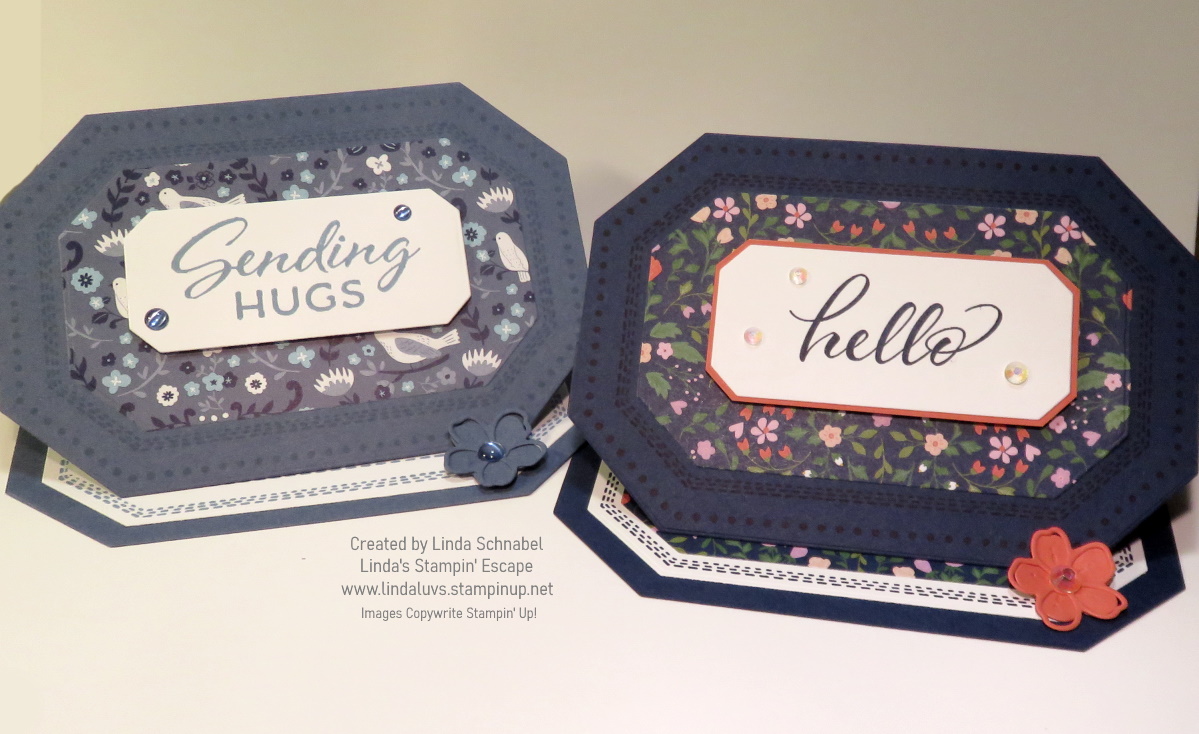
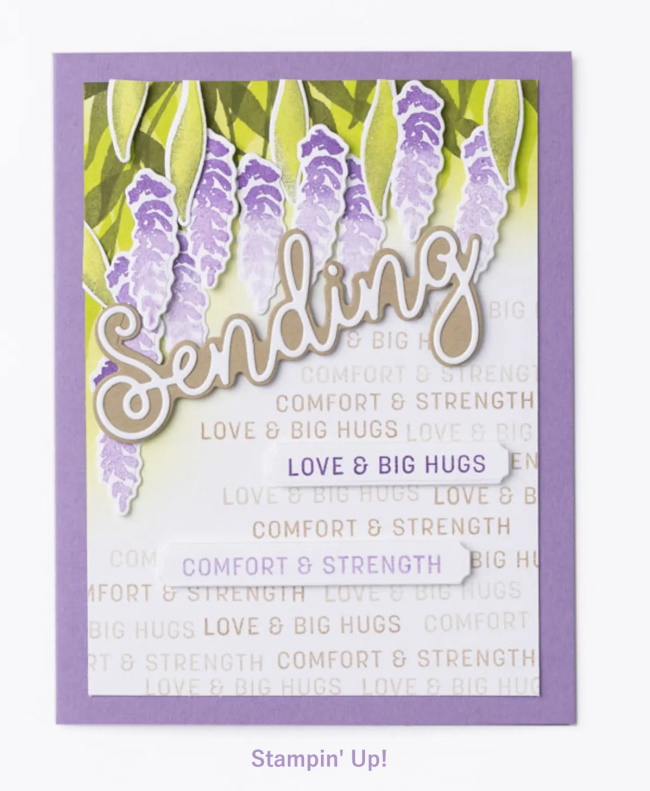
Today I want to reflect on a stamp set that truly conveys why we make cards; because there’s something truly special about the power of personal touch when we create. With this we convey emotions and sentiments in a tangible, heartfelt manner. And when it comes to spreading joy, comfort, and gratitude, the Sending Smiles Stamp Set and Coordinating Sending Dies stand out as indispensable tools in any crafter’s arsenal.
I have several cards that I want to share with you, and these two products will be retiring at the end of April. Let me start with the card I created for the Tutorial Group that I am in …. Our June theme was our favorite new color so of course I used, Lemon Lolly!!
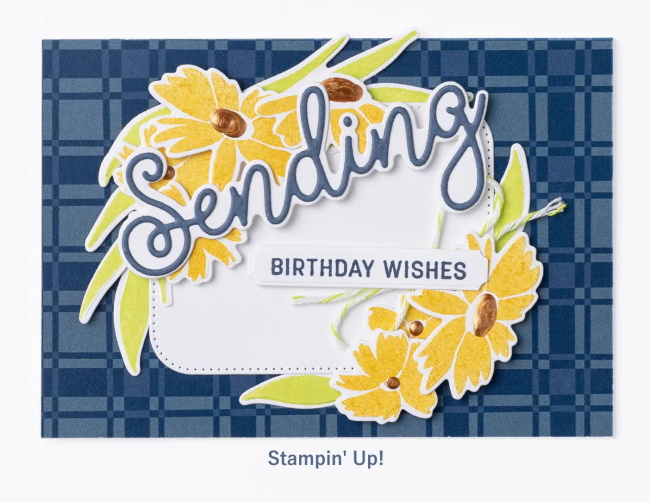
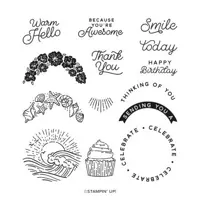
At the heart of this crafting duo lies the Sending Smiles Stamp Set—a collection of nine versatile sentiments and floral images designed to evoke warmth, positivity, and heartfelt emotions. Whether you’re looking to brighten someone’s day with a burst of sunshine, offer comfort and strength during challenging times, express gratitude with a heartfelt note, or shower birthday wishes upon a loved one, this stamp set has you covered.
What sets the Sending Smiles Stamp Set apart is its ability to cater to a multitude of occasions and sentiments. With phrases like “Sending Sunshine,” “Comfort & Strength,” “Thank You,” and “Birthday Wishes,” this set offers a diverse range of options for every crafting project. Whether you’re creating cards, scrapbook layouts, or gift tags, these sentiments serve as the perfect accompaniment, adding a personal touch to your creations.
Complementing the Sending Smiles Stamp Set are the Coordinating Sending Dies—a set of precision-cut dies that take your crafting endeavors to new heights. This set includes a large text die and a shadow die of the word “Sending,” allowing you to effortlessly pair them with the sentiments from the Sending Smiles Stamp Set.
In a world where digital communication often dominates, there’s something inherently special about receiving a handmade card or gift crafted with love and care. The Sending Smiles Stamp Set and Coordinating Dies empower crafters to spread joy, comfort, and gratitude with every impression..
Here’s to Sending Smiles to our loved ones and friends! Your cards really do convey the personal touch. Thanks for stopping by my blog today. Have a good one!!
All products shown below were used on my cards and will be retiring at the end of April 2024 …. with the exception of the Lemon Lolly cardstock.
Hello Stampin’ Friends … Fellow music enthusiasts, card makers, and everyone in between!
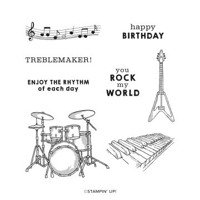
Today, we gather to bid a fond farewell to one of the most beloved stamp sets in the crafting community: the “Enjoy the Rhythm” stamp set. This set has been a source of joy, creativity, and endless possibilities for all who have had the pleasure of using it. As we reflect on its versatility, let’s dive into what made this stamp set truly special by showcasing 5 different cards.
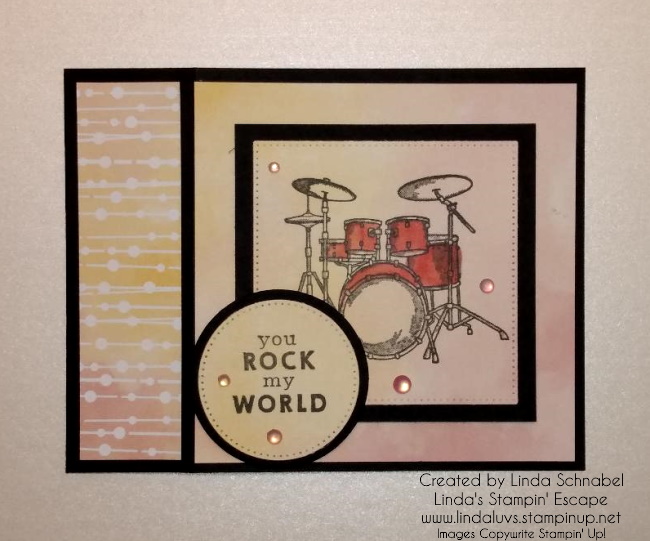
Begin with a Basic Black card base and front for a nice layered effect … Add some die cut circles for a great pop of color and to highlight your drummer using the Stylish Shapes and the Picture This Dies.
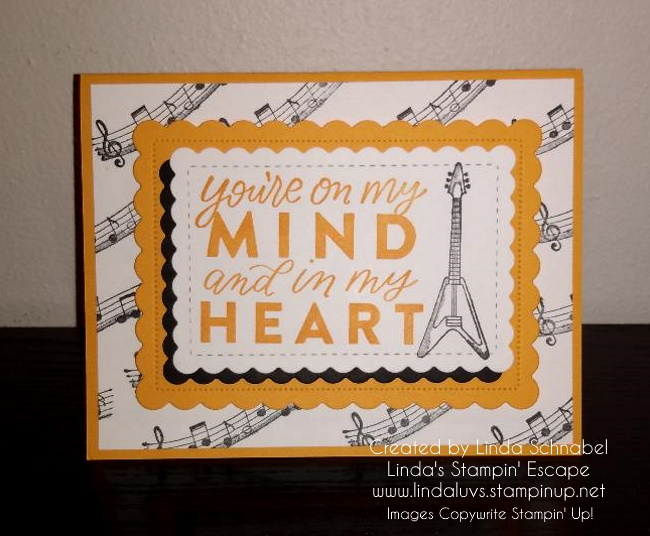
One of the standout features of the “Enjoy the Rhythm” stamp set is its versatility in conveying messages of celebration. Whether it’s birthdays, graduations, or simply cheering someone on, the set offers a delightful array of greetings to suit any occasion. From the classic “Happy Birthday” to the more whimsical “You Rock my World,” each stamp is crafted with care to add a touch of musical flair to your heartfelt messages.
What truly sets the “Enjoy the Rhythm” stamp set apart is its inclusion of iconic musical instruments. With stamps featuring a drum set, electric guitar, and keyboard, creators are invited to compose their own symphonies of creativity. Whether you’re a musician at heart or simply appreciate the power of melody, these stamps provide the perfect backdrop for your artistic endeavors.
The musical notes pen the backdrop for this card as we highlight the many different stamps. Along with the Enjoy the Rhythm, I share two more retiring items; the Good Feelings Stamp set and the Scallop Contour Dies. Don’t you just love how everything coordinates.
One of the most beautiful aspects of the “Enjoy the Rhythm” stamp set is its ability to appeal to all ages and genders. Whether you’re a seasoned crafter looking to add a playful touch to your projects or a beginner eager to explore the world of stamping, this set welcomes you with open arms. Its universal themes of music and celebration know no bounds, transcending barriers and bringing people together through the joy of creativity.
As we bid adieu to the “Enjoy the Rhythm” stamp set, let us take a moment to cherish the memories created and the countless masterpieces crafted, with one more card.
So here’s to you, “Enjoy the Rhythm” stamp set – thank you for the melodies, the memories, and the magic. Though you may no longer grace our crafting tables, your legacy will live on in every card sent, every gift wrapped, and every smile shared.
Thank you for checking in with me today!! Have a wonderful day and a great weekend.
Are you in need of some creative inspiration for your next crafting project? Look no further! Today, we’re diving into the wonderful world of card making using the Circle Sayings Bundle, coupled with the charming Delightfully Eclectic Designer Paper. Get ready to create adorable, floral-themed cards perfect for birthdays, sending well wishes, or just letting someone know you’re thinking of them.
The Circle Sayings Bundle is a versatile set that offers a plethora of options for crafting enthusiasts. With its delightful mix of sentiments and coordinating punch.
We’re going to start with the quick & easy card that is just stamped, colored and punched out. I use Memento Ink when I combine my coloring with the Stampin’ Blends. In the video you got to see a highlight of my coloring technique … also easy!
The second card uses a template punched from your coordinating punch to align your half stamps to create a full round image… So simple, just stamp inside the template. To enhance the imagery I used scraps behind it … easy, resourceful and clever! lol
With the Circle Sayings Bundle and the Delightfully Eclectic Designer Paper, creating beautiful and thoughtful cards has never been easier. Whether you’re crafting for a special occasion or just because, these quick and easy cards are sure to bring joy to both the maker and the recipient. So gather your supplies, unleash your creativity, and let’s get crafting! Don’t wait, as both these products are retiring soon!
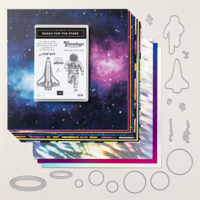
Step into a world where the stars dance and the galaxies swirl – welcome to the enchanting realm of the Stargazing Suite! Bursting with fun and versatility, this celestial collection is a must-have for all crafters seeking to embark on a cosmic adventure.
However, like all great journeys, its time among us draws to a close as it prepares to retire from our annual catalog. You’ll find in our 2023-2024 Annual Catalog on pages 86 & 87. This suite blew my mind and has me over the moon with excitement. to LOVE
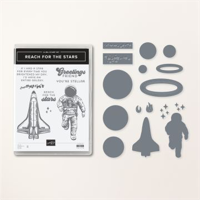
With its captivating designs featuring spaceships, astronauts, and planets, the Stargazing Suite offers endless possibilities for creativity. Whether you’re crafting cards for a space-themed birthday bash or scrapbooking memories of a starlit night, these designs add a touch of magic to any project.
Measurements:
Cardbase: 8-1/2″ x 5-1/2″ scored and folded at 4-1/4″
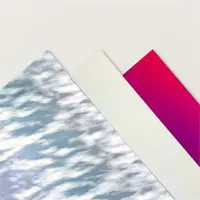
Holographic paper: 4″ x 5-1/4″
Designer Paper: 3-3/4″ x 5″
I used a 4″ x 5-1/4″ sheet of Basic White to stamp both the Astronaut and the Space Shuttle (as I call them) I mentioned in the video that I stamped several at a time, and then die cut them all. I did the same for the planets on both card #1 and card #2. It’s so much easier to just keep making cards when the basics are all ready for you!
The dimensions for Card #2 are exactly the same as our first card! My card base is Berry Burst and I used the funky holographic design (it has a pattern). Don’t forget to cut some stars out of the center of your holographic paper … want to use a much as you can, and no one will see it anyway.
I colored the shuttle with the LIGHT Night of Navy Stampin’ Blend and then highlighted it with Wink of Stella … that gives it the blueish silvery tone! Looks cool right!
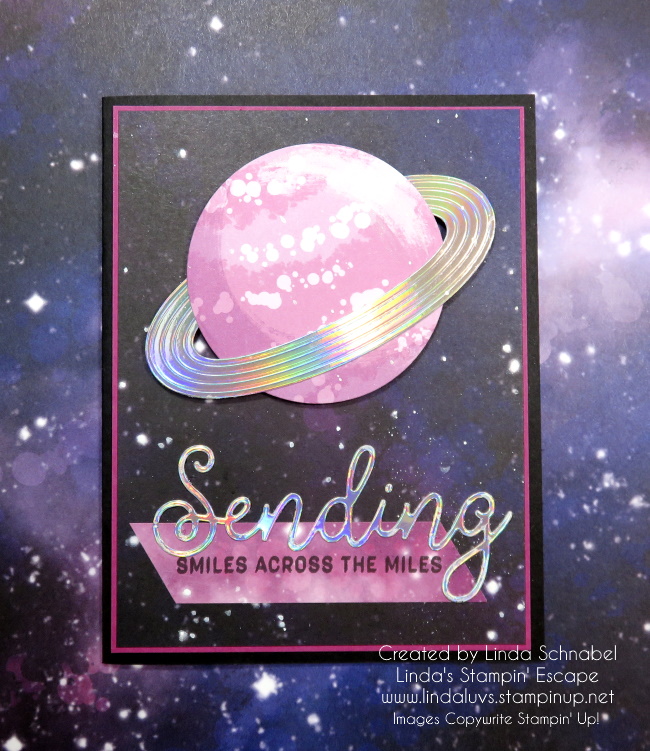
What truly sets the Stargazing Suite apart is its designer paper, a tapestry of galaxies and planets that stretches across the cosmos. Each sheet is a masterpiece in its own right, capturing the beauty and majesty of the universe in stunning detail. And for those seeking an extra touch of magic, the addition of holographic specialty paper lends an out-of-this-world shimmer to every creation.
I couldn’t resist but to explore the galaxies myself, to move into a different dimension, so … I created a ride of my own… I created my very own UFO!! Oh I had so much fun with this and my grandkids just loved it. It even had flames shooting out of the spaceship to propel it across the galaxy!
As we prepare to bid adieu to the Stargazing Suite, let us remember the journeys it has inspired and the dreams it has ignited…. Let’s look at two other cards that take you away in a different sense of the word.
Our first card is teamed up the “In the Moment” stamp set (also on the Retiring List). With our Stargazing Designer paper and the heartfelt sentiment, “You’re in my Thoughts”, this card becomes a heartfelt expression of connection and care. As you send this token of affection to a loved one, may it serve as a reminder to cherish the beauty of the present moment and the bonds that unite us across the vastness of space and time.
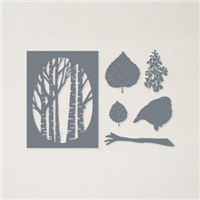
Introducing the perfect fusion of nature’s tranquility and the cosmic wonders of the Stargazing Designer paper – our latest creation features the enchanting Aspen Tree die set against a backdrop of swirling galaxies and twinkling stars. This harmonious blend of earthly beauty and celestial charm brings a touch of magic to any card. Our Aspen Tree Die is also on the Retiring List ….
The Stargazing Suite transcends the ordinary, inviting crafters on a journey from spaceships to stargazing. Its seamless compatibility with other stamp sets transforms mere creations into expressions of heartfelt emotions. Whether exploring the cosmos or delving into the depths of human connection, this suite serves as a versatile tool for crafting unforgettable moments.
So why wait? Take your creativity to infinity and beyond with the Stargazing Suite, there’s something for everyone in this stellar collection.
Thank you for joining me today and hanging out for a while. Have yourself a good day!
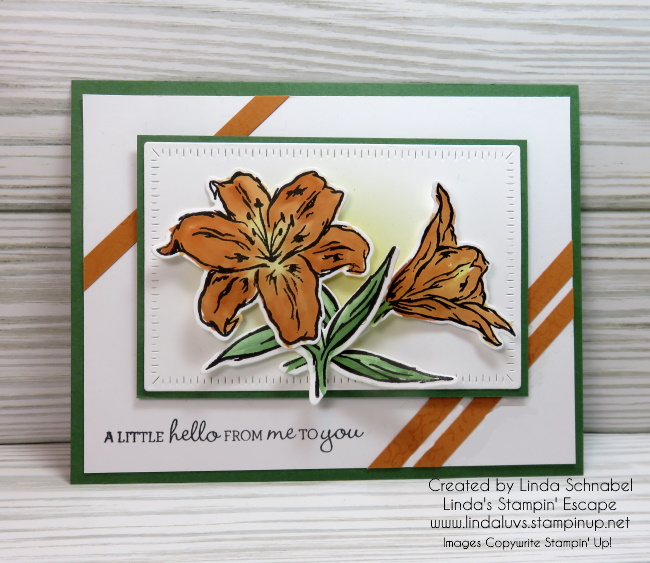
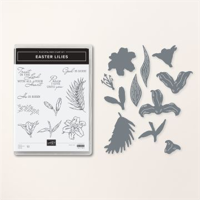
With the Easter season upon us, it was the perfect time to indulge in a crafting session that evoked the spirit of renewal and celebration. Recently, I had the pleasure of teaching a delightful class centered around the enchanting Easter Lilies stamp set from Stampin’ Up! And let me tell you, it was an experience filled with creativity, camaraderie, and a myriad of coloring techniques.
In this blog post, I’m excited to share one of the four captivating cards we created during the class, each showcasing the beauty of Lilies in unique ways. But before we delve into the details of the card, let’s talk about the techniques we explored to bring these lilies to life. I guided my guests through a diverse array of coloring methods, each lending its own charm to the delicate petals of the Easter Lilies. We experimented with pastels (chalks), daubers, watercoloring, and Stampin’ Blends, discovering the nuances of each technique and the stunning effects they can achieve.
Today I’m sharing the “watercoloring” card ….
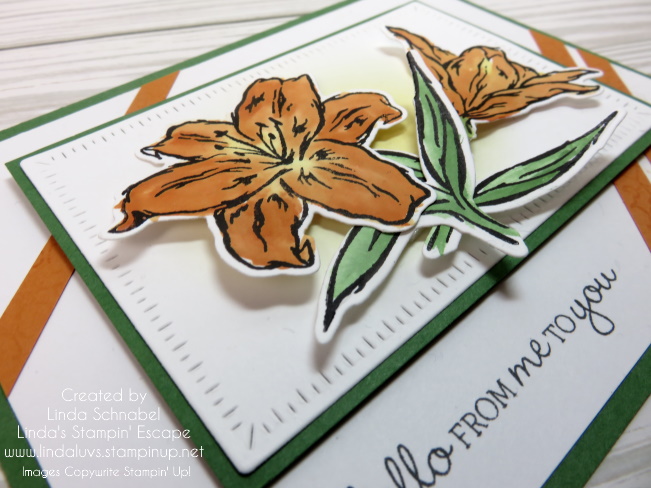
One of the most captivating techniques I taught during the class was watercoloring, which lent a mesmerizing effect to the common day lily featured on our card. With vibrant oranges and yellows blending seamlessly across the petals, the lilies seemed to dance with life and energy. To complement this stunning focal point, we incorporated additional elements such as the Radiating Stitches die for a touch of texture and dimension, and the stamped strips of paper to draw your eye to the focal point … our lilies.
The water painters proved to be invaluable tools, allowing us to effortlessly blend and layer colors to achieve the desired intensity and depth.
While Easter Lilies are often associated with springtime and religious celebrations, this card demonstrates that the beauty of the lilies transcends any specific occasion. With its sophisticated design and timeless appeal, it can be sent as a heartfelt greeting for birthdays, anniversaries, weddings, or any moment deserving of a touch of grace and beauty.
For me, the most cherished aspect of the class wasn’t just the techniques we learned or the cards we created—it was the sense of community and connection forged with fellow crafters. Gathering around a shared passion for creativity, we laughed, learned, and inspired each other, making memories that will last long beyond the crafting table.
Thank you for joining me today, and make sure YOU are on my mailing list so you are notified of all classes, and upcoming events.