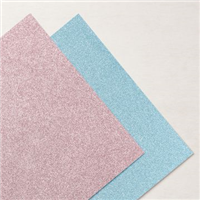
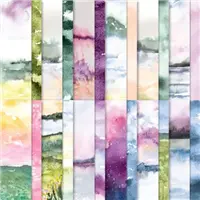
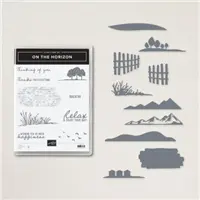
Shake Things Up with the New Horizons Designer Paper

Hello Stampin’ Friends ~

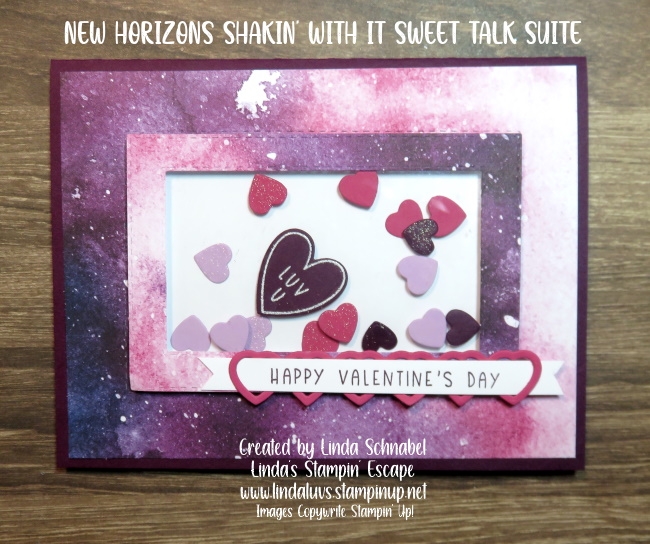
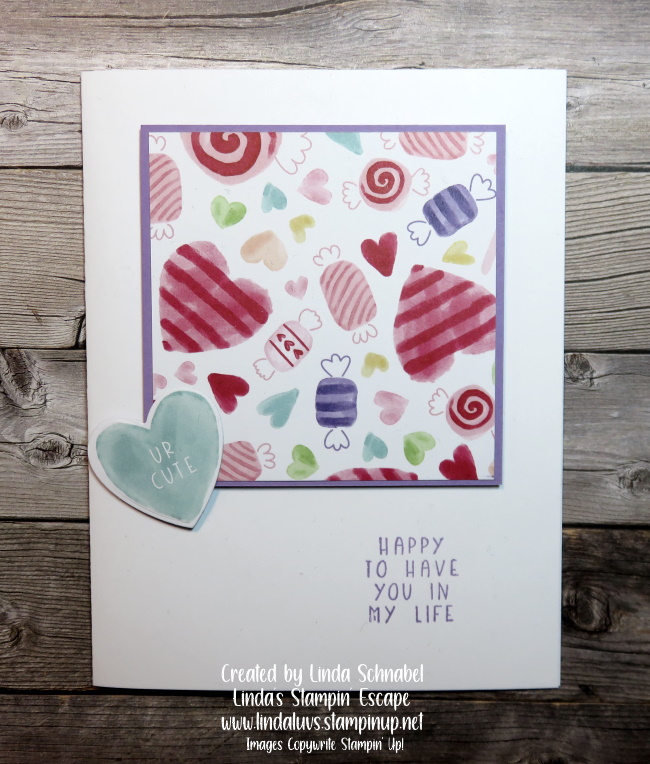
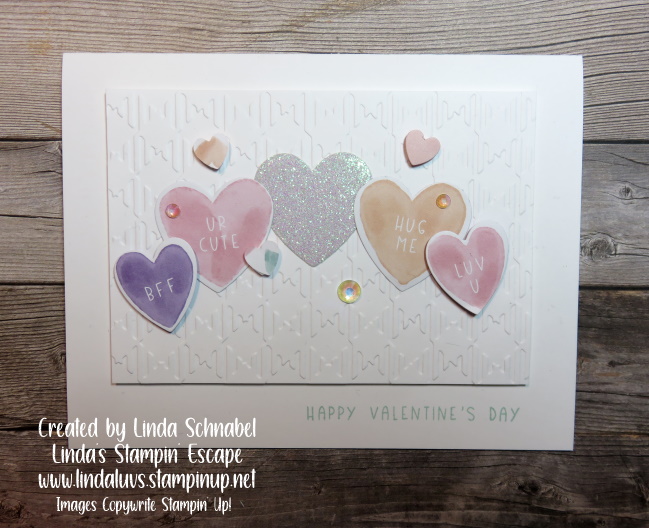
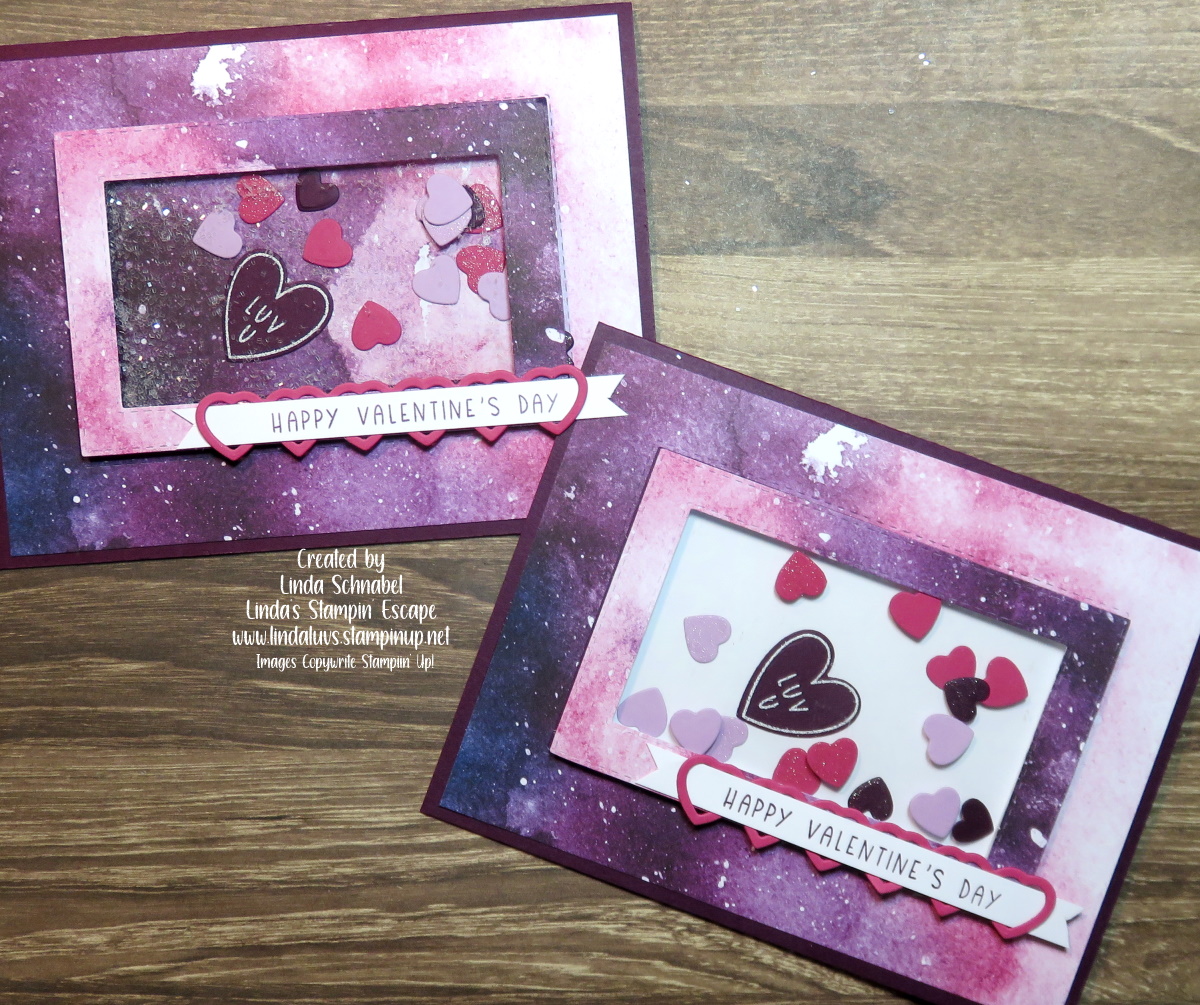
Today I’ll be sharing my video replay of last nights Facebook LIVE along with the two cards. I showcasing the New Horizons Designer Paper and Stitched Rectangle Dies … also highlighted is the Sweet Conversations Bundle.

I love all the pinks and purples in this card and with Valentines Day right around the corner … I thought this would be perfect, and what better way to showcase the card than a “Shaker” card! Don’t we all want to get “all shook up” over Valentines?

Ok … just a little teaser there and a close up of how I did the greeting! Let’s take a look at the video. You can grab a cup of coffee (or your favorite beverage) and join me …

The card would have been assembled even quicker if I wouldn’t have had “technical difficulties” … Oh, if only life’s little problems wouldn’t rear their heads when your going LIVE … LOL

Measurements:

  • Blackberry Bliss: 8-1/2″ x 5-1/2″ Scored at 4-1/4″ fold in half
  • Designer Paper: 5-1/4″ x 4″ (to be die cut)
  • Basic White: 5-1/4″ x 4″ (inside of card) Extra strip for greeting.
  • Window Sheet: 3-7/8″ x 2-3/8″

The video shows how you can use the entire piece of designer paper on your card as I did here on my sample …

I thought it was just too cute to wrap my greeting in hearts, and it was a way to use the strip of heart from the die cut. I’m sure Stampin’ Up! designed it that way, but we like to think we can be creative too! lol

I really do like the “white” background on the card because it really makes the hearts POP!! I also enjoy stamping with my friends and getting their opinion … that is my favorite part of the Facebook LIVES! I love to share but the interaction with you, my stampin’ friends is what makes it so fun.

I thank you for taking time out of your day to hang with me and watch (or rewatch) the video. I really would love to hear what YOU want to see … If I have it, I will share it.

Have an amazing day ~

TODAY’S STAMPIN’ SUPPLY LIST … If you liked the products used in today’s projects, I have links for you below. Just click on the item you would like more information on, or to begin your shopping. It will take you directly to my website. Thank you ❤
Sending Rainbows of Happiness

Hello Stampin’ Friends ~

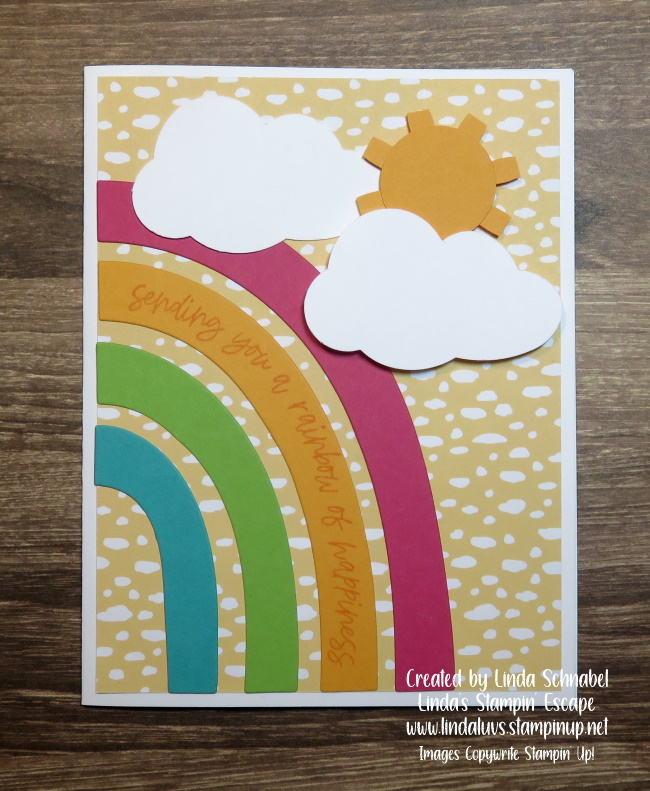
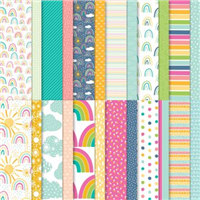
Well … Well … Well.. I have another rainbow for you today! I’ve also got some fun hack (tips) for this card too. I’m again using some of that cute designer paper you get for FREE out of the Sale-a-bration catalog for my background! Plus, I’m showcasing the large rainbow.

My card base is Basic White and the designer paper as my background. For the rainbow … you are actually cutting the 4 different colors; Bermuda Bay, Granny Apple Green, Mango Melody and Melon Mambo. This means you are going to have a lot of extra rainbows in your future! I suggest that you store them by “size” in an envelope or a plastic container … so that it will be easy to create your next rainbow!

Because the stamps are photoplymer, the are more flexible so I could manipulate the stamp so I could put my greeting right on the rainbow!!

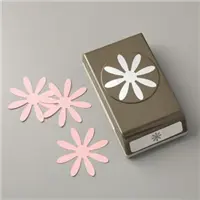
Also … don’t throw away that piece you cut out of … I’m sure we’ll find something to do with it, as crafters we always do. I’ll share someday soon 🙂 Now … lets talk about our sun! I used one of the smallest dies in the Layering Circle Dies and the Daisy punch … that’s right, the suns rays are the daisy petals trimmed down. You could even make them pointy if you prefer.

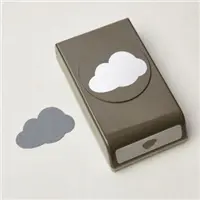
The clouds were punched from the “Cloud Punch” and are layered behind and in front of the sun to create some beautiful depth and texture to the card. This was such a fun and easy card to make and who can resist the colors of the rainbow!!

I thank you for joining me today. I hope your day is sunny and full of rainbows!

TODAY’S STAMPIN’ SUPPLY LIST … If you liked the products used in today’s projects, I have links for you below. Just click on the item you would like more information on, or to begin your shopping. It will take you directly to my website. Thank you ❤
Rainbows… Just Because

Hello Stampin’ Friends ~

It’s Monday and time to start a new week. Today I’m going to share another rainbow card with you today. Yesterday I shared a parade of “rainbow” cards however I’m toning it down a bit … something a bit more simple for those looking for a quick card.

I’m using some of that fabulous designer paper you get for FREE out of the Sale-a-bration catalog for my pop of color! I also used it behind my die cut rainbow.

My card base is Basic White and I added some Pool Party and embossed it with the Gingham Embossing folder. I got the embossing folder as part of my Sweet Talk “suite” but love the texture, so I find myself using it on several different projects.

Adding a little bit of bling to the card there is nothing better than using the In-Color Gems … the color make them little dots come alive! It just makes the card fun!!

Thank you for stopping by, have yourself a great week!!

TODAY’S STAMPIN’ SUPPLY LIST … If you liked the products used in today’s projects, I have links for you below. Just click on the item you would like more information on, or to begin your shopping. It will take you directly to my website. Thank you ❤
Simply Sunday: Card Share of Rainbows

Hello Stampin’ Friends ~

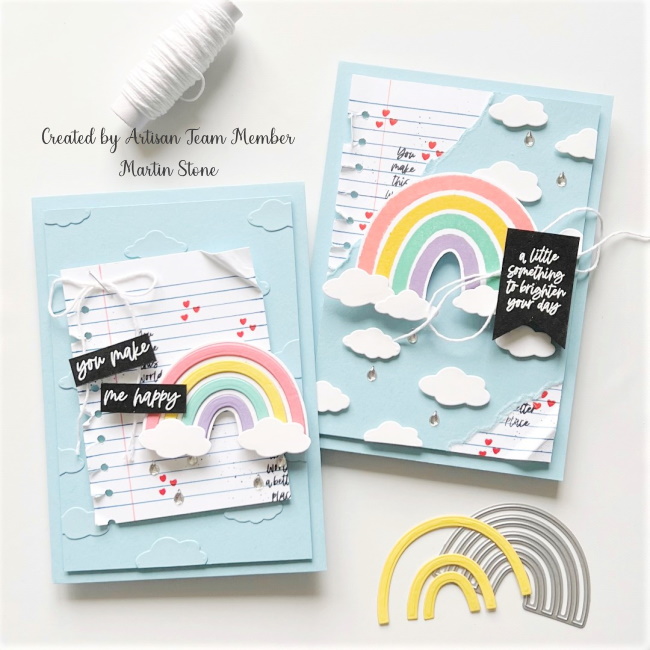
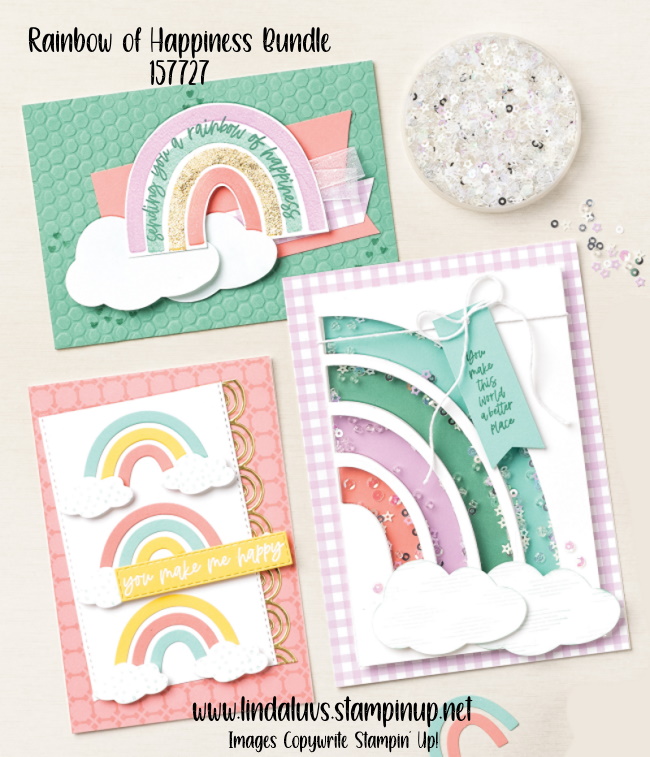
I love rainbows … do you? They are the comfort after the storm to tell us everything is alright. I have some very special cards to share with you today. These projects were made with the Rainbow of Happiness Bundle by our global Artisan Design Team members Berdien Weideveld, Martin Stone, and Tami Hewlett.

I have noted the designer on their creations to make sure they get the credit they deserve … You are in for a treat, and will be inspired by the different styles.

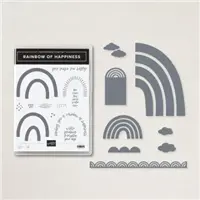
The bow-shaped greetings in the stamp set can be stamped on die-cut pieces for a unique look. The A Little Something To Brighten Your Day greeting is sized perfectly to fit on the tag piece in the die set. Add clouds and scallops to your handmade cards for extra texture and dimension.

The color pallet on these cards is amazing, so bright and fun!! I have one more set of these beautiful cards for you today. Baby cards …. Don’t you just love it when you find inspiration that is out of the box!

Today I have a quick video that introduces the Sunshine & Rainbows Designer paper which coordinates with the bundle and how you can get it for FREE!!

Add a little sunshine and rainbows to your life with this beautiful set of products. Look through our products to find the coordination you are looking for and get your Sale-A-Bration products for FREE! Now through February 28!!

Thank you for the visit today, hope you enjoyed these pretty cards as much as I did!!

Enjoy your Sunday!

TODAY’S STAMPIN’ SUPPLY LIST … If you liked the products used in today’s projects, I have links for you below. Just click on the item you would like more information on, or to begin your shopping. It will take you directly to my website. Thank you ❤
You Matter …

Hello Stampin’ Friends ~

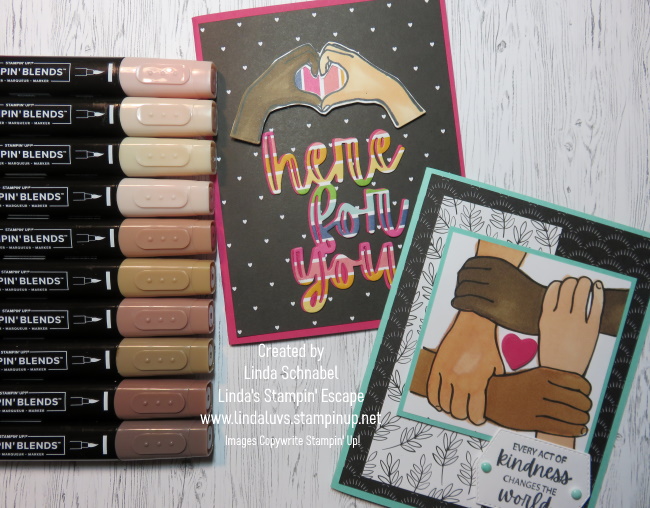
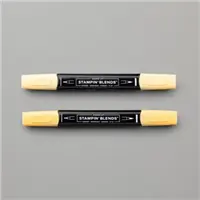
Today I have two cards that highlight the new Natural Tones Stampin’ Blends markers … Available May 1st. My Facebook followers knew I would showcase this sheet of designer paper because I am always asking them for “a show of hands” … lol

A simple card created by our Stampin’ Up! designers ….

I’m liking the new colors and grabbing all my stamp sets that I can use them on!! I was even cruising through the catalog again, but I’ve got some great ideas I will be sharing with you soon.

If you watched the video I shared yesterday, this card features two different designs from the All Together Designer Paper … and they even colored it like a rainbow! It looks great against the black background with the little white hearts.

I think the “pinky swear” stamp … at least that’s what it reminds me of, would make a perfect kids card as well. I’ll have to work on that one!

Here is the “All Together Collection” which includes the bundle, the set of 10 Stampin’ Blends and the Designer paper ….

I also have the Stampin’ Blends and the Bundle separate if you prefer ….

If you missed the download yesterday, I will leave it here ….

CLICK HERE TO DOWNLOAD THE STAMPIN’ UP! TONAL CHART

Thank you for stopping by today, have a great weekend

We’re in this Together …

Hello Stampin’ Friends ~

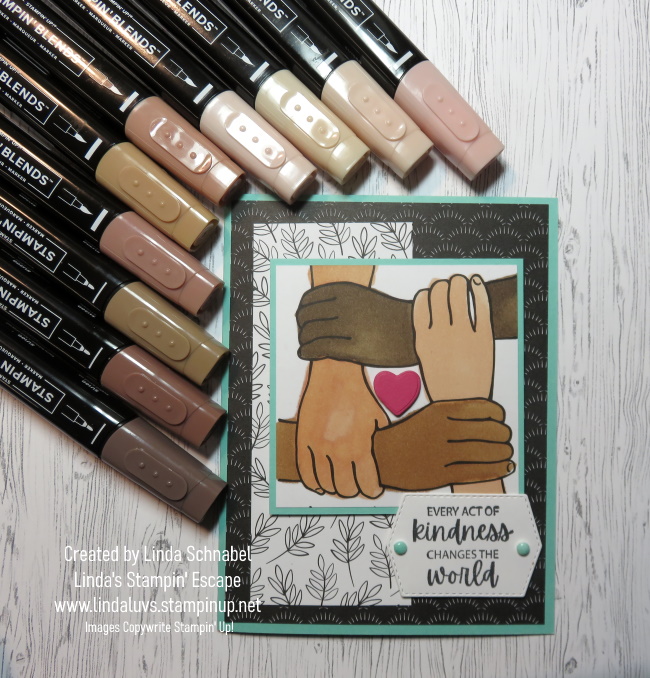
Today I’m going to share with you two cute cards and a short video that highlights the All Together Collection by Stampin’ Up! I’ll share the new Natural Tones Stampin’ Blends markers … It’s a fun sneak peek as these will not be released until May 1st … luckily that is only a couple days away!

Let me begin with the video which is a replay of my Facebook LIVE mini-class.

I am really enjoying these new markers, and the stamp set and designer paper are so much fun, and so needed in these times. I feel stampers are conduits to a happier world … sending joy one card at a time!!

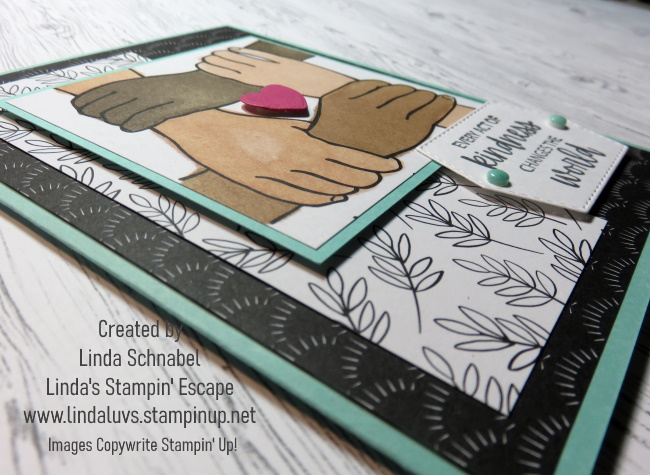
As I stated in the video, the designer paper was created with a nice and simple design so we don’t feel like we have to go crazy with shading and trying to create a realistic hand! It’s easy and fun to make … and share! I believe that every act of kindness truly does change the world.

Check out the layering on this card …

I created this color pallet of sorts with the 10 new Stampin’ Blend markers ….

CLICK HERE TO DOWNLOAD THE STAMPIN’ UP! TONAL CHART

Now … when you get your markers, you can write in the numbers like I did above and then try some color combinations of your own. I did a little experimenting here …

You know I’m going to have to come up with a card using those raised hands … I’m always asking for a “show of hands” for this or that … lol

Here is my card where I highlight the stamp set and dies along with the markers. … This really is a versatile stamp set and your can have a whole lot of fun with it!

This card was fun to make … and always remember that you can pick designer paper or greetings from anything you have in your stash. I’m sure you can come up with some really cool stuff. And like I said, those markers are perfect for hair and/or fur!! lol

Thank you for spending time here today, and to those of you who hung out with me last night for the LIVE broadcast.

Have an awesome day and don’t forget to share your smile 🙂

Hello Friend Card Tutorial 2

Hello Stampin’ Friends ~

Yesterday I told you that I would be sharing cards all this week from the Friendly Hello bundle from the Sale-a-bration Catalog. I know many of you have it … or have it on your wish list, so my intention is to show you the value of this beautiful bundle. Let’s get you started with a collection on beautiful samples.

Today’s card highlights several of the designer paper patterns from the bundle. I will include the dimensions and full instructions for you 🙂

Measurements: 

  • Thick Basic White
    • Card Base 4-1/4” x 11”, scored and folded to 4-1/4” x 5-1/2”
  • Basic White
    • Stamping & Die Cut: 1-3/4” x 5-1/4”
  • Friendly Hello Designer Paper
    • Layer 1: 4” x 5-1/4”
    • Die Cut: 2-3/4” x 3-3/4”
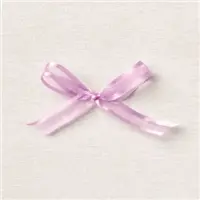
  • Fresh Freesia Open Weave Ribbon
    • 12”
  • Crinkled White Seam Binding
    • 10”

Instructions:

  • Adhere the Friendly Hello Designer Paper to the card base with Multipurpose Glue and set aside.
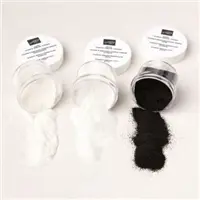
  • Mask the sentiment from Friendly Hello and ink the “hello” with Versamark and then Fresh Freesia. Stamp on the Basic White, sprinkle with White Stampin’ Emboss Powder and set with your Heat Tool.
  • Cut out the sentiment with a Stitched Rectangle Die and a piece of Friendly Hello Designer Paper with a Stitched So Sweetly Die.
  • Stamp the leaves from Friendly Hello in Granny Apple Green on Basic White and cut out with your Paper Snips.
  • Stamp one of the flowers below the bird in Basic Gray on Basic White.  Then use a Sponge Dauber to add Pool Party ink giving a final twist of the dauber in the center to add shading. Cut out using your Paper Snips.
  • Adhere the die cut label with Dimensionals.
  • Adhere the leaves with Multipurpose Glue.
  • Adhere the sentiment with Dimensionals.
  • Adhere the flower with Dimenionals and a double stack of Mini Dimensionals.
  • Cut the Fresh Freesia Open Weave Ribbon in half lengthwise. Create a double loop the Crinkled White Seam Binding.  Then tie with one piece of the Fresh Freesia Open Weave Ribbon.  Adhere with Mini Glue Dots.
  • Add Rhinestone Basic Jewels to accent.

Oh … I hope you are saving these great tutorials for future use! Today’s card would be fun to create with several of our awesome designer papers.

Have yourself a wonderful day, and thank you for joining me.

TODAY’S STAMPIN’ SUPPLY LIST … If you liked the products used in today’s projects, I have links for you below. Just click on the item you would like more information on, or to begin your shopping. It will take you directly to my website. Thank you ❤

This bundle is a Sale-a-bration item that you can receive for FREE Sale-a-bration with a qualifying purchase of $100 (before shipping / handling). CLICK HERE TO VIEW CATALOG

Hello Friend Card Tutorial

Hello Stampin’ Friends ~

All this week I will be sharing a wide variety of designs from the Friendly Hello bundle from the Sale-a-bration Catalog. My intention is to show you the value of this beautiful bundle. I know many of you have it … or have it on your wish list, so why not get you started on the right foot with lots of samples!

Today’s card is delicately beautiful and a bit more detailed, so I will include the dimensions and full instructions for you 🙂

Measurements: 

  • Card Base: 5-1/2″ x 8-1/2″ scored and folded at 4-1/4″
  • Cardstock #2: Basic White 4-1/4″ x 5-1/2″
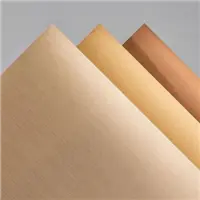
  • Cardstock #3: Brushed Metallic Cardstock (brass) 2-3/4″ x 4″
  • Cardstock #4: Basic White 2-3/4″ x 4″ (plus scrap for stamped bird)
  • Designer Paper #1: 4″ x 5-1/2″

Instructions:

  • Emboss cardstock #2 with embossing folder and adhere to card base.
  • Die cut DSP with largest scalloped die and adhere to embossed background.
  • Die cut cardstock #4 with third smallest scalloped die (the stitched one). Stamp spatters and greeting.
  • Adhere to brushed metallic cardstock #3 and then attach to card base with Stampin’ Dimensionals.
  • Adhere approximately 7″ of Petal Pink cotton ribbon in a zigzag where bird will be attached.
  • Stamp the bird on branch and color. Cut out and adhere with dimensionals.
  • Add butterflies and rhinestones.

These simple instructions will help you recreate this card easily. You will find easy to use links below to learn more about the products used, and to begin your shopping experience.

Thank you for stopping by today. I hope your day is a good one.

TODAY’S STAMPIN’ SUPPLY LIST … If you liked the products used in today’s projects, I have links for you below. Just click on the item you would like more information on, or to begin your shopping. It will take you directly to my website. Thank you ❤

This bundle is a Sale-a-bration item that you can receive for FREE Sale-a-bration with a qualifying purchase of $100 (before shipping / handling). CLICK HERE TO VIEW CATALOG

Hello Friend

Hello Stampin’ Friends ~

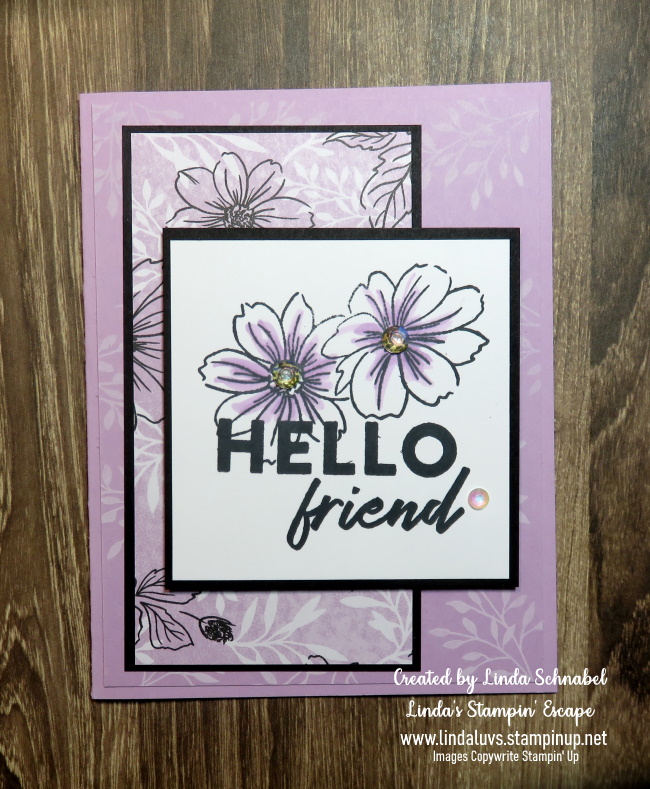
I have another card from the Friendly Hello you’ll find in the Sale-a-bration Catalog. I decided to showcase the stamp set on this one, along with the pretty paper. It is all about the Fresh Freesia today!

And what better way to make the Freesia pop than to add Black to it!! The designer paper is used as is … I didn’t do anything to it, however, I took the look of the light leaves and recreated it on the Fresh Freesia piece of cardstock I used as my background. We simply stamped the leaf image using the White Craft Ink. I love the soft look and that it creates added depth to the card.

I stamped the flowers and greeting onto Basic White with the Momento Ink on a 3″ x 3″ square and added a black mat to make it pop. The flower was colored with the Fresh Freesia Stampin’ Blends and then added the Iridescent Rhinestones. That entire piece was popped up.

I think these fun rhinestones are perfect for this card … the large ones fit nicely into the centers of the flower, and I added three to draw your eye around the entire focal point. Besides, we all like a little bling now and then!

Thank you for joining me today … Have a great week!

TODAY’S STAMPIN’ SUPPLY LIST … If you liked the products used in today’s projects, I have links for you below. Just click on the item you would like more information on, or to begin your shopping. It will take you directly to my website. Thank you ❤

This bundle is a Sale-a-bration item that you can receive for FREE Sale-a-bration with a qualifying purchase of $100 (before shipping / handling). CLICK HERE TO VIEW CATALOG

Simply Sunday: Friendly Hello

Hello Stampin’ Friends ~

I missed you yesterday as I was hosting my Virtual Kick Off Party for the Jan-Jun Mini and Sale-a-bration Catalogs … we had a blast! I showcased four product suites or bundles with one being the Friendly Hello from the Sale-a-bration Catalog.

The designer paper in this bundle is amazing ….

The pretty patterns are fun and playful and so easy to work with … they are so pretty the really wouldn’t need much to turn it into a card, and that is exactly what I demonstrated!

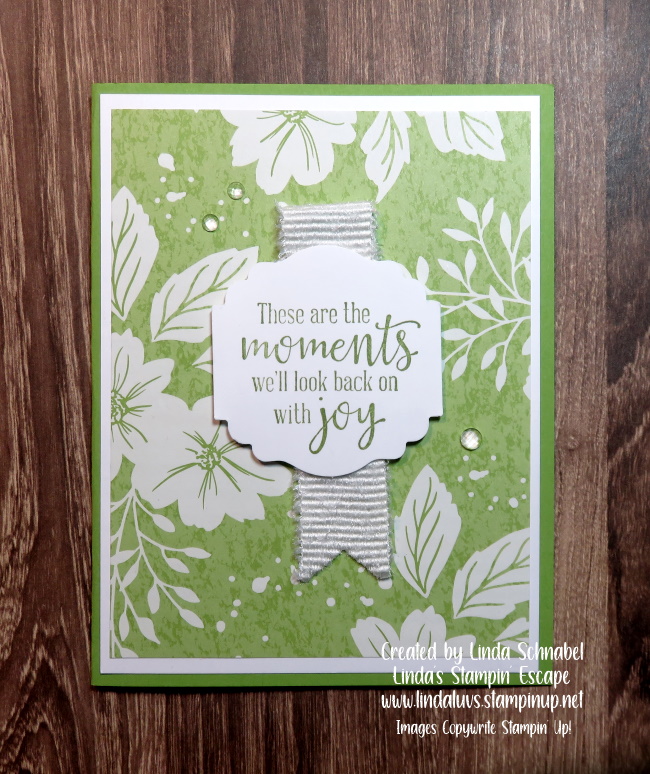
I chose the Granny Apple Green with White floral pattern …

I trimmed the designer paper to 5″ x 3-3/4″ … my mat is Basic White and cut to 5-1/4″ x 4″ and the Granny Apple Green card base is 8-1/2″ x 5-1/2″ and scored at 4-1/4″. Both cards I am sharing today are using the same paper and dimensions.

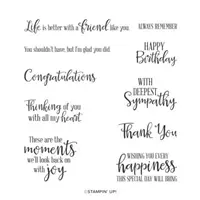
I simply layered my cardstock pieces … then added my greeting which comes from the Peaceful Moments stamp set and punched with the Label Me Lovely Punch. Add just a piece of the pretty new White 3/4″ Frayed Ribbon and a few Elegant Faceted Gems.

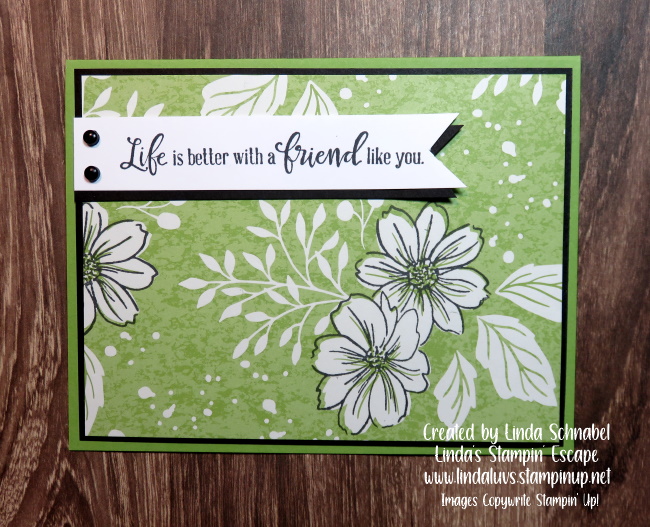
Now for the next card, I swapped out the White Mat for a Black one and wow …

For this card, I wanted to show that the dual floral stamp that is in the stamp set aligns with the flowers on your designer paper! I stamped it in Black to really bring that Granny Apple Green to a bolder level … who knew! lol You could add more black as both the different leaves have coordinating stamps.

I used that same stamp set ” Peaceful Moments” for my greeting, and just stamped it on a scrap piece of white which I turned into a banner! I made a black banner as well and put it behind the white. I used the NEW Classic Mat Dots to anchor my greeting.

Isn’t it amazing how the same paper can be changed up to create two different cards. I have only begun to work with this bundle. You can create tons of quick cards with this designer paper … and I have yet to share cards with the bird. Stay tuned, I have so much more to share!

This bundle is a Sale-a-bration item that you can receive for FREE Sale-a-bration with a qualifying purchase of $100 (before shipping / handling). CLICK HERE TO VIEW CATALOG

Thank you for hanging out with me today, and I hope you are just as excited as I am for this new bundle and you’re looking forward to seeing more. 🙂

Have a wonderful day ~

TODAY’S STAMPIN’ SUPPLY LIST … If you liked the products used in today’s projects, I have links for you below. Just click on the item you would like more information on, or to begin your shopping. It will take you directly to my website. Thank you ❤
Sweet Talk Card Parade: Be My Valentine!

Hello Stampin’ Friends ~

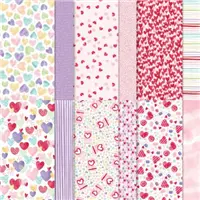
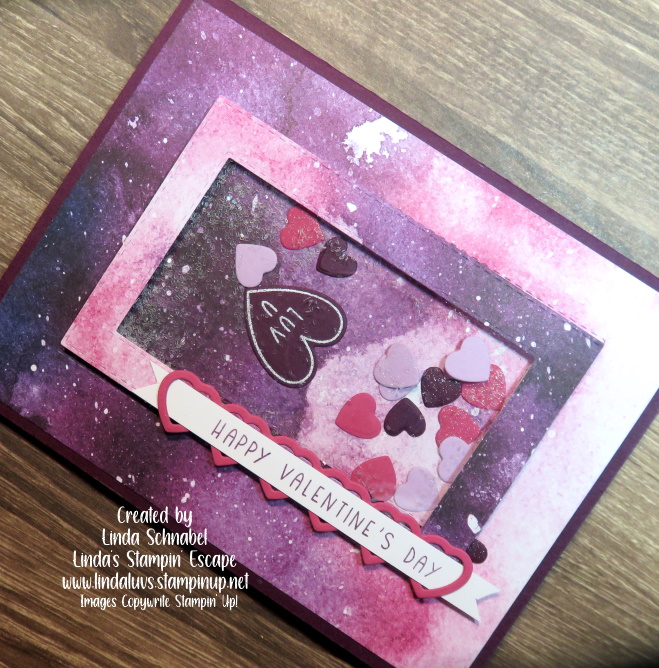
I am so excited to share all of these cards with you today … the cards turned out so cute and are all so different for being created with the same suite. I tried to showcase all of the products in the suite … I did good!

A simple card base and a 3″ x 3″ square with a 3-1/4″ x 3-1/4″ mat with a coordinating color behind it. Stamp on your greeting and your good to go. Remember, you can stamp those cute hearts instead of die cutting your designer paper … just do what works best for you!

My second card highlights the embossing folder and the hearts and Iridescent Rhinestones really say … Happy Valentines Day!

By popping up the embossed card stock, you not only add texture to your card but so much dimension, and that includes the playful layering of the hearts. Who wouldn’t want to get this little cutie!? It’s just full of love

The third card adds a bit more “bold” to our valentine cards … I pulled the red out of the designer paper pattern and added some black. Don’t you just love the gingham ribbon, so glad it carried over, it adds that nice pop without over taking the the hearts.

The hearts are stamped in Real Red and die cut so I could “pop” them up too! There is double the layers because I popped up the tags as well. This card wouldn’t have to be for Valentines at all … it’s a perfect way to say “I’m glad you’re in my life” to your friends (BFF!)

I’m so thrilled with the way all these cards turned out and so happy to share them with you. I hope they inspire you to create and send Valentines or cards filled with love for a friend (or your favorite sister)!

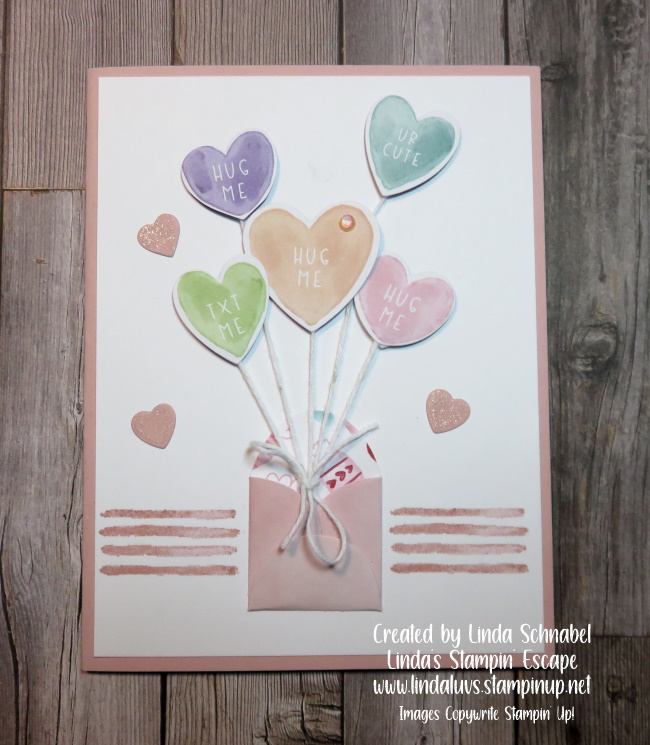
One last card for you … This is one of my favorites! I just love the way that the hearts are floating out of the little envelope.

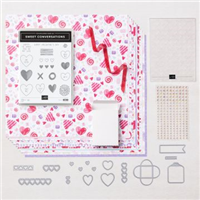
Don’t forget … Sale-a-bration is in full swing and you will receive a FREE Sale-a-bration item with the purchase of this suite … Add the Take Your Pick Tool and the mat and you’ll have enough for 2 FREE items or a Level 2 Sale-a-bration item. CLICK HERE TO VIEW CATALOG

Thank you for hanging out with me today, and I hope you are just as excited as I am for this new suite, and that I’ve inspired you to get back in your stamp room! Have fun 🙂

Have a wonderful day ~

TODAY’S STAMPIN’ SUPPLY LIST … If you liked the products used in today’s projects, I have links for you below. Just click on the item you would like more information on, or to begin your shopping. It will take you directly to my website. Thank you ❤
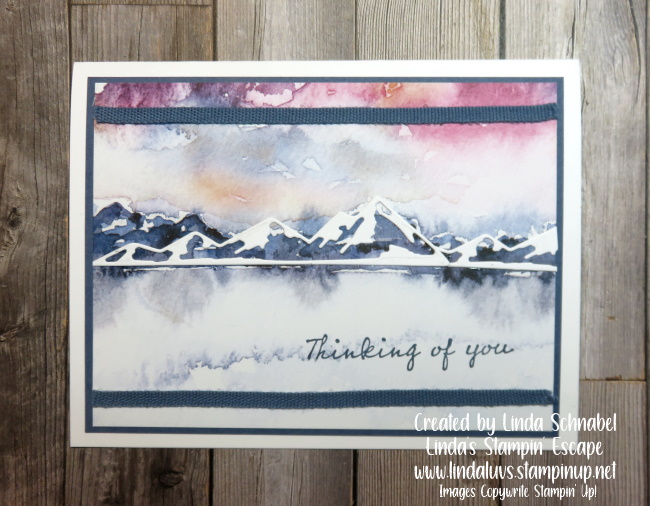
New Horizons Trio of Cards!

Hello Stampin’ Friends ~

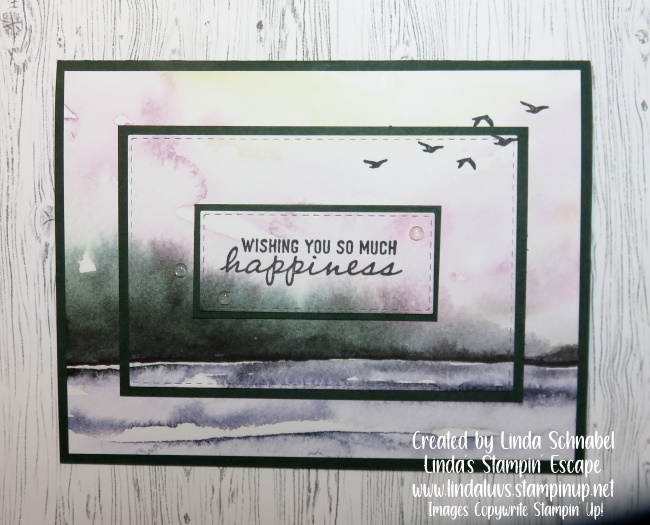
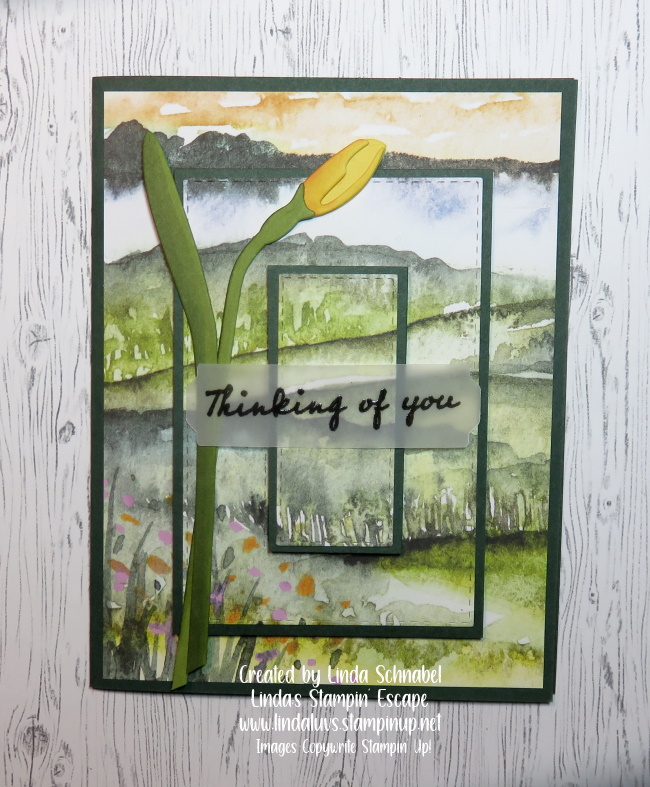
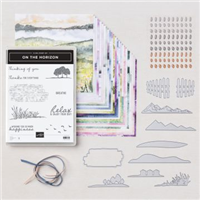
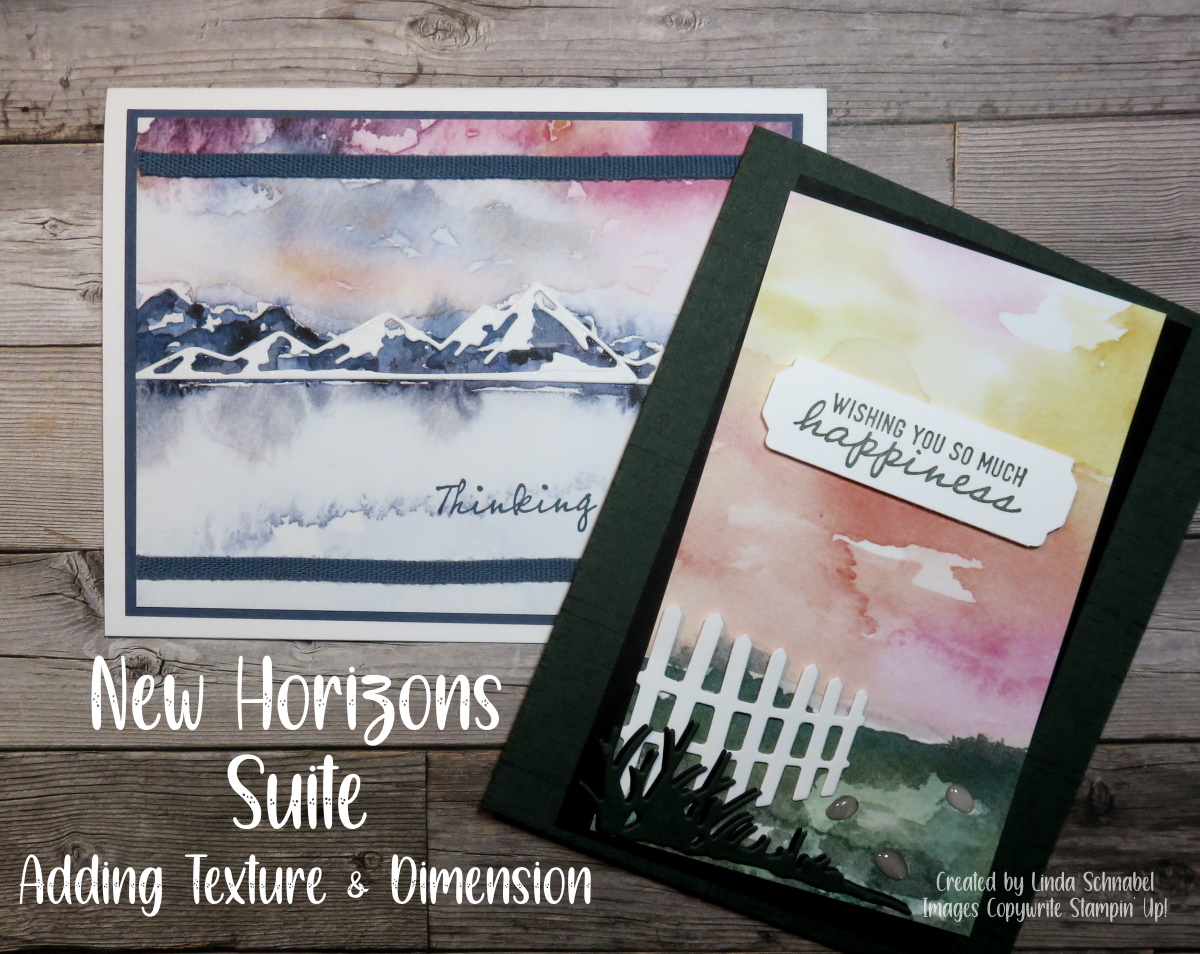
Today I will be sharing the two cards that I made during my Facebook Live last night, plus another card I created with the left over designer paper from the second card! I used the New Horizons suite … and highlighted how amazing the coordinating dies look with the designer paper.

Let’s start the fun off with the video …

Now that you watched the video, let’s get a close up of those cards. The first card begins with a 8-1/2″ x 5-1/2″ Basic White card base. The New Horizons Designer paper was cut to 5″ x 4-3/4″ with a Basic Black mat that was cut to 5-1/8″ x 4-7/8″.

It’s amazing what a little ribbon and a die cut can do for a card … and it’s so easy to make because the “work” is already done for you with this stunning designer paper. Stampin’ Up! gets two thumbs up from me … I LOVE this Suite!

My second card highlights the fence and grasses die … It really does look like an invitation to walk into the sunset, doesn’t it!?

The stamping of the background is an old technique but one I pull out quite a bit. It really does create a sense of depth and texture without adding any bulk to your card, we’ll save that for our dies

The third card is actually the other half of the designer paper from our second card, and I simple cut the 5″ x 3″ piece into equal 1″ strips. I would suggest to cut down the 5″ to 4-3/4″ as it would make a nicer border around your card instead of going almost to the bottom.

This card has a few more layers but it is not hard to do, let’s start with our base;

  • The Evening Evergreen Base: 8-1/2″ x 5-1/2″ then score at 4-1/4″ and fold
  • The Evening Evergreen Mat: 5-1/4″ x 4″ … Textured with the Hammered Metal Embossing Folder
  • Designer Paper: Three strips of 1″ x 4-3/4″ with a mat of Basic Black (3) 1-1/8″ x 4-7/8″

These are all layered directly on top of each other but if you wanted to add additional dimension to your card, you could secure the layers with Stampin’ Dimensionals and pop them up.

The greeting was stamped in black and punched with the Tailored Tag punch. A second punch was done with Basic Black so we could mat the greeting … this has been popped up with dimensionals and embellished with the Silver & Clear Epoxy elements. I then colored them with the Stampin’ Blends.

Don’t forget … Sale-a-bration is in full swing and you will receive a FREE Sale-a-bration item with the purchase of this suite … Add the Take Your Pick Tool, the Silicone mat… whatever you’d like and you’ll have enough for 2 FREE items or a Level 2 Sale-a-bration item. CLICK HERE TO VIEW CATALOG

Thank you for hanging out with me today, and I hope you are just as excited as I am for this new suite, and that I’ve inspired you to get back in your stamp room! Have fun 🙂

Have a wonderful day ~

TODAY’S STAMPIN’ SUPPLY LIST … If you liked the products used in today’s projects, I have links for you below. Just click on the item you would like more information on, or to begin your shopping. It will take you directly to my website. Thank you ❤
Slim Slayings Tutorial …

Hello Stampin’ Friends ~

I’m ready to shake off the old and kick off this new year with positivity and creativity! I hope you’ll join me in the challenge of sharing more joy this year. The new January-2-June Mini Catalog is packed with just what you need to kick start your creative projects. If you haven’t had a chance to check it out yet, you’ll want to make a point to see some of the exciting new goodies.

I’m so giddy about the new Slim Sayings Bundle, that I just had to use it for this month’s tutorial. I think you’ll love this fresh card style, too!

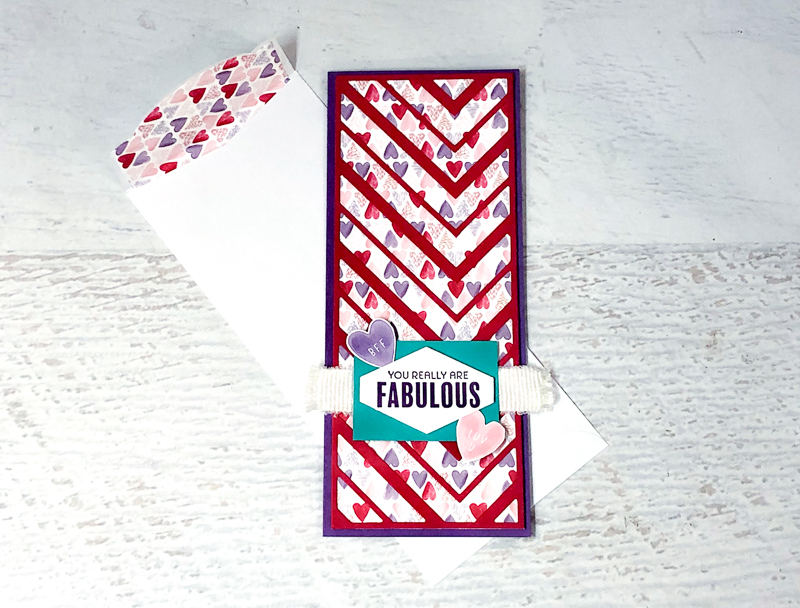
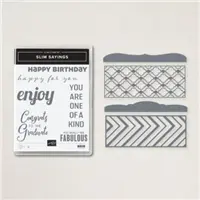
This tutorial features the Slim Sayings Bundle (#157966) and the Sweet Talk 12″ x 12″ Designer Series Paper (#157616) to make a sweet card for a fabulous friend!
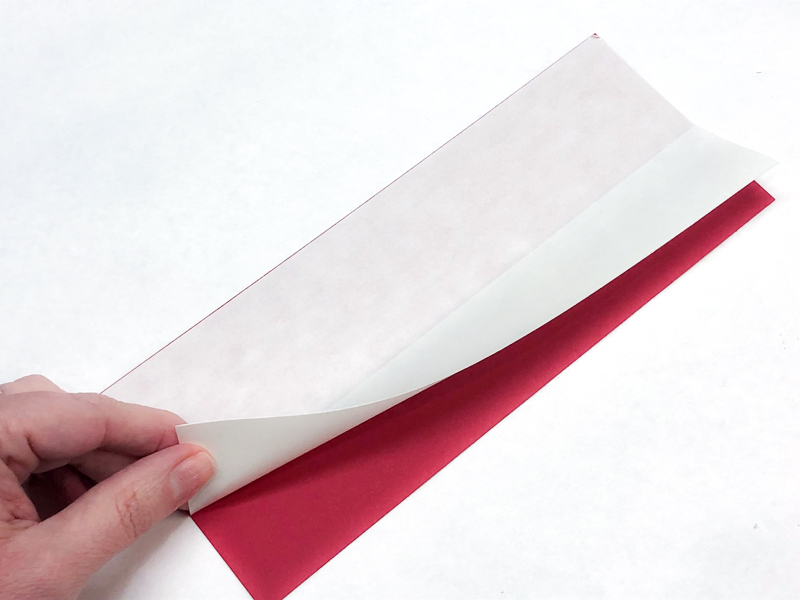
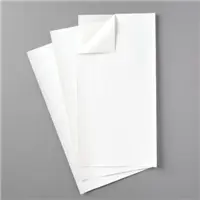
Project - Step 1 1. Add Adhesive Sheet Cut Real Red cardstock and Adhesive Sheet to 3-1/2″ x 8-1/2″. Peel backing off of Adhesive Sheet, line up, and adhere to back of cardstock.
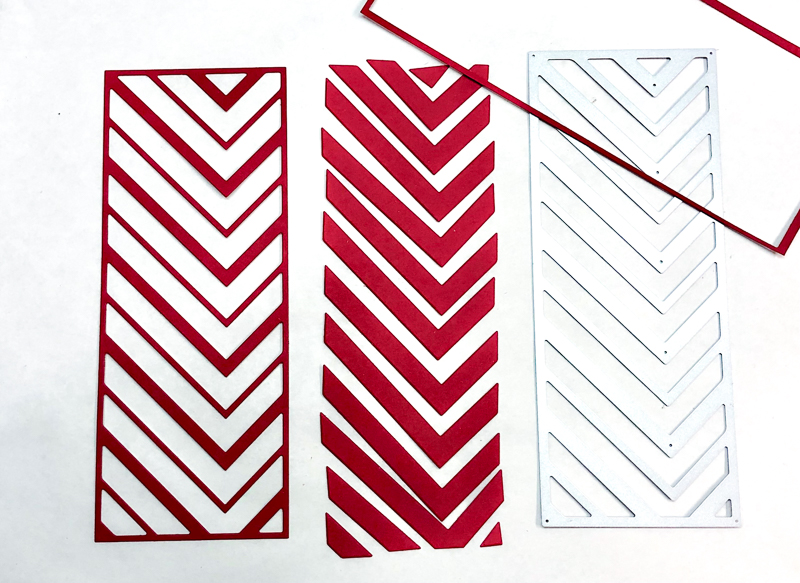
Project - Step 2 2. Slim Die Cut Center die cut on cardstock and run through Stampin’ Cut & Emboss. Pop the die cut pieces from the die. Set aside the negative pieces to use on the inside of the card and on other projects.
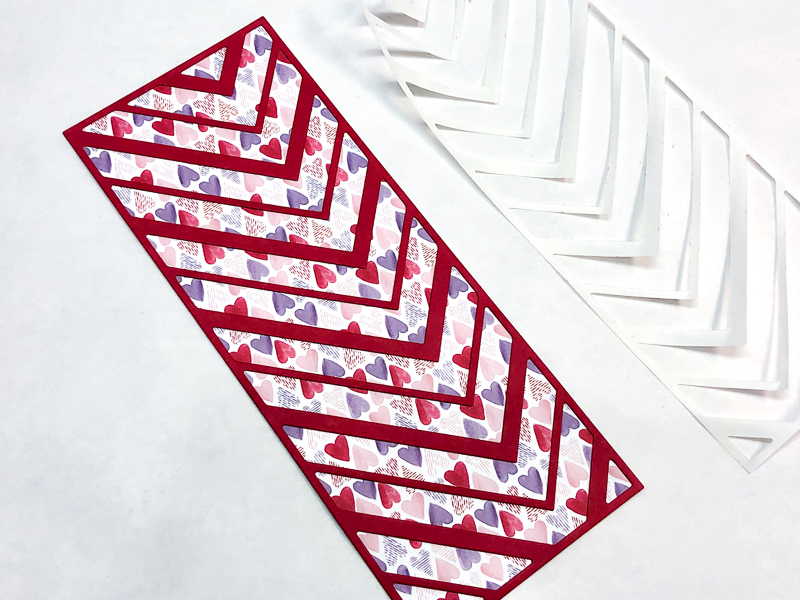
Project - Step 3 3. Adhere Die Cut Cut Sweet Talk Paper to 3-1/4″ x 8-1/4″. Peel adhesive backing off of slim die cut and carefully line up on the Sweet Talk paper and adhere. Start with lining up the bottom corners and then the top corners.
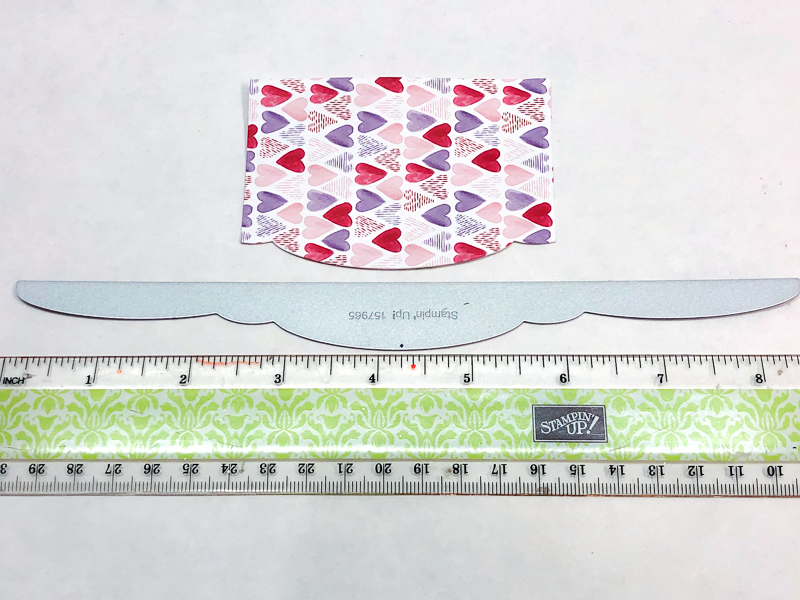
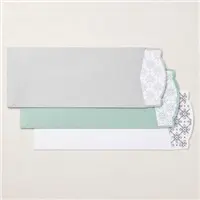
Project - Step 4 4. Die Cut Scallop Edge Pick a gray or white Slimline Envelope (#157981). Cut Sweet Talk paper to 3-1/2″ x 3″. Mark the center of the 3-1/2″ side and the center of the scalloped die (matches envelope flap) from the Slim Card Dies. Line up centers and die cut.
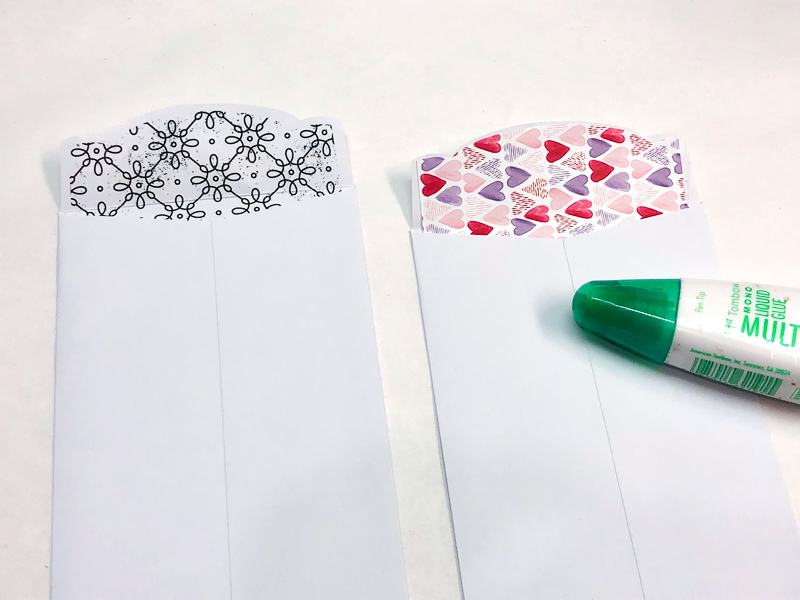
Project - Step 5 5. Customize Envelope Flap Use Multipurpose Liquid Glue to adhere the die cut paper inside the envelope flap so it matches the card. You’ll Use Multipurpose Liquid Glue or Stampin’ SEAL+ to adhere you envelope flap closed when ready to mail. Note: This end-opening envelope may require additional postage. Check before mailing.
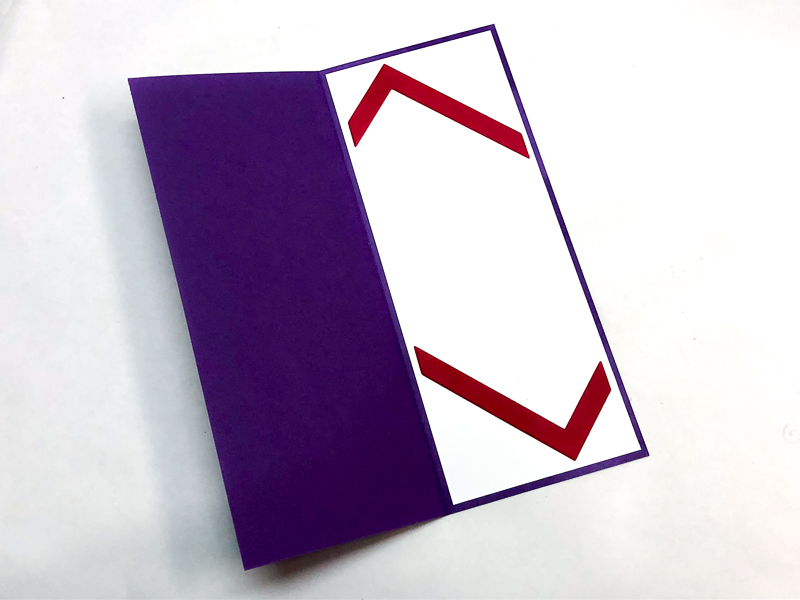
Project - Step 6 6. Cut Card Base Cut Gorgeous Grape cardstock to 7″ x 8-1/2″. Score at 3-1/2″ along the 7″ side to make the slimline card base. Adhere 3-1/4″ x 8-1/4″ Basic White cardstock inside card. Add two of the negative die cut strips inside the card as accents.
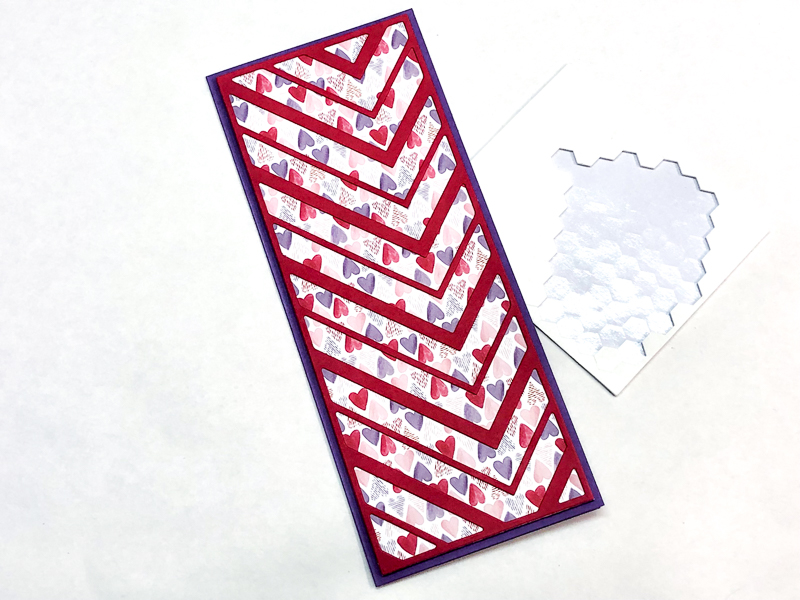
Project - Step 7 7. Layer Card Front Adhere the layered slim die cut and Sweet Talk to card front. Use Stampin’ Dimensionals if you want extra dimension.
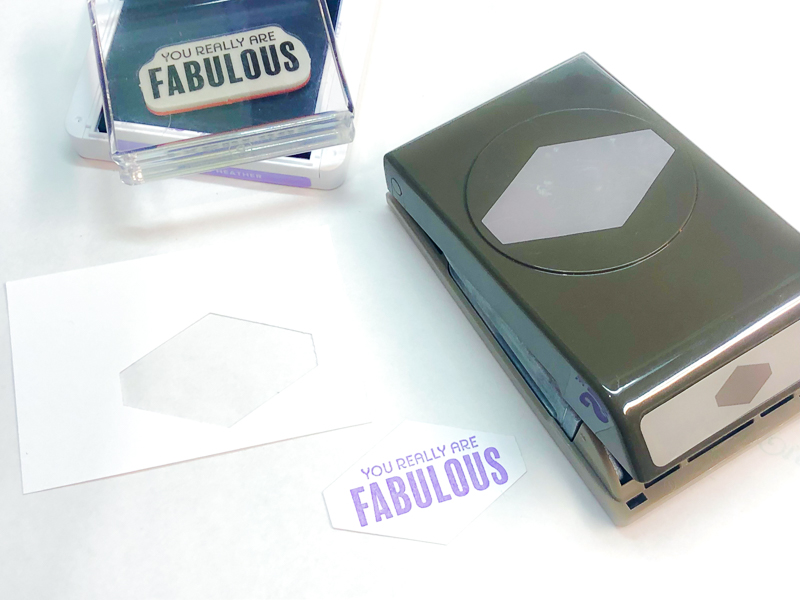
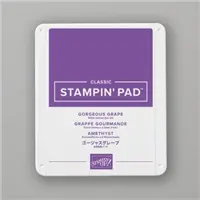
Project - Step 8 8. Stamp & Punch Greeting Stamp greeting with Gorgeous Grape ink on Basic White cardstock. Punch with Tailored Tag Punch (#145667).
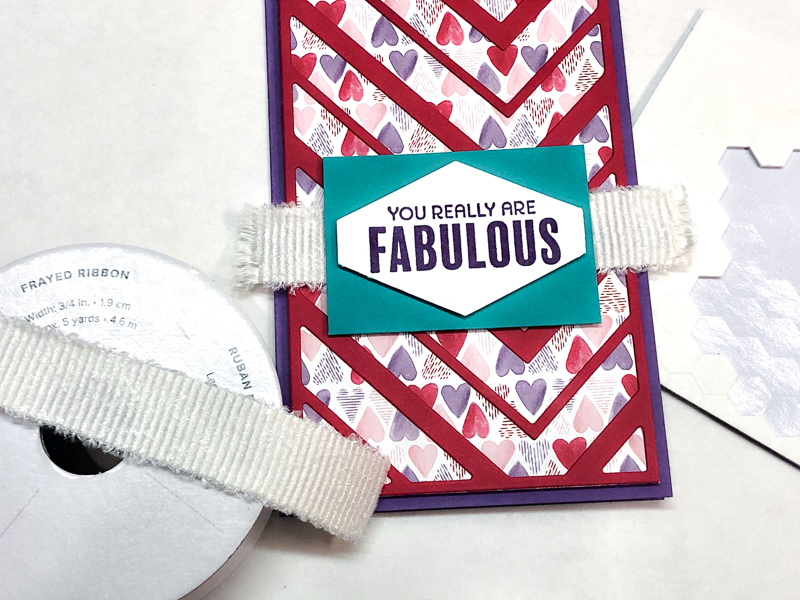
Project - Step 9 9. Add Greeting & Ribbon Cut a 4-1/2″ piece of White 3/4″ Frayed Ribbon (#158138). Pull threads on each end to fray the ribbon. Adhere to card with Multipurpose Liquid Glue or Glue Dots. Layer punched greeting onto 2-1/2″ x 1-3/4″ Bermuda Bay cardstock with Stampin’ Dimensional. Adhere over ribbon with Stampin’ Dimensionals.
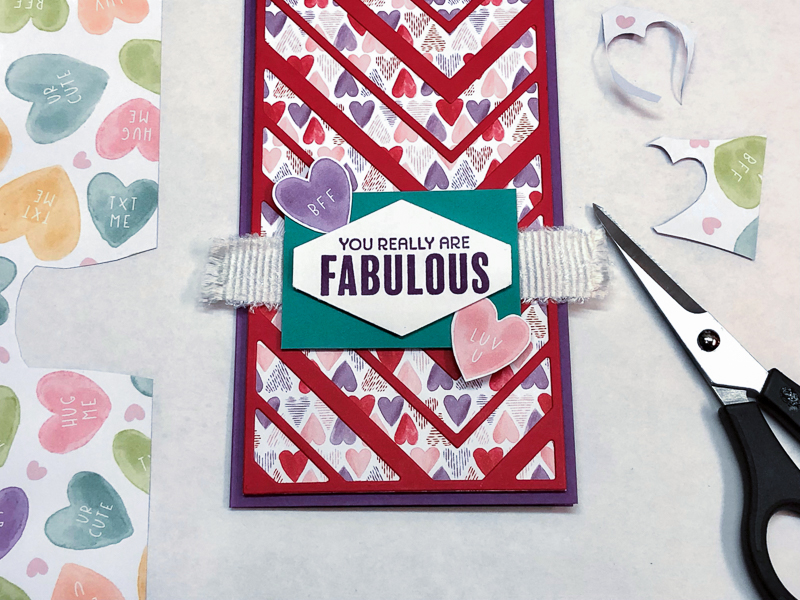
Project - Step 10 10. Hand-cut Hearts Hand-cut two hearts from the Sweet Talk Designer Series Paper with Paper Snips. Adhere to greeting background with Glue Dots.
Sale-a-Bration is happening now through the end of February, so don’t miss your chance to get new goodies and earn fun bonus stamps or paper from the Sale-a-Bration brochure with your qualifying purchases or parties!

Now is a great time to create some fun with friends so join a class or contact me to host a party!

Have a beautiful day ~

TODAY’S STAMPIN’ SUPPLY LIST … If you liked the products used in today’s projects, I have links for you below. Just click on the item you would like more information on, or to begin your shopping. It will take you directly to my website. Thank you!

Rainbows of Happiness …

Hello Stampin’ Friends ~

Are you one of those people who runs for the camera or grab your phone when you see a rainbow? Me too!! Who doesn’t like rainbows … they portray happiness and good luck, so doesn’t that sound like the perfect card to send someone.

Today I have a quick video that introduces the Sunshine & Rainbows Designer paper which coordinates with the bundle and how you can get it for FREE!!

Add a little sunshine and rainbows to your life with this beautiful set of products. Look through our products to find the coordination you are looking for and get your Sale-A-Bration products for FREE! Now through February 28!!

I fell in love with all the different ways you can make cards with this bundle. Look at all they layers, fun and bling!! It’s just a bundle of smiles and happiness 🙂

The Rainbow of Happiness is just one of the bundles that will be highlighted during my Mini Catty and Sale-a-bration Kick off Party!!

If you are new to my group and would like to join in on the party … CLICK HERE and request membership!! Feel free to invite your friends to join in!! If you are a Stampin’ Up! demonstrator, you are welcome to join in on the fun … I do however, reserve the prizes for my customers and downline members. I appreciate your understanding.

Thank you for the visit today!! Hope to see you at the party.

Happy Monday … Let’s have a great week!

Chalkboard Technique with a Twist!

Hello Stampin’ Friends ~

Today I want to share a video with you where I demonstrate the Chalkboard technique. We’re going to re-visit this fun card / technique because it was created with hearts for Valentines.

Now … while the stamp set I used has discontinued, the techniques never do!! And you can easily substitute the Sweet Conversations stamp set that I have shared with you the past few day. The Heart Punches are still in the Annual Catalog so this card would be easy to replicate.

Grab a cup of coffee or tea and sit back and enjoy this fun technique … you’ll love the twist of “coloring” your hearts!

Just a note: The Winter Fest downtown is not this weekend (replay of video) HOWEVER … watch for an announcement telling you about my upcoming “J2J Mini Catalog Kick Off Party!!!

I’ve always liked the “Chalkboard” technique and don’t always remember to use it! I guess that happens to all of us! Sometimes we forget about all the cool techniques and fun folds when we start creating, so I invite you to find me on my YouTube Channel … CLICK HERE! There you will be able to find techniques, fun folds and more.

While you are are there, please give any videos you’ve enjoyed a “thumbs up” and SUBSCRIBE to my channel so you get notifications when a post a new video.

Thank you for hanging out today … Hope you head over to my YouTube Channel and check out some of your favorite techniques. Let me know if there is one you want to see but I haven’t done it yet, I will put it on my list of video’s to do!

Have a wonderful day ~

TODAY’S STAMPIN’ SUPPLY LIST … If you liked the products used in today’s projects, I have links for you below. Just click on the item you would like more information on, or to begin your shopping. It will take you directly to my website. Thank you ❤