Good as Gold and many, many more!

Hello Stampin’ Friends,

Wow … It’s Sunday already! Boy the weekends just fly by. Come to think of it, so do the weeks and months, it’s already December and another year almost over … wow!

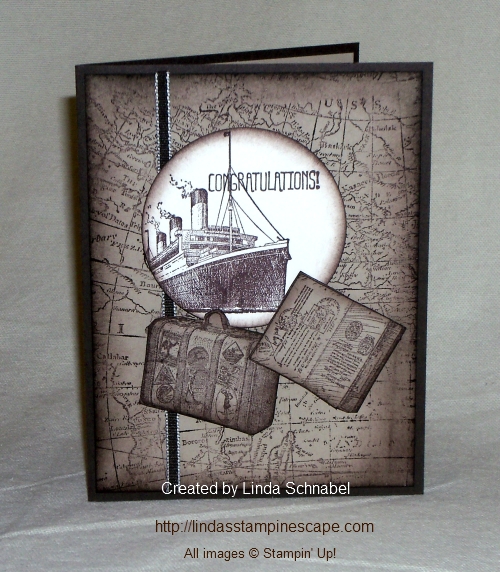
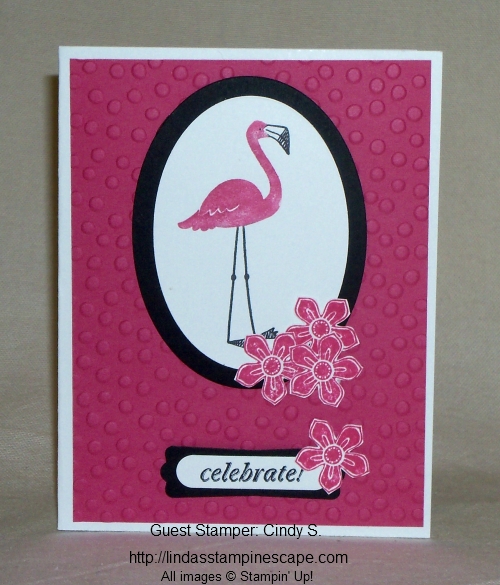
As promised yesterday, I will be sharing more card samples that I created using products from our Year End Clearance. (One of the items I wanted to share is already gone).

CM15BWhile supplies last.            


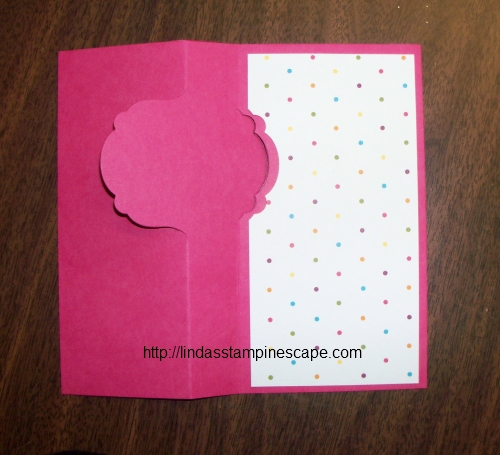
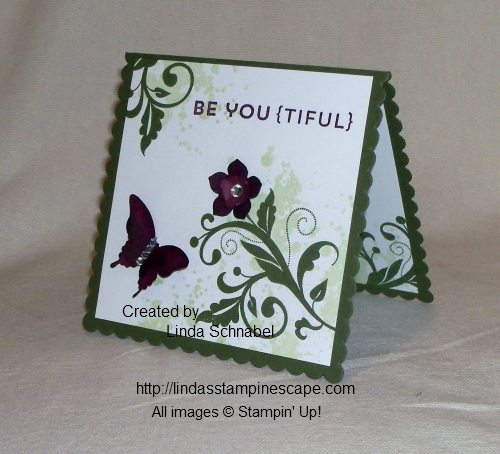
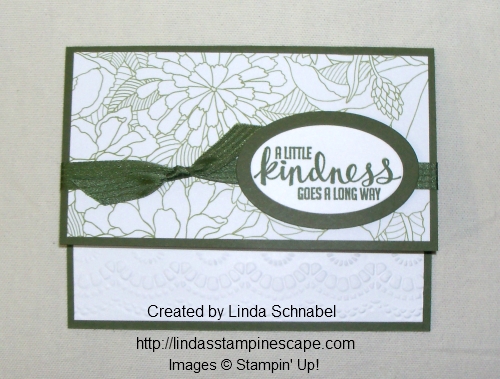
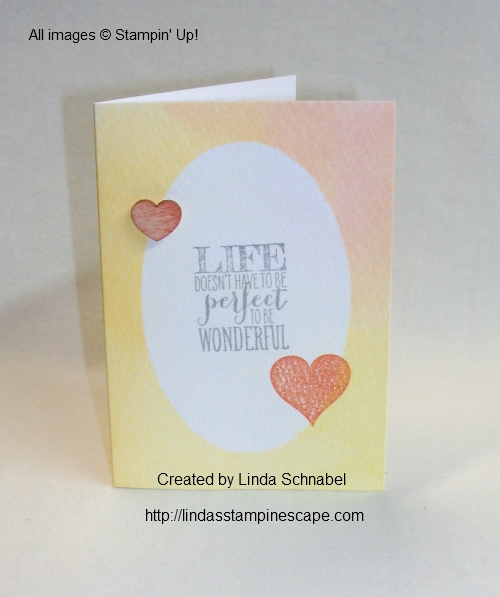
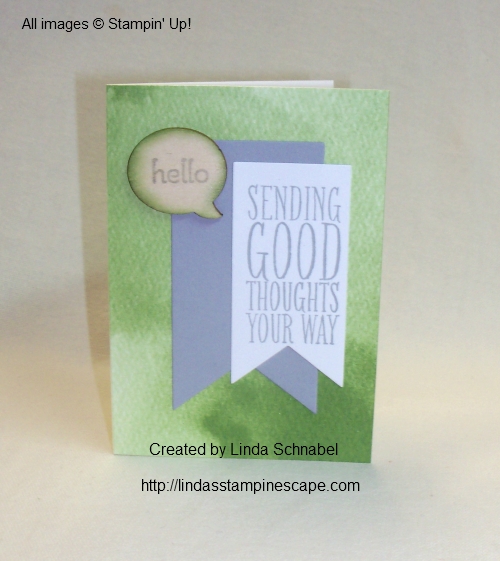
Yesterday I shared several samples from the Watercolor Wonder Note cards … today I have two more ideas for you!

Watercolor Wonder Designer Note Cards & Envelopes

Watercolor Wonder Designer Note Cards & Envelopes 133362
Price: $12.95 $5.19
Easiest DIY cards ever! Take a printed Watercolor Wonder Designer Note Card. Stamp or write on it. Done! Coordinate with the Watercolor Wonder suite.■ 20 printed cards on watercolor paper: 4 ea. of 5 designs
■ 20 Ivory envelopes
■ Card size: 3-1/2″ x 5″

000_0519

000_0518

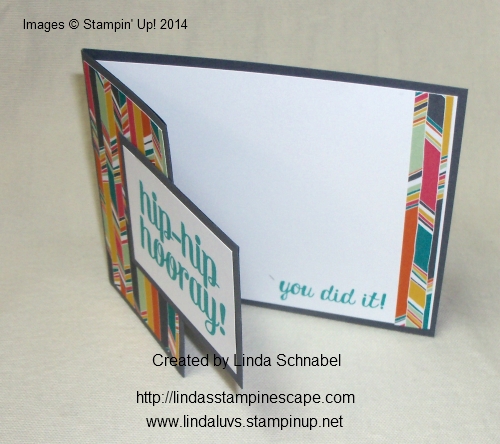
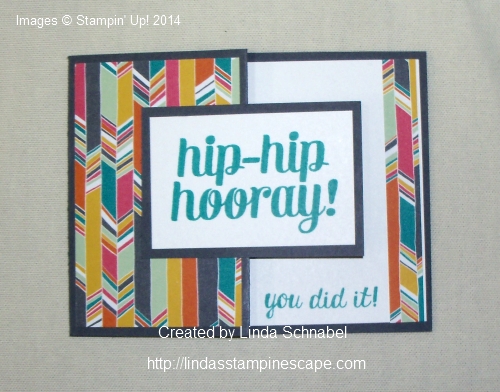
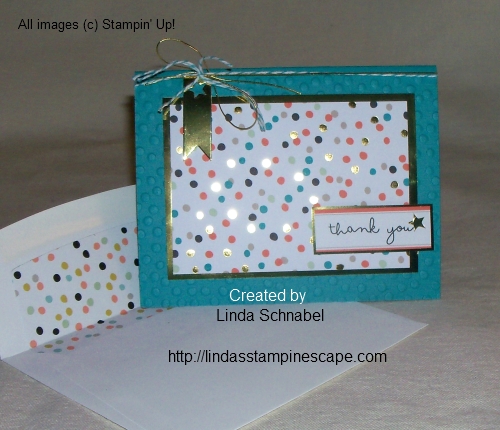
Here is the “Good as Gold” Card kit … my samples. Stampin’ Up! also has patterns for you to follow in the kit, it’s all there for you and for only $4.39 you can create 8 fabulous cards for slightly over 50¢ a card!!

Good as Gold Card Kit

Good As Gold Card Kit 133512
Price: $10.95 $4.39
Quickly create thank-you cards in gorgeous Bermuda Bay and Tangerine Tango with rich gold accents! Also features Basic Black, Pistachio Pudding, and Sahara Sand.Kit includes
• 8 card bases (3-1/2″ x 5″)
• 8 envelope liners
• 1 sheet Gold Foil Tags
• 1 sheet printed die-cut tags
• 8 pieces Gold Elastic Cord (24″ each)
• 8 pieces Bermuda Bay Baker’s Twine (24″ each)

000_0708000_0705

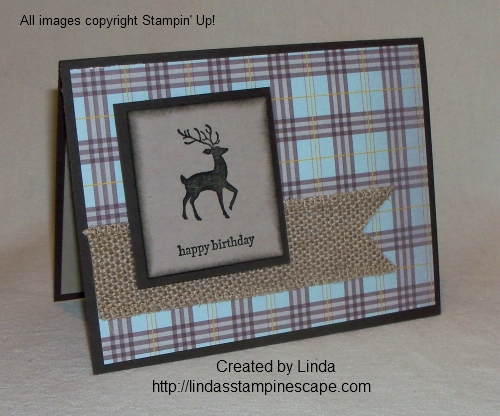
Next, I’d like to share some card samples I made using the “Sweater Weather” Designer Series Paper. This is awesome paper for those “guy cards” you need to make. Pair it up with stamps sets like “Wetlands”, “Walk in the Wild” or any of our great greeting sets.

Sweater Weather Designer Series Paper
Sweater Weather Designer Series Paper 132184
Price: $10.95 $4.39
Warm colors and texture-rich designs will make you want to wrap up in your favorite sweater and scarf for a little seasonal crafting. 12 sheets: 2 ea. of 6 double-sided designs. 12″ x 12″. Acid free, lignin free.
Chocolate Chip, Crushed Curry, Sahara Sand, Soft Sky, Tangerine Tango, Very Vanilla, Whisper White.

000_0338

000_0136

000_0134

000_0345

000_0109

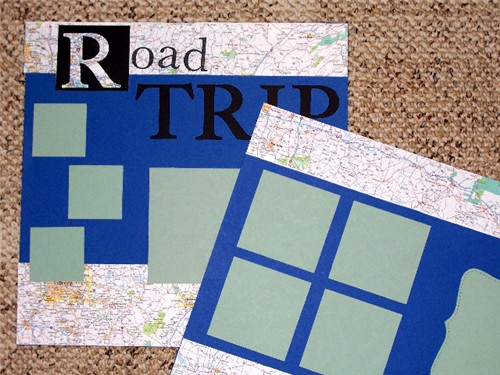
I have one more item that I would like to share with you … the “Typeset Alphabet Bigz Die”. This works great for your scrapbook pages, cards and projects. We used it a lot for school projects and banners.

Typeset Alphabet Bigz Die
Typeset Alphabet Bigz Die 127553
Price: $89.95 $53.99
4 dies. Includes 26 letters, 10 numbers, and 1 symbol: ea. 1-1/4″ high. Use with Big Shot and Standard Cutting Pads.

Road Trip - Sept ScrapClub

100_2188

Hope you enjoyed today’s showcase of cards and projects using these fabulous products at unbelievable prices. They would make a great gift for the crafter on your Christmas shopping list… or a little reward for yourself.

Because they are year end closeouts … it’s while supplies last, and some are already gone. Don’t delay.

Thank you so much for stopping by and have a wonderful Sunday ~

blog-closing-small


Shine Like Star’s in the Universe …

Hello Stampin’ Friends ~

Today I want to share a card with you that I created using my new Banner Blessings stamp set! I also have the weekly deals for you listed below.

Every since the “Banner Blessings” stamp set was released, I knew it was one that I had to have. I shared some samples with you earlier this month (Click Here to view).

I did today’s card in Gold, Vanilla and a whole lot of stars! Many of the items that I used for my card today are currently listed in the Extravaganza!

000_1726

Let’s begin with the background created with the “Lucky Star’s” embossing folder found in the Holiday Catalog. I got to use my new Impressions Boutique machine too!

I knew I wanted to use both the gold glimmer and foil papers with the star’s and create a bigger impact. The foil is attached to the base of the card and the glimmer star is popped up with the dimensionals.

Next … I embossed the greeting twice in gold. I did that so I could cut out the banner and create additional dimension on the card. I cut my Stampin’ Dimensionals in half to pop it up over the greeting and curled the edges of my banner. There is definitely no shortage of dimension on this card.

000_1728

These items are included in the extravaganza … Glimmer Paper – 50% off / Big Shot Magnetic Platform – 40% off / Star Framelit Dies – 20% off until December 2nd.

 I have the full list of ingredients below the “Weekly Deals” … 

CM1634B

Alphabet Press Textured Impressions Embossing Folder

Price: $7.95 $5.96
Argyle Textured Impressions Embossing Folder

Price: $7.95 $5.96
Fancy Fan Textured Impressions Embossing Folder

Price: $7.95 $5.96
Label Petite Curly Punch

Price: $12.95 $9.71
Merry Monogram Stamp Brush Set -- Digital Download
Merry Monogram Stamp Brush Set – Digital Download

Price: $9.95 $5.97
Rosette Designer Bigz XL Die
Rosette Designer Bigz Xl Die

Price: $42.95 $32.21
Silver Sparkle Dazzling Details

Price: $2.50 $1.88


Thank you so much for checking out my blog today.

The full list of ingredients for today’s card listed below under Stampin’ Supply List.

Have a wonderful day ~

blog-closing-small

Stampin’ Supply List ~


It’s beginning to look a lot like Christmas …

Hello Stampin’ Friends,

Today I would like to share with you some wonderful samples from the Stampin’ Up! Get Inspired blog and Senior Staff Writer Cindy B.

Her projects were so pretty I just had to share, it really is beginning to look a lot like Christmas!

If you’re a papercrafter, Christmas is probably one of your busiest times of the year. And I don’t know about you, but I pretty much want everything in this year’s holiday catalog . . . so deciding what to buy has become a serious problem for me! Is anyone else in the same boat? Here are some great samples …

Introducing the beautiful Nature’s Peace Stamp Set . Here’s what it looks like when you emboss it using VersaMark ink, Gold Stampin’ Emboss Powder, and the Heat Tool.

Christmas_crb2

A gorgeous product from the holiday catalog is the Bright & Beautiful Stamp Set. Use it to make a fun gift package. (Tip: cut the top of a Petite Café Gift Bag using the Large Scallop Edgelits Die.)

Christmas_crb3

I used the same stamp set to create a tag that doubles as a Christmas tree ornament—and put it on one of our Takeout Boxes for a cute gift.

Christmas_crb4

Here’s a fast and easy card made using the adorable Cheerful Christmas Stamp Set.

Christmas_crb5

Last of all, check out this idea for a treat bag—again using that awesome Bright & Beautiful Stamp Set.

Christmas_crb6

If you haven’t seen the holiday catalog yet, click here (US)—then tell us which products are YOUR very favorites!

Cindy B.
Sr. Staff Writer

Don’t you just love Cindy’s projects! What wonderful ideas and great tips. You can see Cindy’s post by Clicking HERE!

Stay Warm & Have a great day ~

blog-closing-small


Banner Blessings Card Share …

Hello Stampin’ Friends,

Yesterday I shared with you three ideas to give the gift of creativity …. but note that any of these would be a great gift to give yourself too. There are times when you just have to treat yourself!

Today I would like to share some card samples made with the Banner Blessing that I introduced to you yesterday. This will give you some creative ideas so that when you get your Banner Blessings stamp set, you will be ready to stamp.

The cards were created by Holly Stene who also created the stamp set! I would also love to share with you, her touching story and how she came to design these stamps (see below).

friend_2d

Also used on this card are Choose Happiness, Gorgeous Grunge and Chalk Talk Framelits


shine_2

Also used on this card are Hearts & Stars Decorative Mask and Star’s Framelits

Here is Holly’s story …

About a year-and-a-half ago, Stampin’ Up! announced a new contest inviting all stampers, demonstrators and non-demonstrators, to put on their creative caps and submit a design for a monster-themed set. You all might remember my sweet friend, Doris, and her winning Monster Maniacs set? 🙂 I loved the set and didn’t mind being the runner-up to her creation. So when Shelli announced at convention that year that there would be another contest, I knew I wanted to try again!

As my mother and I drove back to Vegas from our first convention, we brainstormed all sorts of sayings and phrases that we thought would make a great stamp set. When I went back to work, I couldn’t help but doodle here and there. I would draw something, take a picture, and send it to my mom and she’d say yes or no. (She was my upline at the time so I figured she knew what would work. After all, mother knows best!)

One night I was rocking our middle son to sleep and saw the Bible verse I had painted on a canvas to match his spaceship-themed room. “Shine like stars in the universe”–one of my favorite verses of scripture. That’s when I decided I wanted to do a scripture set. I sat down and thought of a few that I felt would not only look great on a card but would reach someone who needed to be lifted up.

I was in the Air Force for nine years. All nine years were spent far from family, and even a few months were in the Middle East–away from my husband and our 7-month-old son. Nothing helped more than the scripture verses my mom or dad or my church family would write on my cards. In fact, I still have a scrap of paper with a verse that my dad sent me while I was in basic training.

There’s something special about making a card for someone and I wanted these Banner Blessings to make it even more special! Thank you, Stampin’ Up!, for the opportunity, and thanks to everyone for their support! I hope you enjoy the set as much as I have already! 🙂

Holly Stene

**Please note the opportunity to design stamp sets is no longer available.

One more card to share …

joyful_2This card also used the Kinda Eclectic stamp set and Heart Framelits

I hope you enjoyed Holly’s cards as much as I did. She truly highlighted this wonderful stamp.

Thank You for stopping by my blog today.

Have a Fabulous Friday ~

blog-closing-small

STAMPIN’ SUPPLY LIST …


Our Stampin’ Retreat Swaps to Share ….

Hello Stampin’ Friends,

I hope you had a good weekend.  Mine turned out great … I FOUND MY SWAP CARDS and will be sharing 3 of them with you today!!!

IMG_20141026_073015

I have been looking in every bag and container that I brought back from retreat and could not find them anywhere. But today as I was going through my kitchen, I saw the little bag tucked nicely on the shelf and there they were!

It appears that I did not want anything to happen to my swaps so I put them on the shelf to keep them safe while I unpacked everything from the car. Oh my gosh … I couldn’t believe it, but I am so happy.

So today, I would like to share 3 of those cards with you …

Our first swap was done by Kathie D. She used the very versatile “Work of Art” stamp set in the delicious Blackberry Bliss!

000_1674

The second card is from Cheryl G. She used our ever popular “Lovely as a Tree” and created a beautiful winter scene by adding snow with the help of the “Gorgeous Grunge” stamp set.

000_1673

Last but definitely not least (This one won the card contest) is our swap from Meg … she used the new “Ornamental Pine” and a touch of glitter glue to add that holiday sparkle.

000_1669

Each of these stamp sets can be used for so many different occasions, they should be a staple in your stamp collection. I know most of you already have “Lovely as a Tree”.

I think my stampin’ friends do a spectacular job … there was a lot of talent at my Holiday retreat! We all had a great time. I will be sharing more swaps with you next Monday.

Stop back tomorrow to see how I used the “Ornamental Pine” for an upcoming birthday, and yes … It’s a masculine card!

Have a great Monday, and I’ll see you tomorrow!

blog-closing-small

STAMPIN’ SUPPLY LIST:

To purchase any of the stamp sets you have seen here today, just click on the link. I’ll have a sweet treat sent to your home as a Thank you from me.


Flippin’ for You!

Hello Stampin’ Friends,

I hope those of you who live near me in Wisconsin got a chance to get outside yesterday … what a beautiful day!  I also hope you all had a chance to look over the Weekly Deals I posted because today I’m going to share with you a few of those!

I’ve have the cutest card, stampin’ tips & techniques that you’ll flip over!  Let’s begin with the front of the card.  I used Melon Mambo for my flip card and the “Label Card” Thinlit die – one of our weekly deals … Sweet!

000_1483

Speaking of sweet, I paired the Melon Mambo with the “Sweet Taffy” Designer Series paper.  I cut the designer paper to fit the inside of my card, then I aligned it within the framelit die to cut out the area that flips.

000_1478

Now my designer paper is perfectly notched out and has the perfect mambo frame of color around it.  The Whisper White pieces for the greetings, were cut with one of the thinlits that are included with the card thinlit … it actually contains 9 dies!

000_1479

Because I love polka dots and texture … I used the “Perfect Polka Dot” folder to the left side of my lip card.  I took a picture of how I just tucked that piece into the folder, then folded the card behind the folder.  I did not use any tabs when embossing this folder.

000_1481

My greeting is from “Yippee Skippee” … also on sale this week!  I love this quirky and fun stamp set.  I used the black StazOn™ because I like the richness of the black color, and it smells good! LOL

I snuck the little heart from the “Another Thank You” stamp set to add a bit more color to my sentiments.

The third item from the Weekly deals list that I am using on my card, is the brand NEW “Sweetheart” punch!!  I punched it out of the Silver Glimmer paper and dyed it Melon Mambo!

TO DYE: All you need is a sponge dauber … then you can either use the ink pad or the ink refill.  I prefer the refill because it’s quicker and I get a darker color quicker.  Stampin’ Tip …  I dampen the sponge dauber first (not wet) but it really helps spread the ink evenly over the glimmer paper.

Now, for the inside of the card …

000_1484

I hope you enjoyed today’s card, the stampin’ tips of trimming the designer paper, embossing just a section of a card, and the technique of dying glimmer paper.

I’d love to hear what you think!  Thanks so much for following along.

Have yourself a flippin’ awesome day!

blog-closing-small

Please note that the sales price is not reflected on the ingredient list below … to check the Weekly Deals, just scroll up until you see it listed on the right hand side of the blog – then click on it.  That will take you directly to my “Weekly Deals” on my website.

Trimming the Tree Christmas Card …

Hello Stampin’ Friends,

Welcome to a brand new week! Yesterday I shared a “glitzy” Christmas card so today I’d like to share a card inspired by one of my Christmas trees that I decorated in the past.  I did a nature inspired tree with raffia, cardinals and stars.

100_2325

The card reflects the tree in many ways, the colors are warm and inviting … Crumb Cake, Garden Green and Cherry Cobbler. I used the linen thread to reflect the raffia on the tree.

000_1471

To pull the cherry color in I used the Basic Pearls and colored them with the new Blendabilities “Cherry Cobbler” collection.  I color them while they are still on the paper and then transfer them to my card.

I created a focal point by highlighting the tree with a “Crumb Cake” oval.  I used dimensionals to pop it up and create added dimension to the card.

I even brought the stars in with the use of the “Trim the Tree” paper stack.  I love those paper packs … when I cut down the paper to the desired size (usually 5-1/4″ x 4″) I use the left over pieces to decorate the inside of the card and my envelope.  I love it when everything coordinates … one of the things that drew me to Stampin’ Up!

The sweet “Merry Christmas” greeting is from the “Good Greeting” Hostess stamp set … which you can get for FREE when you host a $300 stampin’ party.  That is in addition to the Hostess benefits you already get.

000_1477

So gather your friends and lets make some awesome cards, pull together a book show, or just place an order yourself.  Choose any of these options, I’d love to help you get your “Good Greetings” stamp set! Contact me today … this offer ends October 31st!

As always, I have the list of supplies that I have used to make this card below.  Click on any one for full details or to begin your shopping experience.  Please let me know if I can help in any way.

Have a wonderful week ~

blog-closing-small


Happenings Simply Created Card Kit

Hello Stampin’ Friends,

Today I want to share with you one of my favorite card kits … Happenings Simply Created Card Kit.

Think you don’t have time to make your own cards? Think again! Watch what happens when you get your hands on this easy-to-use card kit. You can make 15 cards in just minutes. Everything’s printed, cut, and ready for you to put together. Just add your own adhesive and you’re ready to go. Personalize it with a hand-stamped message (stamp and ink sold separately).

Here is a video showing you how to create these cute cards …


Fun right!  Here is another video showing you alternative projects you can make with this kit …


Aren’t they just fabulous … and so quick and easy to make.  I would love to see what you create!

I have put the links to these products below for your convenience.  Just click on them for full details or to purchase.

Thank you for stopping by … I’ll have more for you tomorrow.

Have a wonderful weekend~

blog-closing-small


Sail Away …

Hello Stampin’ Friends,

Today’s card share begins with the Traveler stamp set, so sit back, relax and enjoy the trip.

I started with Early Espresso as my base color and then added Crumb Cake and a pop of Very Vanilla.  Our background stamp is the “World Map” … the edges were sponged to created a softer, yet aged look.

000_1456

I used the 2-1/2″ circle punch to create the focal point of my card and highlight the ship.  So I’d be ready to go … I cut out my passport and luggage with our “very sharp” paper snips.  It makes trimming around the baggage (hehehe) easy breezy!

I stayed with the neutral colors but you could go all out and really add some color to this card by coloring the background like a world map!  Have fun with it.

Thanks for stopping by… and enjoy today!

blog-closing-small


Gratitude for Days …

Hello Stampin’ Friends,

Today I’d like to share some cute projects created by one of our concept artists, Jen.

There are some darling kits in the new holiday catalog. Today we are highlighting the Gratitude for Days Simply Created Kit. I love the bright colors and patterns. The coordinating stamp set also has some great images for any card or project.

Here are Jen’s creations playing with this cute kit.

1. Add a little pocket and note to a treat or gift. I love being able to tuck a little message inside the pocket. And there are 30 of these cute clips in the kit that are perfect for attaching the pocket to your gift.

Gratitude For Days_crbQuick thanks tag

2. Create a little birthday “card” that holds both a message and a gift card. Use the number stickers to represent your recipient’s age. Stamp on the lined pocket card and add a sweet birthday wish. This is super-quick and easy.

Gratitude For Days_crbGift Card Pocket

3. Use it with Project Life. This kit coordinates beautifully with the Happiness Is Project Life Card Collection. If you cut down the pockets from the Gratitude for Days kit, they become 3″ x 4″ specialty cards—which you can then add as an interactive element to your Project Life layout. Insert the lined card in the pocket with journaling, or use it to store ticket stubs/memorabilia.

The coordinating stamp set is also great for memory keeping. It helps prompt journaling about things you’re grateful for.

Gratitude For Days_crbProject Life

I had a lot of fun playing with this kit. There are so many fun ways to use it!

Thanks for stopping by.  Have a wonderful weekend,

blog-closing-small


Guest Stamper … Cindy S.

Hello Stampin’ Friends,

Happy September! Today I have a fun card to share with you, created by one of my Star’s group members … Cindy S.  I believe this may be the last of our swap cards, but not to worry … we meet monthly!

Cindy used our exclusive RMHC stamp set, Flamingo Lingo.  I was not much of a Flamingo person before, but I am totally falling in love with this stamp set.  Besides … for each stamp set we sell – $3.00 is donated to the Ronald McDonald House Charities.

            134306G                 38462c7375ca777e506fb182285a0f54


Click directly onto the Ronald McDonald House to learn more about this amazing charity.  See the houses that host families so that they may be close to their seriously ill or injured children.

Cindy used the Melon Mambo and Basic Black markers to bring her Flamingo to life, and created a focal point by using the Ovals Collection Framelit dies. The background is the Decorative Dots embossing folder.

000_1399

The pretty flowers that draw your eye from the focal point to the greeting can be found in the Flamingo Lingo stamp set, and coordinate with the Petite Petals punch.

Cindy used the “And Many More” stamp set for her greeting and used the fun combination of the Word Window and Modern Label punch… they look great together!

I think Cindy did a great job and I thank her for sharing.

Thank you for dropping by today.

Hope you are having a safe and Happy Holiday weekend,

blog-closing-small

You may click on any of the items to view details or to start shopping.  Thank you.


Beautiful Day …

Hello Stampin’ Friends,

So … Did you guess which one of the new Weekly Deals was my favorite?  If you guessed the Elegant Butterfly – YOU were correct!  The Square framelit dies come in a close second.

I thought I would share with you a card I created using my 2 favorites from this weeks, Weekly Deals … the Elegant Butterfly and the Square Framelits!

000_1362

The “Mossy Meadow” cardstock you see, is simply folded in half.  Make sure your framelit sits above the fold so you do not cut the cardstock into 2 pieces.

I used the beautiful “Flowering Flourishes” stamp set, and teamed it up with the “Gorgeous Grunge” to create some depth to the card.

000_1364

As you can see … I layered the Petite Petals (in Black Raspberry) with the Boho Blossom (in Razzleberry) punches to create my flower.  The Elegant Butterfly and Bitty Butterflies also used the above color combination.

000_1366

I topped them off with the Rhinestones to create a bit of contrast and add some sparkle.  A beautiful friend always “shines”.

And finally, the greeting comes from the stamp set; Flower Patch.  I just used that stamp set on Sunday, so you can add this to your collection of samples for the Flower Patch set … so versatile.

000_1365

I hope I’ve inspired you to add the Square Framelits and Elegant Butterfly to your stampin’ collection … and while they are on Sale.  Just click on any links below for details – although the sale items do not reflect the sale price below, they will come up in your shopping card as the sale price.

I would be more than happy to place an order for you, if you do not shop on-line.  You can e-mail me at lindaluvs2stamp@aol.com

Thanks for stopping by ~

Have a “BE*YOU*TIFUL Day!

blog-closing-small


Tickled Pink …

Hello Stampin’ Friends,

Eileen and I have been busy creating boards for the annual Hostess Appreciation Party.  By “boards” I mean that we showcase several stamp sets at the event, and then create about 5 different cards for each board … then we raffle them off!

Everyone loves seeing the different cards and how versatile the stamp sets are. Create * Inspire * Share!

OK … why am I telling you this?  Because I just had to share one of the cards that will be posted on the “Flamingo Lingo” board.  Each year I highlight the Ronald McDonald House Exclusive stamp set,  because $3 from each stamp set sold goes to the Ronald McDonald Charity Houses.  Great Cause … great stamp set!

000_1343

Now … Isn’t this just too cute!

My flamingo is stamped in Strawberry Slush and highlighted with a Coastal Cabana scallop and twine bow.   The cute flower in this stamp set, coordinates with the Petite Petals Punch.

000_1342

Stampin’ Tip of the Day: Pretty Pearls … in any color!  Our new Blendabilities markers work great for coloring our pearls, rhinestones, and even our buttons!  Watch for upcoming “Blendabilities” classes.

I wanted to bring in that touch of “Florida” so I added the big bright shining sun from the “Kinda Eclectic” stamp set.  Warms it up nicely … don’t you think!?

Picture this ….I wanted to use my “On Film” Framelit die, and just love the way it frames our flamingo.

000_1343

I hope you enjoyed today’s card share, and consider purchasing the “Flamingo Lingo” stamp set.

Click Here to Shop Now. ..

I’d be “Tickled Pink” and I’ll send you a special “Flamingo Lingo” Thank You card!

Have a bright and sunny day ~

blog-closing-small


A Little Kindness …

Hello Stampin’ Friends,

Wooo Hooo …. it’s Wednesday already!  Time just seems to be flying by.   On that note, I wanted to share a card that’s fun and easy to create!  And … I’m using one of the fabulous folders that was introduced on our Weekly Deals yesterday.

Today, you’ll get step by step instructions;

I wanted to showcase the Delicate Designs Embossing Folder, so I actually started my card from the inside out!  My inner piece of Whisper White is cut to 5-1/4″ x 4″ and then embossed.  I then took my 1/2 sheet of the NEW Mossy Meadow cardstock … inserted the inner piece and made a “tick mark” on each side at the top of the embossed area.

000_1298

Then … using my tick marks, I cut off the the Mossy Meadow so the pretty embossed area would be exposed!  Before I adhered the inner piece, I stamped it with the amazing “Kinda Eclectic” stamp set.

000_1304

Next I wanted to add some color without all the work – Designer Paper … that’s the answer!  I chose “Park Lane”.  I thought the Old Olive on the designer paper really pops when teamed with the Mossy Meadow.

000_1300

My greeting, also from “Kinda Eclectic” was highlighted with the use of the “Oval Framelits” and the beautiful Mossy Meadow ribbon finished off the card.  When sending such a beautiful card you will definitely want to coordinate your envelope with the envelope liner die and leftover designer paper.

000_1302

I hope you enjoyed today’s stampin’ session!  Don’t forget that not only is the Delicate Designs folder on sale, but Stampin’ Up! also has an awesome BigShot promotion.  I will have all the links for you.

Please let me know if you have any questions, concerns, or comments on today’s post.

Have a “kind” day ~

blog-closing-small

6a00e554f4a3a4883401a511ee0d9d970c-800wi          CM1634B


Hip-Hip Hooray … for Sundays!

Hello Stampin’ Friends,

Today I have a quick and easy card to share with you.   I gave the basic card layout a bit of a twist to create some added fun!

Simply begin with a half sheet of cardstock cut horizontally (the long way) and fold in half … then fold the top half back onto itself!

000_1283

I use the Fast Fuse adhesive to secure it and make sure it doesn’t pop back open.  I used SNAIL for the remainder of the card.

The crazy fun designer paper I used is the  “Confetti Celebration”, doesn’t it just scream … let’s party!!  The large piece on the card measures 2-1/2″ x 4″.

000_1287

My “hip-hip hooray!” and “you did it” comes from the stamp set “Bravo” found on page 133.  It’s a great stamp set for birthdays, graduations or anytime you want to congratulate someone.  A must have for your stamp collection.

Now … didn’t I say this way easy!  And a different style of card that’s just a bit more fun!  Hip-Hip Hooray for Sundays 🙂

000_1285

SPECIAL ANNOUNCEMENT ….

GRAB your catalog and create your wish list, because

tomorrow I hosting a “ONE DAY ONLY EVENT … Monday Madness”.

Stop back for full details.

If you are on my mailing list … you will receive a special e-mail invite.

Thank you for checking out my blog today.

Have a Super Sunday!

blog-closing-small