Christmas Snowflakes …

Hello Stampin’ Friends ~

I am back today with another beautiful card from the Itty Bitty Christmas Bundle … this card is done in the gorgeous Seaside Spray from our 2019 – 2021 In Color collection. This soft hue in blue tone is perfect for a snowflake card.  We added some shimmer to the cardstock by spritzing it with a combination of rubbing alcohol and our Shimmer Paint.

The snowflakes were cut from the Christmas Layers dies which are teamed with Itty Bitty Christmas for the bundle.  Purchasing these as a bundle will save you 10% … it’s like FREE Shipping! A good deal, either way.  I used the Sparkle Shimmer Paper for my snowflakes … however, I consider this “glitter” paper. We made the “Shimmer” paper by spritzing on our Shimmer paint mixture.  You can see it much better in this photo ….

Our snowflakes are attached with the Multi-purpose glue … it the tip is too large for you, put some on a piece of scrap paper and use a tooth pick to apply.  This was a tip given to me by one of my club members.   Our greeting, from the Itty Bitty Christmas stamp set and the Seaside Spray mat were both punched using our circle punches.  The greeting and the entire front were popped up with the help of our trusty Stampin’ Dimensionals!!

Our club members adorned their cards with Rhinestones…. they loved it because they could use as many as they wanted on their cards!!  What girl doesn’t like a little bit of bling anyway.  I just love stamping with my club members, many are like part of my family now … we share so much together!

I have one more card for you tomorrow using the Itty Bitty Christmas Bundle. I love how totally different the first two have been.  I hope you are enjoying the samples. If you would like to order any of the supplies used to make this card, you can contact me directly or use the images below to start your shopping.

Thank you so very much for stopping by …

Have a wonderful day!

TODAY’S STAMPING SUPPLY LIST … Click on any item for more information or to begin shopping.  Thank you!


More Shimmer Specialty Paper: Brayer Technique

Hello Stampin’ Friends ~

I am happy to see so many of you enjoyed yesterday’s card made with the Shimmer Detailed Laser-Cut Specialty Paper by Stampin’ Up!  They shared several tips with us on how to use and enhance this beautiful specialty paper.

Today I’m going to share another card featuring the Shimmer Detailed Laser-Cut Specialty Paper using a brayer technique and products from the  wonderful Bird Ballad Suite …

It’s your day, but it’s also so easy to make their day by creating a project that looks like you went that extra mile! Sponge Brayers are a great tool for adding custom color to the Shimmer Detailed Laser-Cut Specialty Paper.

You simply roll they sponge brayer over your ink pad to pick up the color and then roll they brayer back and forth over your Shimmer Detailed Laser-Cut Specialty Paper and you’ll have a beautiful shimmery accent in any color you choose.

HERE’S A GREAT TIP: Roll your brayer and specialty paper onto another piece of cardstock and you will have created a designer piece of paper all your own with the reverse image from your Shimmer Detailed Laser-Cut Specialty Paper!  It won’t have that shimmer but you’ll get 2 designs for the work of one!!

Hope you enjoyed the beautiful card, brayer technique and creative tip today …

Thank you so much for stopping in to visit. If you like my blog … please share it with your friends.  The more the merrier.

Have a wonderful day ~

TODAYS STAMPING SUPPLY LIST …. click on any of the images for more details about the product or to begin your shopping experience with me.

Sailing Away: Bridge Fold Card …

Hello Stampin’ Friends ~

Last night I held my “Sailing Away” Class … rescheduled because I was sick last week (Thanks Ladies) and we had a great time making some really amazing cards, learning a new technique and did two cards with cool fold cards.

One of these cards I am sharing with you today … it is the Bridge Fold card with a fun new technique I called Watercolor Waves.  I will try to explain it to you the best I can.  First let me show you the card …

We did this in Night of Navy cardstock and embellished it with the Come Sail Away Designer Series paper and the Sail Away Trinkets.  The greeting and sun were punched out using the 1-1/2″ Circle punch, the mat behind the greeting was die cut using one of the dies from the set included in the bundle.

The inner part of the card is Balmy Blue cardstock which was embossed 1/2 way up using the “High Seas” embossing folder.  Then we used the Wink of Stella pen and Night of Navy ink to watercolor over our waves.  Start with the darker shades at the bottom of the wave and as the ink comes off the brush, it gets lighter as you go up the wave.  Once dry (and it dries pretty fast) use a sponge dauber and the White Craft Ink to sponge the tops of the waves … creating white caps!

The “bridge” that goes across the card was done in Night of Navy and Balmy Blue wrapped in the Night of Navy / Sahara Sand Bakers Twine.  Everything coordinates so nicely and can be found on pages 144 – 146 in the Come Sail Away Suite.  That can now be purchased with just one number, and includes the “Sailing Home” bundle of the stamp set and dies (at a 10% discount).

Don’t forget the Designer Series Paper in on Sale … Buy 3 / Get 1 FREE.

Hope you enjoyed today’s card as much as I enjoyed designing it and sharing it with my class.

Thank you so much for sharing a part of your day with me.

Enjoy your Saturday ~

TODAY’S STAMPING SUPPLY LIST …


Blessed to Know You …

Hello Stampin’ Friends ~

I hope you had a wonderful weekend. I had fun stamping with friends, visiting with family and enjoying a relaxing Sunday…. it was nice. As promised yesterday, I will be sharing a card I created from the “To A Wild Rose” bundle. This bundle contains a “Three Step Stamping” stamp set and I used it to teach my Stamping Clubs this cool technique. I also shared a great tip for aligning the rose while stamping.

I am beginning my 2019-20 Stamp Clubs in September so we are currently signing up members now … if you have questions about my clubs or an interest to join, shoot me a message below.  Our focus will be on Techniques and Fun Folds this year and will include instructions!! There is no charge for club meetings, however we do require a $30 minimum order … this allows each member in the group to get Hostess benefits one month!!  Time to share our card …

I began by choosing my color pallet for my rose … There are 3 stamp “layers”. The most solid of the three is actually a DistINKtive stamp it gives monochromatic dimension and artistic fair to your stamping, and will use the “LIGHTEST” of our three colors; Pineapple Punch.

The second stamp (also DistINKtive) adds layering to the first stamp, as you stamp directly on top of your first stamped image. We used Daffodil Delight but we stamped “off” before stamping onto our rose.

The last rose stamp is the detailed stamp set (Or Line Image) and we use the darkest of the 3 yellows … We used Crushed Curry.  You can stamp directly onto the first two layers, or you can stamp it off, both work well.  This is one of those fun stamp sets that you can do a lot of experimenting with different color pallets.

The beautifully die cut leaves, lattice and greeting banner are all included in the bundle, as are the words we used for our greeting.  The “Blessed” and “To Know You” are actually 2 different stamps. You can stamp them separately or you can put both images onto the block and stamp it all at once.

We embellished our rose with the Clear Facet Gems and the lattice with Rhinestones. With the world rearing it’s ugly head lately … I wanted a bright and beautiful card with sparkle, and to let someone know how you feel about them.  I am truly blessed to have such amazing women in my stamp clubs. We’d be thrilled to have you join us!!

Thank you for stopping by my blog today!  Come back tomorrow to check out my second Wild Rose card.

Enjoy the day ~

TODAY’S STAMPIN’ SUPPLY LIST … 


Hello Magnolia!!

Hello Stampin’ Friends,

If you are lovin’ the Magnolia Lane Suite, then today’s card is going to dazzle you!!  Just like you, I head to pinterest if I need a little inspiration and with my busy work schedule lately that is right where I went when I was planning my Magnolia Card Class. It may have been storming outside but we were safe inside with out Magnolia Lane Suite and flowery treats!

Today’s card was inspired by a card I found on Pinterest from “Cheri’s Cards” but I put a big ole’ twist to make it my own … that’s where the “dazzle” comes from!

The base comes from the ___ which is included in the suite. I added some of the “Sprarkly” Shimmer paper to highlight the focal point which is our magnolia.  The magnolia was stamped with White Craft Ink on our Vellum Cardstock and heat embossed with the White Embossing powder.

Once the embossing is complete ~ it’s time to color!  I used the Stampin’ Blends because well … they blend so nice. I really wanted the colors to POP so I chose the Flirty Flamingo and Granny Apple Green, these colors really go together nicely.  Flip OVER your embossed paper because you will be coloring on the backside. We started with the flamingo and brushed the color on from the bottom of the petals and went about half way up, then added a little more to the base (bottom) of the petal to create a darker look.

Then came the leaves … with a stroke of the Dark Granny Apple Green up the center and then finished it off with the Light. It dries pretty quick, so you can now flip it back over to the front where you can feel the raised embossed area.  We will also add a little color on this side … add just a touch more of the Flirty Flamingo to the base of the petals, creating even more depth. Then we add some Daffodil Delight onto the center of our Magnolia.  Time to pull out the framelit die and cut it out.

To finish off our card, we stamped the greeting “Hello” from the stamp set as well, in Flirty Flamingo and backed it with Silver Foil … this brings out the silver imagery on the card base! We also added some of the twine that is in the duo ribbon pack included in your product suite!  It doesn’t take much to create amazing cards with Magnolia Lane product suite …. there are so many fun and interesting elements included in the suite.

Thank you for spending a part of your Saturday with me, I will be back tomorrow with another Magnolia Lane card share.

Have a beautiful day ~

TODAY’S STAMPING SUPPLY LIST …


Free As A Bird: Spotlighting Technique

Hello Stampin’ Friends ~

Happy Monday! Yesterday I shared a simple spotlighting technique using the Bird Ballad Designer paper and said I would share another type of spotlighting technique with you today.  This spotlighting technique is done with hand stamped imagery… and today I’m using the Free As A Bird stamp set…

I have chosen to use Basic Black and Whisper White cardstock with a simple stamped image in black to start my card.  Then I stamped my chosen image of the birds on a branch with the Black Momento Ink.  This way when I color the image I’m going to spotlight … it will really stand out! In other words, it spotlights that section of the image.

Another simple spotlighting technique with the fun of coloring, whether you use the watercolor pencils, Stampin’ Write markers or the new Stampin’ Blends alcohol markers you are sure to fall in love with this. Choose an image from your favorite stamp set, I’m using the Free As A Bird stamp set … you will stamp your image twice (or you can cut out the image as I did yesterday to spotlight).

Because I used the Layering Squares Framelits Dies yesterday, I’ve decided to use them again today to cut out and spotlight my part of the image I stamped.  I decided to spotlight the two birds sitting next to each other because my greeting states “We are the best of friends”.

I used the Stampin’ Blends to color my sweet little birds but the watercolor pencils and the markers would work just fine too.  I just love the watercoloring look you get with the stampin’ blends.

Have yourself a wonderful day ~

Today’s Stampin’ Supply List … Just click on any of the items for more information or to begin shopping.  

Simply Sunday: Simple Spotlighting Technique

Hello Stampin’ Friends ~

Hope you’re enjoying your weekend. It’s been nice here lately but rain is in the forecast for today, so it’s a good day to stamp.  If you’re looking for a quick way to make cards with your designer paper and want to add a pop of fun, I love the “Spotlighting” technique! When using your designer papers, there’s no coloring or fuss at all. (Although I do love to color)!

Today I’m using the Bird Ballad Designer paper from the Bird Ballad Suite / Free As A Bird Bundle.  I teamed that up with the Layering Square Framelits (the Stitched Nested Labels Dies come in the suite/bundle).  I also used the Free As A Bird stamp set for my greeting …

To create the spotlighting “with no wasted designer paper” simply cut your designer paper at 4″ x 5-1/4″ … this will give you a nice boarder around your designer paper.  Lay your designer paper onto your die cutter and cut out your desired image, you can see here that I am using the bird to “spotlight” on my card.

Then I simply die cut a coordinating piece of cardstock … I used Early Espresso for my base and mat behind my spotlighted area.  When you place your die cut bird directly from your designer paper and then put it right back in it’s place with a mat behind it … it spotlights that image. Do you see how the images on the cut piece still line up with the images on the background?  Cool right? And Simple.

I love using this technique on our patterned papers that have fun and interesting images.  The spotlighting technique can also be used on your stamped images, and I can share that with you tomorrow!

Thank you for taking time out of your Sunday to visit with me. Hope you found this card helpful and that it inspires you to create some quick -n- easy cards.

Enjoy the rest of your day ~

Today’s Stampin’ Supply List … Just click on any of the items for more information or to begin shopping.  


Two for Tuesday: Sponging Technique

Hello Stampin’ Friends ~

How have you been enjoying the Serene Garden cards so far?  I have another one for you today … it was inspired by the winning Attendee Swap Card Contest at my Spring Stamping Retreat this past weekend.  Kathie’s card was well received and won the contest with its “Resist / Sponging” Technique and then you will see how I used her card to inspire me to create the “Serene Garden” card …

Kathie embossed both the small flowers on the base and the larger flowers which she did on Vellum Cardstock.  The vellum flowers were punched out.  Kathie created a beautifully soft pop of color by sponging it over the flowers.  With a little wipe of a kleenex … you’ll remove the extra ink off the embossed flowers and they white will pop through.  It’s so pretty, it inspired me to do the same technique on my Serene Garden card.


I stamped the main image in the lower left hand corner of my card, sponged the Flirty Flamingo over the top, then wiped off the excess ink off the embossed image to make the white pop.  Using the Flirty Flamigo Stampin’ Write marker, I added some depth to the flowers and then topped it off with Wink of Stella for that touch of glitter!

I also embossed a piece of Flirty Flamingo with white emboss powder using the elegant bird … once it was embossed, I sponged Flirty Flamingo over the head and tail to create some dimension. The wings were highlighted with Wink of Stella and the bird was cut out with the coordinating dies.  My greeting is from the Colorful Seasons Stamp set and was stamped in Flirty Flamingo.

It is amazing how a technique like embossing teamed up with some simple sponging can turn a card into a work of art.  I really like the monochromatic color as well.  Sometimes simple is better.

Thank you for hanging out with me for a bit today…

I hope your day is a good one.

TODAY’S STAMPING SUPPLY LIST: If you would like to purchase any of the items I used to create this card and don’t have a demonstrator, I’d be honored to be your creative coach. With each $50 purchase, you will receive a Rewards Point, when you collect 10, I will send you a coupon for a FREE Stamp set of your choice. Just click on any of the items to get to my online store. If you have any questions, please message me.


Serene Garden Die Embossing Technique

Hello Stampin’ Friends ~

Hope you all enjoyed a wonderful weekend.  I had a very nice weekend, my niece Carla took me out to lunch and brought me a bouquet of tulips. Then on Sunday we went to the Cher concert … amazing!!

Today I have a very special card for you, another Serene Garden card that shows you an amazing technique … embossing with your dies!!

You can easily do this with the BigShot Embossing Mats.  Here is a video to explain these a little better than a whole bunch of my words! lol

I love all that you can do when you have the BigShot Embossing Mats.  I do mine just a bit differently, I layer my mat under my cardstock to I don’t have to used the cutting side of the die face up! Either way you do it, you will love the results.

I also have another Stampin’ Tip: If the blue pad does not give you a deep enough emboss, and the gray is too deep … Use the blue mat but stick a piece of cardstock underneath the first cutting plate to give it just a bit more height… a shim in fact.

The embossed background on the card is somewhat subtle but in the hand, it’s amazing and with the Wink of Stella on the flowers the card is truly a beauty.  You get a pop of color with the greeting and our Highland Heather butterlfy.

I did share with you yesterday that this bundle is retiring and so are the Embossing Mats, if you would like these, I have a link below or you can contact me and I will help you get these in your stamp room.

Thank you for stopping back today to see yet another sample from the Serene Garden bundle, but I’m not stopping here … I have another one for you tomorrow.

Have yourself a great day today, and I’ll meet you back here tomorrow.

STAMPING SUPPLY LIST FOR TODAY’S PROJECT … If you do not have a demonstrator, I’d be honored to have you as a customer and stampin’ friend. If you like this technique and card and need to purchase supplies, just click on any of the items below, it will take you to my online store. Thank you so very much.


You’re Unstoppable Card with Glitter Technique

Hello Stampin’ Friends ~

Hope you are doing well today, a bit gloomy outside but we are one day closer to the weekend and that is always a ray of sunshine!!  Today I will be sharing another card from our Stamping Retreat afternoon session.  This is one of my most requested techniques … Creating your own glitter paper!  I have been doing this for years, ever since I learned how to heat emboss, I have been creating “glimmer paper”!

When our Iridescent Ice embossing powder was discontinued I thought all was lost, but then Stampin’ Up! introduced the Adhesive Sheets and I was back it glimmer heaven.  However, the Adhesive Sheets are on the discontinued list … so, you will want to order them right away!!  I am using the Pretty Promenade Designer Series paper, although any of your favorites will work … I’ve even glittered the Bokeh style papers!!

You can see the sparkle on the card, just like stars in the sky … it’s so pretty!!  And you can’t go wrong with the Pretty Promenade Designer Paper, perfect for Mother’s Day or Grandma’s birthday! My grandmother would have loved this card, flowers and sparkling (now I know where I get it from!) lol

Technique: Glitter Designer Paper

  1. You begin by cutting your Adhesive sheets to the size of your designer paper.  Your adhesive sheets have an edge that you can hold onto when pulling the protective backing off the adhesive (This is where you want to begin measuring your adhesive sheets) or your adhesive will be short on your designer paper. 
  2. Once it’s cut and you peel back the backing – carefully place your designer paper onto adhesive. Make sure the side you want glittered is the side your laying onto the adhesive. 
  3. Then rub it down with your bone folder to secure, and peel off the protective sheet and expose the adhesive on your designer paper.
  4. WHAT HAPPENS IF THERE IS A SPOT OR SECTION THAT DID NOT ADHERE?  Simple … take out your Snail and run it over any place that does not have adhesive! A very simple way to ensure full coverage!  
  5. Now you are ready to dip your designer paper into your Dazzling Diamonds Glitter.  Place a piece of paper over the top and rub your bone folder over the top to secure all the glitter.  Sometimes I use a “block” that I put my stamps on to push the glitter into the adhesive, it’s just bigger than the bone folder.  Both work
  6. Time to create a beautiful card … Have fun!

Once the designer paper was transformed to glimmer paper, we added the Mossy Meadow gorgeous die cut from the Beautiful Promenade bundle, it really compliments the glitter.  The greeting, same as yesterday’s card came from the Strong and Beautiful Stamp Set and we added one of the Petal Pink Rhinestone Gems.

Did you know that the Beautiful Layers Thinlits Dies that comes in the bundle also has a die to cut an envelope piece … I love it, and what better way to coordinate your entire card that you are sending out.

This designer paper is stunning and is on the retiring list 😦 so sad, but there is still time to get it, I have added a link below. It is also something I tucked into my guests Saturday night Pillow Gift. There was plenty of designer paper left over once I cut for their cards, so, I cut them into 4 x 6 sheets and tucked them into a pretty envelope, along with adhesive sheets, Dazzling Diamonds Glitter, and some Gingham Gala Designer paper and Glitter Sheets!!

Each guest got 2 sheets of each color in the Gingham Gala Designer Paper and 4 sheets each of 3 colors of the Glimmer Sheets. The top was put on and it was tied up with a pretty bow.

I hope you enjoyed todays technique card share as much as all the ladies at our retreat enjoyed making it … I would love to hear your thoughts below, thank you.

Have a wonderful day, and thanks for stopping in to visit.

STAMPING SUPPLY LIST FOR TODAY’S PROJECT … If you do not have a demonstrator, I’d be honored to have you as a customer and stampin’ friend. If you like this technique and card and need to purchase supplies, just click on any of the items below, it will take you to my online store.  Thank you so very much. 


Friends and Butterflies …

Hello Stampin’ Friends ~

I did not get my “alternative” project finished yet, however I do have a super cute card that we made at Cindy and Sarah’s stamping party (one of the Make -n- Takes. It’s super simple and perfect for your friend.  I’m using the Beauty Abounds stamp set and nothing says spring like “butterflies”

I stamped the background with the “Bokeh” dots … it just creates another layer of dimension. The focal point of the card is the beautiful butterfly designer paper that you can get for FREE during Sala-a-bration with a qualifying purchase.  So … how did I get that sparkle on there?  Good Question!!

There are two ways to do this technique which I call the Glimmer Designer Paper Technique and it’s one of my favorites because it creates such a “WOW” whenever I show it.

  1.  Grab your Silicone pad … you’ll want it for both ways. Place your designer paper onto the silicone pad and with your Snail adhesive – cover the entire piece of designer paper. Next, sprinkle with the Dazzling Diamonds glitter, tap off excess and gently rub it into the adhesive using your finger tip. Tap off excess again.
  2. The second way to do it is just switching adhesives, the rest is the same.  If you are covering a larger piece of designer paper, you will want to use the Multipurpose adhesive sheets. This is also super simple.  Peel off the first layer, lay your designer paper onto the adhesive sheet … then peel off the top layer and add glitter as in step one.

Besides the beautiful butterflies in this stamp set, the verbiage is perfect for sharing a card with your friend.  I added a little ribbon to the card and some rhinestones to jazz it up a bit.

And to create another layer of dimension … I added a piece of vellum behind the focal point of the card.  Hope you enjoyed this technique and you give it a try … it’s simple, it’s fun and it looks amazing!!

Thank you for taking time out of your day and share it with me by stopping by my blog.

Enjoy the rest of your day.


Stamparatus “Sweetheart” of a Deal Bundle …

Hello Stampin’ Friends ~

My, my, my … it’s about 70° warmer today than it was 3 days ago!!  Even 20° felt warm yesterday!! lol   Speaking of yesterday, I hope you enjoyed my Mirror Image card. It was fun and easy to make with the Stamparatus!

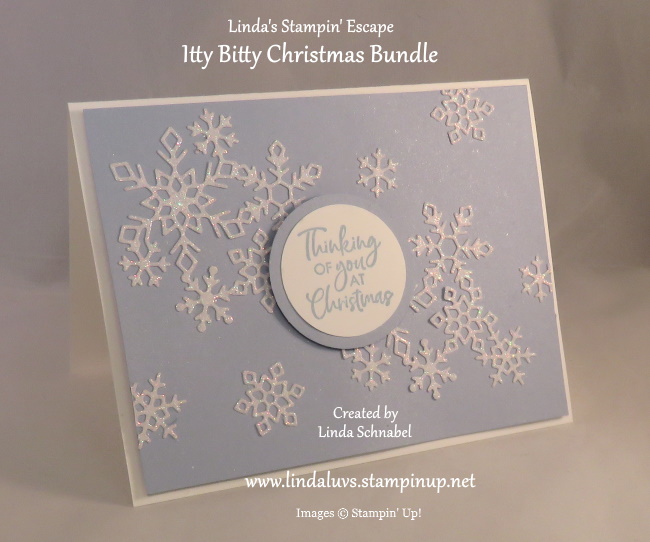
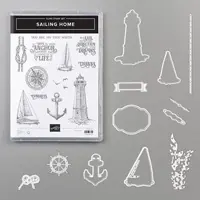
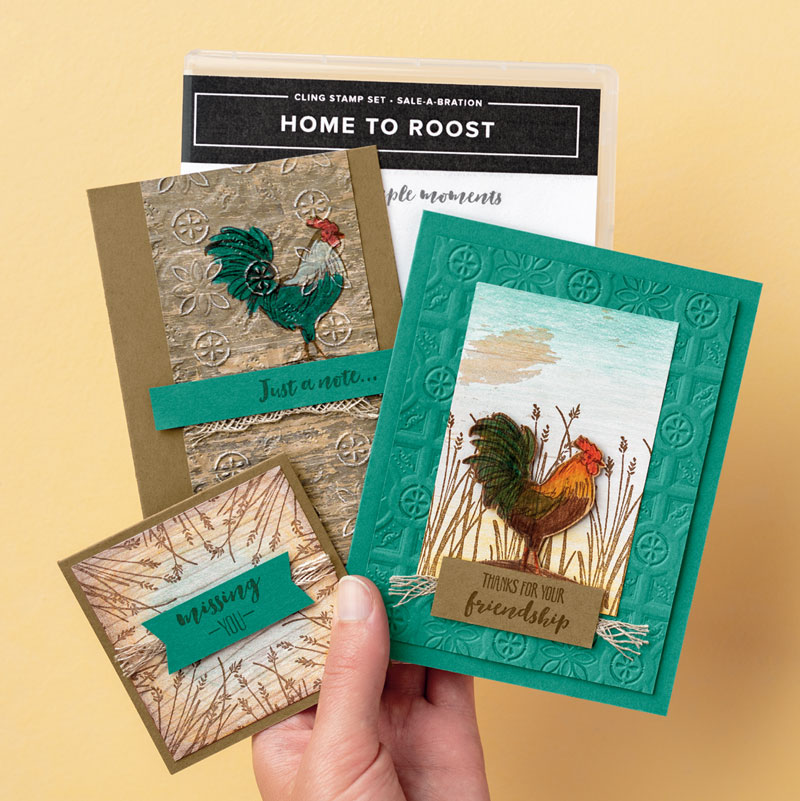
Today I’d like to share more cards that were created using the Stamparatus!!   You can use your Stamparatus to create “ANY” card … it’s especially useful you are making repetitive cards such as Birthday invitations, Save the Date cards or your Christmas cards.

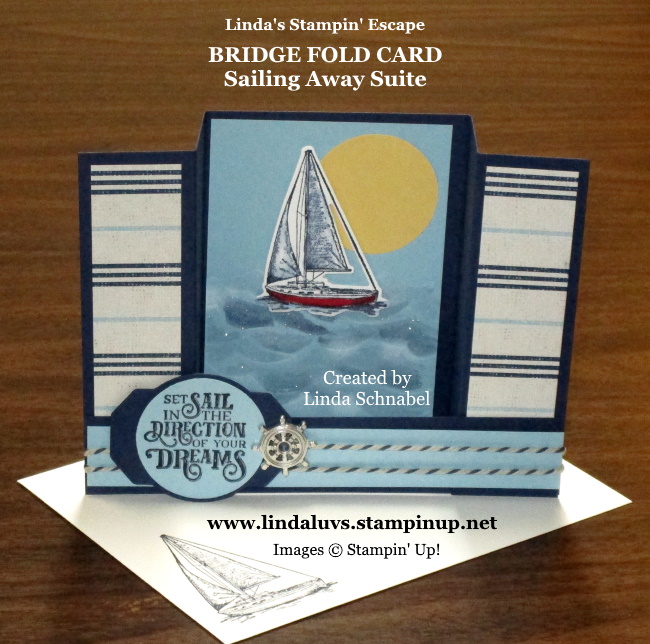
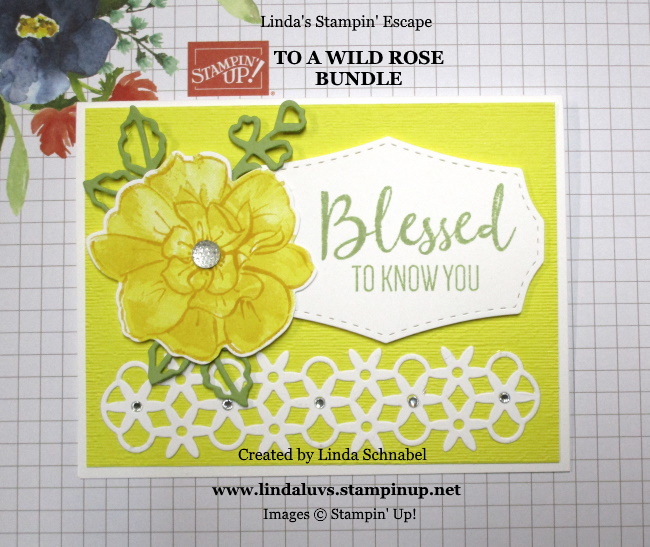
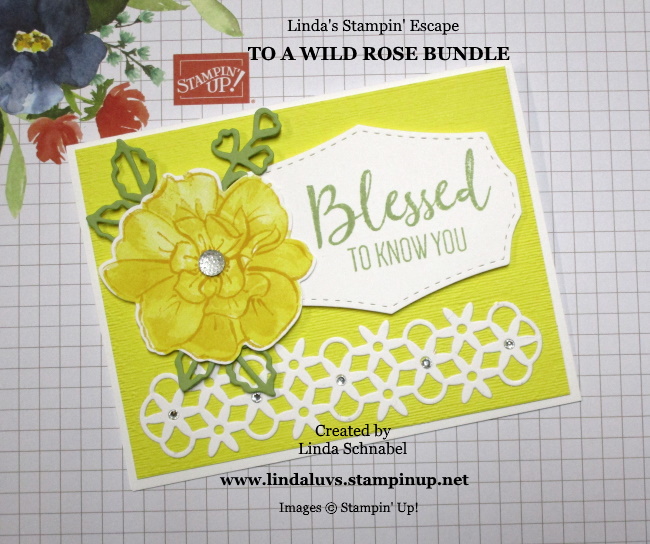
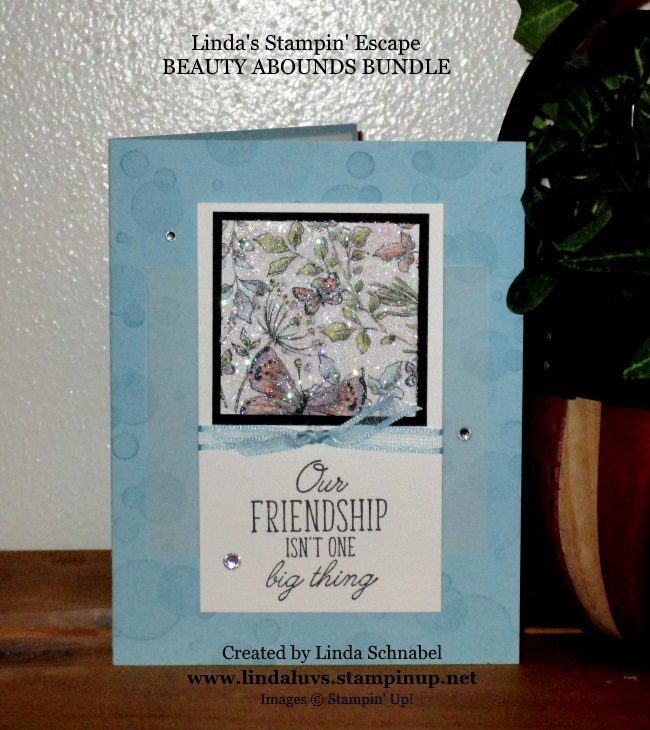
It also creates the fun techniques like the Mirror Image above or the “Hinge Technique” below …

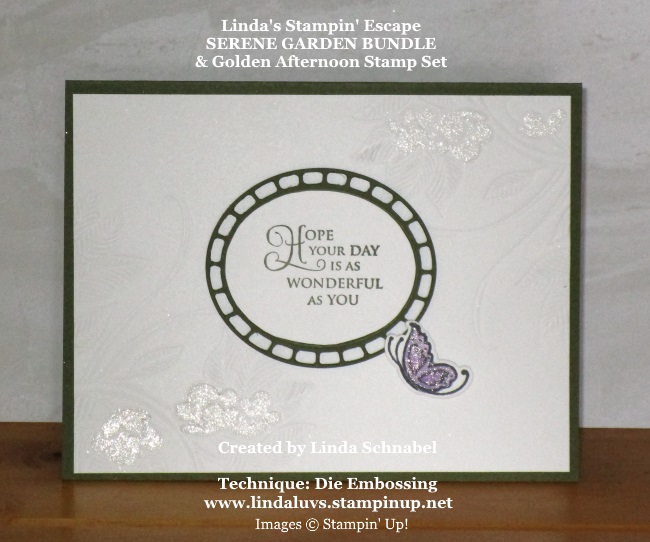
The Hinge Technique is unique to our stamp positioning tool (the Stamparatus) because of the removeable plates!  The hinges allow you space your stamping equally each time. So pretty!

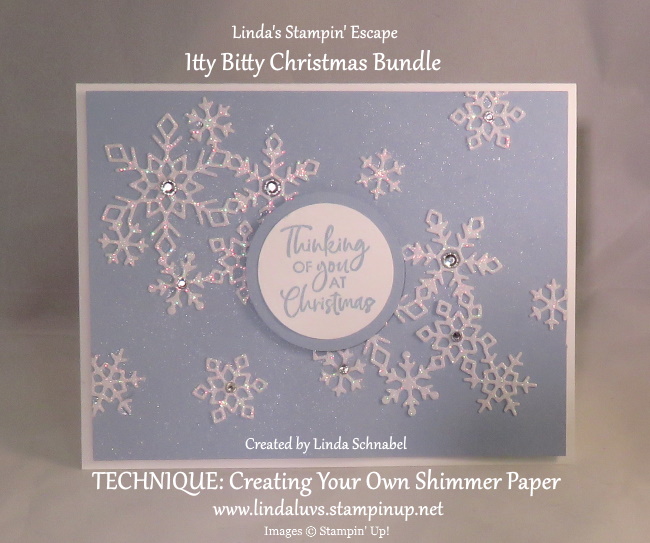
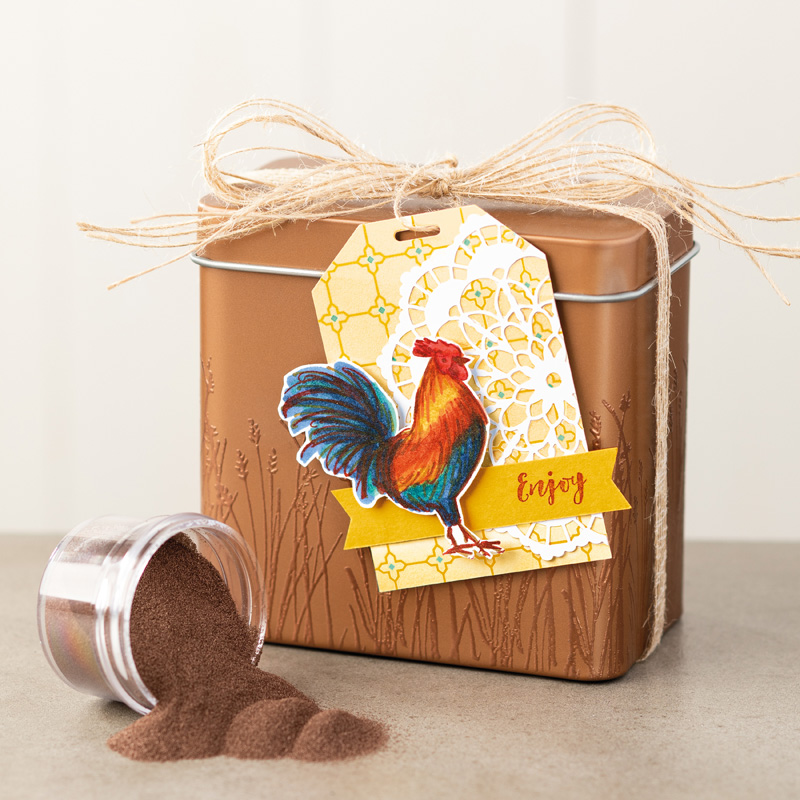
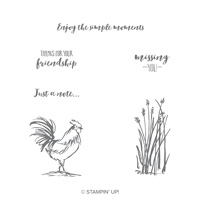
I think this is perfect for our craftin’ sisters (or brothers) who are NEW to Stamping.  It helps in the placement of the stamped images and if it doesn’t stamp the best the first time … just re-ink and stamp!  Walla … perfection!  Next is a simple card that is a great example of stamp placement ….

If you’re new to stamping I will show you how easy it is to place your stamps on the Stamparatus to ensure repeatable perfection.   If you’re ready to try your hand at the magic of the Stamparatus, let me sweeten the deal for you ….

First, we are in our Sale-A-Bration celebration so with a $50 purchase you can choose a FREE Sale-A-Bration item … You will also get a Virtual Rewards Point from me AND I will send you a tutorial for “each” of the three techniques shown here today.  You will receive a PDF file showing you how to do the Basic Set up, the Mirror Image and the Hinge Technique during the month of February.  This offer will end on February 28th, 2019.

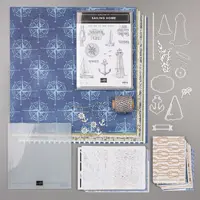
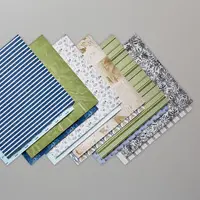
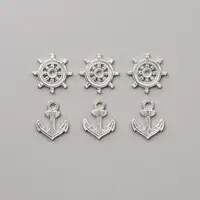
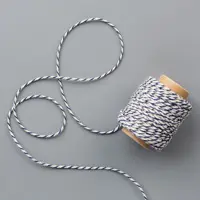
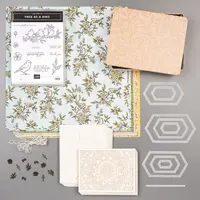
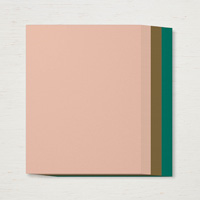
Here is my suggestion to hit your $50 goal …
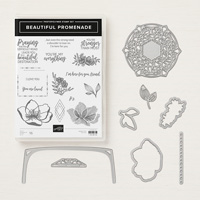
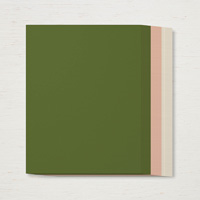
Supply List

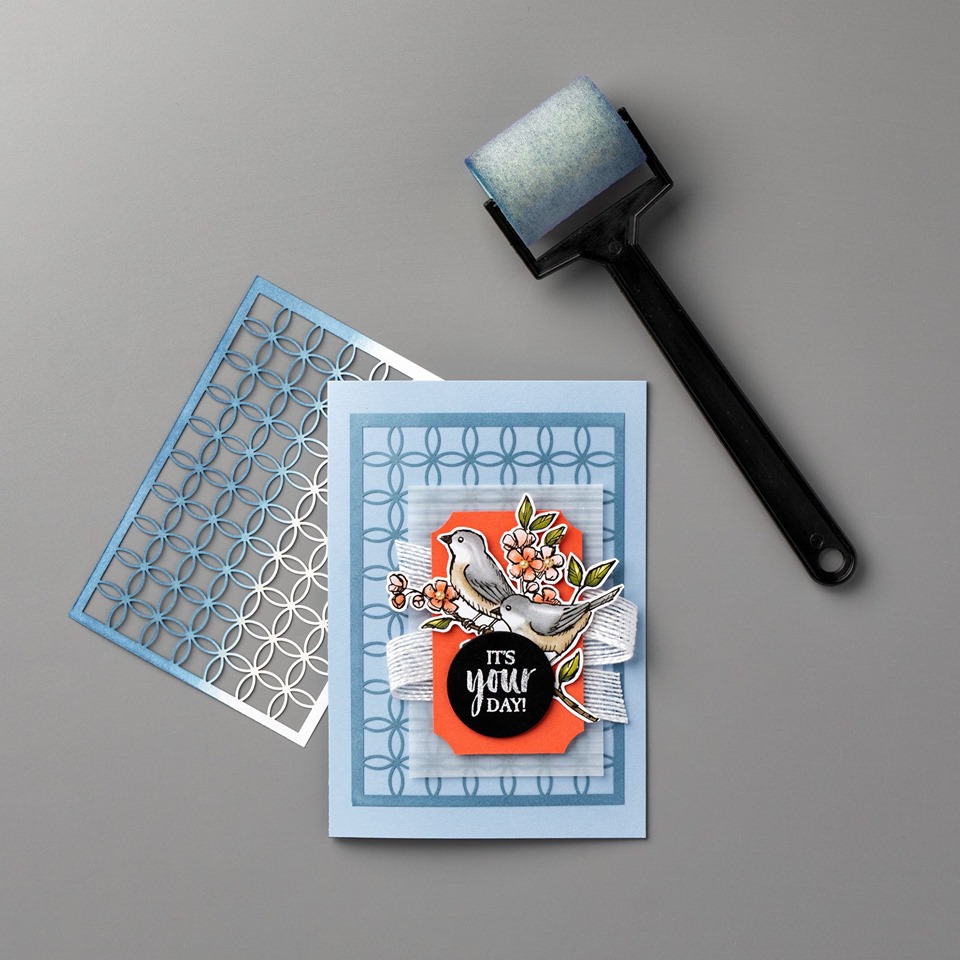
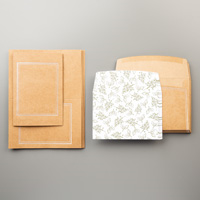
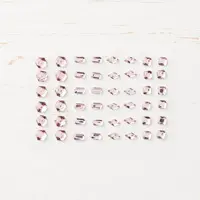
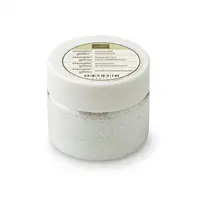
You can click on the images to learn more about the products … you will need the Silicone Craft sheet to do the Mirror Image technique, however, I use it all the time … it just gives the “pad” that’s included a little lift for stamping images close to the hinges.
Please let me know if you have any questions.  One More Thing … I will be sending you a Special Gift and Hand Stamped Card when you purchase my Stamparatus “Sweetheart of a Deal” Bundle.


Stamparatus Know How …

Hello Stampin’ Friends ~

Yesterday I shared a step by step guide on how use the Stamparatus and the masking technique to add my lighthouse “behind” the house from the By the Bay stamp set.  I explained a few things about the Stamparatus that I think would bring you more clarity by watching this video …

I think by seeing the Stamparatus in action, it will actually bring my words to life and help you better understand my step by step tutorial.  For example, not getting it stamped fully on the first try, it’s easily fixed by re-inking the stamp and stamping it again … perfection!

Hope you enjoyed this video on our Stamparatus, it is a great addition to your stamping tools.  Stop back tomorrow as I will be sharing another cute card and amazing technique using your stamparatus.

Have a great day ~


Heat Embossing Techniques

Hello Stampin’ Friends ~

Quick post  … Today I have a technique video for you: Faux Metal Embossing!  Watch how easy this technique is …

Pretty cool right? This is a fun technique that can give you a real “wow” to your card.  Stop back tomorrow and I will show you what I came up with.

Thanks for stopping in today ~

Hope your day is a good one!

Home to Roost

Hello Stampin’ Friends ~

Today I’m going to share another of our fun Sale-a-bration stamps sets Home to Roost.  For those of you who are new to my blog and Stampin’ Up! … Sale-a-bration is an exciting sales event. For “each” $50 you spend, you can chose an item out of our Sale-a-bration catalog!!  It’s just a fun way to build your stamp collection.

Our Sale-a-bration product of the week is the Home to Roost stamp set, Warm thoughts come home to roost when you create projects with this set.

Home to Roost is a wonderful stamp set for all-year use with versatile sentiments and line-art images perfect for lots of coloring techniques. You’ll love the high-quality, color pencils. Perfect for watercoloring stamped images. Use with Aqua Painters, Blender Pens, or alone.

Purchase the products to make these projects and you’ll immediately qualify for the following FREE Sale-A-Bration item used to make the project: Home to Roost Cling Stamp Set. I have them listed below.

More ways to earn … Hostesses will get an extra $25 in FREE Merchandise above the regular rewards with party sales of $250 or more.  Gather your friends for a fun evening of stamping and everyone can earn free goodies!

Or … if you want it all, you can purchase the ultimate starter kit and join my stampin’ family ❤ . We’d love to have you on our team.  CLICK HERE

Let me know if you have any questions regarding Sale-a-bration, or the starter kit.

Wishing you a wonderful day ~

TODAY’S STAMPING SUPPLY LIST …