Fun Fold Card Featuring the Splendid Autumn Designer Paper

Hello Stampin’ Friends ~

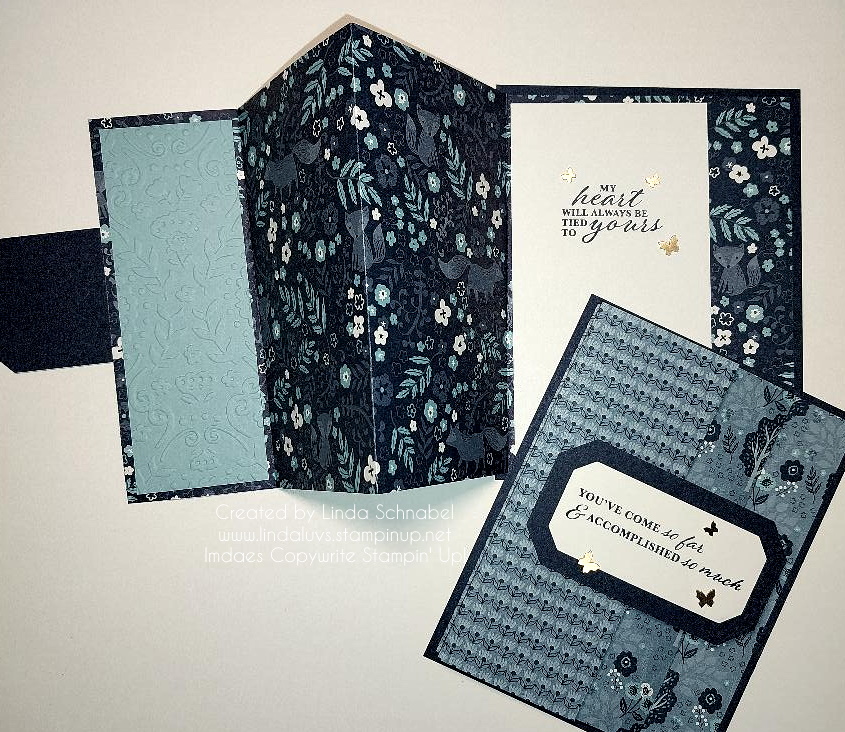
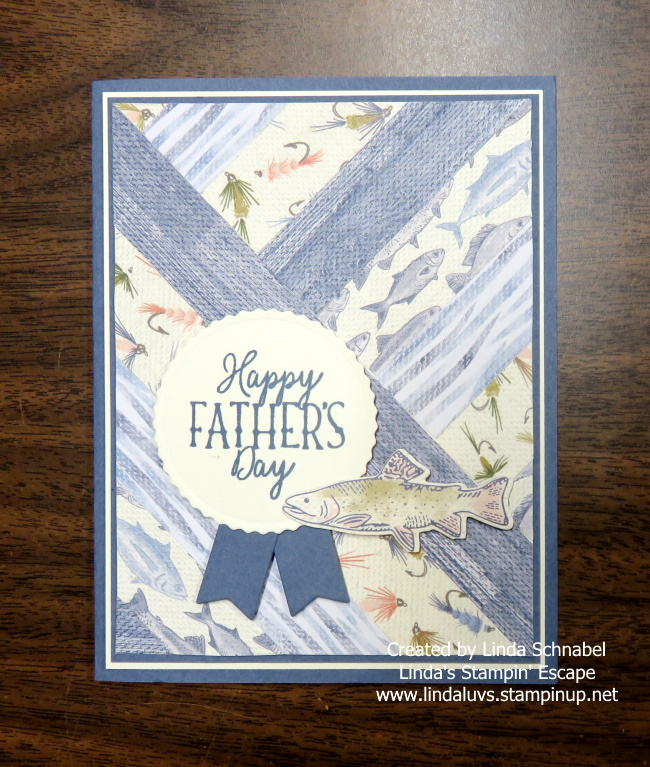
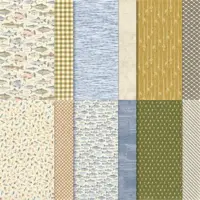
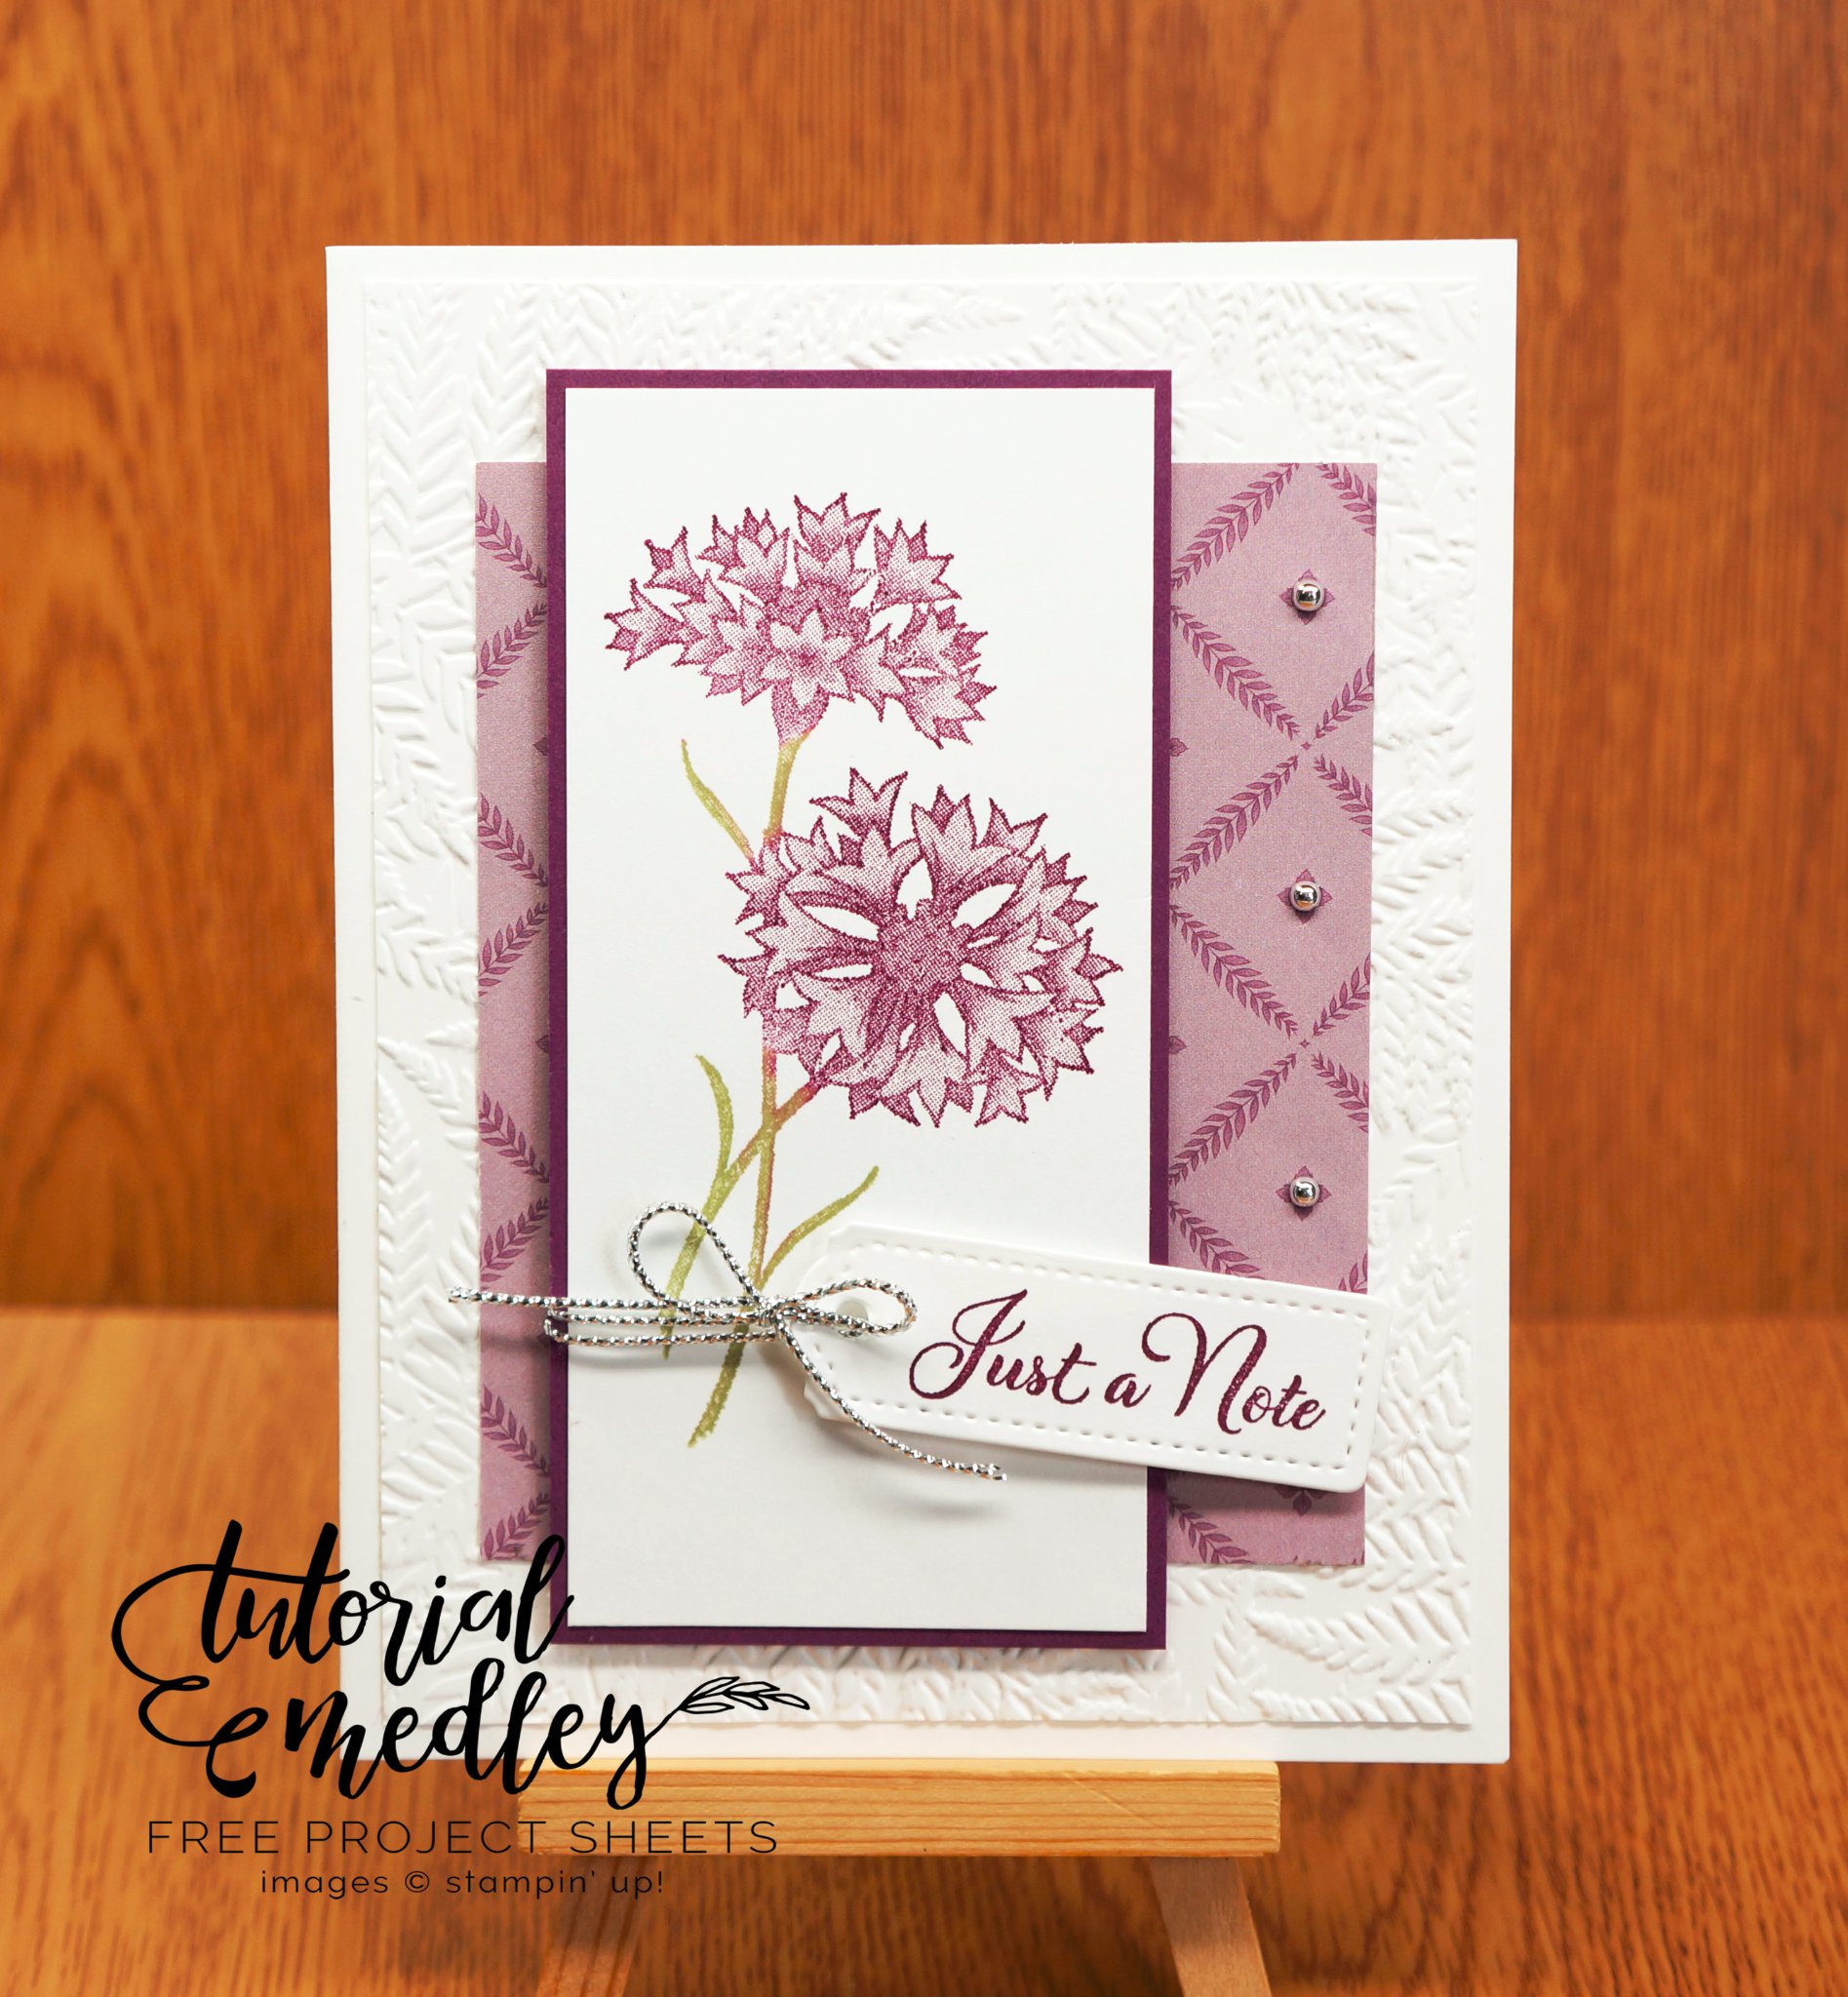
Today, I’m excited to showcase a gorgeous and easy-to-do Fun Fold card featuring the stunning Splendid Autumn 6 x 6 Designer Paper. I’m back after a week and a half of partying online on my Facebook page!! This card design really allows you to appreciate the beauty of the paper, as it’s cut to show off both the inside and outside on your continuous pattern. Fun folds are one of the easiest ways to take a simple card to the next level, and with designer paper as lovely as this, it does all the hard work for you! I call this fold my “Open Face Front”.

Card Details:

For this card, I began with a Cajun Craze card base cut at 5 1/2″ x 7 1/4″ and then scored and folded at 3″. This simple fold adds an elegant touch and can be used in both landscape (as shown) or portrait orientation, depending on your preference.

To create a continuous, cohesive look, I cut the designer paper to a width of 5″ and a height of 4″. I then cut 1 1/2″ off the bottom of this precut piece to use on the inside of the card. I layered the designer paper on top of a piece of Basic Vanilla cardstock (5″ x 3 3/4″) and then added a Pumpkin Pie layer (5 1/4″ x 4″) beneath it to tie all the colors together.

For the front, I took the remaining piece of designer paper and adhered it to another piece of Pumpkin Pie cardstock cut to 5 1/4″ x 2 3/4″. The layering really helps the designer paper stand out and gives the card a rich, polished feel.

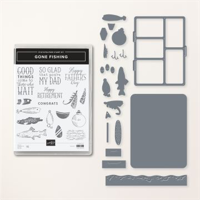
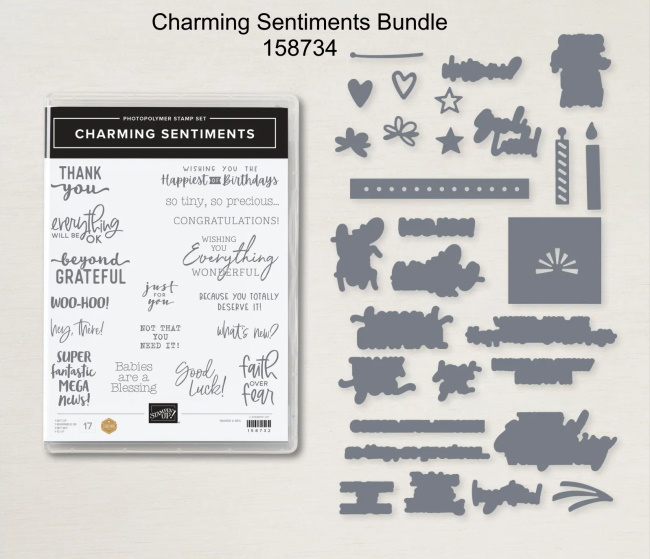
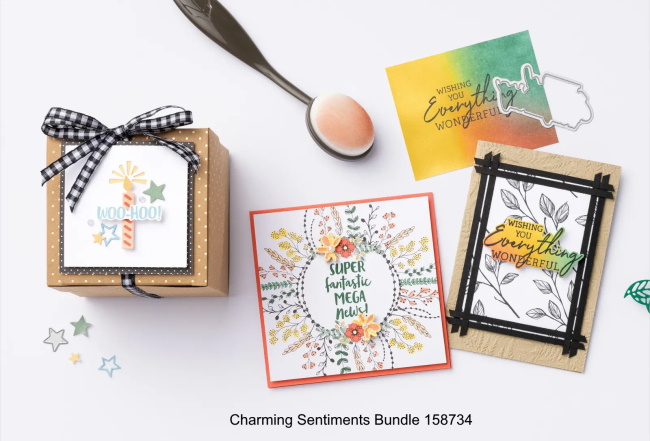
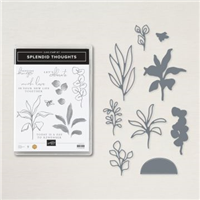
The sentiment comes from the adorable Warms My Heart stamp set, then die-cut using the Spotlight on Nature Dies for a clean, elegant look. To finish off the card, I added a few Faux Glass Dots (currently unavailable) for a little extra sparkle.

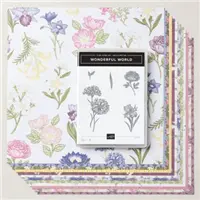
The Splendid Autumn Designer Paper is a true standout with its warm, rich tones and intricate designs. It’s perfect for fall-themed cards, but its versatility means it can be used for a variety of occasions. Whether you’re working with fun folds or standard layouts, this paper is an effortless way to add dimension and interest to your projects.

Fun folds, like the one featured here, are a great way to elevate your cards without a lot of extra effort. With just a few extra cuts and scores, you can transform a basic card into something truly special. And when paired with designer paper, fun folds make it easy to showcase the beautiful patterns and colors both inside and outside the card.

Ready to create your own? Pick up the Splendid Autumn Designer Paper and other supplies listed below today, and start crafting your own beautiful fun fold cards!

Thanks for joining me today!

Accordion Fun Fold Card with Countryside Inn Designer Paper

Hello Stampin’ Friends ~

Ready to add some elegance to your crafting projects? The Countryside Inn Designer Paper is now on sale and it’s the perfect time to grab it! This stunning paper features beautiful patterns that bring a touch of the countryside to your creations. Whether you’re making cards, scrapbooks, or other paper crafts, this designer paper will add that special something to your projects.

To inspire you, I’ve put together a video tutorial that takes you step by step through creating an “Accordion” Fun Fold card using this gorgeous paper. Grab a cup of coffee or your favorite beverage and join me for this short video …

Dimensions:

  • Night of Navy Base: 5-1/2″ x 4-1/4″
  • Designer Paper: 12″ x 5-1/4″ Scored at 2″ – 5″ – and 8″
  • Basic White (Inside) 5″ x 3-3/4″
  • Plus you will need a piece of Night of Navy and Basic White to Die Cut your Greeting
  • Balmy Blue (Inside – 1st Flap) 5″ x 1-3/4″

See how simple it was to create something beautiful. Now that you know how to make this adorable card, head over to my store and take advantage of the sale—this is one offer you won’t want to miss!

Thank you so much for stopping by and checking out my video today.

Enjoy your day ~

Join the Fun at Linda’s Stampin’ Escape Pop-Up Party!

Hello, Stamping friends!

I’m thrilled to invite you to a special POP-UP party on my Linda’s Stampin’ Escape Facebook page this Tuesday, July 23rd! Get ready for a day full of fun, engaging posts, and three fabulous online classes that you won’t want to miss.

PARTY DETAILS ….

  • Kick-off: 7 AM
  • End: Around 9 PM
  • Order Placement: Until midnight of the 23rd

CLASS / LIVE PRESENTATION LINE UP ….

Special Offers

Throughout the event, I have some exciting specials just for you:

  • All orders will receive 2 PDFs from my July Collection (featuring Wedding/Anniversary Cards).
  • Orders of $50 or more will get the PDFs, a Virtual Rewards Point, and a Bonus Days Coupon from Stampin’ Up! to use in August.
  • Orders of $75 or more will get the PDFs, a Virtual Rewards Point, the Bonus Days Coupon from Stampin’ Up! to use in August, and FREE Shipping!

PRIZE PATROL

We will also have our PRIZE PATROL running during the event with some fun giveaways!

Mark your calendars and join us for a day filled with creativity, inspiration, and exclusive offers. I can’t wait to see you there and share in the joy of stamping together! CLICK HERE / LINK

Happy Stamping!

Christmas in July “FUN FOLD” Card / Video

Hello Stampin’ Friends ~

Last night’s Facebook LIVE class was an absolute joy! If you missed it, don’t worry—you can catch the replay in the enclosed video. We had a fantastic time exploring the creative possibilities of the Merriest Trees Dies and the stunning NEW Iconic Celebrations patterned paper. Today, I want to share some highlights from our session and give you a closer look at these wonderful products.

First, lets watch the video for a step-by-step guide and some creative inspiration.

CLICK HERE TO VIEW VIDEO

The Merriest Trees Dies are an absolute must-have for your holiday crafting. These dies are incredibly versatile and perfect for creating beautiful, layered Christmas trees that add dimension and elegance to any project. During my LIVE, I demonstrated how to use these dies to create this beautiful FUN FOLD card.

Here are some of the stand out features of the Merriest Trees Dies …

Intricate Designs: The dies include detailed tree shapes and decorative elements like stars and ornaments, allowing you to create intricate and eye-catching designs.

Layering Capability: With multiple sizes and shapes, you can layer the trees to add depth and dimension to your projects.

High-Quality: Made with precision, these dies ensure clean cuts every time, making your crafting process smooth and enjoyable.

The Iconic Celebrations patterned paper is a brand new addition to our Online Exclusive collection, and it’s already a favorite! This designer paper is perfect for adding a festive touch not only to your holiday projects, but was designed to use all year long!

Ready to get started on your holiday crafting? Don’t wait—add the Merriest Trees Dies and Iconic Celebrations designer paper to your collection today! These products are perfect for creating beautiful, handmade holiday items that will be cherished for years to come.

Happy crafting, and see you at my next Facebook LIVE class!

Sending Smiles Card in Lemon Lolly

Hello Stampin’ Friends ~

Thought I would change things up a bit today and share my Sending Smiles Card created in Lemon Lolly. Who know I would flip head over heals for this new color. It’s so cheerful and some days we all need a little more cheer in our lives.

I created this card for the Tutorial Group that I am in …. Our June theme is our favorite new color.

Let me know if you would like the PDF for this card… just leave me a comment below. You will need WORD to open the file … I’d be happy to share this one with you.

Thanks for stopping by my blog today. Have a good one!!

The Take Your Pick Tool: Tips and Benefits

Hello Stampin’ Friends ~

Are you an avid crafter looking for the perfect tool to enhance your crafting experience? Look no further than the Stampin’ Up! Take Your Pick tool! This versatile and handy tool has become a favorite among crafters worldwide for its ability to simplify various crafting tasks and add precision to their projects. In today’s blog post, we will explore the tips and benefits of using our Take Your Pick tool.

Benefits of the Stampin’ Up! Take Your Pick Tool:

  1. Versatility: The Take Your Pick tool is a multi-functional instrument that offers a wide array of crafting capabilities. It comes with interchangeable tips that serve different purposes, making it a versatile tool suitable for various crafting projects.
  2. Precision Placement: One of the most significant advantages of the Take Your Pick tool is its precision. The tool features a tacky putty tip that allows you to easily pick up and precisely place small embellishments, such as sequins, beads, rhinestones, and more. Say goodbye to struggling with tweezers or accidentally knocking embellishments out of place!
  3. Adhesive Placement: Crafting can sometimes get messy when it comes to applying adhesive. The Take Your Pick tool includes a removable spatula tip that aids in the precise application of adhesives. No more sticky fingers or adhesive mishaps!
  4. Paper Piercing: For those who love adding intricate details to their projects, the Take Your Pick tool has a paper-piercing tip that enables precise piercing for creating holes, faux stitching, or adding delicate accents to your designs.
  5. Score and Fold: The tool also comes with a scoring stylus, making it convenient for scoring and folding paper without the need for an additional scoring board. It’s perfect for creating cards, envelopes, and 3D projects.
  6. Comfortable Grip: The ergonomic design of the Take Your Pick tool ensures a comfortable grip, reducing hand fatigue during extended crafting sessions.

Crafters’ Tips for Using the Take Your Pick Tool:

  1. Clean the Tips: Regularly clean the tool’s tips to ensure optimal performance. Use adhesive remover or gently rub off any residue that may accumulate on the tacky putty or paper-piercing tip.
  2. Store Securely: The Take Your Pick tool comes with a protective lid, so always store it with the lid on to keep the tips safe from damage and maintain the tackiness of the putty tip.
  3. Practice Pick-Up: Before working on your main project, practice using the tacky putty tip to pick up small embellishments. This will help you get comfortable with the tool’s sensitivity and ensure precise placement.
  4. Use Gentle Pressure: When using the tacky putty tip to pick up embellishments, apply gentle pressure. The tackiness of the tip is sufficient to hold the items without squishing or damaging them.
  5. Coordinate with Grid Paper: When using the paper-piercing tip or scoring stylus, align the tool with the grid lines on your crafting surface to maintain straight lines and accurate measurements.
  6. Keep Spare Tips: Consider keeping spare interchangeable tips handy. This way, you won’t have to interrupt your crafting session if a tip needs replacement.

The Stampin’ Up! Take Your Pick tool is a must-have for every crafter, offering convenience, precision, and versatility to elevate your crafting projects. Whether you’re a seasoned crafter or just starting, this tool will undoubtedly become an essential part of your crafting arsenal.

So why wait? Grab the Stampin’ Up! Take Your Pick tool today and take your crafting to the next level! Happy crafting!

Sending Smiles Card in Lemon Lolly

Hello Stampin’ Friends ~

Thought I would change things up a bit today and share my Sending Smiles Card created in Lemon Lolly. Who know I would flip head over heals for this new color. It’s so cheerful and some days we all need a little more cheer in our lives.

I created this card for the Tutorial Group that I am in …. Our June theme is our favorite new color.

Let me know if you would like the PDF for this card… just leave me a comment below. You will need WORD to open the file … I’d be happy to share this one with you.

Thanks for stopping by my blog today. Have a good one!!

Fun Background with Gone Fishing Bundle

Hello Stampin’ Friends ~

Today I have and cards for you showcasing a FUN Background using the Gone Fishing Bundle and the Lets Go Fishing Designer Series paper. You’ll see though watching the video how easy it is to create this fun background, along with some tips and I share my “discovery” of what other bundle works GREAT with the NEW Gone Fishing Bundle.

Let’s watch, then I’ll share the cards again with you …

So easy to make this fun background with scrap paper … and just think of all the different occasions you can create for!! The dimensions are in the video and I leave them up for a while so you can easily write them down as well.

This is the one that I create during the video … don’t forget, there is a coordinating die for that fish!! lol I have just fallen in love with this suite. Watch for more!!

Background is the same on this next card … a little different as far as paper strips but I used the dies from the “All That” dies to create an award ribbon to show Dad that he’s the best.

So … who is going to try this out? Or have you already. I do have another card with this pattern but with different designer paper .. WOW! It’s a whole different look. I will share that with you tomorrow.

Thank you for stopping in and sittin’ a spell. Enjoy your Wednesday!!

Accordion Fun Fold Card

Hello Stampin’ Friends ~

Today I’ll be sharing the Accordion Fun Fold from the replay VIDEO of last nights Facebook LIVE … You are going to love seeing all the cute swap cards from retreat and the one that inspired me to create the two cards I made for you.

I’m using the NEW Countryside Inn Designer Paper and dies from the suite. The greetings come from the Wonderful Thoughts stamp set. Grab a cup of coffee or your favorite beverage and join me for this short video … you’ll be amazed at how easy the Accordion Fold card is to make.

Dimensions:

  • Night of Navy Base: 5-1/2″ x 4-1/4″
  • Designer Paper: 12″ x 5-1/4″ Scored at 2″ – 5″ – and 8″
  • Basic White (Inside) 5″ x 3-3/4″
  • Plus you will need a piece of Night of Navy and Basic White to Die Cut your Greeting
  • Balmy Blue (Inside – 1st Flap) 5″ x 1-3/4″

I hope that I with the help of my video inspires you to grab some of that beautiful designer paper you have and try out this FUN FOLD card today. I’m adding the list of ingredients below, if you like what you saw (like that amazing sentiment set) you can click on that item and shop at my store … it will be sent directly to you.

Thank you so much for stopping by and checking out my video today.

Enjoy your day ~

Just a Note to say …

Hello Stampin’ Friends ~

A new week ahead, so Just a Note to say Happy Monday to you! Today I’d like to share another card from the Wonderful World bundle. The layers truly highlight the beauty of this flower. We begin with a Basic White base and a Basic White mat that is embossed with the Fern 3D folder … this adds a nice touch of texture to the card.

Our next layer is the Wonderful World Designer Series paper which is attached directly to the embossed cardstock. Next we’ll ink up the stamp using a sponge dauber and Rich Razzleberry for the flower and the Pear Pizzazz Stampin’ Write marker to add color to the stem and stamp onto Basic White cardstock. Secure to a Rich Razzleberry mat.

Stamp greeting on white carstock and die cut with smallest tag die. Wrap silver cord twice around matted image and thread tag on, then tie a bow. Adhere to card with dimensionals. Finish off your card by adding silver pearls to the designer paper.

If you would like a PDF of this card with photo, dimensions and full instructions … just leave a comment below and I will send it out to you.

Thank you for joining me this Monday. Have an amazing day!

Here is a list of ingredients to make today’s card ….

Simply Sunday: Stamp & Die Organization

Hello Stampin’ Friends ~

Today I have a special post, I want to show you an amazing tip for organizing the Charming Sentiments bundle. Wow … this will really make your life easier, and it’s sooo simple!

There are many dies for the sentiments and this QUICK TIP will get you stamping much quicker and without the frustration of trying to match up these dies to your stamped images. Take a look at my video ….

WOW … how easy is that!? Now you will know exactly which dies coordinate with the sentiment you just stamped. I use StazOn ink because it’s permanent ink and its such a rich black color … it should not wear off, were as a lighter color might. With just a little preparation in the beginning … stamping and die cutting these will be a breeze.

I only take one image/die at a time. This way, they go back onto the die card the way they were on it. If you use a magnetic sheet for your dies, simply cover one side with cardstock and then you can begin stamping the sentiments on that … it will work just the same.

I love this quick tip, it has saved me so much time when making my cards, it’s no longer a drawn out match-fest, it is quick and easy to find the coordinating pieces …

Thank you for taking time out of your Sunday to visit … I hope you have a beautiful day.

The Beauty of Watercoloring

Hello Stampin’ Friends!

And welcome to my blog as we take a look at the Beauty of Watercoloring today. I would like to share the replay of my Facebook LIVE that shows you step by step how to create 4 different Watercolor Wash backgrounds. With that I will share the cards I created with those backgrounds. Here is the video ….

Here is the card I shared in the video from the first background I created. This technique reflects the Ombre look as the color fades from dark to light. I used the Splendid Stems dies to frame my greeting… and you all know how I love my greetings!!

If you would like more information about this card CLICK HERE to view the original post.

The second card highlights the dual color watercolor wash where you start one color from the top and the second from the bottom and let them meet in the middle … gives you a brand new color there!

The third card is a blending of multiple colors! If you’re not sure what colors go together … let nature be your guide! Here I used the colors of an early sunset, when the skies are pink and blue with a few shades of purple. I framed part of the background and used it for my moon!

If you want to read more about this card CLICK HERE for more information.

The fourth card I made had multiple colors and I added Sea Salt which pulled up some of the color which created some “spots”. This time I die cut my background … this technique is not just for backgrounds but can be used in many ways!

Full details for my butterfly card can be found HERE.

I want to thank you for joining me today on my blog … and invite you to join me tonight for my Facebook LIVE where I will be showing you an easy & beautiful technique watercoloring heat embossing images.

Take good care ~

Here is a list of the ingredients that I used for one or both of the cards. Remember, every $50 purchased, is rewarded with a exclusive Sale-a-bration item.

Watercolor Wash Backgrounds

Hello Stampin’ Friends!

Welcome to my blog and to today’s Watercolor Wash Backgrounds post where I will share some great tips for easy watercolored backgrounds. I’m using the Wet on Wet technique with our everyday ink pads!! You are going to marvel at how easy this is, and what amazing results you get!

I will have last nights replay of my Facebook LIVE to share with you, along with two cards created with our watercolor backgrounds.

Don’t you just love how easy that was … just a few simple tips:

  • Keep your watercolor paper wet (nice sheen) but NO puddles.
  • Have your colors ready and some water to clean your brush.
  • Don’t be afraid to experiment!

Here is the card I shared in the video. I used the Splendid Stems dies to frame my greeting… and you all know how I love my greetings!!

The measurements for both cards are the same except the double color card has and extra mat. The base is 8-1/2″ x 5-1/2″ with a Starry Sky front (4″ x 5-1/4″) that was embossed with the Painted Texture Embossing Folder. The watercolor paper is 4″ x 3″ so the mat is 4-1/4″ x 3-1/4″.

The greeting comes from the Flowering Tulip stamp set and is stamped in Starry Sky and die cut with the layering circles die. The greeting is adorn with the die cut leaves from the Splendid Thoughts Bundle and the card was completed by embellishing it with the Iridescent Rhinestones.

My next card highlights the dual color watercolor wash …

I used the Melon Mango and Calypso Coral inks. Measurements for the card are the same as above except for the second mat of Flirty Flamingo which measures 4-1/2″ x 3-1/2″. The palm tree and the fun border are both die cut using dies from the Palms dies.

The greeting is stamped directly onto the watercolor paper. This card is more stunning in person, the colors are much more brilliant. This card was so simple and easy to create!

I want to thank you for joining me today on my blog … I hope you enjoyed the video and the samples. I will be back tomorrow with another of of the backgrounds we created.

Take good care ~

Here is a list of the ingredients that I used for one or both of the cards. Remember, every $50 purchased, is rewarded with a exclusive Sale-a-bration item.

Stampin’ Blends Tutorial

Hello Stampin’ Friends ~

Today I’d like to share the Facebook Live that I did last night demonstrating the Stampin’ Blends coloring technique. I used the Celebrate Sunflowers stamp set …

This is a “Facebook Live” so you are going to hear me talking to the viewers as they arrive. I’ve also shared some tips and more. Pardon the wiggle, this was my first LIVE Video (still learning) I will be finding a more stable holder for my phone!

I hope you enjoyed, and I really hope that you learned a little more about our Stampin’ Blends and how easy they are to use. I really do believe that the large flower in the Celebrate Sunflowers bundle is the perfect image to practice on…. besides, it’s a beautiful bundle!

I will be back tomorrow to share another card from the Celebrate Sunflowers bundle using more of the dies!! Until then, have yourself a sunshiny day!

TODAY’S STAMPIN’ SUPPLY LIST … If you liked the products used in today’s projects, I have links for you below. Just click on the item you would like more information on, or to begin your shopping. It will take you directly to my website. Thank you ♥ 

My “Watercolor Lifting” Card …

Hello Stampin’ Friends ~

It is Thursday and it’s a good day (because it’s my Friday!) I have off of my other job Friday, Saturday and Sunday! I have a Stampin’ Club on Saturday morning and then Andrea’s Stampin’ Party that afternoon and I’m so excited to share my love of stamping with them.

Today I’m going to share my card that I created using the “Watercolor Lifting” technique that I shared via video with you yesterday. I’m going to share a couple extra pictures to show you how I did it … This is my first card with this technique!!

Let’s begin with the preparation … I started with Melon Mambo, Rich Razzleberry and Elegant Eggplant Ink Pads. I used the Shimmery White cardstock because I thought it would emboss better than the watercolor paper (because my design on the stamp set was very fine) and my Aqua painter!

You will notice that I pushed my pads together to get some ink in the lids … if you don’t like this method, you could put a few drops of re-inker in the lid or another container. Either way … I generally clean out the cover before storing them.

Grab your Aqua Painter and lets have some fun!  This is so easy and looks so cool …

I put some notes on my pictures as well … in case you would like to print them out and make a tutorial. I held the sides down with a little washi tape.

I made sure to Aqua Painter had plenty of water and the tip was wet, then I picked up my first color (Melon Mambo) and began brushing it across my cardstock.  When I started my second color, I went over the first color a little so it blended nicely.

Once you get it to look the way you want (I like it a little on the dark side, remember … you will be removing some of this color).  Make sure your cardstock is totally dried. You do not want any moisture, the embossing powder will stick and you will have a mess!

Once DRY … rub your embossing buddy across the cardstock so you don’t get any flecks of additional powder on your project…. this is just a good habit to get into if your love to emboss.  I used VersaMark and Clear Embossing Powder (don’t over heat).

Now that your embossing is done … you’re ready for the Watercolor Lift! Take your Aqua Painter and spread a layer of water over your project … use a paper towel to begin “LIFTING” the color back up ….

What you will get is pretty pops of color where you embossed with a beautiful watercolor background!  I love this technique and it is so easy to do. This was my very first time doing it and here is my card …

I wanted to highlight the beautiful technique on this card so it is the focal point and I popped some black behind it so it really stands out on the card.

I used the floral pattern from the “Wood Words” stamp set on page 159 of our Annual catalog and I just stamped it all over the cardstock.  The greeting comes from the “Picture Perfect Birthday” stamp set which is on page 5 of our Occasions Catalog.

I know there was a lot to read through today but I hope you understand the steps to create your own Watercolor Lift Cards.

Just think … you can do this is any color combination, including a rainbow!! Why not have some fun, pick your favorite colors and give it a try!

Thank you so much for coming back today to check out my card.

Have a great Thursday … and I hope it feels like a Friday for you too.

See you tomorrow ~

TODAY’S STAMPIN’ SUPPLY LIST ….