A Few Favorites …

Hello Stampin’ Friends,

Today I’m going to share with you a post from Stampin’ Up! Concept artist Jen C.

I have already shared a few of “my” favorites, but when I saw Jen’s projects … I just had to share.  She created some really cute projects!  Just take a look …

A Few Favorites

I am so excited that it’s 2014 and we can finally share projects using new Stampin’ Up! products. It’s so fun to use new stamps and accessories. It reignites my creativity.

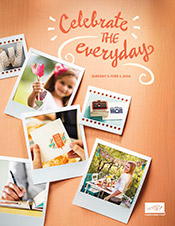
In the 2014 occasions catalog, there are so many things to get excited about. I wanted to share just a few of my very favorite things.

I made a few different projects to showcase my faves. On the Hello card, I spritzed part of the Designer Series Paper to create a fun background. And I love the stamped greeting on the Designer Series Paper, as well.

Next, I made a box using the Envelope Punch Board. (By adding a second score line to each side, you can add sides to your envelope and create a box.) The black and white stripe is my favorite sheet in this Designer Series Paper pack. I also love the little greeting stamped on the wooden flag using the rotary stamp.

On the Thank You card, I used a Stamp-a-ma-jig and a few different ink colors to create a fun diagonal stripe of thank you’s. Every cute card needs a coordinating envelope . . . and the Envelope Punch Board makes creating custom envelopes a cinch.

Last, I wanted to use the Enjoy stamp from the Simply Celebrate set to package a little treat. I’ve stamped “Enjoy” on an acetate box using White StāzOn ink. Then, I’ve embellished it with Kaleidoscope Designer Series Paper
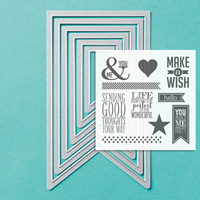
 and a small length of Gold Sequin Trim.

What do you love most in the new occasions catalog?

Jen C.
Concept Artist

So what do you think?  She’s pretty awesome … and I thank her for sharing.  Click here for the link.

Thanks for stopping by today, and let’s all thank Jen for sharing her fabulous projects with us.

blog-closing-small

You Make Me Happy …

Hello My Stampin’ Friends,

How are you on this fine day?  I hope you doing well.

Last night I had one of my Stampin’ Technique Club meetings and we had a blast.  Lot’s of silliness and laughter, it was at times hard to stamp!  We blamed it on the full moon.

Today’s card share goes out to all my Stampin’ Friends … because you make me so happy! I really love my job as a demonstrator!

The card is cute and simple, and is a snap to make.

000_0523 blog

I paired up the Perfect Pennants Stamp Set and Banners Framelit Dies.  Now add that to the Watercolor Wonder Designer Note cards and making this card is easy-peasy!

I picked the “polka-dot” card … there are 5 designs to choose from, because it just looked fun!  Who doesn’t love Polka-Dots?

I began by stamping my greeting in Smokey Slate and cut it out with the Banner Framelit.  Then I added another banner in Tangerine Tango – I chose the tangerine because it coordinates with the color on the card, and it draws the eye right to the greeting.

I simply finished off my card by adding a sweet bow with the Whisper White Taffeta Ribbon.

The Watercolor Wonder Designer Note cards also come with envelopes, so you are ready to send out your card.

000_0523 blog

Thank you for stopping by today …

Hope your day is filled with “happy”.

blog-closing-small

Here is the ingredient list for the card.  Be sure to keep scrolling down so you can see the weekly deals.

 ITEM

 PRICE

 DESCRIPTION

133227

$29.95

 Perfect Pennants Stamp Set – WOOD

133230

$21.95

 Perfect Pennants Stamp Set – CLEAR

132173

$26.95

 Banners Framelit Die

134815

$48.50

 Pennants & Banners BUNDLE / Wood

134816

$41.50

 Pennants & Banners BUNDLE / Clear

133362

12.95

 Watercolor Wonder Designer Note Cards

109070

$6.95

Whisper White 3/8” Taffeta Ribbon

Clicking on the item number will link you to my on-line store.

From Christmas to Valentine’s Day …

Hi Stampin’ Friends,

Woo Hoo … this will be a quick post today, I have the pleasure of shoveling out about 5 – 6 inches of snow … Yippee!

Enough about that white stuff, I wanted to share with you a Paper Pumpkin project that I did just the other day.  With this fabulous opportunity to get FREE Markers when you sign up, I just wanted you to get a good feel of these fun stampin’ projects.

This was the November project that was delivered to my door (well … mailbox)

000_0620

Ohhhh so pretty.  I love it because I don’t have a sewing machine, so the only way anyone is going to see something sewn from me is on a card from Paper Pumpkin – LOL!

I’m not sure if I mentioned this yesterday … but Stampin’ Up! also puts out a video that coordinates with your Paper Pumpkin!  They’re short, cute, and give you a quick view on how to make the project.  Remember, they give you full color directions in your kit too.

OK … so I was playing around with my November Paper Pumpkin and came up with this …

000_0622

What do you think?  All I did was take one of those left over hearts from another project and added it to the card!  And a greeting.

I really would like to hear what you think of the Paper Pumpkin projects that I have shown you so far.  If you would like to sign up … here is the link again.

My Paper Pumpkin / Sign Up Now

Have yourself an awesome day!

blog closing-small

Stampin’ Kits at your door …

Hello Stampin’ Friends,

How many of you know what “Paper Pumpkin” is?  OK, a few of you … well, for those of you who don’t know, it is simply a stampin’ kit that comes delivered to you each month.  How sweet is that!

I will be sharing with you what to expect, what your first kit looks like, and some of the past kits that have been sent to those of us who are subscribers (it’s like subscribing to a magazine, but you get to make cool stuff … and you can unsubscribe at any time).

Here is how your “Paper Pumpkin” arrives … packaged nicely in this bright orange box.

 000_0132

Yes, it really does say “You’re moments away from your escape … Now you know why “I” love these, I’m all about the Stampin’ Escape!

Now open it …. Ooooooooooh the suspense!

000_0133

YEAH!! … this is the kit you will get when you first sign up.  It is our starter kit, named that because it comes with the clear block you will use for future kits.

PaperPumpkin_US

The kit comes with everything seen here …

6a00e54f95df928834017ee76b283f970d-500wi

All you really need is your favorite adhesive and a few minutes.  The directions (in color) are included in each Paper Pumpkin.

Here is a sample of what I did with one of the cards inside … I decided to play around a bit, just to show you that you can change it up, if you want to.  Yes, you can embellish them more … and it’s fun!

jan-paper pumpkin embellished

I changed to position of my card from portrait, to landscape.  Then I added one of our doilies and some pearls.  I think it’s so cute.

Here are some of the other kits that I have done …

000_0618

This cut little message board works great … in fact, I’ve been thinking about taking it to work with me.  I need one place to right down our supplies, instead of a pile of loose notes!

000_0619

The idea of sweet little book is to put snap shots and notes in for your everyday life … not over whelming for those who never scrap booked.  But when I saw the “Top 10” flag, I knew I was going to put in my top 10 – my grandchildren!  So look out kids, next sleep over – the camera will be out.  Besides … I can’t wait to use the rest of those cute little wooden people – LOL!

I love getting these kits every month, a fun project to do with my granddaughters (sometimes my grandsons)  It’s a great way to spend time with family or a friend … just get together.

If getting a package of a fabulous stampin’ kit each month wasn’t enough …. Stampin’ Up! will be adding a FREE set of the 2012-14 In-color Markers with your kit when you sign up before February 10th!!

demoheader_paperpumpkin_demo_1.11-1.27.2014_US_CA

AND if I get 10 NEW subscribers … I will send “ALL” my Paper Pumpkin subscribers a stack of matching cardstock! Yes, that includes my current subscribers, so tell your friends to sign up too.

You must subscribe through me (Linda Schnabel) and I must have 10 or more for ALL of you to receive the added coordinating cardstock.  We can do it!!

I just think they are so much fun to do …

CLICK HERE TO SIGN UP NOW

Contact me if you have any questions.  I’m here to help.

Thanks so much for taking time today to check out my blog and this awesome special.

blog closing-small

New Product Intro …

Hello Stampin’ Friends,

There are so many wonderful new products in the Occasions Catalog that (unfortunately) I don’t have them all.  So today I would like to share with you a Stampin’ Up! video to introduce to you the new ….

Happenings Simply Created Card Kit

Think you don’t have time to make your own cards? Think again! With this kit, you can make 15 cards in just minutes. We’ve done the measuring and cutting for you. Coordinates with the Says It All Stamp Set.

Here are all the fun supplies that are included in the kit!  You’ll just need your favorite adhesive.

6a0120a5bac552970c01a5107b9c35970c-500wi

Happenings Simply Created Card Kit

133329

Price: $14.95

Coordinating colors: Baked Brown Sugar, Bermuda Bay, Pear Pizzazz, Smoky Slate, Strawberry Slush, Whisper White.

Includes pieces for making 15 cards:
■ 15 card bases: finished card size: 4-1/4″ x 5-1/2″
■ 15 sheets of single-sided, printed designer paper backgrounds, 5 ea. of 3 designs
■ 15 die-cut accents, 5 ea. of 3 designs
■ 15 Silver glitter banners
■ 15 White banners
■ 15 pieces of Baker’s Twine, 10″ ea.
■ 15 buttons

Beautiful, quick and easy cards … and they’re only $1.00 per card.  Your friends will think you’ve spent hours creating these.

If you would like to order the KIT … JUST CLICK HERE!

“Says It All Stamp Set” … Includes 4 stamps. This limited-time set is only available from January 3 through May 31, 2014, order yours today!

133173G

You can use the coordinating “Says It All” stamp set, or use a stamp set you already have at home.

Thanks so much for stopping by today.

blog closing-small

Sending Flowers & Get Well Wishes …

Hello Stampin’ Friends,

One thing that cheers me up is stamping or getting hand stamped cards, so as I was a bit under the weather … I created a “Get Well” card!  That darn flu bug has hit many of you too, so I hope my card brings a smile to your face.

I began with the beautiful “Watercolor Wonder” Designer Series Paper… don’t you just love these flowers!  I chose the green/blue flowers this time and used the Island Indigo card stock for the base of the card.

000_0616

I cut the designer paper ( 4′ x 5-1/4″) for the front of the card, then I used the left over piece to cut the liner for my envelope.  I used the Envelope Liner Thinlet Die…which is now on sale!  I set the scrap piece aside because I will be using it later.

My “Get Well” greeting comes from the “Perfectly Penned” stamp set.  This is one of those stamp sets that when I first saw it, I just had to have it.  The font is so unique and fun … and who doesn’t want to be “cheered up” when they aren’t feeling well.

My greeting is stamped in Island Indigo ink and was cut out using the smallest of the “Oval Collections Framelits”.  I then cut a mat out of Island Indigo cardstock with the next size oval and punched out my first butterfly with the “Elegant Butterfly” punch.

I took the scrap piece of designer paper left over from the envelope liner, and punched out my second (smaller) butterfly with the “Bitty Butterfly Punch”.  I think the butterfly looks so cool punched out of the designer paper!

000_0607

I adhered the smaller butterfly to the larger with the “Glue Dots”  because it allows better placement and I won’t get adhesive on the wings … I like them moveable. Our butterflies must fly!

To embellish card … I used 4 of the pearls that are connected together to create the body of the butterfly, and then wrapped another string of the pearls around my greeting.  I added a few loose ones too, just to created a smoother, airier look.

Well … I still had a strip of designer paper left from the envelope liner scrap, so I cut a piece for the inside of my card and edged it with the “Finishing Touches Edgelit Die”, (which is also on sale until the 13th).  It really did add the finishing touch to my card.

000_0617

Hope my card brought some brightness into your day.  The pretty butterfly makes me think of spring (Wishing it was, while I was out salting the 1-1/2″ of sheer ice on my driveway)

Spring … I’m ready for you! LOL

Thanks for visiting me today.  Hope yours is a beautiful one.

blog closing-small

Here is a list of supplies used for today’s card …

 ITEM

 PRICE

 DESCRIPTION

128703

$16.95

 Perfectly Penned Stamp Set – WOOD

122892

$12.95

 Perfectly Penned Stamp Set  – CLEAR

132994

$10.95

 Watercolor Wonder Designer Series Paper

129381

$26.95

 Ovals Collection Framelit Dies

127526

$15.95

 Elegant Butterfly Punch

129406

$15.95

 Bitty Butterfly

119247

$4.95

 Pearl Basic Jewels

132172

$20.21

 Envelope Liner Framelits (ON SALE thru 1/13)

130658

$39.95

 Big Shot Magnetic Platform

127010

$7.46

 Finishing Touches Edgelits (ON SALE thru 1/13)

Clicking on the item number will link you to my on-line store.

Hip Notes Video & FREE Product Opportunity!

Hello Stampin’ Friends,

Just a quick post today …  Yesterday I shared a card using the “Hip Notes” Stamp Set, today I’d like to share a video using the coordinating “Essentials Wooden Elements”!

6a00e54f95df92883401a510852025970c-320wi

Learn how these small Essentials Wooden Elements can make a big impact on your projects.  They’re small, fun, and customizable.  You can stamp on them, spritz them, sponge them and more!

Sit back and enjoy ~

If the video does not appear, click on the link to watch …

Hip Notes Stamp Set and Essentials Wooden Elements

How do you like the new “Essentials Wooden Elements”?  I think they are so cute. I’ll be sharing card samples that include them.

You’ll find the right words when you combine them with the fun and a bit sassy coordinating “Hip Notes Stamp Set”.

6a00e54f95df92883401a510851b95970c-320wi

Keep checking back to see them, or better yet … just hit the button “FOLLOW THIS BLOG” and my posts will be sent to you daily.

I also have a “FREE PRODUCT” give-a-way for you.

demoheader_paperpumpkin_demo_1.11-1.27.2014_US_CA

Here’s the details:

When you sign up for “Paper Pumpkin” between January 11th and February 10th … You will receive the a FREE Set of 2012-14 In-Color Markers… that’s a $14.95 value!

SIGN UP NOW!

Thanks so much for stopping by my blog today.

blog closing-small

Thanks… Love ya! Card

Hello Stampin’ Friends,

How are you today?  I am feeling pretty darn good, hope you are too.

I am excited to share today’s card with you.  I have been “piggy-backing” my cards for the past couple days … and today is no exception.  Yesterday I shared a card using the “Hip Notes” stamp set, so today I will share another design using that same set!

So my first task was to decide which image I would use this time, so I chose the “Thanks”.  Well those little arrows took me to the “Retro Fresh Designer Series Paper”.  I chose the pattern with “arrows” on it!

000_0602

You got it … it was the little circles on the designer paper that made me think of the “Circle Card Thinlits Die”.  I love working with this die!  It is so easy to use, and the recipient of the card just “flips” over it!  Ok … bad pun, I’m sorry!  Back to the card.

Well, with all these little arrow going on … I thought I would pull out my “Chevron Border Punch”.  I bought this a while ago and never used it yet!  Whew … I was really happy when Stampin’ Up! carried it over into the Occasions catalog!!

000_0600

Of course you can see that my color pallet was supplied by my designer paper … so I went with the Baked Brown Sugar, the Coastal Cabana, and Very Vanilla.

After cutting out the “circle flip card base” … I punched out at Baked Brown Sugar mat, using the 2-1/2″ circle punch.  For my greeting, that was stamped in the Baked Brown Sugar onto Very Vanilla, and then cut out with one of the circles from the “Circle Collection Framelits”.  Just as I said yesterday, I also used my “Magnetic Platform”.

As you can see, one little image can take you on a journey through an entire creation!  Another cute and simple card … what did we ever do before that “Big Shot” came to town!  I’ll tell ya, it was mighty boring around here.  LOL

Oh yes, and when you “flip” that card … you will get a sweet little greeting from the Just Sayin’ stamp set that I used a couple days ago.

000_0601

Thanks for stopping by and following along on my card making journey today.

blog closing-small

Here is a list of supplies used for today’s card …

 ITEM

 PRICE

 DESCRIPTION

133501

$14.95

 Hip Notes Stamp Set – WOOD

133504

$11.95

 Hip Notes Stamp Set – CLEAR

133480

$32.95

 Circle Card Thinlets Die

132154

$21.95

 Chevron Border Punch

130911

$26.95

 Circle Collection Framelit Dies

120906

$26.95

 2-1/2” Circle Punch

130685

$39.95

 Magnetic Plateform

132172

$20.21

 Envelope Liner Framelit Die (ON SALE)

Clicking on the item number will link you to my on-line store.

Simply You … & … Me

Hello Stampin’ Friends,

Yesterday I shared with you a glimpse of the “Sweet Sorbet” Designer Series Paper that will be available during Sale-a-bration, which kicks off January 28th.

Today… I would like to share with you another design from the “Sweet Sorbet” paper.  I want you to be able to see different ways the paper can be used in combination with some of our favorite stamp sets.

000_0596

I chose this fun and somewhat sassy designer paper and I thought of “you & me” … just think back on some of our discussions at our club meetings … right!

Well the next step was easy, and besides, I wanted to show you how fun the “Ampersand” embossing folder was to use.  I used “Pool Party” cardstock and the “Circle Collection Framelit Die” to cut it out.

The “You … Me” comes from the stamp set “Hip Notes”… it’s on page 18 of the new Occasions catalog.   This is the first time I got to use it and I’m so happy I can share it with you.

I cut the “You” and “Me” out using the Bitty Banner Framelits.  I also cut out 2 Basic Black banners out to act as a mat and give it that “pop”!  The card was secured to the Basic Black base for it’s WOW factor.

000_0598

I lined the envelope with the “Sweet Sorbet” designer paper using the “Envelope Liner Framelit Die”  which is currently on sale.

I must say, the card was really quite simple to make with the right tools, and so stinkin’ cute!  I want to let you know, that when I’m working with the “framelits” … I use the “Magnetic Platform” to hold them into place.  It is fantastic … no more slipping, and no more sticky notes!

6a00e54f9444b988330192aa89c31d970d-800wi

Please note that there are very  strong magnets in the platform and care must be used  if you have a pacemaker or such.

Hope you enjoyed today’s card and I thank you for stopping in today.

blog closing-small

Here is a list of supplies used for today’s card …

 ITEM

 PRICE

 DESCRIPTION

133501

$14.95

 Hip Notes Stamp Set – WOOD

133504

$11.95

 Hip Notes Stamp Set – CLEAR

Sale-a-bration


 Sweet Sorbet Designer Series Paper

132970

$7.95

 Ampersand Embossing Folder

129267

$14.95

 Bitty Banner Framelit Dies

130911

$26.95

 Circle Collection Framelit Dies

130685

$39.95

 Magnetic Plateform

132172

$20.21

 Envelope Liner Framelit Die (ON SALE)

Clicking on the item number will link you to my on-line store.

“Thank You” includes Weekly Deals & More …

Hello Stampin’ Friends,

Today I am going to share a card with you, that I created using some of the items on the just released “Weekly Deals” list. First the card, and then I will follow with the entire “Weekly Deals” list for you.

Today’s card will highlight the Houndstooth embossing folder, the Finishing Touched Edgelits Die, and the Envelope Liner framelit dies.  Get ready for a “SNEAK PEEK” at an upcoming Sale-a-bration item!

000_0595

I began by choosing the “Sweet Sorbet Designer Series Paper” … the Sale-a-bration item!  The paper actually helped me chose my color pallet for the card.

I started with Crisp Cantaloupe (2013-15 in-Color) and embossed it with the Houndstooth embossing folder.  I picked “Pistachio Pudding ” as my contrasting color and used the “Finishing Touched Edgelit Die” to create a border.

I also added the “Stitched Grosgrain Ribbon in Whisper White” to soften the line between the designer paper and embossed cardstock.  It pulls they eye to the center of the card as your focal point and brings your right to our greeting.

000_0594

I chose the Basic Black for my card base because it tied all the colors together, and it gave the other colors a real “pop”.

I chose the “Thank You” for my greeting which comes from the “Another Thank You” photopolymer stamp set.

000_0589

I finished off my project by using the “Envelope Liner Die” to cut the “Sweet Sorbet Designer Paper” and tuck it into my envelope to perfectly match the card.

000_0595

Here are your ….

Weekly Deals

Borders Scoring Plate Simply Scored

Item # 126192 

Regular Price $14.95

Discounted Price: $11.21

Classic Pad Soft Sky Item #131181

Regular Price: $5.95

Discounted Price: $4.46

Finishing Touches Edgelit Die

Item # 127010

Regular Price: $9.95

Discounted Price: $7.46

Houndstooth Textured Impressions Embossing Folder Die

Item # 123134

Regular Price: $7.95

Discounted Price: $5.96

Marina Mist 3/4″ Chevron Ribbon

Item # 130016

Regular Price: $8.95

Discounted Price: $6.71

Envelope Liners Framelits Item # 132172

Regular Price: $26.95

Discounted Price: $20.21

Frosty Day II Digital Download Kit

Item # 128875

Regular Price: $9.95

Discounted Price: $5.97

You can view any of the items that are not listed in the “Weekly Deals” by clicking onto the links (highlighted in pink) in the blog.  Enjoy.

Thanks for stopping by today!

blog closing-small

Make a Wish …

Hello Stampin’ Friends,

Today my card share is a quick and simple card made with the perfect ingredients… The Perfect Pennants and the Watercolor Wonder Note Cards.  They are a perfect pairing when looking to create a cute card … fast!

The card I am sharing with you today is one of 5 that my downline members made at our Star’s Christmas party.  They got to make a full set of cards using the Watercolor Wonder Note cards, the Perfect Pennant Stamp Set, and the new Essentials Wooden Elements.  I created a “class” for them to take back to their stampin’ friends.  You can always go to my class schedule to see what stampin’ events I have planned.

000_0583

I love using the “Watercolor Wonder Note Cards” because the work is already done for you.  They are designed beautifully, color included.  I chose this playful pattern to create a quick birthday card.

Next, I stamped the “Make a Wish” greeting in “Smokey Slate” onto the card.  Then stamped again in Crushed Curry onto a scrap piece of paper … just so I could punch out the “a”.  I used the 1/2″ circle punch for that.

Using the star from the Perfect Pennants stamp set and the Crushed Curry ink, I stamped one star onto the card and then another right away so it would be lighter.  I re-inked the star stamp and then repeated the double stamping.

000_0582

WOW! It’s just that simple … and Done!  I think these “Watercolor Wonder Note Cards” are a must have on your list, and the envelopes are included!

AND NOW for our “Blog Candy” winner…

KATHIE DEMMON

You have 24 hours to contact me, and then I will have your prize sent to you.

CONGRATULATIONS KATHIE!

Thanks to all who participated in my Blog Candy give-a-way.  I loved reading each of the comments.

Keep on posting your comments, I love to hear what you think of my blog and my cards & projects.  There will be many more chances to win prizes / blog candy on future posts.  Thanks again.

And I thank all of you for stopping by to visit my blog today!

blog closing-small

Here is a list of supplies used for today’s card …

 ITEM

 PRICE

 DESCRIPTION

133227

$29.95

 Perfect Pennants – WOOD

133230

$21.95

 Perfect Pennants – CLEAR

133362

$12.95

 Watercolor Wonder Note Cards

119869

$5.95

 ½” Circle Punch

Clicking on the item number will link you to my on-line store.

Sending Love …

Hello Stampin’ Friends,

Today my card share is from one of the most requested card classes I receive… sympathy cards.   Usually when we go to our stamping spots to create, we are happy and make fun birthday cards for friends and family.

It seems to me that when you need a sympathy card, that is the last thing you want to do … so I am going to help out in 2 ways today.  First, my card share and then to invite you to an upcoming card class designed around those occasions when our hearts are just not into stamping … My “Open Hearts Class”.

Just remember, even though it’s a difficult time, the card you make to cheer someone up when they’re sick or comfort someone who’s lost a loved one – those cards forever touch their hearts.

000_0485

I began with the “Blessed Easter” stamps (comes in wood only) and just omitted the Easter greeting.  I did this by the “Direct to Rubber” technique, using markers to color the image.

The colors I chose were Elegant Eggplant and Wild Wasabi.  I then used the “Blender Pen” to pull color off my marker tip, and add it to the card, creating a watercolor look to the flower.

My salutation (greeting) comes from the “Love & Sympathy” stamp set found on page 68 of our catalog.  To add a touch of texture to the card, I used the “Flower Garden” embossing folder.  It’s very subtle but it added a nice touch to the card.

000_0482

Simplicity is key… for those making the card and those who receive it … just a heartfelt note to let them know you are thinking of them and that you care.

I will be posting my “Open Hearts Class” on my website www.lindaluvs.stampinup.net  I will post full details including class details and time.  Date for this class will be Monday, February 24th.  Mark your calendar and save the date!

Thanks so much for stopping by today!

blog closing-small

Just Sayin’… Two-day is Special

Hello Stampin’ Friends,

Today I have something special for you … two card shares and a treat.  Why you ask?  Well, today is my 200th blog post!  I am really excited to have shared my passion of stampin’, some of my travels, and even a bit of my home life & family with you.

Yesterday I shared a few of my favorite things from the new Occasions Catalog, and told you that I would create a cute card for you with the Just Sayin’ bundle.   In honor of my 200th post, I didn’t bake a cake, but I have BLOG CANDY!  Keep reading …

The first is with the beautiful “Watercolor Wonder Designer Series Paper” …

000_0573

The card is sweet and simple to make.  I used two different patterns from the “Watercolor Wonder” designer paper.  The patterns coordinates perfectly so it’s easy to pick 2 to pair up.  Then, I simply stamped the “miss you already” greeting from the Just Sayin’ stamp set in Tangerine Tango, and cut it out with the coordinating “Word Bubble” framelits.

Ahh yes, and I must not forget the beautiful “Organza Ribbon“.  I keep at least 2 rolls on hand at all times because it works so nicely on a number of different styles of cards.

So, how are you liking the Just Sayin’ stamp set so far?  And how about the coordinating framelits?  No cutting … I love that!

OK … on to the next card.  With Valentine’s Day coming up, I just wanted to say “Love Ya”!

000_0578

Oh my, it appears as if I have another “SNEAK PEEK” … this time it comes from the upcoming Sale-a-Bration Catalog!  The texture you see on the card comes from the “Decorative Dots” Embossing folder in the Sale-a-bration catalog.  (I am currently booking “stampin’ parties” if you’d like to get you folder and more for free… contact me).

Once I textured the cardstock for the card and coordinating envelope, I used the “Hearts Collection Framelits” to create the focal point of the card – the hearts.

I wanted to add a bit of “zing” to the card, so instead of leaving the background of the heart plain, I simply dabbed my “Versamark” onto the white cardstock, then heat embossed it using silver embossing powder and our spiffy new heat gun.  Did you know it has two temperature settings?  One is for drying … the other is for embossing!

What better greeting from the Just Sayin’ stamp set goes better with hearts than “Love Ya”.  I used Cherry Cobbler for both the ink and cardstock.  I then finished it off with a cute little bow made with the Silver Ribbon.

Both of the cards have coordinating envelopes.  These were created with the use of the “Envelope Liner Framelits“.  I think it adds such a nice touch when sending your hand stamped cards.

000_0573  000_0578

OK … Now how do you like this dynamic duo – the Just Sayin’ Bundle?  Well, I love them.  In fact, I love the stamp set so much (and because we’re celebrating my 200th post) I’m giving away a “Just Sayin’ Clear Stamp Set“!!  That’s right … BLOG CANDY!

000_0581

All you have to do is comment on what “you” think about this duo!  One name will be randomly chosen on Monday night at midnight (central time) … and then I’ll post the winner on Tuesday.  You will have 24 hrs to send me your contact information (lindaluvs2stamp@aol.com) so I can get your stamp set out to you!  Good Luck … and thanks for following my blog!

Thanks for stopping by today!

blog closing-small

Here is a list of supplies used for today’s card …

 ITEM

 PRICE

 DESCRIPTION

134819

$43.95

 Just Sayin’ Bundle (Save 15%) – WOOD

134820

$37.95

 Just Sayin’ Bundle (Save 15%) – CLEAR

132994

$10.95

 Watercolor Wonder Designer Series Paper

132172

$26.95

 Envelope Liner Framelits

Clicking on the item number will link you to my on-line store.

My New Catalog Favorites …

Hello Stampin’ Friends,

Yesterday Stampin’ Up! released the much anticipated “Occasions Catalog”.  I’ve shown you some sneak peeks…

20140103_Occasions_en-US

So, today I’d like to share with you some of my favorite things in the catalog.  First, the beautiful “Watercolor Wonder Designer Series Paper”.  It is scrumptious … I love the “real” watercolor look on some pattern … and well, you’ve seen the card with the flowers posted on December 29th.  Click on the link to view the card using this beautiful designer paper.

  132994S

Watercolor Wonder Designer Series Paper

132994
Price: $10.95

One of my favorite Bundles is … WAIT, I have 2!  The “Perfect Pennants Bundle (I used the pennant dies on the December 28th card share) … Just click on the link to see card.

134816S

Perfect Pennants Clear-Mount Bundle

134816
Price: $41.50

and the “Just Sayin’ Clear Bundle” … both are available in wood.

CM1608B

Just Sayin’ Clear-Mount Bundle

134820
Price: $37.25

Now seriously … isn’t this just too cute!  OK, I’ll show you tomorrow 🙂  I’ll share a cute card made with the “Just Sayin'” Bundle.

Now I fell in love with the “Watercolor Wonder Designer Note Cards and Envelopes because the are so pretty and work wonders when you need to whip up a quick card!

133362S

Watercolor Wonder Designer Note Cards & Envelopes

133362
Price: $12.95

CM1617B

Next I would like to share a fun birthday stamp set, and I think it would pair up nicely with the “Watercolor Wonder Designer Note Cards”.  NOW … you really could whip out some cards!

133038G

Another Great Year

133038
Price: $23.95

I could go on and on … and who knows, my top picks may change the more I use the other stamp sets, but today I wanted to share with you my Top 5 favorites.

Thanks so much for stopping by, and I’ll see you tomorrow when I showcase the “Just Sayin’ Bundle”.

Have a great weekend!

blog closing-small

You & Me …

Hello Stampin’ Friends,

Happy Friday!  Today’s card share is day 2 of the “Weekly Deals” showcase.  I also wanted to share with you some of the “new” by introducing you to the “Perfect Pennants” stamp set which is found in the “just released” Occasions Catalog.  This stamp set has a coordinating framelit die … Click this link to see bundle!

Here are the weekly deals I’ll be using today …


Window Frames Collection Framelits Dies
Item # 129021
Regular Price: $26.95
Discounted Price: $20.21


Silver Glimmer Paper Item #124005
Regular Price: $4.95
Discounted Price: $3.71


Fancy Fan Textured Embossing Folder
Item # 127751
Regular Price: $7.95
Discounted Price: $5.96


Regals Core’dinations Item # 129955
Regular Price: $23.95
Discounted Price: $17.96

Combining these 4 items was really easy and fun!  I began with the Regals Core’dinations paper … Cherry Cobbler of course, and embossed it with the “Fancy Fan Embossing Folder”.   Then I sanded the Cherry Cobbler Core’dinations paper to give it that two-tone look.

000_0570

I knew I wanted to incorporate a new stamp set for you, so I chose the “Perfect Pennants” stamp set. Since it’s been soooo cold outside, I thought it was time to heat things up with another Valentine’s card … or Anniversary card, and chose the “You & Me” greeting.  I stamped it with Black StazOn and then stamped the heart (from the stamp set) in Pink Pirouette.

Next I used the “Window Frames Collection Dies” to cut out the greeting.  And what else would I mat this with … why the Silver Glimmer paper of course!  I then topped it off with 3 small hearts punched out of the Silver Glimmer paper.

000_0571

I then added a simple ribbon bow to tie it all together.  To finish off the card … I punched a single heart on the inside.

Hope you enjoyed today’s “Weekly Deals” showcase.  I find it challenging and fun to create a card using specific items!  Sometimes a card idea pops in your head from other images, and sometimes it’s comes together by choosing a few of your favorite things.

Thank you so much for stopping by today.

blog closing-small

Here is a list of supplies used for today’s card …

 ITEM

 PRICE

 DESCRIPTION

129021

$20.21

 Window Frames Collection Framelits

129955

$17.96

 Regals Core’dinations Paper

127751

$5.96

 Fancy Fan Textured Impressions Folder

133227

$29.95

 Perfect Pennants Stamp Set – WOOD

133230

$21.95

 Perfect Pennants Stamp Set – CLEAR

124005

$3.71

 Silver Glimmer Paper

Clicking on the item number will link you to my on-line store.