and a Happy Saturday to you! It’s a little gloomy outside today, that’s OK … makes for a great stampin’ day!
This afternoon I’ll be setting up my Stampin’ Studio for my “Christmas Stamp Camp” tomorrow. So today I thought I would share with you a little inspiration for card ideas.
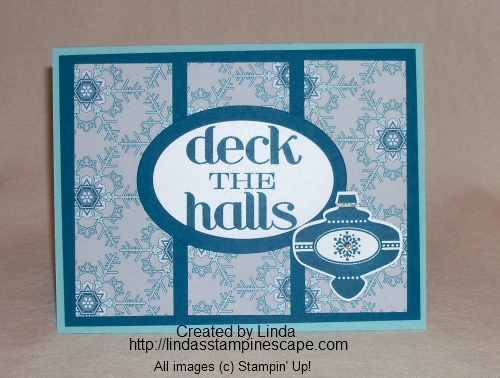
I began with some left over designer series paper from my last stamp camp, and came up with this quick and cute card. My paper is the “Winter Frost Specialty Designer Paper” located on page 29 of the Holiday catalog.
Because our designer paper is designed to coordinate so nicely, the core colors I am using are the Pool Party and Island Indigo.
Next I decided to use the “Deck the Halls” stamp from the “Christmas Messages” stamp set on page 34 of the Holiday catalog. I love when Stampin’ Up! puts the inner verses for our cards along with the greetings…. makes life so much easier!
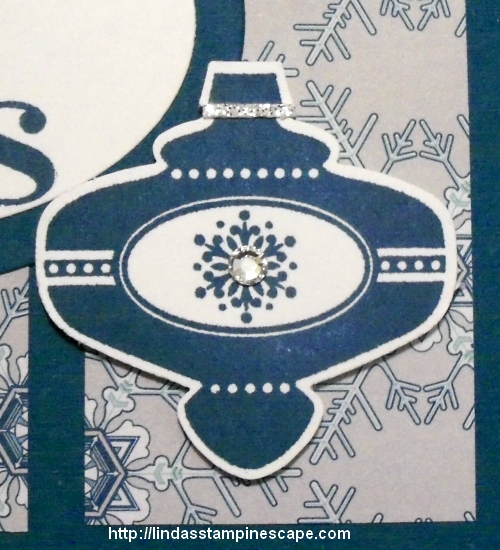
I wanted to jazz it up a bit more, so I added one of those cute new ornaments from the “Christmas Collectibles” stamp set. And talk about making life easier … Stampin’ Up! has a coordinating punch, the “Christmas Ornament” punch so we don’t have to cut these out! Both of these items can be found on page 35 of the Holiday catalog.
To finish off the card, I added a little bling! First as sliver of the Silver Glimmer paper, and then a rhinestone in the center of my ornament.
Wow … wasn’t that easy! And quick!
I hope you enjoyed today’s inspiration for Christmas …. Thanks so much for stopping by.
Happy Friday to you … I hope you have an enjoyable weekend planned.
I will be having a wonderful weekend with some of you … Saturday morning with my Technique Club and Sunday afternoon with my Christmas Card Stamp-a-stack group. It’s always a good weekend when you stamp with friends.
Speaking of stampin’ friends … today I would like to share with you some beautiful cards that I had taken photos of at Leadership last year.
Leadership is a gathering of Stampin’ Up! demonstrators who have achieved the level of Senior Supervisor and above. We share stampin’ and business ideas, receive training from the home office, and just have a great time hookin’ up with old friends and making new ones.
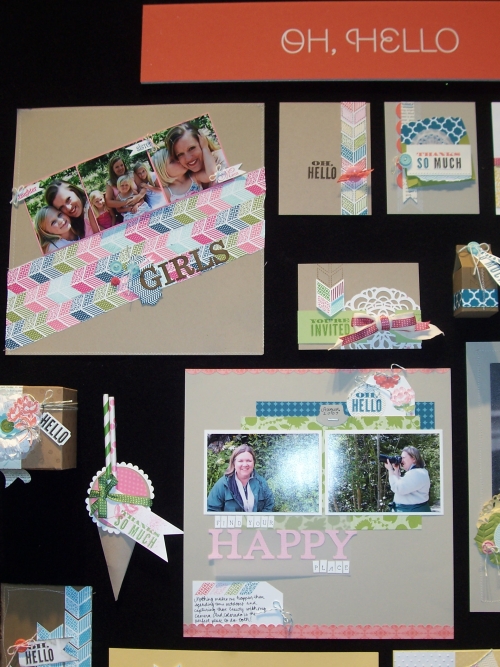
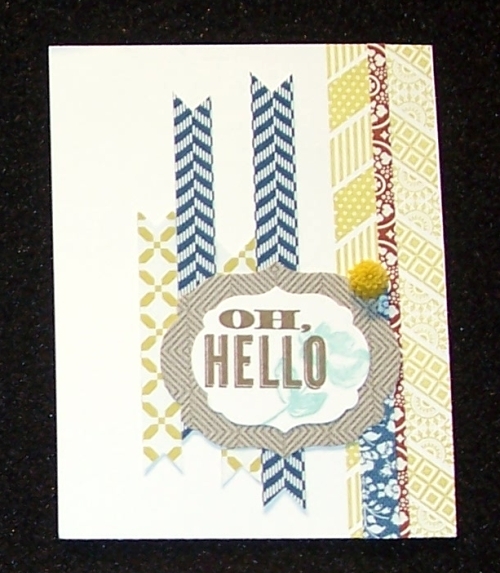
I do not know who that talented demonstrators are who created these cards, but I’m grateful that they share their talents. The following photos are their creations using our “Oh Hello” Stamp set …
Aren’t they fantastic! I love that we can see so many different stamping styles and color pallets. So much inspiration, when we attend the Stampin’ Up! events. You could always join us …. contact me! I’d love to share with you the benefits you would receive as part of my Stampin’ Stars and the Stampin’ Up! family.
I hope you enjoyed the card share, and thanks for stopping by.
Today I want to share with you some of the news and products coming from Stampin’ Up! I have two products that are now available to purchase, two new photopolymer stamp sets to show you, and more!
First lets begin with our fabulous products. I know you have all been waiting for the new BFF of your Framelits and Edgelits! The exclusive Magnetic Platform to hold your Framelits and Edgelits in place when you cut.
The video you are about to see showcases our new “Expressions Framelits” along with the Magnetic Platform. Enjoy …
Please note: * The platform produces a magnetic field—like all magnetic fields, it may interfere with pacemakers, magnetic strips on credit cards, and cell phones if they are too close to the platform.
The next product I want to share with you is the Envelope Punch Board …
If you are in my clubs, you will be using all these items “hands-on” very soon. If you are not, don’t worry … I will be hosting some great classes that feature these products. I’ll keep you posted.
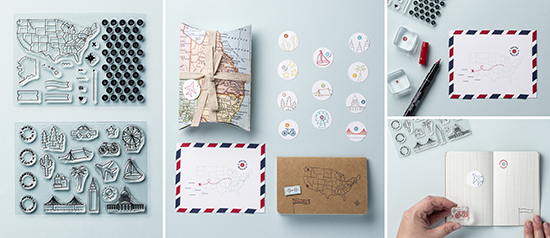
Next, I’d like to show you 2 of our newest Photopolymer stamp sets. These are so cool … Of course they are great for scrapbookers, but just think of the neat school projects your kids could make with these sets!
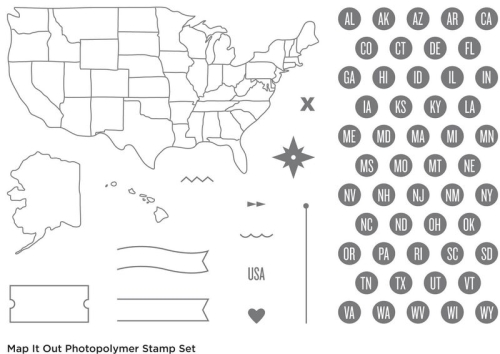
Here is the “Map it Out” stamp set …
And here is the “Greetings From” stamp set …
I just think these are the perfect stamp sets for teachers, and kids for their school projects … geography, social sciences, or even to decorate their book covers (do kids still do that?). Just think of the possibilities! FUN.
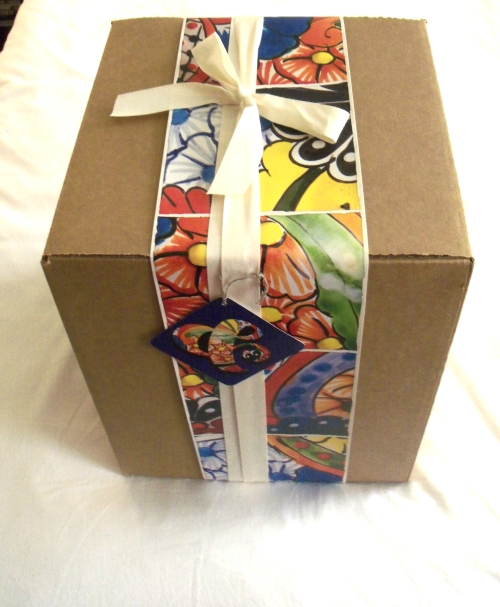
I also want to share our current special with you, the “Butterfly Bundle” … too cute!
Offer: Get 15 percent off when you buy this bundled butterfly stamp set and punch!
Stampin’ Up! has added NEW items to the Clearance Rack! You may click on the link (Clearance Rack) or the picture … and shop at anytime from my on-line store or just check out what’s on sale!
Some items are up to 80% Savings … Now that’s a deal!
Today I wanted to share a bit of my Stampin’ Up! incentive trip with you … if not for you, I would not get to experience all these wonderful places. Our destination … Sunny San Diego!
We are on our way and flying over the Grand Canyon. Even from the airplane the view is spectacular.
We had a smooooth landing, in fact, after I got done saying so, the pilot told us too!
This is our hotel … the US GRANT. A San Diego Icon since 1910, the palatial US GRANT hotel is situated in the city’s lively and historic downtown Gaslamp Quarter.
This is our room … yes, Stampin’ Up! spoils us. And yes, I did have to try out the bed… awesome. Really, count them, there are 7 pillows on that bed!
Once we settled in at the hotel, we decided to get something to eat. Eileen had promised her grandson that she would try fish taco’s … so off we were to find a place that served fish. There are soooooooooooo many restaurants in the Gaslamp district it’s hard to choose one. We chose ….
Eileen had her fish taco’s and I tried Grilled Mai-Mai, it was the best meal I had the whole trip (and there were many).
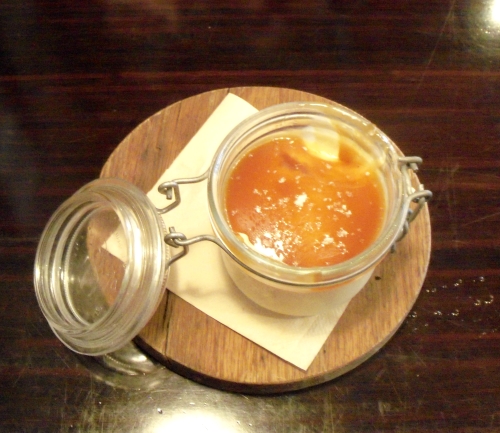
As full as we were, we tried a new dessert ….
You guessed it, the Butterscotch pudding with the rum! Oh my gosh … it was awesome! Warm caramel and sweet with that touch of sea salt. If you’re ever in San Diego … I would recommend a stop at Spike Africa’s. (No … they did not pay me to say that) LOL
We walked back to the hotel and then off to the mall to check it out. Not really in a shopping mood, we walked back to the hotel.
We had dinner across the street at the Yard House, they are known for their selection of beers. I tried one from Hawaii … not bad, and the burger was awesome.
Once back to our hotel … there was a “pillow gift” left on my bed
A beautiful vase as a remembrance of our stay in San Diego. Let me say, Stampin’ Up! does it right.
Hope you enjoyed my first day in San Diego, and “THANK YOU” for making it possible.
A bit chilly here is Wisconsin this morning, but fall is approaching so we were expecting it. I love the cool nights and warm days… it makes for great bonfire weather!
Well enough of that, time to move on to my last card in the series of cards I created with the “I Am Me” Designer Series Paper. I hope you have enjoyed the cards I have shared so far… I would love to hear your thoughts on them.
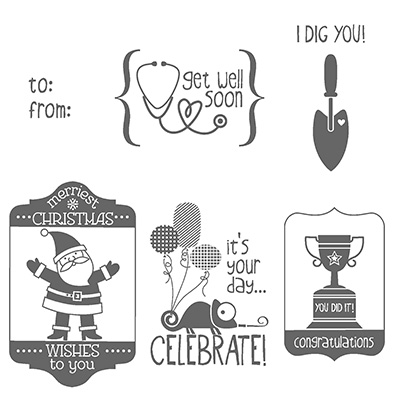
* If you click on the RMHC name, it will take you to their website, where you can find out more about this wonderful charity. Here are the stamps included in the stamp set.
To create the look on the tag, I first stamped the image in Real Red, and cut it out using the “Chalk Talk Framelit Dies which coordinate with the Tag It stamp set.
Next, I stamped the image Wild Wasabi and cut out the area I wanted to highlight. I then used our Stampin’ Dimensionals to “pop” it up.
I did add a pearl to finish off Santa’s hat … then just add a ribbon, and your done!
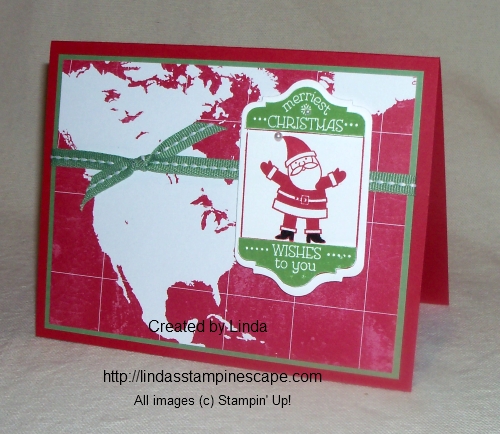
I thought this was a fun way to showcase the designer paper with the world map. I think it was also make a good scrapbook page to those of you who travel… hmmm, there’s an idea!
Again, I would love to hear your thoughts on my series of cards done with the “I Am Me” designer series paper.
To view any of the products highlighted today … just click on the “highlighted” words.
Stop back tomorrow as I will share a bit of my Stampin’ Up! incentive trip to San Diego.
I’m B-a-a-a-c-k! My apologies … I do not like black spaces on my blog! I was in sunny San Diego for our Stampin’ Up! incentive trip. I made the mistake of “not” taking my laptop with me, and thinking that I could blog from the hotel … let’s just say that was not much of an option.
But I’m back now and have the cutest card to share with you today. I am still showcasing the “I Am Me” designer series paper. Here’s a simple, simple card that you can use for any age, any gender, any occasion, AND it’s a great way to use up your scrap paper!
You have your designer paper … ” I Am Me”, so all you need is a paper cutter, a little ribbon, and some dimensionals.
Feel free to take it up to the next level as I did by using one of our many impression folders. Today I used the new “Stylish Stripes” Impressions folder (132174) found on page 22 of our Holiday Catalog.
Just a quick post today … tomorrow I will be back with my last card, showcasing the designer series paper.
Thanks for sticking with me, and for stopping back today.
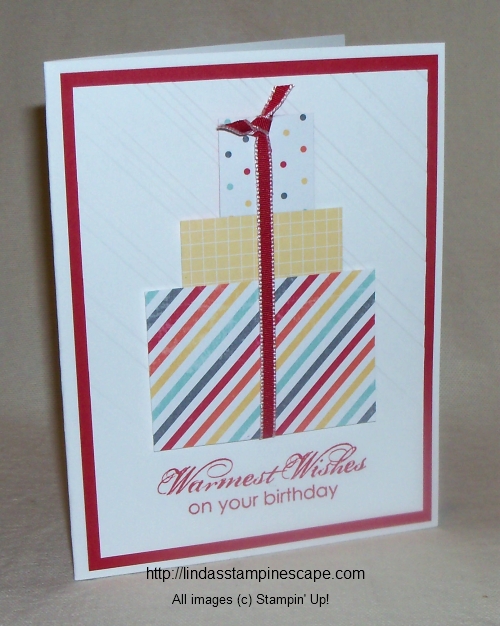
Today I have a quick & easy card for you, showcasing the “I Am Me” Designer Series Paper … and what better way to do that, than a card with a sampling of the papers!
The card was totally created using multiple circle punches … can’t get much easier than that! Simply punch out different sized circles from your designer series paper and adhere them to your card front. I used Basic Gray … however, it appears (at least on my computer) as navy… ?
I layered my card, so I could run the piece with the circles through the Bigshot to give it even more texture!
The greeting comes from the stamp set “Lots of Thanks” (W- 129687 / C – 129690) and is stamped in basic gray.
Today’s quick and easy card … comes with a quick and easy post.
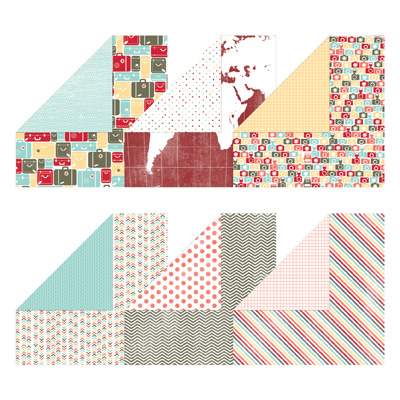
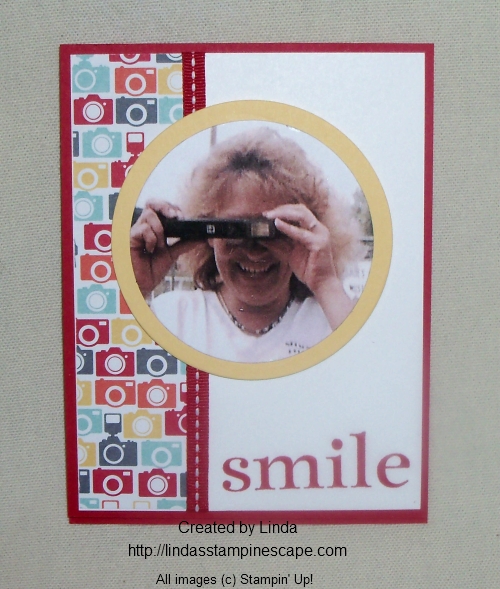
Smile! On day four of my “I Am Me” Designer Series paper showcase, I have decided to use the paper with the cute little camera’s on. Here is a pic of all the sheets and their backsides!With that in mind … I decided to make my card a “picture” card. It’s really easy when you use the framelits … I chose the NEW “Circle Collections” (130091) Framelits to match the lens of the cameras!
This is my sister Ruthie. We were at our family reunion and were having fun with the photo opportunities! I believe that was back in the 90’s … She looked great, glad you can’t see my hair-do! LOL
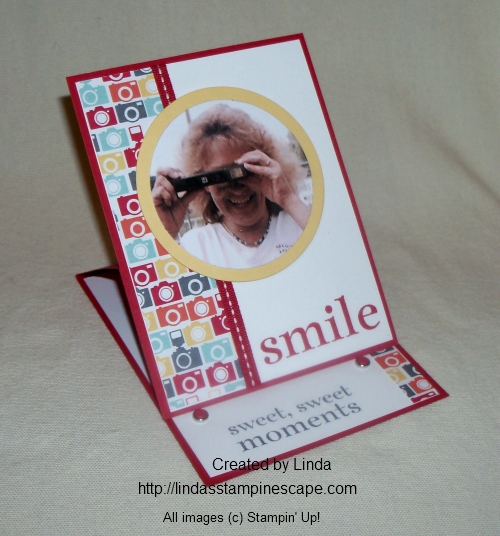
I figured since I was using a photo on the front of my card, I would make an “easel card”. How cool is that … and easy. I used the “Happy Day” stamp set (W-130294 / C-130297) for both the front and inside of the card. You will find this stamp set is great for scrapbooking too.
To hold the card front (easel) in place, I used the Brights Collection (130931) Candy Dots … how “yummy” are they! And I combined them with the Candy Dots Brad Bases (132293) page 171. I love the way the look together.
I also like how the candy dots and the circle framelits tie into the camera theme of the card.
To create the easel … begin with a half sheet of cardstock 4-1/4″ x 11″ … fold it in half to create your base. Now “fold” the top flap of your base card in half. Create your card front (4-1/4″ x 5-1/2″) and secure to the bottom half of the top flap of your base card. You can see by the photo that only the bottom half of the top flap and the card front are adhered together… this allows the card to lay flat for mailing.
I have 3 more cards coming in my “I Am Me” Designer Paper Showcase.
Welcome to day 3 of my “I Am Me” designer series paper showcase. I must say, I am really having fun doing this!
Today’s card highlights the Calypso Coral “grid paper” found in the paper packet, and for some reason … maybe it was the color, but I chose to team it up with the “Pleasant Poppies” stamp set. This is not a hard card to make, but has an awesome technique: Dazzling Diamond Dust.
I began coloring my poppies with markers and a blender pen. I scribbled the ink from the marker onto the plastic case of the stamp set, then pulled the color up with my blender pen… it gives you a softer look and you have much more control.
To do the “Dazzling Diamond Dust Technique” – Cover the entire cardstock of your stamped image with VersaMark™, then cover with “Iridescent Ice Embossing Power” and use heat gun to emboss the entire piece. So simple … so pretty.
For my greeting, I used the “nothing but heaven itself in better than a friend” from the “Blessings from Heaven” stamp set. Then topped it off with the Whisper White Taffeta Ribbon and 3 rhinestones.
Have a wonderful Wednesday! Stop back tomorrow … I have a “SMILE” to share with you!
Happy Tuesday to you! Today is day 2 of my “I Am Me” designer series paper share and I have teamed it up with the “wheely” fun stamp set … Cycle Celebration!
I also have a great stamping tip for you today … so sit back and enjoy the ride 🙂
The designer paper is so fun and colorful and I wanted to highlight it, so I chose “So Saffron” as my cardstock. I added a touch of texture with the “Needlepoint Border Expressions Folder” and ran it down the edge of the card.
I’m excited to show you how I got the curved edge on my “tag” …
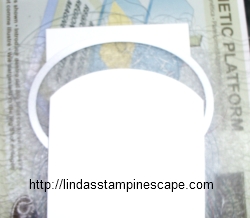
Once you have chosen the size cardstock you will be using for your tag, you can find a coordinating size “Oval Framelit” to cut the top!
Place the top of the cardstock “under” the framelit on top to cut … then be sure to layer the bottom end of the cardstock “OVER” the framelit so it does not cut.
** I only rolled my framelit slightly past the cutting edge so that I did not damage the rest of the cardstock.
How cool is that!! Just think of the cool edges you can make now … and you have another use for your framelits 🙂
The greetings were colored in with my markers, something fun you can do with any stamp to make it multi-colored.
I just have to point out that yummy little “Candy Dot” that anchors my tag. Today I used it with the “Base Brads” … wow, that really makes the candy dots stand out.
I hope you had a nice relaxing weekend, or had a great time if you were out and about! I stayed in my stampin’ room and created some neat projects to share this week.
Yesterday… I said I would be featuring the “I AM ME” designer series paper all this week, so, today is day number one.
As I looked at each pattern, I began to come up with some ideas of what I wanted to do, based on the stamp sets I have. The paper pattern I used today has simple scallops of white on pool party. With that …
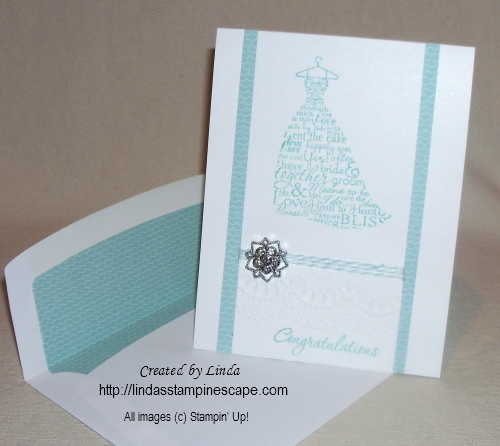
I chose the “Love and Laughter” stamp set (If you click on the title, you can view the stamp set). Another set that I had to have, but did not get the chance until now. I think we all do that, and I hope that I can inspire you to break out those stamp sets you have not used yet.
This stamp set is so dainty and beautiful, that I decided to use the “Shimmery White” paper … It has a beautiful shimmer to it, without over powering your images.
Next, I embossed the lower part of the cardstock with the “Delicate Designs” embossing folder. I thought it added a beautiful touch of texture, and just felt that it belonged on the card.
The Delicate Designs folder comes in a set of 2 … the lace border I used and snowflakes (at least that what I thought they were) and the coordinate with the Large Scallop Edgelits Die on page 188.
I wanted to add a ribbon but it seemed a bit heavy, so I pulled out my “Pool Party Bakers Twine” … just enough to add a pop of color and to draw attention to the embossing. My apologies … the “Pool Party” is discontinued.
To complete the card, I wanted to add a little “bling” and immediately thought of the gorgeous “Frosted Finishes” Embellishments! Who said you had to use them just for Christmas cards! I love it on this card.
Hmmm… we may need a bit more postage for this card, but well worth it! The bride is going to love it, and I’m sure you’ll impress many in the room.
Here is a list of the ingredients for today’s card ….
If you do not have a demonstrator, and live in the United States … you can shop at my on-line store 24-7. Clicking on the item number will take you to my store, and show you a picture of the product and give you a description of the item. I would be honored to be your demonstrator.
Let me know if you like today’s card … I’d love to hear from you.
Thanks for stopping by.
Tomorrow I’ll share a “wheely” fun card, so be sure to stop back for day 2 of the I Am Me – featured Designer Series Paper showcase.
I hope you are having a wonderful weekend! This Sunday we are going to keep it simple with my “For You” card.
Beginning today, and going through the week, I am going to showcase the “I AM ME” Designer Series Paper. I was speaking with my friend Sandy yesterday and we were talking about how we both liked the “Modern Medley” DSP … so that got me to thinking about some of our other designer papers!
So, this week you will see a wonderful assortment of cards I made with the “I Am Me” Designer Series Paper and some of your favorite (and some new) stamp sets.
Today’s color pallet is Whisper White and Calypso Coral. All of the DSP colors are listed in the book and now … on the back of your designer series paper pack! I love it, love it, love it!! (DSP = Designer Series Paper)
I chose the “polka dot” paper from the “I Am Me” DSP and began there. I teamed it up with the “For You” from the stamp set “Chalk Talk” on page 12 of the catalog … and my new stamp set “Gorgeous Grunge” found on page 109.
I received “Gorgeous Grunge” free at Convention this year and thought it was time I put it to use! Splatter is all the “rage” in stampin’ these days, and I must say … it really did add to this card.
Now… I normally wouldn’t think of teaming up “grunge” with glimmer paper, but I wanted my “For You” greeting to POP, and it really did work! I believe you can be as expressive and unique in your card making as you want to be. After all … it is an expression on you! Have fun with it 🙂
Hope you enjoyed today’s “Simple Sunday” card … and stop back each day to see what else you can do with the “I AM ME” Designer Series Paper. Better yet – Sign up to follow my blog and you will receive an e-mail that brings you my posts!
Whew … we made it. Just kidding, I saw a poster that said that, but I must admit, I am happy the weekend is almost here.
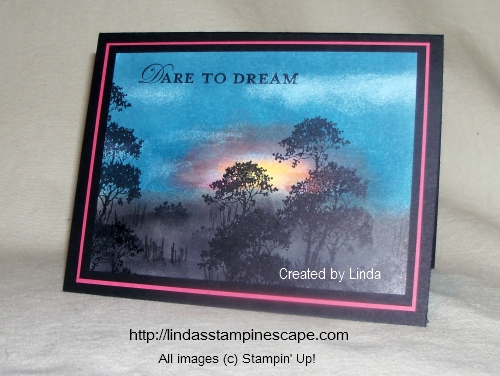
Yesterday I told you that I would be sharing a card with you, that I created from a picture that inspired me. I saw the picture on Pinterest and though it would make a beautiful card.
It’s hard to believe but I began with Whisper White cardstock! Although the cardstock I used for matting is Calypso Coral… my camera made it look a bit pink. The background for the card was created entirely by sponging.
Here is my inspiration …
If you click on the picture… you can see it in all it’s grandeur, and if you look closely, you can see the elephants. I hope you find it as inspiring as I did. I often look at nature for inspiration in designing and in the color pallets I choose.
For my card, I started with the foreground or “land” part of the card. I sponged Basic Gray ink, layering it to create highlights and low-lights. Then I moved into the sunset … beginning with Daffodil Delight, Calypso Coral and then Marina Mist. I added the clouds next, using the Whisper White Craft Ink.
The trees (from Serene Silhouettes) were stamped with the Black StazOn, as was the “Dare to Dream” from the Loving Thoughts stamp set. If you click on the stamp set name, it will take you to the page so you can view the entire stamp set.
I hope you enjoyed today’s card and feel inspired to go outside and take a walk, or stamp a card for a friend… better yet, with a friend!
How are you this fine Thursday? My wish for you is a marvelous day!
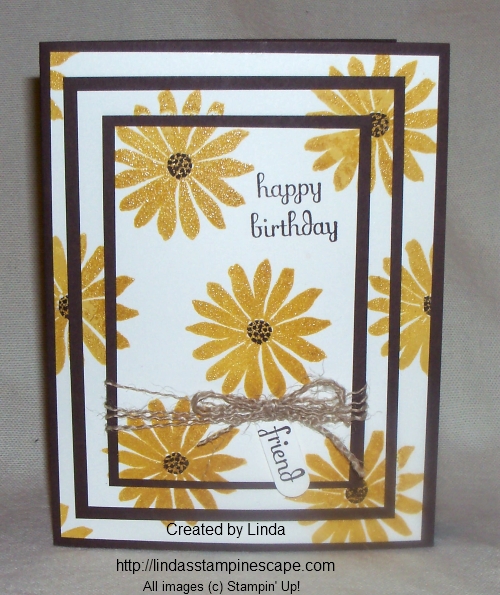
Today I am going to share with you, a birthday card that I made for a dear friend of mine who’s birthday is on Friday. We have been friends since the 5th grade (and that’s all I’m going to say about that) lol.
My technique today is triple time. Simply layer your 3 light colored cardstock together when stamping, then separate and mat. I just love this technique, it’s easy and looks cool.
I have used the “Secret Garden” stamp set with the Crushed Curry ink. When using the new ink pads … you can emboss, which I did with the clear embossing powder. Then I colored the centers in with the Chocolate Chip marker. I wanted to give my card a fall flair.
To continue with the fall theme, I choose to use the “Burlap Ribbon” … however in a very different way. I cut the surged edge off and then pulled it apart. The strings from the burlap ribbon add even more texture because it kinked. I’ve seen this done before and always wanted to try it … what was I waiting for!
Here are the ingredients for today’s card … the item numbers are linked to my on-line store. You will be able to see a picture and a description of the product, just by clicking on it.
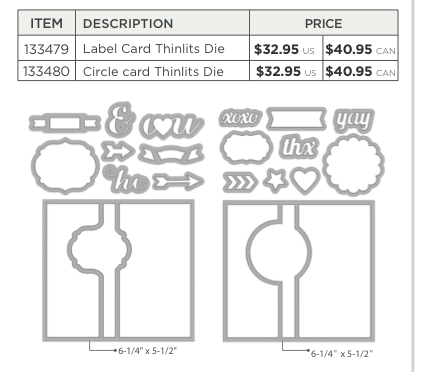
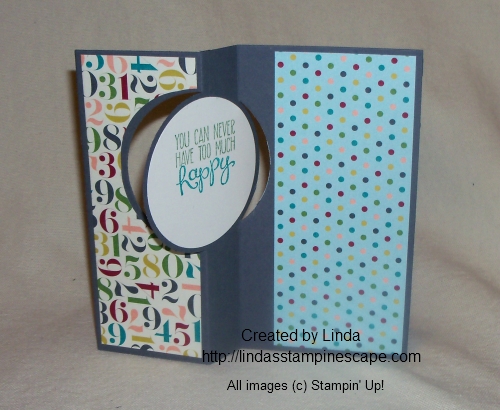
I am really excited today to share my first “flip” card with you! I finally got to sit down and create a card using the new *Thinlits Card Dies! I was all prepared to spend “some time” in my stampin’ room, but found that it was quite easy to create!
I began with the “Circle card Thinlits Die and “Basic Gray” Cardstock …
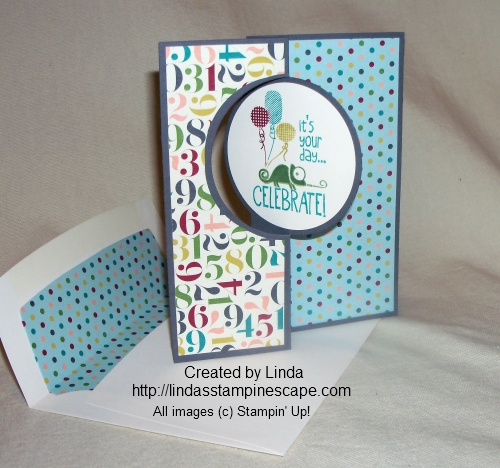
Then I added my “go to” Designer Series Paper … the “Birthday Basics”. I find this paper so easy to use, and it works so well for any age group.
Since I have decided to create a “special” card … I wanted to choose a special stamp set. The “TAG IT” stamp set is very special as it is this years exclusively designed “Ronald McDonald House Charities” stamp set. For each stamp set that is sold, Stampin’ Up! will donate $3 to the RMHC.
I am trying to sell 100 of these sets … It’s not a contest – I just wanted to see if we (you and I) could raise $300. Together … in the past 10 years, we (you, me… demonstrators and Stampin’ Up!) have raised well over a million dollars for the Ronald McDonald House Charities.
Will you help us this year … All you need to do is purchase this stamp set. It helps families of critically ill children stay together while the child is being treated.
Don’t you think this is a wonderful combination so far? Me too! I will be posting more cards featuring the “Tag It” stamp set in the future. You’ll soon see how fun and versatile this stamp set is.
I think you could use this card for anyone … my granddaughter loved it! I think she watched the card flip back and forth for about 5 minutes. Hmmm… free entertainment! When you run the cardstock through the BigShot with the die … it cut and scores for you! The 2-1/2″ punch works perfectly for your greetings. Now … let’s go to the flip side!
I used the “Yippee Skippee” (page 37) Stamp set for my flip side, and just used my markers to create that multi-colored greeting. I thought it finished off my card nicely. Here is the list of ingredients to the card I have made for you today.
Please consider purchasing the “Tag It” stamp set and help us raise money and awareness for such a wonderful cause.