I invite you to join me on this wonderful adventure …. you can just take it out for a test drive! Join me now, enjoy the FREE OnStage event and shop for the next three months at a discount while enjoying all the benefits you choose. CLICK HERE to JOIN
We maybe celebrating Halloween on my Facebook Page but here on my blog … it’s all about Christmas. It is sneaking up on us quickly so I’m hoping to inspire you with today’s cutie from the Merry & Bright Bundle!
Measurements:
Lemon Lime Twist: 5 ½” x 8 ½”
Basic Black: scraps
Real Red: scrap
Shaded Spruce: scrap
Granny Apple Green: scrap
Crushed Curry: scrap
Melon Mamo & Granny Apple Green Foil: scraps
Night of Navy Shimmer: scrap
Vellum: 2 ½” x 3 ¼”
Merry Bold & Bright: 3 ¾” x 5”
Instructions:
Cut a 5 ½” x 8 ½” Lemon Lime Twist card base. Fold in half.
Cut a 3 ¾” x 5” multi-color designer paper panel.
Round the corners of the designer paper using the circle punch.
Adhere the designer paper to the card base.
Cut a 2 3/8” x 3” piece of vellum using the Nested Essentials dies.
Stamp the sentiment pieces onto a scrap piece of Shaded Spruce, Real Red, & Granny Apple Green cardstock using Craft White ink. Let dry completely. Cut.
Lay the sentiment pieces onto the vellum for placement.
Stamp “Jolly” onto the vellum using Jet Black Stazon ink.
Adhere the sentiment pieces to the label using Stampin’ Dimensionals.
Add adhesive ONLY to the BACKSIDE of the sentiment behind the cardstock pieces.
Adhere the label to the card front.
Cut a star from Crushed Curry cardstock and adhere to the top of the sentiment using a Stampin’ Dimensional.
Cut a light bulb from Melon Mambo Foil, Granny Apple Green Foil and Night of Navy Soft Shimmer paper.
Cut the wire and (3) bulb sets from Basic Black cardstock.
Adhere the colored bulbs to the bulb pieces.
Slide the completed bulbs onto the wire and adhere to the card front using Stampin’ Dimensionals. Tack the ends of the wire if needed.
Thank you for stopping by today, I hope this fuels your holiday stamping. Some of my stamping friends are done, and some are like me and haven’t started YET!! Have YOU started your holiday cardmaking?
Are you ready to get into the Halloween spirit without breaking the bank? Look no further! Our clearance rack is brimming with a fabulous deal just in time for spooky season. For a mere $2.40, you can grab a pack of high-quality linen paper that’s perfect for crafting some eerie and adorable Halloween mummy cards.
These mummy cards are a breeze to make. With some simple materials and a little creativity, you can have a stack of charming, handcrafted cards in no time. Better yet … you can watch my video. Feel free to use any designer paper and greeting you have on hand!
In a world where store-bought cards can be expensive and lack that personal touch, crafting your own mummy cards is a great way to spread the Halloween spirit without emptying your wallet.
Don’t miss out on this incredible clearance deal. Hurry to my store or click on the link below and grab your linen paper for $2.40 before it vanishes into thin air. Create memorable mummy cards and celebrate Halloween in a budget-friendly and creative way.
Halloween Week on my Facebook page (Click Here to Join in) and don’t forget to hit the notifications button so you don’t miss out on any Samples / Tips / Specials and FUN!
Today I’ll be sharing the cards we made last night during the LIVE, the Video replay, the measurement sheets and two extra cards!! I have an action packed day for you today. Let’s begin with the video with the measurements and cards to follow.
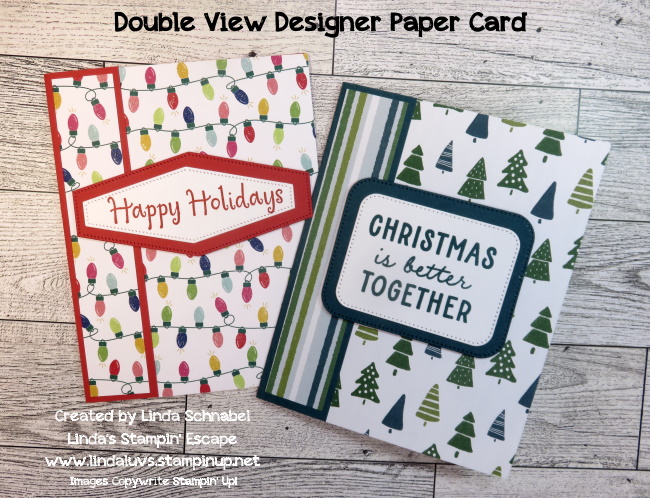
Here is the measurements for our Double View Designer Paper card that highlights your designer paper showing both sides .. Our pretty papers make these easy to assemble cards with the message and feelings you intend.
On today’s cards I used the Merry & Bright and the Walk in the Woods Designer Series papers, with the Poppy Parade and Pretty Peacock cardstocks. The “Christmas is Better Together” greeting comes from the Beary Cute Bundle and the “Happy Holidays” came from the Throughout the Year stamp set. Both greetings were die cut from the Nested Essentials Dies.
For the fun fold I used the same designer paper and cardstock. On the Poppy Parade card I again used the Throughout the Year stamp set and the 2 3/8″ punch for our greeting, and then embellished with the Iridescent Rhinestones. The greeting, the tag & tree dies all come from the Merriest Tree Bundle.
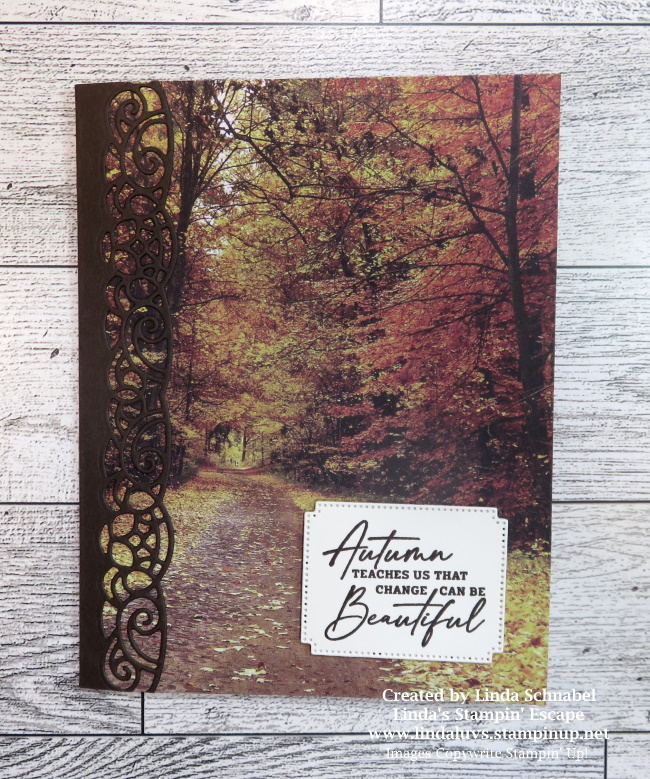
Now let’s take a look at some alternatives for our Quick & Easy Double View card ….
On this card I used the designer paper, greeting and die all from the All About Autumn suite of products and the Elegant Borders Dies. This adds a beautiful touch to the stunning designer paper. This just shows that you can change up the 1 1/4″ section of our cardstock.
Our second card was designed to celebrate Halloween …
This little cutie screams fun! The Elegant Borders dies were also used on our Halloween card to enhance and create a fun border. A strip of designer paper and bakers twine were also used to embellish our card and tie in all the colors. I used the “Them Bones” Designer paper for our last card, along with the die cuts from the “Tricks and Treats” bundle.
And this brings me into more Halloween FUN on my Facebook page …. Be sure to head on over and join in the fun, games and specials!
Are you ready to explore the world of stunning Stampin’ Up! designer papers and take your cardmaking skills to the next level? If so, you’re in for a treat! Tonight I’m going LIVE with Week #2 of my Twelve Weeks of Christmas.
This evening, I’m thrilled to invite you to a Facebook Live event where we’ll dive into the art of showcasing these beautiful designer papers. I’ll be sharing not one, but TWO incredible ways to make your creations shine.
🌟 Quick & Simple Layout for Easy Cardmaking: Perfect for beginners and those who love a straightforward approach to crafting. You’ll learn how to create stunning cards with ease, using the charm of Stampin’ Up! designer papers.
🎉 Fun Fold Design for That Extra WOW Factor: For those looking to elevate their card game, I’ve got a delightful fun fold that’s bound to impress both you and the lucky recipient of your masterpiece.
To join, simply visit my Facebook page at [Linda’s Stampin’ Escape] at 6:30 Central Time. Make sure to click the notification bell so you don’t miss a thing!
Don’t miss out on the fun – we can’t wait to see you there! 💖✂️💌
If you’re looking for a quick card that anyone would love to receive then you’re in for a treat today. This gorgeous card was created with the Autumn Leaves Bundle and the All About Autumn Designer Paper ….
Measurements:
Very Vanilla: 4 ¼ by 11 AND 1 x 4 strip for sentiment
All About Autumn DSP: 4 x 5 ¼ and the scrap for the leave dies
Linen Thread approx 10 inches for the bow
Instructions:
Score the very vanilla card base at 5 ½
Glue the all about autumn DSP layer to the card base
Stamp the sentiment on the very vanilla strip
Die cute the leaves out of the all about autumn scrap
Attach the sentiment to the DSP with dimensionals
Attach the leaves with dimensionals and the linen thread bow with a glue dot add the speckled dot
Mail this cute out to a friend or family member
Thank you for joining me today! Have a great week.
Hello Stampin’ Friends , Light up the Christmas season with this month’s Paper Pumpkin Kit. With traditional Christmas home designs and warm Christmas wishes, spread the light of Christmas with a gift box. Plus, you can get the Warm Wishes Cards & Envelopes Add-On to take your Christmas crafting even further. (Available while supplies last).
ABOUT THE KIT
Kit Name: Warm Wishes
This kit includes:
8 boxes; 4 each of 2 designs
1 Mossy Meadow Stampin’ Spot
Iridescent glitter accents on paper
Precut paper pieces
Linen thread
Treat bags
Warm Wishes photopolymer stamp set
Completed box size: 4-1/4″ x 4-1/2″ x 1-1/2″ (10.8 x 11.4 x 3.8 cm) and 4/1/4″ x 3-3/4″ x 1-1/2″ (10.8 x 9.5 x 3.8 cm)
Coordinating Stampin’ Up! colors: Balmy Blue, Blueberry Bushel, Cherry Cobbler, Crushed Curry, Daffodil Delight, Lemon Lolly, Mossy Meadow, Night of Navy, Old Olive, Pecan Pie, Real Red
ADD-ON DETAILS
Warm Wishes Cards & Envelopes Available for purchase starting 11 October; only while supplies last. Item number: 163985 $14.00 USD | $20.00 CAD
This add-on includes: • 20 Cards & Envelopes • Irisdescent glitter accents on paper • Folded card size: 5″ x 7″ (12.7 x 17.8 cm)
Thank you for stopping by today. Have a wonderful weekend.
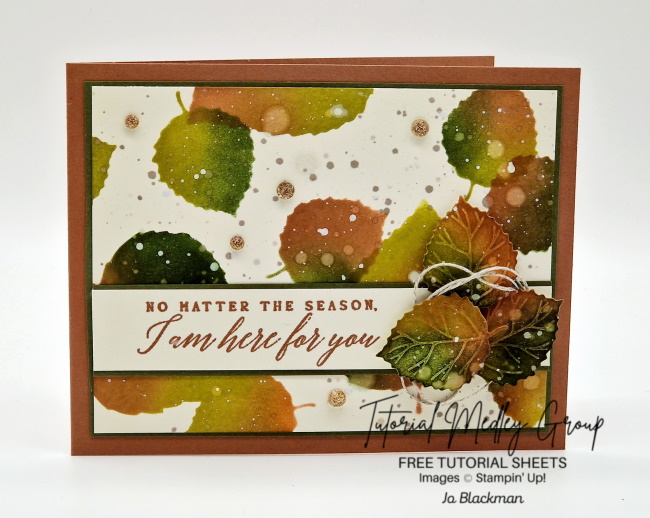
Today I have another beautiful card shared from one of the talented artistic in the Tutorial Design group I belong to. This gorgeous card just seemed fitting somehow. I will list the ingredients, the measurements and then step by step instructions ….
Supplies:
Stamp Set/Bundle: Perched in a Tree (159791), Aspen Tree Dies (159798)
Cardstock: Very Vanilla (101650), Pebbled Path (161722), Pecan Pie (161717)
Ink: Mossy Meadow (147111), Pecan Pie (161665), Wild Wheat (161725), White Craft Stampin’ Ink Refill (101780)
Tools& Accessories: Stampin’ Cut & Emboss Machine (149653), Take Your Pick (144107), Bone Folder (102300), Paper Trimmer (152392), Paper Snips (103579)
Cut a template from a piece of scrap paper of the two size leaves from the Aspen Tree Dies.
Using this template and blending brushes, blend the inks through the leaves, overlapping as you go until you are happy with the coverage.
Using some fresh water, flick some droplets over the background. Mix some Pebbled Path ink with a little water and flick some droplets over the background and repeat with the Craft White Ink. Set aside to dry.
Stamp the sentiment on to the Very Vanilla strip.
Die cut three small leaves and using the blending brushes, add ink to the leaves.
Glue the leaf background to the Pebbled Path layer and glue to the card front.
Glue the sentiment strip to the Pebbled Path strip and attach to the card front using Stampin’ Dimensionals.
Add a length of Linen Thread to the right hand of the sentiment and add the leaves using glue and Stampin’ Dimensionals.
Add a few gems to complete.
hank you for spending some time here today. Enjoy your day.
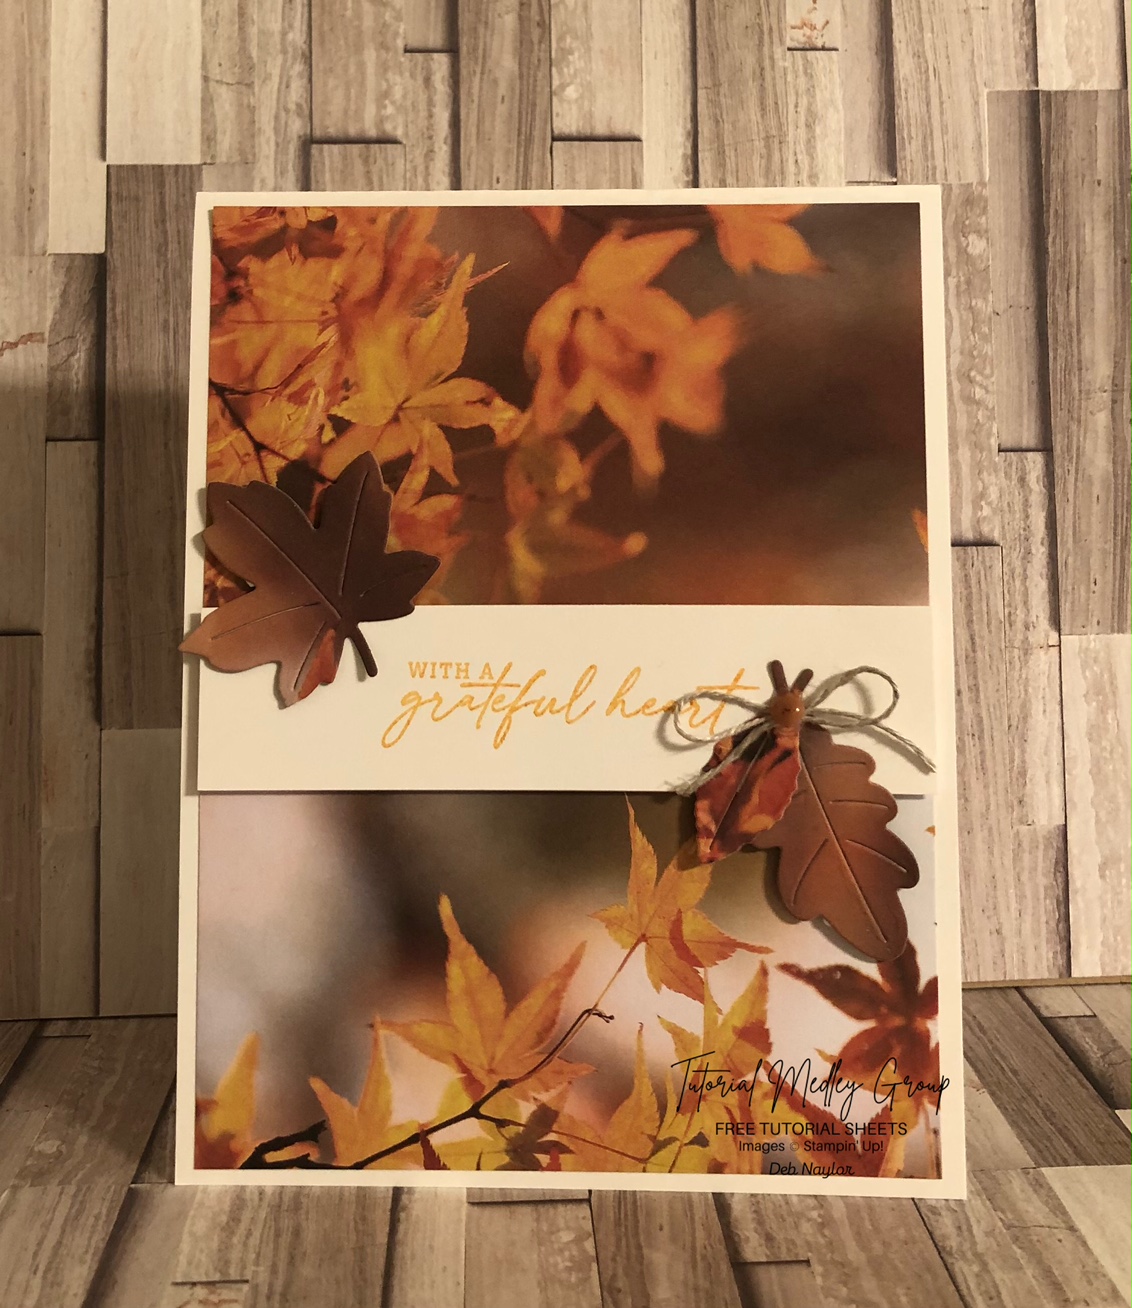
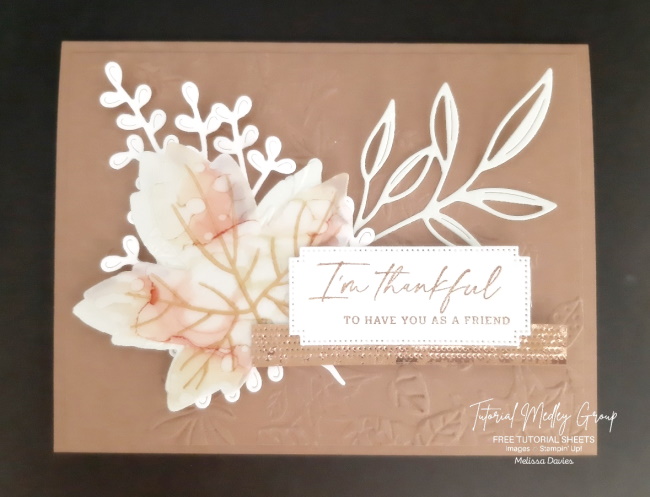
Today’s beautiful card comes from one of my fellow Tutorial Team members because with a little help from my friends, I can continue to share with you. This soft and stunning fall card was created by Melissa Davies ….
Supplies:
Stamp Set/Bundle: Autumn Leaves bundle (162719)
Cardstock: Basic White (159276), Pecan Pie (161717), Soft Seafoam (146988), Vellum (101856)
Ink: Saddle Brown Stazon (151508)
Designer Series Paper: Oxidized Copper (162190)
Tools& Accessories: Stampin’ Cut & Emboss Machine (149653), Bone Folder (102300), Paper Trimmer (152392), Paper Snips (103579), Gorgeously Made dies (161202), Leaf Fall embossing folder (159847), Water painters (151298)
Cut a 5 ½” x 8 ½” Pecan Pie card base. Fold in half.
Cut a 4” x 5 ¼” Pecan Pie panel.
Emboss the panel using the Leaf Fall embossing folder.
Adhere the panel to the card front.
Cut a narrow label from Basic White cardstock.
Stamp the sentiment onto the label using Saddle Brown ink. Set aside.
Cut a branch from Basic White cardstock.
Cut the leaves from Soft Seafoam cardstock.
Cut a large maple leaf from Soft Seafoam cardstock.
Emboss the large Soft Seafoam maple leaf using the Leaf Fall embossing folder.
Cut a large maple leaf from Vellum cardstock.
Color the entire leaf randomly using Soft Seafoam, Calypso Coral, and Wild Wheat Stampin’ Blends.
Saturate the water painter brush with alcohol. Tap the brush to splatter alcohol drops onto the leaf. Let the colors bleed until desired look is achieved. Let dry completely.
Stamp the veining onto the maple leaf using Saddle Brown ink.
Adhere the maple leaf to the Soft Seafoam embossed leaf.
Adhere the leaves and branches to the card front.
Adhere the embossed maple leaf to the card front using Stampin’ Dimensionals.
Die cut a ½” x 3 ¼” Oxidized Copper strip.
Adhere the strip to the BACKSIDE of the label.
Adhere the label to the card front using Stampin’ Dimensionals.
Thank you for joining me today. I hope you enjoyed Melissa’s card as much as I do!
Today would have been Armani’s 4th birthday, as you know… he passed away unexpectedly last Friday from what they believe was a seizure. I’m sharing the Patchwork Pieces card that I created during a Facebook LIVE for him … he LOVES Orange!! This little guy had to come into my stamp room every time he was over and checked out the cards I have made … he’s was the sweetest little guy 🧡!!
Here is the video replay of my Facebook LIVE ….
Wasn’t that fun and easy to create? And by using the designer paper and cardstock, you have enough left over for a second card. Have some fun and die cut some black and turn it into a Halloween card … the possibilities are endless.
So … Do you think he will love this card? The last one he took had flowers, but it was ORANGE!! He even passed up the spaceship over those orange flowers …. told you he was a hoot!
Thank you for stopping by and checking out my blog post today. Have a great day ~
Yesterday’s “Stamp with Me” video and card layout featuring the Joy of Christmas Suite/Collection were an absolute delight, weren’t they? It’s always a pleasure to explore new creative avenues and share our crafting joys.
The clean and straightforward card layout demonstrated in the video is not only visually appealing but also easy to recreate. It allows room for creativity and personalization, making it a go-to design for card makers. You don’t need “what I have” … use the measurements with the goodies YOU have.
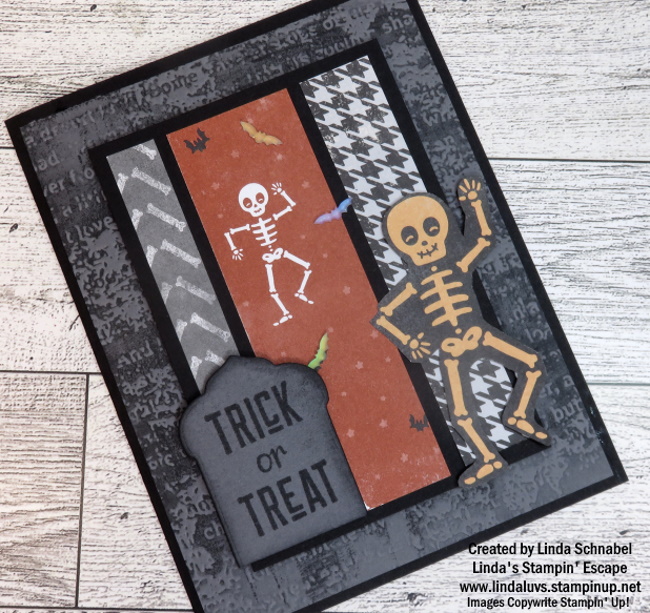
But today, we’re shifting gears and getting into the Halloween spirit! We’re all set to embark on a spine-tingling crafting adventure with the “Them Bones” Designer Paper and the “Tricks and Treats” bundle. Get ready for some frightful fun!
The “Them Bones” Designer Paper is a spooktacular choice for crafting during the Halloween season. With its hauntingly fun skeletons, bats, and other creepy critters, this paper pack is bound to add an extra dose of Halloween spirit to your creations.
Pair this paper with the “Tricks and Treats” bundle, and you’re in for a wickedly good time. This bundle offers a delightful stamp set and coordinating dies, perfect for crafting spooky cards, treat bags, and more.
I used the Timeworn Typed Embossing Folder to create the look of an old headstone to add an added touch of spookiness… on that note, I created a headstone from the die which highlights our greeting. We’ve got skeletons dancing in the graveyard with our Glow in Dark bats lighting up the way!
Stay tuned for more exciting crafting adventures, and remember, it’s not just about the destination; it’s the joy we find in the journey.
Happy crafting, and have a spine-tingling Halloween season!
Today I’m sharing the video for my Stamp with Me and you can follow along at your own pace. You’ll be able to pause it when needed and then carry on. It’s a simply yet fun layout the has texture and dimension to the card.
Grab a cup of coffee, your supplies and join me ….
I hope you enjoyed stamping with me, and as I stated in the video … I would love to see your card!! This easy to assemble layout is perfect for any season and any reason.
Thank you so much for joining me today, I appreciate your time.
Would you like to stamp with me? Here are the dimensions you will need to create your card … Begin by choosing your favorite designer paper because that will help you in picking out your cardstock color!
You will also pick a coordinating embossing folder and some cute embellishments. Then tomorrow I will post a video on how I created the card … Then you can join me during the video putting your card together.
The following day I’d love for you to share your cards here in the comments or on my Facebook page! Then I will share additional samples I have made with this layout! Looking forward to stamping with you.
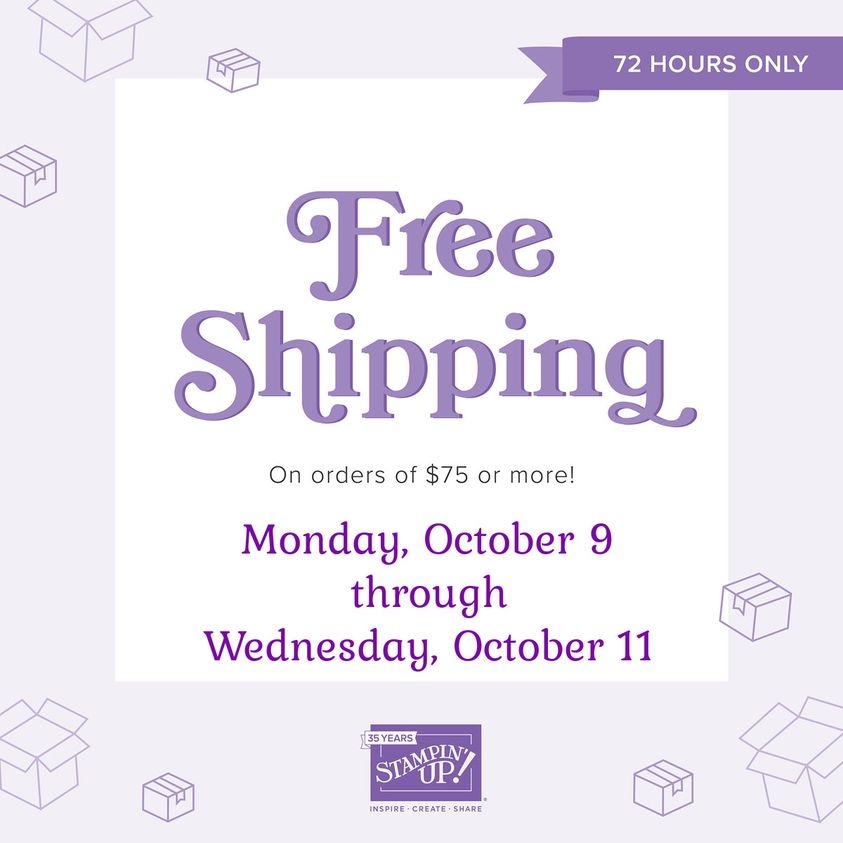
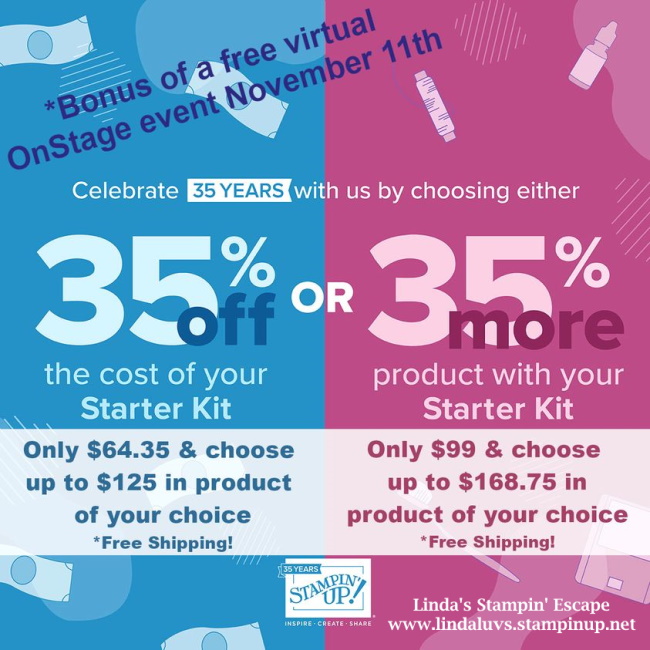
With the announcement of FREE Shipping now through Wednesday it got me thinking …. Stampin’ Up! is also offering a pretty amazing “join” offer. Please note that when you join my team you are not pressured into doing anything more if you don’t want to, but I also want you to know that I and my team and here to support you in whatever it is you choose to do! Sounds pretty good right?
Well, let me share something, and then tell me what YOU think ….
“If YOU are planning to spend $75 to qualify for free shipping, you can maximize your benefits by signing up for our $64.35 offer. With this, you’ll receive products worth $125, still enjoy FREE shipping, get a 20% discount for three months, receive a complimentary ticket valued at $77 for OnStage @Home, (party at my house), gain access to exclusive online pre-orders, and have the opportunity to use the $77 savings towards purchasing our Bee Mine Suite Collection for the Craft Along during OnStage @Home!”
What do you think? Best Deal Ever. I’m a no pressure kind of gal, but a great cheerleader and support for my team members. Plus, they are given the opportunity to join in on my classes at a discount, or receive the PDF’s / directions for my classes so they can use them as needed.
Wanna chat? Have some questions? You can message me HERE or if ready SIGN UP Here.