Dainty Delight Makes the Perfect Gift Card Holder …

Hello Stampin’ Friends ~

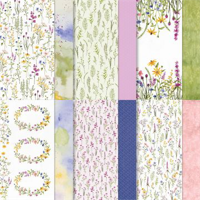
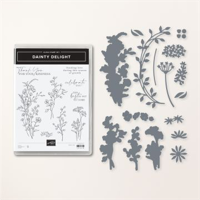
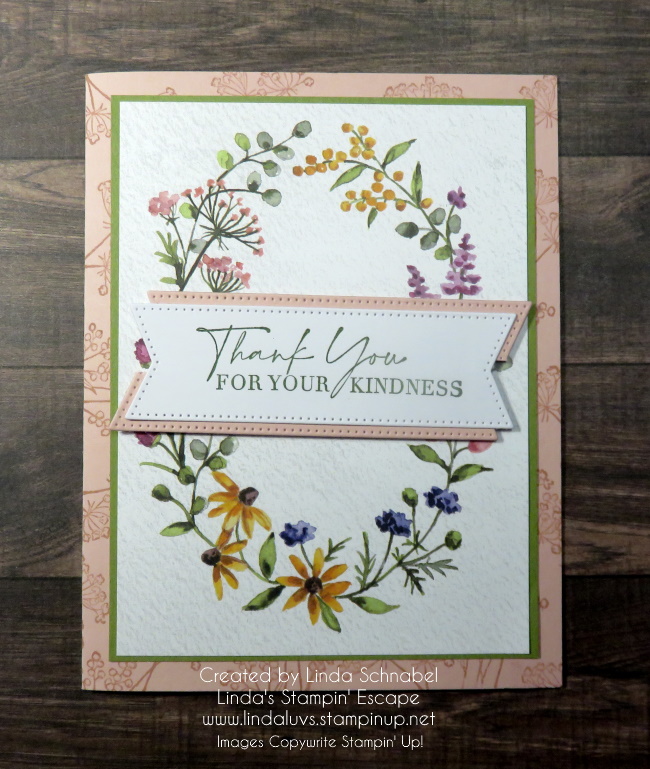
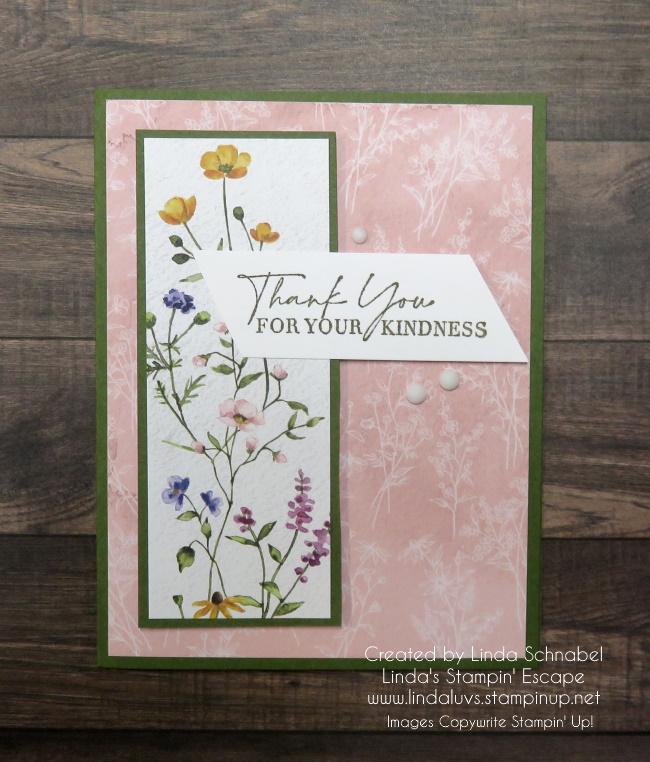
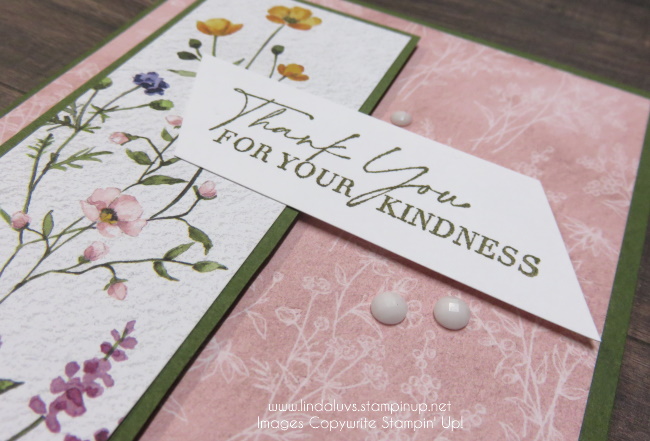
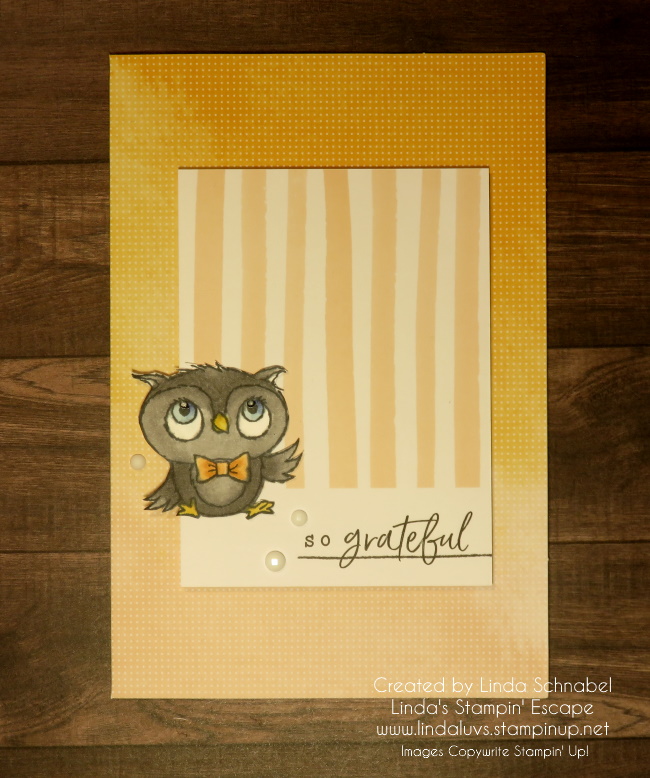
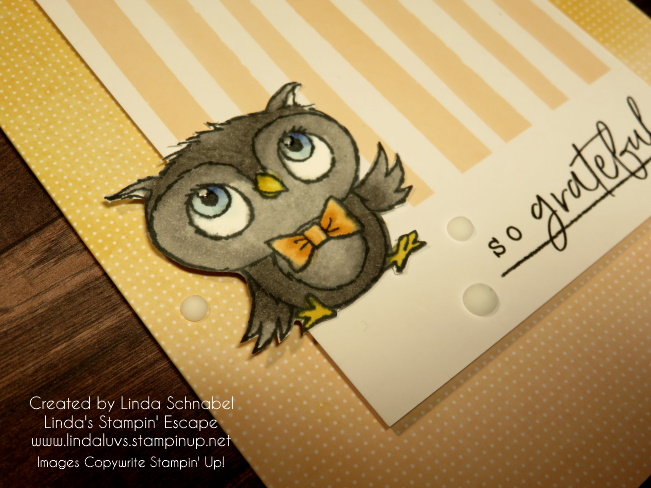
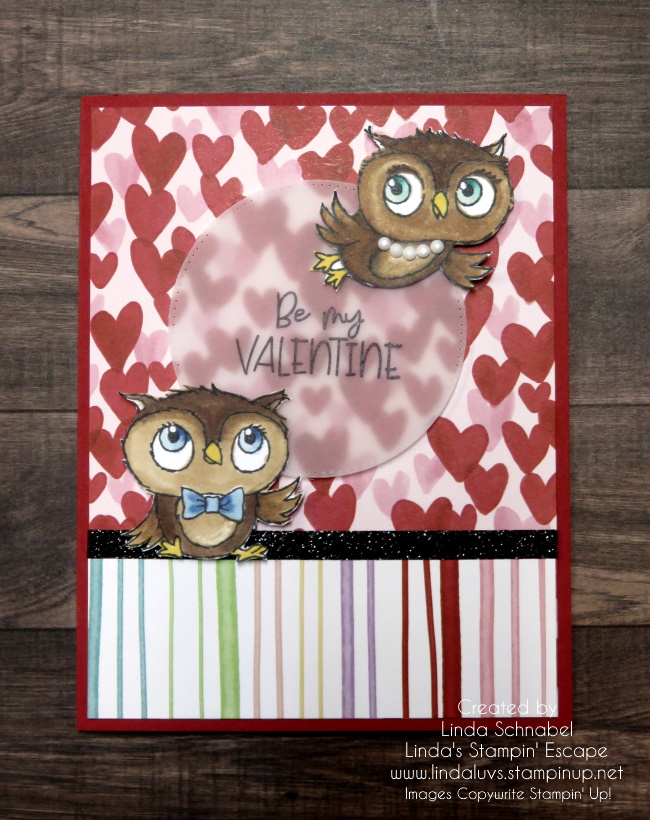
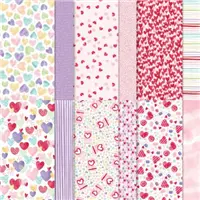
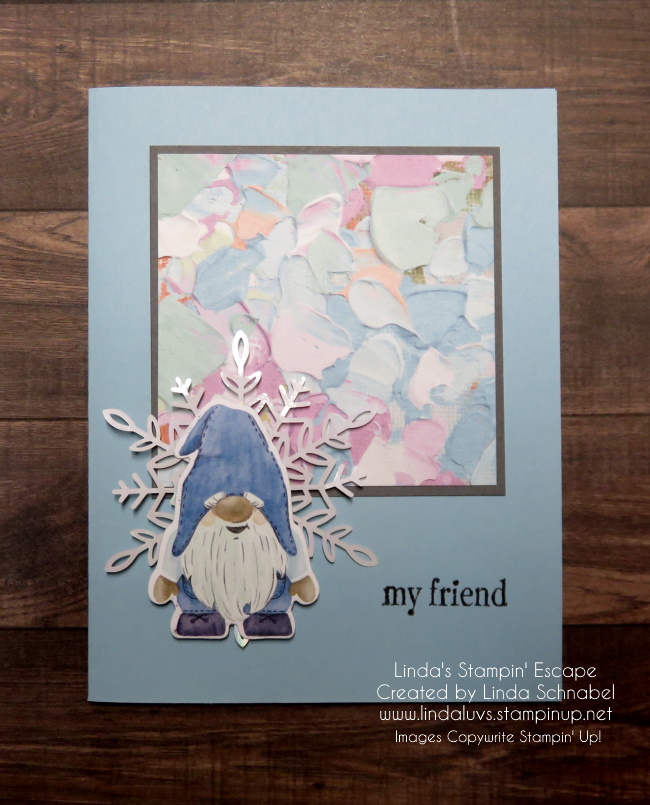
Today I’m going to show you what I did with the last piece of the Dainty Flowers designer paper to create the Perfect Gift Card Holder. Great for Birthdays, Graduations, Thank You’s and more. Isn’t this just the cutest?

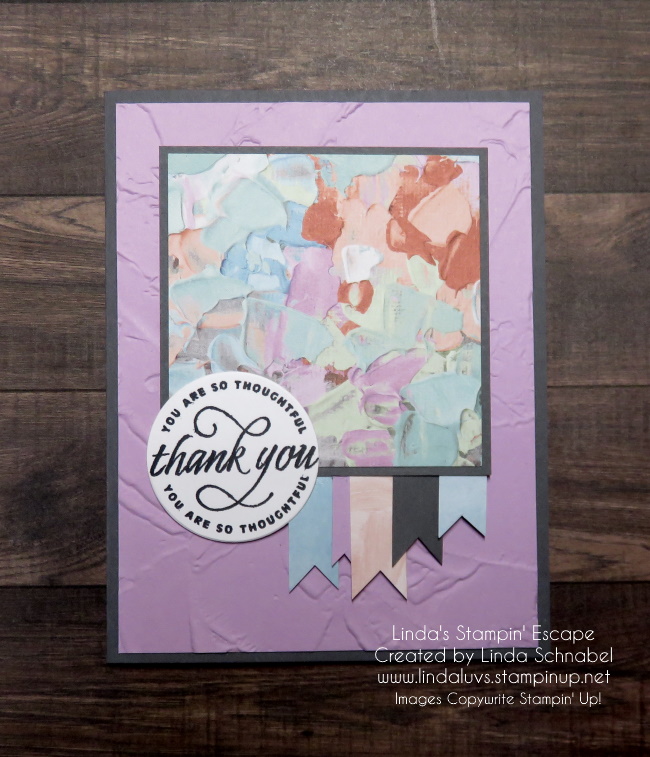
You start with a half sheet of cardstock measuring 11″ x 8-1/2″ … score at 2″ and 5-1/2″. The 5-1/2″ score it to fold your card in half, the 2″ section gets a piece punched out of it and then it’s tucked under to create the pocket for your Gift Card. I used Tear & Tape Adhesive along the edges to secure it.

I used a piece of 5-1/4″ x 4″ piece of Dainty Flowers for the inside … the right side will be exposed when the card is closed. The Label Me Lovely Punched was used to punch the piece out of the pocket and for my sentiment.

I created an area for you to write in … the Basic White measures 3″ x 4″ and the Mango Melody mat is 3-1/8″ x 4-1/8″…. and you won’t be able to see it while the front is closed so your message is safe! lol

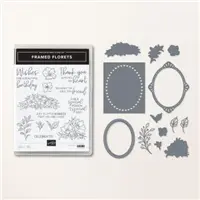
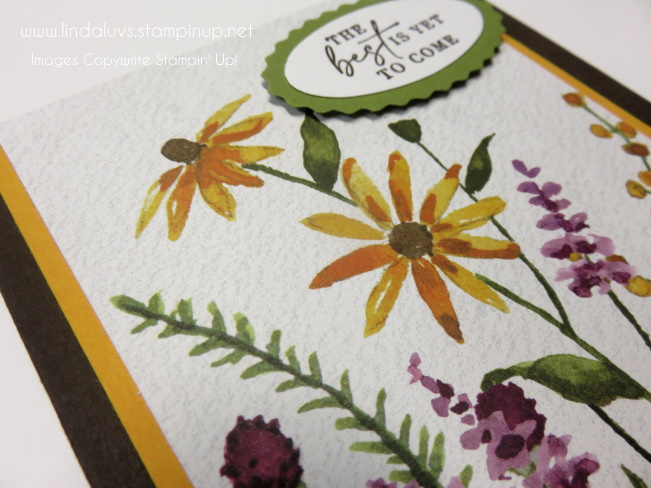
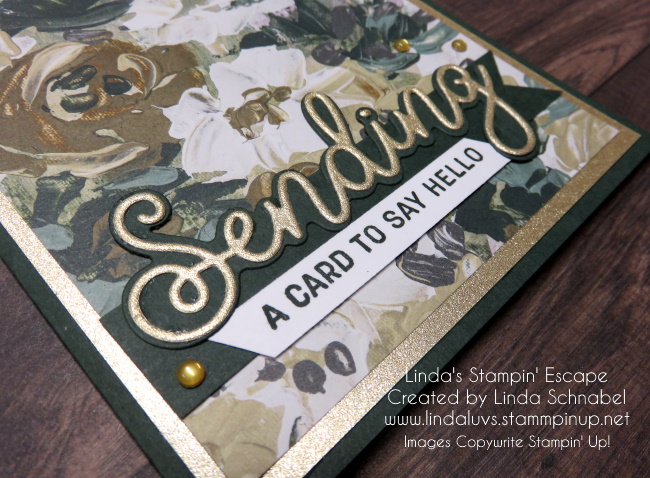
The front Mango Melody piece used to mat the designer paper measures3-3/8″ x 4-1/8″, making the Dainty Flowers designer paper 3-1/2″ x 4″. I used Framed Florets for my sentiment on the front and punched it with the Label Me Lovely punch. The Mango was punched and then cut in half and then adhered to the top half and bottom half (see the split on this back view).

Those pretty flowers sure can make an adorable card to wish someone a happy birthday and tuck a little something in there for them to treat themselves.

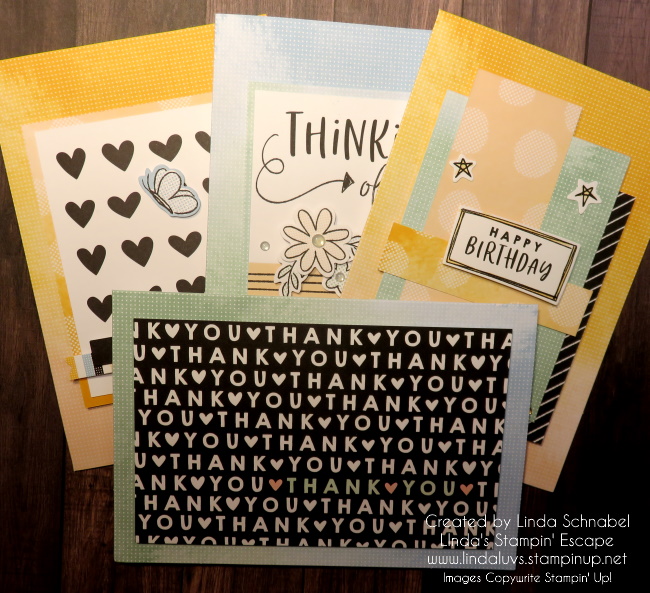
Thanks for stopping by today, I hope these sharing these cards with the beautiful Dainty Flowers Designer papers has inspired you pick a pack up for yourself.

Have a wonderful Monday ~

Here is a list of supplies used for today’s card …

Simply Sunday: Simply Gorgeous Dainty Flowers Card

Hello Stampin’ Friends ~

Happy Sunday! Today I’m sharing a super simple card that is Simply Gorgeous using the Dainty Flowers Designer paper you can get FREE during Sale-a-bration.

For those who don’t know what Sale-a-bration is, it’s Stampin’ Up!s most anticipated time of year because YOU can earn FREE “exclusive” products now through February 28th. Yes, sometimes the freebies sell out, so I don’t hesitate to get the ones I love first! Click HERE to learn more about Sale-a-bration.

Early in the week I shared a cutting technique using the Dainty Flowers (CLICK HERE to see post) and now I want to share what I did with some of the left overs! This piece is 12″ x 6″ – it’s simply cut in half, so you have another sheet just like this one (and a full one too!).

These will show the left over pieces from my first card (they are marked on the paper). Now I’d like to share my finished card and give you the simple instructions to create your own card ….

If you take a look at the layout of the Dainty Flowers paper I have “marked” … the pattern piece I chose for today’s card is on the right. My colors were chosen to highlight the daisies of Mango Melody with Early Espresso centers. The third color I used was Old Olive to bring in my greens from the designer paper.

The Early Espresso card base is 8-1/2″ x 5-1/2″ and is scored and folded at 4-1/4″ (basic A-2 size). I had to trim the top off my designer paper from 6″ to 5-1/2″ to match my card base. The Mango Melody mat behind the Dainty Flowers designer paper is 5-1/2″ x 3-3/4″. Simple measurements for this simply beautiful card (the designer paper does all the work)

Speaking of this designer paper, I had to share a close up so you could see the “look” of texture that it has. We don’t have to do anything … it’s already there for us. It adds such a warm and natural look with these beautiful flowers. And the flowers, well … I have fallen in love with the “watercolor” look. It truly is a work of art, and to share this masterpiece …. just add cardstock.

And a sentiment, which comes from the Dainty Delights stamp set. I suggest the bundle so you don’t have to “fussy cut” any flowers, the dies will do that for you! I’ll share more of that with you as well. Today the sentiment was punched using the Double Oval Punch.

Just so you know, when you purchase the Dainty Delights bundle, you can chose the Dainty Flowers Designer paper for FREE! It’s a perfect pairing. I will also be hosting a Dainty Delights Class in February.

I thank you for taking time out of your Sunday and sharing it with me.

Have a beautiful day ~

Here is a list of supplies used for today’s card. You can click on any image to learn more about it, or to begin shopping with me. Thank you!!

Dainty Flowers Thank You Card …

Hello Stampin’ Friends ~

Today I have a great Thank You card for you created with the Dainty Flowers Designer Series paper. This was just one of the cards that my Stamp Club members made this month. I wanted to highlight the lovely paper you can choose for FREE during Sale-a-bration with a purchase of $50 or more … and if you love this paper, you will want the Dainty Delight bundle. You can find it on page 55 of the NEW Jan – April Mini Catalog.

I choose the pattern with the oval flowers, you can do so many different things with these, today I’m sharing a quick and simple way ….

I started with a Blushing Bride card base and then chose one of the floral stamps from the Dainty Delight stamp set and stamped the front with Blushing Bride ink. This technique adds the look of texture/ and dimension, and I just like the way it looked!! lol

Once the designer paper was trimmed down, I added an Old Olive mat to the paper. This pulls the greens out of the paper and compliments the Blushing Bride. You can pop this up with Stampin’ Dimensionals but I did not. I saved that dimension for my greeting ….

The greeting comes from the Dainty Delight stamp set and was stamped in Old Olive. Then I cut it out with the largest banner from the Stylish Shapes dies. I then cut another banner from Blushing Bride to use as my mat … I cut that in half horizontally and attached it so then ends showing on opposite ends. Then I popped it up using Stampin’ Dimensionals.

Take a close look at the paper … see the texture? This is “actually” in the paper! It appears to have been run though an embossing folder but it was not. Amazing!!

Such a pretty card, and it’s because of this beautiful paper. I’ll have more cards to share with you tomorrow so stop back, or better yet … Click on the “Follow My Blog” tab in the upper right hand area of this blog.

Thank you for joining me today, I hope it’s a good one for you!

Here is a list of supplies used to make today’s card …

You’re Invited to My Sale-a-bration & Mini Catalog Launch Party ….

Hello Stampin’ Friends ~

I have been having fun planning and preparing for my upcoming New Catalog Launch Party … this will be held on Facebook – Friday, January 20th and Saturday January 21st.

We’ll have games and product introductions leading up to the event and a LIVE demonstration on Friday Night. The majority will be happening on Saturday … More LIVE demonstrations, games and more.

I’ll be sharing projects with you here during the week in conjunction with what I’ll be sharing during the Launch Party.

Join in on the FUN … I would love to have you! It’s going to be a party!!

Thank you for the visit, meet you back here tomorrow with a fun project.

Fun Folds & Dainty Flowers

Hello Stampin’ Friends ~ Today I’m sharing the video replay of last nights Facebook LIVE. I’m demonstrating step by stop how to create the Front Flip Fun Fold Card … it’s quite simple and a lot of fun to create.

DIMENSIONS:

Card Base 8-1/2″ x 5-1/2 scored and folded at 4-1/4″. Cut at 1-1/4″ from edge to score line, flip over and cut 1-1/4″ to score line. Secure the 1-1/4″ flaps to card base.

Designer Paper / Cut 2 – 1″ x 4″ pieces for outer pieces and 2-3/4″ x 4″ for center. Also cut a 2-3/4″ x 4″ piece of white for inside.

Let’s take a look at the video …

Here is the Dainty Flowers designer paper and the cutting pattern I used for the Front Flip Fun Fold card ….

This will give you a little more clarity of the directions … a picture is worth a thousand words! I even added the “hint” for the two pieces you can create another 2 cards with.

Now we can take a look at the completed card ….

My greeting comes from the Dainty Delight bundle and was punched out using the Double Oval punch … the Old Olive paper behind the greeting is actually the back of the designer paper!

And I couldn’t forget to decorate the inside ….

The little flower on the inside is actually a sprig from the oval wreaths that I fussy cut and glued inside. The sentiment comes from the Framed Florets stamp set and works beautifully with the Dainty Delight bundle.

I hope you enjoyed the glimpse of the Enjoy the Adventure cards as well, this truly is a “FUN” Fold!!

Thank you for hanging out with me today, hope your day is a good one!

Here is the list of supplies used to create today’s card ….

Ready for an Escape? Save the Date for my Spring Stamping Retreat ….

Hello Stampin’ Friends,

Join me …

When was the last time you got to escape and do something for yourself?

I have exactly what you need …

a Stamping Retreat designed from top to bottom to put you at ease

from the demands of the outside world and recharge your creativity.

I would like to tell you about my Spring Stamping Retreat!

You’ll enjoy your stay in a stunning 1930’s English Tudor Home on beautiful Green Lake. The surroundings offer a carefree setting for nurturing you and your creativity, allow you time for relaxation, and building new friendships.

Our retreat is all inclusive … Your lodging, all your meals for the weekend, and all stamping projects are included in one low price! We want you to enjoy your getaway… so you do not have to drag your entire stamp room with you.

Join us for this creative stamping escape and let the stress of the work week drift away with the tide. Linda

Our Stamping Sessions …

are held in a spacious, light filled meeting room and includes everything you need (cut and prepared for you) to create exceptional cards and projects in a relaxed, friendly & stress free environment.

christian writing center bedroom

Your Retreat Room …

is inviting, clean & comfortable. Our lodging is NOT “dorm style” so you and your friends can enjoy some well deserved “girl” time together. You’ll also find little surprises gifted to you each night of your stay.

Your Meals …

Sit back and relax while enjoying wonderful home-cooked meals, desserts and snacks all weekend long. Coffee, tea, and bottled water are also provided throughout your stay.

You’ll find our All Inclusive Stamping Retreats affordable and private, spacious and splendid …

you will enjoy this relaxing getaway

and come away with fabulous completed projects, new ideas,

stamping tips, and new friendships.

Retreat Dates: April 28 – 30th, 2023

COST: $350 Early Bird /RSVP & Payment due by Feb.1st

After February 1st / Cost = $375 & Paid by March 10th, 2023. 

The Invitations will be coming soon.

Our retreats are on a first come first serve basis, contact me today.
Only payment received will reserve your stay. Once received …
Full details will be sent to you when your registration is confirmed. 
Includes Directions, Swap Information, and More.

Linda’s Stampin’ Retreat

Linda Schnabel | 262-334-1009

Email: lindaluvs2stamp@aol.com

Website: www.lindaluvs.stampinup.net

BLOG: http://lindasstampinescape.com

I would truly enjoy having you join us this spring. It is a true retreat … fun, relaxing, fulfilling and filling! lol  You’ll make new friends and go home with beautiful cards and cute little treats!

Have yourself a beautiful day,

Simply Sunday: Dainty Flowers

Good Morning Stampin’ Friends ~

Welcome to my Simply Sunday post of Dainty Flowers. You will find this beautiful paper in the Sale-a-bration catalog, and is FREE with a qualifying purchase of $50. Today kicks of several days of beautiful cards created using the Dainty Flowers Designer paper and the Dainty Delight Bundle.

Today the main focus is on the Dainty Flowers Designer Paper ….

I went a little darker than the Old Olive by using the Mossy Meadow which really highlights our floral Blushing Bride pattern. The flowers on our background paper mimics the floral piece in which we highlighted here.

This pretty patterned paper was cut from the center of the sheet that also has the floral oval designs. This paper was not embossed, the texture you see on it, is part of the paper design.

This floral piece measures 5″ x 3-3/4″ with a mat slightly larger. The greeting was stamped with Mossy Meadow and comes from the Dainty Delight bundle. I simply trimmed off the edges with my scissors at an angle. I used dimensionals on the right side of the piece.

I embellished the card with my Opaque Adhesive Backed Gems to add some drama… or should I say texture! lol It’s so easy to make beautiful cards using this gorgeous designer paper.

Thank you so very much for spending part of your Sunday with me. Enjoy your day!

Here is a list of the supplies used to create today’s card ….

Time to Celebrate FREE Product …

Hello Stampin’ Friends ~

I hope you have heard the News … Our Sale-a-bration and Mini Catalogs are now LIVE!! We will only be having ONE Saleabration this year! It’s the BEST time of year with Stampin’ Up! For every 50.00 you spend you get to pick exclusive free product! Can we say…ADORABLE OWLS, or beautiful papers!

Another way you can get FREE Sale-a-bration products is to be a Paper Pumpking subscriber.

Our Pre-paid Paper Pumpkin craft kits by mail are an even better deal during Sale-A-Bration! Pick a free reward item for every $50 spent in January when you get your pre-paid code for the year. https://www.paperpumpkin.com/en-us/sign-up/?demoid=26646

So, for every $50 spent during Sale-a-bration (January & February) YOU get to pick a FREE Exclusive Sale-a-Bration Reward … purchase the 12-month subscription and you not only get to pick up to 4 FREE products, YOU will have earned HOSTESS Rewards as well!! That’s right, you will quality as a hostess too.

If your wishlist is over 100.00…you will really want to consider buying the starter kit and joining my Stars team so you get 20-25% off all your future orders! Plus choose to get the Boho Blue Mini Machine added to your starter kit! Choose 175.00 in product of your choice in your starter kit and pay only 99.00 or 129.00!

You can CLICK HERE for more information or to join my team. If you have any questions, please message me and we can chat. There is never an obligation … it’s all about YOU!

Thank you for joining me on this fine Friday… I hope you have yourself a wonderful day.

Here are the QUICK LINKS for the Paper Pumpkin subscriptions …

Enjoy the Adventure Parade of Cards …

Hello Stampin’ Friends ~

Let’s get a close up of the Enjoy the Adventure cards … Today I will be sharing my cards from the LIVE along with the dimensions so you can recreate them for yourself because the Sale-a-bration and Mini catalogs have gone LIVE today!! Woo hooo … YOU can finally get your hands on your favorite stamps, dies and those awesome designer papers.

My first card was the “Thank You” card … the simplest of the bunch. The base comes from the Cards & Envelopes which coordinate with the Memories & More Card Pack. I simply cut down the 4″ x 6″ Thank you card to 3-1/2″ x 5-1/2″ (so a 1/2″ off the top and 1/2″ off one side). I then colored in the THANK YOU with Mint Macaron and Petal Pink Stampin’ Blends. Super Simple!

On to the next card, we begin with the Mango Melody and Petal Pink card base. These are scored for you so they fold nicely …

I took a second card base and cut off the front, then I cut the front down to 3-1/4″ x 4-1/4″ (you’ll get 2 from the front piece). I then layered the “heart” card which measure 3″ x 4″ … not cutting needed.

The rest is easy as I used the die cut adhesive backed elements from the sticker sheet included in the Enjoy the Adventure Memories & More Card Pack. Each of the elements were popped up with Stampin’ Dimensionals and then brushed with Wink of Stella.

The next card also starts with the Mango Melody and Petal Pink card base…

This card is all about layers … the bottom two layers are actually 2 of the 3″ x 4″ cards from the card pack. The two smaller pieces; the Petal Pink is 4″ x 1-3/4″ and was attached vertically, then the Mango Melody piece 3-1/4″ x 3/4″ was layered vertically. Both of these smaller pieces were cut from the 1/2 front that was left over from the second card!

The Happy Birthday (popped up) and Stars are elements from the sticker sheet. The three little dots come from the Adhesive Backed Milky Dots.

Now … I have one more card to share with you. If the first card was a bit too simple for you, this card will show you how you can get the same look, but a little more jacked up …

The card begins exactly how our first card was created, except I took the left over pieces cut off and found a full “THANK YOU” to trim down and color … this will give us more dimension. Then I punched a scalloped heart from vellum to place behind the “Thank You” so it stands out more.

It’s amazing how some simple changes can add so much to a card. These card packs are fun to play with, I better pull out a scrapbook before I use up all my pieces! lol

Thank you for joining me today. Which one of these cards is your favorite??

Here are the products used for today’s cards … Click on any one of them, it will take you to my OnLine store ….

Enjoy the Adventure Cards …

Hello Stampin’ Friends ~

WOW … do I have some great cards to share with you today. I have taken the Enjoy the Adventure Memories & More Card Pack and turned the cards into “cards” you can send using the Memories & More Cards & Envelopes. Using the Card Pack you can quickly capture life’s special moments by scrapbooking … and the cards and envelopes and you can create quick and easy cards.

Join me to watch the replay of last nights Facebook LIVE where I share several cards cards I created using the Enjoy the Adventure Memories and More Card pack …

As promised, I have a cute card created with the two Memories and More packages and the Adorable Owls. This one was so easy to create, first the Mango Melody / Petal Pink card base from the Cards & Envelopes package, and then the so grateful card which I used Stampin’ Dimensionals to pop it up.

There was no extra cutting of cards to create this look … I just used the cards directly from the pack.

This sweet little owl (there are 3) from the Adorable Owls was stamped with Momento ink and colored with the Smoky Slate Combo pack, along with Balmy Blue for they eyes, Mango Melody for the Bow tie and then Daffodil Delight for the beck and feet.

The owl is fussy cut … which means no dies, you have to cut it out yourself.

I also added three of the Opaque Adhesive-backed Gems to draw in your eye and give the cards some additional texture. It’s so easy to create cute cards from these card packs … Both the Enjoy the Adventure and Adorable Owls will be available in just one day!! Woot Woot!

If you’re newer to stamping or if you just want to grab the Enjoy the Adventures packets so you can create your own quick cards. I hope you were inspired today with these designs.

When you stop back tomorrow, I’ll have dimension & more for the cards and a “stepped up” card for you!!

Thank you for taking time our of your day to join me.

Have a wonderful day ~

Something Old & Something New

Hello Stampin’ Friends ~

Today I’d like to send a reminder that the Holiday Mini Catalog will retire in 2 days. You have today and tomorrow to grab any last minute items. I also want to share that Stampin’ Up! just released another card kit …

Now you to say thank you to the people who make your day, every day with Saying Thanks all-inclusive card kit! This month’s kit has everything you need to show appreciation to family and friends who light up your life! This lovely kit will be available January 5th ….

Make nine bright, colorful cards in no time to say thank you, recognize friends, and share your gratitude with a bright watercolor wash that won’t go unnoticed! You’ll never miss an opportunity to express gratitude with this colorful kit!

Grab one for yourself and a friend as they make perfect gifts. It’s a great way to introduce stamping to your friends and loved ones … then you can stamp together. And don’t forget those retiring products!

Thanks for popping in today, hope your day is a great one.

Be My Valentine Card with Adorable Owls

Hello Stampin’ Friends ~

I am tickled pink to share today’s card with you. With Valentines Day approaching quicker than we’d like to think and I cannot get enough of these little owls from the Adorable Owls so they are highlighting my card again today. The Adorable Owls will be FREE during Sale-a-bration with a qualifying order.

First let me start with the Sweet Talk Designer Paper … it’s on the Clearance Rack and is as adorable as these owls!

The sheet I chose has the two patterns you see … one on the front and one on the back, and then I used the Black Glitter Washi Tape from the Holiday catalog that retires on the 4th of this month. I used Real Red for my card base to coordinate with the Sweet Talk Designer paper. Let’s take a look …. Now let’s talk about our Adorable Owls!!

I stamp them with Momento Ink on Basic White Cardstock, and then color them with our Stampin’ Blends Alcohol markers. Yesterday I used the Smoky Slate Combo pack to color and today chose the Natural Tones Stampin’ Blends.

I used 200 from the Deep Tones, and 500 from the Medium Tones Combo. The Natural Tones come in combo packs of two, but they are two different tones. I begin coloring with the 500 Medium tone and then color in my darker 200 marker, then I go back over with the lighter color. I also use the color lifter if I think it’s too dark or go outside of the lines, so the areas that look “highlighted” are actually done with the color lifter.

I decked out my gent with a nice blue bow tie to match his eyes – I used Light Balmy Blue and Light Night of Navy for both. My lady has Dark Pool Party and Dark Bermuda Bay eyes and she is adorned with a necklace created with the NEW Opaque Adhesive Backed Gems.

My greeting comes from the NEW Share a Milkshake bundle and stamped with StazOn ink (doesn’t smear on vellum) and then die cut using the 2nd largest circle from Stylish Shapes. This card uses the Sweet Talk from the Clearance Rack for a sweet Valentines Day and the Adorable Owls… they sure named them correctly!

Thank you so much for stopping by for a visit.

Have a wonderful week ~

Here is a list of supplies used to create this card …. The Share a Milkshake and Opaque Gems will be available January 5th, and the Washi Tape retires after the 4th. The Adorable Owls will be FREE during Sale-a-bration with a qualifying order.

Simply Sunday: Fancy Flora Designer Paper

Hello Stampin’ Friends ~

Happy New Year!! Today I have four cards to share with you that I created using the Fancy Flora Designer paper … yes, it is the paper you’ve seen the past couple days. This pattern is bright and colorful and full of texture. I paired it with the Adorable Owls, Gnomes and Banners!

I began with one pattern from the Fancy Flora paper and cut it into 4 – 3″ x 3″ piece …. thus the start of your 4 cards. I chose Basic Gray as my mat behind each of the pieces for my cards. The cards are simple yet cute cards so you will fall in love with how cute they are and how easy they are to make.

By matting the Fancy Flora designer paper it reminds me of a “framed” picture and the pattern is so fun and whimsical I thought it was perfect to add our Adorable Owl that are in the Sale-a-bration catalog that goes LIVE on January 5th. I used our Stampin’ Blends to color my owl and picked the Fresh Freesia cardstock for my base…. It’s Your Day was stamped three times. Keepin’ it Simple.

My second card has a different cards base … Soft Sea Foam. All of the colors I am using in todays cards coordinate with the designer paper. Again, using basic stamping and Stampin’ Blends for the owl.

Now we’re going to change it up a bit and use one of our gnomes ….

Isn’t it amazing how the same small piece of designer paper looks different when you add different elements. Owl little owls had a spring vibe and here you get a bit of winter … just like our weather! Snow one day … 40 degrees the next. Card base is Balmy Blue!

For my last card, I stepped it up a bit more …

The card base is Basic Gray and the card front is Fresh Freesia and then embossed with the Textured Paint Embossing Folder. I used the Balmy Blue, Basic Gray, and Fresh Freesia scraps to make my banners and the greeting comes from the Tulip stamp set.

Hope you enjoyed taking a peek at my quickie cards! We only have a few more days until the new catalogs go LIVE. I just adore those Adorable Owls and now you have seen that you can go from “fancy” to “fun” with the Fancy Flora designer paper.

Have a Happy New Year and a great day ~

Sending Smiles of Gold Card

Hello Stampin’ Friends ~

On this eve of the New Year, I am so excited to share another Sending Smiles Card with a touch of Gold! The Gold comes from the New Jan-April Mini Catalog on page 15 … it has the most beautiful shimmer! Stampin’ Up! calls it Fine Shimmer and it comes in 12 x 12 size and you get 2 of each of the three colors: Soft Succulent, Fresh Freesia and Gold.

I teamed it up with the Fancy Flora designer paper found on the same page in the Mini catalog, so you know that the colors will coordinate! Makes our life so much easier that way right. No need to stress when designing our cards. I invite you to case (copy) my designs so you can start creating right away.

You can see that the layout is the same as yesterday’s card with just a few changes….

My card base is Evening Evergreen and my mat for the “same” Fancy Flora designer paper is the Gold Fine Shimmer paper. I also replaced the ribbon with a Evening Evergreen banner. Yesterdays card was “stamped” onto the Soft Succulent, where today I used Evening Evergreen and cut my Gold from the center of my mat (paper saving technique).

Layering the detailed die cut “sending” against the die cut mat creates a bold statement and adds some texture to your card. I love sentiments and when you can die cut them it really creates a WOW on your card …

The greetings from both cards that I stamped onto the Basic White comes from the Sending Smiles bundle. Yesterday’s was die cut, and I just cut the ends at an angle for today’s card. It’s these subtle changes to your cards that can make it look like a whole new card. Again, taking the stress out of trying to come up with designs.

I can’t wait for the New Mini and Sale-a-bration Catalogs to go LIVE on January 5th … there is so much to see. The Sending Smiles is already available in our current Annual Catalog and is such a fun bundle to play with … with or without the Gold!

Thank you for spending part of your day with me today. I hope your as excited for the new catalogs as I am, and your ready to play with the Sending Smiles and Gold Fine Glimmer paper (and more).

Happy New Years Eve ~

Here are the supplies I used for today’s card that are currently available…