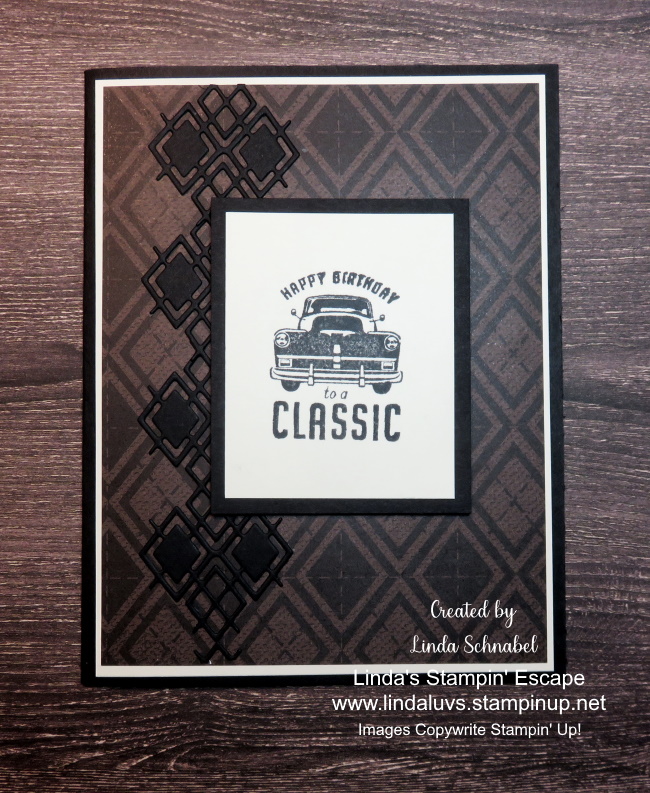
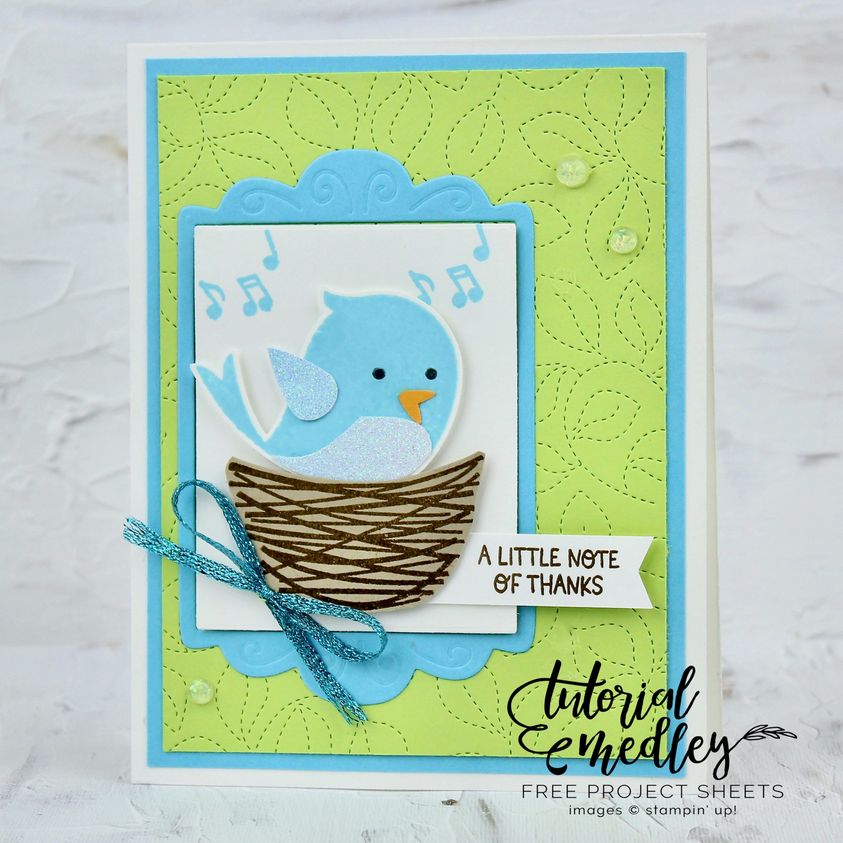
Hello Stampin’ Friends ~
Today I’m going to to take you into how I started my amazing journey with Stampin’ Up! … SCRAPBOOKING!!
I’m going to share a Parade of Scrapbook layouts /pages that I created back when … the layouts are still relevant today with a change of designer papers, you can create a whole new look!! These layouts are GREAT for beginning scrapbookers.
Join me in a stroll down memory lane ….
One of the easiest pages to create, this is actually a 6 x 6 with 4″ squares of designer paper and coordinating cardstock created around 2004! The alphabet stamps with a circle punch and die cuts for the “Hoot” created my theme … and then the owl punch.
For my second layout ….
Super simple layout with a tropical flair … I stamped some flowers on the background just to create some dimension to the page, added a strip of designer paper to the bottom and coordinating cardstock for my photo mats. The coconut cocktail was created using a circle die / or punch … whichever you prefer and then I cut out part of the top and added my accessories! How cute, fun and easy was that!!
My third layout …
Oh my gosh … how easy is this layout! I used an actual road map … what a great way to highlight your road trip. Grab a map or two of the areas you visit and then used it to pin point where you have been. I found some cardstock that coordinated with the colors on the map (good thing Stampin’ Up! has so many amazing colors).
If you don’t have dies to cut out your headers / titles for your pages … Use your computer to print one out. Again, super simple and a great way for beginners to get started.
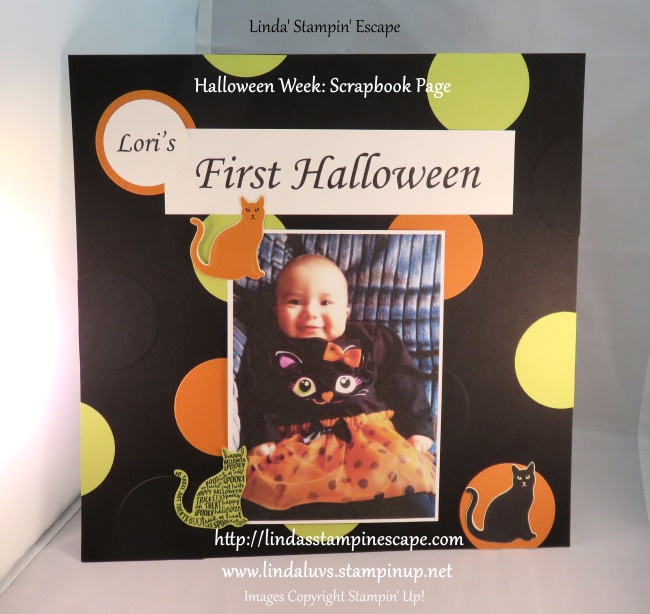
For my last layout, I’m sharing a page I created with scraps …
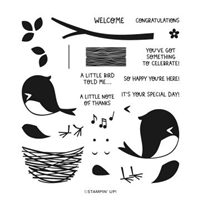
My Card Club was creating “window” cards so all the orange, lime green and black dots are left over from their cards, so I attached them to a piece of black 12 x 12 and created a really fun backdrop for my page. Here is a great example of using your printer to create your title. The cats were actually punched out of designer paper (I love that Stampin’ Up! coordinates dies & punches to the designer paper) … makes for an easy page. To finish it off … I just added my sweet little grandbaby in the center!
I thank you for walking down this path with me today, and I hope you are inspired to whip up a few easy scrapbook pages … you’ve got some layouts now.
Enjoy your Saturday!
I may just start adding scrapbooking back into my stamping … What do you think? Please comment below.
Please feel free to share or save ...