Hello Stampin’ Friends ~
If you love quick & easy cards that pack a big “wow,” you’re in the right place! Today I’m sharing a North Pole Delivery Fun Fold that’s not only adorable—but it also features my favorite paper-saving trick to help you stretch every sheet.
We’ll be crafting with a trio of gorgeous Designer Papers: North Pole Delivery, Hobby Haven, and the NEW Easter Joy… and trust me, you’re going to want them all by the time we’re done. Grab a cozy seat, hit play, and let’s create something magical together!
Click Here to Watch on Youtube
- Card Base = 11″ x 4 1/4″ Score & at 5 1/2″ then slide over and cut at 2 1/4″
- Cut another 4 1/4″ x 2 1/4″ piece from left over card stock.
- Inside / Designer paper = 4″ x 5 1/4″
- Basic White: Cut 2 – 4″ x 2″ pieces to attach to mats
- Frontc Flap / Designer paper = 4″ x 3″
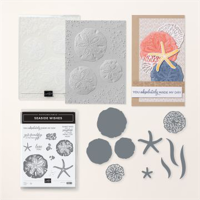
Let’s take a closer look at each card … Here is our North Pole Delivery card that was featured in the video. It’s full of cheer and whimsy, this patterned paper set features dogs, bears, and more animals delivering holiday letters and packages in classic Christmas colors of reds and greens. Plus, you get two sheets of pre-cut images for easy accents!

I really love this easy fun fold and it works for any occasion … Here is the Hobby Haven! This is a fun designer paper to work with! It will bring your favorite pastimes to life … Charming illustrations inspired by baking, sewing, reading, and other simple pleasures!

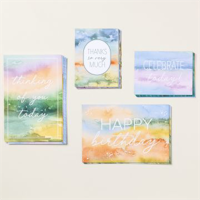
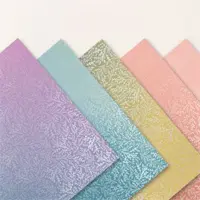
My last feature “Easter Joy” …. SNEAK PEEK into the January / April Mini Catalog (Available January 6th, 2026). Hop into creativity with Easter Joy 12″ x 12″ Specialty Designer Series Paper! This delightful patterned paper brings the charm of spring to your handmade cards and paper crafting projects. Features playful bunnies, Easter eggs, blooming flowers, and festive baskets, all with a hint of metallic foil shine.

As you can see, this easy fun fold truly steals the show—it’s versatile, beginner-friendly, and works beautifully across every season and theme. From the whimsical holiday charm of North Pole Delivery, to the cozy, everyday delights found in Hobby Haven, and finally the fresh spring sparkle of the NEW Easter Joy Designer Paper, this fold lets each pattern shine in its own special way. One simple layout, endless possibilities!
If one (or all 😉) of these papers has caught your eye, now is the perfect time to add them to your craft stash and start creating cards that wow. Thank you so much for watching along with me—be sure to check the links below and let this fun fold inspire your next handmade creation.
Happy stamping! 💕✂️


Sale: $13.20
Price: $16.50