Celebrating the 2018-20 In-Colors

Hello Stampin’ Friends ~

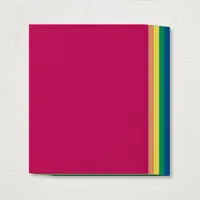
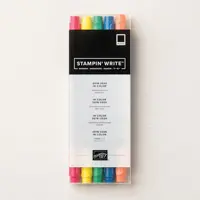
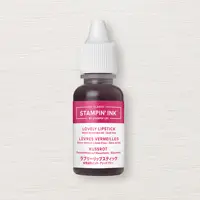
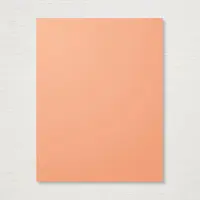
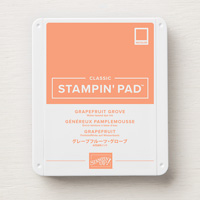
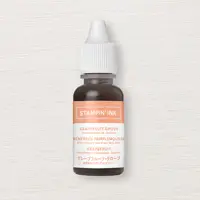
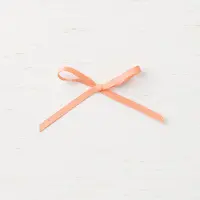
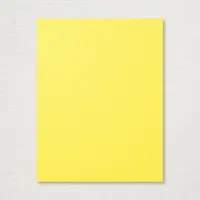
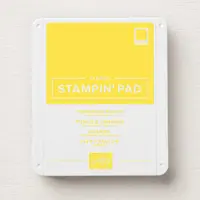
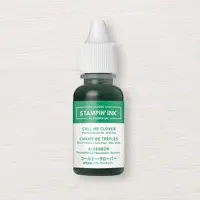
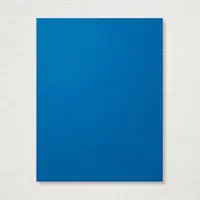
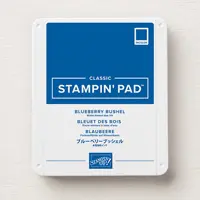
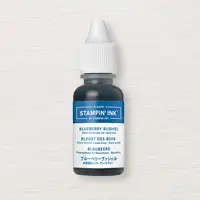
Today I have the 2018-2020 In-Colors … a reminder that these pretty colors will hit the discontinuing list in a few weeks!!  We will be saying good-bye to Lovely Lipstick, Grapefruit Grove, Pineapple Punch, Call Me Clover, and Blueberry Bushel …

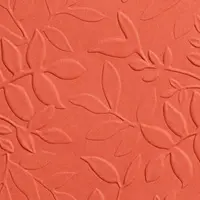
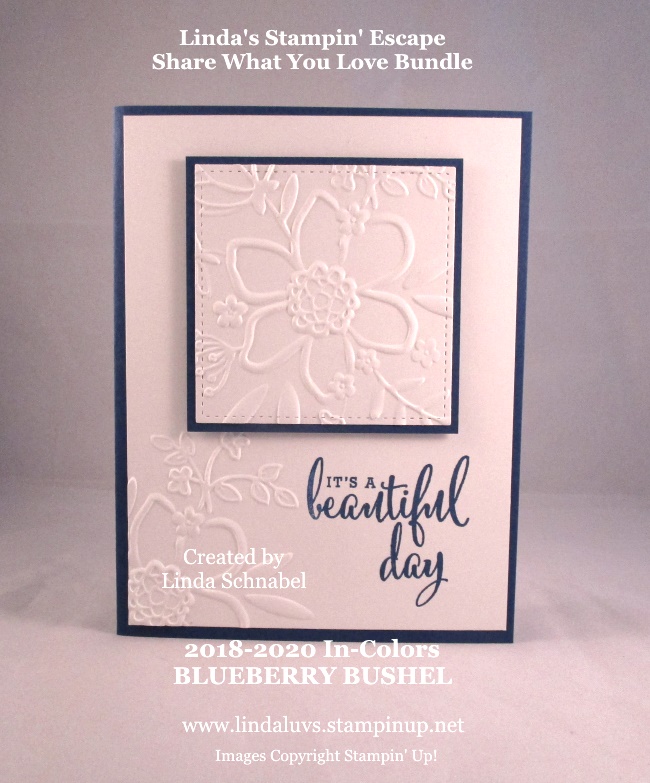
Each card is stamped with it’s coordinating color and embossed with the Lovely Floral embossing folder (DISCONTINUED) … Sorry!!

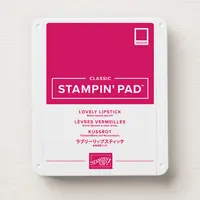
I know many of you have told me these are some of your favorite colors because they are so close to the basic / primary colors.  I’m going to keep reminding everyone that NOW is the time to get your colors … and don’t forget the ink refills … you will want them and you won’t want to find them on ebay later for 10x the price!

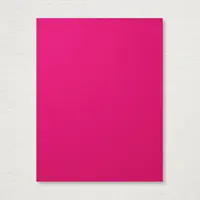
LOVELY LIPSTICK: I simply love this fun new color! It’s not quite red or hot pink but somewhere in between to give you a fun … sassy red!

GRAPEFRUIT GROVE … I don’t know how to describe this color other that it really looks like the wonderful grapefruit color you see when you slice open a juicy grapefruit .. YUM!!

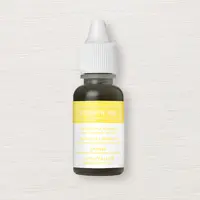
PINEAPPLE PUNCH … and speaking of YUM, who doesn’t like pineapple? This color is a soft, sunny yellow that will just bring a smile to your face.

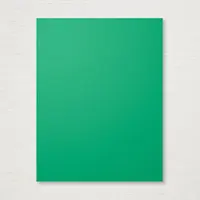
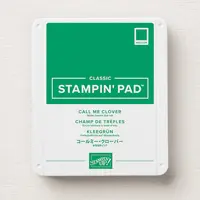
CALL ME CLOVER … Callin’ all lovers of green, you will definitely fall for this one, just like laying in a patch of clover on a warm summer day!  Hmmm … does that bring an image to your mind that makes you want to match this up with another new color? Let’s just wait and see!!

BLUEBERRY BUSHEL …  Another yummy color, this warm blue will really remind you of pint of blueberries. I am really liking this one!
Are you in love with the new In-Colors yet?  I am going to miss this color pallet … it’s new and fresh and complimented our color line.

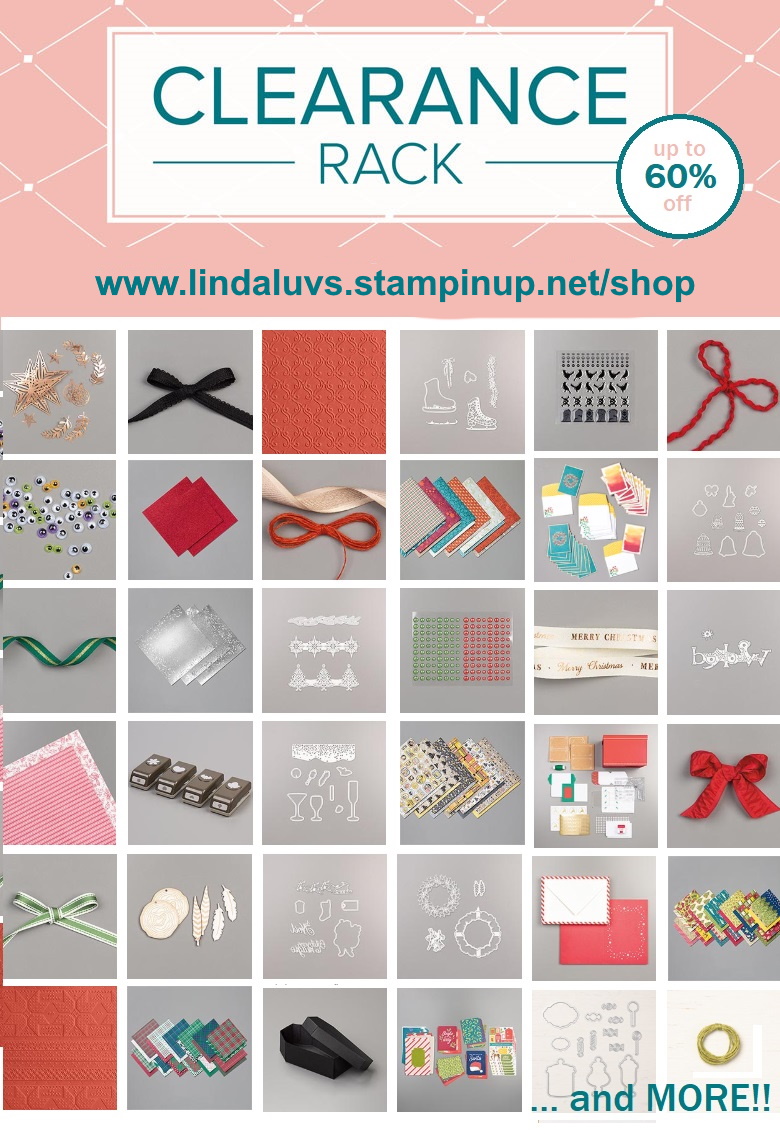
If you haven’t wandered over to the CLEARANCE RACK yet … you might want to hurry, some of them goodies are going fast.  These are sold at discounts up to 60%.  The retirement list is on it’s way but some items will not be discounted.

I want to thank you for joining me today and taking time out of your day to share it with me.

I wish you a colorful day filled with fun!!


TODAY’S STAMPIN’ SUPPLY LIST …
 

Friday’s Fun Fold with Instructions …

Hello Stampin’ Friends ~

How are you doing this fabulous Friday? I’m actually doing quite well … I’m back at work but only during the morning hours when the store is closed, so I’m home in plenty of time to get things done! So the studio is cleaned and I got a cute fun fold for you today!

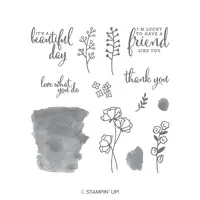
I’ve done this fold before and it’s easy to do and just a little different than sending the same old flat card (those are pretty too!).  I used the “Love What You Do” stamp set in Grapefruit Grove … one of the In-Colors that will be retiring this year.
How would you like some instructions?  OK … Let’s do this!  … oh my!! I forgot to put my Early Espresso Base on!!

  • Cut your card base (It will be on the next picture) 5-1/2″ x 4-1/4″
  • Folded (Grapefruit Grove) cardstock: 9-1/2″ x 5-1/4″ then Score at 2-1/2″ and 5-1/2″
  • Inside (Very Vanilla) cardstock: 5″ x 3-3/4″
  • Fold Grapefruit Grove piece in have (at 5-1/2″ score line)
  • Then fold “back” your piece scored at 2-1/2″ so its over the top and the edge is to the left.
  • Either die cut or punch 2″ through the folded piece (slightly less than 1″ from top) Die cutting is easier than punching!
  • Emboss the front piece (ONLY) Bring your folder to the score line and run it through your embossing machine.  I used the Layered Leaves 3D folder.
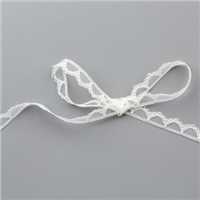
  • Glue the Scalloped Lace trim onto the back of the embossed edge (Let Dry).
  • You can either glue the flap down at this time, or leave it open to add a little more drama to your card!
  • Set your vanilla piece inside (do not glue yet) fold flap over so you can determine where you will stamp your flower.  I place my finger there to hold the spot before I fold the flap back over … then stamp.  If you are a “perfectionist” … draw a light pencil mark around your punched opening so you know exactly where to stamp. Then erase the pencil line.
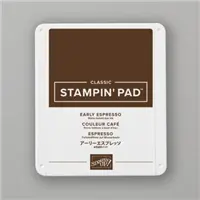
  • Color in your flowers … be careful, I used Early Espresso, this will smear when coloring with the marker. I was just very careful.  Otherwise, you can use the Momento ink pad. Add a touch of the Wink of Stella to give it a little sparkle!!
  • I did not measure my cardstock for the greeting … I stamped it onto a scrap piece and cut it to fit.
  • Finish card by adhering the vanilla to the inside, and card front onto the Espresso base.

Here is the sample with the Early Espresso base attached…

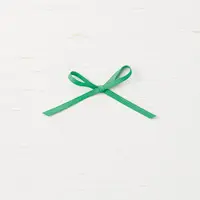
The Espresso base really makes the card “pop” and it ties in the Early Espresso mat behind your greeting and your stamped image.  I forgot in my instructions the Grapefruit Grove Grosgrain Ribbon on the banner. That too will be retiring this year 😦  Love the 2018-20 In-Colors.

I prepared a list of ingredients for you as well …

Supply List

I can’t believe it’s Mid-April already!  The retirement list will be coming out soon, so I like to remind my friends that if they need any of the retiring inks / colors to pick them up before the list goes out.  Just the clearance rack … when it’s gone, it’s gone.  One more peek at that cute card … with or without the base?? lol
Thank you so much for coming over to my blog today! It’s fun to spend some time with you, just wish it was in person!!
Our “Safer at Home” has been extended to May 26th!! I’ve been practicing on Facebook so I can bring you a live stamping session! There is a video of my stamp room on there from yesterday.
Have a great day ~


A Few of my Favorite Things ….

Hello Stampin’ Friends ~

Today I’d like to share several beautiful cards from my favorite things on the Clearance Rack, well … a few of them anyway.  This clearance rack is packed with amazing new items, and if you missed them in the catalog … now if your chance to get them (and on sale!!) Oh yes … I’ll pay your tax in April too!!

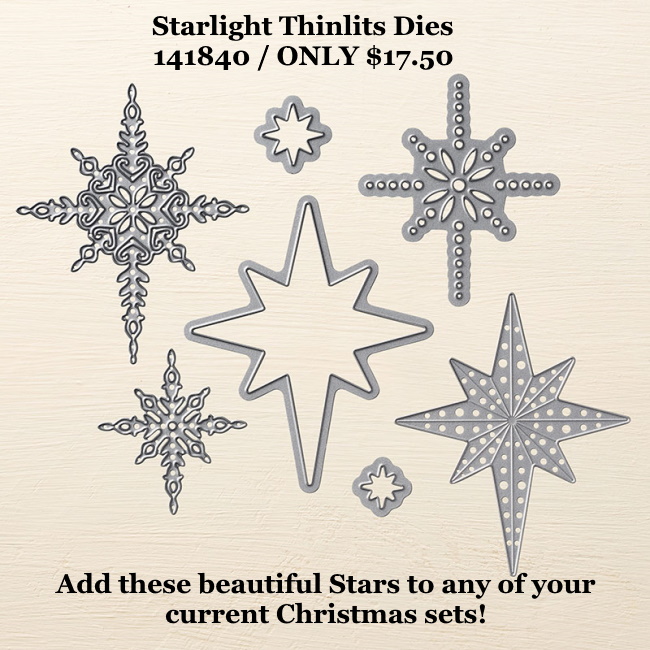
I’ve changed up the greetings on these some of the samples so you can picture using them anytime of the year.  Let me start with the Starlight Thinlits Dies … anything with “Star” in the name is a pretty sure bet that I’ll be buying it … My Team name is “Stars by Design”!!

For me … Stars can be added to any card!! Birthday’s, Christmas, Graduations, Promotions & more!!  Here we are encouraging an up ‘n coming musician … be a star!

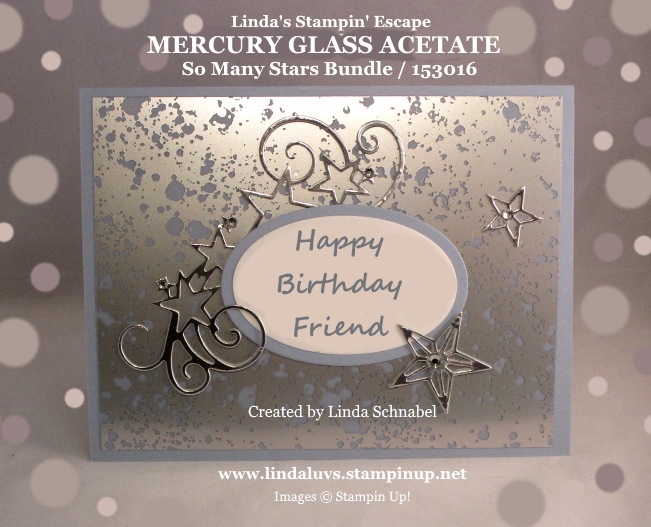
Next I’d like to highlight the amazing Mercury Glass Designer Acetate …

This is a fun acetate that makes great Christmas cards but I think it would also be perfect for a 25th Wedding Anniversary …Silver!!  I will tell you there is a protective film on one side which you will need to remove if you want to punch designs out.  I’ve also seen demonstrators “heat emboss” on this … just remember to use a light hand.  Practice on a scrap piece of paper.  Here is my card ….

Another favorite is the Wrapped in Plaid Designer paper.  You’ve already seen a few cards this week featuring this pretty paper …

Now I’d like to share another!  Green and Gold does not have to mean Christmas … We are Packers fans!! Besides, a little gold glitz goes a long way. This may look a little Christmassy but there are many other colors and patterns (see above) that can be used for any occasion.

Another die I really used a lot …

Don’t let the “snowflake” in the name fool you… I used them along with the lacy background to create a soft feminine card to let my friend know “her friendship is priceless”.

When you see these items on the Clearance Rack … think outside the box.  They don’t have to be used just for snowy holidays, create all year long with them!  Nothing wrong with getting your money’s worth out of your stampin’ stash, and they’re on sale!! Even Better 🙂

Thanks for checking out a few of my favorite things!  What are yours?

Have a great day.  I’ll see you tomorrow with something “FUN”!!

April Showers & May Flowers …

Hello Stampin’ Friends ~

As the saying goes “April Showers brings May Flowers” … certainly true in our gardens! Today’s card has both, a hint of showers with a bouquet of flowers! I’m using another pattern from the beautiful Tropical Oasis designer paper and teaming it up with the sweet little boots from the March Paper Pumpkin kit.

Before I get started … I also want to let you in on some amazing information! First, the May Paper Pumpkin kit is going to include the new “2020-2022 In-Colors”!! I’m so excited that you will get your hands on the new in-colors before they are released in the upcoming new Annual Catalog!!

Second bit of information and just as exciting is … Stampin’ Up! has updated the Clearance Rack!! There are some amazing new items (I’m actually purchasing some to create a fun class!). I’ve posted some of my favorites on my Linda’s Stampin’ Escape Facebook page and I’ll have some with card samples here for you tomorrow!!

Like yesterday’s Gift Card Holders, today’s card was recreated from a “card pack” I had sitting around.  Here is the original card ….

Did you notice the pretty paper on this card?  You can see it above on the Clearance Rack listing.  It is the Wrapped in Plaid Designer Paper.  It is on sale right now!! They’ve just added to the Clearance Rack.

Today’s card uses the left over card kit and the Tropical Oasis designer paper I had left over from yesterday’s card!!  I try not to let anything go to waste!  I’ve also incorporated the two stamp set from last months Paper Pumpkin kit.  The color pallet was inspired from this pair of rain boots …

I bought these boots for my sister Ruthie as she battled Pancreatic Cancer.  The boots represent a story between sisters ❤.  When I was 9 and Ruth was 12, we were walking home from school in a terrible snow storm.  I was little first grader, crying, and my feet were cold … I had a hole in my boots.  My sister Ruthie gave me her boots!! So … as she bravely fought her battle against cancer, I brought her the boots and told her that I was there for her, and it was her turn to walk in my boots ❤ She would not walk alone.

Although my sister Ruthie was capable of amazing things, she lost her battle to Pancreatic Cancer 7 years ago.  It’s amazing how a stamp set can make such a heart connection. I’m sure you have a stamp set that pulls on your heart strings as well. These cute little boots were fun and easy to color!  I love that Paper Pumpkin gives you exclusive stamp sets (these are very special to me). The little bit of bling added to this card are from the Noble Peacock Rhinestones … the add the perfect touch!

Wow … this post is not only full of information but a story too!  I hope I didn’t overwhelm you. I’m here to answer any questions  you may have on the Clearance Rack, Paper Pumpkin or switching up my cards.

Thank you for hanging out with me today. I’ll meet you back here tomorrow and show you some of my Clearance Rack favorites!

Have a wonderful Wednesday ~

Two 4 Tuesday: Gift Card Holders

Hello Stampin’ Friends ~

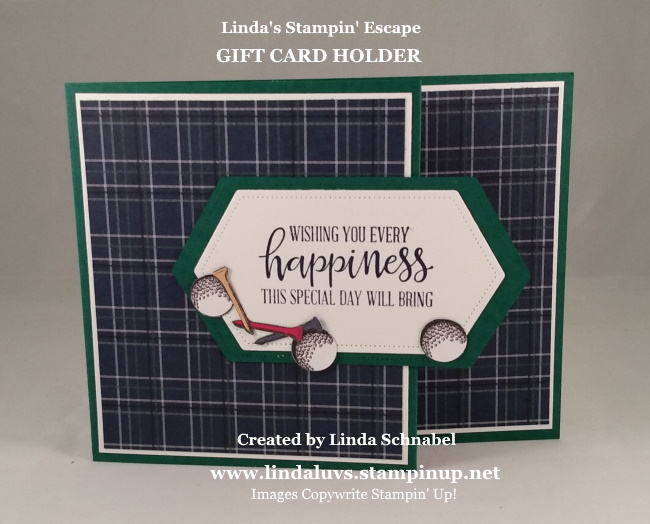
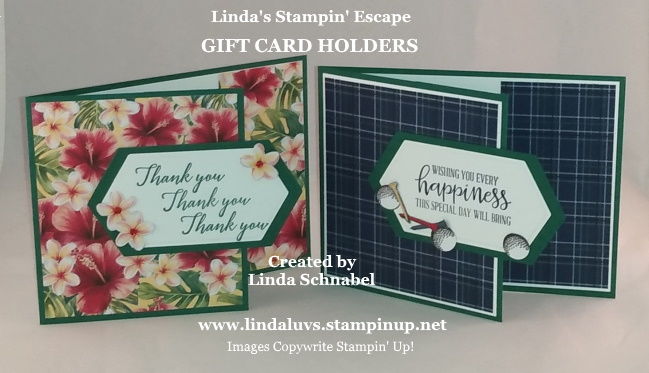
I’m excited to share 2 Gift Card holders with you today … one masculine, the other feminine.  As I was cleaning out some boxes in my back room, I discovered a whole bunch of “pre-cut” cards left over from one of my retreats … usually I try to make them all up, but this one got away from me!! That is when I decided to “re-create” some of them, so I’m starting with the Gift Card Holders!!

Here is the original Gift Card ….

I decided to use up some of the beautiful Tropical Oasis Designer Paper.  This paper will only be available for a short time!!  The Retirement list will be coming out in May sometime, and once this out … it’s till supplies last!

The designer paper is so pretty … I fussy cut the three little flowers out of the designer paper to embellish the greeting.  The greeting comes from the “Tropical Chic” stamp set.  I had not used that one yet or I would have bought the coordinating Timeless Tropical Bundle, but like you, I have to keep an eye on my purchases.

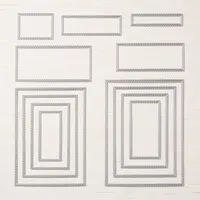
I used the “Stitched Nested Labels” Dies for my greeting, which creates a nice focal point on the card. I’m using the same card base and greeting die cuts for both cards.  The only thing I changed was the designer paper.

My masculine card features the “Country Club” Designer Series Paper …

I don’t really have anyone in my family that golfs, but that never stopped me from getting a designer paper!!  I love the plaid design … and if you flip it over, you’ll see a background of golf balls and tee’s!  Yes, I cut those out too … the tee’s that is. I actually used the 1/2″ circle punch to punch out the gold ball and then just gave it a little trim.  Much easier that trying to cut a perfect circle!!

My greeting for the masculine gift card holder comes from the “Peaceful Moments” stamp set. Hey … we have all these different stamp sets, might as well use them!!

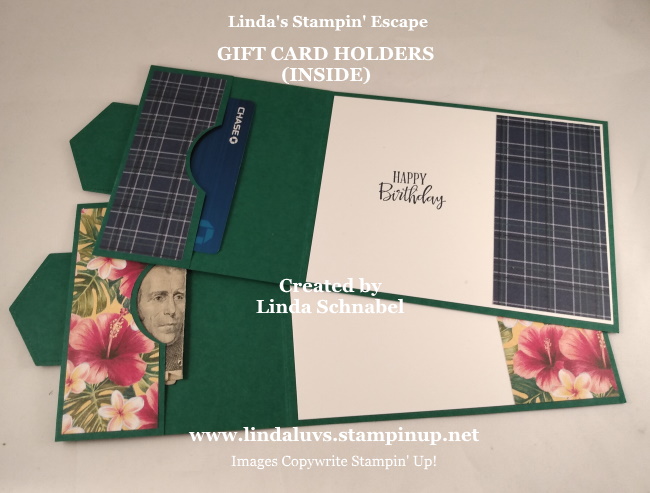
The card front looks like it’s cut short to expose the inner card, but it’s actually scored and tucked inside to create the pocket for your gift cards / money.

I use a punch to take out a piece of the pocket so it’s easier for your fingers to grab that gift! lol  I prefer to use the Multipurpose Liquid Glue to adhere the sides of my holder … holds up better than the Snail Adhesive.

A quick reminder that I have Special for April … When you purchase through me, I will pay your taxes this month.  A $50 order (before Shipping/Tax) will get you the Virtual Rewards Point, your taxes paid, and I’ll send you the PDF instructions w/dimension on how to make the “Gift Card Holder”.

Let me know how I can help you!  Meanwhile, one last look at these cuties today …

With the Retirement List looming … that also means that the NEW CATALOG will soon be here.  All Stampin’ Friends who have purchased within the year, will automatically be sent or given a 2020-2021 Annual Catalog when released.  Make sure you are on my mailing list!!

Thank you for stopping by my blog today, it’s much appreciated.

Have a good day ~


Mosaic Mood Z-Fold Card …

Hello Stampin’ Friends ~

I hope you had a wonderful Easter weekend.  Did you spend a lot of time online chatting with family and friends or are you lucky to have your family members with you.  Either way, hearts seem to find each other don’t they.

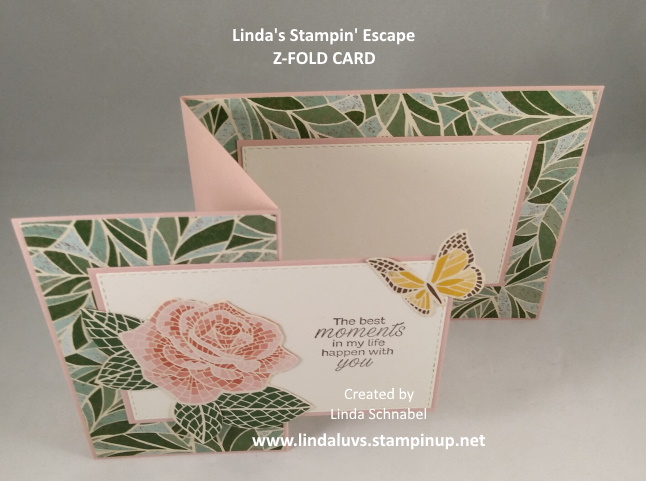
Today I am sharing another Z-Fold card and as promised … I will have Step by Step instructions for you to follow.  I’m using the beautiful “Mosaic Mood” Specialty Designer Paper … the pictures don’t always show the “embossed” areas on the paper, it’s so pretty! I had to cut out my rose and butterfly but I find that relaxing.

Let’s start from the beginning … our card base.  I used Blushing Bride on this card.

  • Cut cardstock: 11″ x 4-1/4″ then score at 2-3/4″ and 5-1/2″
  • Fold cardstock in half, and then at the score line, fold the top back onto itself.  This will give you the Z in your Z-Fold Card!
  • Cut Designer Paper: 2 pieces at 4-1/8″ x 2-5/8″ and 1 piece at 4-1/8″ x 5-3/8″

  • Adhere your designer paper onto your card base.
  • Prepare front and inside of your card.  Die cut 2 pieces of Very Vanilla with the 3rd Largest rectangle from the Stitched Rectangles Dies. Cut 2 pieces of Blushing Bride at: 4-1/8″ x 2-3/4″ these will mat (bottom layer) of the Very Vanilla

  • At this step I fussy cut my rose and butterfly from the “Mosaic Mood” Designer paper to prepare it for assembly.
  • Next step is to stamp the greeting onto the card front.  I have not assembled at this point.
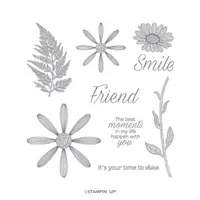
  • Align your cut images into the spots you will want them so you know where to stamp your greeting.  My greeting comes from the Daisy Lane Stamp Set.

  • Now I adhere my Very Vanilla pieces onto the Blushing Bride.
  • Adhere the unstamped piece of cardstock onto the inside of your card … center it.  This will help you align the front piece.

  • When adhering the front piece, remember your front is “folded back upon itself” so only the left HALF of the stamped piece will get adhesive / glue.  If you glue the entire piece … your card will not open.
  • Final step is to attach your rose and butterfly … feel free to embellish with Rhinestones if you’d like.

Congratulations … you have made it through the Z-Fold.  It’s quite simple but a lot of fun to get in the mail!!  Stands up nicely too 🙂

Here are all the ingredients used for today’s card …

In the future I will share the “Double Z-Fold” Card … might have to be a Two 4 Tuesday as there can be variances in the Double Z, but that’s what makes them fun.

Thank you for hanging out with me this Monday.

Have yourself a wonderful day.


Simply Sunday: Easter Wishes

Hello Stampin’ Friends ~

Today I would like to wish you a very Happy Easter.  May your day be filled with love, peace and happiness.  We may not be close to our loved ones but our hearts will be filled with their love.

Enjoy this beautiful day ❤ I will see you tomorrow with the “Z-Fold” card and instructions.

Stampin’ Hugs, Linda

Saturday Share Day …

Hello Stampin’ Friends ~

Today I’d like to share two cards with you.  As some of you know, I asked you to share your card creations with me while we’re under the stay at home order, and my friend Kathie has sent me two cute cards!!

The first was for my birthday 🙂 Thank you Kathie!  It was created with the Free As a Bird Bundle. I have four bundles that I had on my “must have” list and this was definitely one of them.

The birds were stamped and colored a beautiful blue.  Kathie used the Woodland Embossing Fold to add texture to the background.  You will also see this embossing folder used on the second card.

What a beautiful birthday day!!  I’m sure Kathie won’t mind if I share this card with my Mom.  Today would be her birthday …

I’ll share the card from Kathie with her and some of the pretty flowers my daughter brought me with her too ❤

Mom would have liked Kathie’s second card as well … so pretty.  I think this card is perfect for a man or a women. Many of us gals like the outdoors and the card starts out with the Woodland embossing folder.

I believe I’m seeing “Lovely as a Tree” which is retired but I also believe 98% of my stampin’ friends own this set and will enjoy this sample!!

The tree’s are highlighted with the use of the Circle Dies and the pieces of cardstock behind the greeting really draws your eye to the “Happy Birthday”.

I’m hoping you enjoyed Kathie’s card share as much as I did!!  I’d love to see what you’ve been creating in your craft room!!

Thanks for stopping by and I hope  you are doing well.

Enjoy the day ~


Flashback Friday: Hold Onto Hope

Hello Stampin’ Friends,

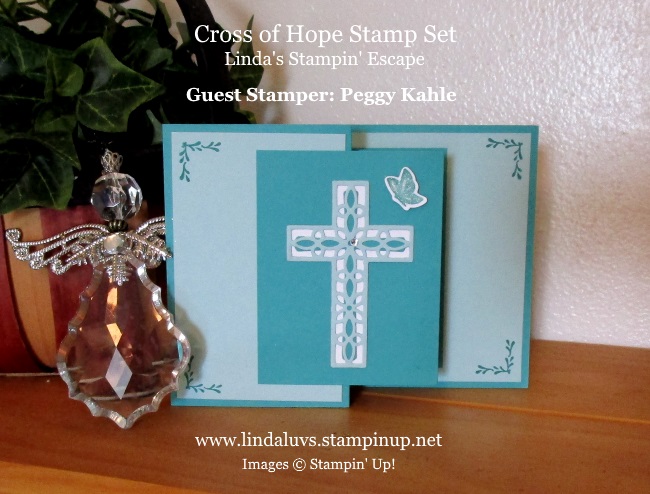
With Easter just around the corner I thought I would share a beautiful card that was created by my friend and fellow demonstrator, Peggy.  This was a swap card from our last Spring Stamping Retreat and I do believe it was the winner! Our guests swap and then vote on which of the cards they like best.  My heart is saddened that we had to cancel this Spring Stamping Retreat due to the Corona Virus.

The color pallet for todays card is Pool Party and Bermuda Bay with a touch of white to pull your eye to the focal point … the cross. Peggy layered the cross which creates it beauty and texture.

Peggy created her card using the “Z Fold” technique … so fun and not to hard to do.  I will share one of my Z-Fold cards with you  in the next couple of days along with step by step instructions so you can recreate these cool cards.

There are several different ways to do the Z-Fold and it’s all based on the dimensions of the “Z” that you are using.  Some appear centered on the card front as Peggy’s and some are smaller and are used to add embellishments to the card.

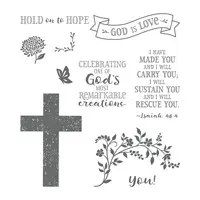
I hope you enjoyed Peggy’s card, it is so pretty and so fitting for this time of year. The Hold onto Hope stamp set and coordinating Cross of Hope Framelits dies are a nice addition to your stamp collection. I purchased mine to go with the Ribbon of Courage stamp set.

FYI … I have the name wrong on my picture!! That’s for the framelits … Hold Onto Hope Stamp Set is correct.

Thank you so much for joining me today. Enjoy your day, and I’ll see you tomorrow!

TODAY’S STAMPIN’ SUPPLY LIST ….


Quick -n- Easy Easter Egg Holder

Hello Stampin’ Friends ~

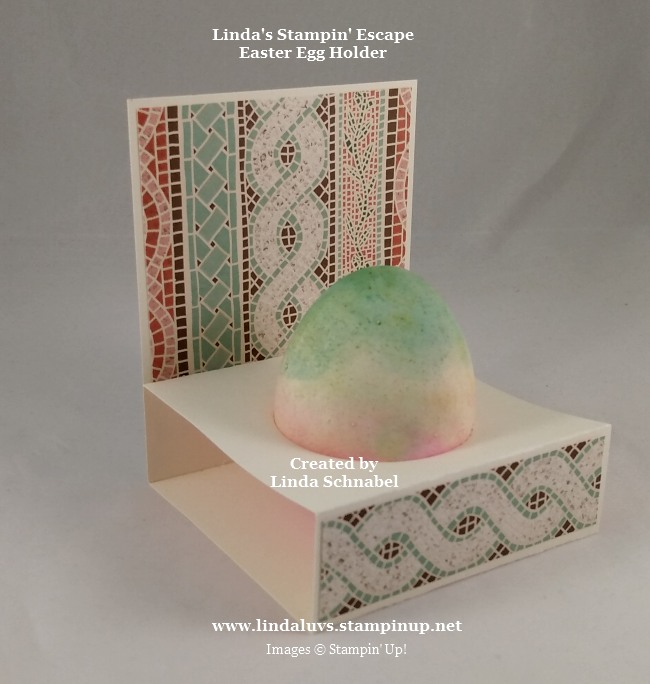
With Easter coming in just days, I have a cute little egg holder to share with you.  It is quick and easy plus you can decorate it with your favorite designer paper, or let the kids help you … yes, they are that easy.

You will start with an 11″ x 3″ piece of cardstock.  You will want to score at 1″ … then 3-3/4″ then 4-3/4″ and finally 7-1/2″. Use your bone folder to press down your score lines, they are much crisper and sturdier.

You can punch or die cut your circle (egg hole) between the first 1″ score line and the 3-3/4″ score line. The size punch or circle die will depend on your eggs! You can set you egg inside a die or punched hole … it should not go further than half way.  That 1″ flap will also be the edge you will take to secure the holder together.

The next 1″ score line is where your first piece of designer paper will go: 2-7/8″ x 7/8″  The back flap (when folded up) will get the second piece of designer paper: 2-7/8″ x 2-7/8 … you won’t need it to fill then entire piece because part of it will be covered up when you glue it together.

Think of the fun you can have … any color cardstock, Dino Days Designer Paper or anyone of our beautiful florals, you could even use the dies cuts or stickers from your Paper Pumpkin kits!  My egg holder is more subtle … I used the Mosaic Mood Specialty Designer Series Paper, the colors and mosaic look reminded me of Easter.

Thank you for checking out my blog post today, and I hope you give these quick -n- cute little Easter Egg holders a try.

Have a fun & creative day ~


Guest Stamper: Pamela L.

Hello Stampin’ Friends ~

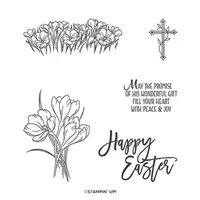
Yesterday I said I had a fun card share with you … well, that will be shared tomorrow and worth the wait!  I received a beautiful card in the mail yesterday and had to share with you! This beautiful card was created with the “Easter Promise” stamp set found on page 45 of the Spring Catalog. You are going to love Pamela’s card …

Was I right?! Beautiful!! Let’s start with the cardstock … Purple Posy was used for the card base. Pamela heat embossed the crocuses in White onto her card base which adds some texture and shine. She used the “Stitched So Sweetly” dies to cut a piece of the Purple Posy vellum (Sale-a-bration item) which actually highlights the embossed flowers and the greeting.

Here are the items used for this card …

Supply List

The greeting is from the Easter Promise stamp set and cut out with the Stitched so Sweetly dies. The crocus was stamped onto the cut out piece and embellished with Wink of Stella! The entire piece was popped up with our Stampin’ Dimensionals.

I have not met Pamela in person … yet!  We were to meet at my Spring Stamping Retreat but I decided to cancel due to the Covid19 outbreak … safety of my stamping friends first.  So we will meet this fall at the Holiday Retreat.  Looking forward to it Pamela and thank you for the beautiful card!!

I thank you for joining me and Pamela today. Hoping you and your family are safe and well. I will be back tomorrow with the “FUN” project.

Have a wonderful day ~


Let Hope Be Your Lighthouse Card …

Hello Stampin’ Friends,

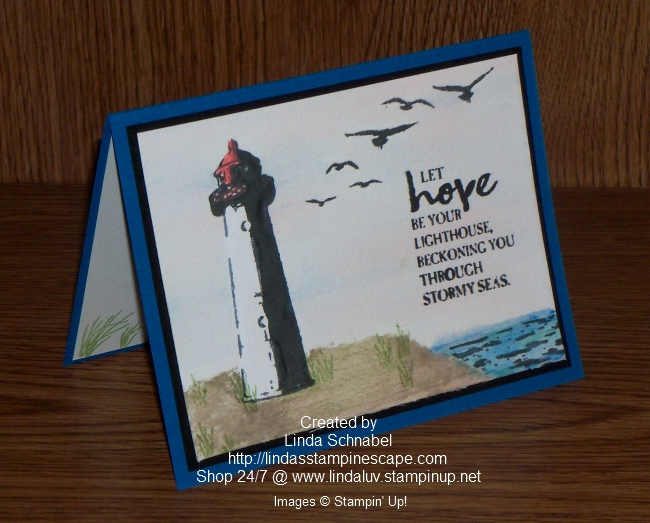
How are you doing?  I hope you’re hanging in there and discovering fun things to do while you are at home.  Today I have somewhat of a landscape card … more like the sea and the mighty lighthouse to shine some hope and happiness to all …

I used the High Tide stamp set, I love that Stampin’ Up! kept this stamp set even though they introduced the new on this year.  My background has a light waterwash to add a touch of color.  This was done with the Aqua Painters.

The water was also colored in using the Aqua Painter after I had stamped it.  Stamps, ink and paper makes this card easy to recreate.  Even the set a birds comes as one stamp so it’s nice and easy to balance out the card.

The greeting fits perfectly for what the world is going through right now … we need hope. And we will get through this and I believe life will be better than before. I do miss hanging out with my stamping friends though!!

Thank you for joining me today.  Take good card of yourself and I’ll meet you back here tomorrow for something “FUN”.


Simply Sunday: Guest Stamper Dawn H.

Hello Stampin’ Friends ~

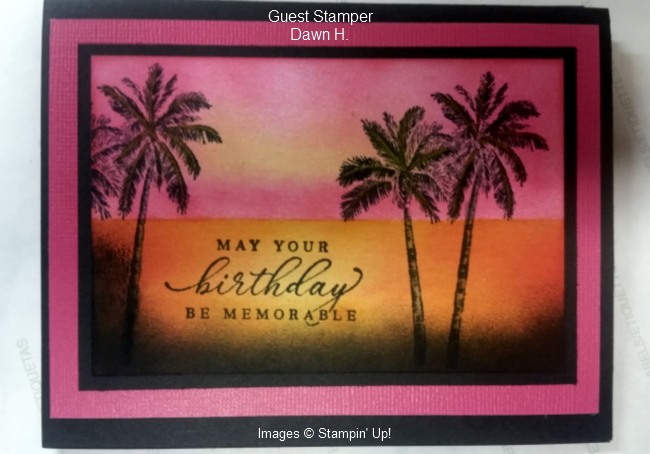
Today I am sharing a beautiful card sent to me by my friend and Club member Dawn H. This card is going to make you wish for warm breezes and beautiful sunsets.

Dawn told me she cased her card from Michelle Zindorf … a fellow demonstrator who specialized in this sponging style.  I’ve done styles similar to this but it inspires me to get back in my studio and create!

Dawn’s color combination is so pretty against the silhouette of the trees.  Just a had to share this beautiful card … Stop back tomorrow to see what I came up with.

Thanks for stopping by.  What inspire you to stamp??

April Showers means Beautiful Flower Cards …

Hello Stampin’ Friends ~

I’m here today to share some cards that remind me of spring … It’s time to bring a little sunshine into our lives. Hope you’re doing well. Sit back and enjoy the parade …

Lets begin with the Perennial Essence Suite.  The pretty flowers are stamped onto the Perennial Essence  Vellum cardstock and punched with the coordinating Perennial Flower punch … and layered onto more of the Vellum cardstock which comes in three colors: Old Olive, Petal Pink, and So Saffron.

Our vellum is then layered over the stunning Perennial Essence Designer Series Paper which features hand-painted impressionistic imagery in rich colors.  I use this designer paper often when I have to make a quick card, because it is so pretty … all you need is a greeting.

The greeting comes from the Floral Essence Photopolymer Stamp Set which is filled with flowers, petals, leaves, and stalks, sentiments for weddings, birthdays, and loved ones!

And speaking of making quick cards, you will love creating with the Magnolia Lane Suite …

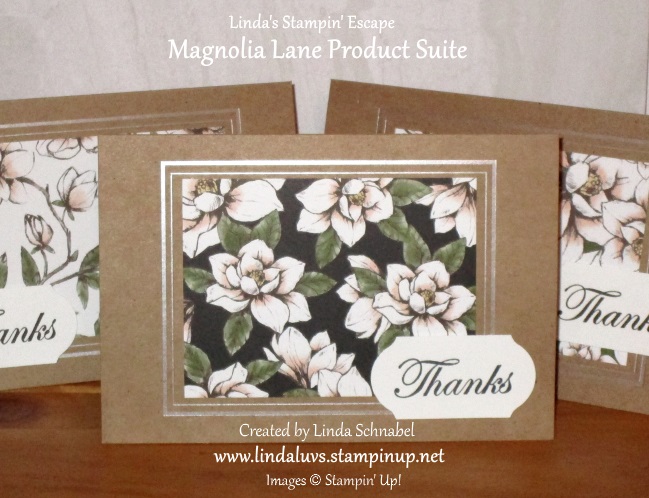
The cards above where created with the Magnolia Lane Designer Series paper and the Magnolia Lane Large Specialty Memories & More Cards & Envelopes … Even the envelopes have liners!!

How simple … the different patterns of the designer paper were cut to fit inside the silver metallic embossing, adhere with your favorite adhesive and then just stamp one of the greetings onto Whisper White cardstock and grab a punch.

The Magnolia Lane Suite Bundle gives you a coordinating selection of products with one simple purchase. It includes the stamp set and tool bundle at 10% off plus one each of the other items listed….

* Good Morning Magnolia Cling Stamp Set (10% off)
* Magnolia Memory Dies (10% off)
* Magnolia 3D Embossing Folder
* Magnolia Lane Designer Series Paper
* Magnolia Lane Large Specialty Memories & More Cards & Envelopes
* Magnolia Lane Memories & More Card Pack
* Magnolia Lane Ribbon Combo Pack
* Magnolia Lane Cork Embellishments
* Stampin’ Blends Combo Pack

I’m going to share several cards that I made using this product suite so you get an idea of all the different things you can do with your suite.  I’ve showed you the designer paper and card pack, now lets focus on the stamp set and how about a fun technique to use with it ….

This technique is called “Spotlighting” … It highlights the image or part of it.  I wanted a bit of drama to the card and adding the black between the stamped image really does this.  If you would like step by step instructions CLICK HERE and it will take you to the original post.  Some subtle sponging and Wink of Stella really takes this card over the top!

If you like glitter and sparkle … this cards for you!  I’ve combined the stamp set and the card pack that we used on the first card to create this stunning card …

Just like the Perennial Essence card, vellum was used to stamp our image on.  I stamped it with White Craft and then heat embossed it with the White Embossing powder. The color was sponged on from behind to add a soft “stained glass” appearance.

The greeting comes from the stamp set and is matted onto the Silver Foil paper, this ties in with the silver border.  The touch of green ribbon comes from the Magnolia Lane Ribbon Combo pack which is also include in the suite.  A touch of “Sparkle” Glimmer paper backs the flower and creates an eye catching background.

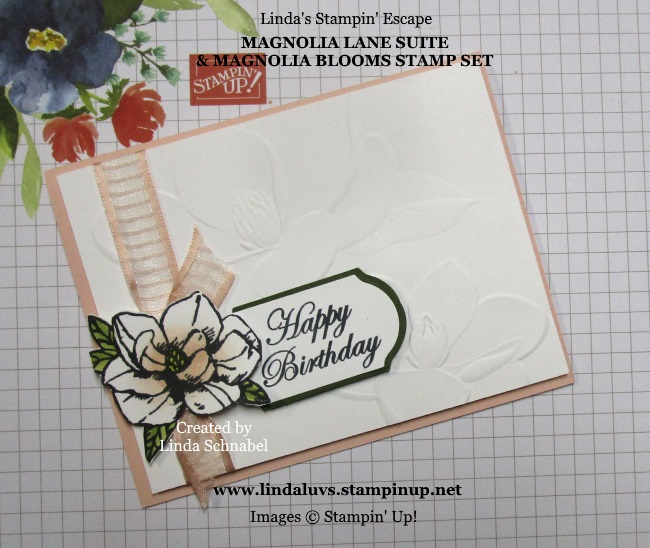
I can’t let you go without showing you the Magnolia 3D Embossing Folder …

This card truly highlights the folder as it is the entire background which adds elegance and a subtle texture and dimension to the card.  The flower comes from a companion stamp set; Magnolia Blooms and does not come in the suite of Magnolia products, but coordinates beautifully. A greeting from the suite, a punch and a little ribbon and your card is complete!

Please let me know if you are interested in any either of the product suites or bundles or ???  Don’t forget … April is my birthday month so I’m paying your tax!!  FREE TAX in April … you don’t here that very often!

Thanks for walking through my floral garden with me!!  Have a wonderful day … Stay safe, healthy and I’ll see you tomorrow!


Guest Stamper: Olivia H

Hello Stampin’ Friends,

Hope you are all doing well today … It’s Friday!  I have to tell myself because sometimes I forget! lol  I was thrilled yesterday as my daughter Andrea surprised me with a new laptop and  to find an envelope in my mailbox … another card share! Yeah!!!!

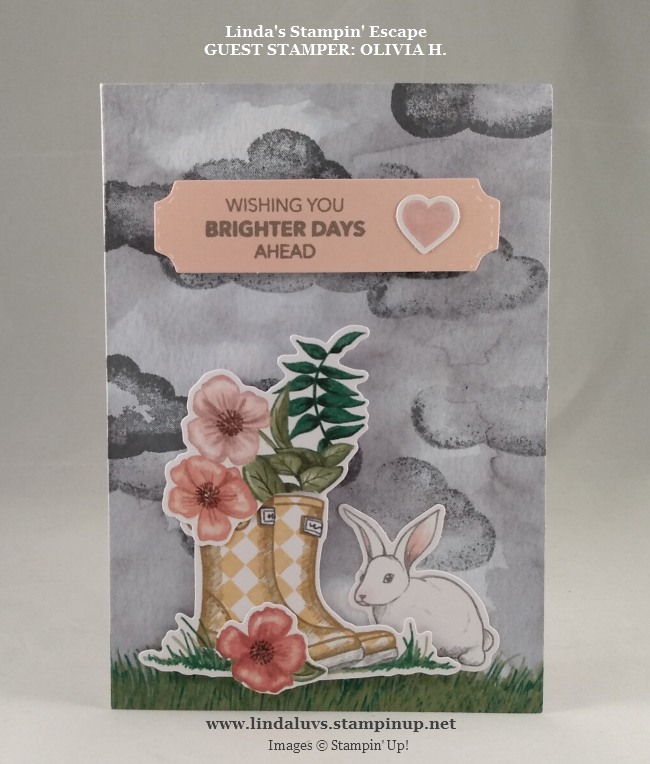
Olivia sent me her version or alternative to the March Paper Pumpkin kit  ….

The card highlights the die cuts included in the Paper Pumpkin … Olivia stamped clouds onto her background which really creates an added depth to the card.  Even simply having the bunny behind the boots and putting the flower right in the front really adds dimension to this card … pretty, right!

It’s amazing how something so simple as the placement of your die cuts can really transform your card into a multi-dimensional image!

Olivia stamped her greeting “Wishing You Brighter Days Ahead” on a coordinating banner … the stamp set, ink spot (mini ink pad) and the banner were all included in the Paper Pumpkin. In fact, everything you need to create your cards / projects from your kits are included!! And … they come delivered right to your door each month!

To finish off her card, Olivia added a bit of “Wink of Stella” on the heart and a “smidge” of color on the bunnies nose!  Those are her words … but I have to say, I love the word “smidge” because it is a term used in one of my favorite movies … It’s a Wonderful Life ❤ “She doesn’t have a smidge of temperature”

And it truly is a Wonderful Life… Many of us maybe home bound but we can still connect with each other through this blog, through social media (which allows us “social distancing”) and through our cardmaking.  Thank you Olivia for sending me your beautiful card so I could share it with our stamping friends.

If you would like to send a card and have it shared on my blog, just send it to : Linda Schnabel * 2019 Miller Street  *  West Bend, WI 53095

APRIL BIRTHDAY SPECIAL ….

It’s my Birthday month so I’d like to celebrate by giving you a GIFT!  Since “Diamonds” are my birthstone and April is “Tax Time” … I will either send you a package of Rhinestones OR will pay the taxes on your order …Whichever is MORE!!  Qualifying orders of $50 or more (before Ship&Tax) can choose their FREE GIFT!  You MUST place your order “though” me so I can apply the FREE TAX or add your Rhinestones for FREE.  Here’s how it works … if you place a $50, the Rhinestones would be shipped FREE because they are higher in value than the taxes … if you placed a $100 or more order, you could choose!  Tax will vary depending where you live. This offer is Valid ONLY through me all month long!

Thank you all for stopping in today, sorry my post is a little late, still learning my new laptop!! lol