Candy Cane Dies & Trick and Treat Bundle Unite for Spooktacular Treats!

Hello Stampin’ Friends,

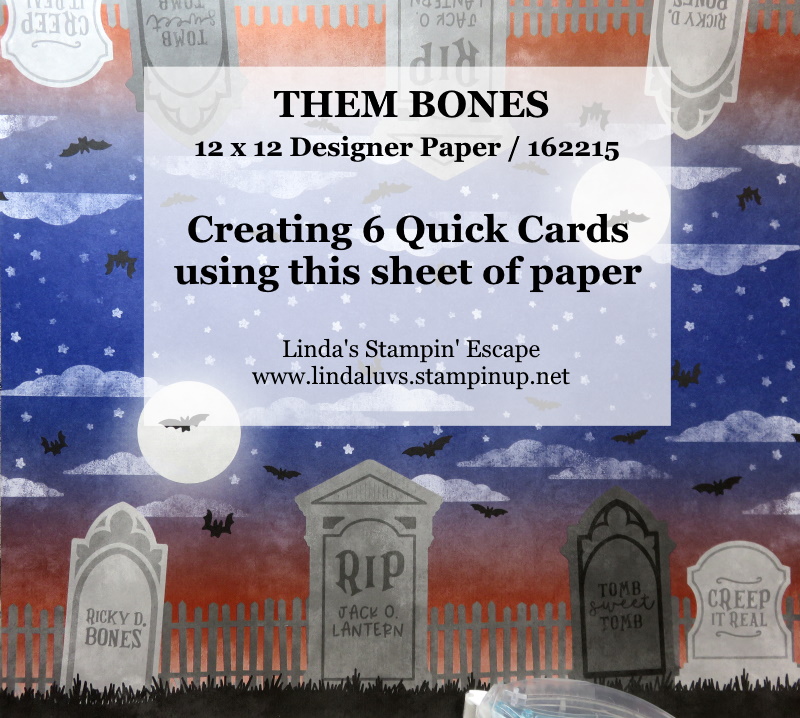
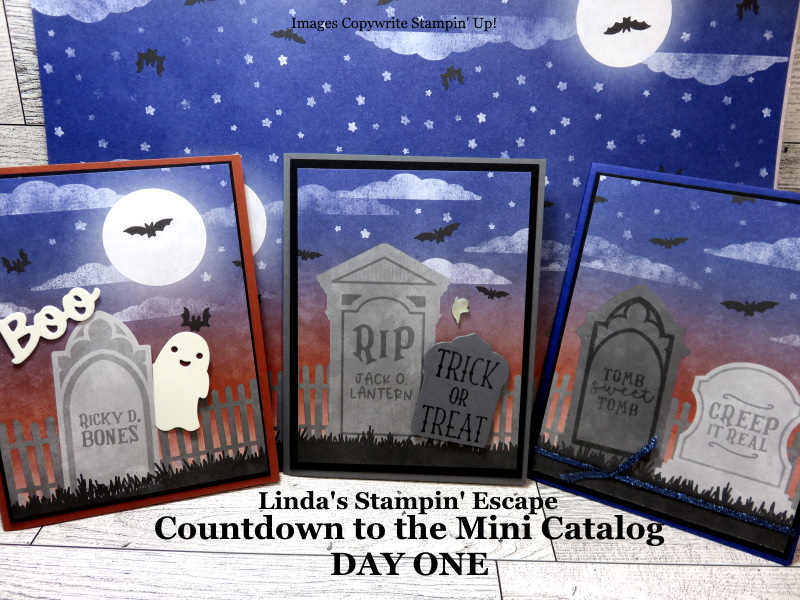
Something Old and Something New: The Candy Cane Dies and Trick or Treat Bundle Unite! If you’re itching to infuse some DIY magic into your Halloween, you’re in for a treat! I’ve got a spine-tingling combination that’s bound to enchant both young and old. And if you want to “save” some cash as well, our Candy Cane Dies are on the clearance rack!! You’ll find the Trick or Treat Bundle in the Holiday Mini catalog. Together, they’re about to bring your Halloween handouts to life!

Check out the video, and then I’ll share the projects with you one more time ….

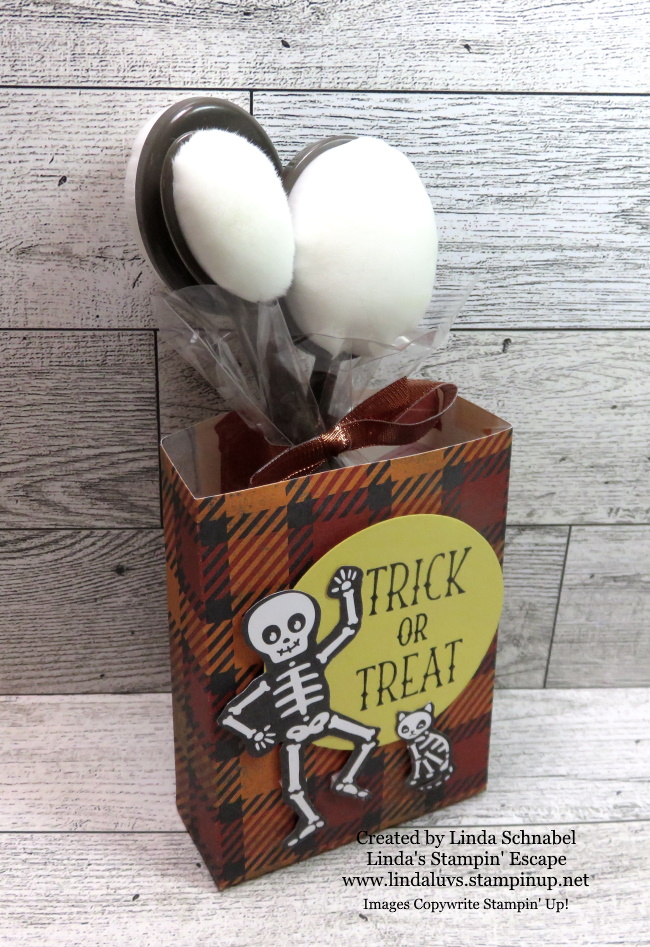
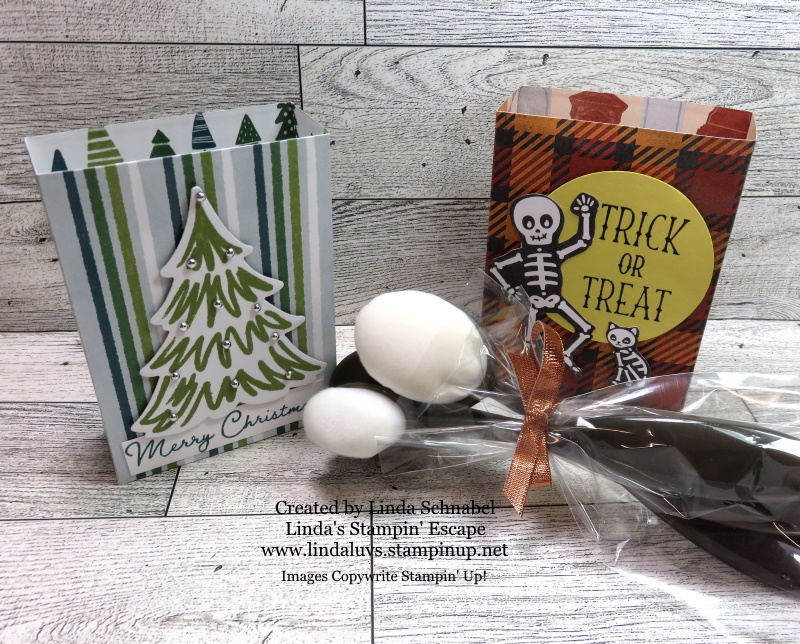
Use the Candy Cane Tag Die and pair it with the Trick or Treat stamps to create eerily delightful Halloween sucker holders. These make fantastic handouts for trick-or-treaters or party favors for your Halloween bash.

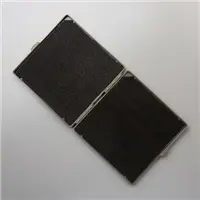
Jazz up your holiday pencils by crafting decorative pencil slides. Add the spooky motifs from the Trick or Treat Bundle, and you’ve got a simple yet charming treat to distribute at school or during your Halloween festivities.

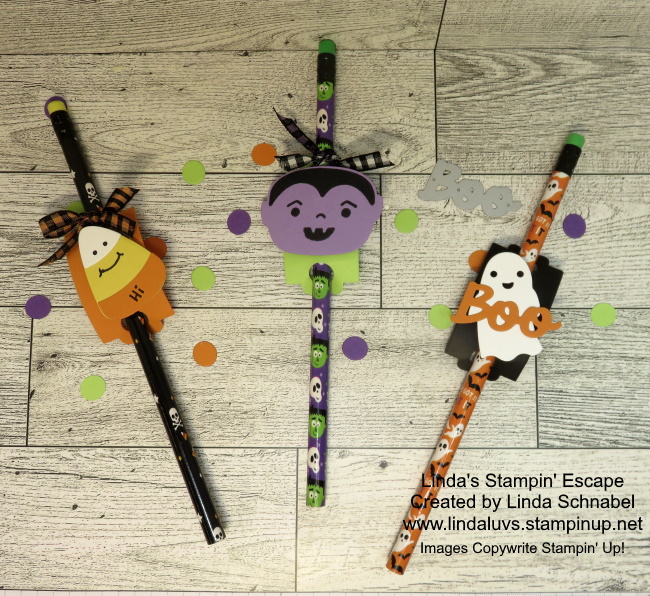
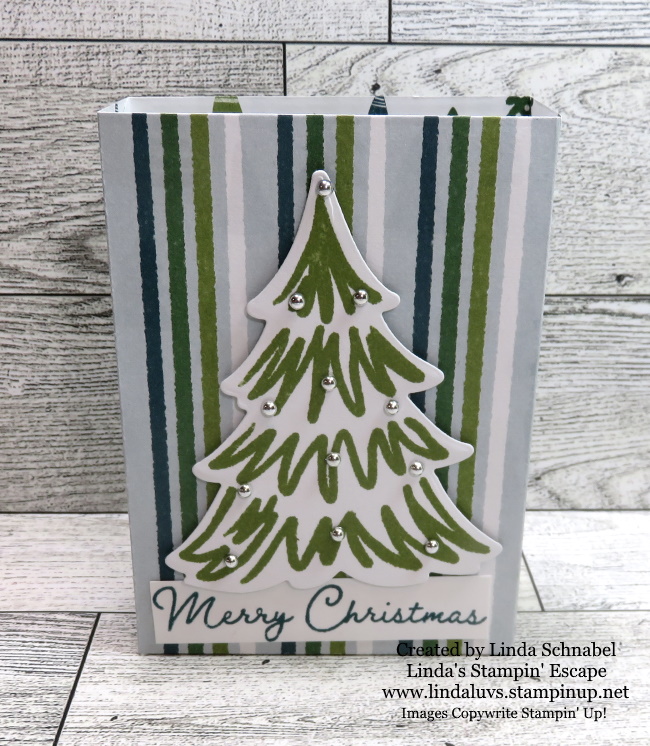
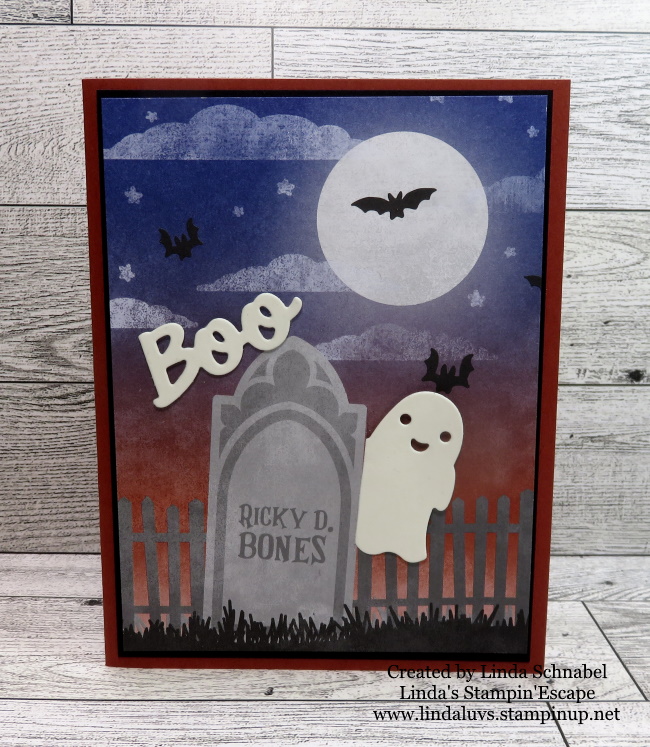
Now lets elevate your candy distribution game by decking out your holiday hand outs. Just a few more ideas for the Halloween party, school treats and handing out when that door bell rings; Trick or Treat!

With the Candy Cane Dies from the clearance rack and the Trick or Treat Bundle from the Holiday Mini catalog, you can easily take your Halloween handouts from ordinary to extraordinary. These delightful creations are perfect for enchanting ghouls and goblins this Halloween night.

Get ready to add a touch of homemade magic to your Halloween celebrations! Happy crafting and a spooktacular Halloween!

Crafting Holiday Magic: A Merriest Trees Christmas Card

Hello Stampin’ Friends,

The holiday season will soon be upon us, and what better way to spread some festive cheer than by sending heartfelt Christmas cards to your loved ones? Today, we’re going to create a stunning Christmas card using the Merriest Trees Dies and the Snowflake Magic 12 x 12 Specialty Designer Paper. This card not only captures the spirit of the season but also showcases some must-have products for your holiday crafting collection.

Let’s begin with a piece of Basic White Cardstock for your card base 8-1/2″ x 5-1/2″ that will be scored at folded at 4-1/4″ . You will also need a card front (white) 5-1/4″ x 4″ and your blending brush with Balmy Blue Classic Ink. Apply a small amount of ink to the brush in a circular motion apply the ink to the card front, this will create a soft glow for behind your tree.

Now, it’s time to bring out the star of the show: the Merriest Trees Dies. Choose a beautiful design from the Snowflake Magic Designer Paper, and die-cut your tree. This paper is ideal for creating intricate and elegant holiday-themed die-cuts.

Carefully place your die-cut tree onto the Balmy Blue background you created earlier. The soft blue glow behind the tree will give it a magical appearance, as if it’s nestled in a snowy forest.

For the finishing touch, let’s add a heartfelt message. The Beary Cute Stamp Set comes to the rescue! I used the “Merry Christmas” to convey my holiday wishes, and stamped onto a scrap piece of cardstock and adhered it near the bottom of the card.

Time to decorate the tree to add your personal touch to the card. Die cut the garland in Balmy Blue that’s included in the Merriest Trees stamp set and add a little sparkle with your Wink of Stella. Lastly you’ll tuck a little Balmy Blue Sparkly ribbon behind the greeting.

Your Merriest Trees Christmas card is now complete and ready to spread holiday joy to your friends and family. Whether you’re sending it in the mail or delivering it in person, your handmade card will surely bring smiles and warmth to those who receive it.

This Merriest Trees Christmas card combines the beauty of Snowflake Magic Designer Paper, the elegance of the Merriest Trees Dies, and the heartfelt sentiment from the Beary Cute Stamp Set. With a touch of Balmy Blue ink, you’ve created a masterpiece that captures the enchantment of the holiday season.

As you embark on your holiday crafting journey, remember that the magic of Christmas lies not only in the materials you use but in the love and thoughtfulness you put into your creations. Happy crafting, and may your holiday season be filled with warmth, joy, and creativity!

Thanks for hangin’ with me today ~

Simply Sunday: A Beary Christmas

Hello Stampin’ Friends,

The Beary Christmas suite shines in the joy of simple, delightful crafting! Today, we’re taking a step back from the complexities of life and crafting to embrace the art of simplicity. We’ll be exploring how to create charming Christmas cards and gift tags effortlessly using the Beary Christmas Memories and More Card Pack in combination with the Beary Christmas Memories Cards & Envelopes by Stampin’ Up!

Before we dive into the crafting magic, let’s talk about what’s included in the Beary Christmas Memories and More Card Pack. This pack is a treasure trove for crafters, especially those seeking an easy and enjoyable creative experience. Inside, you’ll find:

  1. Cards: A variety of beautifully designed, double-sided cards that come in different sizes. These cards feature delightful Christmas-themed artwork, perfect for spreading holiday cheer.
  2. Stickers: An assortment of coordinating stickers that match the card designs. These stickers are great for adding extra flair to your projects.
  3. Journaling Cards: Some cards are designed for journaling or adding personalized messages, making them versatile for different crafting projects.
  4. Memories Cards: These cards are designed for scrapbooking but can be repurposed for other creative endeavors, as you’ll see in our project today.
  5. Coordinating Colors: The color palette in this pack is classic Christmas with shades of red, green, and white.

Now, let’s get to the fun part! When you combine the Beary Christmas Memories and More Card Pack with the Beary Christmas Memories Cards & Envelopes, you can create adorable Christmas cards in no time at all. The pre-scored and pre-folded cards and envelopes make crafting a breeze, especially if you’re new to cardmaking.

Creating Christmas Cards:

  1. Select a Card Base: Start by choosing a Beary Christmas Memories Cards & Envelope as your card base. These cards already have a festive design on the front, saving you time and effort.
  2. Embellish with Memories and More: Pick a Memories and More card or stickers from the Beary Christmas Memories and More Card Pack that complements your card base. You can use double-sided tape or glue to attach these elements.
  3. Personalize: Add a heartfelt message or greeting to the inside of the card using the journaling cards or simply write your own message.
  4. Envelope Decoration: Don’t forget to decorate the envelopes with matching stickers or a touch of your creativity.

But that’s not all; these supplies aren’t just for cards. You can also use them to create easy and charming gift tags for your holiday presents. Here’s how:

  1. Die-Cut Tags: Use the tag die from the Merriest Trees Bundle (or any tag die you prefer) to cut out tags from the Memories Cards or other cardstock in the Beary Christmas Memories and More Card Pack.
  2. Add Festive Touches: Decorate the tags with stickers, additional embellishments, or even some ribbon for that extra holiday charm.
  3. Attach to Gifts: Use a hole punch to make a hole at the top of your tag and thread a ribbon or string through it. Then, attach the tag to your beautifully wrapped gifts.

Crafting doesn’t have to be complicated or time-consuming. With the Beary Christmas Memories and More Card Pack in tandem with the Beary Christmas Memories Cards & Envelopes, you can effortlessly create delightful Christmas cards and gift tags that will bring smiles to your loved ones’ faces. It’s the perfect crafting experience for beginners or anyone seeking a simpler, more joyous way to celebrate the holidays through handmade creations.

So, grab your supplies, put on some holiday tunes, and enjoy the magic of simple crafting this Sunday. Happy crafting! 🎄✨

Celebrate the Season with the Joy of Christmas Suite

Hello Stampin’ Friends ~

Today we will be celebrating the upcoming season with the Joy of Christmas Suite. Many of you are beginning your holiday cardmaking, and what better way to do so than with beautiful handmade Christmas cards? The Joy of Christmas Suite from Stampin’ Up! offers everything you need to create stunning holiday greetings that will warm the hearts of your loved ones.

In this blog post, we’ll focus on two exquisite components of this suite: the Joy of Noel dies and the Joyful 12 x 12 Specialty Designer Paper. I’ll also demonstrate how to make a simple yet elegant Christmas card, embellished with Gold Festive Pearls, using Cherry Cobbler cardstock and Gold Foil. Let’s dive into the world of festive creativity!

The Joy of Noel dies are the perfect addition to your crafting arsenal this holiday season. These intricate dies allow you to effortlessly create stunning holiday-themed designs that will leave a lasting impression. One of the standout features of these dies is the word “Noel,” which adds a touch of elegance to any project.

The Joyful 12 x 12 Specialty Designer Paper is a delightful collection of holiday-themed patterns and designs. With its rich color palette and intricate patterns, this paper is ideal for creating beautiful cards and projects. It includes metallic accents that add a touch of opulence to your creations, making it the perfect choice for your Christmas-themed projects.

  • Cherry Cobbler cardstock (8.5″ x 5.5″, folded in half to create a 4.25″ x 5.5″ card base)
  • Gold Foil (4″ x 5.25″)
  • Joyful 12 x 12 Specialty Designer Paper (3.75″ x 5″)

Using the Joy of Noel dies and a die-cutting machine, cut out the word “Noel” from the Gold Foil. This is a great paper saving technique. Now you can attach the Gold Foil to your Cherry Cobbler Cardbase, and the Joyful Designer paper over that. Using Dimensionals, attach your “NOEL” to the cardfront.

Add Gold Festive Pearls to the card to enhance its elegance. You can place them strategically around the “Noel” die-cut or as you prefer.

With the Joy of Noel dies, Joyful 12 x 12 Specialty Designer Paper, and other coordinating products, you can create beautiful, heartfelt Christmas cards that will bring joy to your loved ones. This simple yet elegant card, adorned with Gold Festive Pearls, is just a glimpse of the endless possibilities this suite offers.

So, gather your supplies, let your creativity shine, and share the magic of Christmas with handmade cards that truly convey the spirit of the season.

Happy crafting ~

Embrace the Season with my All About Autumn Card

Hello Stampin’ Friends,

As the leaves start to turn brilliant shades of red, orange, and gold, and the air becomes crisper, it’s time to welcome the beauty of autumn into our crafting. Stampin’ Up! has made this transition into the fall season seamless with its remarkable All About Autumn Suite from the Holiday Mini catalog. Today, we’re going to take a closer look at this suite by creating a stunning card that captures the essence of autumn.

My cardbase is in the inviting shade of Pecan Pie, setting the stage for the seasonal masterpiece we’re about to create. We’ll also use Pecan Pie cardstock to craft delicate leaf veins, adding an extra layer of authenticity to our design.

To add depth and character to our card, we’re using the Distressed Tile 3-D embossing folder on a mat of Pretty Peacock cardstock. This embossing folder provides an intricate tile-like pattern that perfectly complements the organic feel of our autumn-themed card.

Texture plays a role in bringing the beauty of autumn to life, and for that, I used the Oxidized Specialty Paper. The paper’s unique texture and shimmery finish mimic the natural, weathered look of leaves as they gracefully transform during this season. The leaves are cut from this paper, ensuring they stand out with their distinct appearance.

The Layering Leaves stamp set offers the ideal sentiment for the card. I’ve chosen the greeting, which was stamped with Pretty Peacock ink. It’s then cut out using a circle die from the Stylish Shapes dies, creating a focal point that beautifully ties the card together.

To add a final touch of elegance and a hint of metallic shimmer, we’re incorporating Brushed Copper embellishments. These embellishments add just the right amount of sophistication to our design, elevating it to a whole new level.

The All About Autumn Suite offers a abundance of creative options for crafting beautiful fall-themed cards. From coordinating stamps and dies to versatile paper options, it’s a crafting paradise for autumn enthusiasts (like myself!). There’s no better way to welcome the season than by creating your own autumn-inspired cards and projects with this remarkable suite.

I hope today’s card inspires you to grab your supplies and get ready to create some unforgettable fall memories!

Countdown to the Mini Catalog Party: A Week to Remember!

Hello Stampin’ Friends!

I know I’ve been little MIA lately, but there’s a perfectly good reason for it – I’ve been having a blast with many of you on my Linda’s Stampin’ Escape Facebook page for the Countdown to the Mini Catalog party! It’s been three incredible days filled with creativity, games, prizes, and live demonstrations, and I can’t wait to tell you all about it.

Our party kicked off with a bang, diving straight into the spooky spirit of Halloween. We explored the exciting new products in the Mini Catalog designed for this hauntingly delightful holiday. From whimsical ghosts to eerie pumpkins, there was something for everyone to fall in love with. The comment section was buzzing with ideas and inspiration as we shared our favorite picks and creative tips.

This cute little bag was just one of the products shared during a LIVE demonstration. It comes from the Tricks and Treat Bundle, and includes the die to cut your favorite designer paper. It’s so simple, just cut 2 pieces out, fold on the score lines and glue the small flaps to the sides … then don’t forget to glue the bottom flaps!! And yes, I fussy cut the skeleton and his scaredy cat!!

As we rolled into the second day of the party, our focus shifted from pumpkins to twinkling lights and ornaments. The Mini Catalog’s Christmas-themed products had us all giddy with excitement. We explored festive card designs, handmade gift ideas, and elegant decorations for the holiday season. The virtual party room was filled with the sound of joyful anticipation for the most wonderful time of the year. I have so much to share with you yet.

Till then, let me show you the cute Christmas bag we made using the same bag die …. I used “A Walk in the Forest” Designer paper. The tree is also from the designer paper and was die cut from the Merriest Tree’s Bundle.

The “A Walk in the Forest” Designer paper… Is not just another designer paper, it’s a heartfelt contribution to Stampin’ Up!’s Making A Difference campaign. For every package of this beautiful paper sold, Stampin’ Up! is committed to donating $3 to Toys for Tots. It’s such a wonderful way to make a difference while indulging in our crafting passion. So, when you use this paper for your projects, know that you’re not only adding charm and creativity to your creation but also spreading joy to children in need during the holiday season. What could be more heartwarming than that?

Just when we thought the party couldn’t get any better, I had a little surprise up my sleeve. I announced that I would be turning this fantastic gathering into a Mystery Hostess Party! The excitement in the virtual room reached a fever pitch – what an incredible twist! One lucky participant will get to shop with the party rewards.

Throughout these three days, I was reminded of why I love what I do. Being able to share my passion for stamping and crafting with all of you, my Stampin’ Friends, is an absolute joy. I want to thank each and every one of you for making this Countdown to the Mini Catalog party so special.

But let me tell you a little secret – this won’t be the last surprise you’ll see from me at my parties, events, or retreats. I’m always looking for ways to make our stamping adventures even more memorable, so stay tuned for what’s coming next!

Thanks for joining me today ~

Here is a list of supplies used to create both of my Gift Boxes … All items are available as of this morning 9/7/2023

Create Six Quick & Cute Halloween Cards

Hello Stampin’ Friends and Halloween aficionados!

It’s that time of year again, where the air gets chillier, the leaves change colors, and pumpkin spice everything is back in action. But you know what makes this season even more thrilling? Crafting your way through Halloween with the Tricks and Treats Bundle and the spooktacular Them Bones Designer Series Paper from Stampin’ Up!

We’ll be diving headfirst into the magic of Halloween crafting using these bewitching products. To get you in the spirit, I’m going to show you how to create not one, not two, but three fantastic Halloween cards from a single sheet of the Them Bones Designer Series Paper! 🦴🕸️

Start by cutting your 12 x 12 in half … we’ll trim it down from there. You’ll want to trim it down to 5-1/4″ and then cut your long piece in 4″ sections for your cards … just attach these to a card base and voilà! You’ve just conjured up six spine-chillingly fabulous Halloween cards using only one sheet of the Them Bones Designer Series Paper!!

Now I wanted to take it up a bit so I trimmed my individual pieces down a little further and added a 4″ x 5-1/4″ Black Mat.

Lets take a walk through our graveyard and I’ll share my spooky secrets for creating these cards and I’ll begin to add the Tricks and Treats Bundle.

CARD 1: Simply Creeping it Real …

Once I mounted the designer paper onto the Black Matte, I added the Starry Sky Ribbon and attached the card front directly on to the base.

CARD 2: Trick or Treat

For this card I simply stamped my greeting and then die cut it, the stamp and die comes from the Tricks and Treats bundle. The die is actually a tag die but I cut off the bottom to turn it into a gravestone! Spooky cool stampin’ tip!! I then embellished with one little Glow in the Dark Ghost.

CARD 3: Ricky D. Bones

Hope you have a strong heart because this graveyard is haunted! Using the Glow in the Dark Specialty paper, I die cut my ghost and greeting. I used an exacto knife to create a slit next to my gravestone so my ghost appears to be coming out from behind it.

Once you create the first 3, the second set will be easier! These cards are sure to delight your friends and family with their ghostly charm.

Get ready to make your Halloween crafting dreams come true with the Tricks and Treats Bundle and the Them Bones Designer Series Paper when the catalog goes LIVE tomorrow 🦇🌙🎃

Thanks for stopping by 🧙‍♂️👻🦴 Join me tomorrow during Day 2 of my Countdown to the Mini Catalog … we’re heading into Beary cool territory tomorrow!

A Patchwork of Fun: DIY Birthday Card with a Twist!

Hello Stampin’ Friends,

Are you ready to embark on a creative journey filled with a blast of color and a touch of sass? Well, you’re in for a treat today as we dive into today’s birthday card that’s as fun and vibrant as it gets. So, grab your Patchwork Pieces Dies, Stargazing Designer Paper, and Wanted to Say Dies, because we’re about to get crafty!

Start by selecting your Lemon Lime Twist cardstock for the card base. This lively green hue sets the stage for our vibrant creation. Cut the cardstock to 8-1/2″ x 5-1/2″ and fold it in half – this will be the canvas for your masterpiece.

Now, it’s time to incorporate some whimsical patterns into our design. Take out your Stargazing Designer Paper, and die cut one of each of the Lemon Lime Twist and Pumpkin Pie patterns … This gives you enough for 2 cards. I added a piece of black and white dotted designer paper from some I had laying around to add some fun pops of white. Cut a piece of Basic Black 4″ x 5-1/5″ (same as the Polka dot paper) …This will be the backdrop for our patchwork pieces.

This is where the magic happens! Grab both colors of your Patchwork Pieces and adhere them to the black to create a medley of funky shapes. Arrange them on your card in a random, patchwork-style pattern. Don’t worry about perfection – the more whimsical, the better! Now, trim down the black cardstock to create a border around your funky pattern.

The greeting comes from the Wanted to Say Dies. Cut out the base sentiment from the black and the detail “birthday” from your Lemon Lime Twist cardstock. Stack them and glue them together with your Liquid glue. You can even add a touch of Wink of Stella for some glitz!

Your card is almost ready to dazzle! To really make that greeting POP, punch or die cut a circle from your Vellum Cardstock and attach to the front of your card. If you like, add a few embellishments like sequins, rhinestones, or even a ribbon bow. These little details can take your card to the next level.

There you have it, friends – a DIY birthday card that’s bursting with color, personality, and a sprinkle of sas. Perfect for all ages, this card is sure to bring a smile to anyone’s face. Time to embrace your creative side, laugh a little, and send some handmade joy to your loved ones.

Happy crafting, and even happier birthdays! 🎉🌟🎈

If you enjoyed today’s fun and colorful card and found it inspiring, here’s a list of the supplies you’ll need to recreate the card. Spread joy and connect with others through your handmade creations.

Exploring Creative Possibilities: Direct-to-Block Spritz Technique with Water-Based Ink Dyes

Hello Stampin’ Friends,

Welcome to September, a month filled with the promise of autumn’s vibrant colors and creative inspiration. To kickstart this exciting month, I’m thrilled to introduce you to the “Direct-to-Block Spritz” technique using our water-based ink dyes. In this blog post, I will guide you through the process of creating two distinct looks with the same technique. So, grab your supplies and let’s dive into this innovative and fun crafting journey!

Step 1: Prepare Your Workspace

Set up a clean and well-lit workspace, protecting it with a craft mat or disposable tablecloth to avoid any ink stains.

Step 2: Choose Your Colors

Select the water-based ink dyes that you’d like to use for your background. I used Cajun Craze, Pumpkin Pie, Crushed Curry and Old Olive with worked wonderfully for this project.

Step 3: Apply Ink to Acrylic Blocks

Tap your ink pad of each chosen ink color directly onto separate acrylic blocks… I use a Sponge Dauber or my finger to blend the sharp lines. Don’t overlap colors too much… this will make it muddy. This will serve as your ink palette.

Step 4: Spritz with Water

Lightly mist the ink colors with your Stampin’ Spritz to activate the pigments and create a watercolor effect.

Step 5: Create Your Background

Gently press the inked acrylic blocks onto your Basic White, Very Vanilla or Watercolor paper. Experiment with different angles and color combinations to achieve the desired look.

Step 6: Let it Dry

Allow your background to air dry completely. This might take some time, so be patient. You can use a heat tool to speed up the drying process if you’re in a hurry.

Now we are ready to create our cards: The first card will showcase the mesmerizing background effect achieved using the Direct-to-Block technique. I added a stamped image to incorporate some additional design which comes from our Nature’s Prints stamp set (I also used this stamp set on yesterday’s card). This highlights our beautiful technique.

To create some extra dimension, I stamped the Old Olive background of my card base with the spatter stamp in the same set, and added texture by embossing the “Spatter” from the Stripes & Spatter Embossing Folder.

The second card will take the design a step further by using it to die-cut leaves from our upcoming Autumn Leaves Bundle, set to launch in our mini catalog on September 6th. I used the Stripes & Splatter Embossing Folder to add texture to this card as well (you must run it through twice to emboss the entire piece). I love the simple & clean look of this card.

With the Direct-to-Block Spritz technique and our water-based ink pads, the possibilities for creativity are endless. Whether you’re crafting a stunning background or using the design to enhance your projects, this technique is a fantastic way to welcome the autumn season with a burst of color and style.

Don’t forget to mark your calendars for September 6th when our Autumn Leaves Bundle becomes available in our mini catalog. I hope this blog post has inspired you to experiment with this technique and explore new horizons in your crafting journey.

Thanks for checking out today’s post. Happy September 1st!!

Spooktacular Card with Water-Based Ink Pads and the Magic of Masking

Hello Stampin’ Friends,

Today I have an enchanting combination of water-based ink pads, masking, and blending techniques to help you brew up some spooktacular Halloween fun!

Let’s dive into the enchanting world of water-based ink for the masking technique using our blending brushes to create a mesmerizing background. We’re creating a Halloween card using the Tricks and Treats bundle from our new Holiday Mini Catalog. Sit back and watch while I stir things up ….

Let’s talk about the fabulous water-based ink pads. These little magic makers are perfect for your Halloween crafting escapades. They are easy to use, vibrant, and blend like a witch’s brew!

Blending is like the magic spell that ties everything together and gives your card that “wow” factor. And speaking of “wow” … let’s see those Glow in the Dark Bats & Ghosts.

Now that you’ve unleashed your inner Halloween crafting wizard, you might be wondering why you should bother with masking and the blending brushes… There’s something therapeutic about this technique, it’s like creating your very own therapy session. And you can totally change up the theme.

As promised in the video, I went from a spooktacular Halloween card to a stunning card sending hugs ….

The spooky background with a full moon was transformed into a warm background and heartfelt feelings that can be sent to a friend to show you care. Instead of bats and ghosts, I stamped some pretty foliage from the Natures Prints stamp set.

A slight change to a White mat and a Gorgeous Grape card base can help and soften that transformation.

So, there you have it – a bewitching blend of Stampin’ Up! water-based ink pads, masking, and blending techniques to brew up some Halloween magic or a total transformation. Remember, crafting is all about having fun.

Now, go forth, my friends, and create cards that are spooktacular… or sensational! Thanks for hanging out with me.

Get Creative with Water-Based Ink and the Dragging Technique

Hello Stampin’ Friends ~

Today, we’re diving into the wonderful world of water-based ink and a technique that’s as fun as it is beautiful: the Dragging technique. We’ll be using the Gorgeous Garden dies to cut out our inked creations & add a touch of elegance. Get ready for some crafty goodness we explore the ease and creativity of this technique!

The dragging technique is a simple yet versatile method that involves dragging your water-based ink across the surface of your cardstock for a stunning effect. You can use a straight drag motion as shown above, or you can put your creative juices into it and drag is several different directions.

Once your inked background is dry, it’s time to break out the Gorgeous Garden dies. Carefully align them over your masterpiece and run them through your die-cutting machine. Voilà! You’ve just turned your inked creation into a work of art.

Next you’ll want to create that layered look by simply gluing your Gorgeous Garden die cut onto a piece of Old Olive cardstock … Let Dry and trim down to 5″ x 3-3/4″. Layer with a Basic Black mat measuring 5-1/4″ x 4″. Using dimensionals, attach to Old Olive cardbase.

Let’s not forget the greeting! Use the Layer Leaves stamp set to stamp a heartfelt message, and then use the Stylish Shapes dies to give it shape. Time to use up the left over Threaded Twine that we used on our last card … It’s like giving your project a little bowtie – classy and fun!

The twine also reflects the “natural look” that blends well with the leaves, and adds so much texture and dimension to your card. Pop this up with our Stampin’ Dimensionals. Don’t forget to embellish … I used the Classic Matte Dots in Black to pull out the color of my mat. Clever!

Crafting should always be an adventure, and the dragging technique with water-based ink proves just that. Whether you’re a seasoned pro or a newbie in the crafting world, this technique offers endless possibilities for creativity. So, grab your supplies, unleash your inner artist, and let your imagination run wild with water-based ink and the Gorgeous Garden dies.

Thank you for hanging out with me today … have fun!

Unleash Your Creativity with Water-Based Inks

Hello Stampin’ Friends,

It’s time to Unleash Your Creativity with Water-Based Inks with some tips and techniques to help you in your cardmaking and scrapbooking! On Saturday I shared the differences between three of our most popular inks (Click Here to View) Whether you’re a seasoned crafter or just starting on your creative journey, water-based inks offer a world of possibilities to enhance your projects.

All this week, we’ll explore the exciting world of water-based inks and share tips and techniques that will take your card making and scrapbooking to the next level.

Why Water-Based Inks?

Water-based inks are immensely popular in the crafting community for several reasons:

  1. Versatility: Water-based inks work on a variety of surfaces, including paper, cardstock, vellum, and even fabric. They’re also great for different crafting techniques, making them incredibly versatile.
  2. Ease of Use: These inks are beginner-friendly, forgiving, and easy to clean up. You don’t need specialized equipment or ventilation like you do with some other types of inks.
  3. Blendability: Water-based inks can be effortlessly blended to create beautiful gradients and backgrounds. This feature is especially handy for creating unique card backgrounds and scrapbook pages.
  4. Layering: You can layer multiple colors to achieve complex effects and depth in your projects. This allows for endless creative possibilities.

Today we’re going to start with the basics … Simple stamping with a hint of a fun technique called “Stamping Off”. You can use pre-folded cards or cut and fold your own from cardstock. My base is an A2 size card; 8-1/2″ x 5-1/2″ scored and folded at 4-1/4″. Decide on the card’s theme and the colors you want to use. This is where your creativity shines.

Today we are using the new Autumn Leaves Stamp Set along with the Crushed Curry, Old Olive and Pumpkin Pie water-based ink pads! The Autumn Leaves is a photopolymer stamp set so for best results I use the Stampin’ Pierce mat to stamp onto. (Use a scrap piece of paper over the top to keep it clean).

As for our technique to “stamp off” … you’ll ink up your image and then stamp it onto a scrap piece of paper before stamping it onto your cardstock. Position your inked stamp over the desired area on your card. Apply even pressure, pressing down firmly but not too hard. Hold the stamp in place for a moment to ensure the ink transfers. The veins for the leaves are inked up and then stamped directly over the stamped off leaf, giving it the look of dimension. It’s magical.

After use, clean your stamp with the Stampin’ Scrub or paper towel. I stay away from baby wipes, but if you use them, make sure they are alcohol, lotion and lint free… the last thing you want is to have on your stamps or ink pads is a foreign substance. This maintains the quality of your stamps.

I stamped the greeting onto a scrap piece of white cardstock using the Old Olive ink then trimmed it down. I added some of the Threaded Twine behind it after breaking it apart by pulling out a few threads. I used Stampin’ Dimensionals to pop it up. This was all layered onto a piece of 4-1/4″ x 5-5/8″ Crushed Curry mat.

Stamping cards with water-based inks is a fun and rewarding creative hobby. With practice and these tips, you’ll feel like a master card maker in no time. Each card you create will be a work of art, made with love and care…. and that is why we stamp! So, gather your materials, unleash your imagination, and start stamping your way to heartfelt greetings and beautiful cards!

Thank you for joining me today. Hope you enjoyed a little peek into the New Mini Catalog too!! The products in the Mini go LIVE on the 6th of September, however I did list the other products below.

Simply Sunday: Gold Celebrations Card

Hello Stampin’ Friends,

Let me take you into a sparkling world where you’ll dazzle your friends with our Gold Celebrations Card! This is a step up from your basic stamping, but with your Stampin’ Emboss & Die cut machine, you’ll be able to crank out 6 of these cards in just minutes!

Let’s begin with our supplies: You will need Very Vanilla Cardstock, the Gold Celebrations 12 x 12 Specialty Designer Paper, and the Gold Foil … Yep, that’s it!! Oh, and your Multipurpose Liquid Glue and Stampin’ Dimensionals!

Your dimensions for the card include:

  • Vanilla Cardstock: 8-1/2” x 5-1/2” scored and folded at 4-1/4” plus one piece 5” x 3-3/4”
  • Gold Celebrations paper: 5” x 3-3/4” (You will get 6 pieces from one sheet)
  • Gold Foil Sheet: 5-1/4” x 4” (You will get 6 pieces from one sheet)

Now that you have your basics cut, it will be easy to recreate this card. Let’s do our die cutting next. Using the Gold Foil sheet for your card, use the bold / bottom part of your Celebration greeting … this comes from the “Wanted to Say” Dies … and the stars that are included as well. ***Be sure to use a bottom cutting plate that is not too scuffed up, as those may come through on your foil. I always keep one plate for foils (until it looks like my other “very” loved plates!)

Cut the detailed “celebrate” with the left-over 1/4 sheet of the vanilla cardstock. Using your glue, adhere them together.

Now it’s time to put the card together …. flip your Gold Celebration acetate sheet upside down and place a dot of glue behind many of the stars and graffiti, this will hold your Gold Celebrations onto the small piece of vanilla. You will notice in the cutting dimensions that these are cut to the same size. Attach the “celebration” and the stars (I cut some apart) onto your sheet using dimensionals … you’ll have to trim them down. I use the edges for this part.

Now you can layer this piece over the gold foil sheet … no one will see that you’ve cut out your greeting, and you didn’t waste any gold foil!! Clever. Now, you may glue your card front onto the base or you can attach it with more of your Stampin’ Dimensionals … the choice is yours.

Who wouldn’t love this fun, sleek and sexy card … and it’s so easy to make! It looks like you’re already throwing the party. It’s perfect for a 50th Wedding Anniversary, someones “Golden” Birthday, or maybe a Retirement card, because just retiring from my job just months ago … It’s a CELEBRATION!! lol

Thank you for taking time out of your Sunday to stop over and visit. Hope this inspires you to celebrate someone, or yourself … you deserve it too! I have listed the product links to the bottom of this post if you are interested in making the card I shared today.

Thanks again & enjoy this beautiful day ~

Ready for a Scary Sneak Peek …

Hello Stampin’ Friends,

As promised I have a bit of a sneak peek for your today …. something old (annual catalog) and something new (Mini catalog). My “old” / something from the Annual catalog is the Patchwork pieces dies. The “new” is the Tricks and Treats Bundle. All you Halloween lovers are going to get a kick out of this one ….

This card is just bursting with fun … Love how the rays just shoot out from under the moon, and the haunted house is gently lite not to scare our ghosts away … they are only looking for a safe haven!! lol

My cardbase is a piece of 8-1/2″ x 5-1/2″ Basic Black that’s scored at 4-1/4″ and folded. Next I cut a piece of Lemon Lime Twist at 4″ x 5-1/4″ for my mat which will be used to arrange my die cut patchwork pieces. The pieces were cut from the Stargazing 12″ x 12″ Designer Series paper and another from the Basic Black.

I used the Lemon Lime Twist cardstock as a guide to align the pieces in every other color … starting with the corners and then filling in the rest of the pieces and spacing them evenly. I used my Tombo Liquid glue to secure them to the mat.

Using the Memento Ink I stamped the Haunted House and then I die cut it with the coordinating dies. I stamped the “Trick or Treat” onto Daffodil Delight … then I punched it out with the coordinating 2-3/8″ Circle Punch. Once punched, I used the small blending brush to add some dimension / shading to it.

I used the ghosts from the Glow in the Dark Bats & Ghosts to embellish my card. These little cuties and some fun texture and a glow of warmth. Are you ready for Halloween decorating soon? The Tricks or Treats Bundle will be available on September 6th … not too long yet.

Thank you for coming over to my blog, I appreciate it. Have a great day.

All About Autumn Sneak Peek …

Hello Stampin’ Friends,

I’m excited to share the video, dimensions and the cutting guide for the All About Autumn 6″ x 6″ Designer paper. This is not just a sneak peek, it’s a treat for your senses … I love fall, it’s my favorite season!

Join me, grab the popcorn and a seat and lets watch the video ….

Now lets review the dimensions for the card base … they are quite simple.

CARD BASE: 8” x 5-1/2” then score at 3” … 6” … and 7”. 

STEP PORTION: 6” x 3” then score at 4-1/4”

CUTTING DIRECTIONS FOR 6” X 6” DSP (Designer Series Paper)

  • Cut off ¾” from right side (you do not need this piece)
  • Cute ¾” off bottom (Measures ¾” x 5 ¼”)
  • From Left side cut off 2 ¾” and trim down length to 4”
  • Using the left-over piece / Flip it over to expose the decorative foil side

This beautiful paper makes creating stunning cards easy and now with the dimensions and video instructions, you to can make this card. The mini catalog will go Live on September 6th and in the meantime I’m planning some fun things and adorable to gorgeous cards for you.

Tomorrow I’ll be back with another sneak peek and with a little something old and a little something new. Thanks for hanging out with me today, have a good one!