Opps! Halloween?

Hello Stampin’ Friends ~

Hope you’re staying cool, because we have a heat wave out there! With that thought the images of the Wicked Witch of the West comes to mind … “I’m melting”! lol And if we are thinking about witches, well … Halloween! And I have a cute card to share with you today, along with the instructions!! Ya hooo 🙂

Measurements: 

  • Card Base: Basic White 4.25″ x 11″ folded to 4.25″ x 5.5″
  • Layer #2: Fluid 100 Watercolor paper 3” x 4”

Instructions:

  • Cut and score card base. Fold in half using a bone folder.
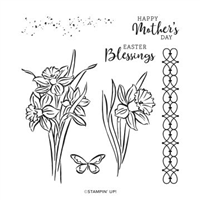
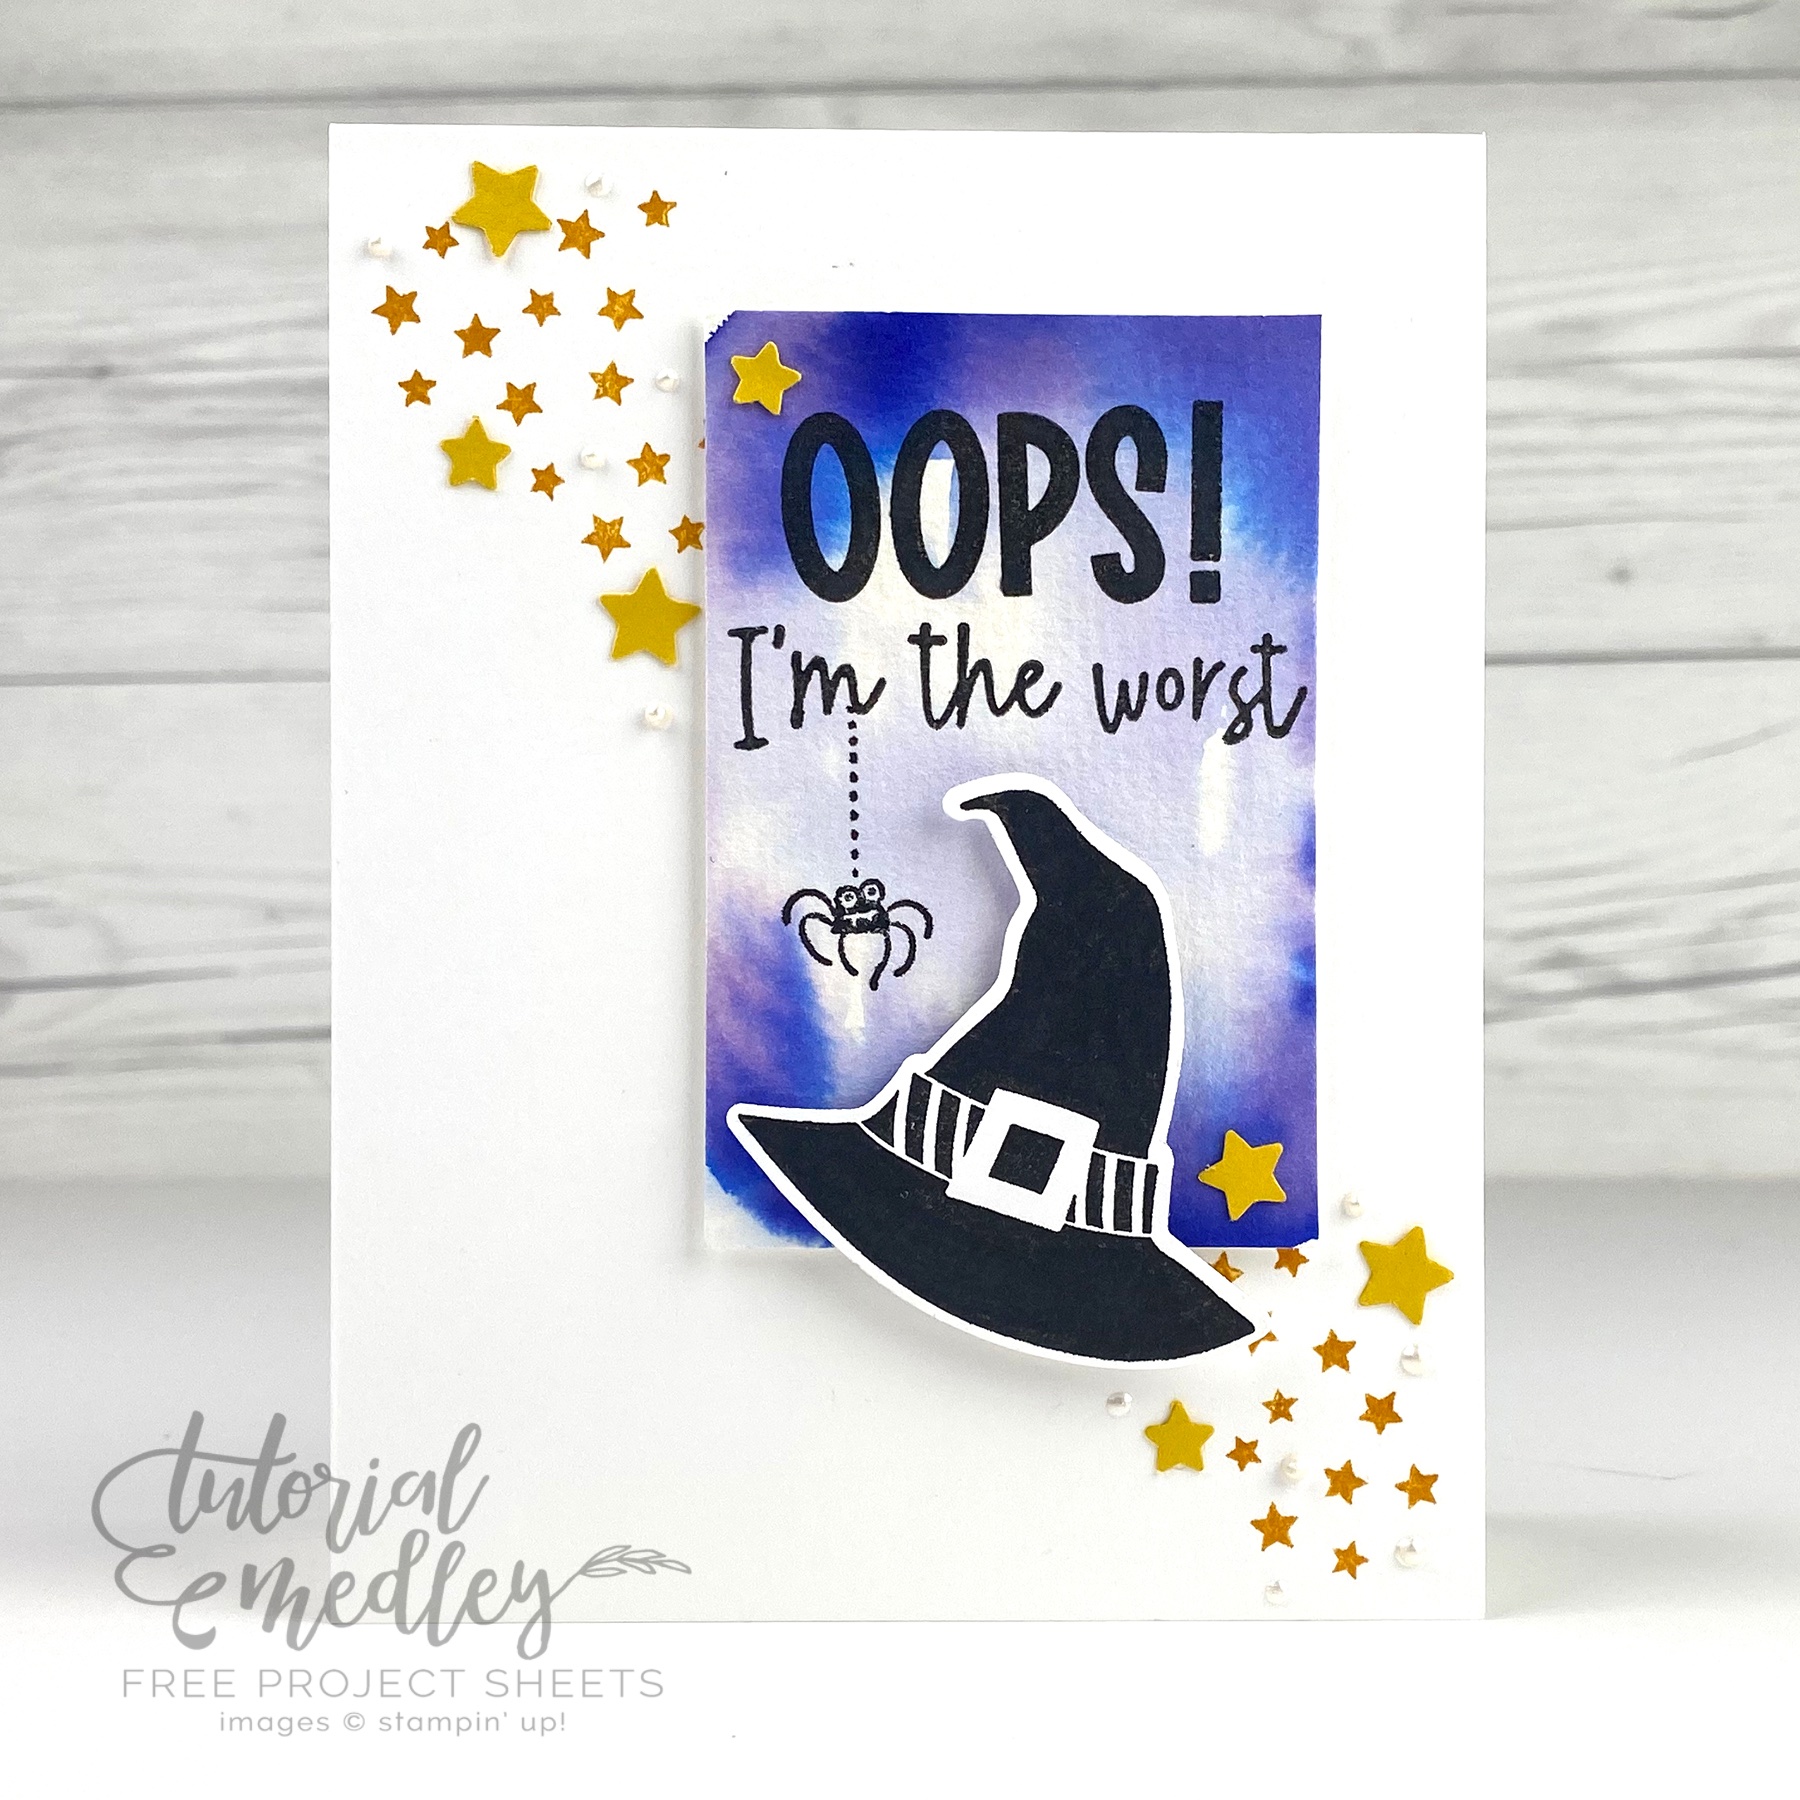
  • Stamp the star image from Bewitching in the bottom right and top left corners of the card base. Stamp three times to create a cluster of stars.
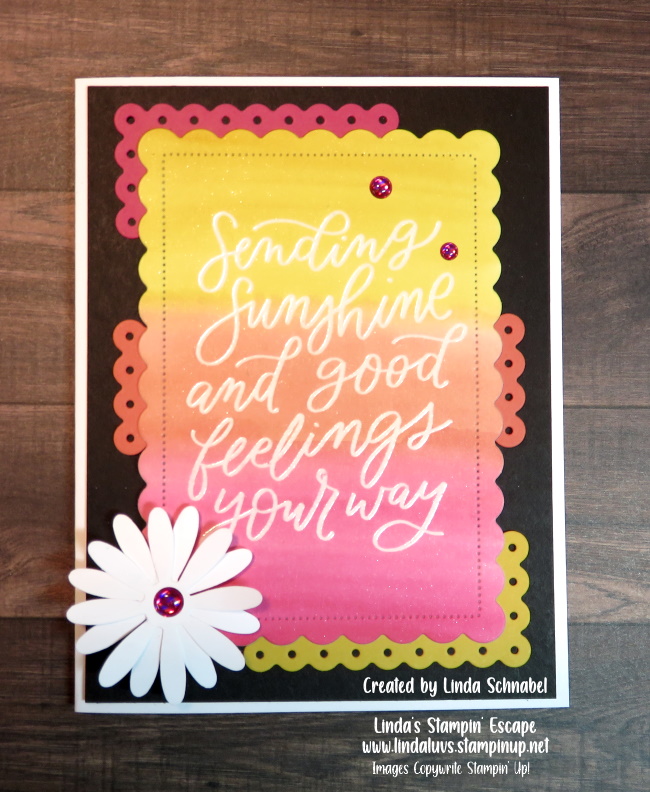
  • Cut a piece of Fluid 100 cardstock to 3”x5”. Create a watercolor wash and drop in Orchid Oasis color around the outside edges of the wash using a water brush. Set aside and let dry.  Once dry trim down to 2”x3”.
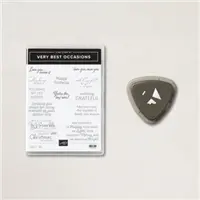
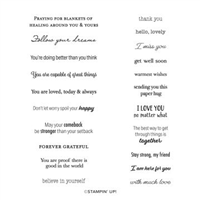
  • Stamp ‘OOPS’ from Amazing Phrasing in Tuxedo black ink onto the Orchis Oasis watercolor fluid paper. Center and stamp on the top portion.
  • Stamp ‘I’m the worst’ from Amazing Phrasing in Tuxedo black ink onto the Orchis Oasis watercolor fluid paper under the OOPS sentiment.
  • Stamp ‘spider image’ from Bewitching stamp set in Tuxedo black ink onto the Orchis Oasis watercolor fluid paper hanging from the M.
  • Mount to card front using Stampin’ Dimensionals in top right corner of card approximately ¾” from top and side.
  • Stamp the witch hat from Bewitching stamp in Tuxedo Black ink onto Basic White cardstock. Punch out using coordinating witch hat punch. Center and mount to watercolor piece on card front. See card photo for placement suggestion.
  • Using the witch hat punch out six stars from Crushed Curry cardstock. Adhere to card front around stamped stars. See card photo for placement suggestion.
  • Add dots of white Pearlized Enamel Effects to the negative spaces around the stamped stars.

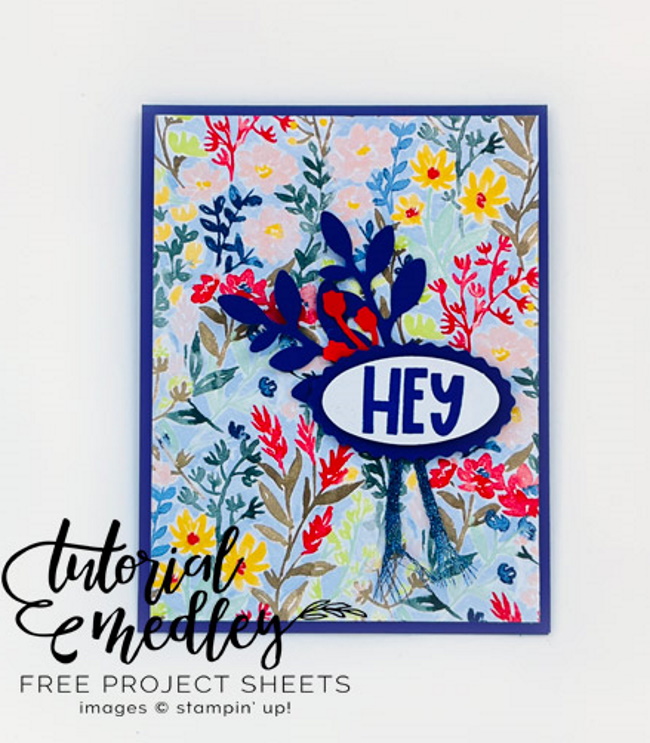
I didn’t think you would mind if I shared another “watercolor” background. This is such an cute and simple card with a touch of humor!

Thank you so very much for stopping by today. Hope you have a wonderful weekend.

Hooray Birthday Card …

Hello Stampin’ Friends ~

Today I have a cute card that is easy to recreate so we’ll celebrate the Hooray Birthday Card! Let’s begin with the main attraction, the Alphabest Bundle found on page 115 of your annual catalog.

Our base is Pool Party … and a Basic White cardstock front embossed with the Hives 3-D embossing folder. Use up your scraps for the greeting … We’re heat embossing the alphabet onto the scrap cardstock and then punch!!

To create the illusion of stringing up your greeting … simply glue your Bakers twine to the front of the card and attach your greeting (after punched) with either Glue Dots or Stampin’ Dimensionals.

Our pretty “Sparkle & Shine” Sequins Assortment finish off the card perfectly. How cute is that Hooray Birthday Card!? This little cutie could be sent to anyone on your birthday list.

Thank you for joining me today. Hope your day is a good one.

I have the list of ingredients for the Hooray Birthday Card for you …

Mash up: Notes of Cheer Card Kit & Charming Sentiments

Hello Stampin’ Friends ~

Today I’m going to share the replay of my Tuesday Night Facebook LIVE … it’s a mash up of the Notes of Cheer Card Kit and the Charming Sentiments Bundle.

You are going to love the great tips included in this video, but you are going to flip over how quick and easy it is to create the prettiest cards in just minutes. This is the main reason I have a few card kits sitting in my stamping room … when I need a card “NOW” … I grab one from one of the kits. Don’t get me wrong, I love sitting in my stamp room creating, but sometimes you just need a card!

In the video you saw me “change up” the card just a bit, enough to introduce you the the amazing Charming Sentiments bundle. I love a good sentiment set and this one is filled with goodies! And to top it off … it has a coordinating die set.

In the video I also shared a few other ways you could change up the card, but it’s so nice to be able to just head off to the craft room and whip out a card. There are many different card kits. Here is a link to look at those: https://www.stampinup.com/categories/shop-products/other-products/kits-collection?demoid=26646

So happy you stopped by today, thank you!! Have yourself a great day.

Here are the links to the products used today …

Woo Hoo … Congratulations Card

Hello Stampin’ Friends ~

How are YOU today? I’m excited … let’s call this terrific Tuesday, because I have the cutest Congratulations card to share with you, best of all … it can be used for any one of any age!! This card was made by one of my talented design team members and I can’t wait to share it with you, so here it is!

OK … isn’t this just the cutest?! So bright and colorful – this card will put a smile on anyone’s face.

Let’s begin … you can use this as a little treat card for someone who just graduated potty training, or how about graduating kindergarten, or middle school, or college. How about a promotion at work, or you just got the job you were dreaming of … see where I’m going with this? You can use this simply amazing card for so many different occasions.

She used the Amazing Phrases stamp set from the Sale-a-bration Catalog along with the thick Basic White and Pacific Point cardstocks. The inks used to stamp the sentiments are Mango Melody, Pacific Point, Granny Apple Green, Real Red, Gorgeous Grape and Tuxedo Black Memento Ink.

She used the Granny Apple Green Stampin’ Blend on the Crinkled White Ribbon to dye it. The sentiment is die cut with the Stylish Shapes dies and then backed with some Vellum cardstock … makes that pop nicely, don’t you think? I just love this card! It’s so bright and fun.

Thank you for joining me today, I hope it’s a good one.

Here is a list of ingredients used in the creation of this card …

Christmas in July Samples & Videos

Hello Stampin’ Friends ~

I have been showcasing several different bundles on my Facebook page during my Christmas in July event. Here is the Lights Aglow Suite which highlights two different bundles; the Christmas Light Bundle and the Brightest Glow Bundle. You’ll find them on pages 30 – 33.

Bring the magic of twinkling Christmas lights to all your seasonal papercrafts with the Lights Aglow Suite Collection. It includes all the coordinating pieces you need to make your handmade greeting cards and gift tags shimmer and shine.

Then I showcased the Boughs of Holly suite / Leaves of Holly Bundle. This beautiful bundle has coordinating designer paper which is simply stunning. Check it out on page 25 of the Mini Catalog. If you don’t have one yet, you can click on the catalog that is located on the right side of the screen … or reach out to me for one if you do not have a demonstrator already.

Make classic seasonal cards, tags, gift boxes, and scrapbook pages with the Boughs of Holly Suite Collection. This suite features holly leaves and berries in deep greens and rich reds that you can stamp, cut out, and embellish with beautifully designed paper, ribbon, and more!

We also looked at the amazing Joyful Flurry … these are very special snowflakes! These dies don’t just cut them out, they make amazing patterns that add a beautiful texture to your card.

Create magical snowflake elements on your handmade cards and gift tags with the Joyful Flurry Bundle, Wonderful Snowflakes foil pieces, and more!

I would love to have you join me on my Facebook page for more samples, fun and tips … just CLICK HERE to get to my page. My Christmas in July event is only going on through the end of July so let me know if you need any help ….

This is a great time to get your holiday stamping needs/wants taken care of and collect some extra goodies for FREE! Thank you for joining me today … head on over to my Facebook page, we’d love to have you join us.

Have a great weekend ~

Free Tutorial Friday: Peaceful Deer

Hello Stampin’ Friends ~

Since I’ve kicked off my Christmas in July special, I thought it would be fun to share of of my favorites from last year Peaceful Deer. I realize that there are no “bundles” so to speak of Christmas items in our Annual catalog, there are a few favorites in there.

What’s great about this card is that it can really be used all year long … perfect for a birthday!

Measurements: 

  • Card Base: Crumb Cake 5-1/2″ x 8-1/2″, scored & folded at 4-1/4
  • Cardstock #2: Crumb Cake 4-1/8″ x 5-3/8″
  • Cardstock #3: Balmy Blue 4″ x 5-1/4″
  • Cardstock #4: Basic White scraps for deer and greeting

Instructions:

  • Cut a mask for the background hills from the copy paper. Use a Blending Brush to add Mossy Meadow ink forming the hills on the Balmy Blue cardstock.
  • Stamp the trees in Mossy Meadow ink, then emboss with the Tasteful Textile folder and adhere to card base.
  • Using the third largest diorama die, cut the Crumb Cake cardstock, then emboss with the Bark folder. Cut 4 pieces of Linen Thread and tie around the right side, fraying ends. Adhere to card with dimensionals.
  • Stamp, color and punch out deer. Adhere to card with double layer of dimensionals.
  • Stamp greeting, die cut with Messages die, and adhere to card with dimensionals (double on left, single on right).
  • Add Brushed Metallic Dots as desired.

I hope you enjoyed today’s tutorial … these are shared so you can print them out and recreate these cute cards. Don’t forget my special Christmas in July special ….

Thank you for joining me today.

Have a beautiful weekend ~

Christmas in July

Hello Stampin’ Friends ~

I have an exciting announcement to share with you today … I am hosting a Christmas in July event in conjunction with Sale-a-Bration so you can earn maximum benefits! You can join in some of the extra fun by following me on Facebook where I share tips, projects and more!

This event runs from Thursday July 28th through the end of the month … July 31st at midnight. When you purchase one of our Holiday Bundles, either from the Mini or Annual Catalog and spend $50+ or more, you will be rewarded with three special gifts.

You will need to use HOST CODE: QGR9QZYP when ordering.

The first gift is from me ….

Make your Christmas cards stand out this year with the Festive Pearls. These little beauties will not only add dimension but also a touch of elegance to all your seasonal papercrafting projects… and they are the first of three gifts during my Christmas in July event.

The second gift is from Stampin’ Up! ….

You will get to choose a FREE item out of the Sale-a-bration catalog. What you choose depends on the amount you spend… $50 = 1 Level 1 item / $100 = 2 Level 1 items or 1 Level 2. If you choose to purchase $150 or more … Do NOT Use the Host Code as I want you to receive hostesses benefits!!

The third gift is a virtual one …

You will receive a point for each $50 you purchase towards a FREE Stamp Set. You can get full details of my Rewards Program HERE.

I thought it would be fun to boost up your benefits when your order for your holiday cardmaking. I know many of my stampin’ friends begin their cards early … I’m here to help you out.

Thank you for hanging out with me today and learning about this amazing special event. If you have any questions message me. I’d love to help you out.

Have a great day ~

No Line Watercolor Technique Card & Video

Hello Stampin’ Friends ~

I’m thrilled to share the No Line Watercolor Technique with you today. It was scheduled for my Facebook LIVE yesterday but I had technical difficulties … well, it took me to more chances but I finally got my video!! It is too cool and pretty not to share.

I’m using the Daffodil Daydream stamp set, it is such a beautiful flower to illustrate and do this technique with.

I invite you to watch the video along with me … I can’t wait to show you the simple steps it takes to create such a gorgeous card. You are going to fall in love with this technique because it’s going to make you look like a real artist! I’m no paint pro, but I sure like the way this looks.

As simple tip is too keep your darker colors in the recesses of your image. I also kept my water painter on the dryer side … it still has water but it easier to control your color when it’s not over wet, and the results are amazing. The dimensions for this card are also simple; Old Olive Card base is 8-1/2″ x 5-1/2″ … the front is a piece of watercolor paper measuring 4-3/4″ x 3-1/2″. The watercolor piece I stamped on measures 3-1/2″ x 2-1/4″ so my Old Olive mat was 3-3/4″ x 2-1/2″. I just used scrap pieces for my greeting.

The greeting comes from a brand new bundle … the Very Best Occasions Bundle! That is also where the triple edge punch comes from that I decked out my daffodil with. It’s a great addition to my stamp & punch collection – I’ll be using them both many, many times.

I hope you enjoyed the video, especially those who joined me last night to support me LIVE before the internet went down.

Have a wonderful day! Thank you

Here is a list of the supplies I used in creating this card …

Are You Ready??

Hello Stampin’ Friends!

And welcome to my blog. Are you ready? Ready to see the last of my watercoloring techniques? For the past 3 weeks I have been celebrating World Watercoloring Month. I began with a simple “Waterwash” background.

If you would like more information about this card CLICK HERE to view the original post.

The second card highlights the dual color watercolor wash where you start one color from the top and the second from the bottom and let them meet in the middle … gives you a brand new color there!

The next week we added the Emboss Resist technique to our watercolored background … this really looks so nice together with that fun surprise of the embossed image / greeting!

If you want to read more about this card CLICK HERE for more information.

The fourth card takes the heat embossing in a bit of a different direction. Instead of resisting the watercolor like our card above … you use the embossed image more as a guide to help highlight your watercoloring.

I want to invite you to join me tonight for my Facebook LIVE where I will be showing you a beautiful watercoloring technique that is going to blow your mind … it creates a stunning image! You won’t want to miss this one, so ARE YOU READY??

Join me for the No Line Watercoloring Technique! I’ll be using one of your favorite stamp sets.

Thank you for hanging out with me … see you tonight!

Take good care ~

Here is a list of the ingredients that I used for one or both of the cards. Remember, every $50 purchased, is rewarded with a exclusive Sale-a-bration item.

Amazing Scottie Dog Card …

Hello Stampin’ Friends ~

I hope you had a wonderful weekend! It was a stormy Saturday by me, but my craft room is in the basement … so I was safe! lol Hope you were too.

I’m thrilled to share today’s card with you. If you are a puppy lover … then you are going to love this simple, fun Amazing Scottie Card! It was created by one of the design team members in the group that I belong to and I just fell in love with it …

We start with our cardbase in the landscape / horizontal position. You’ll attach the Gingham Cottage Designer Series paper onto the black mat, and then secure that to your cardbase. Using the “Deckle Rectangle” die, cut out a piece in Basic White for our greeting.

Stamp the sentiment from the Amazing Phrasing stamp set on the rectangle using Calypso Coral ink. Bend the stamp so that it curves before adding it to the clear block. Then, add the white rectangle to the card front as shown …

Punch a dog using the black cardstock scrap and the Scottie Dog Punch. Cut a small piece of gingham ribbon and add it to the dog’s neck using mini glue dots to hold it on the back. Add the dog to the card using black Stampin’ Dimensionals, and one little gem to the collar for our scottie dog!

You can find the Christmas Scottie Bundle in the July – December Mini Catalog and the Amazing Phrasing stamp set in the Sale-a-bration catalog. See … just because it’s in the mini doesn’t mean it’s just for Christmas! It’s a mission to show you how to maximize the value of your stamping supplies!

Thank you for stopping by this Monday. Have a wonderful week.

Here is a list of the products that were used to create the card. Don’t forget … It’s Sale-a-bration, and you can earn FREE products with qualifying purchases.

The Best Remedy …because sometimes life stinks!

Hello Stampin’ Friends ~

The latest addition to the Kits Collection is here! Use The Best Remedy Kit to make cards that comfort and encourage others during times of trouble. The cute critters in this set are sure to bring a smile!

I just had to share this one … Just look at all the bright fun colors, patterns and critters, it’s just so stinkin’ cute! What a wonderful way to cheer someone up … the world needs “happy” now.

You can breeze through these cards easily with the color instructions included, or go bold and change them up a bit. I tend to just go with the flow and enjoy the creativity without any stress at all. That is why we buy the kits in the first place … right.

The Kits Collection by Stampin’ Up! makes creativity easy with a variety of projects, styles, and designs to choose from. Each kit offers simple steps, beautiful designs, and a fun creative experience…. and this one, is just too cute to pass up.

Thanks for poppin’ in today.

If this is your style and you’d like to get started (it’s great to have get well and cheer cards on hand). I’ve got the link for you below. Enjoy your weekend.

Free Tutorial Friday: Amazing Phrasing

Hello Stampin’ Friends ~

Welcome back for another Free Tutorial Friday. Today we’re showcasing the Amazing Phrases stamp set and Rings of Love Designer paper … both are FREE items in our Sale-a-bration Catalog! This simply cute card was created by one of the fabulous artists from the design team that I belong to. Enjoy!

Your list of ingredients are found below … you can click on them for more information or to begin purchasing the items you will need to make this card.

Measurements: 

  • Starry Sky
    • Card Base 4-1/4” x 11”, scored and folded to 4-1/4” x 5-1/2”
    • Punch: scrap
  • Poppy Parade
    • Punch: scrap
  • Basic White
    • Layer: 4” x 5-1/4”
    • Sentiment: Scrap
  • Rings of Love
    • Layer 1: 4” x 5-1/4”
    • Accent Strip: ½” x 4”

Instructions:

  • Adhere the Rings of Love accent strip to the Basic White Layer with Multipurpose Glue.  Then, adhere the Basic White layer to the inside of the card base with Multipurpose Glue.
  • Adhere the Rings of Love layer to the card front with Multipurpose Glue.
  • Stamp the Amazing Phrases sentiment in Starry Sky on a scrap of Basic White and cut out with the plain oval from the Double Oval Punch.
  • Use the Double Oval Punch scallop to cut Starry Sky. Adhere the sentiment to the scalloped oval with Dimensionals.
  • Use the Bough Punch to cut two sets of leaves from Starry Sky and one bud from Poppy Parade.  Then adhere to the card front with Multipurpose Glue.
  • Cut a 4” strip of Starry Sky Metallic Ribbon and double it over.  Add it to the card front with Mini Glue Dots.  Then, fray the ends.
  • Adhere the sentiment with Dimensionals.

LIST OF INGREDIENTS ….

Thank you so much for stopping by today! Hope you were inspired to make some quick & easy cards this weekend with some adorable designer paper.

Enjoy your weekend ~

Watercolor & Embossing = WOW Cards!

Hello Stamping Friends ~

So happy you joined me today for my Watercolor + Embossing card techniques. I have two cards for you today along with the replay video of last nights Facebook LIVE presentation. You’ll see how easy it is, and more importantly … FUN!

Let’s take a look at the video and then I will present the cards along with the ingredients and any dimensions you may need.

I hope you are falling in love with this beautiful technique, and as I stated in the video … using ink from your stamp pads on your blocks is a simple way to start. AND less messy!! For the Watercolor Wash Resist technique, I am using the “Shimmery White” Cardstock which is cut to a quarter sheet … 5-1/2″ x 4-1/4″ to start. I like to keep it simple.

The stamped image comes from the Good Feelings stamp set which is full of happy! You can check out all the sayings included in the set at the bottoms of my post.

Once dried, I used the 2nd scallop frame from the Scallop Contour dies to die cut our design out. I used the small die from the same set to create the pop of color around our large die cut image. These were then layered onto a 5-1/4″ x 4″ piece of Basic Black and then layered onto the Basic White card base. While I had the White cardstock out, I punched two daisies and layered them onto my card … to finish it off, I used the Glossy Dots to tie it all together.

Now let’s take a look at the card that I designed from my second demonstration using the Splendid Thoughts bundle …

Embossing with the white emboss powder highlights your watercoloring and creates a soft beautiful look … watercoloring within an embossed image is easy and makes YOU look like the artist!! The soft look just pops against this stunning Fresh Freesia foil specialty paper from the Splendid Day Designer Paper. This was attached to the Basic White base is 8-1/2″ x 5-1/2″ scored and folded at 4-1/4″.

I used a medium scallop die to cut the Vellum cardstock on which I layered our watercolor images and die cuts from the beautiful foil paper. Layering the vellum onto the foil creates almost an iridescent look which just highlights the greenery even more.

Let me introduce you to the Charming Sentiments bundle … oh, I love this one!! So many greetings for so many occasions and they have coordinating and accent dies!! I love the way the greeting pulls my entire card together.

Thank you for hanging out with me today.

Here is the list of products I used on both of my cards. The bundles were selected just for you because they are so versatile and can be used year round … plus, either one will qualify you for a FREE Sale-a-bration item!! Let me know if you need any help with your order.

The Beauty of Watercoloring

Hello Stampin’ Friends!

And welcome to my blog as we take a look at the Beauty of Watercoloring today. I would like to share the replay of my Facebook LIVE that shows you step by step how to create 4 different Watercolor Wash backgrounds. With that I will share the cards I created with those backgrounds. Here is the video ….

Here is the card I shared in the video from the first background I created. This technique reflects the Ombre look as the color fades from dark to light. I used the Splendid Stems dies to frame my greeting… and you all know how I love my greetings!!

If you would like more information about this card CLICK HERE to view the original post.

The second card highlights the dual color watercolor wash where you start one color from the top and the second from the bottom and let them meet in the middle … gives you a brand new color there!

The third card is a blending of multiple colors! If you’re not sure what colors go together … let nature be your guide! Here I used the colors of an early sunset, when the skies are pink and blue with a few shades of purple. I framed part of the background and used it for my moon!

If you want to read more about this card CLICK HERE for more information.

The fourth card I made had multiple colors and I added Sea Salt which pulled up some of the color which created some “spots”. This time I die cut my background … this technique is not just for backgrounds but can be used in many ways!

Full details for my butterfly card can be found HERE.

I want to thank you for joining me today on my blog … and invite you to join me tonight for my Facebook LIVE where I will be showing you an easy & beautiful technique watercoloring heat embossing images.

Take good care ~

Here is a list of the ingredients that I used for one or both of the cards. Remember, every $50 purchased, is rewarded with a exclusive Sale-a-bration item.

Fresh Cut Flowers for You

Hello Stampin’ Friends ~

Today I want to share a beautiful card created by one of my fellow artists from the design team I am on. The Fresh Cut Flowers stamp set is the focus on this card …

We begin with our Tahitian Tide card base and the coordinating designer paper. The Basic White cardstock was cut with the Scalloped Contour Dies to create a dramatic statement to draw your eye directly to the Fresh Cut Flower image. What a great use of the dies!!

To get that look you’ll die cut the white using the large scallop frame and turn it so that the corner is facing down, then attach to the Plaid Tahitian Tide Designer paper creating a triangle apron.

The flower image is stamped with Memento Ink and colored with the Flirty Flamingo and Parakeet Party Stampin’ Blends … time to fussy cut out the flower image and mount to front of card.

The sentiment is stamped with the Memento Ink on Parakeet Party cardstock. To finish off the card, you’ll add a few of the Brushed Butterflies around your Fresh Cut Flower bouquet.

I hope you enjoyed this card as much as I did, and were inspired to think outside of the box when using your dies! I love this look.

Thank you for stopping by today.

Here is the supply list for the card shared today …