Thank you for hanging around during my short absence … I appreciate your patience. Working retail during the Holidays can be a bit overwhelming with extra hours, managing staff … but there is still have underlying excitement of the season!! Keeps us all going ❤
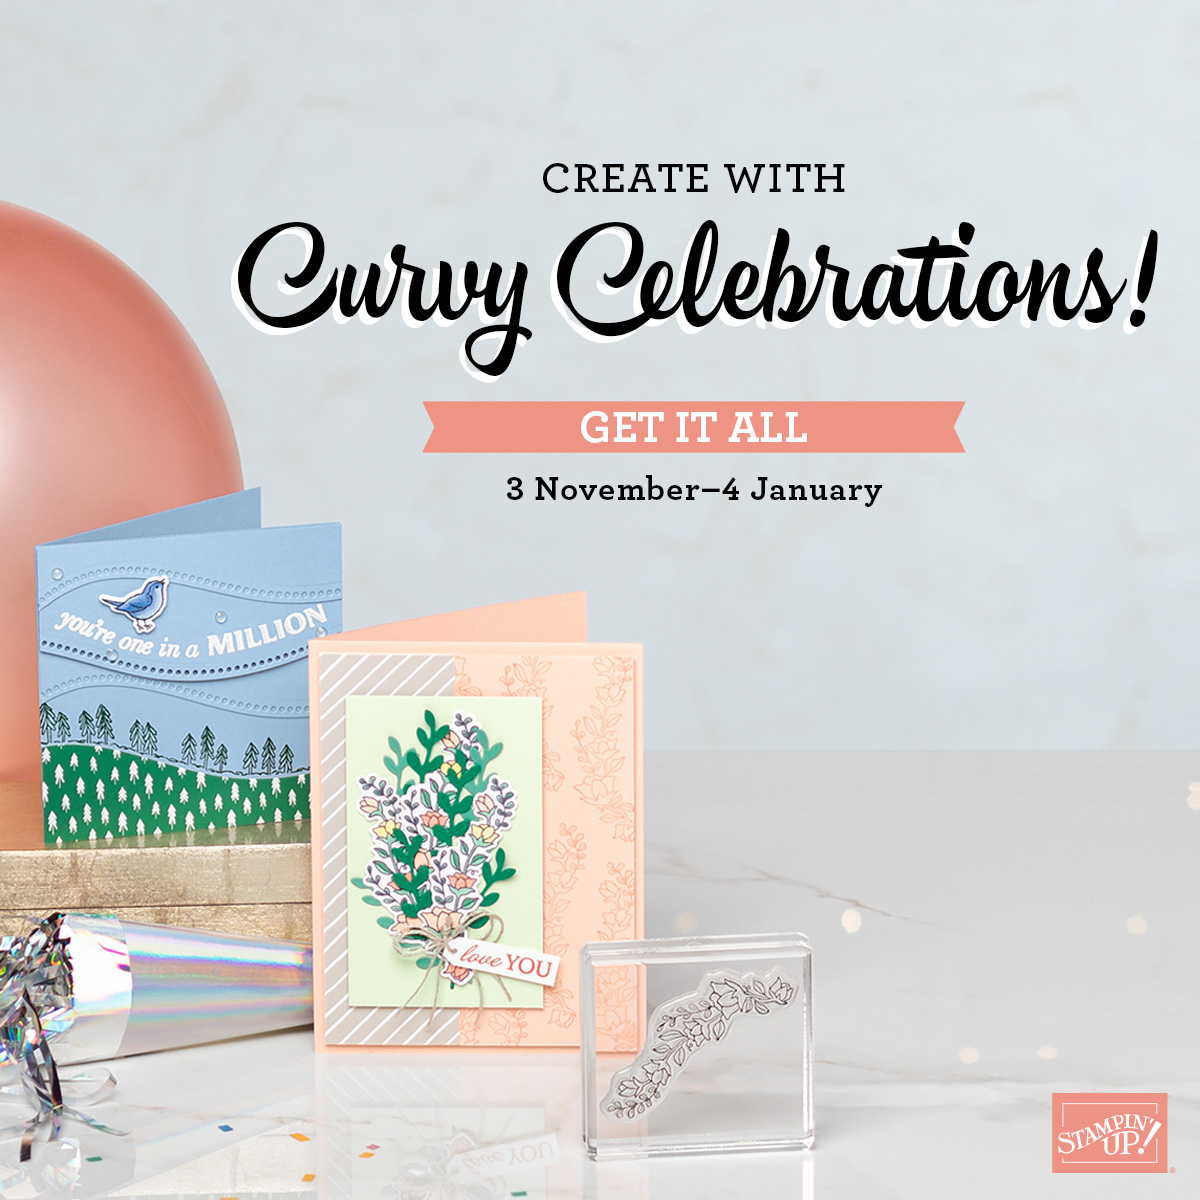
Today I have a cute card to share using the Quite Curvy Bundle and some of the NEW (Sneak Peek) Designer paper that will be in the upcoming Sale-a-bration catalog!! Those and the new Mini are on their way (If you have ordered in the past 6 – 12 months) … If not, I will have some here that you can pick up!!
Isn’t this just adorable!? I love the patterns of this Designer Paper, you will see more tonight when you join me for my FACEBOOK LIVE @ 6 pm. I will also be sharing a simple tip on how you can create this card simply … this fabulous tip will show you how to create a perfect alignment between your cardstock and designer paper!!
Can’t wait to see you tonight!! Thank you so much for checking back in with me!!
Today I have another “DRAPERY FOLD” card for you … from Deb Anderson. Deb caught my Facebook LIVE demonstration on the Drapery Fold and was inspired to try it out … and she shared this sample with me ….
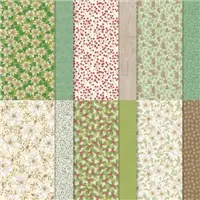
Deb used the Snowflake Splendor Designer Series paper for her card …
It is fairly simple to make and does not need a lot of supplies, and it’s fun! It give you a touch of “fanciness” on your card but slides into the envelope quite easy.
I have a video for you to watch, my Technique Tuesday video from my Facebook LIVE last night. Have a bit of a rest and watch the video …
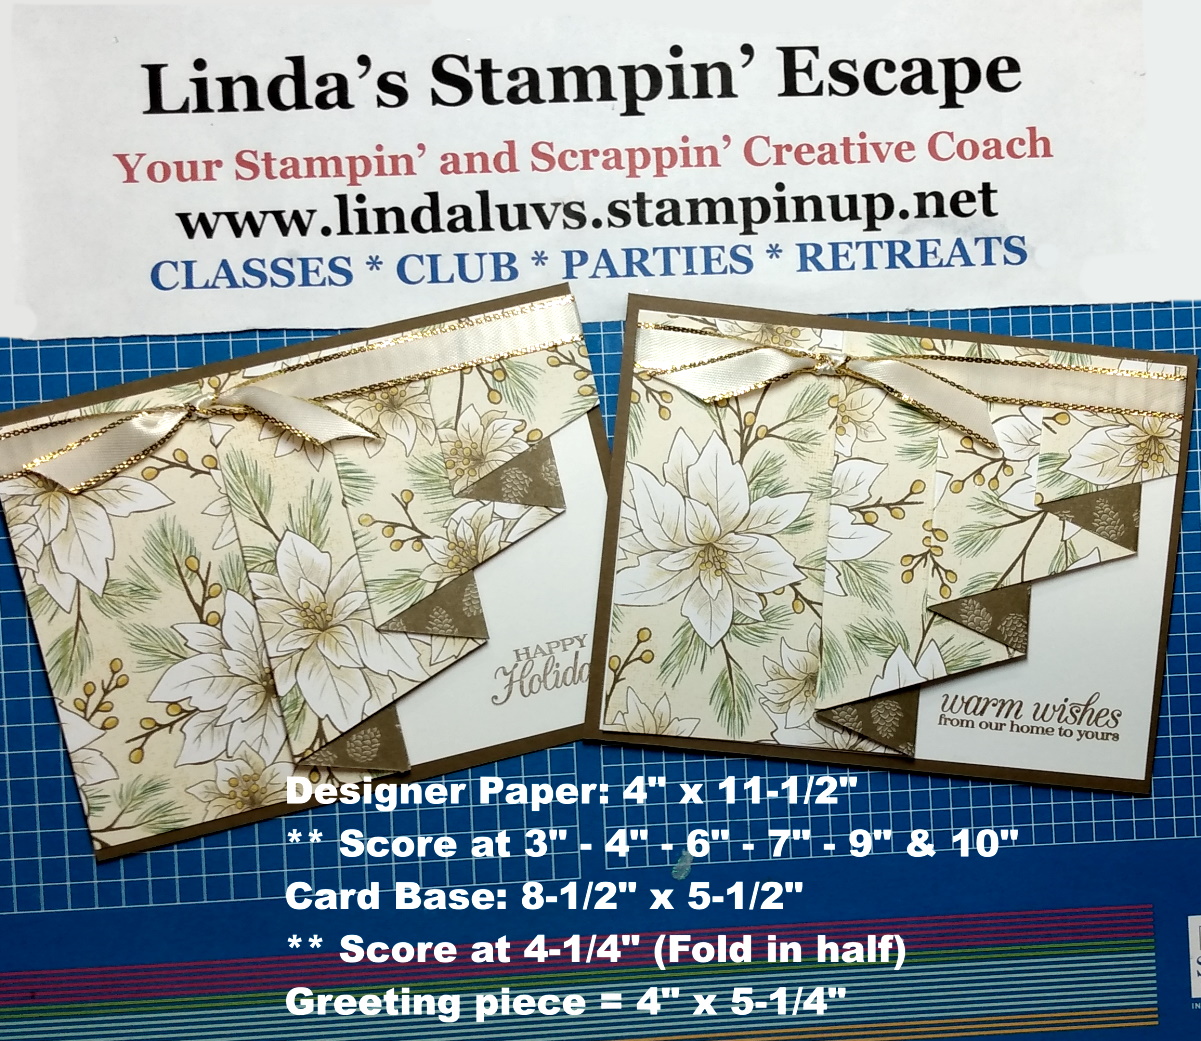
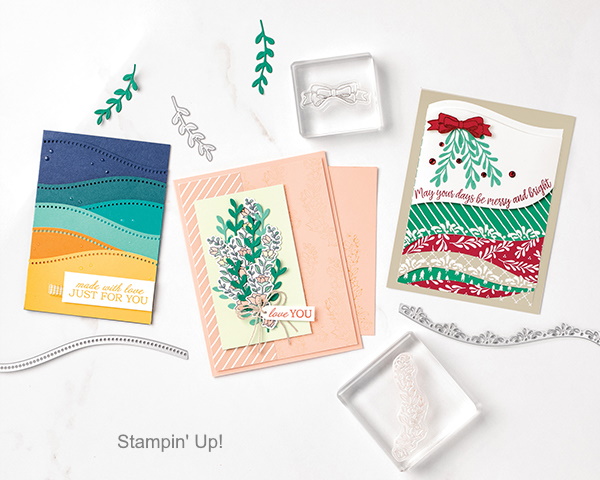
What did you think … ?? This is the type of card that looks fancy but is pretty easy to make. Any designer paper could be used for this style of card. I chose to use the Poinsettia Place suite… such a pretty pattern and a natural background to accent the fold.
I have written down the measurements for you ….
I also showcased both cards in the photo … the one on the left is the one where the drapery fits from end to end, and the one on the right is the one I trimmed off to create a border all the way around my card front.
I hope I inspired you to try out this simple yet pretty “FUN FOLD”, then I’d LOVE to see what you create.
Have yourself a wonderful day, and thank you for spending part of it with me.
TODAY’S STAMPIN’ SUPPLY LIST … If you liked the products used in today’s projects, I have links for you below. Just click on the item you would like more information on, or to begin your shopping. It will take you directly to my website. Thank you ♥
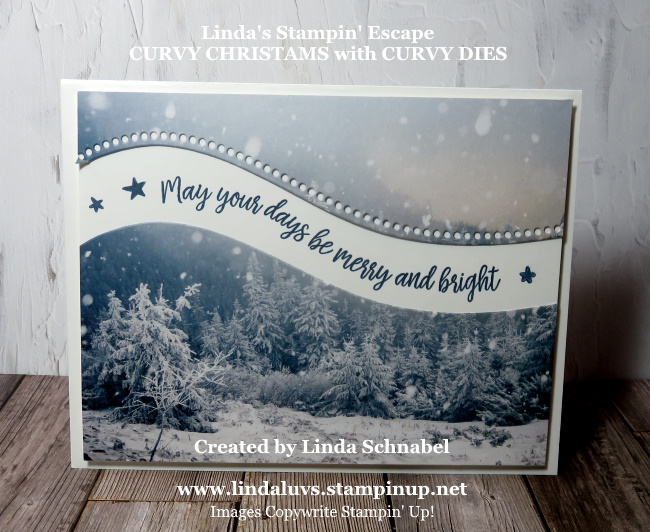
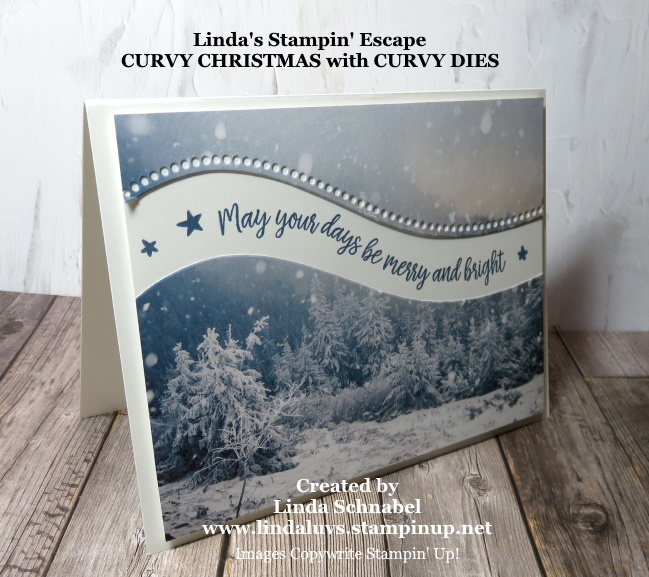
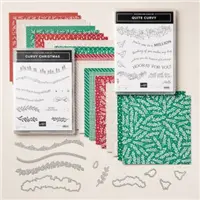
As promised … I am back today with my “Curvy Christmas” card. I can’t believe how easy this was to use and how cool the card turned out. Since I’m going Christmas, I chose the Feels Like Frost Designer Series paper. Once run through the Stampin’ Cut -n- Emboss machine and the Curvy Dies delivered this ……
My base is Whisper White and cut at 8-1/2″ x 5-1/2″ and scored at 4-1/4″. The card front, also Whisper White is 5-1/4″ x 4″. The Feels Like Frost Designer Paper was cut 5-1/4″ x 3″ … and then I ran it through the die cutting machine with the Curvy Die. Once cut you just slide it apart and it exposes the area where you will stamp your greeting.
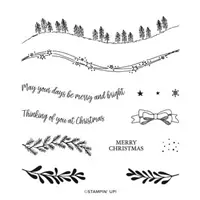
The greeting comes from the Curvy Christmas stamp set … the little stars are included in there as well. The cool thing about the Photopolymer stamps, is that you can shape them to fit “where” you want it to go.
I secure the bottoms piece before I stamp my greeting but I leave the top so I can adjust it if needed … If I do, I just trim off the excess paper. I am going to host an online class where I can show you more about this fun and amazing product line.
Thank you for joining me today. I hope today kicks off an amazing weekend for you!!
Have a great day ~
TODAY’S STAMPIN’ SUPPLY LIST … If you liked the products used in today’s projects, I have links for you below. Just click on the item you would like more information on, or to begin your shopping. It will take you directly to my website. Thank you ♥
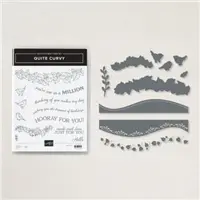
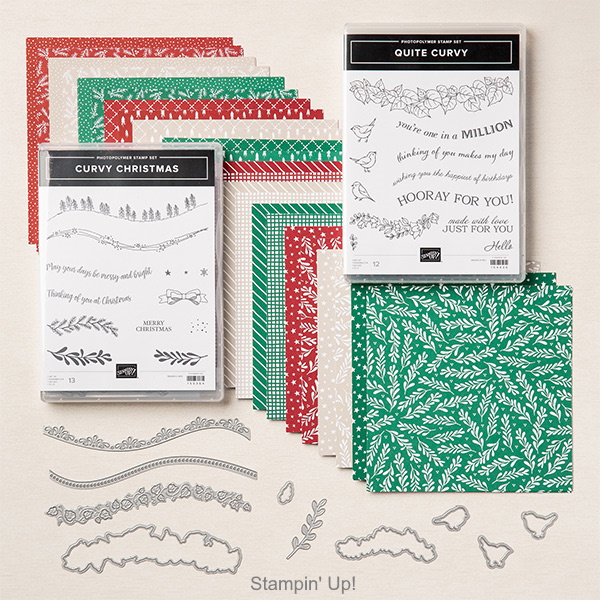
I just had to share this amazing new suite with you! It’s called the Quite Curvy bundle or the Variety Bundle which includes a Curvy Christmas! I’m so excited for this new product offering right before Christmas!!
The Quite Curvy Variety Bundle can be used for Christmas, New Year’s, and Valentine’s Day crafts. The products can be bought separately, or you can save 10% by purchasing them all! The Quite Curvy Variety Bundle includes everything your customers need to create cards for a variety of upcoming special occasions.
156228 – QUITE CURVY BUNDLE
158396 – QUITE CURVY VARIETY BUNDLE
This is a limited time only offer … The sales period runs 3 November 2020–4 January 2021… Let me know if you’re ready for one!
Thank you for stopping by and checking out this amazing new bundle, or should I say “Bundles”… Stop back tomorrow because I will be sharing a beautiful sample made from this suite!!
Have a great day ~
TODAY’S STAMPIN’ SUPPLY LIST …If you liked the products used in today’s projects, I have links for you below. Just click on the item you would like more information on, or to begin your shopping. It will take you directly to my website. Thank you ♥
The YEAR END CLOSEOUT begins today … AND they have updated the Clearance Rack as well!! WOW … it just keeps getting better! I have a few things to share with you today, first my video … it’s a walk through of the catalog and what’s retiring, what’s discounted and a whole lot of samples!!
This is a long one, but it’s go great info ….
As suggested in the video … if there is something you “really” want, get it early! Our mama’s always told us … “The early bird catches the worm”. I don’t know if that’s true but I do know that products are available while supplies last and that there are no guarantees.
If you would like to participate in the “Hostess Code” … I have it listed for you below. Just click on THIS LINK and it will take you directly to my store where you can shop with the Hostess Code. If you are spending more than $150 bypass the Hostess Code and CLICK HERE … you will want to claim any hostess benefits.
These are the samples I missed on the video ….
Let me know if you have any questions. I’ll be back tomorrow with my Technique Tuesday video!
Oh my gosh … can you believe it is the 6th of December already? WOW At times (not always) this year has seemed to fly by … I hope you are all safe, healthy and ready for the holidays!
I have a new card layout I’d like to share with you today along with a big announcement from Stampin’ Up!Let’s begin with their announcement as I have two projects to share with you today …
CLICK HERE TO DOWNLOAD THE RETIREMENT LIST
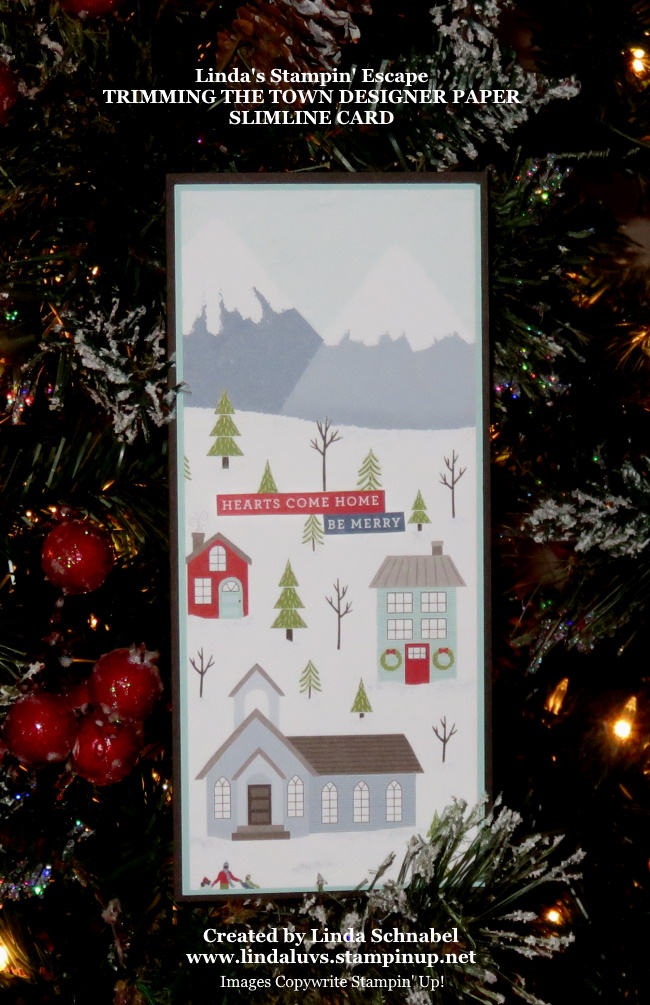
Both of the items I will be sharing today are on the retirement list, let’s begin with the Slimline card … I’ve done these years ago (before someone gave them a fancy name … lol) I think they are fun because they are different from our normal size yet they fit nicely into a business size envelope!
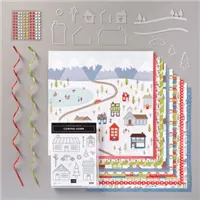
Ok … a little hard to see but there is a Early Espresso card base … 8″ width x 8-1/2″length …. scored at 4′ on the width length and fold in half. My Pool Party mat measures 3-3/4″ x 8-1/4″ and then my Trimming the Town designer paper measures 3-1/2″ by 8″ …. I had a hard time cutting this designer paper pattern because it just looked so cool, but this layout gave me large pieces to work with and show how beautiful this really is.
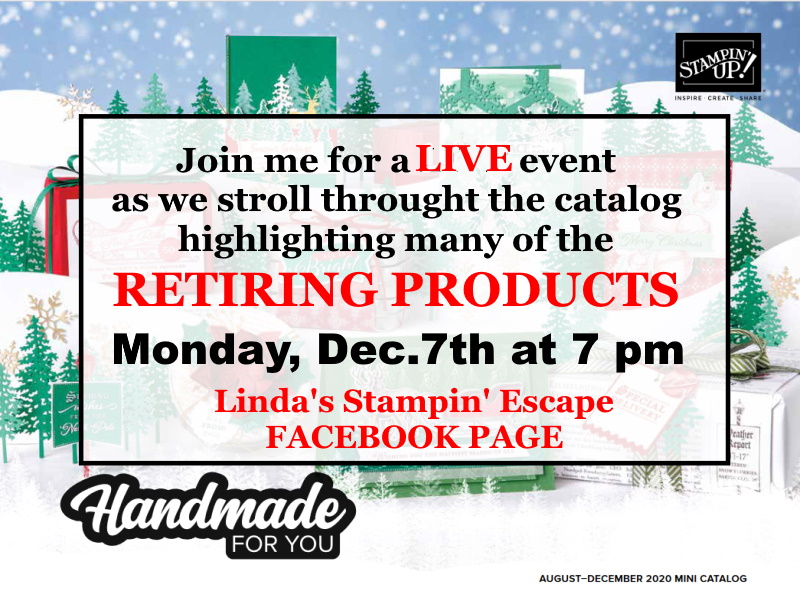
That cute greeting is actually cut from another pattern found in the Trimming the Town Designer paper! Join me for a LIVE event where I go through the Holiday catalog highlighting what is going to retire and many, many samples!!
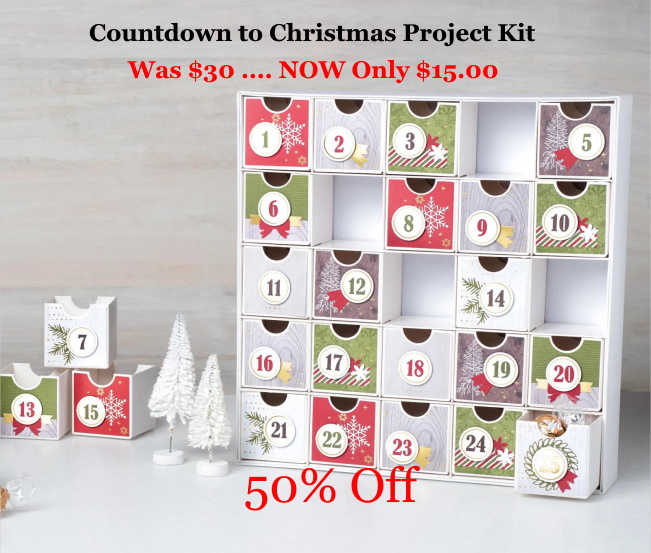
My second project is the Christmas Countdown Kit … this cute Advent type calendar is perfect for hiding those sweet treats as you count down the days to Christmas. Here is what the kit offers ….
I teamed up the kits with the Trimming the Town Designer Series paper. I am using the pattern that I used on my Slimline Card to highlight that pretty paper. I used one of the pieces from the kit as a template …
Thank you for joining me today, and I hope you will join me tomorrow at 7pm on my Linda’s Stampin’ Escape Facebook page for a walk through the catalog as I highlight the retiring items.
Have an amazing day ~
TODAY’S STAMPIN’ SUPPLY LIST … If you liked the products used in today’s projects, I have links for you below. Just click on the item you would like more information on, or to begin your shopping. It will take you directly to my website. Thank you ♥
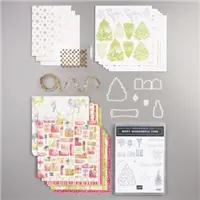
Today I will be sharing one of our Christmas Card kits that was brought back to the Holiday Catalog by popular demand. This is an amazing product suite. I was lucky enough to receive this suite as a gift from Stampin’ Up! on the Greece Incentive trip.
We spent that day in Santorini … such a beautiful place. I wish I was back there!
When we returned to our rooms that evening we got a really cute bag from Stampin’ Up! and it was filled with the “MOST WONDERFUL TIME PRODUCT SUITE” and a note that said we should bring this with us to Make & Takes in the morning…
Everything you need to create your projects are included in the Wonderful Time Product Suite. Stamp Set, dies, designer papers, embellishments and more, and that is what the is too.
Here are the three cards that we made during our Make & Take session yesterday morning. I love how cute the Christmas tree’s look with the tinsel trim and the designer paper with the “gold” that glimmers so beautifully ….
I love the deer but I just can’t get over how cute that Christmas tree is with the tinsel wrapped around it … Perfect for St.Nick!
Thank you so much for taking a part of your Friday to visit my blog …
Have an amazing day!
TODAY’S STAMPIN’ SUPPLY LIST … If you liked the products used in today’s projects, I have links for you below. Just click on the item you would like more information on, or to begin your shopping. It will take you directly to my website. Thank you ♥
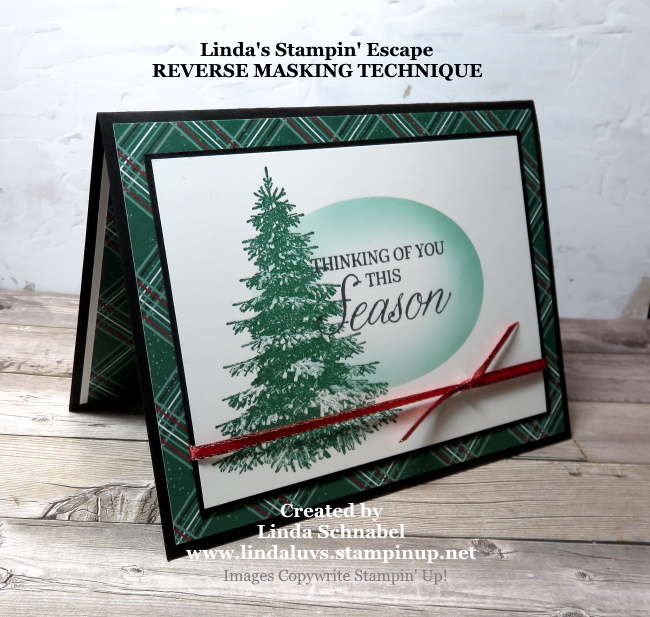
I have my video to share with you today … I am demonstrating the “Reverse Masking” technique and highlighting two different mediums you can use to create your reverse mask! I also have some additional stamping tips to share with you. Sit back and enjoy the video …
What a fun and easy technique this is …. It’s an oldie but a goodie!! I love how this technique creates depth to your card without all the layers and hazzle! Which one of the mediums to do this technique do you prefer? The sponge daubers or the brush? The Blending Brushes will be available in the upcoming Jan – June Mini catalog!
I used Shaded Spruce for my sponging and for the tree and of course it is the main color of our designer paper which comes from the Wonder of the Season and is called the “Tis the Season” 6 x 6, and is layered onto the Basic Black card base.
The Tree and Greeting both come from the Winter Woods stamp set … it was Hot, Hot, Hot last year but I think it’s the perfect year round stamp set!
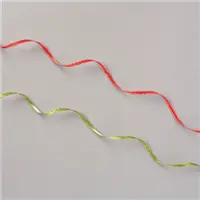
A little piece of the extra designer paper was adhered inside to coordinate our entire card. The pretty gold edged Real Read ribbon is from the All the Trimmings Ribbon Combo pack.
Thank you for stopping by my blog and checking it out.
Have a beautiful day ~
TODAY’S STAMPIN’ SUPPLY LIST … If you liked the products used in today’s projects, I have links for you below. Just click on the item you would like more information on, or to begin your shopping. It will take you directly to my website. Thank you ♥
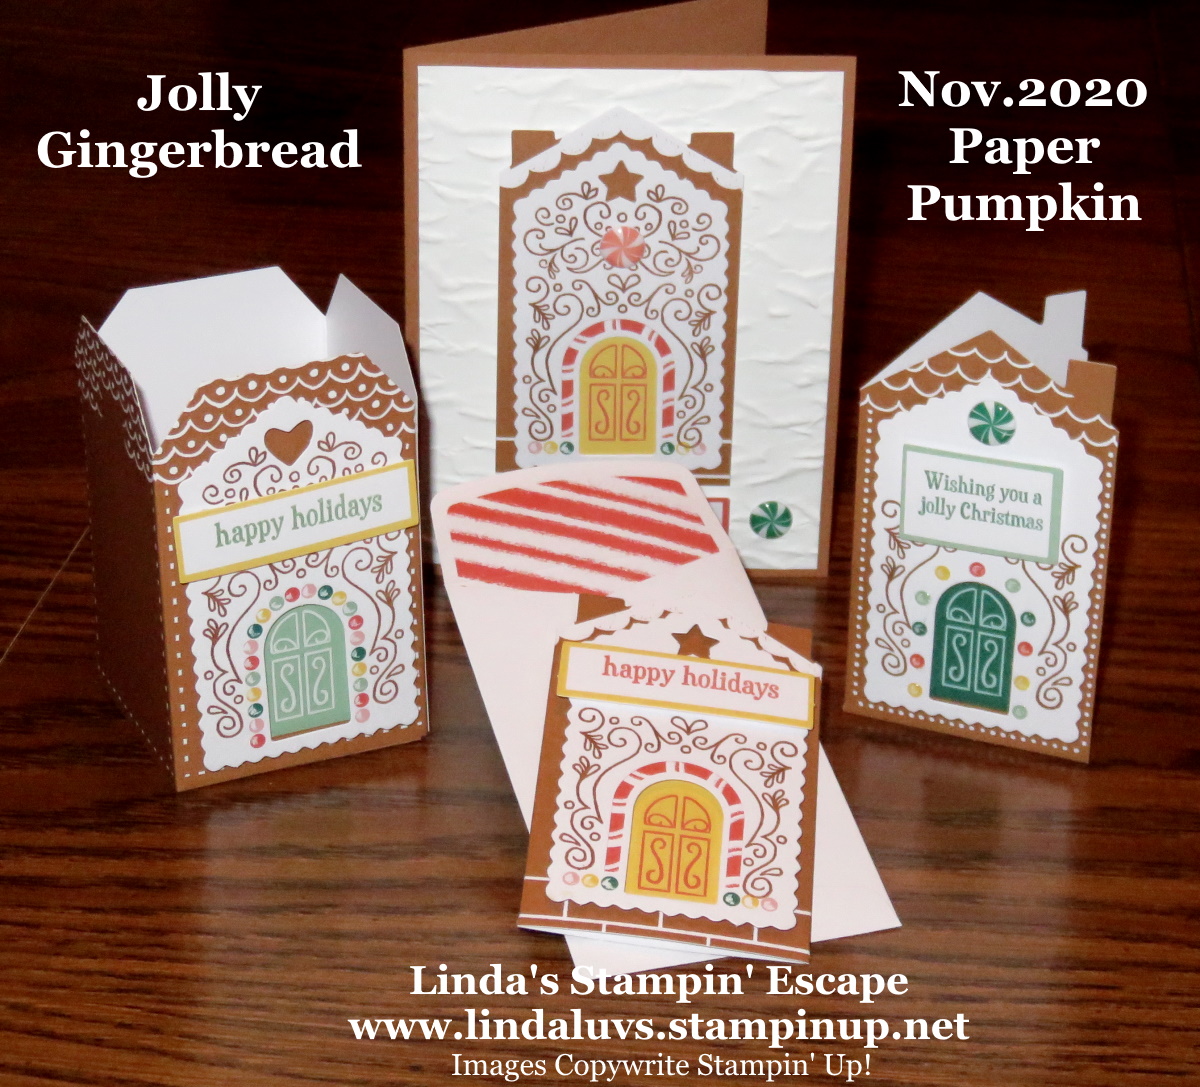
Today I want to share with you a couple of projects that I created this weekend during my Countdown to Christmas party. I am showcasing the Jolly Gingerbread – November 2020 Paper Pumpkin.
Go grab a cup of coffee,tea or your favorite beverage, then sit back and relax and watch the video of my demonstration …
I hope you enjoyed the video and the sneak peek into my Countdown to Christmas party. We have a lot of fun … all done virtually for now. There are games and prizes, special offers, LIVE demonstrations and a whole lot of fun.
If you would like to be invited to future parties, please make sure you are on my mailing list.
Thank you for stopping by today and checking out my blog. Have yourself a great day ~
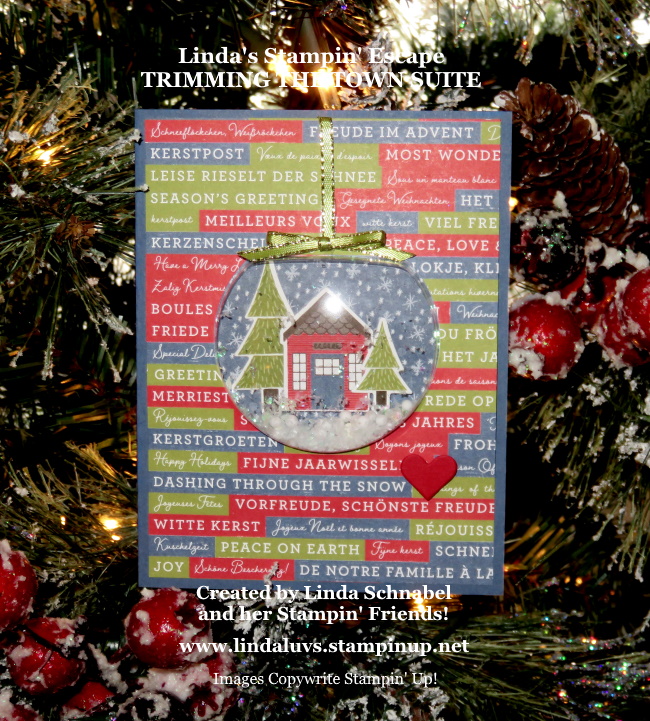
Today I have a special card I would like to share with you. This card was created during my “Countdown to Christmas” virtual party during my “Stamp with Me” session yesterday. What a wonderful collaboration it was! Here is what we came up with ….
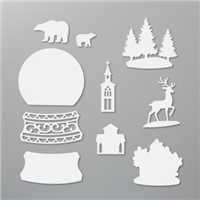
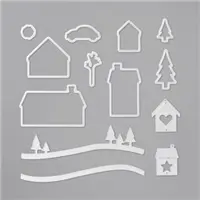
We were using the “Trimming the Town” Suite … They chose the base color of Misty Moonlight, which house we were going to use, how many trees and which of the two colors from the “All the Trimmings” ribbon we were going to use.
I chose the designer paper with Christmas greetings is the different languages because 2020 has been a year like no other… and we all went through this together. For some this pandemic and election has divided us but my WISH for Christmas is to realize life is short, don’t sweat the small stuff, and make it all small stuff … it’s time to gather our hearts together.
We used the Snow Globe dies and Shaker Domes to create our ornament on the card. The house and tree were cut out using the Home Together Dies from the Trimming the Town product suite. A dash of glittery snow was added and our card was complete!
They are so cute and super easy to make … they could also be made into gift tags to add to your presents!!
Thank you for joining me today, I hope your Sunday is Simply beautiful.
TODAY’S STAMPIN’ SUPPLY LIST … If you liked the products used in today’s projects, I have links for you below. Just click on the item you would like more information on, or to begin your shopping. It will take you directly to my website. Thank you ♥
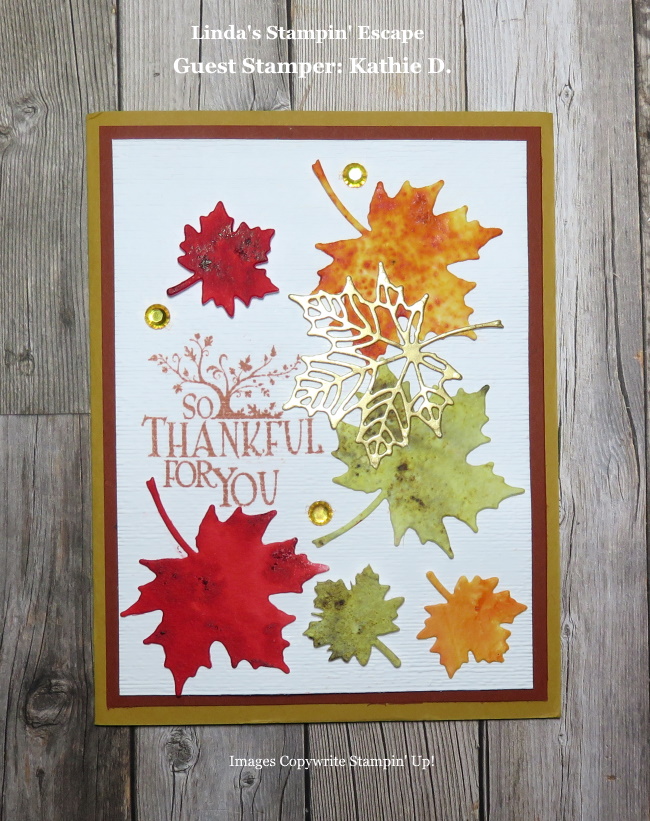
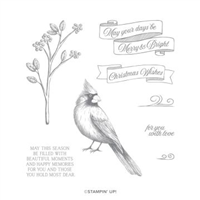
Today I have a very special card to share with you, one that was sent to me for this very occasion … It touched my heart.
Kathie’s beautiful card was created with the Colorful Season stamp set and coordinating dies (retired). I couldn’t resist sharing Kathie’s card with all of you …
I can’t express enough the gratitude that I have in my heart for you, my stampin’ friends … for the past 20 years we have grown to know each other better and have shared the ups and downs that life presents us. You have made it easier to get through the rough times and brightened even my best days … I thank you.
Although we many not be gathering as we normally do … My wish for you on this day is peace and the joy spent with family and/ or friends.
Today I’d like to share my Facebook Live video and card that I created using the Stampartus and highlighting the Mirror Image Technique. You will discover the “secret” or simple trick to creating the Mirror Image.
I’m also very excited to share with you that Stampin’ Up! has extended the Online Extravaganza until Midnight (MT) tomorrow!
Sit back, grab your coffee and enjoy the short video …
The video explains the steps that I took to come up with the size and layout of the stamped area… and also explains the background I’ve used. It is actually one of the backgrounds I demonstrated the Embossing Paste with last week!
Let’s get a closer look at the card …
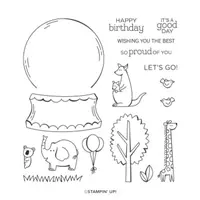
Our cute giraffes come from the Zoo Globe stamp set, and our verbiage come from the Well Said stamp sets.
The background was created with the Shimmery White Embossing paste and the masks … you can watch the video HERE.
Now before we go … lets take a look at the layering and see how amazing a few Stampin’ Dimensionals can change up a card! Besides the beautiful texture you get from the Embossing paste, you ‘ll get great dimension and height.
I hope you enjoyed today’s card and are inspired to try this fun technique. Please don’t forget that all of the items used in today’s card are available in the Online Extravaganza (with the exception of the Memento Ink) …
With hundreds of items On Sale … I’d be happy to help you with your Holiday Shopping List.
Thank you for hanging out with me today. I hope your day is a good one.
TODAY’S STAMPIN’ SUPPLY LIST … If you liked the products used in today’s projects, I have links for you below. Just click on the item you would like more information on, or to begin your shopping. It will take you directly to my website. Thank you ♥
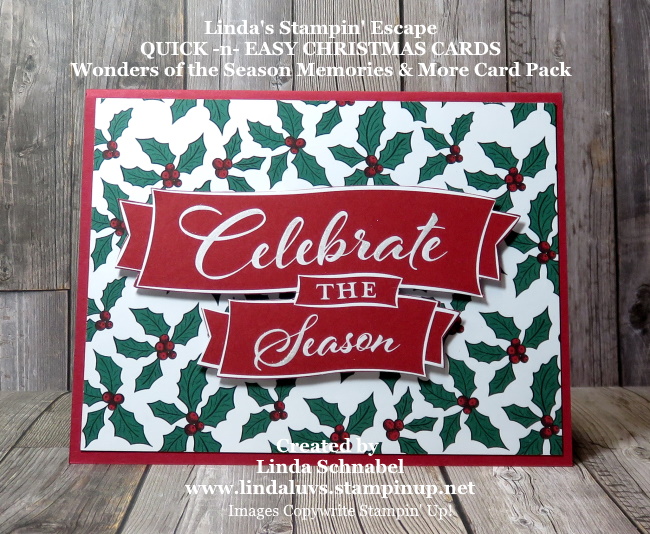
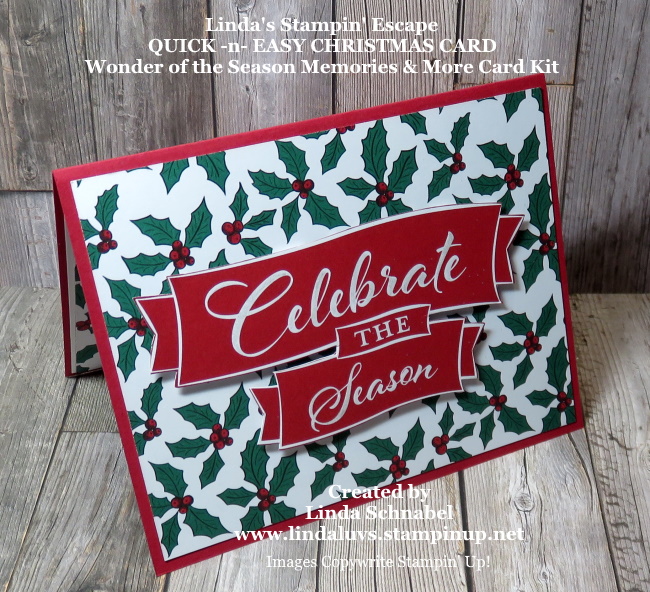
Yesterday I shared a Quick -n- Easy Christmas Card that I created with the Wonder of the Season Memories and More Card Pack, and I have another version for you today!
Still didn’t break out the stamps and ink yet … just a little cutting and some stampin’ dimensionals and a touch of Wink of Stella …
The two (4″ x 6″) cards I used are actually the same … The front of the card is the “Celebrate the Season” which I cut out, and the back side is the holly which I used as my card front.
The holly card was trimmed down to 5-1/4″ and the piece that was cut off was tucked on the inside to decorate that too!
To finish off my card … I highlighted the greeting with my Wink of Stella. It adds a beautiful sparkle to the card.
Have a wonderful day, and thank you for joining me today.
I’m excited to share what I came up with from the “Embossing Paste” background I made on Tuesday night. I hope you got a chance to watch the video yesterday, if you did … you know that I’ve created a card with the “polka dot” embossed background. Using the embossing paste adds such a fun texture to your card.
Well my friends, I couldn’t decide how I wanted to do this … so I did two cards!! I mentioned that the background reminded me of Minnie Mouse, so I thought … How Cute Would That Be??
I am just tickled pink with how it turned out!! It’s all glitzy … the background was done with the Shimmery White Embossing Paste, Minnie is from the Black Glitter paper and the greeting is highlighted with “Wink of Stella”!!
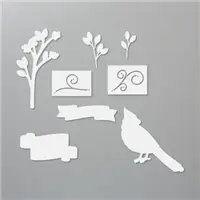
I used the “bow tie” from the upcoming “Well Suited” bundle with the Red Foil paper. The greeting comes from the Toile Christmas stamp set and die cut from the Christmas Cardinal die set. The greeting banner was colored with the Garden Green marker to coordinate with the leaf that was cut from the Poinsettia dies.
I couldn’t stop there, I had to have a Mickey!!
Made the background the same as above … polka dot mask and Shimmery White Embossing paste, I love it!! Mickey was made the same as Minnie but the hair bow was turned into a bow tie.
I used the “celebrate” from a past Paper Pumpkin kit but felt that it worked perfect for this card. This is one of the biggest benefits of being a Paper Pumpkin subscriber. I die cut it from the Tasteful Labels dies…. same with the Black Glitter base.
I hope you enjoyed seeing what I created with the polka dot embossing paste … I had a “HOOT” making these! I may end up using Mickey for my daughters birthday, she is way more into Mickey than she is a “foo foo” card!
Thank you so much for sharing part of your day with me. Join me back here tomorrow as I share the “lacey” background on the Peony Garden Designer Paper.
Enjoy your day ~
TODAY’S STAMPIN’ SUPPLY LIST … If you liked the products used in today’s projects, I have links for you below. Just click on the item you would like more information on, or to begin your shopping. It will take you directly to my website. Thank you ♥
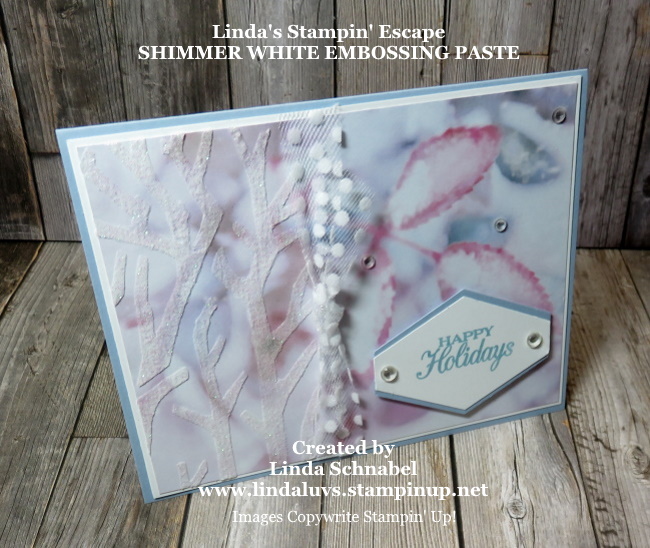
Have you ever looked through the catalog and wondered “What is that for” … “How would I use that”? Well, today I’d like to answer that question on our “Shimmer White Embossing Paste! Time to make things Shimmer & Shine!!
You can now create tasteful texture and subtle sparkle with our Shimmery White Embossing Paste, and my video will show you how easy it is to apply. Grab a cup of coffee or your favorite beverage and sit back and enjoy …..
I hope you enjoyed the video and watching my “creative process” as I work through how I built up this card. Can’t wait for you to see how the other “embossed masks” look when completed!
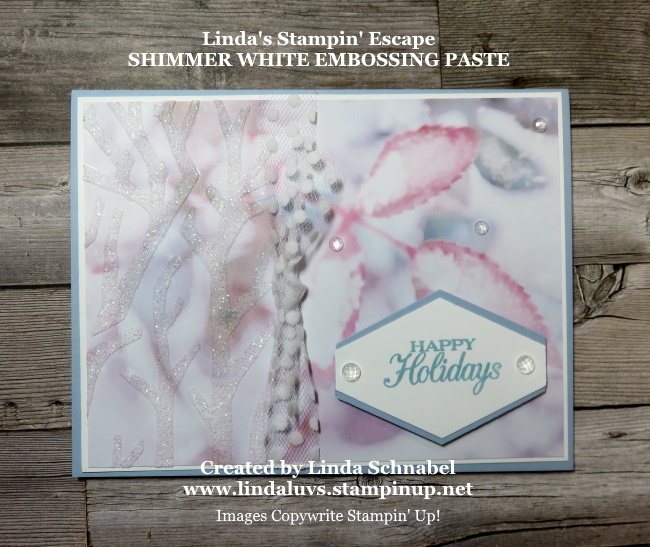
Here are some different angles of today’s card. We began with the Feels Like Frost Designer Series Paper and Seaside Spray cardstock and ink ….
I added the ribbon on my card because of a little line left from the masking. I do believe if I had used some washi tape or removable tape, it would have stopped that from happening.
My greeting was added and punched out with the Tailored Tag Punch, I then added some of the Seaside Spray cardstock behind the greeting before I popped it up with the Stampin’ Dimensionals.
The above photograph really shows what I wanted to highlight with my design … the shimmery tree from the paste and mask turned out so well and pairs perfectly with the images on the Feels Like Frost Designer paper.
The Elegant Faceted Gems really highlight the entire card as well … that little sparkle ties in so nicely with the Shimmery White Embossing Paste.
** Just make sure you clean off your mask and tools as you work, it will make it much easier when you are finished with your card.
Thank you so much for hanging out with me today, to view the video and check out my cards. Are you inspired to try the Embossing Paste? I hope so … I have even more to show you with this fun medium!
Have a sparkling good day ~
TODAY’S STAMPIN’ SUPPLY LIST …If you liked the products used in today’s projects, I have links for you below. Just click on the item you would like more information on, or to begin your shopping. It will take you directly to my website. Thank you ♥