Passion for Coloring

Hello Stampin’ Friends ~

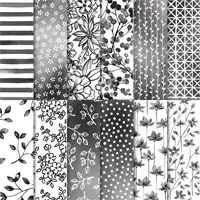
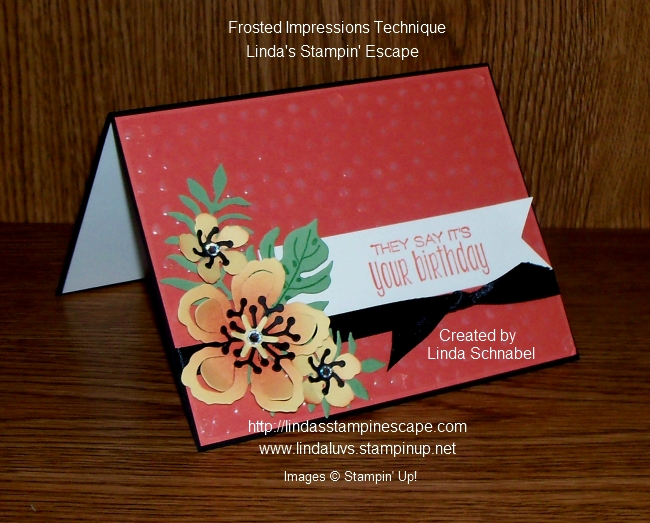
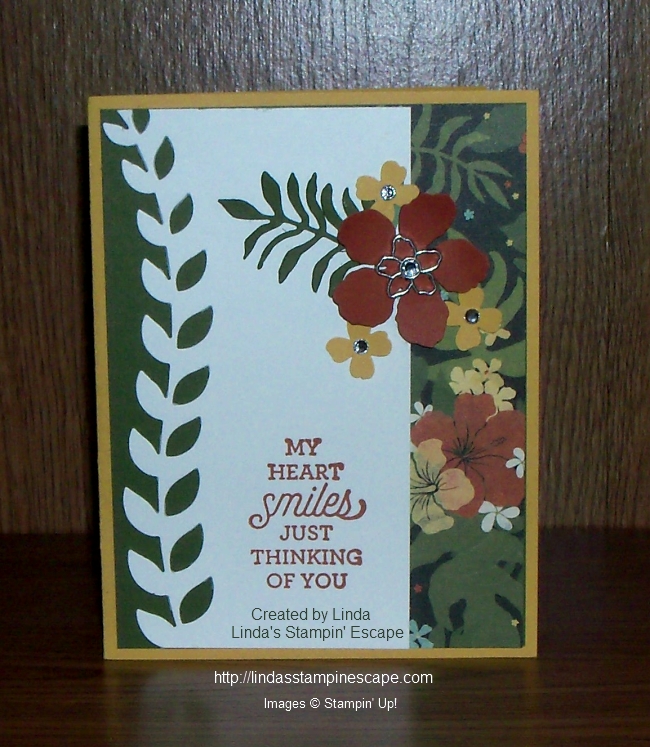
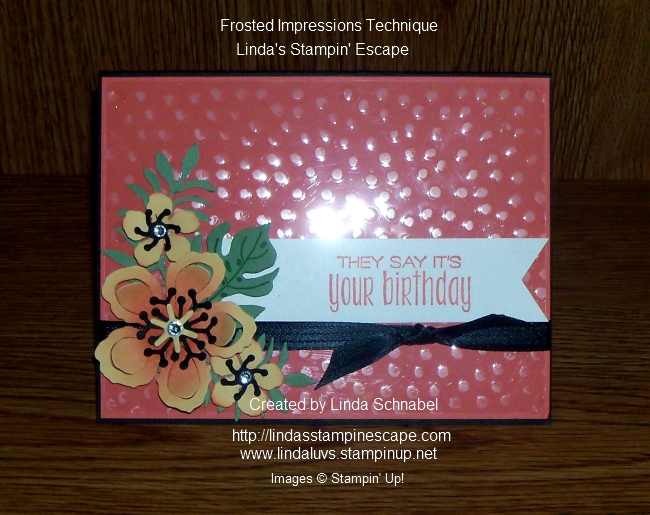
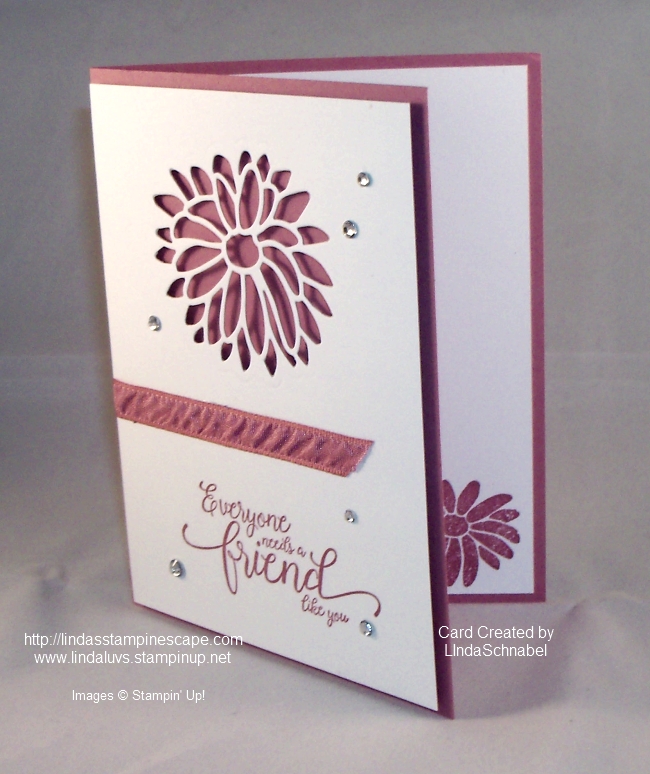
Happy New Year!! Today I’m back to share another card that features the Petal Passion Designer Series paper … and I’ve grabbed my Stampin’ Blends! The patterns in the Designer paper are so fun to color and what better to start with but the Stampin’ Blends.

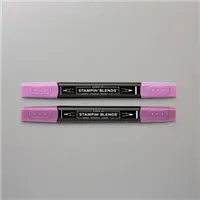
Stampin’ Blends are really easy to use. I begin with my lighter of the two colors and then I go over the areas I want darker with the darker of the two … then I go back over with the lighter color and blend (soften) any harsh lines that were created when coloring.

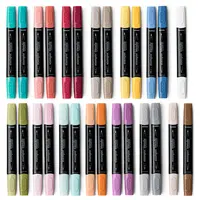
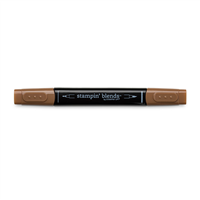
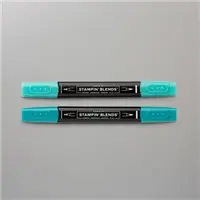
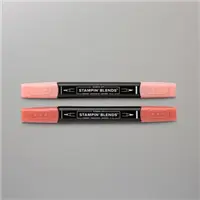
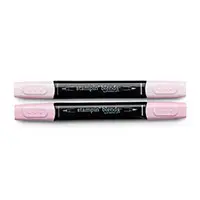
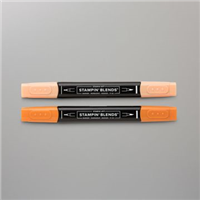
My Stampin’ Blends colors are; Daffodil Delight, Old Olive and Rich Razzleberry with a touch of the Light Pool Party! Plus, I’ve added the Wink of Stella onto a couple small flowers to maintain the white but add some sparkle.

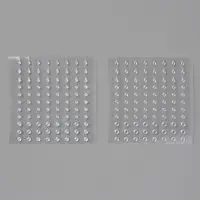
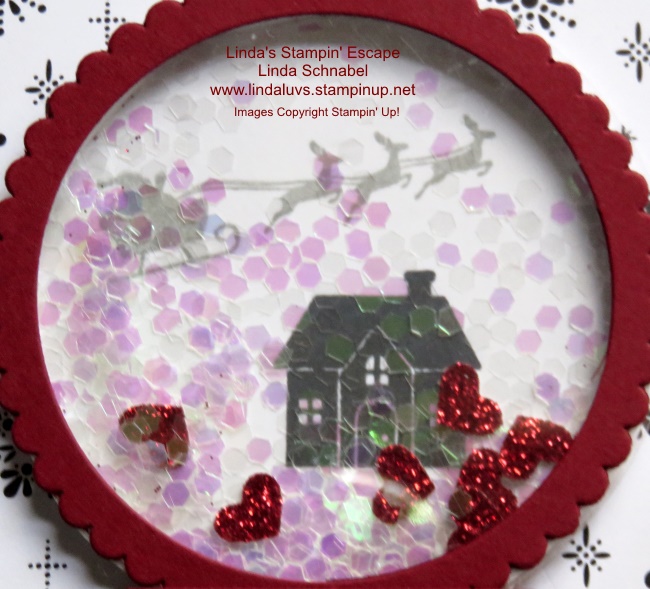
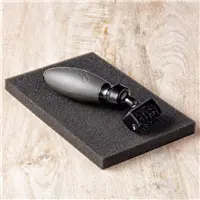
I also used the Color Lifter to pull up a little color and add some highlighted areas to the petals. This picture not only shows the highlights but you can also see the Wink of Stella and the Clear/Glimmer Epoxy Shapes. (Did you know you could color these with your Stampin’ Blends?!)

The Stampin’ Blends are fun and easy to use and coloring is a great way to relax and color away the stress. That should check off one of your New Years Resolutions … take care of yourself more often and relax!!

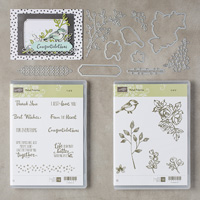
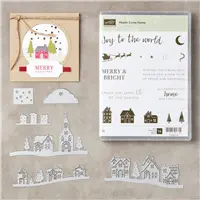
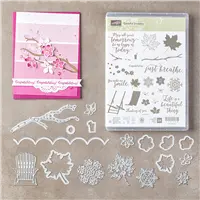
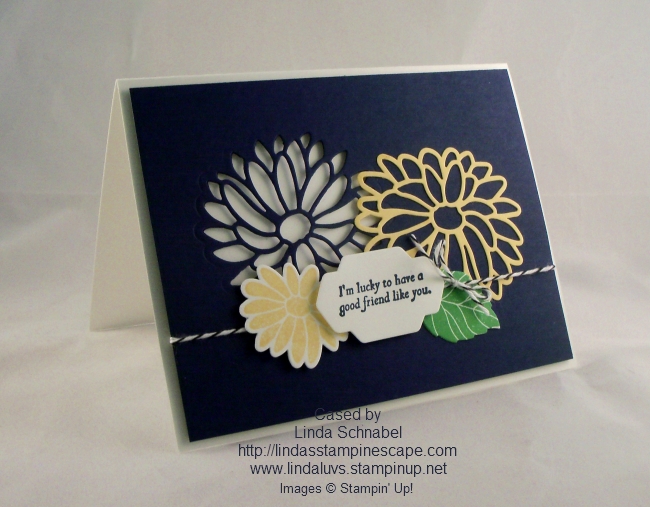
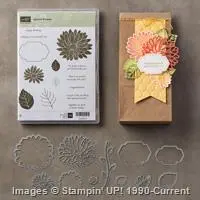
Let’s not forget our greeting … it comes from the Petal Pallet which is part of the Petal Pallet bundle. Love the 10% savings when I purchase the bundles!!

Thank you for joining me on this New Years Day … that’s how I like starting my new year, with friends!

Have a wonderful and relaxing day ~

TODAY’S STAMPIN’ SUPPLY LIST …


Stampin’ Blends & A Sneak Peek!

Hello Stampin’ Friends ~

Today I have a video to share with you that explores used for our stampin’ Blends, plus you’ll see a sneak peek into the Occasions Catalog … they should be arriving in your mailbox!!

Let your creativity loose with Stampin’ Blends, Stampin’ Up!’s alcohol-based blending markers in their exclusive colors. Here, Shannon shows you how to color and blend with different colors–resulting in beautiful creations you’ll love sharing with others.

For those of you wanting to know more about the Stampin’ Blends, I want to be sure to share the Color Lifter marker as well …

I love how the Stampin’ Blends markers can create so much depth on your project.

Let Santa … or I know if you would like these for Christmas! I have added the attachments below. OR …

If you want it all >>> May I suggest you until January and then get in on the Sale-a-bration Rewards!! For every $50 you spend you get to choose a FREE item out of the Sale-a-bration Catalog!

Thank you so much, I appreciate the visit to my blog …

Have a wonderful day~

Today’s Stampin’ Supply List …


Technique Tuesday: Heat Embossing

Hello Stampin’ Friends ~

Today I’m going to share a video with you that shows different heat embossing techniques … You’re going to want to watch, because they’re showing one I’ve NEVER seen before!

Embossing is one of our favorite techniques! But did you know there are many ways to emboss? Watch as Andrea demonstrates three additional embossing techniques: water embossing, embossing in any color, and faux metal embossing.

So … what did you think? Are you going to try the “Water Drops”??

I’d love to hear what you think! Thanks for checking in today …

Hope your day is a good one.

Snow Globe – Shaker Card

Hello Stampin’ Friends ~

Happy Monday! I hope you had a wonderful weekend … Sunday turned out to be a beautiful fall day.

Today I want to share with you another retreat card … a shaker card! Our afternoon session include 3 cards that we created using the “Hearts Come Home” bundle. My mission was to show them how quick and easy you can create a shaker card.

Our background comes from the Merry Music Designer Specialty Paper. Using the Layering Circles Framelits dies, we cut 1 white and 1 window sheet from the same size circle. Then we took the scallop circle and the circle one size smaller that our precut circles, and layered them together before cutting to create our frame.

On the white circle, we stamped our house in Black and then our Santa in Smoky Slate. Our next step was to attach the foam adhesive strips to the outer edge of the white circle. Once applied, you can fill this with whatever you’d like … we used a large glitter and Red Glimmer hearts.

Once you have filled your “well” … remove the top layer off the adhesive strip and drop the window sheet over the top – press to seal. Next, we glued the frame onto the window sheet.

To create a snowglobe … I used the Everyday Label punch!! This is the punch that we used on the Merry Little Christmas Suite cards. Our  greeting was heat embossed in white and then the punch was aligned (1/2 way into the cardstock) to create the base… then punch!

Use the adhesive strip to mount the base onto the front of the card so it’s the same height as the globe.

Everybody loves getting Shake Cards, and now you know how to make a Snowglobe Shaker …. quick -n- easy!

Thank you for sharing a part of your day with me and visiting my blog.

Have yourself a great day!

TODAY’S STAMPIN’ SUPPLY LIST  … Click on the link for more information for to begin your shopping.


Halloween Week: Meet me at the Gate!

Hello Stampin’ Friends ~

Today is my last post for “Halloween Week” … and I’ve saved the best for last! I’m using the Graveyard Gate bundle and this gate is extraordinary! I love it!!

Make sure you keep following my posts, because you will see this gorgeous gate many more times!!

I started by cutting my gate with the help of the Precision Base plate and the Die Brush … makes creating this detailed gate much easier. Once the gate closes … you must lock it, and that is done with the dies that are included in the bundle.

Next, I worked on my background. I began with Whisper White paper and a 1-1/4″ circle punch and used it as a mask for my moon.  I sponged Daffodil Delight around the moon, then Elegant Eggplant, and Night of Navy after that. When I removed my mask, a bright white moon showed above! I dabbed the sponge over the moon just a bit to make it look more realistic.

I then sponged the bottom of the card with the Archival Black ink… I did not wait till it was fully dry, I stamped my gravestones over the top using Craft Whisper White! The white picked up some of the colors from the other inks and created an aged gravestone … so cool!

Here is a sneak peek at the inside… all done with one ink pad, just stamping off the ink on the gate so it looks lighter.

This entire bundle is so much fun, and don’t think that it’s only for Halloween. Make sure you follow my blog because I will be sharing more ideas from this great bundle.

There’s only 1 more month to Halloween so I shared the list of ingredients that I used to create this card.

Thanks so much for walking through the graveyard with me. I hope you enjoyed the techniques I used to create this card.

Happy Friday and enjoy your weekend!

TODAY’S STAMPIN’ SUPPLY LIST…

Raising the Bar on Embossing

Hello Stampin’ Friends ~

Today I have a awesome technique video to share with you from the Stampin’ Up! home office!

Just when you think you’ve explored every aspect of crafting, another exciting technique appears! This video about faux metal embellishments will help you take your customers’ embossing to a new level.

Wasn’t that fun … My clubs will be doing this technique in the near future, then I’ll be sure to share the results with you.

Thank you so much for stopping by on this beautiful day. Every day is beautiful if you want it to be!

Hope your day is a good one ~

Simply Sunday: Colorful Seasons Bundle

Hello Stampin’ Friends ~

Today I’m going to share with you a quick –n- easy card that you are going to totally fall in love with … How do I know?  Because this is just one of the cards that my club members made at our Appreciation Party in June!

It really is simple to make ….

First thing we did was to create our background … on our block; we used our markers to color in ¾ of the block with Marina Mist and the bottom ¼ in Crumb Cake.  We then “spritzed” our block with water until it “beaded” up… then we simply pressed this onto our cardstock.  We used the Thick Whisper White, however I have made some with our standard Whisper White as well.  LET DRY.

While it’s drying you can cut out your die images (theirs was pre-cut for them) We used the awesome Adirondack Chair from the Seasonal Layers Thinlits with the Color Theory Designer Series paper.  The swirl for the sun was cut from from the Swirly Scribbles Thinlits in Crushed Curry Cardstock.

Our greeting comes from the Colorful Seasons stamp set. This bundles with the Adirondack Chair from the Seasonal Layers Thinlits, and I recommend purchasing the Colorful Seasons bundle … save 10% plus get your $5.00 coupon from Stampin’ Up! and a virtual rewards point from me!

Speaking of the Virtual Rewards points … I sat down and updated everyone’s cards and I’m excited to be able to send all these “rewards cards” out to my customers!! Watch your mail box … they should reach you by the end of the week. You can always find out how many points you have by contact me … lindaluvs2stamp@aol.com

I do believe the Colorful Seasons bundle is my favorite in the entire catalog!! Yes, there are many stamp sets that I love this year, but this is so pretty and so versatile … it’s my number 1.

Just image what you could do with this technique and these awesome dies. I will be sharing more with you but till then …

Enjoy your Sunday & just breathe ~


Today’s Stampin’ Supply List …


Retiring: Botanical Blooms

Hello Stampin’ Friends ~

Today I’d like to share a very popular pair that will also be retiring! The Botanical Blooms stamp set and Botanical Builder Framelits Dies. This was a fun one and you can create the most amazing cards and gifts.

Just look at the variety here …

This is a card that we did in our Technique group in which they learned the “Frosted Impressions” Technique.  It’s quite easy really … We ran a “Window Sheet” through the BigShot with an embossing folder and then we used a sanding block to create the “frosted” look.

These die cut flowers are so pretty and just a touch of sponging in the center gives you a multi-colored bloom … just like the real ones!


This was very easy to make with the dies and designer paper.  That paper is no longer available, it retired last year.  So if you have a favorite this year … get it now, they all retire!!

I love this simple yet elegant card and so easy to create. This one I doubled the flowers so you had the lighter one peeking through.

Not sure where I found this grouping … I may have pulled it off Pinterest or the Stampin’ Up! blog but again it shows how quick and easy it is to create with this pair: The Botanical Blooms stamp set and Botanical Builder Framelits Dies.

Let me know if you have any questions on the cards shown today. If you love these pretty blooms, you won’t want to miss out.  You can click on the links below for more information, or to begin shopping.

Thank you for visiting my blog today ~

Hope your day is as beautiful as a tropical flower!

blog-closing-small    

Here are the products I used to make my projects shown today. You can purchase these and other Stampin’ Up! products at my online store by clicking on the links below each products. Below you will find links to all the RETIRING PRODUCTS … just click on the picture.


Day at the Beach …

Hello Stampin’ Friends ~

Before I begin today, I’d like to send out a big …

THANK YOU!

to all of you that participated in my March Madness: Sale-a-bration Celebration.  You’ve got some great stampin’ supplies, fun Sale-a-bration stamp sets, and 10 great cards with instructions!  I was busy working on those last night! Keep an eye on your mailbox within the next couple weeks for your cards and instructions!

I’m also in the process of packing and getting ready for another Stampin’ Up! OnStage event. This is where demonstrators gather for some training, stampin’ and a whole lot of fun. I’m actually going with my daughter Sarah this Wednesday … and we’ll be headed to the Shreveport, LA event.  They are being held all over the world!

This is from our November 2016 OnStage where we got a sneak peak of the new Occasions catalog (actually we got to take it home!) the one you have now.  This time we’ll get our hands on the New “ANNUAL” catalog!! I am so excited!! I need to chill a bit … I don’t want any speeding tickets on our Road Trip to fun!

I thought it would be fun to highlight and share with you some of the fabulous stamp sets in our Occasions catalog. Today we’re going to pull out the flip flops and get ready for a “Day on the Beach”.

Here are the images we saw at our OnStage …

Choose the look you want to create with our Watercolor Pencils.  The “Hello Friend” card uses the pencils with the Aqua Painter; the “Hoping” card uses them with the Blender Pens; the “Brighten” card uses only the pencils.

My favorite part … THEY ARE FORMULATED IN STAMPIN’ UP COLORS!!!

Thanks much for stopping by today.

Hoping your day is a warm & sunny one!


TODAY’S HIGHLIGHTED PRODUCTS …


March Madness: Card #2

Hello Stampin’ Friends ~

Today I have Card #2 of my March Madness: Sale-a-bration Celebration! I also have some important updates to share with you concerning the Sale-a-bration gifts. Stampin’ Up! has added some new items, that is exciting, however … two of the previously released items have so to speak “sold out”. The supplies have been depleted and are no longer available.  (See Below)

Today’s card is featuring the beautiful “Floral Boutique” Designer Series paper and the “Stitched Shapes Framelits” dies, and one of my favorite techniques “Dazzling Diamond Dust”. The card is easy to make and can be done in a variety of Designer Papers and greetings!

Remember … you will get step by step instructions and the card dimensions when you choose this card and a qualifying purchase.

STAMPIN’ UPDATES:

Sale-A-Bration has flown by! Times flies when you’re having fun, though, right? Only a few days are remaining during Sale-A-Bration— the year’s biggest promotion. We have added additional products for you to earn and enjoy. Don’t forget you have until March 31 to earn free the products.

* Please note, to receive one of the Sale-A-Bration final day’s products for free, you will need to use the item code noted below and not the regular item code.

Item Number Description
147361 2016-2018 In Color 8-1/2” x 11” Cardstock
147365 Party Animal Designer Series Paper
147363 Succulent Garden Designer Series Paper
147364 Tasty Treats Specialty Designer Series Paper
147362 Party Animal Designer Washi Tape
147360 Seaside Textured Impressions Embossing Folder
147356 Sparkle Textured Impressions Embossing Folder

Thank you so much for stopping by. Please let me know if you have ANY questions on the March Madness promotion (this promotion is only available thru me, Linda Schnabel) or the new products Stampin’ Up! has added to your Sale-a-bration items.

The sun is shining … Have a wonderful day!


Throwback Thursday: Happy Easter

Hello Stampin’ Friends ~

Today I’m bringing back a really cute Easter card and a scrapbook page! With the products we currently have in our catalog today, you could easily recreate either of these two projects.

My “technique” that I was teaching when these were created was “Dying your Glimmer Paper”.  I taught my classes how to use your ink refills and either a sponge dauber or the Stampin’ Spritzers to color the Glimmer paper … NOW you don’t have too! With the beautiful colors of Glimmer Paper Stampin’ Up! has brought out for Sale-a-bration all you have to do is punch! No fuss required!

The first is my bunny card …

Both the bunny and the eggs were created with a combination of circle and oval punches … now, I think I would use the Layering Circle and Oval Framelits. You will have a greater choice of sizes this way. The little bunny tail was made with a flower punch.

I used the same format on my scrapbook page as I did on my card.  That is one thing that I have always taught in my classes.  Use what inspires you to create what ever you need.  How do you like the little chick I tucked inside the cracked egg? Again, made with the oval 🙂

OK, I have one more card that I want to share with you that I created using the “Dying your Glimmer Paper” technique …

You could easily recreate this card using the Sale-a-bration Glimmer paper. And you know what … the “Petite Petals” punch that I used to make this card is still in the catalog!!  You know what else would be cute … the Elegant Butterfly punch.

Just because something is old (Created 2014) … doesn’t mean it can’t be new again!

Thank you for stepping back in time with me today, I hope this inspires you to get creative and have some fun!

Have yourself a wonderful day ~


Below is a list of products I used and suggested products to create that projects shown.  You can purchase any of these items by clicking on the item.  Remember that you will receive a FREE Sale-a-bration item with a qualifying purchase of $50 or more.

Live * Laugh * Love …

Hello Stampin’ Friends ~

Here today to share another card from the “Beautiful You” stamp set with a focus on creating backgrounds.  This is card 2 of my trio. The background on this card was created by “Masking” and sponging. Again, going back to basics. Simple yet dramatic.

First we stamped the lady in the lower left hand corner of our card, then we placed the “circle mask” in the upper right hand corner. Using the Soft Sky ink pad, we inked up our sponge and dragged it across the cardstock and mask to create the background. Leaving some white space gives you the illusion of clouds. Remove mask. Stamp greeting.

Then we used Sahara Sand for the lower part of the card. This was mounted onto Basic Black and then “popped up” with dimensionals onto the Sahara Sand card base.

I tried coloring the image but did not like it, so I just used my Wink of Stella brush to color her dress and umbrella! Subtle but very effective.  I think if I would have tried using the new “Watercolor Pencils” … it would have turned out, I used the markers and they were too bold for the rest of the card.

Thank You for stopping by today, hope to see you back again tomorrow for my Simply Sunday series.

Have a beautiful day ~


Here are the products I used to make my projects shown today. You can purchase these and other Stampin’ Up! products at my online store by clicking on the links below each products. During Jan. 4-Mar. 31, 2017.  All $50 orders receive a free Sale-a-bration reward!


Good Friends Like You Card …

Hello Stampin’ Friends ~

Today I’m sharing the second card that our Technique Club made in our February meeting.  If you recall, we did the “Peek Through” technique. The layout is almost the same as the card I shared with the new glimmer paper …

000_4101

We began with a Whisper White base and cut our flower into the Night of Navy.  Our second flower was cut out from So Saffron.  Both used the Precision Base Plate on the BigShot.

We also used the stamp set more on this card as we used not only the greeting but stamped a smaller flower and a leaf as well. Because the small flower, greeting die and leaf are all open dies (not detailed like the flowers) we used the Magnetic Plate. All of the images cut out used the coordinating framelits … Love them bundles!

000_4103

We tied the entire card together with the Bakers twine. I love that you can see all of the dimension on this card!  We popped up the entire Night of Navy piece along with the greeting and Saffron flower.

You can see step by step instructions on the cutting of the two main flowers on my Wednesday, Feb. 15th post. CLICK HERE TO VIEW

I  thank you for checking in on me and my blog today. Let me know if you have any questions on this awesome bundle.

Enjoy your day and have a wonderful weekend!

blog-closing-small          starry-purple-background-vector

TODAY’S STAMPIN’ SUPPLY LIST …


Simply Sunday: Peek Through Technique

Hello Stampin’ Friends ~

Today we’re pulling out the BigShot to create our Simply Sunday card, which features the Peek Through technique.  This is the technique my Technique Clubs learned this month and this is one of their cards.

It’s a done in our Sweet Sugarplum and Whisper White, in fact, we are using the “thick” Whisper White for today’s technique card. Our base is in the Sweet Sugarplum and our Thick Whisper White is our 4″ x 5-1/4″ front.

000_4077

We are using the Special Reasons bundle found on page 42 of the Occasions Catalog. These special dies create our “Peek Through” by cutting the flower without cutting the edge so it gives you an almost negative image and allows you to see through to the back ground. It also comes with an outline die that will cut out the same flower … so it gives you two uses!

We used the Precision plate with our flower die and placed it onto our thick cardstock and rolled it through. It cut out beautifully and easily releases the pieces, however if you have the die brush you can use that to hurry the process of removing the pieces.

You can see from this camera angle that the entire white front piece has been popped up which creates a wonderful dimension to the flower and the card.

000_4076

The greeting comes from the Suite Sentiments stamp set found on page 54 of the Occasions catalog … you’ve seen me use this stamp set many times.  Did you know that the fonts in this stamp set coordinate with fonts from some of the other Occasions stamp sets! Good to know 🙂

The ribbon is the coordinating Sweet Sugarplum Ruched Ribbon and is used as an anchor to the card. Then just a touch of bling was added to draw your eye around the entire card, and it really completes it.

Thank you so much for joining me this Sunday,

I hope you have a wonderful day.

blog-closing-small          starry-purple-background-vector


TODAY’S STAMPIN’ SUPPLY LIST …


Enjoy Your Special Day …

Hello Stampin’ Friends ~

Today I’d like to share with you another one of the cards that we did as a Make -n- Take at Kathie’s party. We learned two different types of embossing, watercoloring, and how fun the BigShot is!!

We begin with our color pallet: Whisper White, Tempting Turquoise, and Silver! Sounds like a touch of the Southwest! Our base card is Whisper White and the card front Tempting Turquoise … soon to be embossed with the New “Petal Burst Embossing Folder”.  All you need to do is roll it through the BigShot and it comes out beautifully textured.

000_4042

Our next step and second type of embossing is “heat embossing”. You will need the beautiful dragonfly from the “Dragonfly Dreams” bundle.  Next you’ll need the VersaMark ink pad, the Silver Embossing Powder and the heat gun.

Stamp dragonfly with VersaMark, sprinkle with embossing powder (shake off excess) and begin to heat.  Watch the dull powder turn into a shiny silver raised image!! It’s amazing! Our next step was to take the dragonfly framelit from our bundle, and on a separate piece of turquoise cardstock layer one of the circle dies from the “Stitched Framelits Dies” and cut them out on the BigShot.

000_4040

We’re now going to color our dragonfly by pulling some Tempting Turquoise ink from the pad with your Aqua Painter and then gently brush color onto the wings. It’s so easy to do and adds a nice touch of color to our dragonfly. Now we’re going to adhere our layers beginning with the Silver Metallic Doily.

Our greeting comes directly from the stamp set from our “Dragonfly Dreams” bundle. A few rhinestones were added to the card to draw the eye to the dragonfly and to anchor our greeting. Our new stampers were amazed they could make a card with that many techniques … I just reminded them they are just doing 3 simple techniques/steps, and then putting it all together!

000_4042

I hope you enjoyed our card as much as the rest of us did, and that our hint of the Southwest will bring us some much needed sun and a bit warmer temperature!

Thanks for coming by …

Enjoy your day, and I hope it’s special!

blog-closing-small            starry-purple-background-vector

TODAY’S STAMPIN’ SUPPLY LIST …